

Latest & Greatest
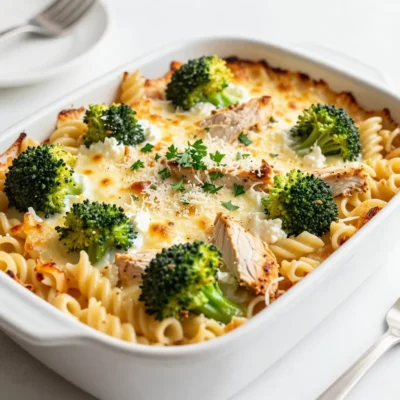
Chicken Broccoli Pasta Bake Simple and Satisfying Meal
Looking for a simple and tasty meal? This Chicken Broccoli Pasta Bake is perfect for busy nights. With just a
Read more…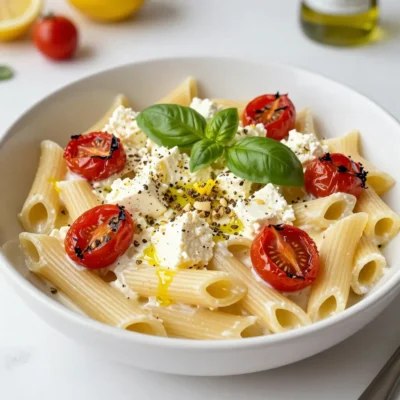
Baked Feta Pasta Delight Easy and Flavorful Recipe
Are you ready to delight your taste buds with a simple yet flavorful dish? This Baked Feta Pasta is perfect
Read more…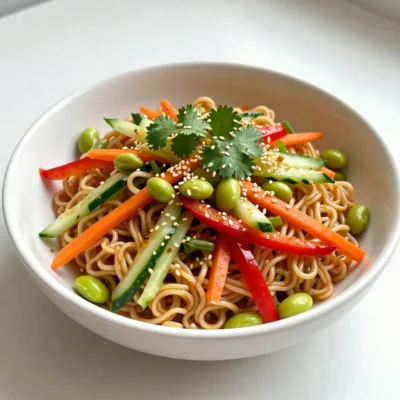
Sesame Ginger Ramen Noodle Salad Simple and Fresh Recipe
If you’re looking for a bright, fresh dish to impress your family or friends, you’ve found it! This Sesame Ginger
Read more…
Jalapeño Honey Cornbread Muffins Flavorful Treat Recipe
Looking for a delicious twist on a classic? Try my Jalapeño Honey Cornbread Muffins! These muffins mix sweet honey with
Read more…
White Chocolate Cranberry Cookies Irresistible Treat
Are you ready to bake the perfect treat? White chocolate cranberry cookies are sweet, chewy, and bursting with flavor! With
Read more…
Irresistible Strawberry Shortcake Icebox Cake Recipe
Get ready to experience the ultimate summer dessert with my Irresistible Strawberry Shortcake Icebox Cake recipe! This no-bake cake combines
Read more…
Thai Basil Beef Rolls Flavorful and Easy Recipe
Looking for a fun, tasty dish that’s easy to make? Thai Basil Beef Rolls are here to impress! With fresh
Read more…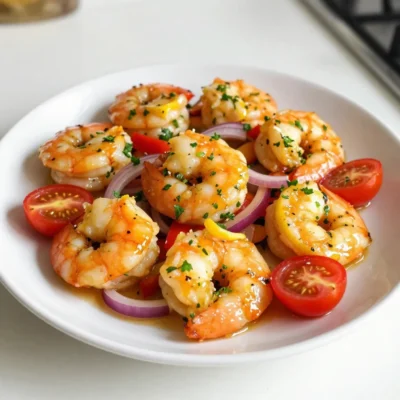
Savory Sheet Pan Lemon Garlic Shrimp Dinner Delight
Looking for a quick and tasty dinner? Try my Savory Sheet Pan Lemon Garlic Shrimp! This dish bursts with fresh
Read more…browse recipes


Pumpkin Chocolate Chip Muffins Soft and Flavorful Treat
Are you ready to bake a delicious treat that blends sweet chocolate and cozy pumpkin flavors? In this guide, I’ll share my favorite recipe…
My Latest Desserts
My Latest Recipes

hey,
i’m !
I’m so happy you’re here!
I’m not just sharing recipes I’m sharing a piece of my heart. I hope these dishes bring you comfort, joy, and maybe even a new favorite.

![To make this yummy dish, you need simple and fresh ingredients. Here’s what you will need: - 4 salmon fillets - 2 tablespoons olive oil - 4 cloves garlic, minced - 1 large lemon, zested and juiced - 2 teaspoons fresh dill, chopped (or 1 teaspoon dried dill) - 1 teaspoon salt - ½ teaspoon black pepper - 1 cup cherry tomatoes, halved - 1 bunch asparagus, trimmed - Lemon slices for garnish Each ingredient plays a role. The salmon gives a rich flavor, while lemon and garlic add brightness. Dill brings a hint of freshness that rounds it all out. You can add a few touches to make your meal special. Consider these garnishes and sides: - Fresh parsley or chives for color and taste - A side of quinoa or rice for a filling meal - Roasted potatoes for a hearty side These options can make your dish more colorful and fun. Having the right tools makes cooking easier. Here are some items you will find useful: - Sheet pan for baking - Parchment paper for easy cleanup - Mixing bowl for making the marinade - A sharp knife for cutting veggies - A spatula for serving With these tools, you can whip up this tasty dish with ease. Check out the Full Recipe for more details. Start by preheating your oven to 400°F (200°C). This helps your meal cook evenly. Next, line a sheet pan with parchment paper. This makes cleanup easy and saves time. In a small bowl, mix together the olive oil, minced garlic, lemon juice, lemon zest, dill, salt, and black pepper. Stir until you have a nice marinade. Place the salmon fillets on one side of the sheet pan. Brush them well with the marinade. On the other side, add the asparagus and halved cherry tomatoes. Drizzle them with some olive oil and sprinkle a little salt and pepper. Now, it's time to bake! Put the sheet pan in the oven and set a timer for 15 to 20 minutes. The salmon should cook through and flake easily with a fork. The asparagus should be tender and still have a nice crunch. Keep an eye on the timer. To check if the salmon is done, use a fork to gently poke it. If it flakes easily, it is ready. You can also look for a light pink color inside. The asparagus should be bright green and tender. If everything looks good, remove the pan from the oven. Let it cool for a few minutes before serving. Enjoy your delicious meal! For the complete recipe, see [Full Recipe]. To get the best flavor, marinate your salmon for at least 30 minutes. This lets the marinade soak in. Use a mix of olive oil, garlic, lemon juice, and dill. The acidity from the lemon helps tenderize the fish. If you have more time, try marinating it for up to two hours. Just keep it in the fridge. This will enhance the taste even more. Asparagus cooks fast, so watch it closely. Start by trimming the tough ends. Toss the asparagus with olive oil, salt, and pepper. Spread it out in a single layer on the sheet pan. This helps it roast evenly. Bake alongside the salmon for 15-20 minutes. You want it bright green and slightly crispy. A quick way to check is to pierce it with a fork—it should be tender but still firm. You can easily boost the flavor of your dish. Consider adding red pepper flakes for a kick. Fresh herbs like parsley or basil can also add brightness. A sprinkle of smoked paprika gives a nice, warm depth. If you love citrus, try adding lime zest or orange juice. Each of these options can change the flavor profile. Have fun experimenting with different spices and herbs to find your favorite mix. For the complete recipe, check the Full Recipe section. {{image_2}} You can swap salmon for other fish like cod or trout. Both cook well and taste great. If you prefer a meat option, try chicken breast. It cooks similarly and absorbs flavors beautifully. For vegetables, asparagus is lovely, but green beans or broccoli work too. Just keep the cooking time in mind. Want to change things up? Use different herbs! Instead of dill, try parsley or basil. These herbs add fresh notes to your dish. You can also use spices like paprika or cumin for warmth. A bit of red pepper flakes gives it a nice kick. Mix and match to find your favorite taste! To make this dish a full meal, add grains. Quinoa or brown rice pairs well with the salmon and veggies. Cook the grains according to the package instructions. Serve the salmon and vegetables on a bed of grains for a hearty meal. You’ll enjoy flavor, texture, and nutrition all in one plate. For the full recipe, check out the link above. To store leftovers from your Sheet Pan Lemon Garlic Salmon, first let the dish cool. Place the salmon, asparagus, and tomatoes in an airtight container. Make sure to separate the salmon from the veggies to keep them fresh. Store the container in the fridge. It will stay good for up to three days. If you think you won’t eat it in that time, consider freezing it. When you’re ready to enjoy leftovers, reheat them gently. Place the salmon and veggies on a baking sheet. Preheat your oven to 350°F (175°C). Heat them for about 10 minutes. This method keeps the salmon moist and the veggies crisp. Avoid using a microwave, as it can make your salmon rubbery. If you want to freeze the salmon, wrap it tightly in plastic wrap. Then, place it in a freezer bag or container. This keeps it fresh for about three months. For best results, freeze the salmon and veggies separately. When you’re ready to eat, thaw them in the fridge overnight. Then, follow the reheating tips for a delicious meal. Enjoy your flavorful dinner anytime! It takes about 15 to 20 minutes to cook salmon on a sheet pan. The oven should be set to 400°F (200°C). Check if the salmon flakes easily with a fork. This means it's done. Yes, you can use frozen salmon. Just thaw it first. Place it in the fridge overnight or use cold water. After thawing, pat it dry. This helps the marinade stick better. You can serve many sides with this dish. Here are some ideas: - Rice or quinoa for a grain option - Roasted potatoes for a hearty side - A fresh green salad for crunch - Steamed broccoli for added nutrients These sides will complement the flavors of the salmon well. For the full recipe, refer to the instructions above. This blog post detailed how to make Sheet Pan Lemon Garlic Salmon. We covered the complete ingredient list, tips for preparation, and guidance on baking. I shared tools that make the process easier, along with variations to fit your taste. Storing leftovers is simple and keeps your meals fresh. With these insights, you can create a tasty dish that impresses everyone at your table. I hope you feel ready to try this recipe and enjoy every bite!](https://emmasdish.com/wp-content/uploads/2025/07/8e928ca0-d1e7-48e9-9001-0d995acac6dc-300x300.webp)
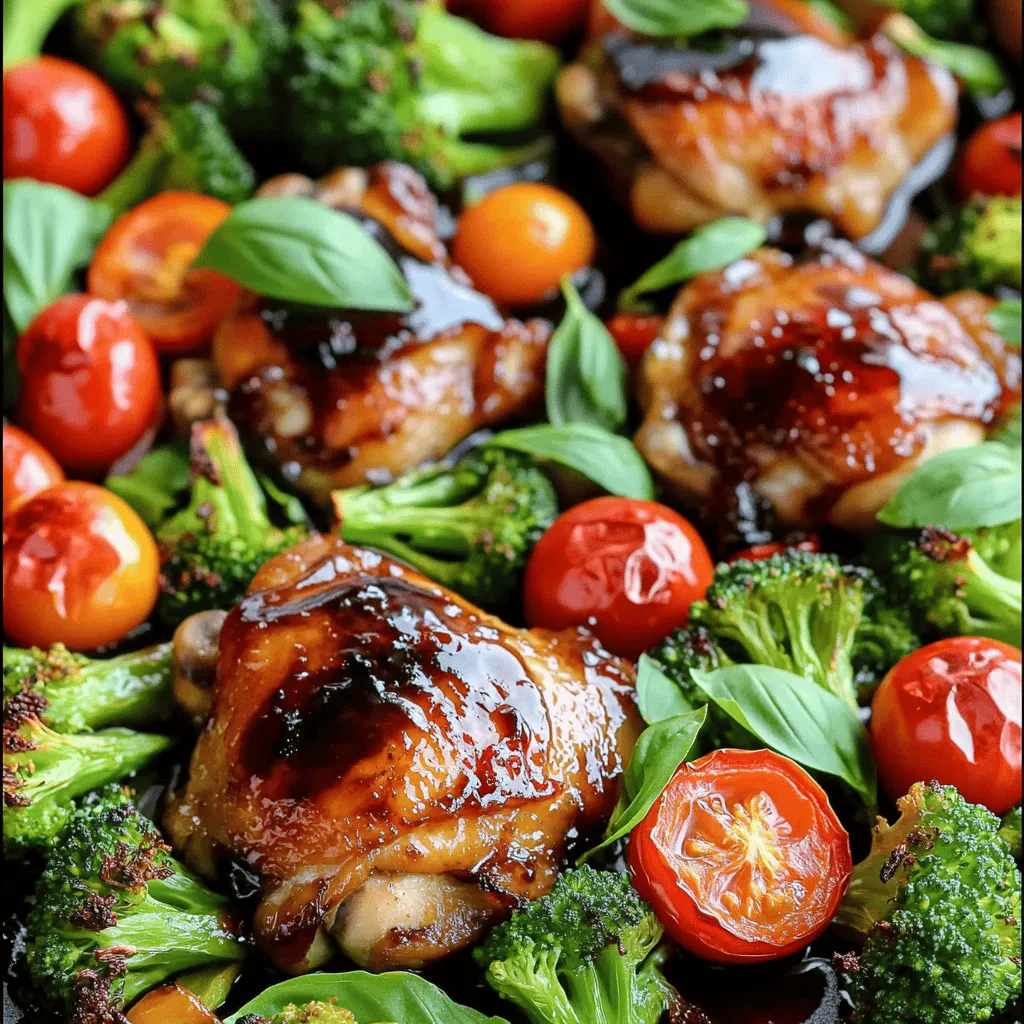
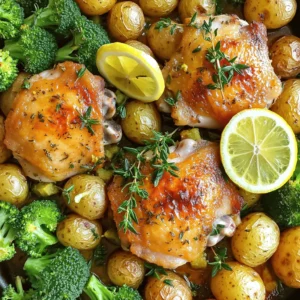
Sheet Pan Balsamic Chicken & Veggies Easy Dinner Delight
Looking for an easy dinner that packs flavor? My Sheet Pan Balsamic Chicken & Veggies offers just that! With tender chicken thighs and vibrant…