![- Fresh apples: Choose firm apples like Granny Smith or Honeycrisp. They balance sweetness and tartness. Look for apples that are free from bruises and soft spots for the best taste. - Essential spices: Cinnamon and nutmeg are must-haves. They add warmth and depth to the dish. Just a pinch of nutmeg enhances the cinnamon flavor without overpowering it. - Sweeteners: Use brown sugar for rich flavor and granulated sugar for sweetness. The mix helps caramelize the apples as they cook. - Topping components: Rolled oats, all-purpose flour, and melted butter create a crunchy topping. The oats give a hearty texture, while flour helps bind everything together. - Chopped nuts: Add walnuts or pecans for a nice crunch. Nuts also add healthy fats and protein. They enhance flavor and texture in every bite. - Additional flavorings: A splash of vanilla extract or a bit of lemon zest can brighten the dish. These add layers of flavor, making the crisp even more delightful. For the full recipe, click here: [Full Recipe]. Start with six medium apples. They can be Granny Smith or Honeycrisp. First, peel the apples. Use a sharp knife or a peeler. Then slice them into thin wedges. Aim for even slices for best cooking. Next, mix the apple slices in a large bowl. Add one tablespoon of lemon juice. This keeps the apples fresh and bright. Then sprinkle in one teaspoon of ground cinnamon and half a teaspoon of nutmeg. Add one-third cup of brown sugar for sweetness. Toss everything together. Make sure all the apple slices are coated well. Now, let’s create the topping. In a separate bowl, combine the dry ingredients. Add one cup of rolled oats, half a cup of all-purpose flour, and one-third cup of granulated sugar. Don’t forget half a teaspoon of salt. Mix these dry ingredients well. Next, pour in half a cup of melted unsalted butter. This makes the topping rich and delicious. Use a fork or your hands to mix until crumbly. The texture should feel like wet sand. If you like nuts, add half a cup of chopped walnuts or pecans. They add a nice crunch. It’s time to bake! First, preheat your oven to 350°F (175°C). While it heats, grease a 9x13-inch baking dish. Spread the apple mixture evenly in the dish. Make sure to cover the bottom well. Now, sprinkle the oat mixture on top of the apples. Try to cover all the apples. This helps them cook evenly. Bake your apple crisp in the preheated oven. Set a timer for 35 to 40 minutes. It’s ready when the apples are tender. The topping should be golden brown and crisp. Once done, take it out and let it cool a bit. This dessert is best served warm. Check the [Full Recipe] for more details! Choosing the right apple is key. For a great apple crisp, I like to use Granny Smith or Honeycrisp apples. These apples hold their shape and mix well with spices. You want a bit of tartness to balance the sweetness of the crisp. Now, let’s talk about the topping. To ensure it stays crispy, mix your dry ingredients well. Use rolled oats, flour, and melted butter. This combo gives you that crunchy texture. If you want some extra flavor, add chopped nuts to the topping. They add a nice crunch and richness. Serving apple crisp is fun! I love to scoop it into bowls while it's warm. A scoop of vanilla ice cream on top makes it even better. The cold ice cream melts into the warm apples, creating a yummy mix. You can also add a dollop of whipped cream for a light touch. For a pretty finish, sprinkle some cinnamon on top. This little detail enhances the look and flavor. It’s all about making your dish look as good as it tastes! For the full recipe, check out the link. Enjoy creating this delightful dish! {{image_2}} You can easily customize your apple crisp to suit your taste. Adding cranberries or raisins gives your dish a nice twist. Both fruits add a sweet and tart flavor that balances the apples. Simply mix a half-cup of either into your apple filling. You might also want to try different spices. Adding cloves or cardamom can enhance the warmth of your dish. Just a pinch will do. These spices pair well with the apples and cinnamon, creating amazing aromas. If you need a gluten-free option, you can switch the all-purpose flour. Use gluten-free flour blends, which work just as well in the topping. They help keep your crisp crunchy and tasty. For those who follow a vegan diet, you can replace the butter. Use coconut oil or a vegan butter substitute instead. These options will keep your apple crisp rich and flavorful without using dairy. To keep your apple crisp fresh, store it in the fridge. Use an airtight container. This helps prevent it from drying out. It will stay good for about 3 to 4 days. You can also cover the dish with plastic wrap or aluminum foil. If you want to keep it longer, freezing is a great option. To freeze apple crisp, let it cool first. Then, wrap it tightly in plastic wrap. Place it in a freezer-safe bag or container. Make sure to label it with the date. It can last for up to 3 months in the freezer. When you are ready to eat it, just thaw it in the fridge overnight. When reheating apple crisp, you want to keep that nice crunch. The best way is to use the oven. Preheat your oven to 350°F (175°C). Place the apple crisp in a baking dish. Cover it loosely with foil to avoid burning. Heat for about 15 to 20 minutes. Check it often to make sure it warms evenly. Another option is to use the microwave. While it’s faster, it can make the topping soggy. To avoid this, heat it in short bursts. Start with 30 seconds, then check it. If you prefer, you can also pop it into the toaster oven for a quick warm-up. For serving after storage, try adding a scoop of vanilla ice cream or some whipped cream. This gives it a nice touch and balances the flavors. You can also sprinkle some cinnamon on top for extra flavor. Enjoy your delicious apple crisp! You can store homemade apple crisp in the fridge for about three days. To keep it fresh, place it in an airtight container. If you want to store it longer, freeze the crisp. It will last for up to three months in the freezer. Just wrap it tightly in plastic wrap, then place it in a freezer bag. When you are ready to eat, thaw it in the fridge overnight. You can reheat it in the oven for a warm treat. Yes, you can mix it up! Many fruits work well in apple crisp. You can use pears, peaches, or berries. Just make sure to adjust the sugar based on the sweetness of the fruit. For example, if you use tart berries, you may want to add a bit more sugar. This way, you can enjoy different flavors while keeping the same delicious crisp texture. If your topping isn’t crispy, there are a few easy fixes. First, check if you used enough butter. The butter helps create that crunchy texture. If you skipped the nuts, consider adding some. Nuts add both crunch and flavor. Also, make sure you bake it long enough. If it still looks soggy, try broiling it for a few minutes. This will help to crisp up the topping without cooking the apples more. Homemade apple crisp is simple and fun to make. We covered key ingredients, like fresh apples and warm spices. You learned how to prep, bake, and store it well. Remember to try different flavors and toppings to match your taste. Enjoy your warm apple crisp with ice cream for a sweet touch. Experiment with options, and make it your own. Each bite brings comfort, reminding us why we love homemade desserts. Happy baking!](https://emmasdish.com/wp-content/uploads/2025/06/d5190ddf-db3d-4b82-959d-2087dd89de84-768x768.webp)
Are you ready to indulge in a warm, cozy dessert that feels like a hug? In this blog post, I’ll walk you through my favorite Homemade Apple Crisp recipe that’s both simple and full of flavor. With fresh apples, warm spices, and a crunchy topping, this dish is perfect for any occasion. Let’s dive into the ingredients and steps that will make your kitchen smell amazing!
Ingredients
Key Ingredients for Homemade Apple Crisp
– Fresh apples: Choose firm apples like Granny Smith or Honeycrisp. They balance sweetness and tartness. Look for apples that are free from bruises and soft spots for the best taste.
– Essential spices: Cinnamon and nutmeg are must-haves. They add warmth and depth to the dish. Just a pinch of nutmeg enhances the cinnamon flavor without overpowering it.
– Sweeteners: Use brown sugar for rich flavor and granulated sugar for sweetness. The mix helps caramelize the apples as they cook.
– Topping components: Rolled oats, all-purpose flour, and melted butter create a crunchy topping. The oats give a hearty texture, while flour helps bind everything together.
Optional Ingredients
– Chopped nuts: Add walnuts or pecans for a nice crunch. Nuts also add healthy fats and protein. They enhance flavor and texture in every bite.
– Additional flavorings: A splash of vanilla extract or a bit of lemon zest can brighten the dish. These add layers of flavor, making the crisp even more delightful.
Step-by-Step Instructions
Prepping the Apples
Start with six medium apples. They can be Granny Smith or Honeycrisp. First, peel the apples. Use a sharp knife or a peeler. Then slice them into thin wedges. Aim for even slices for best cooking.
Next, mix the apple slices in a large bowl. Add one tablespoon of lemon juice. This keeps the apples fresh and bright. Then sprinkle in one teaspoon of ground cinnamon and half a teaspoon of nutmeg. Add one-third cup of brown sugar for sweetness. Toss everything together. Make sure all the apple slices are coated well.
Making the Crisp Topping
Now, let’s create the topping. In a separate bowl, combine the dry ingredients. Add one cup of rolled oats, half a cup of all-purpose flour, and one-third cup of granulated sugar. Don’t forget half a teaspoon of salt. Mix these dry ingredients well.
Next, pour in half a cup of melted unsalted butter. This makes the topping rich and delicious. Use a fork or your hands to mix until crumbly. The texture should feel like wet sand. If you like nuts, add half a cup of chopped walnuts or pecans. They add a nice crunch.
Baking the Apple Crisp
It’s time to bake! First, preheat your oven to 350°F (175°C). While it heats, grease a 9×13-inch baking dish. Spread the apple mixture evenly in the dish. Make sure to cover the bottom well.
Now, sprinkle the oat mixture on top of the apples. Try to cover all the apples. This helps them cook evenly.
Bake your apple crisp in the preheated oven. Set a timer for 35 to 40 minutes. It’s ready when the apples are tender. The topping should be golden brown and crisp. Once done, take it out and let it cool a bit. This dessert is best served warm.
Tips & Tricks
Achieving the Best Texture
Choosing the right apple is key. For a great apple crisp, I like to use Granny Smith or Honeycrisp apples. These apples hold their shape and mix well with spices. You want a bit of tartness to balance the sweetness of the crisp.
Now, let’s talk about the topping. To ensure it stays crispy, mix your dry ingredients well. Use rolled oats, flour, and melted butter. This combo gives you that crunchy texture. If you want some extra flavor, add chopped nuts to the topping. They add a nice crunch and richness.
Serving Suggestions
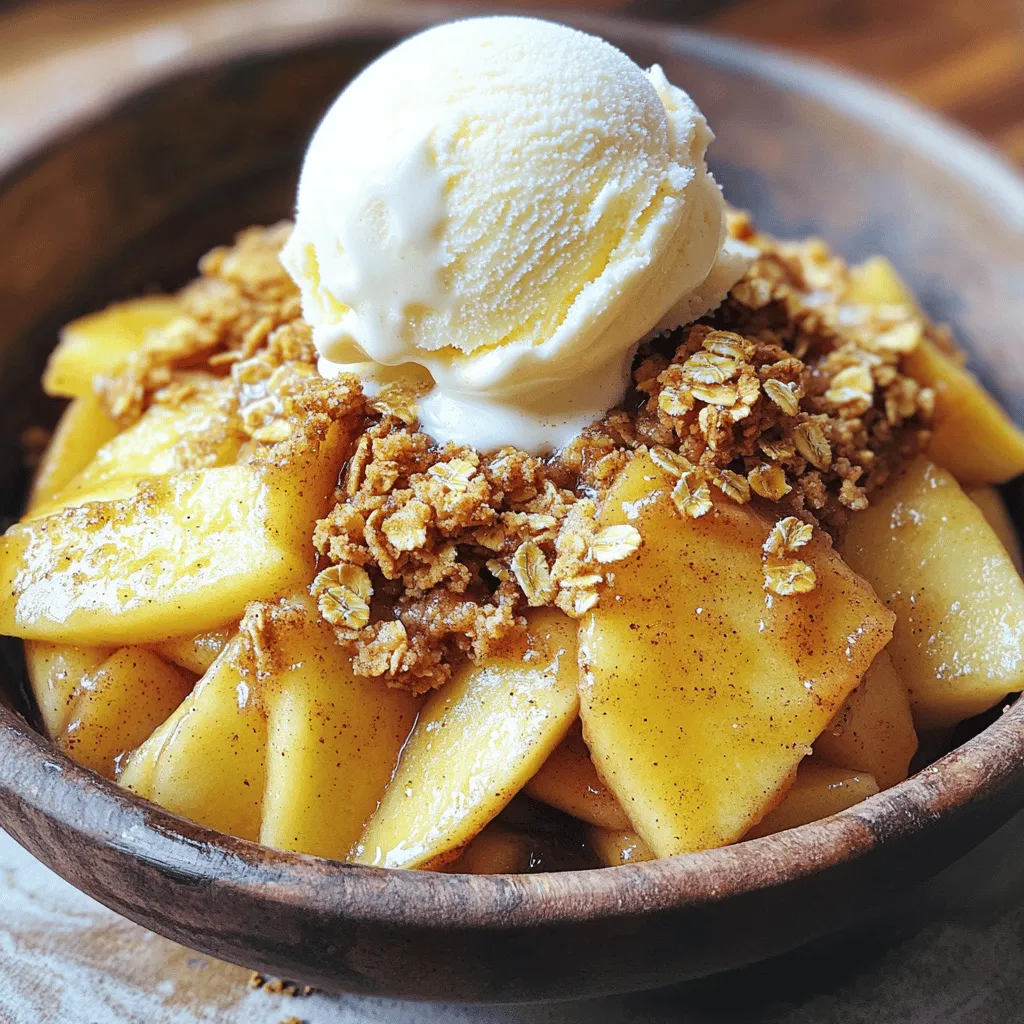
Serving apple crisp is fun! I love to scoop it into bowls while it’s warm. A scoop of vanilla ice cream on top makes it even better. The cold ice cream melts into the warm apples, creating a yummy mix.
You can also add a dollop of whipped cream for a light touch. For a pretty finish, sprinkle some cinnamon on top. This little detail enhances the look and flavor. It’s all about making your dish look as good as it tastes!Enjoy creating this delightful dish!
Variations
Flavor Variations
You can easily customize your apple crisp to suit your taste. Adding cranberries or raisins gives your dish a nice twist. Both fruits add a sweet and tart flavor that balances the apples. Simply mix a half-cup of either into your apple filling.
You might also want to try different spices. Adding cloves or cardamom can enhance the warmth of your dish. Just a pinch will do. These spices pair well with the apples and cinnamon, creating amazing aromas.
Dietary Modifications
If you need a gluten-free option, you can switch the all-purpose flour. Use gluten-free flour blends, which work just as well in the topping. They help keep your crisp crunchy and tasty.
For those who follow a vegan diet, you can replace the butter. Use coconut oil or a vegan butter substitute instead. These options will keep your apple crisp rich and flavorful without using dairy.
Storage Information
How to Store Leftover Apple Crisp
To keep your apple crisp fresh, store it in the fridge. Use an airtight container. This helps prevent it from drying out. It will stay good for about 3 to 4 days. You can also cover the dish with plastic wrap or aluminum foil. If you want to keep it longer, freezing is a great option.
To freeze apple crisp, let it cool first. Then, wrap it tightly in plastic wrap. Place it in a freezer-safe bag or container. Make sure to label it with the date. It can last for up to 3 months in the freezer. When you are ready to eat it, just thaw it in the fridge overnight.
Reheating Options
When reheating apple crisp, you want to keep that nice crunch. The best way is to use the oven. Preheat your oven to 350°F (175°C). Place the apple crisp in a baking dish. Cover it loosely with foil to avoid burning. Heat for about 15 to 20 minutes. Check it often to make sure it warms evenly.
Another option is to use the microwave. While it’s faster, it can make the topping soggy. To avoid this, heat it in short bursts. Start with 30 seconds, then check it. If you prefer, you can also pop it into the toaster oven for a quick warm-up.
For serving after storage, try adding a scoop of vanilla ice cream or some whipped cream. This gives it a nice touch and balances the flavors. You can also sprinkle some cinnamon on top for extra flavor. Enjoy your delicious apple crisp!
FAQs
How long can I store homemade apple crisp?
You can store homemade apple crisp in the fridge for about three days. To keep it fresh, place it in an airtight container. If you want to store it longer, freeze the crisp. It will last for up to three months in the freezer. Just wrap it tightly in plastic wrap, then place it in a freezer bag. When you are ready to eat, thaw it in the fridge overnight. You can reheat it in the oven for a warm treat.
Can I substitute different fruits in this recipe?
Yes, you can mix it up! Many fruits work well in apple crisp. You can use pears, peaches, or berries. Just make sure to adjust the sugar based on the sweetness of the fruit. For example, if you use tart berries, you may want to add a bit more sugar. This way, you can enjoy different flavors while keeping the same delicious crisp texture.
What can I do if my topping isn’t crispy?
If your topping isn’t crispy, there are a few easy fixes. First, check if you used enough butter. The butter helps create that crunchy texture. If you skipped the nuts, consider adding some. Nuts add both crunch and flavor. Also, make sure you bake it long enough. If it still looks soggy, try broiling it for a few minutes. This will help to crisp up the topping without cooking the apples more.
Homemade apple crisp is simple and fun to make. We covered key ingredients, like fresh apples and warm spices. You learned how to prep, bake, and store it well. Remember to try different flavors and toppings to match your taste. Enjoy your warm apple crisp with ice cream for a sweet touch. Experiment with options, and make it your own. Each bite brings comfort, reminding us why we love homemade desserts. Happy baking!
![- Fresh apples: Choose firm apples like Granny Smith or Honeycrisp. They balance sweetness and tartness. Look for apples that are free from bruises and soft spots for the best taste. - Essential spices: Cinnamon and nutmeg are must-haves. They add warmth and depth to the dish. Just a pinch of nutmeg enhances the cinnamon flavor without overpowering it. - Sweeteners: Use brown sugar for rich flavor and granulated sugar for sweetness. The mix helps caramelize the apples as they cook. - Topping components: Rolled oats, all-purpose flour, and melted butter create a crunchy topping. The oats give a hearty texture, while flour helps bind everything together. - Chopped nuts: Add walnuts or pecans for a nice crunch. Nuts also add healthy fats and protein. They enhance flavor and texture in every bite. - Additional flavorings: A splash of vanilla extract or a bit of lemon zest can brighten the dish. These add layers of flavor, making the crisp even more delightful. For the full recipe, click here: [Full Recipe]. Start with six medium apples. They can be Granny Smith or Honeycrisp. First, peel the apples. Use a sharp knife or a peeler. Then slice them into thin wedges. Aim for even slices for best cooking. Next, mix the apple slices in a large bowl. Add one tablespoon of lemon juice. This keeps the apples fresh and bright. Then sprinkle in one teaspoon of ground cinnamon and half a teaspoon of nutmeg. Add one-third cup of brown sugar for sweetness. Toss everything together. Make sure all the apple slices are coated well. Now, let’s create the topping. In a separate bowl, combine the dry ingredients. Add one cup of rolled oats, half a cup of all-purpose flour, and one-third cup of granulated sugar. Don’t forget half a teaspoon of salt. Mix these dry ingredients well. Next, pour in half a cup of melted unsalted butter. This makes the topping rich and delicious. Use a fork or your hands to mix until crumbly. The texture should feel like wet sand. If you like nuts, add half a cup of chopped walnuts or pecans. They add a nice crunch. It’s time to bake! First, preheat your oven to 350°F (175°C). While it heats, grease a 9x13-inch baking dish. Spread the apple mixture evenly in the dish. Make sure to cover the bottom well. Now, sprinkle the oat mixture on top of the apples. Try to cover all the apples. This helps them cook evenly. Bake your apple crisp in the preheated oven. Set a timer for 35 to 40 minutes. It’s ready when the apples are tender. The topping should be golden brown and crisp. Once done, take it out and let it cool a bit. This dessert is best served warm. Check the [Full Recipe] for more details! Choosing the right apple is key. For a great apple crisp, I like to use Granny Smith or Honeycrisp apples. These apples hold their shape and mix well with spices. You want a bit of tartness to balance the sweetness of the crisp. Now, let’s talk about the topping. To ensure it stays crispy, mix your dry ingredients well. Use rolled oats, flour, and melted butter. This combo gives you that crunchy texture. If you want some extra flavor, add chopped nuts to the topping. They add a nice crunch and richness. Serving apple crisp is fun! I love to scoop it into bowls while it's warm. A scoop of vanilla ice cream on top makes it even better. The cold ice cream melts into the warm apples, creating a yummy mix. You can also add a dollop of whipped cream for a light touch. For a pretty finish, sprinkle some cinnamon on top. This little detail enhances the look and flavor. It’s all about making your dish look as good as it tastes! For the full recipe, check out the link. Enjoy creating this delightful dish! {{image_2}} You can easily customize your apple crisp to suit your taste. Adding cranberries or raisins gives your dish a nice twist. Both fruits add a sweet and tart flavor that balances the apples. Simply mix a half-cup of either into your apple filling. You might also want to try different spices. Adding cloves or cardamom can enhance the warmth of your dish. Just a pinch will do. These spices pair well with the apples and cinnamon, creating amazing aromas. If you need a gluten-free option, you can switch the all-purpose flour. Use gluten-free flour blends, which work just as well in the topping. They help keep your crisp crunchy and tasty. For those who follow a vegan diet, you can replace the butter. Use coconut oil or a vegan butter substitute instead. These options will keep your apple crisp rich and flavorful without using dairy. To keep your apple crisp fresh, store it in the fridge. Use an airtight container. This helps prevent it from drying out. It will stay good for about 3 to 4 days. You can also cover the dish with plastic wrap or aluminum foil. If you want to keep it longer, freezing is a great option. To freeze apple crisp, let it cool first. Then, wrap it tightly in plastic wrap. Place it in a freezer-safe bag or container. Make sure to label it with the date. It can last for up to 3 months in the freezer. When you are ready to eat it, just thaw it in the fridge overnight. When reheating apple crisp, you want to keep that nice crunch. The best way is to use the oven. Preheat your oven to 350°F (175°C). Place the apple crisp in a baking dish. Cover it loosely with foil to avoid burning. Heat for about 15 to 20 minutes. Check it often to make sure it warms evenly. Another option is to use the microwave. While it’s faster, it can make the topping soggy. To avoid this, heat it in short bursts. Start with 30 seconds, then check it. If you prefer, you can also pop it into the toaster oven for a quick warm-up. For serving after storage, try adding a scoop of vanilla ice cream or some whipped cream. This gives it a nice touch and balances the flavors. You can also sprinkle some cinnamon on top for extra flavor. Enjoy your delicious apple crisp! You can store homemade apple crisp in the fridge for about three days. To keep it fresh, place it in an airtight container. If you want to store it longer, freeze the crisp. It will last for up to three months in the freezer. Just wrap it tightly in plastic wrap, then place it in a freezer bag. When you are ready to eat, thaw it in the fridge overnight. You can reheat it in the oven for a warm treat. Yes, you can mix it up! Many fruits work well in apple crisp. You can use pears, peaches, or berries. Just make sure to adjust the sugar based on the sweetness of the fruit. For example, if you use tart berries, you may want to add a bit more sugar. This way, you can enjoy different flavors while keeping the same delicious crisp texture. If your topping isn’t crispy, there are a few easy fixes. First, check if you used enough butter. The butter helps create that crunchy texture. If you skipped the nuts, consider adding some. Nuts add both crunch and flavor. Also, make sure you bake it long enough. If it still looks soggy, try broiling it for a few minutes. This will help to crisp up the topping without cooking the apples more. Homemade apple crisp is simple and fun to make. We covered key ingredients, like fresh apples and warm spices. You learned how to prep, bake, and store it well. Remember to try different flavors and toppings to match your taste. Enjoy your warm apple crisp with ice cream for a sweet touch. Experiment with options, and make it your own. Each bite brings comfort, reminding us why we love homemade desserts. Happy baking!](https://emmasdish.com/wp-content/uploads/2025/06/d5190ddf-db3d-4b82-959d-2087dd89de84-250x250.webp)
