Skip to content
DisclaimerTerms Of UseGDPR PolicyCookie Policy

Emmas Dish

  • Home
  • Drinks
  • Appetizers
  • Dinner
  • Dessert
  • About
  • Contact
  • Privacy Policy
DisclaimerTerms Of UseGDPR PolicyCookie Policy

Emma

To make these easy and tasty cheesecake cups, you will need: - 1 cup graham cracker crumbs - 4 tablespoons unsalted butter, melted - 1 cup cream cheese, softened - 1/2 cup powdered sugar - 1 cup whipped cream (or whipped topping) - 1 teaspoon vanilla extract - 1/2 cup mini marshmallows - 1/2 cup chocolate chips These main ingredients create a rich and creamy filling with a crunchy base. You will also need some common kitchen tools: - Mixing bowls - A spoon or spatula - A whisk or electric mixer - Serving cups or glasses - A refrigerator Having these tools ready will help you make the process smooth and fun. To make your cheesecake cups even more special, consider adding: - Extra mini marshmallows - Chocolate shavings These toppings will give your dessert a lovely look and extra flavor. You can even toast the marshmallows for a fun twist! First, grab a medium bowl. Add 1 cup of graham cracker crumbs to the bowl. Next, pour in 4 tablespoons of melted butter. Mix until it feels like wet sand. This mixture is your crust. Now, take your serving cups. Divide the graham cracker mix evenly among them. Press it down firmly to form a solid base. Place the cups in the fridge to chill while you make the filling. In a clean mixing bowl, add 1 cup of softened cream cheese. Beat it until it is smooth. Then, add 1/2 cup of powdered sugar. Also, mix in 1 teaspoon of vanilla extract. Blend until all is well combined. Now, gently fold in 1 cup of whipped cream. Keep mixing until no white streaks remain. Stir in 1/2 cup of mini marshmallows and 1/2 cup of chocolate chips. This filling will be fluffy and sweet. Take your chilled cups out of the fridge. Spoon the cheesecake filling over the graham cracker crust. Smooth the top with a spatula. Once done, place the cups back in the fridge. Chill them for at least 2 hours. This helps the cheesecake set properly. Before serving, you can toast some extra mini marshmallows on top. Use a kitchen torch or a broiler for a few seconds. Finish with chocolate shavings for a nice touch. Enjoy your delicious dessert! To get the best texture, use softened cream cheese. Cold cream cheese will lead to lumps. Beat your cream cheese until it is very smooth. This step is key. Mix in the powdered sugar slowly. This helps avoid graininess. Gently fold in the whipped cream. Do not stir too hard; you want it light and airy. Chill your cups for at least two hours. This helps the cheesecake set well. If you can, leave them overnight. The longer they chill, the better they taste. Make sure your fridge is cold. A colder temperature helps with the setting process. You can toast mini marshmallows in a few fun ways. Use a kitchen torch for a quick and easy method. Hold the torch about six inches away from the marshmallows. Move it in circles to get an even toast. If you don’t have a torch, broil them in the oven. Place them on a baking sheet and watch closely. They can burn fast! {{image_2}} If you love chocolate, this version is for you. Use chocolate graham crackers for the crust. This will add a deep chocolate flavor. You can also add more chocolate chips to the filling. Top it off with chocolate sauce for extra sweetness. This version is a dream for chocolate fans. If you have nut allergies, you can still enjoy these cups. You can make the crust with regular graham crackers. Just check the label to ensure they are nut-free. For the filling, use dairy cream cheese and whipped cream. This way, you get all the taste without any nuts. To make a vegan version, swap out the cream cheese and whipped cream. Use a vegan cream cheese and coconut whipped cream instead. For the crust, use vegan graham crackers. You can also add a bit of maple syrup for sweetness. This way, everyone can enjoy your tasty dessert. Feel free to mix and match these ideas. Each variation offers a fun twist on a classic treat! To keep your No Bake S'mores Cheesecake Cups fresh, cover them tightly. Use plastic wrap or a lid on your container. This prevents air from entering. Store them in the fridge for up to three days. If you want to save them longer, consider freezing them. Just make sure to use freezer-safe containers. Keep the cheesecake cups away from strong-smelling foods in the fridge. They can absorb odors easily. Always check the cups before serving. If you notice any signs of spoilage, skip eating them. If you're topping them before serving, do that just before. This keeps the marshmallows and chocolate shavings fresh and tasty. These cheesecake cups are best served cold. Reheating is not needed and not recommended. If you want warm chocolate, you can microwave chocolate chips separately. Pour the melted chocolate on top when ready to serve. Enjoy the delicious mix of cold cheesecake and warm chocolate! You can keep these cheesecake cups in the fridge for up to five days. Make sure to cover them tightly with plastic wrap or a lid. This keeps them fresh and tasty. If you want them to last longer, consider freezing them. Just note that the texture may change a bit after thawing. Yes, you can substitute some ingredients. If you want a lighter option, try Greek yogurt instead of cream cheese. For a dairy-free choice, use a dairy-free cream cheese. You can also replace whipped cream with coconut whipped cream. Just make sure any replacements still taste good with the other flavors. Serve these cheesecake cups chilled for the best taste. Place them on a nice platter for a fun look. You can add extra mini marshmallows on top for a cute touch. For an interactive twist, add a mini skewer with a marshmallow for guests to toast. This brings the campfire feel right to your table! You can make delicious No Bake S'mores Cheesecake Cups using simple ingredients. I shared how to create the perfect graham cracker crust and creamy filling. You can add fun toppings or variations to suit your taste. Remember to chill them to achieve a smooth texture. Proper storage keeps them fresh for longer. Enjoy this easy treat with friends and family. You now have the tools to impress anyone with this tasty dessert!

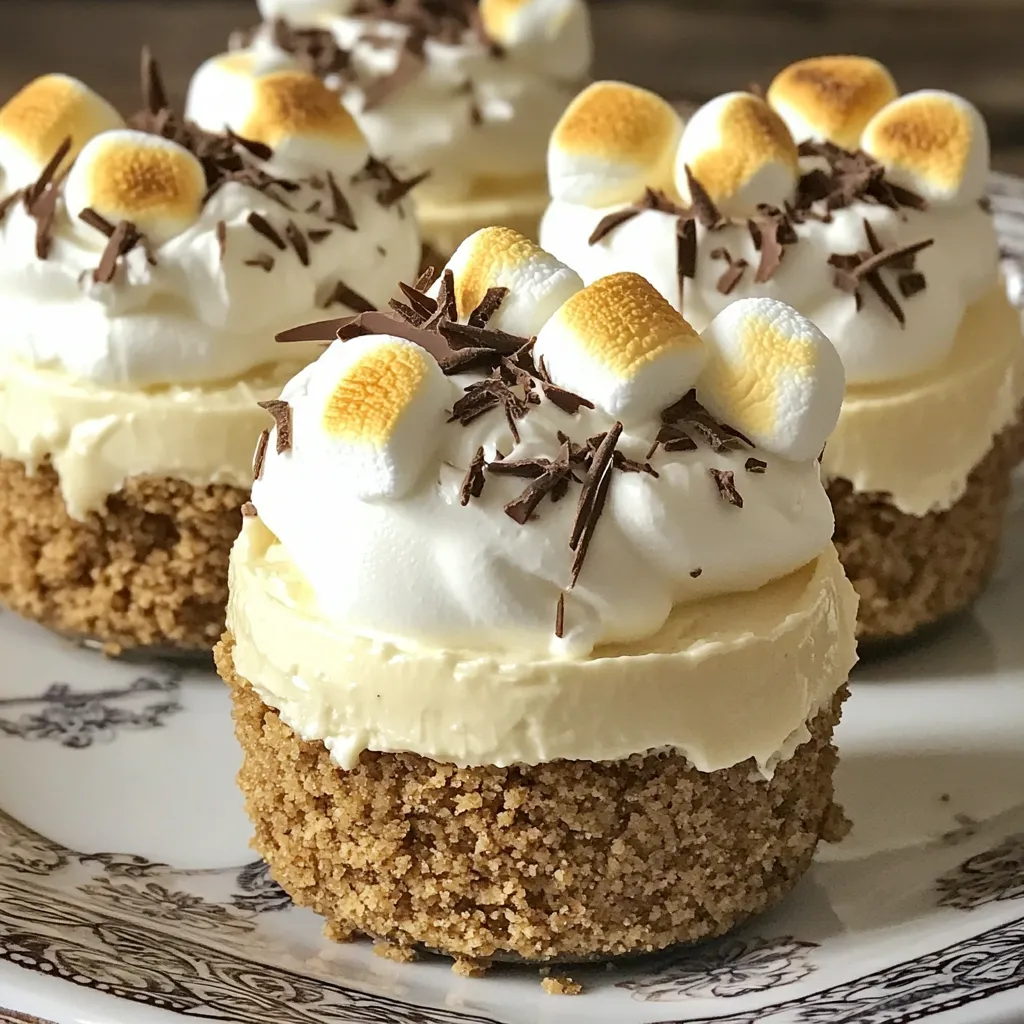
No Bake S’mores Cheesecake Cups Quick and Easy Recipe

Are you ready to whip up a sweet treat that requires zero baking? Our No Bake S’mores Cheesecake Cups are

- 1 pound large shrimp, peeled and deveined - 3 medium zucchinis, spiralized - 4 cloves garlic, minced - 2 tablespoons olive oil - 1 teaspoon red pepper flakes (adjust to taste) - 1 bell pepper, sliced (any color) - 1 cup cherry tomatoes, halved - 2 tablespoons soy sauce (or tamari for gluten-free) - 1 tablespoon lime juice - Fresh cilantro, chopped (for garnish) - Salt and pepper to taste You can swap shrimp with chicken or tofu for a different protein. If you don’t have zucchinis, try using spaghetti squash or even carrots. For a low-sodium option, use coconut aminos instead of soy sauce. Squeeze in lemon juice if you lack lime juice for a fresh flavor. Fresh basil can stand in for cilantro if you prefer. Each serving provides about 250 calories. You get 25 grams of protein and 10 grams of carbs. The dish is rich in vitamins A and C from the bell pepper and tomatoes. It also offers healthy fats from the olive oil. This meal is low in calories and high in nutrients, making it a smart choice for healthy eating. To make zoodles, start with three medium zucchinis. Use a spiralizer to turn them into noodles. A spiralizer is easy and fun to use! After spiralizing, place the zoodles on a paper towel. This helps absorb extra moisture. Moist zoodles can become soggy when cooked. Let them sit while you prepare the shrimp and veggies. Grab one pound of large shrimp. Make sure they are peeled and deveined. In a mixing bowl, add the shrimp. Sprinkle in salt, pepper, and half of the red pepper flakes. This adds a nice kick! Toss the shrimp gently to coat all sides. Let the shrimp marinate for about ten minutes. Next, heat one tablespoon of olive oil in a large skillet over medium-high heat. Once hot, add the shrimp. Cook them for 2-3 minutes. They should turn pink and opaque when done. This means they are perfectly cooked! Remove the shrimp from the skillet and set them aside. In the same skillet, add one tablespoon of olive oil. Then, toss in the minced garlic and sliced bell pepper. Sauté for about two minutes. You want the garlic to smell amazing and the peppers to soften a bit. After that, add in one cup of halved cherry tomatoes. Then, add the spiralized zucchini. Stir everything together well. Cook for another 2-3 minutes. The veggies should be tender yet still crisp. Now it’s time to combine everything. Return the cooked shrimp to the skillet. Pour in the soy sauce and lime juice. Sprinkle the rest of the red pepper flakes. Toss all the ingredients together and heat for one more minute. Your Spicy Garlic Shrimp Zoodle Bowls are ready to enjoy! To get shrimp just right, start with fresh or thawed shrimp. Rinse them under cold water and pat them dry. Season them with salt, pepper, and half the red pepper flakes. Let them sit for about 10 minutes. This helps the flavors soak in. When you cook them, use a hot skillet. Cook the shrimp for only 2-3 minutes. They should turn pink and opaque. Overcooking makes them tough. Always remove them from the heat as soon as they are done. Zoodles can get watery if not managed well. After spiralizing the zucchinis, place them on a paper towel. This helps absorb excess moisture. You can also sprinkle a little salt on them. Let them sit for 10 minutes, then pat them dry. When cooking zoodles, sauté them quickly. Aim for just 2-3 minutes to keep them crisp. You want them tender but not mushy. This way, your zoodle bowls stay fresh and delightful. If you love heat, use more red pepper flakes. Start with the teaspoon in the recipe. You can always add more while cooking. If you prefer less spice, reduce the flakes or skip them altogether. Lime juice helps balance the heat. You can also serve extra lime wedges on the side. This gives each person control over their spice level. Enjoy making the dish just right for your taste buds! {{image_2}} You can switch shrimp for other proteins. Chicken works great in this dish. Simply cut it into small pieces and cook it like the shrimp. Tofu is another good choice for a vegetarian option. Use firm tofu, and sauté it until golden brown. You can also try scallops or fish, like salmon. These proteins add different flavors and textures, making the dish even more exciting. Feel free to mix up your veggies! You can add broccoli, snap peas, or carrots for extra crunch. If you want a different flavor, try using asparagus or green beans. You can also swap zucchinis with other spiralized veggies like carrots or sweet potatoes. This keeps the dish fresh and colorful, making it more fun to eat. The sauce can be changed to suit your taste. Instead of soy sauce, use teriyaki or hoisin sauce for a sweeter flavor. You can add sesame oil for a nutty taste or coconut aminos for a soy-free option. Play with different herbs and spices too! Fresh basil or parsley can add a nice touch. Adjust the red pepper flakes to make it spicier or milder based on your preference. These changes create a unique flavor profile every time. You can store the Spicy Garlic Shrimp Zoodle Bowls in the fridge. Place any leftovers in an airtight container. They will stay fresh for up to three days. Make sure to cool the dish to room temperature before sealing it. This helps prevent moisture buildup. I don't recommend freezing the zoodles. They can become mushy when thawed. However, you can freeze the shrimp and sauce. Place them in a freezer-safe bag. Remove as much air as possible before sealing. They will last for about two months. To reheat, use a skillet on medium heat. Add a splash of olive oil to keep things moist. Heat the shrimp and sauce until warmed through. For the zoodles, avoid overcooking them. Just warm them gently to keep some crunch. You can also microwave in short bursts if you prefer. Yes, you can use frozen shrimp. Just make sure to thaw them first. Place the shrimp in a bowl of cold water for about 15-20 minutes. Once thawed, peel and devein them if needed. This will help you keep the shrimp fresh and tasty. To spiralize zucchini, you need a spiralizer. First, wash the zucchinis. Then, cut off the ends. Place one zucchini in the spiralizer and turn the handle. This will create long, noodle-like strands. Repeat with the other zucchinis. After spiralizing, lay the zoodles on a paper towel to absorb extra moisture. You can serve Spicy Garlic Shrimp Zoodle Bowls with a variety of sides. Here are some great options: - A simple green salad with lemon dressing - Steamed broccoli or asparagus - Quinoa or brown rice for a heartier meal - Crusty bread for dipping in sauce These sides will add flavor and balance to your meal! This article covered how to make Spicy Garlic Shrimp Zoodle Bowls. We explored ingredients, including swaps and nutrition facts. The step-by-step guide helped you prepare the zoodles, cook shrimp, and sauté veggies. Tips on cooking perfect shrimp, zoodle texture, and adjusting spice levels added value. Variations offered ideas for proteins and sauces. We also included storage tips and answered common questions. Now, you have all the tools to create a tasty dish. Enjoy making this meal your way!

Spicy Garlic Shrimp Zoodle Bowls Flavorful and Fresh

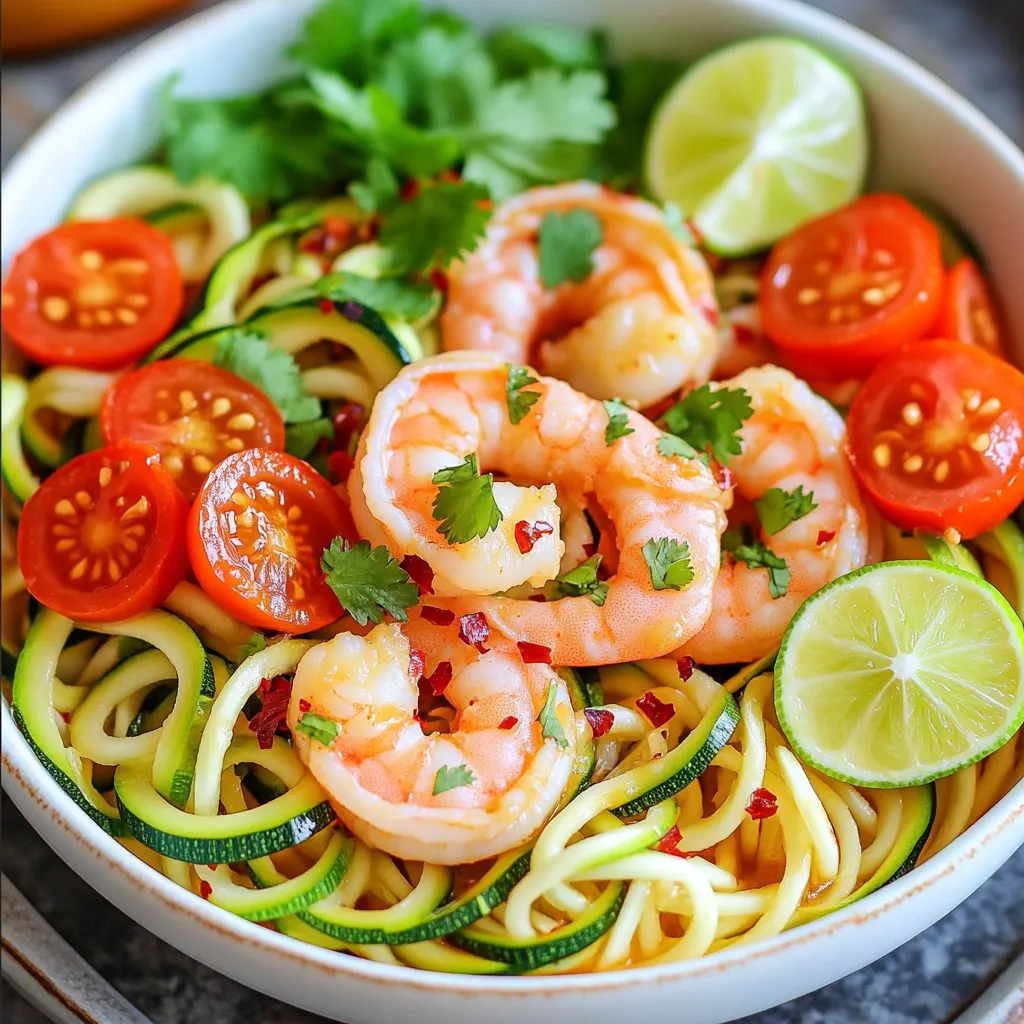
Are you ready to spice up your dinner routine? These Spicy Garlic Shrimp Zoodle Bowls are the perfect blend of

- 1 ½ cups all-purpose flour - 1 teaspoon baking powder - ½ teaspoon baking soda - ¼ teaspoon salt - ½ cup unsalted butter, softened - 1 cup granulated sugar - 2 large eggs - 1 teaspoon vanilla extract - Zest of 1 orange - ½ cup orange juice (freshly squeezed) - 1 cup fresh or frozen cranberries, coarsely chopped - ½ cup chopped walnuts (optional) - ¼ teaspoon ground cinnamon I often use King Arthur Flour for a reliable texture. For butter, I prefer Land O'Lakes unsalted butter; it blends well. Use fresh cranberries when possible, but frozen works great too. If you need a dairy-free option, try coconut oil in place of butter. You can use almond milk for orange juice if you want a nutty twist. For sugar, coconut sugar is a good alternative. If you want to skip eggs, use applesauce; one egg equals ¼ cup of applesauce. Start by gathering all your ingredients. This makes the process smooth and fun. Preheat your oven to 350°F (175°C). Grease a 9x5 inch loaf pan or line it with parchment paper. This will help with easy removal later. In a medium bowl, whisk together the dry ingredients: flour, baking powder, baking soda, salt, and cinnamon. Set this bowl aside. In a large bowl, cream the softened butter and sugar. Mix until it looks light and fluffy. This takes about 3 to 4 minutes. Next, add the eggs one at a time. Make sure to mix well after each egg. Then, stir in the vanilla extract and orange zest. Now, it's time to combine the dry and wet mixes. Gradually add the dry mix to the wet mix, alternating with the orange juice. Start and end with the dry ingredients. Mix until just combined. Gently fold in the chopped cranberries and walnuts if you choose to use them. Pour the batter into the prepared loaf pan. Smooth the top with a spatula. Bake in the oven for 50 to 60 minutes. You will know it’s done when a toothpick inserted in the center comes out clean. Once baked, let the loaf cool in the pan for 10 minutes. After that, transfer it to a wire rack to cool completely. For a nice presentation, dust the cooled loaf with powdered sugar. Serve it with a small bowl of fresh cranberries or orange slices for a festive touch. Enjoy your delicious cranberry orange loaf cake! To get a soft and moist loaf, use room temperature butter. Cream it with sugar until fluffy. This step adds air and gives the right texture. Measure flour correctly using a spoon and leveling it off. Too much flour makes the loaf dense. One common mistake is overmixing the batter. Mix just until combined. Overmixing makes the loaf tough. Also, avoid opening the oven door too soon. This can let heat out and affect baking. Add zest from another orange for a stronger flavor. You can also mix in lemon zest for a bright twist. For presentation, dust the loaf with powdered sugar after it cools. Serve it with fresh cranberries or orange slices for a pop of color. This makes the loaf look festive and inviting. {{image_2}} You can make your cranberry orange loaf cake even more fun with add-ins. Here are a few ideas: - Chocolate chips: Fold in ½ cup of dark or white chocolate chips. This adds sweetness and richness. - Different nuts: Use pecans or almonds instead of walnuts for a unique crunch. Chop them finely for even bites. - Seeds: Consider adding pumpkin seeds or sunflower seeds for a nut-free option. They bring a nice texture. If you need a gluten-free or vegan loaf, I have you covered. For gluten-free: - Flour: Substitute all-purpose flour with a gluten-free blend. Check that it contains xanthan gum for better texture. - Baking powder: Ensure it’s gluten-free as well. For a vegan version: - Butter: Use coconut oil or vegan butter instead. - Eggs: Replace each egg with ¼ cup of unsweetened applesauce or a flax egg (1 tablespoon flaxseed meal mixed with 2.5 tablespoons water). Feel free to play with flavors to suit your taste. Here are some fun options: - Citrus swaps: Try lemon or lime juice and zest instead of orange for a different tang. - Spices: Add ½ teaspoon of nutmeg or ginger for a warm spice note. Cinnamon is great, but these spices can really shine too. - Herbs: Consider adding a hint of rosemary or thyme for a savory twist. Just a small pinch can add depth. These variations make your cranberry orange loaf cake uniquely yours. Have fun with it! To keep your cranberry orange loaf cake fresh, store it in an airtight container. This will help lock in moisture and keep the cake soft. Place a piece of parchment paper between the cake and the lid to absorb extra moisture. If you want to keep it longer, you can wrap it in plastic wrap before placing it in the container. If you have leftover loaf cake, freezing is a great option. First, cool the cake completely. Then, slice it into individual pieces. Wrap each slice tightly in plastic wrap. Next, place the wrapped slices in a freezer-safe bag. Remove as much air as possible. You can freeze the slices for up to three months. When you want to enjoy a slice, just thaw it at room temperature or warm it in the microwave for a few seconds. When stored properly, the cranberry orange loaf cake stays fresh for about three to four days at room temperature. If you refrigerate it, it can last up to a week. However, refrigeration can make the cake a bit dry. For the best taste and texture, enjoy it within the first few days. Yes, you can use dried cranberries. They add sweetness and chewiness. Just use the same amount as fresh cranberries. If you choose dried, consider reducing the sugar slightly. This keeps your cake from being too sweet. To check if the cake is done, insert a toothpick into the center. If it comes out clean, the cake is ready. You can also gently press the top. It should spring back when it is cooked through. If it leaves a dent, bake a bit longer. Absolutely! You can bake the loaf a day or two in advance. Just let it cool completely before wrapping it in plastic wrap. This keeps it fresh. You can also freeze the loaf for later. Just slice it before freezing for easy serving. This guide covered key ingredients, baking steps, and helpful tips. You learned about brands and substitutions, plus ways to enhance flavor. Experimenting with variations helps personalize your loaf. Proper storage keeps it fresh, and clear FAQs answer common questions. Baking is fun and rewarding. Enjoy the process, and savor your delicious creation!

Cranberry Orange Loaf Cake Simple and Tasty Recipe

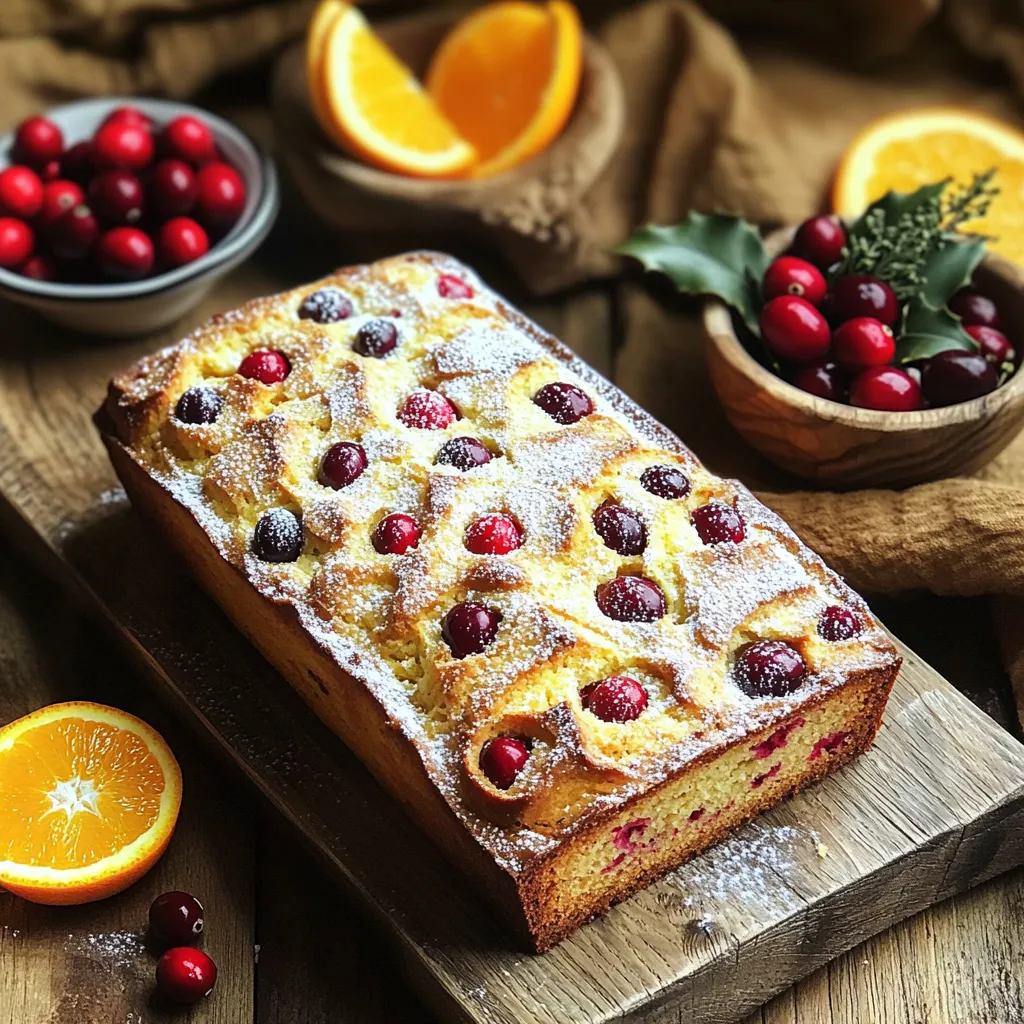
Looking for a delightful treat that’s easy to make? Try my Cranberry Orange Loaf Cake! This simple and tasty recipe

- 12 oz penne pasta - 2 cups chicken broth - 1 cup cooked chicken breast - 1 cup cherry tomatoes - 1/2 cup basil pesto - 1/2 cup heavy cream - 1 cup fresh spinach - 1/2 cup grated Parmesan cheese - 2 tablespoons olive oil - 2 cloves garlic - Salt and pepper In this recipe, each ingredient plays a key role. The penne pasta gives a hearty base. Chicken broth adds depth and flavor. Cooked chicken breast makes it filling. Cherry tomatoes bring a burst of sweetness. Basil pesto infuses vibrant herbal notes. Heavy cream lends a rich, smooth texture. Fresh spinach adds color and nutrients. Grated Parmesan cheese enhances the dish with umami. Olive oil helps sauté the garlic, which builds a strong flavor foundation. Salt and pepper allow you to adjust seasoning to your taste. - Fresh basil leaves - Additional Parmesan cheese Garnishing with fresh basil leaves adds a pop of color and freshness. Extra Parmesan cheese offers a creamy finish. These small touches make your meal look and taste even better. Enjoy this dish with your family. It’s a simple way to bring joy to the dinner table. - Heat 2 tablespoons of olive oil in a large pot over medium heat. - Add 2 cloves of minced garlic and sauté for about 1 minute. The garlic should smell good, but do not let it brown. - Pour in 2 cups of chicken broth and bring it to a simmer. - Stir in 12 oz of penne pasta. Cook according to package instructions, which is usually 10-12 minutes. Stir the pasta occasionally so it cooks evenly. - When the pasta is al dente, add 1 cup of shredded cooked chicken, 1 cup of halved cherry tomatoes, and 1/2 cup of heavy cream to the pot. Mix everything well. - Lower the heat and let it cook for another 3-5 minutes until all ingredients are heated through. - Remove the pot from heat. Stir in 1/2 cup of basil pesto, 1 cup of fresh spinach, and 1/2 cup of grated Parmesan cheese until well combined. - Season your dish with salt and pepper to taste. - Let it sit for a couple of minutes. This helps it thicken before you serve. To get your pasta just right, cook it al dente. This means the pasta should be firm but not hard. Start by boiling the pasta in chicken broth. Follow the package instructions, usually around 10-12 minutes. Stir it often to keep it from sticking. For a creamy texture, add heavy cream after the pasta cooks. This helps create a rich sauce. Mix it well and heat it gently. Add herbs and spices to make your dish pop. Fresh basil can brighten the meal. A pinch of red pepper flakes adds heat. Don't forget salt and pepper to taste. You can choose between homemade pesto or store-bought. Homemade pesto has a fresh taste. Store-bought is quick and easy. Both work well in this recipe. Using the right pot makes cooking smoother. A large pot is best for one-pot meals. It allows enough space for all the ingredients to mix. Essential tools include a wooden spoon for stirring and a measuring cup for liquids. A good knife helps with chopping veggies. Having these tools ready makes cooking easier and more fun. {{image_2}} You can easily switch up the pasta in this recipe. Try gluten-free penne if you need. It works just as well! You can also use other pasta shapes like fusilli or rigatoni. For protein, shredded chicken works great. But you can also use tofu for a vegetarian meal. Shrimp cooks fast and adds a nice twist too. To make this dish vegetarian, simply leave out the chicken. You can add more veggies instead, like bell peppers or zucchini. For a vegan option, swap the heavy cream with coconut milk or a vegan cream. You can also skip the cheese or use a dairy-free alternative. If you want a low-calorie version, use less cream and cheese. You can even use a light broth to cut down on calories. Adding different veggies can change the taste. Try adding broccoli, peas, or artichoke hearts for more texture. Each veggie adds a new layer of flavor. You can also mix in different sauces. If you love spice, try a spicy arrabbiata sauce. For a twist, a creamy Alfredo sauce can also work. The key is to keep experimenting until you find your favorite mix! Store your leftover One Pot Pesto Chicken Pasta in an airtight container. This keeps it fresh. Place it in the fridge. It will last about 3 to 4 days. Make sure to let it cool down first. This helps prevent excess moisture. To freeze your pasta, let it cool completely. Divide it into portions. Use freezer-safe bags or containers. Squeeze out excess air before sealing. It can stay good for about 2 to 3 months. When ready to eat, thaw it in the fridge overnight. Reheat it on the stove with a splash of chicken broth. You can prepare ingredients ahead of time. Chop your cherry tomatoes and shred the chicken. Store them in separate containers in the fridge. This saves time on busy days. If you want to store pre-cooked pasta, toss it with a bit of olive oil. This prevents it from sticking together. Making this dish is quick. It takes about 10 minutes to prep and 25 minutes to cook. So, you can enjoy a tasty meal in just 35 minutes! Yes, you can use raw chicken! Just cut it into small pieces. Add it to the pot with garlic and olive oil. Cook it through before adding the broth and pasta. This way, it will be juicy and full of flavor. You can pair this dish with many sides. Here are some ideas: - Garlic bread - Caesar salad - Steamed vegetables - A light green salad These options add freshness and balance to your meal. Enjoy! In this post, we explored making One Pot Pesto Chicken Pasta. We covered the main ingredients, steps, and tips for a creamy, tasty dish. You learned how to customize it and store leftovers. Remember, this meal is easy and flexible. Try different proteins or veggies to suit your taste. With a few simple steps, you can enjoy a delightful dinner that brings joy. Happy cooking!

One Pot Pesto Chicken Pasta Flavorful Family Meal

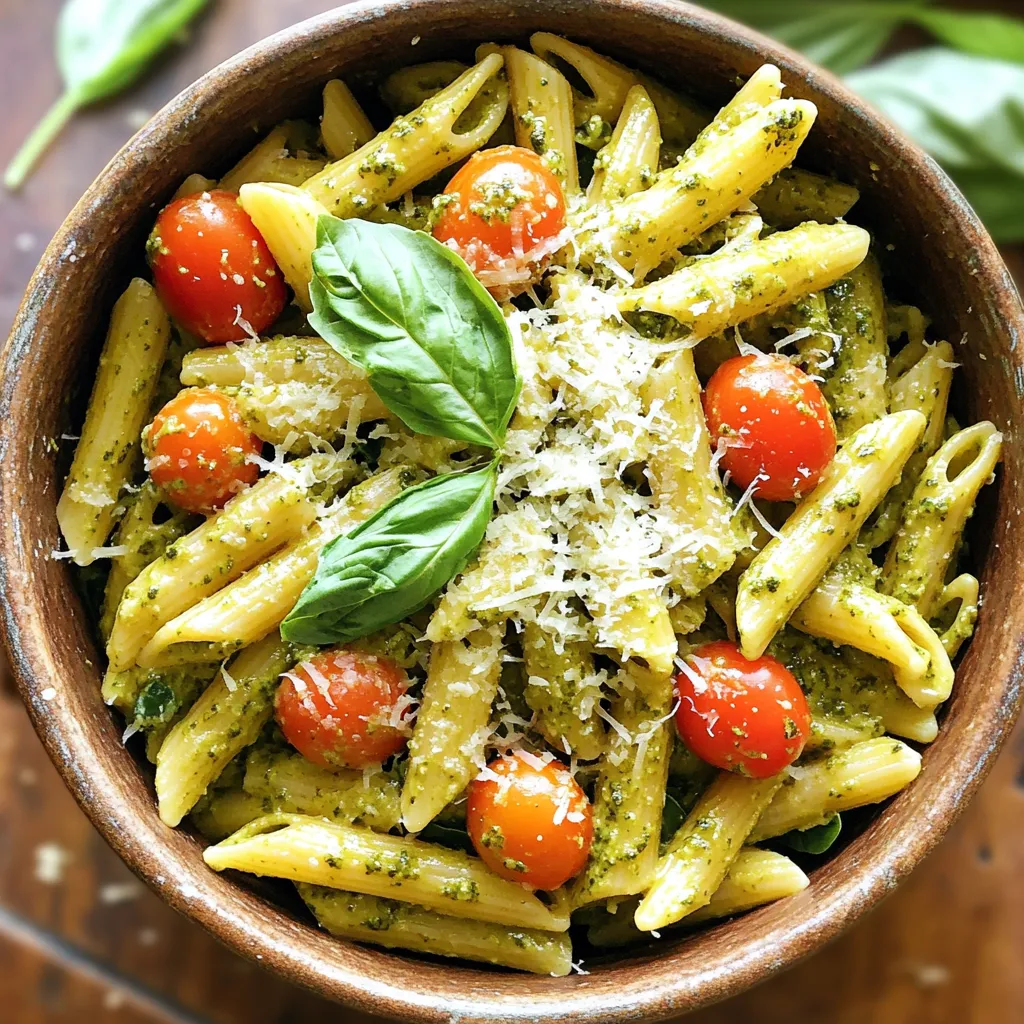
Are you searching for a quick and tasty family dinner? Look no further! One Pot Pesto Chicken Pasta is your

- 2 cups cooked jasmine rice (day-old preferred) - 1 pound chicken breast, diced - 1 cup mixed vegetables (peas, carrots, corn) - 2 tablespoons soy sauce - 2 tablespoons sesame oil - Salt and pepper to taste - 2 green onions, sliced - 2 eggs, beaten - 3 cloves garlic, minced - 1 teaspoon ginger, minced - Fresh cilantro for garnish The main ingredients for Blackstone chicken fried rice are simple and easy to find. Day-old jasmine rice works best. It stays firm and doesn’t clump together. For protein, use diced chicken breast. This meat cooks quickly and adds great flavor. Mixed vegetables bring color and nutrients. Peas, carrots, and corn are perfect choices. For seasoning, soy sauce and sesame oil add depth. These ingredients balance the dish. Don’t forget salt and pepper to taste. They enhance all the flavors. Lastly, the additional ingredients finish off your meal. Sliced green onions add a fresh crunch. Beaten eggs bring richness. Minced garlic and ginger give an aromatic kick. Fresh cilantro makes for a lovely garnish. This combination creates a tasty and vibrant dish. {{ingredient_image_1}} First, heat your Blackstone griddle to medium-high. This step is key for even cooking. Next, add 1 tablespoon of sesame oil to one side of the griddle. The oil helps to prevent sticking and adds great flavor. Now, season the diced chicken breast with salt and pepper. Once the griddle is hot, add the chicken to the oil. Cook it for about 5 to 7 minutes. You want it to be fully cooked and nicely browned. After cooking, remove the chicken and set it aside. On the same side of the griddle, pour in the beaten eggs. Scramble them until fully cooked. Once done, mix the eggs with the cooked chicken. This adds protein and richness to your fried rice. On the other side of the griddle, add the remaining tablespoon of sesame oil. Toss in the minced garlic and ginger. Sauté them for about 30 seconds until fragrant. Next, add the mixed vegetables. Cook them for another 2 to 3 minutes until heated through. Now, stir in the day-old jasmine rice. Break up any clumps as you mix. Pour the soy sauce over the rice. This adds that classic fried rice flavor. Finally, mix in the chicken and scrambled eggs thoroughly. Toss in the sliced green onions for a fresh crunch. Check your seasonings and adjust with more salt or pepper if needed. Cook everything together for an additional 2 minutes. This helps all the flavors meld perfectly. When making fried rice, day-old rice is best. It has dried out a bit, which helps it fry evenly. Fresh rice can turn mushy when cooked. I suggest using jasmine rice for its nice aroma and flavor. Long-grain rice also works well since it stays separate during cooking. For cooking on a Blackstone griddle, heat is key. Set the griddle to medium-high heat for even cooking. This helps get a nice sear on the chicken and veggies. Avoid overcrowding the griddle. This lets everything cook properly and not steam. Want to boost flavor? Add some extra spices like chili flakes or a splash of hot sauce. You can also try adding teriyaki or oyster sauce for a twist. For a fresh touch, toss in bell peppers or snap peas. They add crunch and color to your meal. Pro Tips Use Day-Old Rice: Day-old jasmine rice works best for fried rice as it is drier and prevents clumping, resulting in a better texture. High Heat for Stir-Frying: Ensure your griddle is at medium-high heat to achieve that perfect sear on the chicken and vegetables, enhancing flavor. Customize Your Veggies: Feel free to add any vegetables you have on hand, such as bell peppers or broccoli, for more color and nutrition. Garnish for Flavor: Don't skip the fresh cilantro and green onions; they add a burst of freshness that elevates the dish significantly. {{image_2}} You can switch up the protein in this dish. Instead of chicken, try shrimp, beef, or tofu. Each option gives a unique taste. Shrimp cooks fast and adds a sweet flavor. Beef offers a hearty bite. Tofu is great for a plant-based meal. Just make sure to adjust cooking times. Feel free to change the veggies too. Bell peppers or broccoli work well. Bell peppers add a crunch and sweetness. Broccoli brings a nice texture and color. You can also use snap peas or zucchini for variety. Mix and match to suit your taste! If you like heat, add chili sauce or fresh peppers. Sriracha is a popular choice. It gives a nice kick without overpowering the dish. You can also try diced jalapeños for a fresh spice. Just start with a little and taste as you go. This way, you can find the level of heat you enjoy! To keep your chicken fried rice fresh, store it in an airtight container. This helps keep the flavors locked in. Make sure to cool the rice to room temperature before sealing it. This way, it won’t trap steam and become soggy. Fried rice can stay fresh in the fridge for about three to four days. Just remember to label the container with the date so you know when to use it. You can reheat the fried rice on a Blackstone griddle or in the microwave. For the griddle, heat it on medium. Add a little sesame oil to prevent sticking. Spread the rice evenly on the griddle and stir occasionally until hot. If using the microwave, place the rice in a microwave-safe bowl. Cover it with a damp paper towel to keep it moist. Heat in short bursts of one to two minutes, stirring in between, until hot. Freezing fried rice is easy and great for meal prep. First, let it cool completely. Then, divide it into portions. Use freezer-safe bags or containers, leaving some space for expansion. Label each bag with the date. Fried rice can last in the freezer for up to three months. When you're ready to eat, just thaw it in the fridge overnight before reheating. You can use fresh rice, but day-old rice is better. Day-old rice is drier. It helps the grains stay separate. Fresh rice tends to be sticky. This can make your fried rice mushy. If you use fresh rice, spread it out to cool first. If you don’t have a Blackstone griddle, you can use a regular pan. A large skillet works well too. Just make sure it has high sides. This will help keep the rice from spilling out. You may need to adjust the heat. Keep an eye on it to avoid burning. Blackstone chicken fried rice can be a healthy meal. It has lean chicken and veggies. You control the amount of oil and soy sauce. Use less oil for a lighter dish. Add more vegetables for extra nutrients. It can fit into a balanced diet easily. To make this recipe vegetarian, skip the chicken. You can use tofu or tempeh instead. Just cube it and cook like chicken. Add extra vegetables too. Peppers, mushrooms, or snap peas work great. You still get a tasty meal without meat. Fried rice pairs well with many side dishes. Try spring rolls for a crunchy snack. A simple salad adds freshness. You can also serve dumplings for a fun touch. Stir-fried veggies make a great side too. Each option complements the fried rice well. This blog shared a quick and easy recipe for Blackstone chicken fried rice. You learned about key ingredients like jasmine rice, chicken, and mixed veggies. I outlined the step-by-step cooking process and helpful tips for perfect results. You also discovered ways to customize the dish and store leftovers. In the end, this fried rice can fit any meal. With a few simple changes, you can enjoy a delicious meal anytime. Now, take these ideas and make your Blackstone fried rice a hit!

Blackstone Chicken Fried Rice Flavorful and Simple Meal

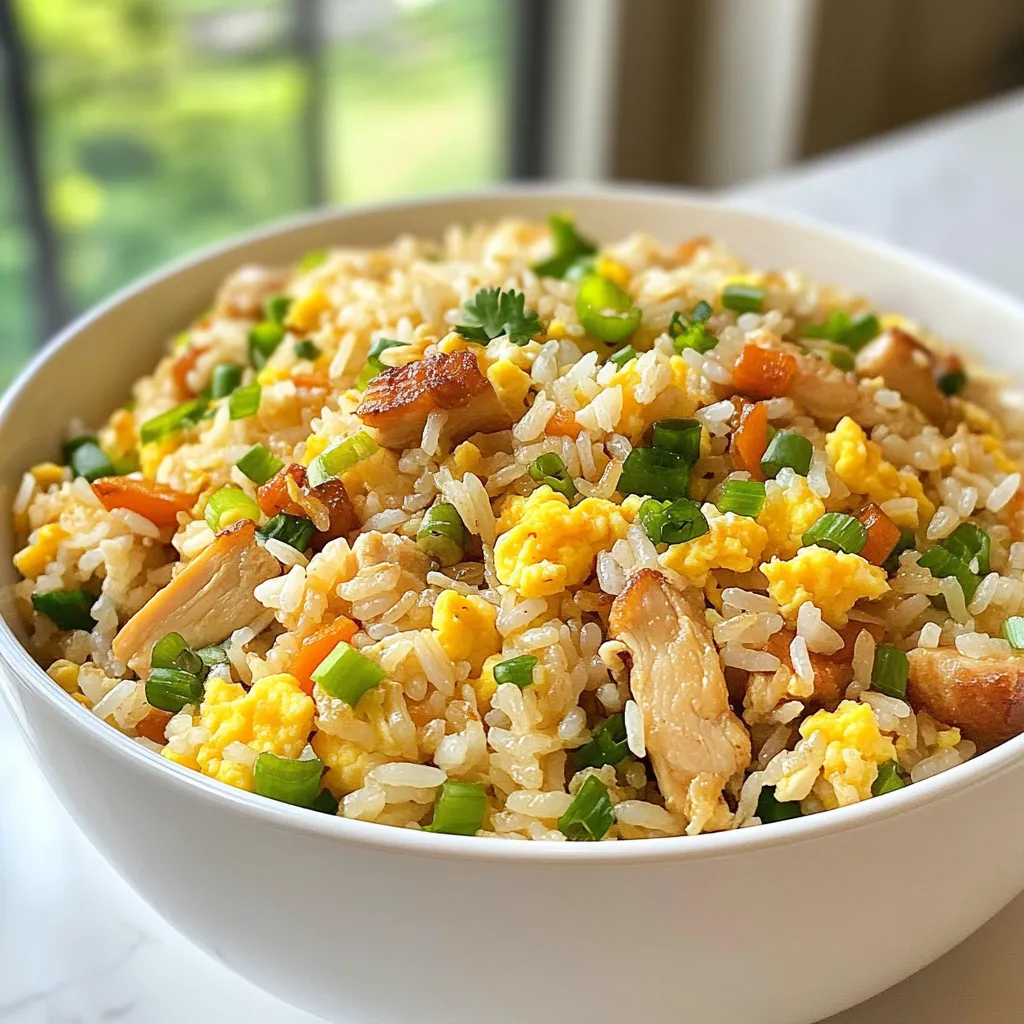
If you crave a quick, tasty meal, Blackstone Chicken Fried Rice is your answer. This dish is easy to make

To make Creamy One-Pot Spinach Artichoke Pasta, gather these simple ingredients: - 12 ounces pasta (penne or rotini works well) - 1 tablespoon olive oil - 3 cloves garlic, minced - 1 onion, finely chopped - 1 can (14 ounces) artichoke hearts, drained and quartered - 4 cups fresh spinach - 1 cup vegetable broth - 1 cup heavy cream - 1 cup grated Parmesan cheese - Salt and pepper to taste - 1 teaspoon crushed red pepper flakes (optional) - Fresh basil for garnish You only need a few tools for this dish: - A large pot - A wooden spoon for stirring - A sharp knife for chopping - A cutting board for prep - Measuring cups and spoons For this recipe, you can use different pasta types. I suggest: - Penne, because it holds sauce well. - Rotini, as its twists catch every bit of cream. Both will give you a tasty and filling dish! First, gather your ingredients. You need olive oil, garlic, onions, artichoke hearts, and spinach. Heat the olive oil in a large pot over medium heat. Add the chopped onions. Cook them until they turn soft and clear. This takes about 3 to 4 minutes. Next, toss in the minced garlic. Cook for just 1 more minute. The aroma will fill your kitchen. Now, add the drained artichoke hearts. Stir these gently. After that, mix in the fresh spinach. Keep stirring until the spinach wilts down, which takes about 2 to 3 minutes. Pour in the vegetable broth. Bring this mixture to a gentle simmer. Now, it’s time to add the pasta. You can use penne or rotini. Stir it well to mix everything. Cover the pot and cook the pasta according to the package instructions. Make sure to stir occasionally. This helps stop the pasta from sticking together. Cook until the pasta is al dente. This should take around 10 to 12 minutes. Once your pasta is cooked, lower the heat. Now, add the heavy cream and grated Parmesan cheese. Stir everything together until it becomes creamy and smooth. This is where the magic happens! Season it with salt, pepper, and the red pepper flakes if you like some heat. Let the dish sit for a minute to thicken slightly. It’s now ready to serve. Enjoy your creamy one-pot spinach artichoke pasta! To get a creamy sauce, use heavy cream. It makes the dish rich and smooth. Stir in the cream after cooking the pasta. This lets the flavors blend well. You can also add more Parmesan cheese for extra creaminess. Mix it in slowly to avoid lumps. One mistake is not stirring the pasta enough. This can cause it to stick. Always stir occasionally while it cooks. Another mistake is adding too much broth. Use just one cup to keep it creamy. Lastly, don't skip the seasoning. Salt and pepper bring out the flavors, so add them to taste. I love serving this pasta with a fresh salad. A simple green salad works great. You can also pair it with garlic bread to soak up the sauce. For a special touch, add fresh basil on top. It gives a nice color and flavor. Enjoy your meal with a glass of white wine for a perfect finish! {{image_2}} You can easily make this dish vegetarian. Just skip the Parmesan cheese or use a vegan cheese alternative. Use vegetable broth as the base, which gives great flavor. For a vegan cream, try coconut cream or cashew cream. Both add a nice richness without the dairy. You can also add nutritional yeast for a cheesy taste without the cheese. If you want to add protein, chicken or shrimp works well. For chicken, dice it and sauté it before adding the onion. Cook until no longer pink. For shrimp, add them after the garlic, cooking until they turn pink. Both options boost protein and make the meal heartier. You can also use cooked sausage or tofu for more variety. Herbs and spices can take this dish to the next level. Fresh basil adds a bright flavor. You can also try thyme or oregano for a more earthy taste. For some heat, add crushed red pepper flakes or even chili powder. A squeeze of lemon juice at the end brightens the whole dish. Experiment with what you love to make it your own! To store leftovers, let the pasta cool. Then, place it in an airtight container. Keep it in the fridge for up to three days. Make sure to cover it well to avoid drying out. To reheat, add the pasta to a pot. Pour in a splash of vegetable broth or water. Heat over low on the stove, stirring often. This keeps it creamy. If you prefer, use the microwave. Heat in short bursts, stirring between each. You can freeze the pasta for longer storage. First, let it cool completely. Then, transfer it to a freezer-safe container. It will last up to three months. When ready to eat, thaw it in the fridge overnight. Reheat as mentioned above for best results. Yes, you can use frozen spinach. Just thaw it and squeeze out extra water. This change saves time, and frozen spinach is still nutritious. It will work well in this creamy dish. You can use half-and-half or a mix of milk and butter. Coconut cream also adds a nice flavor. Each option gives a different taste but still keeps the sauce creamy. This dish lasts about three to four days in the fridge. Store it in an airtight container for best results. The flavors will meld and get even better over time. No, this recipe is not gluten-free because it uses regular pasta. You can swap in gluten-free pasta. Just adjust the cooking time based on the type you choose. This article covered all the key steps to make a tasty pasta dish. We went over the ingredients, cooking methods, and some helpful tips. I shared ways to add flavor and options for different diets. Remember to store your leftovers properly for the best taste later. With these instructions, you can enjoy making this recipe again and again. Happy cooking!

Creamy One-Pot Spinach Artichoke Pasta Delight

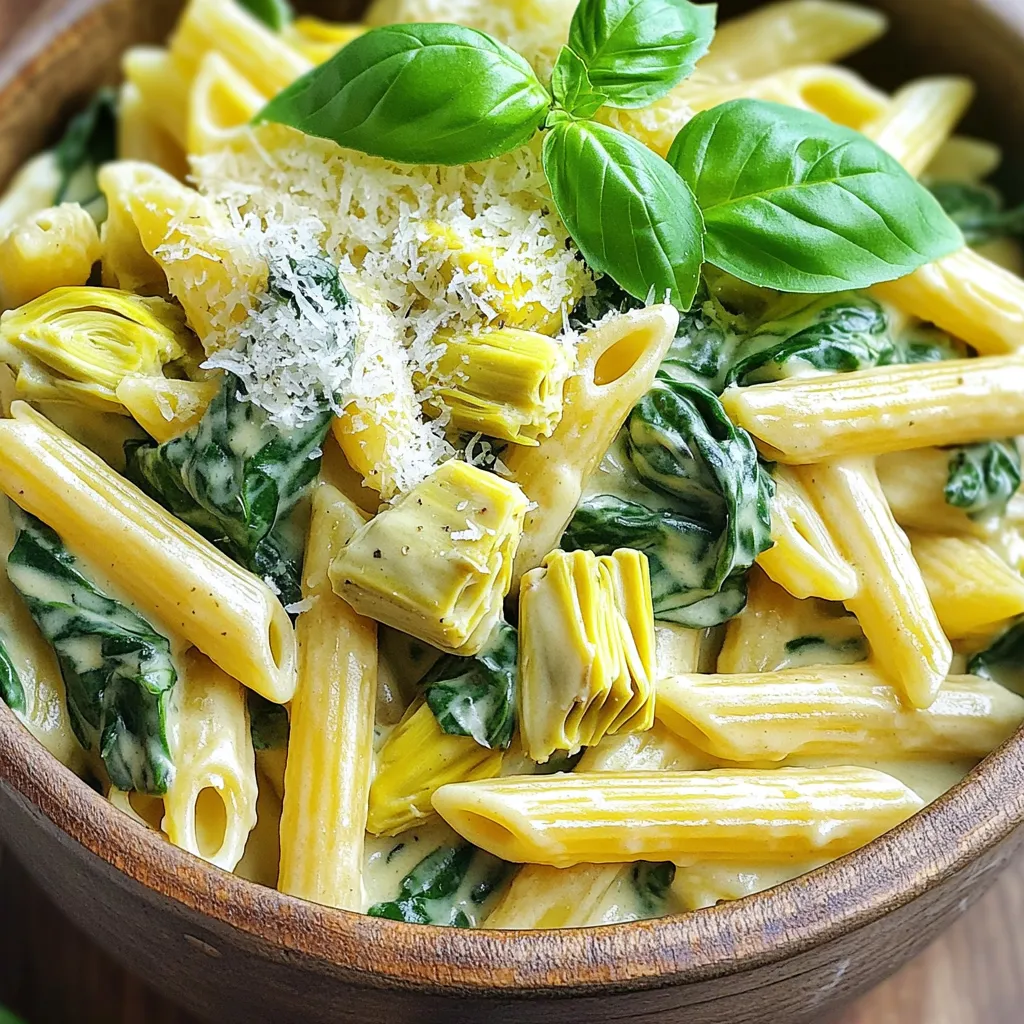
Looking for a simple and tasty dinner idea? You’ve found it! My Creamy One-Pot Spinach Artichoke Pasta is a cozy

- 2 packs instant ramen noodles - 2 chicken breasts, thinly sliced - 3 cloves garlic, minced - 1 tablespoon ginger, grated - 2 tablespoons soy sauce - 1 tablespoon chili paste or Sriracha - 3 cups chicken broth - 1 tablespoon sesame oil - 1 cup bok choy, chopped - 1 green onion, sliced - 1 teaspoon sesame seeds (for garnish) - Salt and pepper to taste - Extra veggies like carrots or mushrooms - Soft-boiled eggs for richness - Fresh herbs like cilantro or basil - Lime wedges for a zesty kick - Use vegetable broth instead of chicken broth for a lighter taste. - Swap chicken for tofu or shrimp if you want something different. - Instead of bok choy, use spinach or kale for greens. - If you lack sesame oil, olive oil works in a pinch. Each ingredient plays a key role in the dish. The chicken provides protein, while garlic and ginger add depth. The noodles soak up the rich broth, making every bite delightful. Feel free to mix and match based on what you have. Cooking should be fun and flexible! Start by boiling water in a pot. Use enough water to cover the noodles well. Once the water boils, add the instant ramen noodles. Cook them according to the package directions, usually about 3-4 minutes. When the noodles are ready, drain them and set them aside. This step makes sure the noodles are just right for your soup. Next, grab a large skillet or wok. Heat sesame oil over medium heat. This oil adds a nice flavor to the chicken. Add the thinly sliced chicken breasts to the pan. Season them with a pinch of salt. Cook the chicken for about 5-6 minutes. You want it golden and cooked through. Stir occasionally to ensure even cooking. Once the chicken is done, add the minced garlic and grated ginger. Cook for another 1-2 minutes. Be careful not to burn the garlic, as it can turn bitter. Now, it's time to build the soup. Pour in the chicken broth. Bring the broth to a gentle simmer. This helps all the flavors mix well. Stir in soy sauce and chili paste or Sriracha. Adjust the spice level to your liking. If you want it spicier, add more chili paste. Then, add the chopped bok choy to the broth. Let it cook for 2-3 minutes until it's tender but still bright green. Finally, add the cooked ramen noodles to the skillet. Toss everything together in the broth. Make sure the noodles are well coated and heated through. Now you have a delicious bowl of spicy garlic chicken ramen! To make Minute Spicy Garlic Chicken Ramen truly shine, focus on the garlic and ginger. Fresh garlic adds a bold taste. Use a microplane to grate the ginger for a finer texture. This releases more flavor. Adjust the chili paste or Sriracha to match your heat level. For a richer broth, consider adding a splash of fish sauce. This small addition can elevate the dish. While cooking the chicken, keep an eye on the time. Thin slices cook faster, usually in 5-6 minutes. If your chicken is thicker, you may need an extra minute or two. When you add bok choy, cook it just until it wilts. This keeps its bright color and crunch. Lastly, remember that ramen noodles only take 3-4 minutes to cook. Avoid overcooking them, or they will become mushy. A beautiful dish starts with how you serve it. Use deep bowls to hold the broth and noodles. First, add the ramen, then the chicken, and top it with bok choy. Finish with sliced green onions and a sprinkle of sesame seeds. This not only adds flavor but also a nice visual touch. Don’t forget to serve it with chopsticks for a fun experience. Enjoy your gourmet meal at home! {{image_2}} You can boost this dish's protein. Try adding shrimp, tofu, or beef. Cook these proteins in the same way as chicken. Just be sure to cook shrimp until it turns pink. Tofu can be crispy if you pan-fry it first. This way, you get great texture and flavor. To make this recipe vegetarian or vegan, swap the chicken for tofu or tempeh. Use vegetable broth instead of chicken broth. You can also add extra veggies like bell peppers, mushrooms, or carrots. This keeps the dish hearty and tasty while meeting your needs. You can easily change the flavor of this ramen. Use different sauces like teriyaki or hoisin for a sweeter taste. Add lime juice for a zesty kick. For a smoky flavor, try adding a bit of smoked paprika. These small changes can create a whole new dish. Store any leftover spicy garlic chicken ramen in an airtight container. Let it cool down first. Place it in the fridge. It can stay fresh for up to three days. Make sure to seal it well to keep the flavors intact. To reheat, pour the ramen into a pot. Add a splash of water or broth. Heat over medium until hot. Stir well to mix the flavors. You can also microwave it. Use a microwave-safe bowl, cover it loosely, and heat in short bursts. If you want to freeze the ramen, do so without the noodles. Cooked noodles can turn mushy when frozen. Place the soup and chicken in a freezer-safe bag or container. Remove as much air as possible. It can last up to three months in the freezer. When ready to eat, thaw in the fridge overnight and reheat as described above. Yes, you can use many types of noodles. Soba or udon noodles work well. Rice noodles are another great option. Each type adds its own twist. Just cook them as per the package instructions. To reduce the heat, use less chili paste or Sriracha. You can also add more broth. Adding a bit of sugar can help balance the spice too. Remember, taste as you go. You can use tofu for a vegetarian option. Shrimp or beef are good chicken swaps too. Just cook them until fully done. Adjust the cooking time based on what you choose. This post covered all you need to make a tasty soup. We discussed key ingredients, substitutes, and variations. I shared tips for flavor and perfect cooking times. You learned how to store and reheat leftovers well. With different options for protein and spice, you can tailor this dish to your taste. Try your own spin to make it unique. Remember, the best soup is the one made just for you. Enjoy creating your delicious masterpiece!

Minute Spicy Garlic Chicken Ramen Flavorful Dish

Are you ready to spice up your dinner? This Minute Spicy Garlic Chicken Ramen packs bold flavors into a quick

- 1 cup apple butter - ½ cup unsalted butter, melted - 1 cup brown sugar, packed - ½ cup granulated sugar - 2 large eggs - 1 teaspoon vanilla extract - 1 ½ cups all-purpose flour - 1 teaspoon baking powder - ½ teaspoon baking soda - ½ teaspoon salt - 1 teaspoon ground cinnamon - ½ teaspoon nutmeg - ½ cup chopped walnuts (optional) - 1 cup powdered sugar - 2 tablespoons milk or apple juice - ½ teaspoon ground cinnamon - Pinch of salt You can swap apple butter with pumpkin puree for a different flavor. If you're out of unsalted butter, use salted butter and cut back on salt. Brown sugar can be replaced with coconut sugar for a unique taste. You can omit nuts for a nut-free version. For a vegan option, use flax eggs and a plant-based butter. Gather your ingredients first. You need 1 cup of apple butter, ½ cup of melted unsalted butter, and both brown and granulated sugar. In a big bowl, mix the melted butter, apple butter, brown sugar, and granulated sugar. Whisk until smooth. Next, add 2 large eggs and 1 teaspoon of vanilla extract. Whisk after each egg. Now, take another bowl. Combine 1 ½ cups of flour, 1 teaspoon of baking powder, ½ teaspoon of baking soda, ½ teaspoon of salt, 1 teaspoon of ground cinnamon, and ½ teaspoon of nutmeg. Mix these dry ingredients together. Slowly add the dry mix into the wet mix. Stir gently. If you like nuts, fold in ½ cup of chopped walnuts. To make the glaze, grab a bowl. Add 1 cup of powdered sugar, 2 tablespoons of milk or apple juice, and ½ teaspoon of ground cinnamon. Add a pinch of salt too. Whisk until the glaze is smooth. If it’s too thick, add a bit of milk or juice. If too thin, add more powdered sugar. Preheat your oven to 350°F (175°C). Grease an 8x8-inch baking dish or use parchment paper for easy removal. Pour the blondie batter into the dish. Smooth the top with a spatula. Bake for 25-30 minutes. Check by inserting a toothpick in the center. It should come out clean. Once baked, let the blondies cool in the pan for about 10 minutes. Then, move them to a wire rack to cool completely. After cooling, drizzle the cinnamon glaze over the top. Use a spoon or piping bag to make it pretty. Enjoy every bite! To keep your blondies moist, use fresh apple butter. The apple butter adds rich flavor and moisture. Always measure your flour correctly. Too much flour can dry them out. I recommend using the spoon-and-level method. This way, you avoid packing the flour too tight. Do not over-mix the batter; mix until just combined. Over-mixing can make the blondies tough. For added moisture, let them cool completely before serving. The cinnamon glaze should be smooth and pourable. Start with powdered sugar and add milk or apple juice. Whisk until it is lump-free. If it is too thick, add more liquid, one teaspoon at a time. If it is too thin, add more powdered sugar. A pinch of salt enhances the flavor. Drizzle the glaze over the cooled blondies for the best look. You can use a spoon or a piping bag for fun designs. Serve these blondies warm or at room temperature. They taste great on their own. Pair them with warm apple cider for a cozy treat. A scoop of vanilla ice cream adds a creamy touch. For extra crunch, sprinkle some chopped walnuts on top. These blondies are perfect for fall gatherings or a snack at home. Enjoy sharing them with friends and family! {{image_2}} You can make your apple butter blondies even better by adding nuts or chocolate. Chopped walnuts add a nice crunch and pair well with the apple butter. If you prefer chocolate, try adding semi-sweet or dark chocolate chips. Fold in about half a cup of either option when mixing the batter. This addition gives a rich taste that enhances the blondies' flavor. To make these blondies gluten-free, swap the all-purpose flour for a gluten-free flour blend. Look for a blend that includes xanthan gum, as it helps mimic the texture of regular flour. Follow the same measurements, and your blondies will still taste delicious. You won’t miss the gluten, I promise! Enhance the flavor by adding spices! Besides cinnamon, consider adding ginger, allspice, or cloves. Just a pinch can change the profile of your blondies. For a warm twist, add an extra teaspoon of vanilla extract. This small change can create a unique taste that surprises your guests. Experiment to find your favorite mix! To keep your Apple Butter Blondies fresh, store them in an airtight container. This will help lock in moisture. Place a piece of parchment paper between each blondie for easy removal. You can store them at room temperature for up to three days. If you want to keep them longer, refrigeration is a good option. To freeze your blondies, first, let them cool completely. Cut them into squares and wrap each piece tightly in plastic wrap. Then, place them in a freezer-safe bag or container. Label the bag with the date. You can freeze them for up to three months. When you are ready to enjoy, let them thaw in the fridge overnight or at room temperature for a few hours. Apple Butter Blondies can last about a week at room temperature. For the best taste and texture, enjoy them within three days. If you refrigerate them, they can last longer but may dry out. To prevent this, always store them in an airtight container. For the best flavor, warm them slightly before serving. This will bring back that soft, gooey goodness! Yes, you can use homemade apple butter. It adds a personal touch. The flavor may vary, but it enhances the blondies. Just ensure it has a smooth texture. This will keep the blondies moist and rich. To check if the blondies are done, insert a toothpick into the center. If it comes out clean or with a few moist crumbs, they are ready. The edges will also look slightly golden. Avoid overbaking for the best texture. Yes, you can make the cinnamon glaze ahead of time. Store it in the fridge in an airtight container. When ready to use, let it sit at room temperature. Stir until smooth before drizzling over the blondies. This saves time and keeps your dessert fresh. This blog post covered how to make tasty apple butter blondies with a cinnamon glaze. You learned the right ingredients, step-by-step instructions, and helpful tips. I also shared ways to tweak the recipe to fit your taste. Remember, storing and freezing your blondies properly keeps them fresh. Keep experimenting with flavors and enjoy sharing these treats! Your baking skills will shine with these easy steps and tips. Enjoy your delicious creations!

Apple Butter Blondies with Cinnamon Glaze Delight

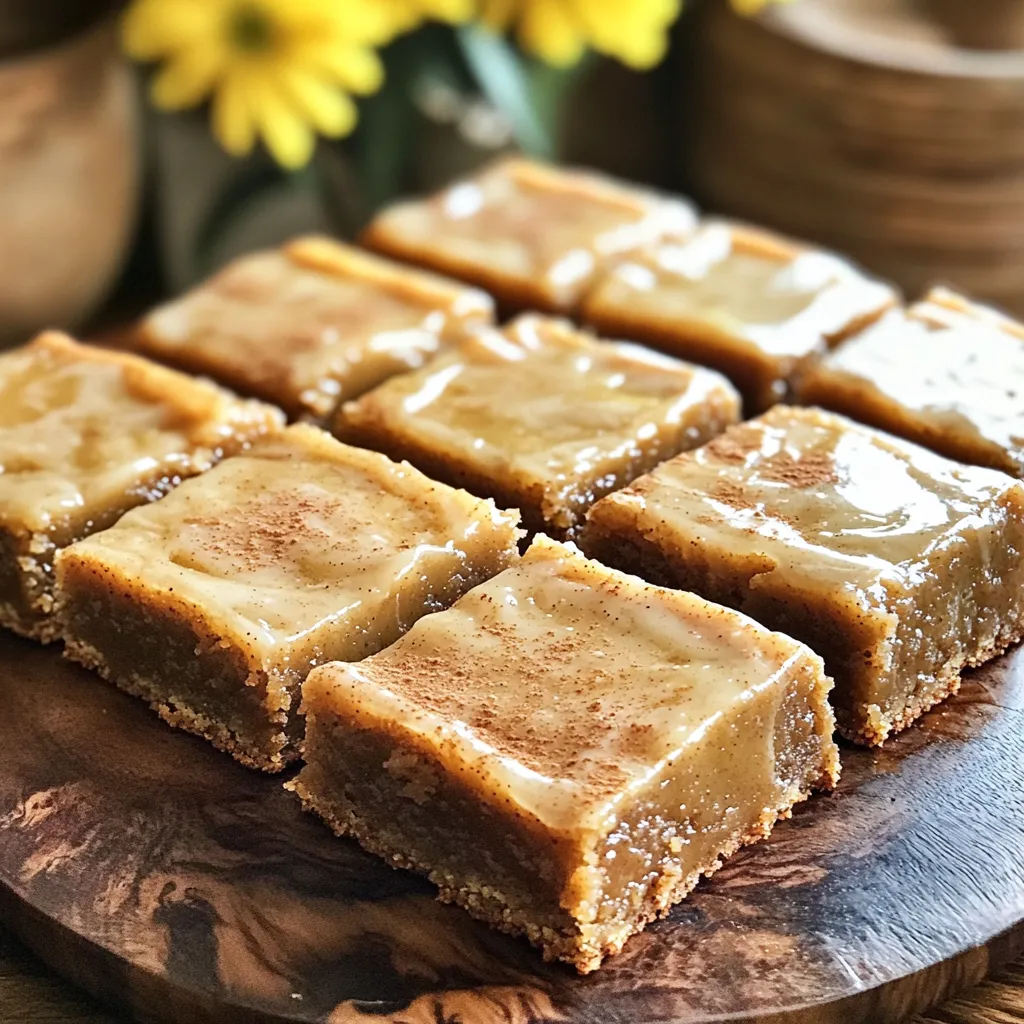
Get ready to bake a fall favorite: Apple Butter Blondies with Cinnamon Glaze! I’ll show you how to craft these

To make these bakery-style maple brown sugar scones, gather these key ingredients: - 2 cups all-purpose flour - 1/2 cup packed brown sugar - 1 tablespoon baking powder - 1/2 teaspoon salt - 1/2 cup unsalted butter, cold and cubed - 1/2 cup heavy cream - 1/4 cup pure maple syrup - 1 large egg - 1 teaspoon vanilla extract These ingredients blend to create a light and fluffy scone. The brown sugar adds a warm sweetness, while the maple syrup gives a lovely flavor. You can enhance your scones with these optional add-ins: - 1/2 cup chopped walnuts or pecans - Extra maple syrup for drizzle Adding nuts gives a nice crunch and flavor. The drizzle of syrup makes your scones even more appealing. To make your baking easier, gather these tools: - Large mixing bowl - Whisk - Pastry cutter or fingertips for mixing - Parchment paper for lining the baking sheet - Baking sheet These tools help you mix, shape, and bake your scones perfectly. First, you need to preheat your oven to 400°F (200°C). Line a baking sheet with parchment paper. In a large bowl, mix 2 cups of all-purpose flour, 1/2 cup of packed brown sugar, 1 tablespoon of baking powder, and 1/2 teaspoon of salt. Whisk these until they are well combined. Next, add 1/2 cup of cold, cubed unsalted butter. You can use a pastry cutter or your fingers to work the butter into the flour. Keep mixing until it looks like coarse crumbs. In a separate bowl, whisk together 1/2 cup of heavy cream, 1/4 cup of pure maple syrup, 1 large egg, and 1 teaspoon of vanilla extract. Make sure this mix is smooth. Pour these wet ingredients into the dry mix. Gently stir until they just combine. If you want nuts, fold in 1/2 cup of chopped walnuts or pecans here. The dough will feel a bit sticky. Now, turn the dough onto a lightly floured surface. Gently knead it a few times to bring it together. Shape the dough into a circle about 1-inch thick. Use a sharp knife or a pizza cutter to slice the dough into 8 wedges. Place the wedges on the prepared baking sheet, leaving some space between them. Bake the scones for 15 to 18 minutes. They should turn golden brown on top when done. Once baked, take them out of the oven and let them cool slightly on the sheet. If you like, you can drizzle some extra maple syrup on top for added sweetness. Enjoy your fresh scones warm! To get that perfect bakery-style texture in your scones, start with cold butter. Cold butter helps create flaky layers. Cut the butter into small cubes and mix it with the flour quickly. You want the mixture to look like coarse crumbs. This step is key! Next, avoid over-mixing your dough. Mix just until the ingredients come together. If the dough feels sticky, that's okay. Lightly flour your surface when kneading. This keeps the texture light and airy. For deeper flavor, use high-quality maple syrup. It adds richness and sweetness. If you want a nutty crunch, add walnuts or pecans. This gives your scones a lovely texture. You can also try adding spices like cinnamon or nutmeg. A pinch of these spices brings warmth to the flavor. For a twist, consider adding dried fruits like cranberries or apricots. They pair well with the maple flavor. One common mistake is using room temperature butter. This can lead to dense scones. Always use cold butter. Another mistake is not measuring the flour correctly. Scooping flour directly from the bag can pack it down. Instead, spoon it into your measuring cup and level it off. Lastly, do not skip the resting time after mixing. Letting the dough sit for a few minutes helps the flavors meld. This small step makes a big difference in taste! {{image_2}} You can easily make these scones nut-free. Simply skip the chopped walnuts or pecans. The scones will still taste great. They will be soft and sweet, just like the original. You can add more flavor with spices or choose a different mix-in. Feel free to swap flavors to suit your taste. You can add chocolate chips for a sweet twist. Dark chocolate adds richness. You can also use dried fruits like cranberries or apricots. They bring a chewy texture and tartness. Try adding lemon zest for a bright kick. Each of these swaps adds a fun touch to your scones. If you want to change up the glaze, there are tasty options. Instead of maple syrup, use a simple icing. Mix powdered sugar with milk until smooth. You can add a splash of vanilla or almond extract for more flavor. Another option is a honey drizzle. It gives a nice sweetness and pairs well with the scones. To keep your leftover scones fresh, store them in an airtight container. Place a piece of parchment paper between layers to prevent sticking. Keep them at room temperature for up to two days. If you want them to last longer, refrigerate them for up to a week. When you are ready to enjoy a scone, preheat your oven to 350°F (175°C). Place the scone on a baking sheet and heat for about 5-7 minutes. This warms them up and brings back that fresh-baked taste. You can also microwave them for 10-15 seconds if you are in a hurry, but the oven gives a better texture. If you want to save scones for later, freezing works great. Wrap each scone tightly in plastic wrap. Then, place them in a freezer bag or container. They will stay good for up to three months. When you are ready to eat them, let them thaw overnight in the fridge. Reheat them in the oven for best results. You can tell when scones are done by their color. They should be golden brown on top. You can also gently tap the top. If it sounds hollow, they are ready. Keep an eye on them while baking. Every oven is a bit different. Start checking at 15 minutes. If they need more time, check every minute after that. Yes, you can make the dough ahead of time! Prepare the dough and shape it into a circle. Wrap it in plastic wrap and chill it in the fridge. This lets the flavors blend well. You can store it for up to 24 hours. When ready, cut into wedges and bake as usual. This saves time on busy mornings. These scones taste great with many things! You can serve them with butter or jam. A drizzle of extra maple syrup adds sweetness. They also pair well with coffee or tea. If you want something more filling, add cheese or fruit. Fresh fruit like berries complements the scones nicely. Enjoy them with your favorite drink or spread! Making scones is simple and fun. We covered the key ingredients and tools you need. I shared step-by-step instructions for perfect dough, shaping, and baking. You learned tips for getting a great texture and avoiding common mistakes. We also explored tasty variations and how to store extras. With these ideas, you can bake scones like a pro. Enjoy experimenting with flavors and sharing your creations!

Bakery-Style Maple Brown Sugar Scones Recipe Guide

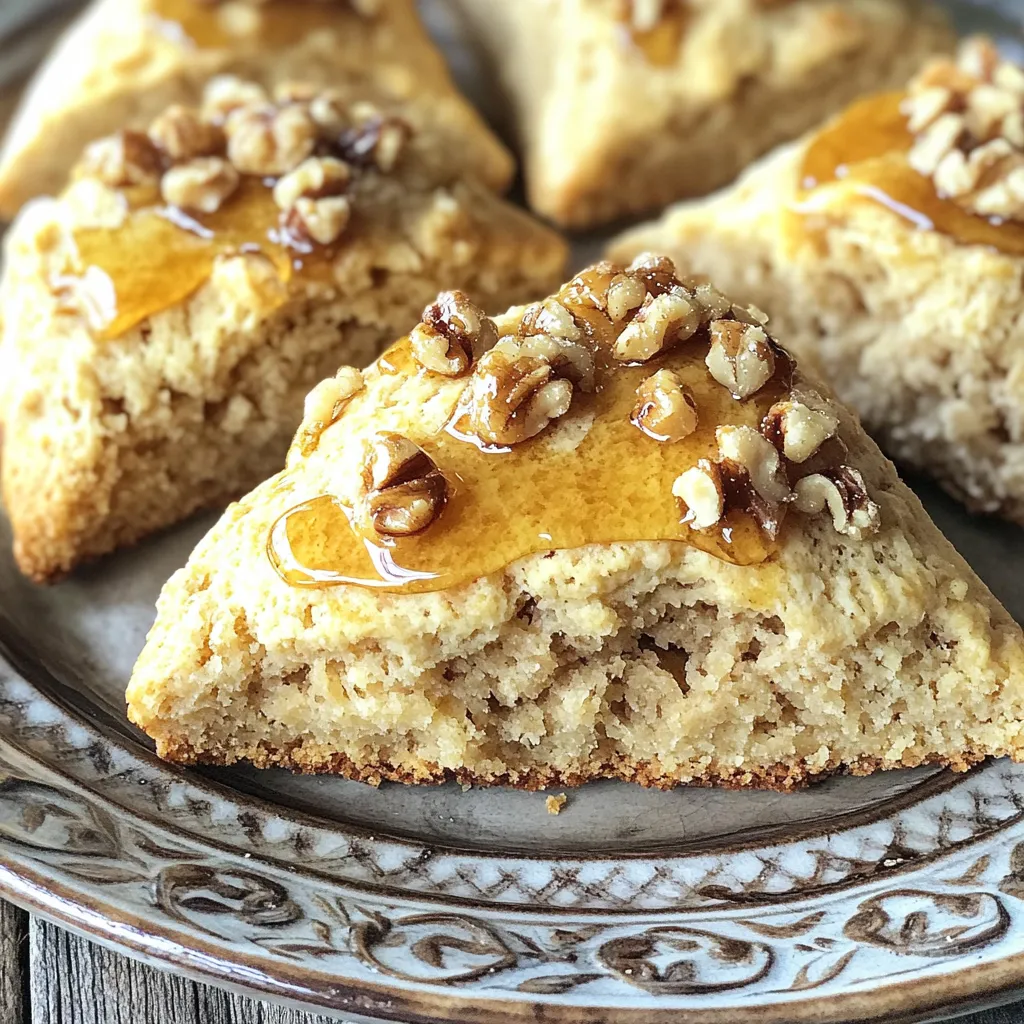
Are you ready to elevate your baking game? This guide will show you how to make bakery-style maple brown sugar

To make pumpkin pie granola clusters, gather these ingredients: - 2 cups rolled oats - 1 cup pumpkin puree - 1/2 cup maple syrup - 1/2 cup almond butter (or peanut butter) - 1 teaspoon vanilla extract - 1 teaspoon pumpkin pie spice - 1/2 teaspoon salt - 1 cup mixed nuts (almonds, pecans, walnuts) - 1/2 cup dried cranberries or raisins - 1/4 cup chia seeds These simple items create a perfect balance of flavors and textures. If you have allergies, here are some easy swaps: - Replace almond butter with sunflower seed butter for nut-free options. - Use agave syrup in place of maple syrup for a different sweetener. - Choose gluten-free oats if you need to avoid gluten. - Swap mixed nuts with seeds for a nut-free version. These changes keep the recipe safe while still delicious. Let’s break down some key nutrition facts: - Rolled oats: Great for fiber and energy. - Pumpkin puree: High in vitamins A and C, plus antioxidants. - Maple syrup: Natural sweetener with minerals like manganese and zinc. - Almond butter: Packed with healthy fats and protein. - Chia seeds: Full of omega-3s, fiber, and protein. These ingredients not only taste good, but they also provide health benefits. To start, gather your ingredients. You need: - 2 cups rolled oats - 1 cup pumpkin puree - 1/2 cup maple syrup - 1/2 cup almond butter (or peanut butter) - 1 teaspoon vanilla extract - 1 teaspoon pumpkin pie spice - 1/2 teaspoon salt - 1 cup mixed nuts (almonds, pecans, walnuts) - 1/2 cup dried cranberries or raisins - 1/4 cup chia seeds First, preheat your oven to 350°F (175°C). This ensures even baking. Next, line a baking sheet with parchment paper. This makes cleanup easy. In a large bowl, mix the rolled oats, pumpkin puree, maple syrup, almond butter, vanilla extract, pumpkin pie spice, and salt. Stir well until everything is combined. The mixture should be thick and sticky. Now it’s time to add the fun stuff! Fold in the mixed nuts, dried cranberries (or raisins), and chia seeds. Make sure they are evenly spread throughout the mix. Shape the mixture into clusters. Aim for golf ball-sized clumps. Place them on the lined baking sheet, giving them space to expand. Bake in the preheated oven for 20-25 minutes. Keep an eye on them. You want them golden brown and firm to the touch. The smell will be amazing! Once baked, remove the clusters from the oven. Let them cool completely on the baking sheet. They will harden as they cool, creating that satisfying crunch. After cooling, break any large clusters into smaller pieces if you like. Store your pumpkin pie granola clusters in an airtight container at room temperature. They stay fresh for up to two weeks. Enjoy this tasty snack at any time! To make sure your granola clusters are crunchy, start with the right mix. Use 2 cups of rolled oats, as they hold together well. Add 1 cup of pumpkin puree for moisture. The mix of 1/2 cup of maple syrup and 1/2 cup of almond butter binds everything. Shape the mixture into golf ball-sized clusters. This size helps them bake evenly. Want more flavor? Try adding a pinch of nutmeg or a dash of cinnamon. You can swap pumpkin pie spice for fresh spices for a unique twist. Mix in 1/2 cup of dried cranberries or raisins for sweetness. These additions brighten the flavor and add a chewy texture. One common mistake is not baking long enough. Bake the clusters for 20-25 minutes until they turn golden brown. If you remove them too soon, they may stay soft. Also, avoid overcrowding the baking sheet. Space out the clusters to allow even cooking and better crispiness. {{image_2}} You can change the flavor of your pumpkin pie granola clusters with seasonal twists. Try adding chopped apples and cinnamon for a fall vibe. In winter, swap in dried figs and a hint of nutmeg. For a summer treat, mix in fresh berries or coconut flakes. Each season brings new flavors to explore! If you want to change the sweet taste, use different sweeteners. Honey or agave syrup works well in place of maple syrup. You can even try brown sugar for a deeper flavor. Each sweetener adds its own twist, so taste as you go! Customizing your nut and fruit mix-ins makes your clusters unique. Use any nuts you love—like cashews or hazelnuts. Dried fruits like apricots or figs also add a nice touch. You can even skip the fruit altogether for a nut-only version. Mix and match to find your favorite combo! To keep your pumpkin pie granola clusters fresh, store them in an airtight container. Use a glass jar or a plastic container with a tight lid. This helps retain their crunch and flavor. Avoid storing them in a warm or humid place. A cool pantry or a kitchen cupboard works best. If you want to save your clusters for later, freezing is a great option. Place the clusters in a freezer-safe bag. Remove as much air as possible before sealing. Label the bag with the date. They can stay fresh in the freezer for up to three months. When ready to eat, just thaw them at room temperature. When stored correctly at room temperature, the granola clusters last about two weeks. If you see any signs of moisture or mold, discard them. Always check the smell and texture before eating. This way, you ensure you enjoy the best flavors and crunch. You can use peanut butter as a tasty swap. It adds a nice flavor too. Sunflower seed butter is another great choice if you need a nut-free option. Both will work well in the recipe and will keep the clusters nice and crunchy. To make these clusters gluten-free, choose certified gluten-free oats. Regular oats may have traces of gluten, so it's best to check. This small change ensures everyone can enjoy the snack safely. You can find pre-made pumpkin pie granola clusters at health food stores or online. Many brands offer them during the fall season. Just check the ingredients to make sure they fit your taste and diet needs. Yes, you can make these clusters without nuts if you prefer. Just leave out the mixed nuts and add more seeds or dried fruit. This will keep the clusters tasty and interesting without the crunch of nuts. You can enjoy these clusters as a snack on their own. They also work great as a topping for yogurt or smoothie bowls. Add them to your breakfast for a fun twist or pack them for a healthy lunch treat. This blog post covered all you need to know about making pumpkin pie granola clusters. We talked about the ingredients, step-by-step instructions, storage tips, and common mistakes. Now you can create tasty and healthy snacks that suit your needs. Don't be afraid to try different flavors or mix-ins. These clusters are easy to customize and store well. Grab your ingredients and have fun in the kitchen! Enjoy your tasty creations!

Pumpkin Pie Granola Clusters Perfectly Crunchy Snack

Looking for a tasty snack that captures the cozy flavors of fall? You’re in the right place! My Pumpkin Pie

Older posts
Newer posts
← Previous Page1 … Page10 Page11 Page12 … Page129 Next →

dsad

© 2025 Emmas Dish • Built with GeneratePress

Our Policies

  • Copyright Policy
  • Cookie Policy
  • GDPR Policy
  • Privacy Policy
  • Disclaimer
  • Terms Of Use

More Information

  • Home
  • About
  • Contact
  • Appetizers
  • Dessert
  • Dinner
  • Drinks
©2025, Emmas Dish About Back To Top