Skip to content
DisclaimerTerms Of UseGDPR PolicyCookie Policy

Emmas Dish

  • Home
  • Drinks
  • Appetizers
  • Dinner
  • Dessert
  • About
  • Contact
  • Privacy Policy
DisclaimerTerms Of UseGDPR PolicyCookie Policy

Emma

- 2 pounds chicken wings - 3 tablespoons olive oil - 4 cloves garlic, minced - 1 teaspoon salt - 1/2 teaspoon black pepper - 1 teaspoon paprika - 1/2 teaspoon Italian seasoning - 1/4 cup grated Parmesan cheese - Fresh parsley, chopped (for garnish) To make Air Fryer Garlic Parmesan Chicken Wings, we need a few key items. First, gather the chicken wings. I like using 2 pounds for a nice serving size. Next, grab some olive oil. This will help the wings crisp up nicely. You will also need garlic, which gives a great flavor. Use four cloves and mince them finely. Next, we add some seasoning. You will want one teaspoon of salt, half a teaspoon of black pepper, and one teaspoon of paprika. These spices mix well together and add depth to the dish. For the finishing touch, we have our garnishing ingredients. Half a teaspoon of Italian seasoning adds a great herb flavor. You will also need a quarter cup of grated Parmesan cheese. This cheese melts beautifully and adds richness. Finally, chop some fresh parsley for a colorful garnish. This will make your wings look even more appetizing. With these ingredients ready, you are on your way to making delicious Air Fryer Garlic Parmesan Chicken Wings! Set the air fryer to 400°F (200°C). Let it preheat for about 5 minutes. This helps cook the wings evenly. Rinse the chicken wings under cold water. Pat them dry with paper towels. Dry wings give a crispy texture. In a large bowl, mix 3 tablespoons of olive oil, 4 minced garlic cloves, 1 teaspoon salt, 1/2 teaspoon black pepper, 1 teaspoon paprika, and 1/2 teaspoon Italian seasoning. Toss the wings in the bowl. Make sure each wing gets an even coating. Place the seasoned wings in a single layer in the air fryer basket. Cook them for 25-30 minutes. Shake the basket halfway through. This helps them cook evenly. The wings will turn golden brown and crispy. Once the wings are cooked, sprinkle 1/4 cup of grated Parmesan cheese over the hot wings. Let them cook for an additional 2-3 minutes. This melts the cheese just right. Remove the wings from the air fryer and place them on a serving plate. Garnish with freshly chopped parsley for flavor and color. You can serve these wings with your favorite dips for extra fun! To make your wings extra crispy, start by drying them well. Rinse the chicken wings with cold water. Use paper towels to pat them dry completely. This step helps remove moisture. Less moisture means more crispiness. When it comes to oil, three tablespoons of olive oil work well. Use just enough to coat the wings. Too much oil can make them soggy. Air fryers have limited space. Cooking in batches helps ensure even cooking. Don’t overcrowd the basket. Leave some room for air to flow around the wings. If you need to keep the wings warm, set your oven to a low temperature. A warm oven can hold them while you cook the rest. Feel free to change the spice levels. If you like heat, add more black pepper or paprika. For a milder flavor, reduce these spices. You can also use different herbs. Try adding oregano or thyme for a unique twist. Mixing up the seasonings keeps things fun and fresh! {{image_2}} You can try new flavors for your wings. Buffalo-style wings are a popular choice. They have a spicy kick. To make them, toss your cooked wings in hot sauce. Add melted butter for a rich taste. Another great option is lemon pepper wings. For these, sprinkle lemon pepper seasoning over the cooked wings. You can also add a squeeze of fresh lemon juice. This gives a zesty flavor that brightens the dish. Chicken wings are not the only option. You can use chicken thighs or drumsticks instead. Both will have a similar flavor and texture. If you choose chicken thighs, cook them for about 30-35 minutes. For drumsticks, go for 25-30 minutes. Make sure they reach an internal temperature of 165°F (75°C) for safety. Using the right tools can improve your air frying experience. Baking racks or trays can help cook more wings at once. They allow hot air to flow around the wings, making them crispier. I recommend using a non-stick spray on the racks. This helps prevent sticking. Other useful air fryer tools include silicone mats. They help with cleanup and protect the basket. Always check your air fryer’s manual for safe accessory options. To store leftover wings, let them cool first. Place them in an airtight container. This keeps them fresh. Cooked wings can last in the fridge for about 3 to 4 days. Always check for any off smells before eating. To freeze wings, wrap them tightly in plastic wrap or foil. Use a freezer bag for extra protection. Label the bag with the date. Wings can stay fresh in the freezer for about 2 to 3 months. When reheating, let them thaw in the fridge overnight. This helps keep the wings juicy. To keep wings crispy, reheat them in the air fryer if possible. Set it to 350°F (175°C) and cook for about 5 to 10 minutes. This will revive their crunch. Avoid microwaving, as it can make them soggy. For best results, always store wings in a single layer. Cook chicken wings for 25 to 30 minutes at 400°F (200°C). This time gives you crispy and golden wings. Make sure to shake the basket halfway through. This step helps them cook evenly. Yes, you can use frozen wings. If they are frozen, cook them for 30 to 35 minutes. Check that they reach a safe temperature of 165°F (74°C). You might need a few extra minutes, so keep an eye on them. Garlic Parmesan wings pair well with many sides. Consider serving them with celery sticks and carrot sticks. Ranch or blue cheese dressing makes great dips. You can also add a side of fries or a fresh salad for a complete meal. You can make crispy, flavorful chicken wings in your air fryer with ease. We discussed the simple ingredients needed, like chicken wings and garlic, and how to season them just right. I shared step-by-step instructions to ensure you cook them perfectly crispy. Remember, tips like drying the wings and shaking the basket are key for that crunch. Feel free to explore variations and customize flavors. With proper storage, you can enjoy these wings even later. Whether for game day or a family meal, air-fried chicken wings are a hit! Enjoy your tasty creations!

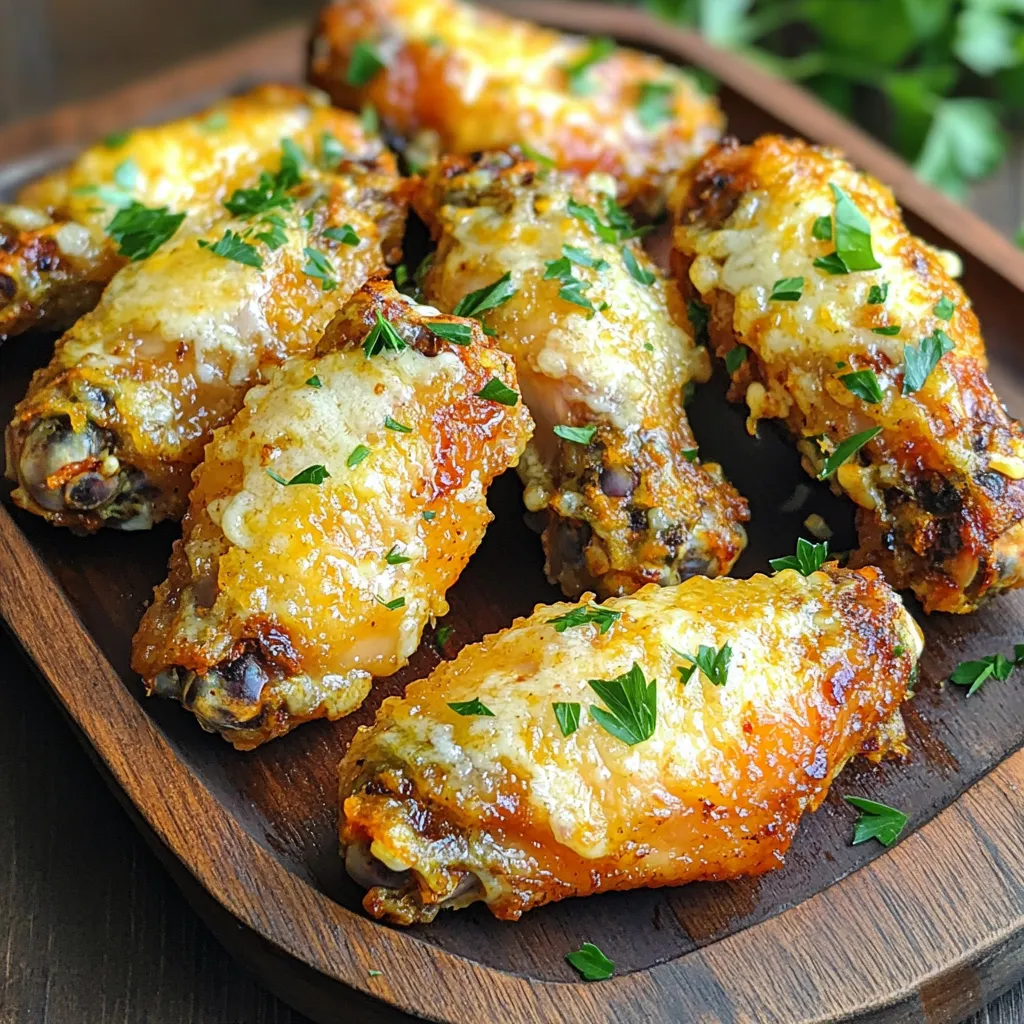
Air Fryer Garlic Parmesan Chicken Wings Recipe

Are you ready to make the best Air Fryer Garlic Parmesan Chicken Wings? This easy recipe packs a punch of

The key to a great soup starts with fresh, quality ingredients. For this Slow Cooker Tuscan Lentil Soup, you will need: - 1 cup dried green or brown lentils, rinsed - 1 medium onion, diced - 2 carrots, diced - 2 celery stalks, diced - 3 cloves garlic, minced - 1 can (14.5 oz) diced tomatoes, with juice - 4 cups vegetable broth - 1 teaspoon dried oregano - 1 teaspoon dried thyme - 1 teaspoon smoked paprika - 2 cups fresh kale, chopped - 2 tablespoons olive oil - Salt and pepper, to taste - Juice of 1 lemon Each ingredient plays a role. Lentils provide protein and fiber. The vegetables add sweetness and nutrients. Herbs like oregano and thyme bring depth. You can boost the flavor even more with some optional ingredients: - A bay leaf for added aroma - A splash of balsamic vinegar for tang - Crushed red pepper flakes for heat These extras can elevate the soup. They offer layers of flavor and personal touch. If you have dietary needs, don’t worry! Here are some easy swaps: - Use quinoa or barley instead of lentils for a gluten-free option. - Replace vegetable broth with chicken broth for a non-vegetarian version. - Skip the kale and add spinach or Swiss chard if you prefer. These substitutions keep the soup delicious while accommodating your preferences. Start by heating two tablespoons of olive oil in a skillet over medium heat. Add one diced onion, two diced carrots, and two diced celery stalks. Sauté these vegetables for about five to seven minutes. You want them to soften, but not brown. Next, add three minced garlic cloves and sauté for one more minute. The aroma will be delicious! Now, transfer the sautéed vegetables into your slow cooker. Add one cup of rinsed lentils and one can of diced tomatoes with their juice. Pour in four cups of vegetable broth. Then, add one teaspoon of dried oregano, one teaspoon of dried thyme, and one teaspoon of smoked paprika. Don't forget to sprinkle in some salt and pepper to taste. Stir everything well to mix the flavors. Cover the slow cooker and set it to cook on low for six to eight hours or on high for three to four hours. You will know the soup is ready when the lentils are tender. About thirty minutes before you plan to serve the soup, stir in two cups of chopped fresh kale. This will add color and nutrition to your meal. Adjust the seasoning with salt, pepper, and the juice of one lemon before serving. Enjoy this hearty and flavorful dish! To get the best flavor from your soup, use fresh herbs. Fresh kale adds great taste and nutrition. Chop it finely before adding it to the soup. The lemon juice brightens the dish. It makes each bite fresh and zesty. Sautéing the vegetables first helps release their flavors. Don't skip this step; it makes a big difference. Use good-quality vegetable broth for depth. Homemade broth is even better if you have it. One common mistake is overcooking the lentils. They should be tender but not mushy. Keep an eye on the cooking time. Make sure to add the kale later in the cooking process. If you add it too soon, it can lose its bright color and texture. Also, don’t forget to taste and adjust the seasoning. A little salt or pepper can enhance the flavor. Serve the soup with crusty bread for a hearty meal. A sprinkle of grated Parmesan cheese adds richness. You can also drizzle extra olive oil on top for flavor. Fresh parsley gives a nice touch of color. Pair it with a light salad for balance. This soup is perfect for lunch or dinner. Enjoy every warm, hearty spoonful! {{image_2}} You can easily make this soup vegetarian or vegan. Simply stick to the vegetable broth. If you want more flavor, add a splash of soy sauce or tamari. You can also toss in some extra veggies. Zucchini or bell peppers work well here. They add color and taste to the soup. For meat lovers, adding protein can make this soup even heartier. You can use diced chicken or turkey. Just cook the meat first, then add it to the slow cooker. Ground sausage also adds great flavor. Brown it in the skillet before adding it with the other ingredients. If you enjoy beef, diced beef stew meat is another tasty option. If you love heat, add some spice! Red pepper flakes can give your soup a nice kick. Start with half a teaspoon and add more if you like it spicier. You can also use a dash of hot sauce for extra flavor. For a smoky taste, try adding chipotle peppers in adobo sauce. Adjust the heat to make it just right for your taste buds. After enjoying your Slow Cooker Tuscan Lentil Soup, store any leftovers in an airtight container. Make sure the soup cools down first. Place the container in the fridge. The soup stays fresh for about 4-5 days. Always label the container with the date. This way, you know when to use it. Freezing this soup is a great way to save time. Pour the cooled soup into freezer-safe bags or containers. Leave some room at the top. The soup expands when it freezes. You can freeze it for up to 3 months. To thaw, move it to the fridge overnight before reheating. When you're ready to eat the soup, reheat it on the stove or in the microwave. If using the stove, warm it over low heat. Stir it often to avoid burning. If using the microwave, heat in short bursts. Stir in between to ensure even heating. Always check that it reaches a safe temperature before serving. Yes, you can use canned lentils. They cook faster and save time. Drain and rinse them before adding to the soup. Use about two cups of canned lentils for this recipe. Just add them in the last 30 minutes of cooking. This helps them heat through without getting mushy. Yes, you can cook this soup on the stove. Start by sautéing the veggies in a pot. Add the lentils, tomatoes, broth, and spices. Bring it to a boil, then reduce the heat. Simmer for about 30-40 minutes. Stir in the kale before serving. This method gives you a tasty soup in less time. You can serve this soup with crusty bread or a simple salad. A slice of sourdough is great for dipping. You might also enjoy a sprinkle of cheese on top. Fresh herbs like parsley can add color. For a complete meal, pair it with a light dessert. Enjoy the warmth and flavors! This slow cooker Tuscan lentil soup is easy and full of flavor. You learned about the key ingredients, cooking steps, and tips for the best taste. You can adapt it to fit your diet and enjoy it with various sides. Remember to store leftovers well for later use. This soup is versatile, so get creative! Trust me; it’s a meal you’ll love. Enjoy cooking and sharing this comforting dish with others.

Slow Cooker Tuscan Lentil Soup Hearty and Flavorful Meal

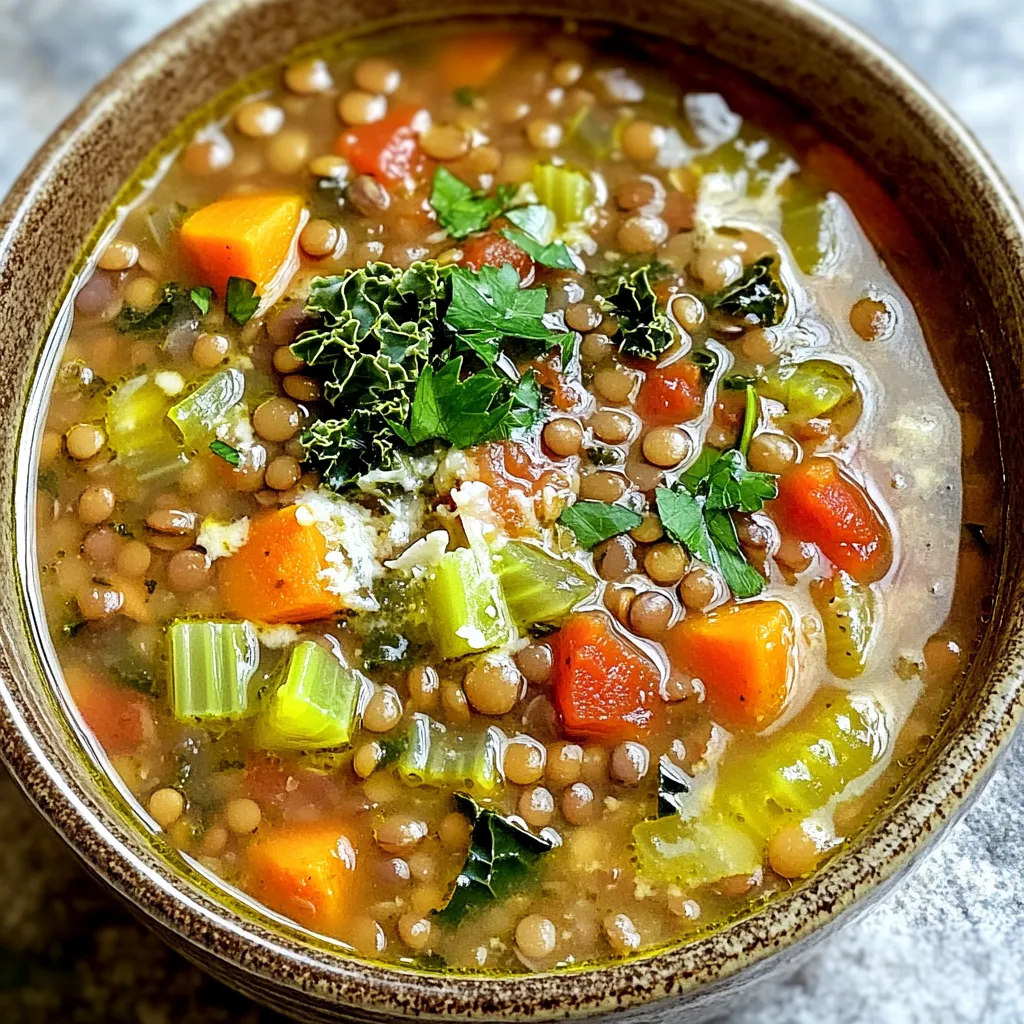
Are you ready for a warm, tasty bowl of comfort? My Slow Cooker Tuscan Lentil Soup is just what you

For these tasty bars, you will need: - 1 ½ cups graham cracker crumbs - ½ cup unsalted butter, melted - 2 tablespoons brown sugar - 2 cups cream cheese, softened - 1 cup pumpkin puree - ¾ cup powdered sugar - 1 teaspoon vanilla extract - 1 teaspoon ground cinnamon - ½ teaspoon ground nutmeg - 1 teaspoon pumpkin pie spice - 1 cup whipped cream (for topping) These ingredients create a rich and creamy filling with a crunchy crust. The pumpkin puree gives it that lovely fall flavor. The spices add warmth and depth. You can make your bars even better with: - Crushed pecans for garnish Adding pecans gives a nice crunch and a nutty taste. You can also use other nuts if you prefer. If you want to change things up, consider these swaps: - Use almond flour instead of graham cracker crumbs for a gluten-free option. - Swap cream cheese for Greek yogurt for a lighter filling. - Agave syrup can replace powdered sugar for a different sweetness. These substitutions help you customize the recipe to your taste or dietary needs. Enjoy experimenting! To make the crust, grab a medium bowl. Combine 1 ½ cups of graham cracker crumbs with ½ cup of melted unsalted butter and 2 tablespoons of brown sugar. Stir this mixture until it looks like wet sand. Next, take a 9x9-inch baking pan and line it with parchment paper. Press the graham cracker mixture firmly into the bottom of the pan. Make sure it is even all over. Put the pan in the fridge to set while you work on the filling. Now, let’s create the cheesecake filling. In a large mixing bowl, beat 2 cups of softened cream cheese until it is smooth. Next, add 1 cup of pumpkin puree, ¾ cup of powdered sugar, and 1 teaspoon each of vanilla extract, ground cinnamon, and pumpkin pie spice. Also, include ½ teaspoon of ground nutmeg. Mix everything well until it becomes creamy and smooth. This step is key to getting a rich filling. After the crust has set, it is time to layer the filling. Remove the crust from the fridge. Spread the creamy cheesecake filling evenly over the crust with a spatula. Make sure the top is smooth. Cover the pan with plastic wrap and refrigerate for at least 4 hours. This helps the filling to set firm. When ready, lift the bars from the pan using the parchment paper. Cut them into squares and top each one with whipped cream. If you like, sprinkle some crushed pecans on top for extra crunch. When making pumpkin pie cheesecake bars, avoid over-mixing the filling. This can make it too thin. Also, don’t skip chilling the crust. It needs time to set and hold its shape. If you rush, the bars may fall apart when you cut them. Lastly, use softened cream cheese. Cold cream cheese will not mix well and can leave lumps. To get a creamy filling, mix the cream cheese well first. Make sure it’s smooth before adding other ingredients. When you add pumpkin puree, mix just until combined. Over-mixing can add too much air, leading to cracks as it sets. For a firmer texture, chill the bars long enough. Four hours is best, but overnight is even better. You can add a pinch of salt to balance the sweetness. A little salt makes the flavors pop. Consider adding more spices, too. A dash of ginger or cloves can give your bars a warm kick. For extra crunch, sprinkle crushed pecans on top. They add a nice texture contrast to the creamy filling. If you want a sweeter touch, drizzle caramel sauce over the bars before serving. {{image_2}} You can change the flavor of these bars easily. For a holiday twist, add some peppermint extract. It gives a fresh taste. You can also mix in some crushed ginger cookies for the crust. This adds a spicy crunch. For a summer treat, swap pumpkin for fresh berries. Use a berry puree instead of pumpkin. This makes a light, fruity dessert. You can make these bars fit your diet needs. For gluten-free options, use gluten-free graham crackers. Substitute regular cream cheese with a lactose-free version if needed. For low-sugar bars, use a sugar substitute like stevia. This keeps the taste great without added sugar. These changes let everyone enjoy this dessert. How you serve these bars can make them special. Instead of plain whipped cream, try flavored whipped cream. Add some maple syrup or vanilla for extra taste. You can also serve them with a drizzle of caramel sauce. For a fun touch, top each bar with a mini pumpkin candy. This makes each slice look festive and fun. To keep your Pumpkin Pie Cheesecake Bars fresh, store them in the fridge. Use an airtight container to prevent them from drying out. If you leave them in the baking pan, cover the top with plastic wrap. This helps keep the bars moist and tasty. These cheesecake bars freeze well, making them a great make-ahead treat. Cut the bars into squares before freezing. Place them in a single layer on a baking sheet until firm. Then, transfer them to an airtight container, separating layers with parchment paper. They can last up to three months in the freezer. When stored properly in the fridge, these bars last about five days. If you freeze them, they stay fresh for up to three months. Just remember to thaw them in the fridge overnight before serving. This keeps the texture nice and creamy! Yes, you can make these bars ahead of time. In fact, they taste even better after a day in the fridge. I often prepare them the day before a gathering. This way, they have time to chill and set properly. If you want a dairy-free option, use a vegan cream cheese. You can also try Greek yogurt for a lighter option. Both will give you a creamy texture, but the flavor may change a bit. The filling is set when it feels firm to the touch. After chilling for at least four hours, check the edges. They should hold their shape, and the center will not jiggle. If it’s still soft, give it more chill time. In this blog post, we covered key ingredients, step-by-step instructions, and helpful tips for making cheesecake bars. You learned about optional ingredients and creative variations to fit your taste. Remember to avoid common mistakes for perfect results. With the right storage, these bars can last over a week. Enjoy experimenting with flavors and textures. This recipe is all about making delicious cheesecake bars that anyone can love!

Pumpkin Pie Cheesecake Bars No Bake Simple Dessert

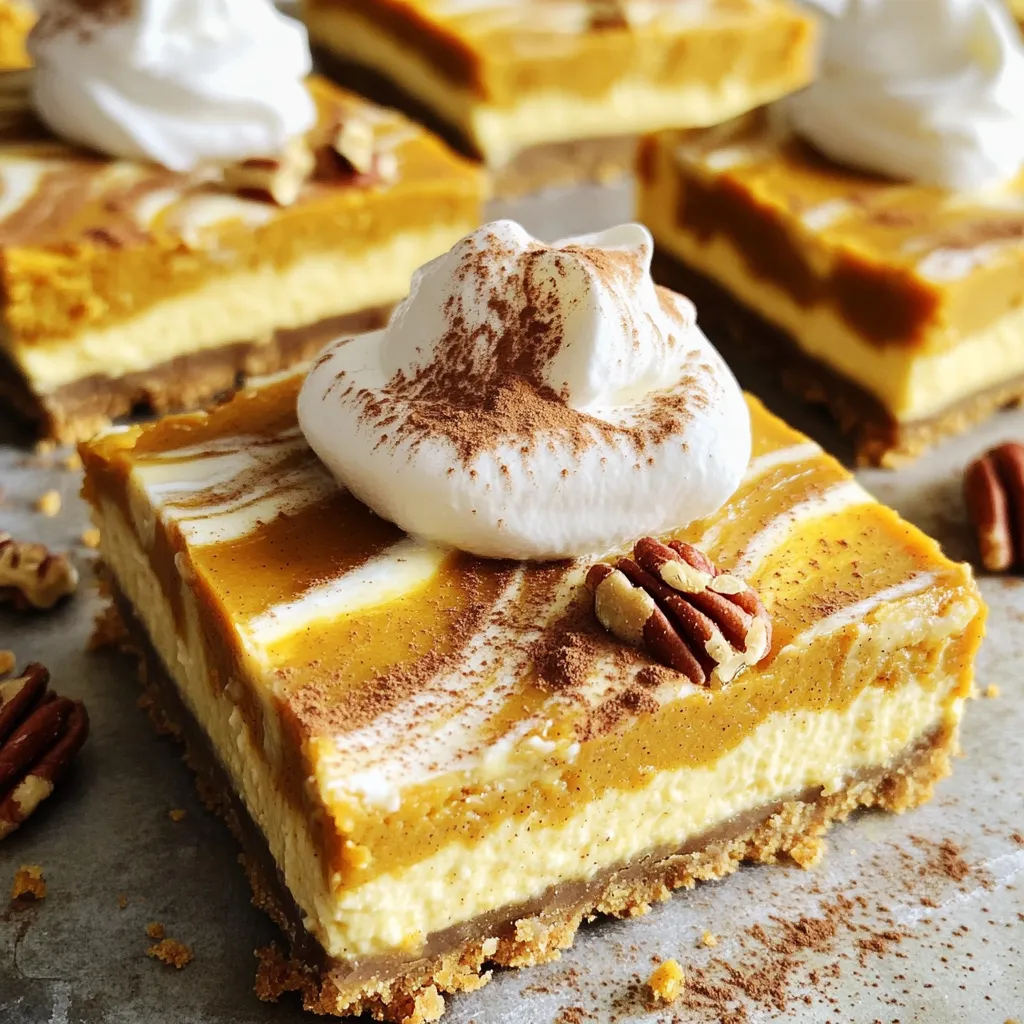
Craving a sweet treat that’s easy and delicious? Try my no-bake pumpkin pie cheesecake bars! They combine creamy cheesecake and

- 1 lb large shrimp, peeled and deveined - 2 tablespoons olive oil - 1 red bell pepper, sliced - 1 yellow bell pepper, sliced - 1 medium red onion, sliced For these shrimp tacos, I start with large shrimp. They have a nice bite and soak up all the flavors. Olive oil gives a rich base for the marinade. The bell peppers and onion add color and crunch to the dish. - 2 teaspoons chili powder - 1 teaspoon cumin - 1 teaspoon smoked paprika - 1 teaspoon garlic powder - Zest and juice of 2 limes - Salt and pepper to taste The seasoning mix is key for flavor. Chili powder gives heat, while cumin adds earthiness. Smoked paprika offers a nice depth, and garlic powder adds savoriness. Lime zest and juice brighten everything up. Don't forget salt and pepper to taste! - 8 small corn tortillas - Fresh cilantro, for garnish - Avocado, sliced, for serving - Lime wedges, for serving Corn tortillas are perfect for holding all the goodness. Fresh cilantro adds a pop of flavor and color. Sliced avocado gives a creamy touch. Lime wedges on the side offer a fresh squeeze for extra zing! 1. Preheat the oven and line the pan: Start by preheating your oven to 400°F (200°C). This step is key for cooking the shrimp and veggies evenly. Line a large sheet pan with parchment paper. This makes cleanup easy and keeps everything from sticking. 2. Making the marinade: In a medium bowl, mix 2 tablespoons of olive oil, 2 teaspoons of chili powder, 1 teaspoon of cumin, 1 teaspoon of smoked paprika, and 1 teaspoon of garlic powder. Add the zest and juice of 2 limes. Season with salt and pepper. Stir well until all the flavors blend together. 1. Coating the shrimp in the marinade: Add 1 pound of peeled and deveined shrimp into the bowl with your marinade. Toss the shrimp well so they are fully coated. Each shrimp should be covered in that zesty mix. 2. Recommended resting time: Let the shrimp rest for about 10 minutes. This time allows the shrimp to soak up the flavors. It makes each bite burst with taste. 1. Arranging the vegetables and shrimp: While the shrimp marinate, prepare the veggies. Slice 1 red bell pepper, 1 yellow bell pepper, and 1 medium red onion. Spread them evenly on your lined sheet pan. Then, arrange the marinated shrimp on top of the veggies in a single layer. 2. Baking times and temperature specifics: Place the sheet pan in your preheated oven. Bake for 10-12 minutes. The shrimp will turn pink and opaque when they are done. The veggies should be tender but not mushy. Keep an eye on them for best results. How can you tell when shrimp are done? Look for shrimp that turn pink and opaque. This means they are cooked through. Use a timer and check them at the 10-minute mark. They cook quickly, so watch closely. Overcooked shrimp can become rubbery. To avoid overcooked vegetables, cut them into even pieces. This helps them cook at the same rate. Bell peppers and onions should be tender but still slightly crisp. If you see them browning too much, take them out. Presentation makes your tacos look even better. Serve them on a large platter. Add lime wedges and fresh cilantro for a pop of color. You can stack the tacos or lay them flat. This makes it easy for everyone to grab their favorites. For toppings, try sliced avocado, diced tomatoes, or crumbled queso. Fresh salsa or a drizzle of creamy sauce adds a nice touch. You can also serve these tacos with a side of chips and guacamole. Want to enhance the flavors? Add more spices like smoked paprika or a pinch of cayenne pepper for heat. Fresh herbs, such as cilantro or parsley, brighten the dish. You can customize the recipe too. Swap shrimp for chicken or tofu for a different taste. Try adding pineapple or mango for a sweet twist. Each change gives you a new taco experience. {{image_2}} You can switch up the shrimp if you want. Chicken works well too. Just cut it into small pieces. Tofu is a great choice for a plant-based option. Firm tofu gives a nice texture. You can also change the veggies. Try zucchini, corn, or cherry tomatoes. These add color and flavor. For a gluten-free meal, use corn tortillas. They are tasty and safe for those avoiding gluten. If you want a vegan dish, skip the shrimp. Use marinated jackfruit instead. It gives a nice, meaty feel. You can also add beans for protein. Want some heat? Add jalapeños or your favorite hot sauce. They bring a spicy kick to the tacos. For a sweet touch, try mango or pineapple. These fruits balance the spice with their natural sweetness. You can mix them into the shrimp or serve as a topping. To keep your chili lime shrimp tacos fresh, store leftovers in an airtight container. This helps keep flavors in and moisture out. Place the container in the fridge. The dish lasts up to three days in the fridge. After that, the shrimp may lose their tasty flavor and texture. You can freeze prepped shrimp and veggies if you want to store them longer. Place the shrimp and vegetables in a freezer-safe bag. Squeeze out the air and seal tightly. They can last up to three months in the freezer. To reheat, thaw overnight in the fridge. Then cook in a skillet until heated through. This keeps the shrimp juicy and the veggies crisp. For quick weeknight meals, prepare the shrimp and veggies in advance. Marinate the shrimp and chop the veggies a day ahead. Store them in the fridge until ready to cook. Assemble tacos fresh for the best taste. Warm tortillas just before adding the shrimp and veggies. This way, you get a warm, tasty meal in no time. Yes, you can use frozen shrimp. Just make sure to thaw them first. Place the shrimp in cold water for about 15-20 minutes. Pat them dry before you marinate. This helps them soak up all the great flavors. To store leftover shrimp tacos, wrap them tightly in plastic wrap. You can also use a sealed container. Keep them in the fridge for up to two days. When ready to eat, you can reheat the shrimp and veggies on the stove. Warm the tortillas in a dry skillet for the best taste. You can serve many tasty sides with these tacos: - Additional side dish suggestions: - Mexican rice - Refried beans - Fresh corn salad - Pico de gallo - Beverage pairings and complementary flavors: - A light beer, like a lager - Fresh limeade - Coconut water - Crisp white wine, such as Sauvignon Blanc These pairings will enhance the bright flavors of your chili lime shrimp tacos. Enjoy experimenting! This article guides you through making delicious chili lime shrimp tacos. You learned about the best ingredients, like shrimp, olive oil, and spices. I shared tips for marinating, baking, and serving your tacos to perfection. Mix things up with protein swaps or flavor boosts. Don't forget to store leftovers properly for future meals. Enjoy making these tacos your own; let your taste shine!

Chili Lime Shrimp Tacos Sheet Pan Simple and Tasty

Looking for a simple and tasty meal that will impress? These Chili Lime Shrimp Tacos are perfect for you! Using

- 4 salmon fillets (6 oz each) - 4 cloves garlic, minced - 1 teaspoon dried thyme - 1 teaspoon dried oregano - 1 tablespoon fresh parsley, chopped - 2 tablespoons olive oil - 1 lemon, zested and juiced - Salt and pepper to taste The key to this dish is fresh salmon. Choose fillets that are bright and firm. Garlic adds great flavor, while thyme and oregano give depth. Fresh parsley brightens the dish, making it look nice too. Olive oil helps everything stick and adds richness. - Lemon wedges for serving Lemon wedges add a fresh zing. Squeeze a bit on top right before eating. It elevates the taste and makes the dish pop. Use quality olive oil for the best taste. You can also experiment with other oils, like avocado oil. Salt and pepper are must-haves. Adjust them to your liking. Always taste your garlic herb paste before spreading it on the salmon. This way, you can ensure it’s just right for your palate. To make the garlic herb paste, take a small bowl. Add 4 minced garlic cloves. Then, mix in 1 teaspoon of dried thyme and 1 teaspoon of dried oregano. Add 1 tablespoon of fresh parsley, chopped. Pour in 2 tablespoons of olive oil. Zest and juice 1 lemon, and add it to the bowl. Mix all the ingredients well. Finally, season with salt and pepper to your taste. This paste brings a burst of flavor to your salmon. Take 4 salmon fillets, each about 6 ounces. First, pat them dry with paper towels. This step helps the herb paste stick better. Next, spread the garlic herb mixture evenly on top of each fillet. Press it lightly to help it adhere. Make sure each piece is well coated. This simple step makes your salmon truly shine. Now it’s time to cook! Preheat your air fryer to 400°F (200°C) for 5 minutes. Once it's hot, place the salmon fillets in the basket, skin-side down. Make sure not to overcrowd the basket. Cook for 8 to 10 minutes. The salmon is done when it reaches an internal temperature of 145°F (63°C) and flakes easily. Carefully take out the salmon and let it rest for a couple of minutes. This rest time allows the juices to settle, making it even more delicious. To get a great, crispy crust on your salmon, follow a few easy steps. First, make sure your air fryer is preheated. Set it to 400°F (200°C) for about 5 minutes. This helps the salmon cook evenly. Next, spread the garlic herb mixture thickly on the fillets. This crust will get nice and crunchy in the hot air. Don't overcrowd the basket; this lets hot air flow around each piece. Cooking time matters. If your salmon fillets are thicker than 6 oz, increase the cooking time. I recommend adding about 2 minutes for every ounce over 6 oz. Always check the internal temperature. It should be 145°F (63°C) when done. If you’re unsure, use a fork to see if it flakes easily. That’s a good sign it’s ready! If you have leftovers, store them right to keep them fresh. Let the salmon cool down first, then wrap it tightly in plastic wrap or place it in an airtight container. Keep it in the fridge for up to three days. For longer storage, you can freeze it. Just make sure to wrap it well to avoid freezer burn. When ready to eat, thaw it in the fridge overnight before reheating. {{image_2}} You can switch up the herbs in this recipe. Fresh dill brings a bright taste. Basil adds a sweet, aromatic touch. Even a pinch of red pepper flakes adds spice. Try mixing different herbs for unique flavors. Each herb brings its own magic to the dish. Experimenting keeps your meals fresh and exciting. Salmon is delicious, but other fish work too. Try trout for a milder taste. Cod is flaky and absorbs flavors well. Mahi-mahi brings a tropical vibe to your plate. Make sure to adjust cooking times based on thickness. Each fish has its own cooking needs. This garlic herb crusted salmon pairs well with many sides. Serve it with steamed broccoli or green beans. A light salad with lemon vinaigrette brightens the meal. Quinoa or rice can add a nice texture. For a fun twist, serve it on a bed of pasta. Don't forget lemon wedges for extra zing! To keep your garlic herb crusted salmon fresh, store it in the fridge. Place the salmon in an airtight container. Make sure to eat it within three days. If you want to keep it longer, consider freezing it. Always let the salmon cool to room temperature before storing. Freezing is a great way to save your salmon. Wrap each fillet tightly in plastic wrap. Then, place them in a freezer-safe bag. Squeeze out as much air as you can. Label the bag with the date. You can freeze it for up to three months. When you're ready to eat, just thaw it in the fridge overnight. Reheating your salmon can be easy. You can use the air fryer again for the best taste. Preheat it to 350°F (175°C). Place the salmon in the basket and heat for about 5-7 minutes. Check the inside to ensure it reaches 145°F (63°C) again. This method keeps the crust crispy and the fish juicy. I recommend cooking salmon in the air fryer for 8-10 minutes. Set the air fryer to 400°F (200°C). The cooking time can vary based on the thickness of the salmon. Always check the internal temperature. It should reach 145°F (63°C). This ensures the salmon is safe to eat and fully cooked. Yes, you can use fresh herbs instead of dried ones. Fresh herbs add more flavor to your salmon. Use three times the amount of fresh herbs as dried. For example, if a recipe calls for one teaspoon of dried thyme, use three teaspoons of fresh thyme. This will give your dish a vibrant taste. The best way to tell if salmon is done is by checking its color and texture. Cooked salmon should be opaque and flake easily with a fork. You can also use a meat thermometer. Insert it into the thickest part of the fillet. It should read 145°F (63°C) for safe consumption. Always let the salmon rest for a couple of minutes before serving. This helps retain its juices. You've learned how to make a tasty garlic herb crusted salmon today. We covered key ingredients, step-by-step cooking, and useful tips. You can customize your dish with different herbs and fish. Remember to store leftovers properly for the best taste later. This dish is easy and fun, perfect for any meal. Now, get cooking and enjoy your flavorful salmon!

Garlic Herb Crusted Salmon Air Fryer Delight

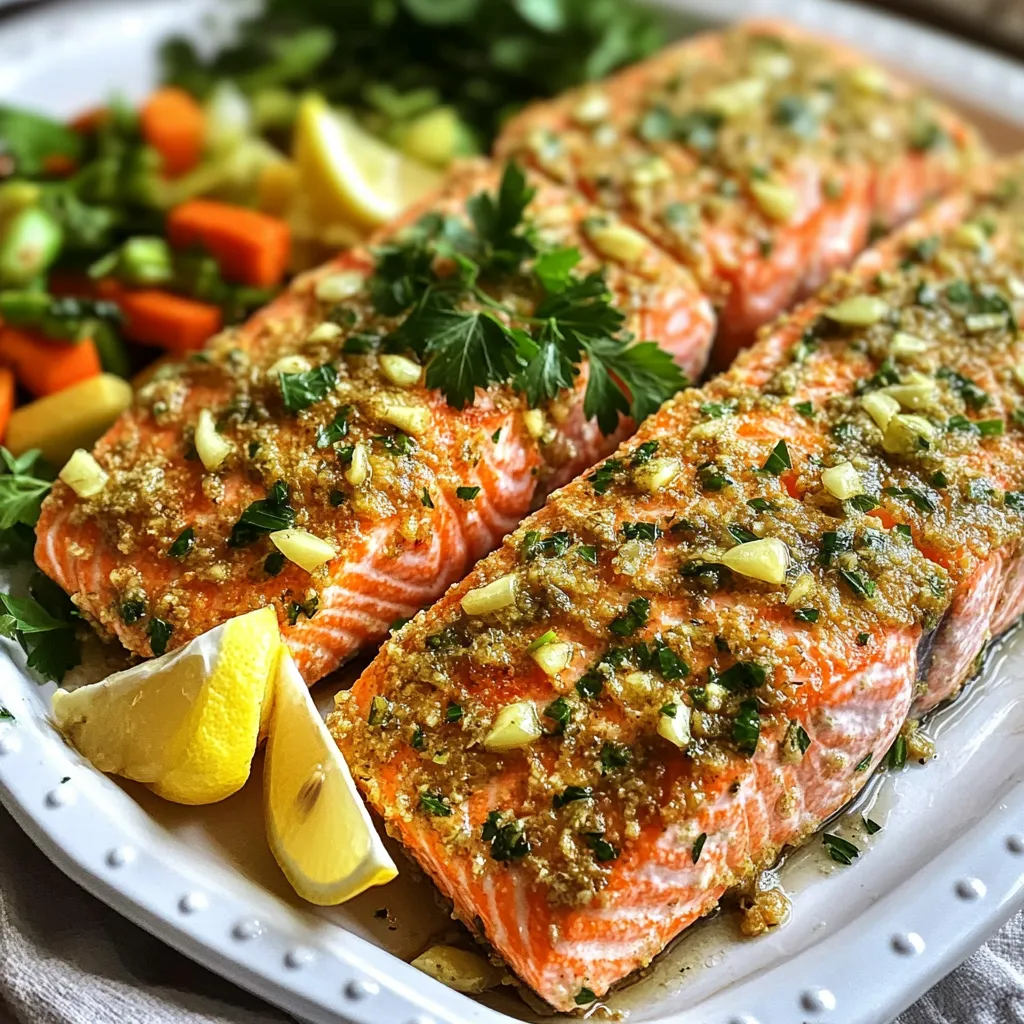
Are you ready to make a stunning meal that impresses? The Garlic Herb Crusted Salmon Air Fryer Delight brings together

To make the Apple Cider Glazed Bundt Cake, you will need the following ingredients: - 2 cups all-purpose flour - 1 tsp baking powder - 1 tsp baking soda - 1 tsp ground cinnamon - ½ tsp ground nutmeg - ½ tsp salt - ¾ cup unsalted butter, softened - 1 cup granulated sugar - 2 large eggs - 1 tsp vanilla extract - 1 cup apple cider - 1 cup diced apples (peeled and cored, such as Granny Smith or Honeycrisp) For the glaze, gather these simple ingredients: - 1 cup powdered sugar - 2-3 tablespoons apple cider You can enhance the cake with these optional ingredients: - ½ cup chopped walnuts or pecans Adding nuts gives a nice crunch to the soft cake. It also complements the sweet apples. If you prefer a nut-free cake, feel free to skip them. This Bundt cake is already packed with flavor from the spices and apple cider. Enjoy making this delicious cake! Start by preheating your oven to 350°F (175°C). Next, grease and flour a 10-cup Bundt pan well. In a medium bowl, mix together the dry ingredients: 2 cups of all-purpose flour, 1 teaspoon of baking powder, 1 teaspoon of baking soda, 1 teaspoon of ground cinnamon, ½ teaspoon of ground nutmeg, and ½ teaspoon of salt. Set this bowl aside. In a large mixing bowl, beat ¾ cup of softened unsalted butter with 1 cup of granulated sugar until it looks light and fluffy. This will take about 4-5 minutes. Add 2 large eggs one at a time, mixing well after each. Stir in 1 teaspoon of vanilla extract. Now, take the dry mix and add it to the butter mix. Alternate with 1 cup of apple cider. Start and end with the dry mix, mixing until everything is just combined. Gently fold in 1 cup of diced apples and ½ cup of chopped walnuts or pecans if you want some crunch. Pour the cake batter into the prepared Bundt pan. Smooth the top with a spatula. Bake in the oven for 45-50 minutes. To check if it's done, insert a toothpick into the center. If it comes out clean, the cake is ready. Once done, remove it from the oven and let it cool in the pan for 10-15 minutes. After that, carefully invert it onto a wire rack to cool completely. This cooling step is key for the best texture. While the cake cools, prepare the glaze. In a bowl, whisk together 1 cup of powdered sugar with 2-3 tablespoons of apple cider. Adjust the amount of cider to get your desired glaze thickness. Once the cake is cool, drizzle the glaze over the top. Let it cascade down the sides for a beautiful look. This glaze adds a sweet touch that pairs perfectly with the apples in the cake. To bake the best apple cider glazed Bundt cake, gather these tools: - A 10-cup Bundt pan - Mixing bowls (one large and one medium) - A whisk and a spatula - An electric mixer or a sturdy hand mixer - Measuring cups and spoons - A toothpick for testing doneness - A wire rack for cooling the cake These tools help make the process smooth and fun! When baking, watch out for these mistakes: - Not measuring ingredients correctly. Use dry measuring cups for flour and sugar. - Overmixing the batter. Mix just until combined to keep the cake soft. - Forgetting to grease the Bundt pan. This step prevents sticking. - Opening the oven door too soon. Wait until at least 30 minutes to check. Avoid these pitfalls to create a lovely cake every time. For the perfect glaze, follow these steps: - Start with one cup of powdered sugar. - Add 2 tablespoons of apple cider. - Whisk until smooth. If it's too thick, add more cider, one teaspoon at a time. - Aim for a pourable yet thick consistency. It should coat the cake without running off too fast. With these tips, your glaze will look great and taste even better! {{image_2}} You can easily make this cake gluten-free. Use a gluten-free flour blend instead of all-purpose flour. For a dairy-free option, swap the butter with coconut oil or a dairy-free butter substitute. Use a dairy-free milk for the glaze, like almond or oat milk, to keep it smooth and sweet. You can play with flavors in this cake. Add a teaspoon of ground ginger for a spicy twist. Try mixing in a half cup of raisins or dried cranberries for added texture. If you want a fruity kick, swap the apples for pears or peaches. Each choice adds a new layer of taste. While the apple cider glaze is delicious, you can try different glazes. A caramel glaze adds a rich sweetness. Mix powdered sugar with lemon juice for a zesty touch. Or, make a simple cream cheese glaze for creaminess. Each glaze brings its own charm to the cake. Store leftover Bundt cake in an airtight container. This keeps the cake moist and fresh. Place it in a cool, dry spot, away from sunlight. If you plan to eat it within a few days, this method works well. You can also wrap the cake in plastic wrap for extra protection. Freezing is a great way to keep your Bundt cake fresh for months. Let the cake cool completely first. Then, wrap it tightly in plastic wrap. After that, place it in a freezer-safe bag or container. Label it with the date. You can freeze the cake for up to three months. To reheat your Bundt cake, remove it from the freezer and let it thaw overnight in the fridge. If you’re in a hurry, you can leave it at room temperature for a few hours. Preheat your oven to 350°F (175°C) and place the cake inside for about 10-15 minutes. This warms it through without drying it out. Enjoy your delicious cake warm! The Bundt cake stays fresh for about 3 to 5 days. Make sure to store it in an airtight container. This keeps the moisture in and helps the flavors last longer. If you cover the cake well, it can even taste great on the last day. Yes, you can make the cake ahead of time. It’s a great option for parties or gatherings. Just bake the cake and let it cool completely. Then, wrap it well in plastic wrap. You can store it at room temperature for up to 3 days. If you want to keep it longer, freeze it for up to 3 months. Just remember to glaze it after you thaw it. If you don’t have apple cider, you can use apple juice. It adds a nice sweetness and flavor. For a twist, try using pear juice or even a mix of orange juice and water. Just make sure the substitute is not too sweet. Adjust the sugar in the recipe if necessary to keep the balance right. This blog post covered all you need for a perfect Bundt cake. You learned about the key ingredients, step-by-step baking methods, and helpful tips to avoid mistakes. We also explored flavor variations and storage tips for leftovers. Baking can be fun and easy, especially with these simple steps. Enjoy your delicious Bundt cake with glaze, and share it with friends. Happy baking!

Apple Cider Glazed Bundt Cake Easy and Flavorful Recipe

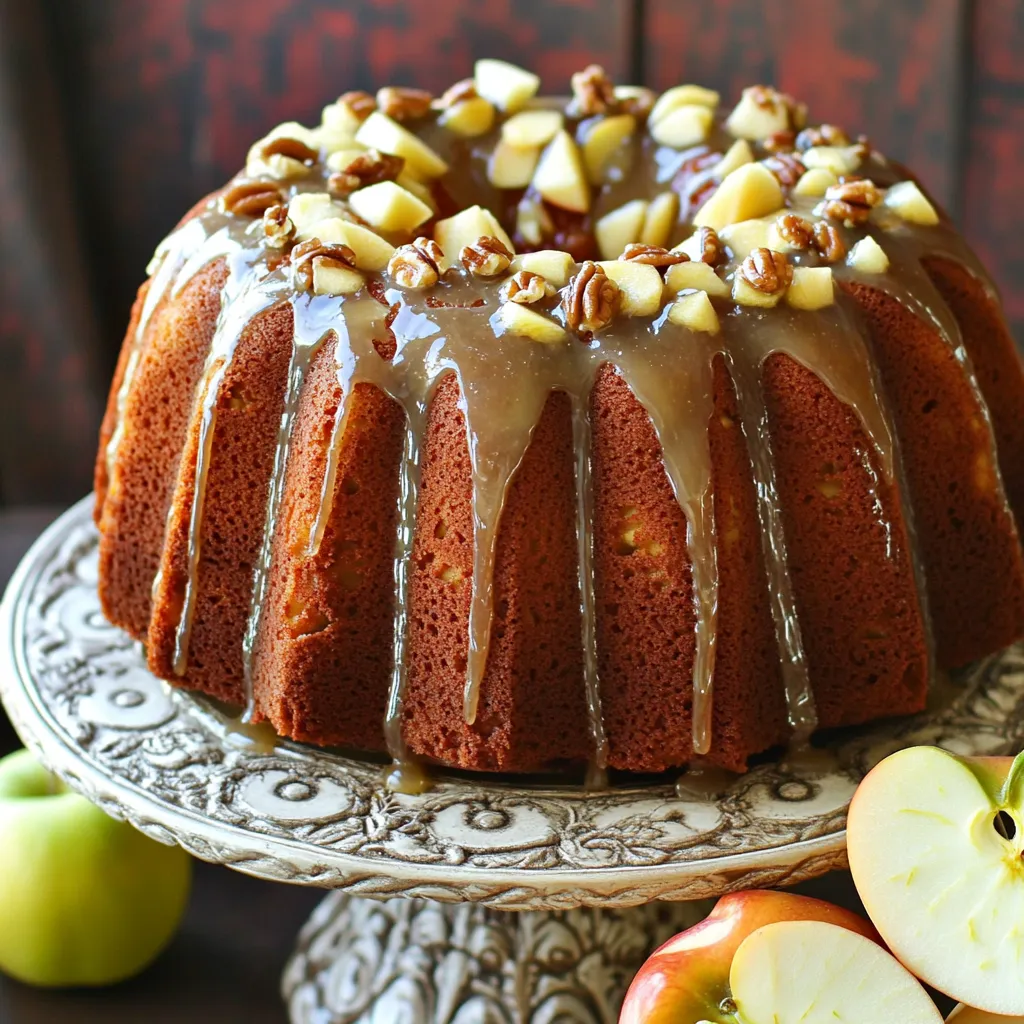
Ready to elevate your baking game? My Apple Cider Glazed Bundt Cake is both easy to make and bursting with

Cottage cheese is the star of this spread. You need 1 cup, either low-fat or full-fat. It gives the spread a creamy texture and packs in protein. You can find it in most grocery stores. Next, we add 2 tablespoons of Greek yogurt. This helps to make the spread even creamier. Greek yogurt also boosts the protein content. Choose plain yogurt for the best taste. Now for the herbs and spices. You’ll need: - 1 tablespoon fresh dill, chopped (or 1 teaspoon dried dill) - 1 tablespoon chives, finely chopped - 1 teaspoon garlic powder - 1 teaspoon lemon juice - Salt and pepper, to taste These flavors make a big difference! Fresh dill and chives add brightness. Garlic powder gives a nice kick, while lemon juice adds freshness. Adjust salt and pepper to fit your taste. For serving, grab your favorite bagels. You can also use optional toppings like sliced cucumbers, radishes, or cherry tomatoes. Each topping adds a fun crunch and fresh flavor. Start by grabbing a mixing bowl. Add 1 cup of cottage cheese and 2 tablespoons of Greek yogurt. Use a fork or spoon to mix until it’s creamy. This base gives your spread a nice, rich texture. Now, it’s time to make it tasty! Add 1 tablespoon of fresh dill and 1 tablespoon of chopped chives. Sprinkle in 1 teaspoon of garlic powder and 1 teaspoon of lemon juice. Mix everything together until it looks well blended. This is where the magic happens! Next, take your bagels and slice them in half. Toast them until they turn golden brown. This step adds a nice crunch to each bite. You can use any bagel flavor you love. Once the bagels are toasted, it’s time to spread! Generously add your cottage cheese mixture on each half. For a fun twist, add sliced cucumbers, radishes, or cherry tomatoes on top. This adds color and extra flavor. Serve it right away or store it for later. Enjoy your high-protein delight! When picking cottage cheese, look for your favorite style. You can choose low-fat or full-fat. Low-fat gives a lighter taste, while full-fat adds creaminess. Check the curd size too. Small curds blend smoothly, while large curds provide a nice texture. Always select fresh cottage cheese for the best flavor. Feel free to switch up the herbs in your spread. If you can’t find fresh dill, try parsley or basil. These herbs add a different taste but still taste great. You could also use lemon zest for more zing. Experiment with other spices like paprika or smoked salt for a unique twist. The texture of your spread is key. Start by mixing the cottage cheese and Greek yogurt well. This will make it creamy and rich. If you prefer a smoother spread, blend it in a food processor. For a chunkier texture, just mix by hand. Adjust the thickness by adding more yogurt or a splash of milk. {{image_2}} You can make your bagel spread even better by adding fresh veggies. Try diced cucumbers for a crisp bite. Chopped radishes add a nice peppery flavor. Cherry tomatoes bring a sweet touch. Just mix these into the cottage cheese spread. This gives your bagel more color and nutrition. Plus, it keeps things fun and tasty! Spices can change your spread's flavor in a big way. You can add smoked paprika for a smoky taste. Try adding a pinch of cayenne for some heat. A dash of cumin gives your spread a warm, earthy note. Experiment with different spices to find your favorite mix. This way, each bagel can be a new adventure! The type of bagel you choose matters a lot. A plain bagel is great for classic flavors. Whole wheat adds a nutty taste and more fiber. Everything bagels are fun with their mix of toppings. Try a sesame bagel for a toasty crunch. Each bagel type brings its own vibe to your spread. Mix and match to discover your perfect pairing! Store your cottage cheese bagel spread in an airtight container. This keeps it fresh. You can place it in the fridge for up to two days. If you see any moisture, drain it before using. You can freeze the spread, but it may change in texture. To freeze, place it in a freezer-safe container. Use it within one month for the best flavor. Thaw it overnight in the fridge before serving. Always check for freshness before using. If the spread smells off or has a strange color, throw it away. For best taste, consume it soon after making. Keep any leftover bagels separate to avoid sogginess. To make this spread vegan, swap cottage cheese with a plant-based option. You can use blended tofu or a vegan cream cheese. Replace Greek yogurt with a dairy-free yogurt. Fresh herbs and spices will still work well. This way, you keep the flavor while making it vegan-friendly. Cottage cheese is packed with protein. One cup has about 25 grams of protein, which helps build muscle. It is also low in fat, making it a healthy choice. It contains calcium, which is good for bones. Plus, it has some B vitamins that help with energy. Overall, it’s a nutritious option for meals or snacks. You can store the cottage cheese bagel spread for up to 2 hours in the fridge. After that, the texture may change. If you want to keep it longer, store it in an airtight container. It is best to eat it fresh for the best taste. We covered how to make a delicious cottage cheese bagel spread. You learned about key ingredients like cottage cheese, Greek yogurt, and spices. I shared steps to mix and toast your bagels just right. Remember to choose the best ingredients for great flavor and texture. Don't forget variations and storage tips to keep it fresh longer. With these easy steps and ideas, you can create a tasty spread that fits your taste. Enjoy making your bagel spread!

Cottage Cheese Bagel Spread High Protein Delight

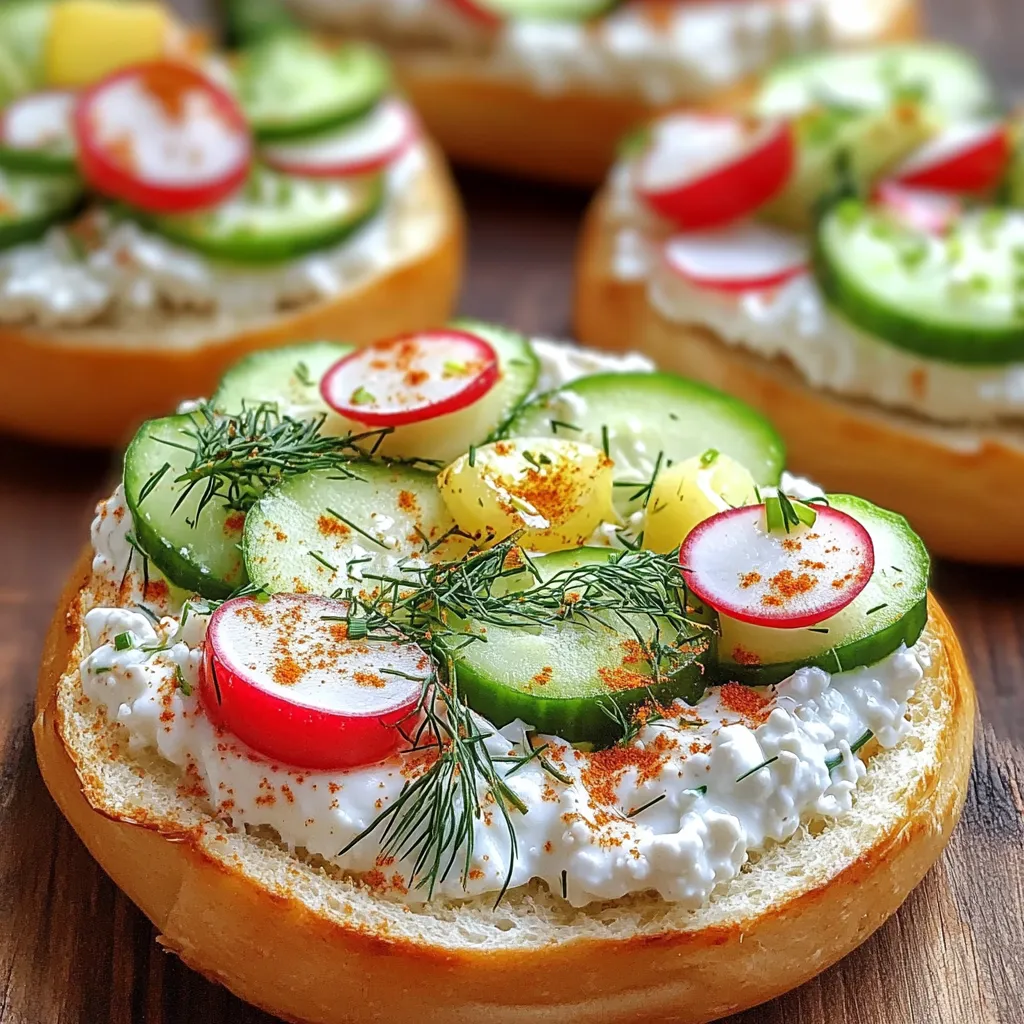
Looking for a tasty way to boost your protein intake? Try my Cottage Cheese Bagel Spread! This simple recipe combines

- 1 ½ cups all-purpose flour - 1 teaspoon baking soda - ½ teaspoon baking powder - ½ teaspoon salt - 1 teaspoon ground cinnamon - ½ teaspoon ground nutmeg - ½ teaspoon ground ginger I start with the dry ingredients. The flour gives the muffins structure. Baking soda and baking powder help them rise. Salt enhances flavor, while spices add warmth and depth. - 1 cup pumpkin puree (canned or fresh) - ¾ cup brown sugar, packed - ½ cup granulated sugar - ½ cup vegetable oil - 2 large eggs - 1 teaspoon vanilla extract Now, let’s mix the wet ingredients. Pumpkin puree brings moisture and flavor. Brown sugar adds sweetness and a rich color. Granulated sugar balances it out. Vegetable oil keeps the muffins tender. Eggs bind everything together, and vanilla adds a lovely aroma. - ½ cup chopped pecans Chopped pecans are optional but highly recommended. They add a crunchy texture and nutty flavor. If you love nuts, fold them into the batter for extra delight. To start, gather all your ingredients. In a large bowl, mix the dry ingredients. Combine 1 ½ cups flour, 1 teaspoon baking soda, ½ teaspoon baking powder, ½ teaspoon salt, 1 teaspoon cinnamon, ½ teaspoon nutmeg, and ½ teaspoon ginger. Stir this well and set it aside. In another bowl, blend your wet ingredients. Add 1 cup of pumpkin puree, ¾ cup brown sugar, ½ cup granulated sugar, ½ cup vegetable oil, 2 large eggs, and 1 teaspoon vanilla extract. Whisk until smooth and creamy. Now, slowly add the dry mix to the wet mix. Stir gently until combined. Remember, a few lumps are okay. If you want some crunch, fold in ½ cup chopped pecans at this point. Next, let's make the streusel topping. In a separate bowl, mix ½ cup flour, ⅓ cup brown sugar, and ½ teaspoon cinnamon. Cut ¼ cup cold unsalted butter into small cubes. Use a pastry cutter or your fingers to mix the butter into the dry ingredients. You want it to look like coarse crumbs. This will give your muffins a crunchy top. Preheat your oven to 350°F (175°C). Line a muffin tin with paper liners or grease it with non-stick spray. Now, fill each muffin cavity with the batter. Fill them about ⅔ full. Don’t forget to sprinkle the streusel topping generously over each muffin. Bake them for 18-20 minutes. To check if they are done, insert a toothpick into the center. If it comes out clean, they are ready! Let the muffins cool in the tin for about 5 minutes. Then, transfer them to a wire rack to cool completely. To make bakery-style muffins, avoid over-mixing. When you mix your batter, do it gently. Stop mixing when you still see some lumps. This helps keep the muffins light and fluffy. Over-mixing makes them dense and tough. Remember, a few lumps are just fine! For the best taste, serve these muffins warm. You can drizzle a little maple syrup on top. A sprinkle of powdered sugar adds a nice touch too. If you want to add more flavor, try spreading some cream cheese or butter on them. They pair well with coffee or tea, making them a perfect breakfast treat or snack. Ovens can vary in heat. If you have a gas oven, the muffins might bake faster. Check them around 15 minutes to see if they are done. For a convection oven, reduce the temperature by 25°F. Always use a toothpick to test doneness. If it comes out clean, your muffins are ready! {{image_2}} You can easily boost the flavor of your muffins. Adding chocolate chips gives a sweet twist. You can also mix in dried fruits like cranberries or raisins. These options create a fun surprise in each bite. Experiment and find your favorite combo! If you need a gluten-free recipe, it’s simple! Just swap the all-purpose flour for gluten-free flour. Many brands work great in muffins. This change keeps the texture fluffy and light. You won't miss the gluten at all! Nuts add crunch and flavor to your muffins. While pecans are great, you can also use walnuts or almonds. Each nut brings its own taste. Walnuts give a rich, earthy flavor, while almonds offer a nice, mild taste. Feel free to explore! To keep your pumpkin streusel muffins fresh, store them in an airtight container. This will help maintain their soft texture and flavor. You can place a paper towel inside the container. This absorbs extra moisture and keeps the muffins from getting soggy. Always let muffins cool completely before storing. If you don’t, steam will form and affect the texture. To freeze the muffins, first, allow them to cool completely. Then, wrap each muffin in plastic wrap. Place the wrapped muffins in a freezer-safe bag or container. Be sure to remove as much air as possible before sealing. You can freeze them for up to three months. To thaw, simply take a muffin out and leave it at room temperature for a few hours. You can also warm them in the microwave for about 15-20 seconds. At room temperature, these muffins stay fresh for about 3 days. If you keep them in the fridge, they can last up to a week. Storing in the fridge may make them a bit firmer. To enjoy them warm, just pop them in the microwave for a few seconds. Enjoy your muffins while they’re still soft and tasty! Yes, you can use fresh pumpkin. Start by roasting or steaming the pumpkin. Once cooked, blend it into a smooth puree. This gives a fresh taste to your muffins. Keep in mind that fresh pumpkin may have more moisture. Adjust the flour if needed to get the right batter consistency. To check if the muffins are done, insert a toothpick into the center. If it comes out clean or with just a few crumbs, they are ready. Be careful not to overbake. This can make your muffins dry. You want them soft and moist. Yes, you can make the batter ahead of time. Store it in the fridge for up to 24 hours. Just remember to mix it gently before baking. The batter may thicken while chilling. This can affect the texture, so be mindful of that. Each muffin contains about 200 calories. They also have 3 grams of protein and 8 grams of fat. The muffins are rich in vitamins A and C due to the pumpkin. If you add pecans, you get healthy fats and some extra protein. These muffins can be a tasty treat in moderation. We covered the key steps to make delicious pumpkin streusel muffins. We explored the right ingredients, from the dry mix to the wet elements. You learned how to create a perfect batter and bake the muffins just right. We shared tips for making them bakery-style and options for variations. Remember to store them carefully to keep them fresh. With these insights, you can enjoy every bite of your homemade muffins. Happy baking!

Pumpkin Streusel Muffins Bakery Style Delightful Treat

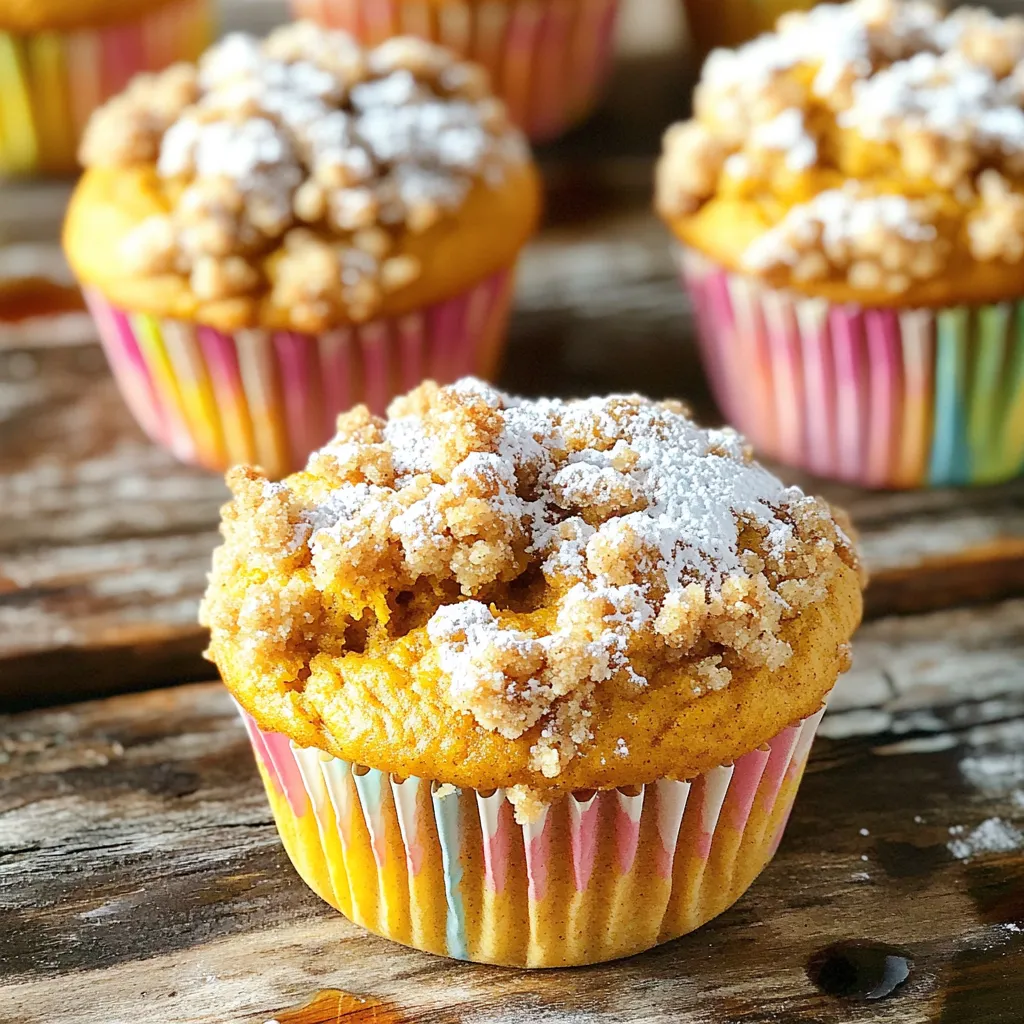
Get ready to indulge in the warm, comforting flavors of fall with my Pumpkin Streusel Muffins. These bakery-style treats are

- 2 cups butternut squash, peeled and diced - 1 pound Italian sausage (mild or spicy) - 12 ounces penne pasta - 1 small onion, finely chopped - 3 cloves garlic, minced - 1 teaspoon dried thyme - 1 teaspoon dried oregano - 1 cup ricotta cheese - 2 cups shredded mozzarella cheese - 1 cup grated Parmesan cheese - 2 cups spinach, roughly chopped - 3 cups chicken broth - 2 tablespoons olive oil - Salt and pepper to taste Butternut squash is sweet and creamy, making it a great base. The Italian sausage adds a savory depth. You can choose mild or spicy sausage based on your taste. Penne pasta holds the sauce well and gives a nice bite. Chop the onion and garlic finely for a smooth blend. Dried thyme and oregano enhance the flavors and add a bit of earthiness. Ricotta cheese provides a creamy texture, while mozzarella and Parmesan give a golden, bubbly topping. Spinach adds color and nutrition. Using chicken broth instead of water boosts the flavor. Olive oil is key for sautéing the onion and garlic. Don’t forget salt and pepper to taste; they bring all the flavors together. Gather these ingredients to make a cozy, delicious meal. This dish is easy to prepare and comforting to eat. You will love how well everything comes together in this pasta bake. - Preheat your oven to 375°F (190°C). - In a large pot, boil salted water. Add penne pasta and cook for 6-7 minutes until al dente. Drain and set aside. - Heat olive oil in a large skillet over medium heat. - Add chopped onion and sauté until soft, about 5 minutes. - Stir in minced garlic and cook for 1 more minute. - Add Italian sausage to the skillet. Break it up with a spoon and cook until browned, about 8-10 minutes. - Once the sausage is done, add diced butternut squash along with dried thyme and oregano. Mix well and cook for 5-7 minutes until squash softens. - Pour in chicken broth and bring the mix to a simmer. - Add chopped spinach and cook for 2-3 minutes until wilted. - In a bowl, combine ricotta cheese, half of the mozzarella, and half of the Parmesan. Mix until smooth. - In a large baking dish, combine cooked penne pasta with the sausage and squash mix. Fold in the ricotta mixture until well coated. - Top the pasta bake with remaining mozzarella and Parmesan cheese. - Cover with aluminum foil and bake for 25 minutes. - Remove foil and bake for another 15 minutes until cheese is golden and bubbly. - Let the dish cool for a few minutes before serving. Sautéing the onion and garlic is key. This step adds deep flavor to your dish. Start with medium heat and stir often. You want the onion to soften and turn clear. This usually takes about five minutes. To get that perfect cheese melt, layer your cheeses wisely. Use both mozzarella and Parmesan. Add the mozzarella on top for a stretchy melt. The Parmesan will give a nice golden crust. Keep an eye on it while baking. You want it bubbly and slightly browned. For side dishes, a simple green salad works best. The freshness of the greens balances the richness of the pasta bake. You can also serve crusty bread. It’s great for soaking up any sauce left on your plate. Garnish the dish with fresh herbs. Chopped parsley or basil adds a pop of color and flavor. A sprinkle of red pepper flakes gives a nice kick, too. This will make your dish look even more inviting. For a vegetarian twist, swap out the sausage for lentils or mushrooms. Both options add great texture and flavor. You can also use plant-based sausage if you prefer. To make a gluten-free version, choose gluten-free pasta. Check the labels on your broth and cheeses to ensure they're gluten-free, too. This way, everyone can enjoy this tasty dish without worry. {{image_2}} You can easily swap out the sausage in this dish. Try using chicken or turkey for a lighter option. Both proteins will still give you great flavor. For cheese, mix it up! Use sharp cheddar for a tangy bite. Gouda will add a nice smokiness. If you prefer a creamier texture, go for a blend of cream cheese and mozzarella. Each choice creates a unique taste and texture. This pasta bake shines with seasonal veggies. In fall, butternut squash is perfect. In spring, add fresh asparagus or peas for a bright touch. Summer is great for zucchini or cherry tomatoes. Adjusting the dish for different seasons keeps it fresh. In winter, add kale for extra nutrients. Each season brings new flavors, making this dish versatile and fun. To keep your Butternut Squash Sausage Pasta Bake fresh, store it in airtight containers. Place the leftovers in the fridge. They will last for about 4 to 5 days. Make sure to cool the dish to room temperature before sealing. For long-term storage, you can freeze it. Just wrap the dish tightly in plastic wrap and foil. It can last up to 3 months in the freezer. Label the container with the date. This helps you keep track of freshness. To reheat your pasta bake, the oven is the best method. Preheat it to 350°F (175°C). Place the pasta bake in an oven-safe dish. Cover it with foil to keep moisture in. Bake for about 20 minutes or until hot. If you use a microwave, make sure to use a microwave-safe plate. Heat in short bursts of 1 to 2 minutes. Stir in between to ensure it heats evenly. Both methods work well, but the oven gives the best texture. You can make this dish healthier by using some simple swaps. Here are a few ideas: - Use turkey sausage instead of Italian sausage to cut fat and calories. - Replace ricotta cheese with low-fat or cottage cheese for a lighter option. - Add more veggies like zucchini or bell peppers to boost nutrients. - Opt for whole grain penne pasta for more fiber and nutrients. - Reduce cheese by using less mozzarella and Parmesan on top. These changes keep the flavor while making it healthier. Yes, you can make this dish ahead of time! Here’s how: - Prepare the dish up to the baking step. - Cover it tightly with foil and store it in the fridge for up to 24 hours. - When ready, bake it straight from the fridge. Just add an extra 10 minutes to the baking time. - If you want to freeze it, let it cool completely before wrapping it tightly. You can freeze it for up to three months. - To reheat, thaw in the fridge overnight and bake as directed. This makes meal prep super easy! This dish pairs well with many sides. Here are some suggestions: - Simple green salad with a light vinaigrette adds freshness. - Garlic bread brings a nice crunch and flavor. - Roasted vegetables like Brussels sprouts or green beans complement the dish. - Steamed broccoli offers a healthy, colorful side. - Caesar salad adds a classic touch with its creamy dressing. These sides make the meal feel complete and satisfying! This recipe blends butternut squash and Italian sausage for a tasty pasta bake. We walked through simple steps to create a dish that's warm and filling. Remember to adjust for your tastes, whether using different proteins or cheeses. Storing leftovers is easy, and reheating keeps them fresh. I hope you enjoy making and sharing this meal with friends. It’s a great way to satisfy your hunger and delight your taste buds.

Butternut Squash Sausage Pasta Bake Easy Comfort Dish

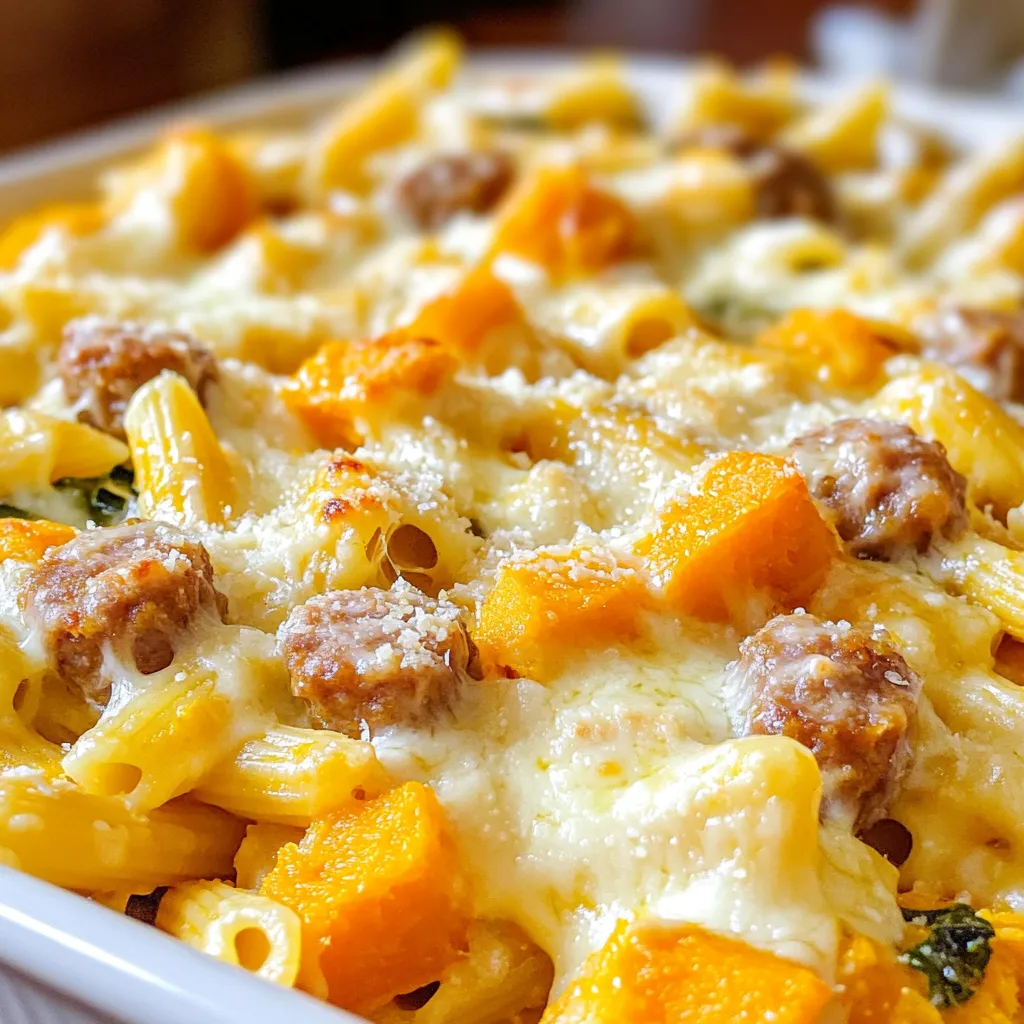
Looking for a cozy dish that warms your heart? Try my Butternut Squash Sausage Pasta Bake! This easy recipe mixes

- 1 cup unsalted butter - 2 cups granulated sugar - 4 large eggs - 1 cup all-purpose flour - 1 cup unsweetened cocoa powder - 1 teaspoon vanilla extract - 1/2 teaspoon baking powder - 1/4 teaspoon salt - 1 cup pumpkin puree - 8 oz cream cheese - 1/2 cup powdered sugar - 1 teaspoon ground cinnamon - 1/2 teaspoon nutmeg The key to rich pumpkin cheesecake swirl brownies lies in these main ingredients. You start with butter, which gives the brownies a moist texture. Granulated sugar sweetens the mix, while eggs help bind the ingredients. Then you add flour and cocoa powder for that rich brownie base. Baking powder and salt balance flavors and aid in rising. The star ingredient, pumpkin puree, adds flavor and moisture. You can’t forget the cream cheese. It creates a smooth swirl that makes these brownies special. Powdered sugar sweetens the cream cheese mix while cinnamon and nutmeg add warmth. - Chocolate chips - Nuts If you want to take your brownies to the next level, add chocolate chips. They melt into gooey pockets of chocolate bliss. Nuts give a nice crunch that contrasts the soft brownie. Choose what you love for a personal touch! - Preheat your oven to 350°F (175°C). - Grease a 9x13 inch baking pan or line it with parchment paper. - In a medium bowl, mix the melted butter and granulated sugar. - Add the eggs one at a time. Stir well after each egg. - Pour in the vanilla extract and mix until combined. - In a separate bowl, whisk together the flour, cocoa powder, baking powder, and salt. - Gradually add this dry mix to the wet ingredients. Stir until just combined. - In another bowl, combine the softened cream cheese, powdered sugar, and pumpkin puree. - Add the ground cinnamon and nutmeg to the mix. - Beat until smooth and creamy. - Reserve 1 cup of brownie batter and spread the rest in the baking pan. - Drop spoonfuls of the pumpkin mixture over the brownie batter. - Add dollops of the reserved brownie batter on top of the pumpkin layer. - Use a knife to gently swirl the batters together. Aim for a marbled effect. - Bake for 30-35 minutes. A toothpick should come out with a few moist crumbs. - Let the brownies cool in the pan for 15 minutes before moving them to a wire rack. To create a beautiful swirl in your brownies, use a knife or skewer. Start by dropping spoonfuls of the pumpkin mixture on top of the brownie batter. Then, gently swirl the two together. Aim for distinct lines of brownie and pumpkin. Avoid overmixing, as this can blend the colors too much. Bake your brownies at 350°F (175°C) for 30-35 minutes. Check for doneness by inserting a toothpick in the center. The toothpick should come out with a few moist crumbs. If it comes out wet, bake a bit longer. Cut the brownies into squares for serving. A decorative platter makes a lovely display. Dust the top lightly with powdered sugar. Add a sprinkle of ground cinnamon for a nice touch. This makes your brownies look as good as they taste! {{image_2}} You can change the taste of your brownies by adding different spices. Try ginger or cloves for a warm kick. These spices pair well with pumpkin and make each bite special. You can also choose between chocolate or white chocolate for the swirl. Using white chocolate gives your brownies a sweet, creamy taste. Chocolate adds richness and deep flavor. Both choices create a unique twist! If you need a gluten-free option, swap the all-purpose flour for a gluten-free blend. This change keeps the texture similar while making it safe for those with gluten allergies. For a vegan version, use flax eggs instead of regular eggs. Mix one tablespoon of ground flaxseed with three tablespoons of water for each egg. Replace cream cheese with a vegan cream cheese for a dairy-free treat. These brownies taste amazing with a scoop of ice cream. Vanilla or caramel ice cream complements the pumpkin flavor well. You can also drizzle caramel sauce over the brownies. A dollop of whipped cream adds a light touch. Both options make for a delightful dessert that everyone will love! To keep your pumpkin cheesecake swirl brownies fresh, store them in an airtight container. This helps to lock in moisture and flavor. You can layer parchment paper between brownies to prevent sticking. If you want to freeze brownies, wrap them tightly in plastic wrap, then place them in a freezer bag. This method keeps them safe from freezer burn. At room temperature, these brownies stay fresh for about 3 to 4 days. Just keep them in a cool, dry place away from direct sunlight. If you refrigerate them, they can last up to a week. The fridge helps maintain moisture and flavor, but be sure to seal them well to avoid drying out. To get fudgy brownies, use these tips: - Use melted butter: This helps achieve a rich texture. - Don’t overmix: Mix just until combined. - Use less flour: Stick to the recipe amount to keep the batter moist. - Bake until just set: A toothpick should come out with a few moist crumbs. These steps help you enjoy brownies that are moist and rich. Yes, you can use homemade pumpkin puree. Here are some points to note: - Texture: Homemade may be thicker. You might need to adjust liquid. - Flavor: It can taste fresher and more vibrant than canned. - Convenience: Canned is quicker and easier for busy cooks. Both options work well, but choose based on your needs. Cutting brownies cleanly can be tricky, but here are some tips: - Cool completely: Let them cool before cutting to set the texture. - Use a sharp knife: A clean cut prevents crumbling. - Wipe the knife: Wipe the knife between cuts for neat edges. Follow these steps for perfect brownie squares every time. In this blog post, we covered how to make delicious pumpkin cheesecake brownies. We started with a list of key ingredients, both main and optional. Then, we outlined clear steps for combining and baking the batter. Helpful tips helped perfect your swirl and ensure tasty results. Finally, remember that creativity can spice things up. Try new flavors or dietary changes. Enjoy your baking adventure, and savor every rich, fudgy bite!

Pumpkin Cheesecake Swirl Brownies Delightful Treat

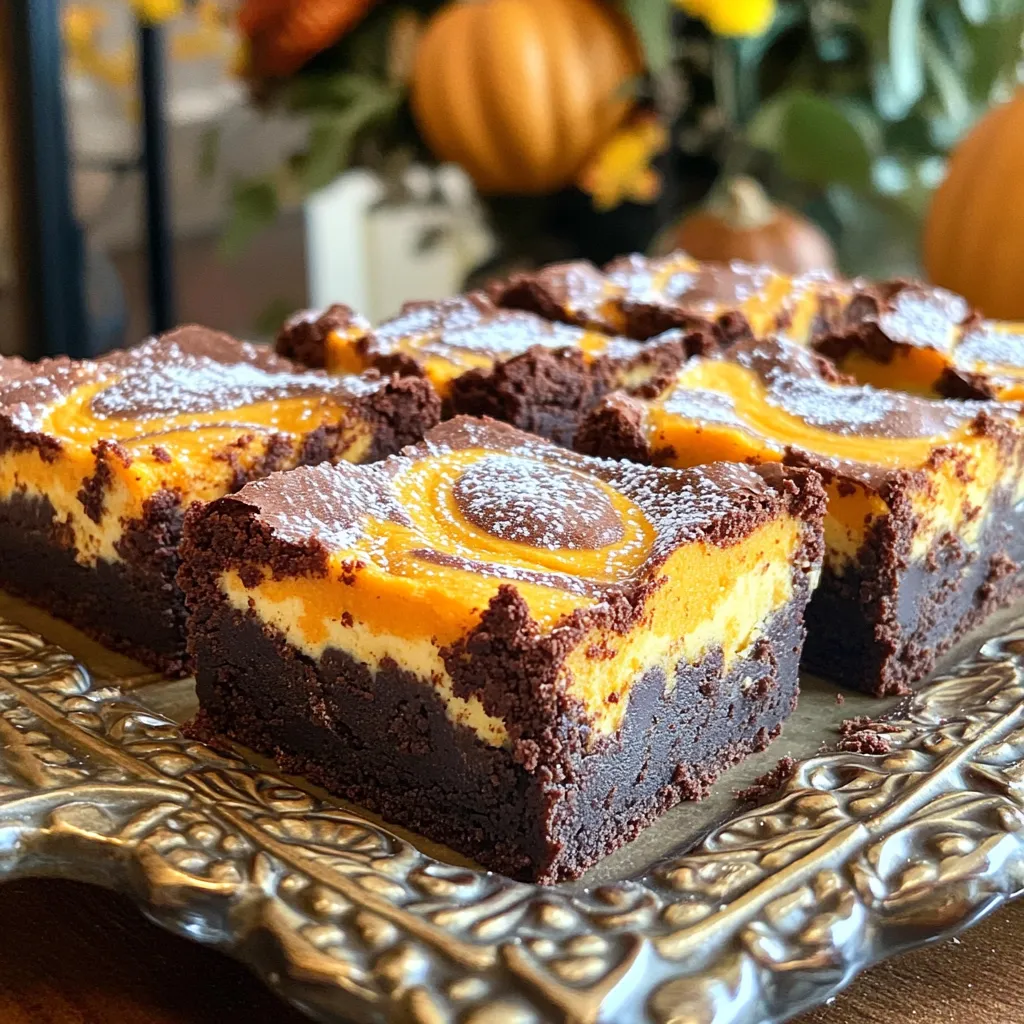
Looking for a sweet fall treat that blends two classic desserts? Try my Pumpkin Cheesecake Swirl Brownies! These rich, fudge

Older posts
Newer posts
← Previous Page1 … Page11 Page12 Page13 … Page129 Next →

dsad

© 2025 Emmas Dish • Built with GeneratePress

Our Policies

  • Copyright Policy
  • Cookie Policy
  • GDPR Policy
  • Privacy Policy
  • Disclaimer
  • Terms Of Use

More Information

  • Home
  • About
  • Contact
  • Appetizers
  • Dessert
  • Dinner
  • Drinks
©2025, Emmas Dish About Back To Top