Skip to content
DisclaimerTerms Of UseGDPR PolicyCookie Policy

Emmas Dish

  • Home
  • Drinks
  • Appetizers
  • Dinner
  • Dessert
  • About
  • Contact
  • Privacy Policy
DisclaimerTerms Of UseGDPR PolicyCookie Policy

Emma

- 8 oz spaghetti noodles - 1 lb ground beef - 2 tablespoons soy sauce - 2 tablespoons oyster sauce - 1 tablespoon sesame oil - 1 tablespoon cornstarch - 1 red bell pepper, thinly sliced - 1 cup snap peas, trimmed - 3 green onions, chopped - 2 cloves garlic, minced - 1 teaspoon ginger, grated - 1 teaspoon chili paste (adjust to taste) - ½ cup beef broth - Salt and pepper to taste - Sesame seeds for garnish When you gather ingredients, quality matters. Fresh vegetables and good beef make a difference. Use whole, firm bell peppers and bright green snap peas. For ground beef, choose lean cuts for less grease. For dietary needs, swap the ground beef with ground turkey or tofu. You can use gluten-free spaghetti for a gluten-free meal. Make sure to get low-sodium soy sauce if you want to cut back on salt. Always adjust flavors to fit your taste. Enjoy the cooking journey! {{ingredient_image_1}} To cook spaghetti, use a large pot of boiling salted water. Salting the water is key. It helps the pasta gain flavor. Cook the spaghetti until al dente, which means it should be firm but not hard. This usually takes around 8-10 minutes. After cooking, drain the spaghetti well and set it aside. In a medium bowl, mix ground beef with soy sauce, oyster sauce, sesame oil, and cornstarch. Use your hands to mix it well. This helps ensure the beef gets coated evenly. Always wash your hands before and after handling raw meat. It’s important for food safety. Heat a tablespoon of oil in a large skillet over medium-high heat. Add minced garlic, grated ginger, and thinly sliced red bell pepper. Stir-fry for about 2 minutes. Watch the garlic and ginger closely. They can burn quickly and ruin the dish. Push the vegetables to the side of the skillet. Add the beef mixture next. Cook for 5-7 minutes. Use a spatula to break apart the meat as it cooks. Keep the heat at medium-high. This helps to brown the beef without overcooking it. After the beef is browned, stir in snap peas and beef broth. Add chili paste, salt, and pepper to taste. Let the mixture simmer for 3-4 minutes. This helps the snap peas become tender and the flavors meld. Taste your dish and adjust the seasoning if needed. You can add more soy sauce or chili paste to suit your taste. For serving, plate the spaghetti and garnish with chopped green onions and a sprinkle of sesame seeds. This adds color and crunch to your dish. To boost the taste of Asian Ground Beef Spaghetti, I suggest adding some great sauces and spices. Here are my favorites: - Soy Sauce: Adds umami and saltiness. - Oyster Sauce: Adds depth and sweetness. - Sesame Oil: Gives a nutty flavor. - Chili Paste: Adds heat; adjust to your taste. For marinating the beef, mix it with soy sauce, oyster sauce, and sesame oil. Let it sit for at least 15 minutes. This makes the beef tastier and more tender. Using the right pans makes cooking easier. I recommend a large skillet or wok for stir-frying. These pans distribute heat well. They help cook the beef and veggies evenly. For mixing and serving, use a spatula and a large spoon. A spatula helps break apart the beef, while a spoon makes serving easy. Prep your ingredients before cooking. This means slicing the bell pepper, trimming the snap peas, and chopping onions ahead of time. It saves you from rushing later. While the spaghetti cooks, you can prepare the beef mixture. This way, you use your time wisely. Multitasking like this makes dinner fast and fun! Pro Tips Use Fresh Ingredients: Fresh vegetables and high-quality ground beef enhance the flavors of this dish, making it more vibrant and delicious. Adjust Spice Levels: Feel free to modify the amount of chili paste to suit your taste. Start with a small amount and add more if you prefer a spicier dish. Cook Noodles Al Dente: Cooking spaghetti until al dente ensures that the noodles maintain their texture and don’t become mushy when mixed with the sauce. Garnish for Flavor: Adding sesame seeds and green onions not only makes the dish visually appealing but also adds a nice crunch and freshness to each bite. {{image_2}} You can easily swap out ground beef for plant-based options. Try using lentils, mushrooms, or chickpeas. These ingredients add great texture and flavor. For a delicious sauce, use hoisin or teriyaki sauce. They add sweetness and depth to the dish. Want more heat? Add extra chili paste or red pepper flakes. Start with a teaspoon and adjust to your taste. You can also use sriracha or sambal oelek for added spice. These chili sauces have bold flavors that enhance the dish. Feel free to add more veggies to your dish. Carrots, broccoli, or zucchini work well. They add color and crunch. You can also mix in tofu or shrimp for extra protein. These options keep the meal interesting and satisfying. To keep your Asian ground beef spaghetti fresh, store leftovers in airtight containers. This helps lock in moisture and flavor. Make sure the dish cools down first before sealing it. I recommend using glass containers with tight lids. They are great for reheating and do not stain. If you want to save some for later, freezing is a good option. Pack the spaghetti in a freezer-safe container, leaving some space at the top. This allows the dish to expand. For best results, freeze it in single servings. When you are ready to eat, thaw it overnight in the fridge. Reheat it in a skillet over medium heat. Add a splash of beef broth to keep the texture nice. In the fridge, your leftovers will last about 3-4 days. If frozen, they can stay good for up to 3 months. Always check for signs of spoilage. If the spaghetti smells off or has a strange texture, it’s best to discard it. This ensures you enjoy your meal at its best. Yes, you can swap out spaghetti for other pasta types. Pros: - Different shapes can change the dish's look and feel. - Whole wheat or other grains add more fiber. Cons: - Cooking time may vary with other pasta. - Some pasta types may not hold the sauce well. This dish is not gluten-free as it uses spaghetti. You can use gluten-free noodles instead. Rice noodles or quinoa pasta are great choices. You can prep the beef and veggies ahead of time. 1. Mix the beef with sauces and store in the fridge. 2. Cut veggies and keep them in a sealed bag. Tips for reheating: - Heat gently on low. - Add a splash of broth for moisture. - Stir often to prevent sticking. One key pitfall is overcooking the beef. Beef should be browned but not dry. Another mistake is under-seasoning. Always taste as you cook and adjust. If your sauce is too thin, add more cornstarch mixed with water. This helps thicken it up. This blog post covered all the essential steps to create a delicious spaghetti dish. We explored the right ingredients, from detailed measurements to smart substitutions. You learned how to cook spaghetti perfectly and prepare a flavorful beef mixture while ensuring safety. I shared useful tips to enhance flavor and manage your cooking time efficiently. With variations like vegetarian and spicy options, you have the flexibility to customize the dish. Finally, I provided smart storage and reheating methods to keep your leftovers fresh. Enjoy your cooking journey!

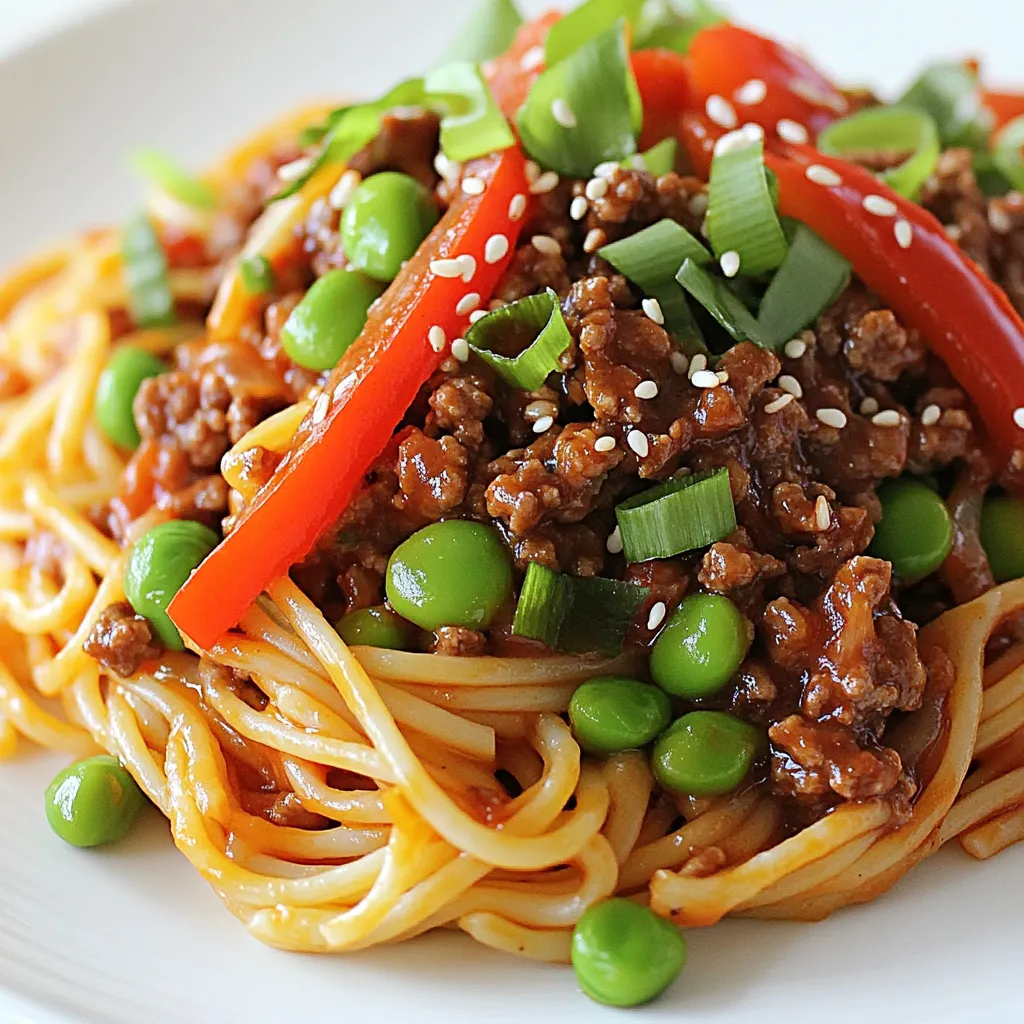
Asian Ground Beef Spaghetti Flavorful and Simple Dish

Looking for a quick and tasty dinner idea? This Asian Ground Beef Spaghetti is your answer! It’s easy to make

- 1 lb lean ground beef or turkey - 1 cup cooked quinoa (or brown rice) - 1 cup chopped lettuce - 1 medium tomato, diced - ½ cup shredded cheddar cheese - ¼ cup diced pickles - 2 tablespoons ketchup - 2 tablespoons yellow mustard - 1 tablespoon olive oil - Salt and pepper to taste These ingredients are simple and easy to find. You can get most from your local store. The lean meat gives the dish protein. Quinoa adds fiber and nutrients. Lettuce and tomato bring freshness and crunch. The cheese adds creaminess, while pickles bring a tangy touch. Ketchup and mustard mimic a classic cheeseburger taste. - Ground chicken or plant-based meat for a lighter option - Brown rice instead of quinoa for a different grain - Spinach or kale instead of lettuce for added nutrients - Pepper jack cheese for a spicy twist You can mix and match based on your taste. Ground chicken lowers fat while still packing protein. If you want more greens, try spinach or kale. Pepper jack cheese adds a fun kick for those who love spice. - Sliced avocado for creaminess - Red onion for sharp flavor - Your favorite hot sauce for heat Add toppings to make each bowl unique. Avocado gives healthy fats and creaminess. Red onion adds a nice crunch and flavor. Hot sauce can take the dish up a notch if you like spice. Customize it to suit your mood or taste! {{ingredient_image_1}} Start by heating a skillet over medium heat. Add 1 tablespoon of olive oil to the hot skillet. Once the oil is warm, crumble in 1 pound of lean ground beef or turkey. Season the meat with salt and pepper. Cook until the meat is browned and fully cooked, about 7 to 10 minutes for beef. Stir it occasionally to break it apart. If you use turkey, it cooks faster, so check it around 5 to 7 minutes. While the meat cooks, prepare 1 cup of quinoa or brown rice. Follow the package instructions for the best results. Usually, you will need to rinse quinoa before cooking. Use a ratio of 1 part quinoa to 2 parts water. Bring the water to a boil, then lower the heat and cover it. It takes about 15 minutes for quinoa to cook. For brown rice, it may take 30 to 40 minutes. Once done, set it aside. In a large bowl, start with a base of cooked quinoa or brown rice. Add a generous portion of the cooked ground meat on top. Next, layer in 1 cup of chopped lettuce, 1 medium diced tomato, ½ cup of shredded cheddar cheese, and ¼ cup of diced pickles. Drizzle 2 tablespoons of ketchup and 2 tablespoons of yellow mustard over the top. This gives you the classic cheeseburger taste. For extra flavor, consider adding sliced avocado or red onions. Serve the bowl warm, or store it for easy meals later. To boost flavor, use garlic powder and onion powder. These spices add great taste. You can also add smoked paprika for a nice smoky kick. If you like heat, sprinkle in some cayenne or chili powder. Always taste as you go! Adjust salt and pepper to your liking. Meal prep makes this dish easy to enjoy all week. Cook a big batch of quinoa or brown rice ahead of time. Store it in the fridge. Cook the meat in bulk and divide it into portions. This way, you can mix and match your bowls. Keep toppings like lettuce and tomatoes fresh by storing them separately. Serve your cheeseburger bowls in deep bowls for a hearty meal. You can garnish with fresh herbs like parsley or cilantro for color. Whole grain buns on the side can make it feel like a real burger meal. For extra flair, drizzle some hot sauce on top. Enjoy your meal! Pro Tips Choose Lean Meat: Opt for lean ground beef or turkey to keep the dish high in protein while reducing fat content. Cook Quinoa Properly: Rinse quinoa before cooking to remove bitterness and enhance its nutty flavor. Use a 2:1 water-to-quinoa ratio for perfect texture. Customize Your Toppings: Feel free to add other toppings like sautéed mushrooms or jalapeños for a gourmet twist on traditional flavors. Meal Prep Friendly: Make a big batch and portion into containers for quick and easy lunches throughout the week, just reheat before serving. {{image_2}} You can easily make this dish vegetarian or vegan. Instead of meat, use black beans or lentils. They add protein and fiber. You can also use plant-based ground meat, which works well. For cheese, try vegan cheese or skip it altogether. Add more veggies like bell peppers or mushrooms for extra taste. To keep this meal gluten-free, choose quinoa or brown rice as your base. Both are naturally gluten-free. Make sure to check labels on any sauces or toppings you use. Some may contain gluten. Use gluten-free ketchup and mustard to stay safe. If you're cutting carbs, skip the quinoa or rice. Use cauliflower rice as a great substitute. It has fewer carbs and adds volume to the bowl. You can also load up on leafy greens instead. Use spinach or kale as a base for your bowl. This keeps the meal light but still filling. To keep your High Protein Cheeseburger Bowls fresh, store them in airtight containers. Make sure to let the bowls cool to room temperature before sealing. This helps prevent moisture buildup. You can separate the toppings to keep them fresh longer, too. You can safely keep your cheeseburger bowls in the fridge for up to four days. After that, the quality may drop. If you notice any change in smell or texture, it’s best to toss them. Always check before eating leftovers. If you want to save some bowls for later, freezing is a great option. Place the bowls in freezer-safe containers. Make sure to label them with dates so you know when to use them. They will stay good for about three months. When ready to eat, thaw in the fridge overnight and reheat in the microwave. Enjoy your meal prep! This recipe is high in protein because it uses lean ground beef or turkey. One pound of lean ground beef has about 80 grams of protein. If you choose turkey, it has similar amounts. The quinoa also adds protein. One cup of cooked quinoa has about 8 grams. Together, these ingredients pack a protein punch. Yes, you can use other types of meat. Ground chicken works well, too. If you prefer a plant-based option, try lentils or black beans. They provide protein and add unique flavors. Each meat or meat alternative changes the taste and texture, so feel free to experiment. You can make this recipe ahead of time easily. Cook the meat and quinoa in advance. Store them in separate containers in the fridge. You can also chop the veggies ahead of time. When you’re ready to eat, just assemble the bowl. This makes for quick and tasty meals during busy days. Healthy sides add variety to your meal. Consider serving steamed broccoli or green beans. A fresh side salad with mixed greens is also great. You might enjoy sweet potato fries or roasted veggies. These sides complement the cheeseburger bowl well and add more nutrients to your plate. This blog post covered all you need to know to make a tasty cheeseburger bowl. We discussed key ingredients, step-by-step cooking, and how to add your spin. You now have tips for flavor, meal prep, and serving options. We also explored variations for different diets and storage tips for leftovers. Remember, you can tweak this bowl to suit your tastes or dietary needs. Enjoy creating your perfect cheeseburger bowl!

High Protein Cheeseburger Bowls Easy and Delicious Meal

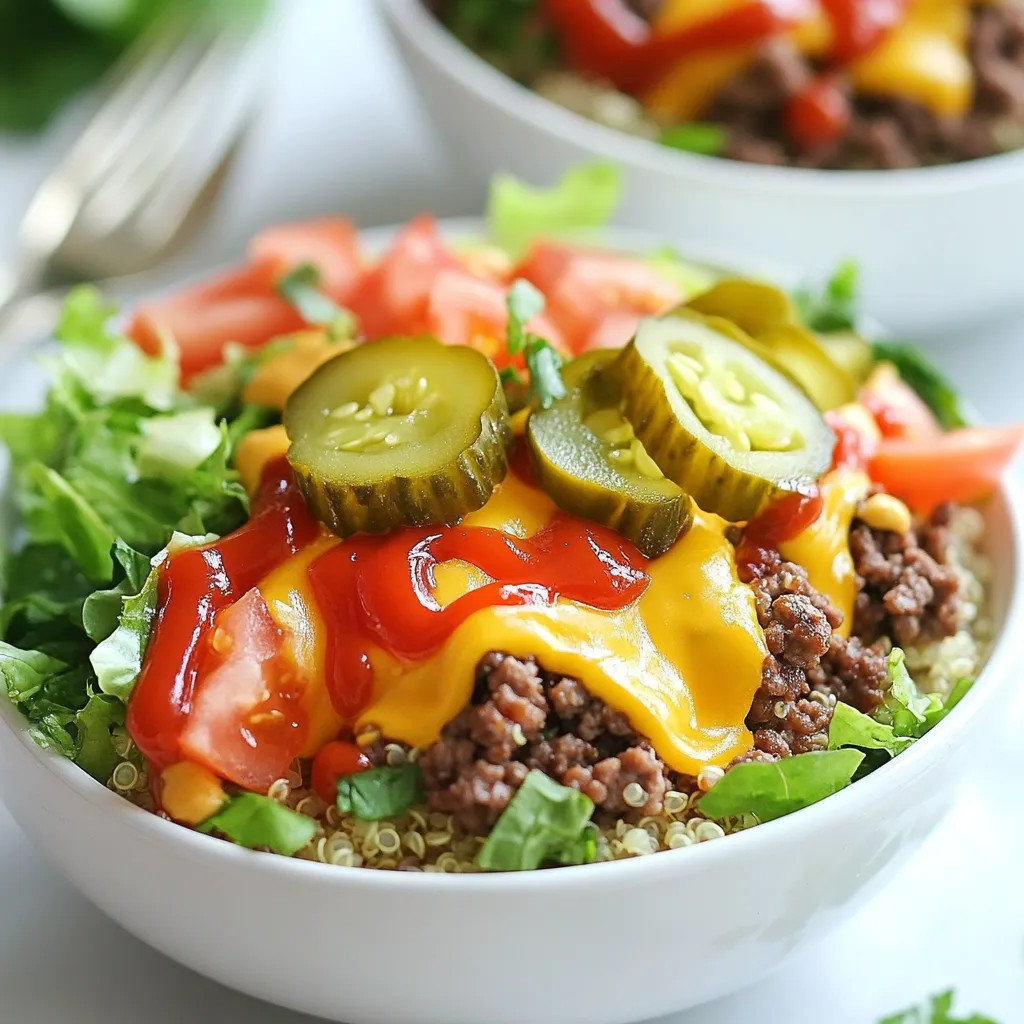
Are you ready to enjoy a meal that’s both tasty and packed with protein? My High Protein Cheeseburger Bowls are

- 1 pound ground beef - 1 cup shredded sharp cheddar cheese - 1 cup refried beans - 1 cup cooked rice - ½ cup diced tomatoes - ½ cup diced onions - 2 cloves garlic, minced - 1 tablespoon taco seasoning - 4 large flour tortillas - 2 cups frozen French fries - 2 tablespoons olive oil - Salsa and sour cream When making Cheesy Beef Burritos, you need quality ingredients. Ground beef is the star. It adds flavor and protein. Sharp cheddar cheese gives the burritos a rich taste. Refried beans and rice create a hearty filling. Diced tomatoes, onions, and minced garlic add freshness. Taco seasoning brings that classic flavor we love. You can’t forget the flour tortillas. They wrap everything up nicely. Frozen French fries are the perfect side. A bit of olive oil helps cook them crispy. For serving, salsa and sour cream enhance the flavors. Don't skip these! With this list, you can create a tasty meal. Each ingredient plays a role, making your burritos a hit. {{ingredient_image_1}} - Preheat your oven for the frozen French fries. Check the package for the right temperature. - While it heats, chop the onions and mince the garlic. - Measure out the ground beef and have all your ingredients ready. - Heat olive oil in a large skillet over medium heat. - Add the chopped onions and minced garlic. Cook them until they smell great and look clear, about 2-3 minutes. - Next, add the ground beef to the skillet. Brown it for 5-7 minutes. Drain any extra fat. - Now, stir in the taco seasoning and diced tomatoes. Sprinkle in salt and pepper to taste. Mix it all well and cook for another 2-3 minutes. - In another bowl, mix the refried beans and cooked rice until they are combined. - Take a flour tortilla and lay it flat. Scoop about ⅓ cup of the beef mixture into the center. - Add a few spoonfuls of the bean and rice mix. Top it with some cheddar cheese. - Fold the sides of the tortilla in and roll it up tightly from the bottom. Repeat this for the other tortillas. - Place each burrito seam-side down on a baking sheet, and sprinkle any leftover cheese on top. - Bake the burritos in the preheated oven for about 10-15 minutes. They should be golden and crispy. - While the burritos bake, cook the frozen French fries according to the package instructions. - Once the burritos are ready, serve them hot with the crispy fries. - Garnish with fresh cilantro and serve with salsa and sour cream for dipping. - Choosing the right tortilla size: Use large flour tortillas. They hold more filling. A bigger tortilla makes it easier to wrap tightly. This helps keep the burrito intact while you eat. - Properly browning beef for flavor: Start with a hot skillet. Add olive oil, then the onions and garlic. Let them cook until they smell good. Next, add the ground beef. Brown it well for rich flavor. Drain any fat to keep it light. - Best dips and toppings: Salsa and sour cream are perfect. They add creaminess and spice. You can also use guacamole for a fresh taste. Chopped cilantro adds a nice touch, too. - Ideal sides to pair with burritos: Serve your burritos with crispy French fries. They add crunch and balance the meal. You can also try a side salad for freshness. A simple green salad works well. - Arranging burritos and fries on the plate: Place each burrito next to a generous pile of fries. This looks inviting and appetizing. Make sure the burrito is seam-side down for a neat look. - Using garnishes for visual appeal: Drizzle salsa over the burritos. This adds color and flavor. Top with chopped cilantro for a fresh pop. A sprinkle of cheese can also enhance the look. Pro Tips Use Fresh Ingredients: Fresh tomatoes and onions will enhance the flavor of your burritos significantly compared to canned options. Customize Your Fillings: Feel free to add or substitute with your favorite ingredients like bell peppers, jalapeños, or corn for extra texture and flavor. Don't Overstuff: While it’s tempting to fill your burritos, overstuffing may make them difficult to roll and could lead to spills during baking. Serve Hot: Burritos are best enjoyed hot out of the oven. Serve them immediately for a delightful experience! {{image_2}} You can swap ground beef for ground turkey or chicken. This change keeps the dish light and tasty. The flavor remains rich, and you still get that comforting burrito feel. For a vegetarian option, try using meat substitutes like lentils or black beans. These options bring a hearty texture and flavor without the meat. Want to spice things up? Add jalapeños or other peppers to the beef mixture. This addition gives a nice kick. You can also play with cheese types. Try pepper jack for a spicy twist, or go for a creamy queso for a different flavor. Mixing cheeses adds depth and makes each bite exciting. For a fun twist, serve burrito bowls instead of wrapped burritos. Layer crispy fries as the base, then pile on the beef and toppings. This style is great for sharing. You can also make wrap-style burritos. Add your favorite toppings like guacamole, sour cream, or fresh veggies for extra crunch. This way, everyone can customize their meal as they like. To keep your cheesy beef burritos fresh, wrap them tight in plastic wrap or foil. Store them in an airtight container in your fridge. This way, they stay tasty and safe. Burritos last about 3 to 4 days in the fridge. After that, they may lose flavor or texture. You can freeze both cooked and uncooked burritos. For cooked ones, let them cool first. Wrap them well in plastic wrap and then in foil. For uncooked burritos, you can freeze them after rolling. This keeps them fresh for up to 3 months. When it's time to eat, reheat cooked burritos in the oven at 350°F for about 20 minutes. If you freeze uncooked burritos, bake them straight from the freezer. Just add a few extra minutes to the cooking time. To maintain flavor and texture, let burritos cool before storing. This prevents sogginess. When reheating, cover them with foil to keep moisture in. Adding a sprinkle of cheese on top before reheating can also boost flavor. Enjoying your leftovers fresh is easy with these simple tips! To keep your burritos intact, rolling is key. Start with a warm tortilla; it bends better. Spoon the filling into the center, leaving room on the sides. Fold the sides in first, then roll from the bottom up. Press gently as you roll. Seal the edge with a bit of water. This helps it stick. Yes, you can prep these burritos ahead. Assemble them and wrap each one tightly in plastic wrap. Store in the fridge for up to 24 hours. When ready, just bake them straight from the fridge. This keeps them fresh and tasty. Crispy French fries are a perfect match. You can also serve a fresh salad or guacamole. Try rice and beans for a hearty option. Chips and salsa are great for snacking too. Each side adds a fun twist to your meal. To lighten up your burritos, use lean ground turkey or chicken. Swap the cheese for a low-fat version. You can add more veggies like bell peppers or spinach. Use whole wheat tortillas for extra fiber. These simple swaps keep the flavor but cut calories. Cheesy beef burritos are a delicious mix of flavor and fun. We covered key ingredients, from ground beef to sharp cheddar cheese. I shared step-by-step instructions, cooking tips, and variations to suit your taste. Remember, you can get creative with substituting ingredients or changing up how you serve them. Store leftovers right to keep them fresh. With these tips, you can make perfect burritos every time. Enjoy exploring this tasty dish that brings joy to your table!

Cheesy Beef Burritos with Fries Flavorful Fiesta Dish

Are you ready to spice up your dinner routine? These Cheesy Beef Burritos with Fries are a fiesta on your

Newer posts
← Previous Page1 … Page126 Page127

dsad

© 2025 Emmas Dish • Built with GeneratePress

Our Policies

  • Copyright Policy
  • Cookie Policy
  • GDPR Policy
  • Privacy Policy
  • Disclaimer
  • Terms Of Use

More Information

  • Home
  • About
  • Contact
  • Appetizers
  • Dessert
  • Dinner
  • Drinks
©2025, Emmas Dish About Back To Top