Skip to content
DisclaimerTerms Of UseGDPR PolicyCookie Policy

Emmas Dish

  • Home
  • Drinks
  • Appetizers
  • Dinner
  • Dessert
  • About
  • Contact
  • Privacy Policy
DisclaimerTerms Of UseGDPR PolicyCookie Policy

Emma

- 1 pound ground beef - 1 cup shredded sharp cheddar cheese - 1 cup refried beans - 1 cup cooked rice - ½ cup diced tomatoes - ½ cup diced onions - 2 cloves garlic, minced - 1 tablespoon taco seasoning - 4 large flour tortillas - 2 cups frozen French fries - 2 tablespoons olive oil - Salsa and sour cream When making Cheesy Beef Burritos, you need quality ingredients. Ground beef is the star. It adds flavor and protein. Sharp cheddar cheese gives the burritos a rich taste. Refried beans and rice create a hearty filling. Diced tomatoes, onions, and minced garlic add freshness. Taco seasoning brings that classic flavor we love. You can’t forget the flour tortillas. They wrap everything up nicely. Frozen French fries are the perfect side. A bit of olive oil helps cook them crispy. For serving, salsa and sour cream enhance the flavors. Don't skip these! With this list, you can create a tasty meal. Each ingredient plays a role, making your burritos a hit. {{ingredient_image_1}} - Preheat your oven for the frozen French fries. Check the package for the right temperature. - While it heats, chop the onions and mince the garlic. - Measure out the ground beef and have all your ingredients ready. - Heat olive oil in a large skillet over medium heat. - Add the chopped onions and minced garlic. Cook them until they smell great and look clear, about 2-3 minutes. - Next, add the ground beef to the skillet. Brown it for 5-7 minutes. Drain any extra fat. - Now, stir in the taco seasoning and diced tomatoes. Sprinkle in salt and pepper to taste. Mix it all well and cook for another 2-3 minutes. - In another bowl, mix the refried beans and cooked rice until they are combined. - Take a flour tortilla and lay it flat. Scoop about ⅓ cup of the beef mixture into the center. - Add a few spoonfuls of the bean and rice mix. Top it with some cheddar cheese. - Fold the sides of the tortilla in and roll it up tightly from the bottom. Repeat this for the other tortillas. - Place each burrito seam-side down on a baking sheet, and sprinkle any leftover cheese on top. - Bake the burritos in the preheated oven for about 10-15 minutes. They should be golden and crispy. - While the burritos bake, cook the frozen French fries according to the package instructions. - Once the burritos are ready, serve them hot with the crispy fries. - Garnish with fresh cilantro and serve with salsa and sour cream for dipping. - Choosing the right tortilla size: Use large flour tortillas. They hold more filling. A bigger tortilla makes it easier to wrap tightly. This helps keep the burrito intact while you eat. - Properly browning beef for flavor: Start with a hot skillet. Add olive oil, then the onions and garlic. Let them cook until they smell good. Next, add the ground beef. Brown it well for rich flavor. Drain any fat to keep it light. - Best dips and toppings: Salsa and sour cream are perfect. They add creaminess and spice. You can also use guacamole for a fresh taste. Chopped cilantro adds a nice touch, too. - Ideal sides to pair with burritos: Serve your burritos with crispy French fries. They add crunch and balance the meal. You can also try a side salad for freshness. A simple green salad works well. - Arranging burritos and fries on the plate: Place each burrito next to a generous pile of fries. This looks inviting and appetizing. Make sure the burrito is seam-side down for a neat look. - Using garnishes for visual appeal: Drizzle salsa over the burritos. This adds color and flavor. Top with chopped cilantro for a fresh pop. A sprinkle of cheese can also enhance the look. Pro Tips Use Fresh Ingredients: Fresh tomatoes and onions will enhance the flavor of your burritos significantly compared to canned options. Customize Your Fillings: Feel free to add or substitute with your favorite ingredients like bell peppers, jalapeños, or corn for extra texture and flavor. Don't Overstuff: While it’s tempting to fill your burritos, overstuffing may make them difficult to roll and could lead to spills during baking. Serve Hot: Burritos are best enjoyed hot out of the oven. Serve them immediately for a delightful experience! {{image_2}} You can swap ground beef for ground turkey or chicken. This change keeps the dish light and tasty. The flavor remains rich, and you still get that comforting burrito feel. For a vegetarian option, try using meat substitutes like lentils or black beans. These options bring a hearty texture and flavor without the meat. Want to spice things up? Add jalapeños or other peppers to the beef mixture. This addition gives a nice kick. You can also play with cheese types. Try pepper jack for a spicy twist, or go for a creamy queso for a different flavor. Mixing cheeses adds depth and makes each bite exciting. For a fun twist, serve burrito bowls instead of wrapped burritos. Layer crispy fries as the base, then pile on the beef and toppings. This style is great for sharing. You can also make wrap-style burritos. Add your favorite toppings like guacamole, sour cream, or fresh veggies for extra crunch. This way, everyone can customize their meal as they like. To keep your cheesy beef burritos fresh, wrap them tight in plastic wrap or foil. Store them in an airtight container in your fridge. This way, they stay tasty and safe. Burritos last about 3 to 4 days in the fridge. After that, they may lose flavor or texture. You can freeze both cooked and uncooked burritos. For cooked ones, let them cool first. Wrap them well in plastic wrap and then in foil. For uncooked burritos, you can freeze them after rolling. This keeps them fresh for up to 3 months. When it's time to eat, reheat cooked burritos in the oven at 350°F for about 20 minutes. If you freeze uncooked burritos, bake them straight from the freezer. Just add a few extra minutes to the cooking time. To maintain flavor and texture, let burritos cool before storing. This prevents sogginess. When reheating, cover them with foil to keep moisture in. Adding a sprinkle of cheese on top before reheating can also boost flavor. Enjoying your leftovers fresh is easy with these simple tips! To keep your burritos intact, rolling is key. Start with a warm tortilla; it bends better. Spoon the filling into the center, leaving room on the sides. Fold the sides in first, then roll from the bottom up. Press gently as you roll. Seal the edge with a bit of water. This helps it stick. Yes, you can prep these burritos ahead. Assemble them and wrap each one tightly in plastic wrap. Store in the fridge for up to 24 hours. When ready, just bake them straight from the fridge. This keeps them fresh and tasty. Crispy French fries are a perfect match. You can also serve a fresh salad or guacamole. Try rice and beans for a hearty option. Chips and salsa are great for snacking too. Each side adds a fun twist to your meal. To lighten up your burritos, use lean ground turkey or chicken. Swap the cheese for a low-fat version. You can add more veggies like bell peppers or spinach. Use whole wheat tortillas for extra fiber. These simple swaps keep the flavor but cut calories. Cheesy beef burritos are a delicious mix of flavor and fun. We covered key ingredients, from ground beef to sharp cheddar cheese. I shared step-by-step instructions, cooking tips, and variations to suit your taste. Remember, you can get creative with substituting ingredients or changing up how you serve them. Store leftovers right to keep them fresh. With these tips, you can make perfect burritos every time. Enjoy exploring this tasty dish that brings joy to your table!

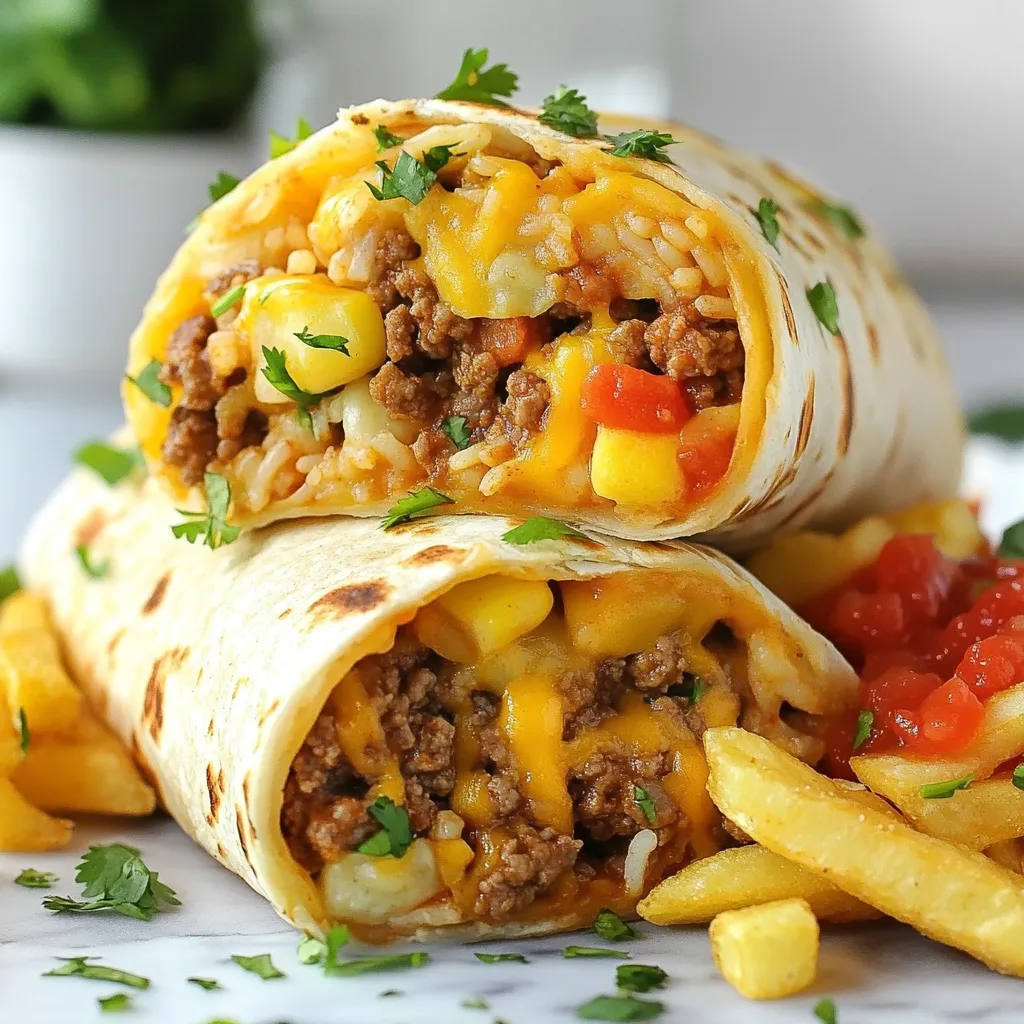
Cheesy Beef Burritos with Fries Flavorful Fiesta Dish

Are you ready to spice up your dinner routine? These Cheesy Beef Burritos with Fries are a fiesta on your

Newer posts
← Previous Page1 … Page128 Page129

dsad

© 2025 Emmas Dish • Built with GeneratePress

Our Policies

  • Copyright Policy
  • Cookie Policy
  • GDPR Policy
  • Privacy Policy
  • Disclaimer
  • Terms Of Use

More Information

  • Home
  • About
  • Contact
  • Appetizers
  • Dessert
  • Dinner
  • Drinks
©2025, Emmas Dish About Back To Top