Skip to content
DisclaimerTerms Of UseGDPR PolicyCookie Policy

Emmas Dish

  • Home
  • Drinks
  • Appetizers
  • Dinner
  • Dessert
  • About
  • Contact
  • Privacy Policy
DisclaimerTerms Of UseGDPR PolicyCookie Policy

Emma

To make crispy oven baked chicken bites, you'll need: - 1 pound chicken breast, cut into bite-sized pieces - 1 cup breadcrumbs (panko works best for crunch) - 1/2 cup grated Parmesan cheese - 1 tablespoon dried Italian herbs (like oregano, basil, and thyme) - 1 teaspoon garlic powder - 1/2 teaspoon paprika - Salt and pepper to taste - 2 eggs, beaten - 1 tablespoon olive oil - Fresh parsley, chopped (for garnish) These ingredients create a tasty and crunchy snack that everyone will love. You can customize your chicken bites by adding: - A pinch of cayenne pepper for heat - Lemon zest for a fresh twist - Other herbs like rosemary or dill Feel free to experiment with these options and find your favorite flavors. If you don't have certain items, don't worry! Here are some swaps: - Use chicken thighs instead of breasts for a juicier bite. - Swap panko for regular breadcrumbs if needed. - For a dairy-free version, try nutritional yeast instead of Parmesan. These substitutions still keep your chicken bites delicious and fun! {{ingredient_image_1}} Start with one pound of chicken breast. Cut it into small, bite-sized pieces. Make sure they are even in size. This helps them cook evenly. In a bowl, mix one cup of breadcrumbs, half a cup of grated Parmesan, and one tablespoon of dried Italian herbs. Add one teaspoon of garlic powder and half a teaspoon of paprika. Season with salt and pepper to taste. In another bowl, beat two eggs and stir in one tablespoon of olive oil. Dip each chicken piece into the egg mix. Make sure it gets fully coated. Then roll it in the breadcrumb mix until it is well covered. Preheat your oven to 400°F (200°C). Line a baking sheet with parchment paper. Place the coated chicken bites on the sheet. Give them space to cook well. Bake for 15 to 20 minutes. The chicken should be golden brown and reach 165°F (74°C) inside. Once done, take them out and let them cool for a few minutes. Garnish with fresh parsley before serving. To get the best crunch, use panko breadcrumbs. They create a great texture. Coat each piece of chicken well. Don’t skip the egg wash; it helps the breadcrumbs stick. Space the chicken bites on the baking sheet. This allows air to circulate for even cooking. Lastly, bake them until golden brown for that perfect crisp. These chicken bites are great for any meal. Serve them with marinara or honey mustard for dipping. You can also add fresh veggies on the side. Try a simple salad or crunchy carrot sticks. If you want to impress guests, serve in a basket lined with parchment paper. It looks nice and is easy to grab. One mistake is crowding the baking sheet. This traps steam and makes the chicken soggy. Another mistake is skipping the seasoning. Make sure to add enough salt and pepper to the breadcrumb mix. Also, don’t forget to check the chicken’s internal temperature. It needs to reach 165°F (74°C) for safe eating. Always let the chicken bites cool a bit before serving; they taste best that way. Pro Tips Use Panko Breadcrumbs: For an extra crunchy texture, opt for panko breadcrumbs instead of regular breadcrumbs. Season the Chicken: Before coating, season the chicken pieces with salt and pepper for enhanced flavor. Space them Out: When placing the chicken bites on the baking sheet, ensure they are spaced apart to allow for even cooking and crispiness. Check Internal Temperature: Use a meat thermometer to ensure the chicken bites reach an internal temperature of 165°F (74°C) for safe consumption. {{image_2}} To add some heat, mix cayenne pepper into your breadcrumb mix. Use about half a teaspoon for a mild kick. If you want it spicier, add more to taste. You can also use hot sauce in the egg mixture for extra flavor. This change will make your chicken bites exciting and tasty. For a cheesy surprise, try stuffing each chicken piece with cheese. Use mozzarella or cheddar cheese cubes. After coating the chicken, cut a slit in each piece. Insert a cheese cube before baking. This gives you a melty, gooey center that everyone will love. If you need a gluten-free option, switch to gluten-free breadcrumbs. Many stores sell these. You can also crush gluten-free crackers as a substitute. Ensure that all other ingredients, like spices and cheese, are gluten-free. This way, everyone can enjoy these bites without worry. To keep your oven baked chicken bites fresh, place them in an airtight container. Let them cool completely before storing. This helps avoid sogginess. Store them in the fridge for up to three days. If you want to keep them longer, freezing is a great option. When you're ready to enjoy leftovers, preheat your oven to 375°F (190°C). Place the chicken bites on a baking sheet. Bake for about 10-15 minutes. This keeps them crispy and hot. You can also reheat them in a microwave, but they may not stay as crispy. To freeze chicken bites, lay them out in a single layer on a baking sheet. Freeze for an hour until firm. Then, transfer them to a freezer-safe bag. They will last for up to three months. When you want to eat them, just bake from frozen. Add a few extra minutes to your baking time. You can tell when chicken bites are done by checking their color and temperature. They should be golden brown on the outside. The inside must reach 165°F (74°C) for safe eating. Use a meat thermometer for accuracy. This helps prevent undercooked chicken. After baking for 15-20 minutes, check them closely. If they look crispy and the temperature is right, they are ready to serve. Yes, you can use chicken thighs instead of breasts. Thighs often have more flavor and stay moist. Cut them into bite-sized pieces like you would with breasts. The cooking time may be slightly longer, so check for doneness as mentioned earlier. This option adds a different taste and texture to the dish. Feel free to experiment with your favorite cuts to find what you love. Many dipping sauces go great with chicken bites. Here are a few ideas: - Marinara sauce for a classic Italian touch - Honey mustard for a sweet twist - BBQ sauce for a smoky flavor - Ranch dressing for creamy goodness - Spicy aioli for a kick These sauces add extra flavor and make your chicken bites even more enjoyable. Try mixing and matching to find your favorite combo! This blog post covered how to make tasty chicken bites. We discussed key ingredients, including options and swaps. I shared step-by-step instructions for prepping and baking. You learned tips for crispiness and serving ideas. We explored fun variations, like spicy and cheese-stuffed bites. I also included storage methods and answered common questions. In the end, making chicken bites is fun and easy. You can try different styles and flavors. Enjoy your cooking!

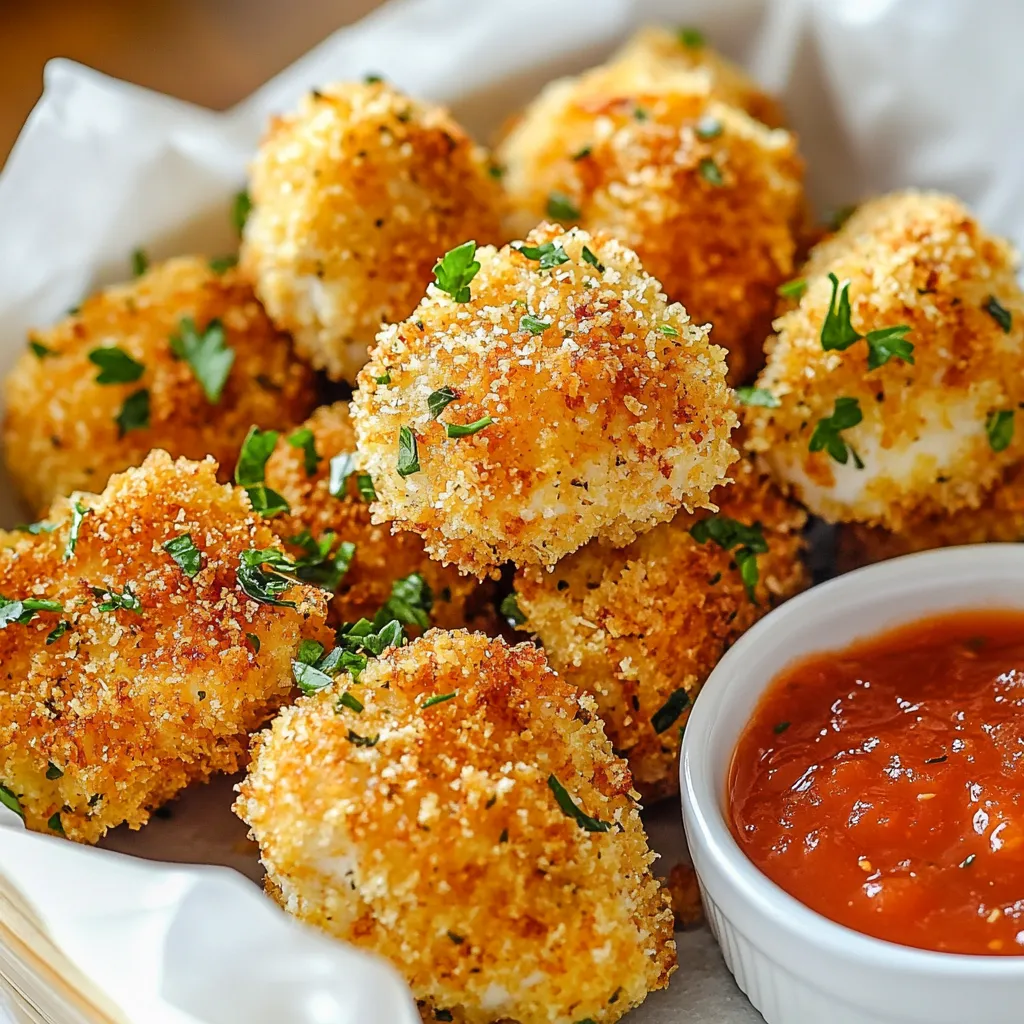
Oven Baked Chicken Bites Quick and Tasty Snack

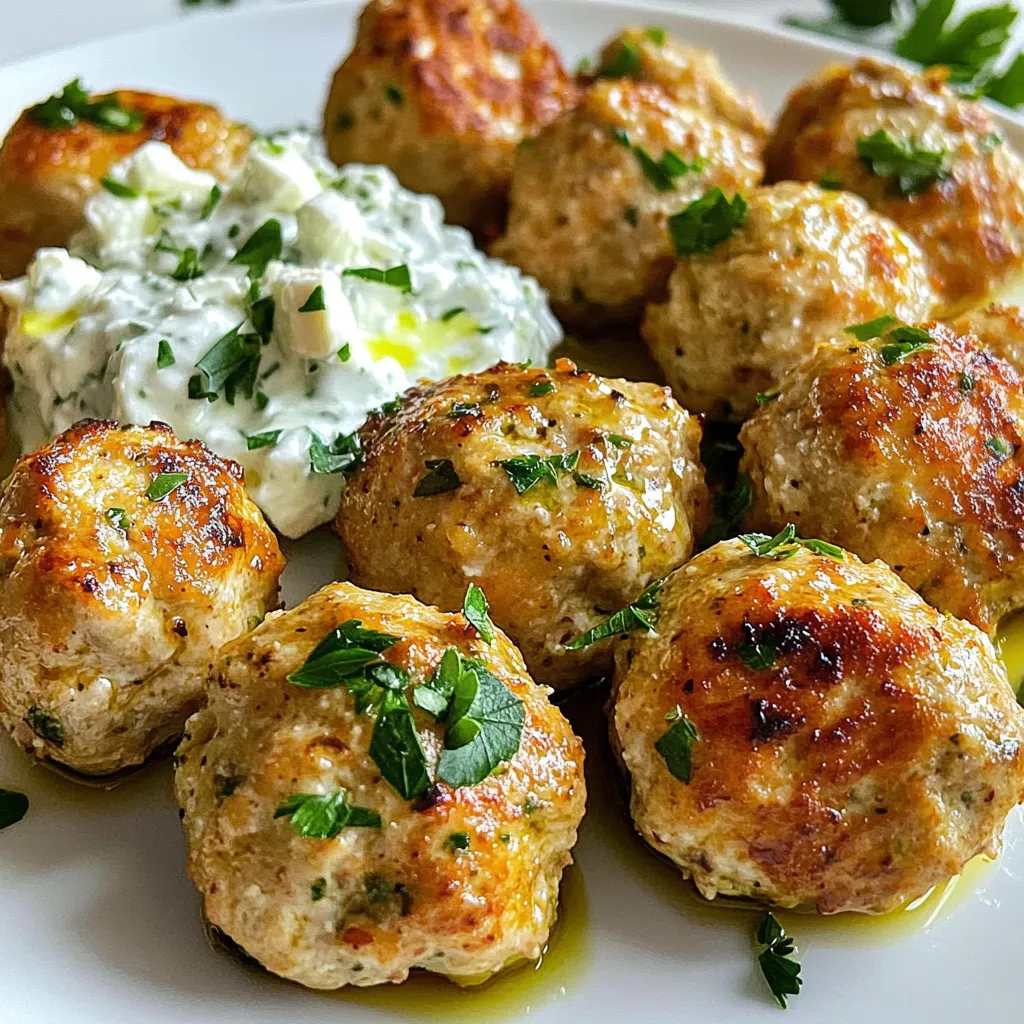
Looking for a quick and tasty snack? Oven Baked Chicken Bites might just be your new favorite treat! They’re easy

To make delicious cranberry orange scones, you'll need: - 2 cups all-purpose flour - 1/3 cup granulated sugar - 1 tablespoon baking powder - 1/2 teaspoon salt - 1/4 cup cold unsalted butter, cubed - 1/2 cup dried cranberries - Zest of 1 large orange - 1/2 cup heavy cream - 1 large egg - 1 teaspoon vanilla extract - 1/4 cup orange juice These ingredients create a perfect balance of sweet and tart flavors in every bite. You can easily swap some ingredients if needed: - Use whole wheat flour for a healthier option. - Coconut sugar can replace granulated sugar for a different taste. - For dairy-free scones, try almond milk instead of heavy cream. - Replace dried cranberries with raisins or blueberries if you prefer. These substitutions keep the scone's texture while offering new flavors. Fresh ingredients make a huge difference in taste. Fresh orange zest adds bright citrus notes. Cold butter creates a flaky texture, essential for scones. Dried cranberries should be plump and flavorful. Using fresh ingredients ensures your scones taste their best. Always choose the best quality to enhance your baking experience. {{ingredient_image_1}} Start by preheating your oven to 400°F (200°C). This step is key for even baking. Next, take a baking sheet and line it with parchment paper. This will help prevent sticking and make cleanup easy. In a large mixing bowl, whisk together 2 cups of all-purpose flour, 1/3 cup of granulated sugar, 1 tablespoon of baking powder, and 1/2 teaspoon of salt. Mix well until it looks uniform. Now, add 1/4 cup of cold unsalted butter. Cut the butter into the flour mix using a pastry cutter or your fingers. You want the mixture to look like coarse crumbs. In another bowl, whisk together 1/2 cup of heavy cream, 1 large egg, 1 teaspoon of vanilla extract, and 1/4 cup of orange juice. Pour this wet mixture into the dry ingredients. Gently stir until just combined; don’t overmix. The dough should feel a bit sticky. Dust a clean surface with flour and turn the dough out onto it. Knead it gently a few times to bring it all together. Form the dough into a disc about 1 inch thick. Use a sharp knife to cut this disc into 8 wedges. Place the wedges on your prepared baking sheet, leaving about 2 inches between each one. Now, it's time to bake! Place the baking sheet in your preheated oven. Bake for 15 to 18 minutes, or until the tops are lightly golden. Once done, let the scones cool for a few minutes on the baking sheet. Then, transfer them to a wire rack to cool completely. Enjoy your freshly baked cranberry orange scones! To get fluffy scones, start with cold butter. This keeps the scones light. Cut the butter into small pieces. Mix it with the flour until it looks like crumbs. Be gentle when adding the wet ingredients. Mix just until combined. Overmixing will make them tough. If the dough feels sticky, that’s normal. It will bake up nice and soft. One big mistake is using warm butter. Warm butter can lead to flat scones. Another mistake is not measuring ingredients correctly. Too much flour can make your scones dry. Also, avoid skipping the zest. The orange zest adds great flavor. Lastly, don’t forget to space out the scones on the baking sheet. They need room to rise. Serve your scones warm for the best taste. A sprinkle of powdered sugar looks nice too. Pair them with orange marmalade or butter. This adds extra flavor. You can also enjoy them with tea or coffee. For a fun twist, add a dollop of whipped cream on top. This makes each bite even more special. Pro Tips Use Cold Ingredients: Ensure your butter and cream are cold to create a flaky texture in the scones. Don’t Overmix: Mix until just combined to keep the scones tender and light. Experiment with Add-ins: Feel free to add nuts or other dried fruits to customize your scones. Serve Fresh: Enjoy the scones warm for the best flavor and texture; they can be reheated briefly in the oven. {{image_2}} You can change the flavor of your scones by adding other fruits or nuts. Try using chopped apples, juicy blueberries, or sweet cherries. You may also add nuts like walnuts or pecans for a crunch. Mix in 1/2 cup of your chosen fruit or nuts into the dough. This keeps the scones exciting and fun. A glaze can make your scones shine and taste even better. To make a simple glaze, mix powdered sugar with a bit of orange juice. Start with 1 cup of sugar and 2 tablespoons of juice. Drizzle it on top after baking. You can also use milk or cream for a creamy glaze. This adds flavor and makes the scones look fancy. If you like savory treats, try adding cheese or herbs. Sharp cheddar or feta makes a nice addition. You can mix in 1/2 cup of cheese into the dough. Adding herbs like rosemary or thyme gives a unique taste. Just use 1 to 2 tablespoons of fresh herbs. This way, you can enjoy a new twist on your cranberry orange scones. To keep your scones fresh, store them in an airtight container. Line the bottom with parchment paper to absorb moisture. Place the scones in a single layer. If you have more, add another layer of parchment paper between them. This helps prevent them from getting soggy. Keep them at room temperature for up to two days. For longer storage, move to the fridge. When you're ready to enjoy a scone, reheat it for the best taste. Preheat your oven to 350°F (175°C). Wrap the scone in aluminum foil. This keeps it moist while warming. Heat for about 10 minutes or until warm. If you're in a hurry, you can use a microwave. Heat on medium power for 15-20 seconds. Check to avoid overcooking, as this can make them tough. Freezing is great for long-term storage. Start by letting the scones cool completely. Wrap each one tightly in plastic wrap. Then place them in a freezer bag or airtight container. Label the bag with the date. You can freeze them for up to three months. When you're ready to eat, thaw them in the fridge overnight. Then reheat as mentioned above for the best flavor. You can make dairy-free scones by replacing the butter and heavy cream. Use coconut oil or a dairy-free butter for the butter. For the cream, try almond milk or coconut cream. These swaps keep the scones moist and tasty. Yes, you can use fresh cranberries! Fresh cranberries give a tart flavor. However, you may want to add a bit more sugar to balance the tartness. Chop the fresh cranberries into smaller pieces for even mixing in the dough. These scones pair well with many tasty options. Serve them warm with butter or orange marmalade for a sweet touch. You can also enjoy them with a cup of tea or coffee. Cream cheese or clotted cream adds a nice creamy flavor. Scones are done when they turn a light golden brown on top. You can also check by gently tapping the top. If it feels firm and sounds hollow, they are ready. Let them cool slightly before serving. Cranberry orange scones are easy and fun to make. We covered key ingredients, step-by-step baking, and helpful tips. Fresh ingredients truly boost flavor. Try different fruits or glazing for tasty variations. Store your scones well to keep them fresh. Remember, adjusting for dietary needs is simple. I hope you enjoy making and sharing these delightful treats!

Cranberry Orange Scones Flavorful and Simple Recipe

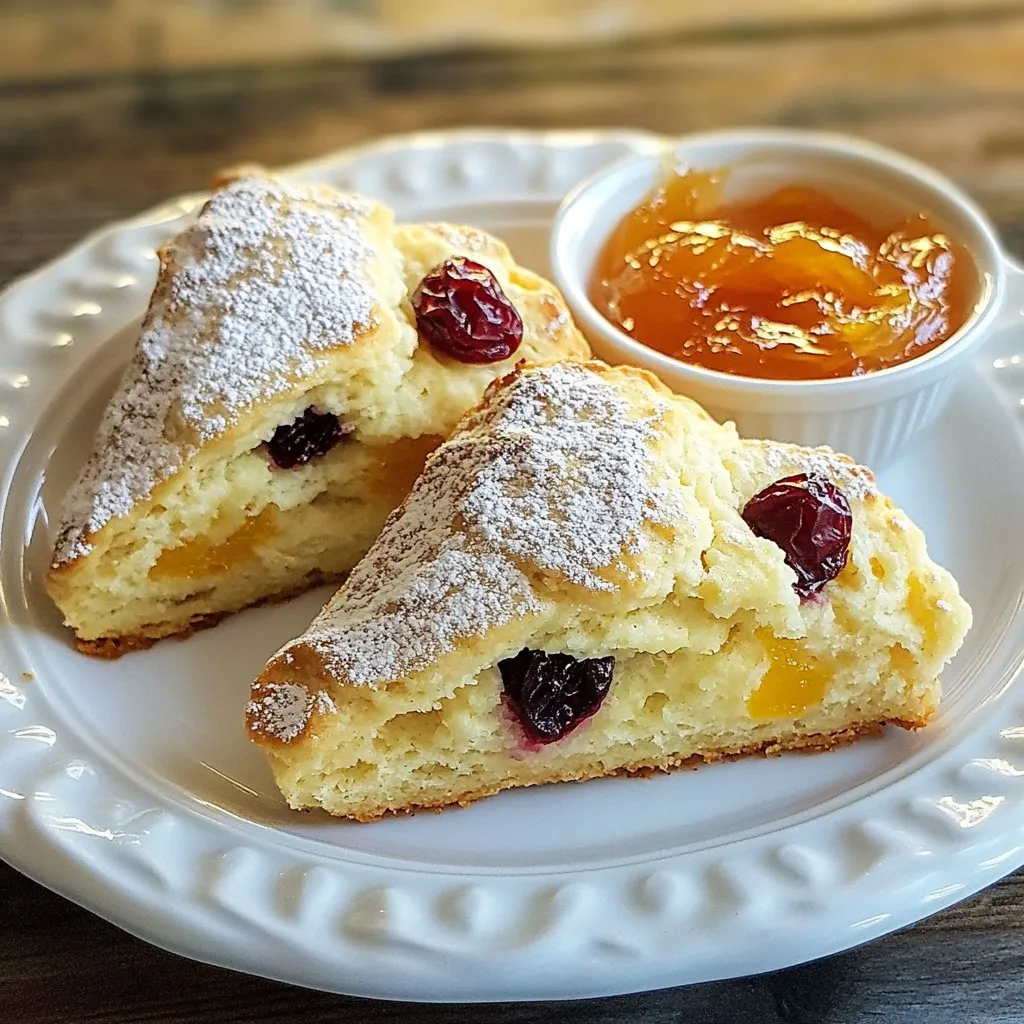
Cranberry orange scones are a delightful treat that combines tart cranberries with bright orange zest. In this recipe, I’ll guide

- 4 medium russet potatoes, scrubbed clean - 1 pound ground beef or turkey - 1 packet taco seasoning - 1 cup shredded cheddar cheese - 1 cup black beans, drained and rinsed - ½ cup corn kernels (frozen or canned) - 1 small onion, diced - 1 tablespoon olive oil - Salt and pepper, to taste These ingredients come together to create a hearty and tasty meal. The potatoes serve as a great base. The ground meat adds protein, and the taco seasoning gives it flavor. Black beans and corn add texture and nutrients. - ½ cup sour cream (optional, for topping) - Fresh cilantro, chopped (for garnish) Sour cream adds a creamy touch. Cilantro freshens up the dish and adds color. You can also use sliced jalapeños, diced tomatoes, or avocado for extra flavor. If you want to switch things up, try these ideas: - Use sweet potatoes instead of russet potatoes for a sweeter taste. - Swap ground beef for ground chicken or a meat alternative for a lighter dish. - Use a different cheese like Monterey Jack or pepper jack for extra spice. These substitutions keep the recipe fun and adaptable. You can make it suit your taste or dietary needs. {{ingredient_image_1}} Start by preheating your oven to 400°F (200°C). This step is key for making soft potatoes. Take the russet potatoes and poke them with a fork many times. This allows steam to escape while they bake. Place the potatoes directly on the oven rack. Bake them for 45 to 60 minutes. They should be tender and easy to pierce with a fork when done. While your potatoes bake, heat one tablespoon of olive oil in a large skillet over medium heat. Add the diced onion and cook it until it turns soft, about 4 to 5 minutes. Next, add one pound of ground beef or turkey. Break it up with a spoon as it cooks. Cook until it is browned, which takes about 6 to 8 minutes. If there's extra fat, drain it away. Now stir in the taco seasoning, black beans, and corn. Cook this mixture for an extra 3 to 4 minutes. Make sure everything is heated through. Taste and add salt and pepper as needed. When the potatoes are ready, take them out of the oven and let them cool for a minute. Cut each potato open lengthwise. Fluff the insides with a fork to make room for the filling. Spoon the taco beef mixture into each potato. Make sure to fill them generously! Top each one with shredded cheddar cheese. Return the stuffed potatoes to the oven for 5 to 7 minutes. This helps the cheese melt and bubble. Once done, let them cool for a couple of minutes. You can drizzle sour cream over the tops and sprinkle chopped cilantro for a fresh touch. Enjoy your cheesy taco potatoes! For cheesy taco potatoes, russet potatoes work best. They are fluffy and hold up well when baked. Their skin crisps nicely, adding a great texture. You can also use Yukon Gold potatoes for a creamier inside. Both choices give you a tasty base. You can easily change the flavor of your cheesy taco potatoes. Add diced bell peppers or jalapeños for extra zest. Try different types of cheese, like pepper jack or Monterey Jack. You can even swap the beef for chicken or beans for a veggie twist. This dish is all about what you love. To get that gooey, perfect cheese melt, use freshly shredded cheese. Pre-shredded cheese has additives that prevent melting well. Make sure to add the cheese at the end of baking. This way, it melts into a bubbly, golden layer. If you want an extra crispy top, broil for a minute at the end. Just watch it closely to avoid burning! Pro Tips Choose the Right Potatoes: Opt for medium-sized russet potatoes for the best texture and flavor. They hold up well when baked and have a fluffy interior that complements the filling. Customize Your Filling: Feel free to add chopped bell peppers or jalapeños for extra flavor. You can also substitute the ground beef or turkey with plant-based meat for a vegetarian option. Cheese Variations: Experiment with different types of cheese like pepper jack for a spicy kick or Monterey Jack for a milder taste. Mixing cheeses can also add depth to the flavor. Make Ahead: You can prepare the taco filling in advance and store it in the refrigerator. Just reheat it when you're ready to assemble the potatoes for a quick meal. {{image_2}} You can easily make a vegetarian version of cheesy taco potatoes. Start with the same russet potatoes. Instead of meat, use 1 can of drained black beans. Add 1 cup of diced bell peppers and 1 cup of corn. Sauté the veggies with the onion in olive oil. Mix in taco seasoning to give it flavor. This dish still packs a punch and is full of tasty goodness. For a kick, turn up the heat! Use your favorite hot sauce or spicy taco seasoning. You can add diced jalapeños to the meat mixture or even on top. If you like, sprinkle crushed red pepper flakes over the cheesy top before baking. This version brings a fun twist that spice lovers will adore. Want to go all out? Load your taco potatoes with more toppings. After baking, try adding diced tomatoes, sliced olives, or fresh avocado. A dollop of guacamole gives it a creamy touch. For crunch, add some tortilla chips on top. The more toppings, the better! Every bite becomes a flavor explosion. To store leftover Cheesy Taco Potatoes, let them cool first. Place the potatoes in an airtight container. You can keep them in the fridge for up to three days. If you have extra filling, store it separately. This keeps the potatoes from getting too soggy. When you’re ready to eat, preheat your oven to 350°F (175°C). Place the potatoes on a baking sheet. Cover them with foil to keep them moist. Heat for about 15-20 minutes until warm. You can also microwave them. Heat on medium for 2-3 minutes, checking to see if they’re hot. Freezing Cheesy Taco Potatoes is easy! Wrap each potato tightly in plastic wrap. Then, place them in a freezer bag. You can freeze them for up to three months. When you want to eat them, thaw in the fridge overnight, then reheat. This helps keep the taste and texture just right. Yes, you can make Cheesy Taco Potatoes ahead of time. Bake the potatoes and prepare the taco filling. Store them separately in the fridge. When you're ready to eat, just stuff the potatoes and bake. This saves time and makes meal prep easy. You can also freeze the filling for later use. You can use several options instead of ground beef or turkey. Try using ground chicken for a lighter choice. Or, opt for lentils or mushrooms for a vegetarian option. Black beans also work well. These substitutes let you enjoy the same great flavor while fitting your diet. To make Cheesy Taco Potatoes in the air fryer, start by preheating it. Set it to 400°F (200°C). Poke the potatoes with a fork and place them in the basket. Cook for about 35-45 minutes, checking for tenderness. While they cook, prepare your taco filling as usual. Once done, stuff the potatoes, add cheese, and air fry for a few more minutes until the cheese melts. This method saves time and gives a crispy skin! Cheesy Taco Potatoes are a fun and tasty dish anyone can enjoy. We covered the main ingredients, optional toppings, and cooking steps. I shared tips for great flavor and perfect cheese melt. Plus, I offered fun variations like vegetarian and spicy options. Don't forget how to store and reheat leftovers to enjoy later. This dish is easy to customize, so get creative with your own favorites!

Cheesy Taco Potatoes Simple and Tasty Recipe

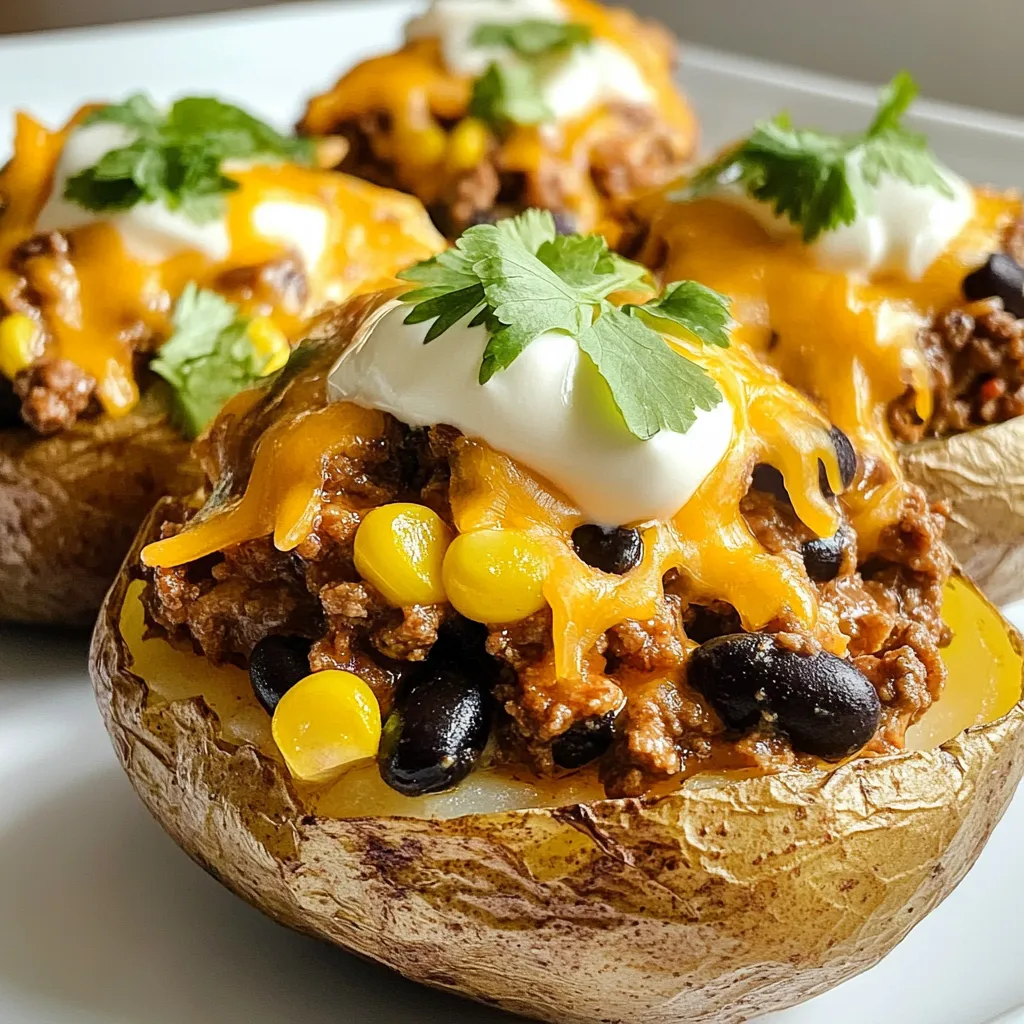
If you’re craving a fun twist on a classic dish, try my Cheesy Taco Potatoes! This simple and tasty recipe

- 2 tablespoons instant coffee - 2 tablespoons unsweetened cocoa powder - 2 tablespoons hot water - 2 tablespoons granulated sugar - 1 cup milk (dairy or non-dairy) - Ice cubes (optional) - Cocoa powder or chocolate shavings for garnish To make the Mocha Dalgona whipped coffee, gather these simple ingredients. The instant coffee gives a strong flavor. Cocoa powder adds a rich, chocolate taste. Hot water helps dissolve the coffee and cocoa. Granulated sugar sweetens the mix. You can choose any milk you like. Dairy milk makes it creamy. Non-dairy milk works just as well. If you want an iced version, add ice cubes to your glass. Finally, for a lovely touch, use cocoa powder or chocolate shavings to garnish. This recipe is easy to follow. You can enjoy this tasty drink any time. {{ingredient_image_1}} Start by gathering your ingredients. In a medium bowl, combine: - 2 tablespoons instant coffee - 2 tablespoons unsweetened cocoa powder - 2 tablespoons hot water - 2 tablespoons granulated sugar Mix these four ingredients together. Use an electric mixer or a whisk. If you use a whisk, it may take longer. Make sure everything blends well before moving on. Now, whip the mixture on high speed. This will take about 2-4 minutes. You want it to be light and fluffy. When you lift the whisk, it should hold peaks and look thick. This is key for that perfect whipped coffee texture. Grab a glass and add your milk. You can use one cup of dairy or non-dairy milk. If you want it iced, fill the glass with ice cubes first. Then, spoon the whipped coffee mixture over the milk. This creates a nice layered look. For a special touch, garnish with cocoa powder or chocolate shavings. You can gently stir it together if you like. Enjoy your creamy mocha Dalgona whipped coffee right away! To get that lovely foam for your mocha Dalgona coffee, you need to whip well. Here are some key tips: - Use an electric mixer: This tool makes it easier to whip up your mix. If you don’t have one, a whisk works too, but it takes longer. - Whip for 2-4 minutes: Keep whipping until it’s light and fluffy. You want a thick foam that holds its shape. - Room temperature ingredients: Using hot water helps dissolve the coffee and sugar faster. Now, let's talk about common mistakes: - Under-whipping: If you don’t whip enough, your coffee won’t foam up right. - Using cold water: This can make it hard to mix well. Always start with hot water. When it comes to presentation, you want your drink to look as good as it tastes. Here’s how to serve it: - Layer beautifully: Pour your milk first, then spoon the whipped coffee on top. This creates a nice layered look. - Garnish well: A sprinkle of cocoa powder or chocolate shavings adds a nice touch. Pair your mocha Dalgona coffee with snacks to enhance your experience: - Enjoy with cookies: Chocolate chip or biscotti are great choices. - Try with pastries: Muffins or croissants can make your coffee time even better. Pro Tips Use High-Quality Coffee: The flavor of your whipped coffee largely depends on the quality of the instant coffee used. Opt for a premium brand for a richer taste. Experiment with Sweetness: Adjust the amount of sugar to match your taste preference. You can also substitute granulated sugar with alternatives like coconut sugar or maple syrup. Chill Your Milk: If you're making iced coffee, use chilled milk and ice cubes to maintain the refreshing temperature of the drink. Customize Your Garnish: Feel free to get creative with your garnishes! Try adding a drizzle of chocolate syrup or a sprinkle of cinnamon for an extra flavor boost. {{image_2}} You can easily change the taste of your mocha Dalgona whipped coffee. Adding flavored syrups is a fun way to do this. Try vanilla or hazelnut syrup for a sweet twist. Just mix it with the coffee and cocoa before whipping. Experimenting with milk alternatives also adds unique flavors. Almond milk gives a nutty taste. Oat milk is creamy and rich. Each option changes the drink in a tasty way. Find what you love best! Seasonal flavors bring a fun twist to your mocha Dalgona whipped coffee. Pumpkin spice mocha Dalgona is a fall favorite. Just add pumpkin spice to your coffee mix. The cozy flavor pairs well with the cocoa. For winter, consider peppermint mocha options. Add peppermint extract or crushed candy canes. This gives a fresh and festive kick. These variations keep your coffee exciting all year long! To store leftover mocha Dalgona whipped coffee, place it in an airtight container. This keeps it fresh. You can store it in the fridge for up to 2 days. If you notice a change in texture, it may not whip well again. To reheat your mocha Dalgona coffee, gently warm it on low heat. Use a saucepan and stir often. This helps keep the foam light and airy. Avoid using a microwave, as it can change the texture. If you want it cold, enjoy it over ice right away. Dalgona coffee is a whipped coffee drink. It became popular on social media. You mix equal parts of instant coffee, sugar, and hot water. Then, you whip this mixture until it’s light and fluffy. You serve it over milk. It looks pretty and tastes great. Yes, you can make this recipe vegan. Simply use non-dairy milk. Almond, oat, or soy milk all work well. Just follow the same steps. You will still enjoy the same creamy taste. You can make Dalgona coffee without electric tools. Use a whisk or a fork instead. It will take longer, about 10-15 minutes, but it’s doable. Just keep whisking until you see peaks form. Your arms will get a workout, but it will be worth it! - What's the difference between Dalgona and regular whipped coffee? Dalgona coffee uses instant coffee. Regular whipped coffee often uses brewed coffee. Dalgona is sweeter and creamier. It has a unique texture because of the whipped foam. - How to adjust the sweetness level? To adjust the sweetness, change the sugar amount. Start with less sugar if you like it less sweet. You can also use sugar substitutes for a healthier option. Taste as you go to find your perfect balance! You now know how to make Dalgona coffee with just a few simple ingredients. We covered everything from mixing the coffee to achieving that perfect whipped texture. Remember to try different flavors and serving styles. The options are endless! Enjoy your drink hot or cold, and don't hesitate to use any leftovers wisely. I hope you feel ready to make this tasty treat at home! Happy whipping!

Mocha Dalgona Whipped Coffee Simple and Creamy Delight

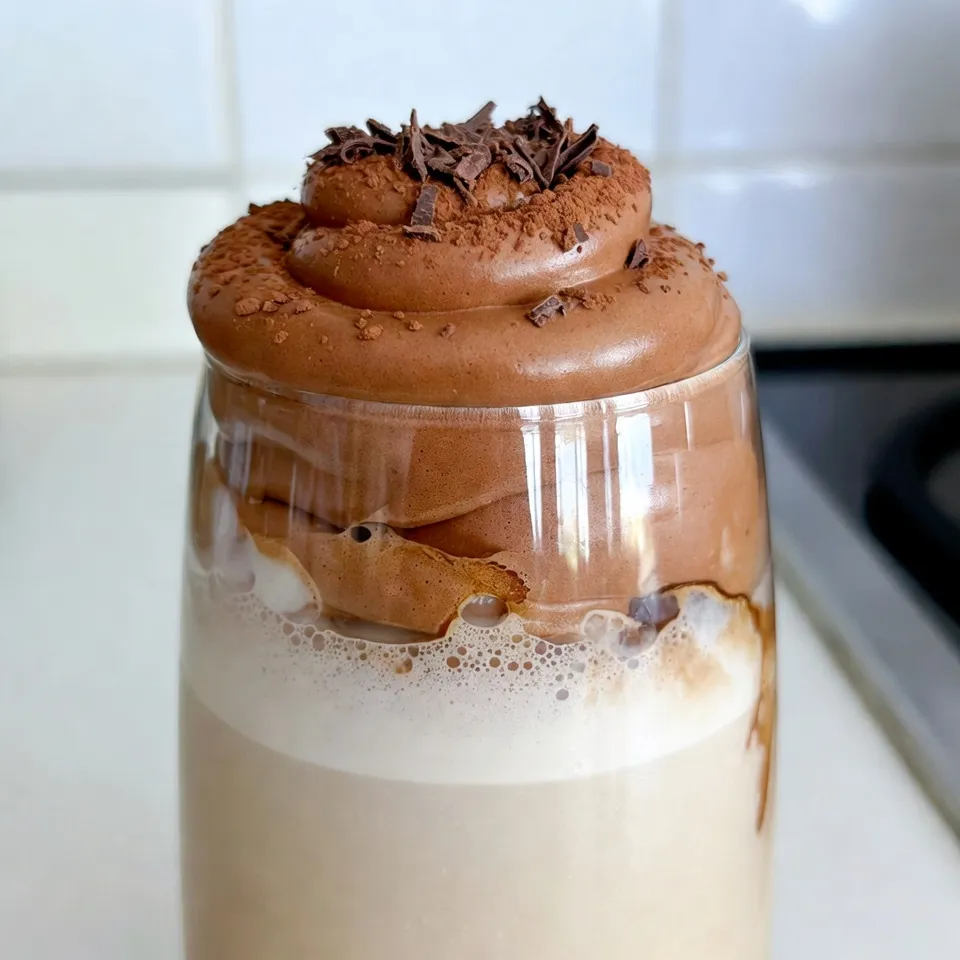
Welcome to your new coffee obsession! Mocha Dalgona whipped coffee is simple, creamy, and delicious. If you love coffee and

- Baguette - Fresh strawberries - Fresh basil leaves - Balsamic glaze - Honey - Lemon juice - Goat cheese - Salt and pepper - Olive oil for drizzling For this Strawberry Basil Bruschetta, you need fresh and simple ingredients. Start with a baguette. Slice it into 1/2-inch pieces. You will also want one cup of hulled and diced fresh strawberries. They bring sweetness and color. Next, grab a 1/4 cup of fresh basil leaves. Chop them finely to release their flavor. You will also need a tablespoon of balsamic glaze. This adds a tangy depth. Honey, just one tablespoon, adds a touch of sweetness. You will need one teaspoon of lemon juice. This brightens the dish. For creaminess, use 1/4 cup of crumbled goat cheese. Salt and pepper are essential to taste. Finally, have olive oil on hand for drizzling. It adds a rich finish to each bite. Gather these ingredients to create a fresh, flavorful treat that everyone will love. {{ingredient_image_1}} 1. Preheat the oven. Set your oven to 400°F (200°C). This helps the bread toast well. 2. Prepare the baguette slices. Slice the baguette into 1/2-inch thick pieces. This size is perfect for topping. 3. Toasting the baguette. Place the slices on a baking sheet. Brush them lightly with olive oil. 4. Mixing the toppings. In a bowl, combine diced strawberries, chopped basil, balsamic glaze, honey, lemon juice, salt, and pepper. Toss gently to mix. 1. Cooling the bread. Once the bread is toasted, take it out and let it cool slightly. 2. Adding the strawberry-basil mixture. Spoon a generous amount of the strawberry-basil mix onto each toasted slice. 3. Finishing touches with goat cheese. Sprinkle crumbled goat cheese over the top. Drizzle with more balsamic glaze and a touch of olive oil. Enjoy your fresh and flavorful Strawberry Basil Bruschetta! To toast the baguette perfectly, set your oven to 400°F (200°C). Slice the baguette into 1/2-inch pieces. Place them on a baking sheet. Brush each slice lightly with olive oil. Bake them for 5-7 minutes. Look for a golden brown color. This gives the bread a nice crunch. When chopping strawberries, hull them first. This means removing the green tops. Dice them into small pieces for easy topping. For the basil, stack the leaves. Roll them tightly and slice thinly. This makes for pretty, flavorful bits. Garnish your bruschetta with a few extra basil leaves. You can also drizzle more balsamic glaze on top. This adds a nice finish and visual appeal. For drinks, pair it with a light white wine. A refreshing lemonade also works well. These choices enhance the flavors of the bruschetta. Enjoy your tasty treat! Pro Tips Choose Ripe Strawberries: Select berries that are bright red and firm for the best flavor and texture. Fresh Basil is Key: Use fresh basil rather than dried to enhance the dish with vibrant, aromatic flavors. Toast to Perfection: Keep an eye on the baguette while toasting to prevent burning; you want them golden brown and crispy. Serve Immediately: For the best experience, serve the bruschetta right after assembling to enjoy the contrast of warm bread and fresh toppings. {{image_2}} If you want to switch up the cheese, try using feta or cream cheese. Both add a nice touch. You can also go for ricotta if you want something creamier. For the bread, ciabatta is a great choice. It has a nice crust that holds toppings well. You can also use whole grain bread for a healthier option. Want to add more fruit? Peaches or blueberries work great with strawberries. They bring a nice sweetness and color. You can also mix in some diced mango for a tropical twist. For herbs, consider using mint or cilantro. They give a fresh taste that pairs well with strawberries. You can even mix different herbs for a unique flavor. After enjoying your strawberry basil bruschetta, you may have some leftovers. To store them properly, follow these steps: - Place the bruschetta toppings in a separate container. - Keep the toasted baguette slices in another container. - This helps prevent the bread from getting soggy. You can store the toppings in the fridge for a maximum of 2 days. The bread will stay fresh for about 1 day, but it’s best enjoyed right away. If you want to reheat the bread, do so carefully. Here are some tips: - Preheat your oven to 350°F (175°C). - Place the bread slices on a baking sheet. - Heat them for about 5 minutes until warm. This method keeps the bread crispy and tasty. Avoid using the microwave, as it can make the bread chewy. Enjoy your bruschetta fresh and delicious! What is the best type of bread for bruschetta? The best bread for bruschetta is a baguette. It has a crisp crust and soft inside. This helps hold toppings well. Sliced into 1/2-inch pieces, it creates the perfect base. Can I make this recipe ahead of time? Yes, you can prepare some parts ahead. You can mix the strawberry topping and store it. Keep it in the fridge for up to a day. Toast the bread just before serving for best taste. Is it possible to freeze bruschetta? Freezing bruschetta is not ideal. The bread can become soggy when thawed. You can freeze the bread slices. Just toast them fresh when you are ready to eat. What can I serve with Strawberry Basil Bruschetta? You can serve this bruschetta with salads or soups. A light green salad pairs well. You might also enjoy it with a glass of crisp white wine. Is there a vegan version of this recipe? Yes, you can make a vegan version. Simply omit the goat cheese. You can add avocado or a vegan cheese instead. This keeps the dish fresh and tasty. This blog post covered making delicious Strawberry Basil Bruschetta. We explored key ingredients, detailed steps, and shared useful tips. You learned how to toast baguette, mix toppings, and add flavor. Remember to try ingredient swaps and variations for fun tastes. Store leftovers properly to keep them fresh. Enjoy your bruschetta as a snack or appetizer. This dish is easy and tasty, perfect for any occasion. Get creative and share your own twists!

Strawberry Basil Bruschetta Fresh and Flavorful Treat

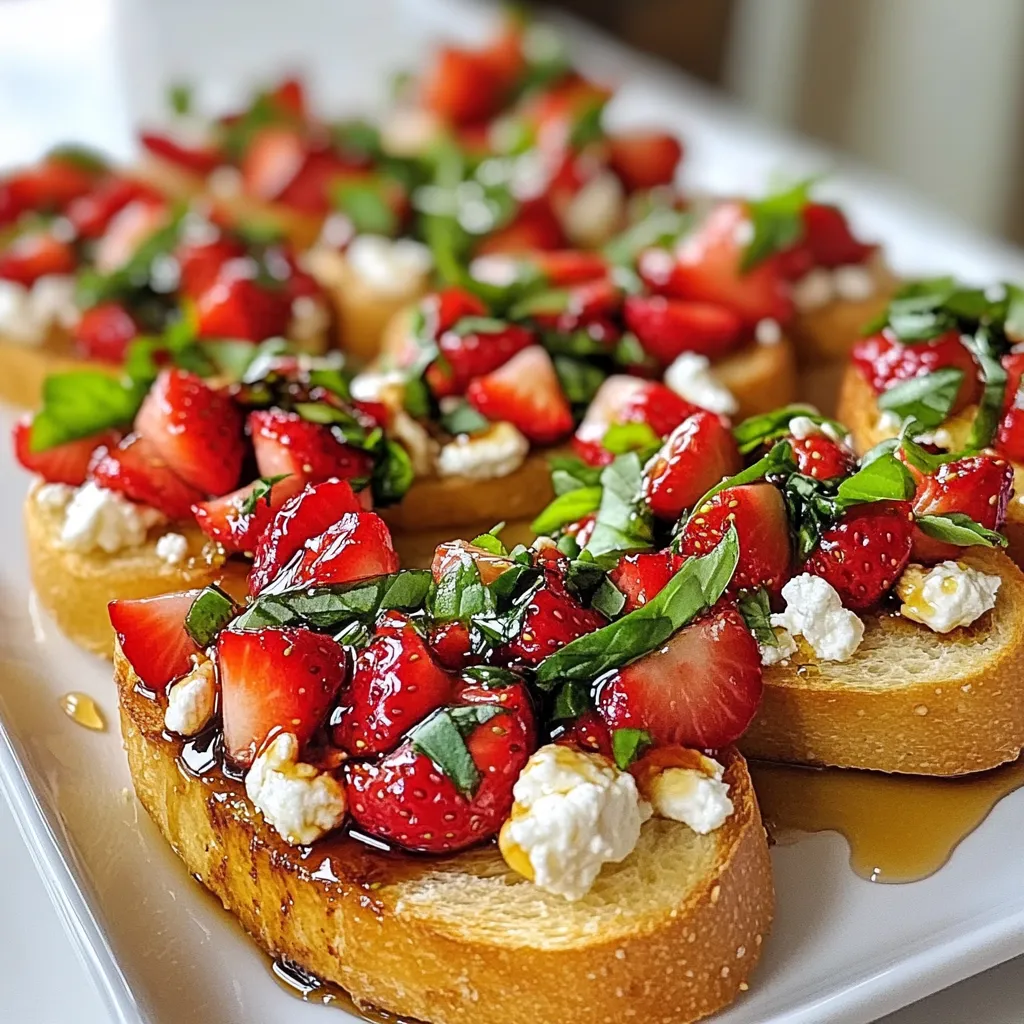
Looking for a fresh and tasty appetizer? Let me introduce you to Strawberry Basil Bruschetta! This simple dish combines sweet

- 4 medium sweet potatoes - 2 cups cooked chicken, shredded - 1/2 cup buffalo sauce (adjust to taste) - 1/2 cup plain Greek yogurt - 1/2 cup shredded cheddar cheese - 1/4 cup green onions, sliced - Olive oil for drizzling - Celery sticks - Salt and pepper to taste - Additional buffalo sauce When I make Buffalo Chicken Stuffed Sweet Potatoes, I love using sweet potatoes. They bring a natural sweetness and a creamy texture. You will need four medium sweet potatoes for this recipe. Next, I use cooked, shredded chicken. This gives the dish protein and heartiness. About two cups will do the trick. Buffalo sauce is key here. I suggest starting with half a cup, but feel free to adjust it. You can make it spicier if you like! To balance the heat, I add half a cup of plain Greek yogurt. It gives a creamy touch and cools the spice. Shredded cheddar cheese is a must. It melts beautifully and adds rich flavor. We need half a cup for this recipe. For extra flavor, you can add green onions. Slicing up a quarter cup will brighten the dish. To prepare the sweet potatoes, drizzle them with olive oil and sprinkle salt. This will enhance their flavor while baking. Don’t forget salt and pepper for seasoning. You can also add more buffalo sauce on top for extra kick when serving! {{ingredient_image_1}} 1. Preheat your oven to 400°F (200°C). 2. Wash the sweet potatoes well. Use a fork to poke a few holes in each potato. 3. Place the sweet potatoes on a baking sheet. Drizzle them with olive oil and sprinkle with salt. 4. Bake the sweet potatoes for 45-60 minutes. They should be tender when done. 1. While the sweet potatoes bake, mix the shredded chicken with buffalo sauce in a bowl. Stir well to coat the chicken evenly. 2. When the sweet potatoes are done, take them out of the oven. Let them cool for a few minutes. 3. Carefully slice each sweet potato down the middle. Create a pocket for your filling. 4. Scoop out a bit of the sweet potato flesh and place it in a bowl. Mix this with the buffalo chicken filling until it’s well combined. 1. Spoon the buffalo chicken mixture back into each sweet potato skin. Make sure to mound it nicely. 2. Top each stuffed sweet potato with shredded cheddar cheese. 3. Return the stuffed sweet potatoes to the oven. Bake for another 10-15 minutes until the cheese melts and bubbles. 4. Take them out and garnish with Greek yogurt, sliced green onions, and extra buffalo sauce if you like. To get sweet potatoes just right, check for doneness. Poke them with a fork. They should feel soft. The baking time varies with size. Large sweet potatoes may need more time. Small ones bake faster. Keep an eye on them as they cook. To balance flavors, mix buffalo sauce with Greek yogurt. This mix adds creaminess and cuts heat. You can also try adding spices. Garlic powder or smoked paprika can boost flavor. Just sprinkle in a little and taste as you go. For a beautiful dish, serve the stuffed sweet potatoes on a platter. Garnish them with sliced green onions. Add celery sticks on the side for some crunch. A drizzle of extra buffalo sauce gives a nice touch too. This makes your dish pop and look inviting. Pro Tips Choose the Right Sweet Potatoes: Look for firm, unblemished sweet potatoes for the best texture and flavor. Adjust the Spice Level: Feel free to modify the amount of buffalo sauce according to your heat preference. Keep it Creamy: Mixing Greek yogurt with the buffalo chicken filling not only adds creaminess but also balances the spice. Perfect Cheese Melt: For an extra cheesy topping, broil the stuffed sweet potatoes for the last few minutes of baking. {{image_2}} You can swap the chicken for turkey or tofu. Turkey works great for a leaner dish. Tofu adds a nice plant-based twist. Just make sure to cube the tofu and cook it in the buffalo sauce. This keeps the flavor bold and exciting. If you want a milder taste, try ranch instead of buffalo sauce. Ranch gives a creamy touch that many love. You can also make your own buffalo sauce at home. Combine hot sauce, butter, and a pinch of garlic powder for a simple recipe. Adjust the heat to your liking. Feel free to play with cheese varieties. Pepper jack adds a spicy kick, while mozzarella makes it gooey. Fresh herbs like cilantro or parsley can brighten the dish. You can also mix in veggies like spinach or bell peppers into the filling. This adds nutrition and color. To store leftovers, let the stuffed sweet potatoes cool down first. Place them in an airtight container. They can stay fresh in the fridge for about 3 to 4 days. Make sure to seal the container tightly to keep out moisture. To freeze stuffed sweet potatoes, follow these steps: - Allow the stuffed sweet potatoes to cool completely. - Wrap each one in plastic wrap tightly. - Place the wrapped sweet potatoes in a freezer-safe bag or container. - Label the bag with the date. They can last up to 3 months in the freezer. For the best texture while reheating, use the oven: - Preheat your oven to 350°F (175°C). - Place the stuffed sweet potatoes on a baking sheet. - Cover them with foil to keep moisture in. - Heat for about 20 minutes, or until warmed through. You can also use a microwave, but the oven keeps the skins crispy. To make buffalo chicken stuffed sweet potatoes, follow these steps: 1. Preheat your oven to 400°F (200°C). 2. Wash 4 medium sweet potatoes and poke holes in them with a fork. 3. Place them on a baking sheet, drizzle with olive oil, and sprinkle salt. 4. Bake for 45-60 minutes until tender. 5. Mix 2 cups of shredded chicken with 1/2 cup of buffalo sauce in a bowl. 6. Once the sweet potatoes cool, slice them open to create a pocket. 7. Scoop out some flesh and mix it with the buffalo chicken. 8. Fill the sweet potato skins with the mixture. 9. Top with 1/2 cup of shredded cheddar cheese. 10. Return to the oven for 10-15 minutes until the cheese melts. 11. Garnish with 1/2 cup of Greek yogurt and sliced green onions. This dish is easy and packs a punch of flavor! Yes, you can prepare buffalo chicken stuffed sweet potatoes in advance. Here are some tips: - Cook the sweet potatoes: You can bake the sweet potatoes a day before serving. Store them in the fridge after they cool. - Make the filling: Mix the chicken and buffalo sauce ahead of time. Keep it in the fridge as well. - Assemble before baking: When ready to eat, slice the sweet potatoes, mix with the filling, and top with cheese. Bake them fresh for the best taste. This method saves time and makes meal prep easy! Buffalo chicken stuffed sweet potatoes go well with several sides: - Celery sticks: They add crunch and match the buffalo flavor. - Side salad: A fresh green salad balances the dish. - Roasted veggies: Carrots or broccoli make a healthy side. - Corn on the cob: Sweet corn complements the spicy filling. These sides enhance your meal and make it more satisfying! Buffalo chicken stuffed sweet potatoes are easy and fun to make. We covered ingredients, preparation, and variations. Remember to adjust baking time for sweet potatoes and play with toppings. You can add your own twist with different proteins or sauces. This dish is tasty and can be stored or frozen for later. Enjoy your cooking and share this recipe to impress others with your skills.

Buffalo Chicken Stuffed Sweet Potatoes Delight

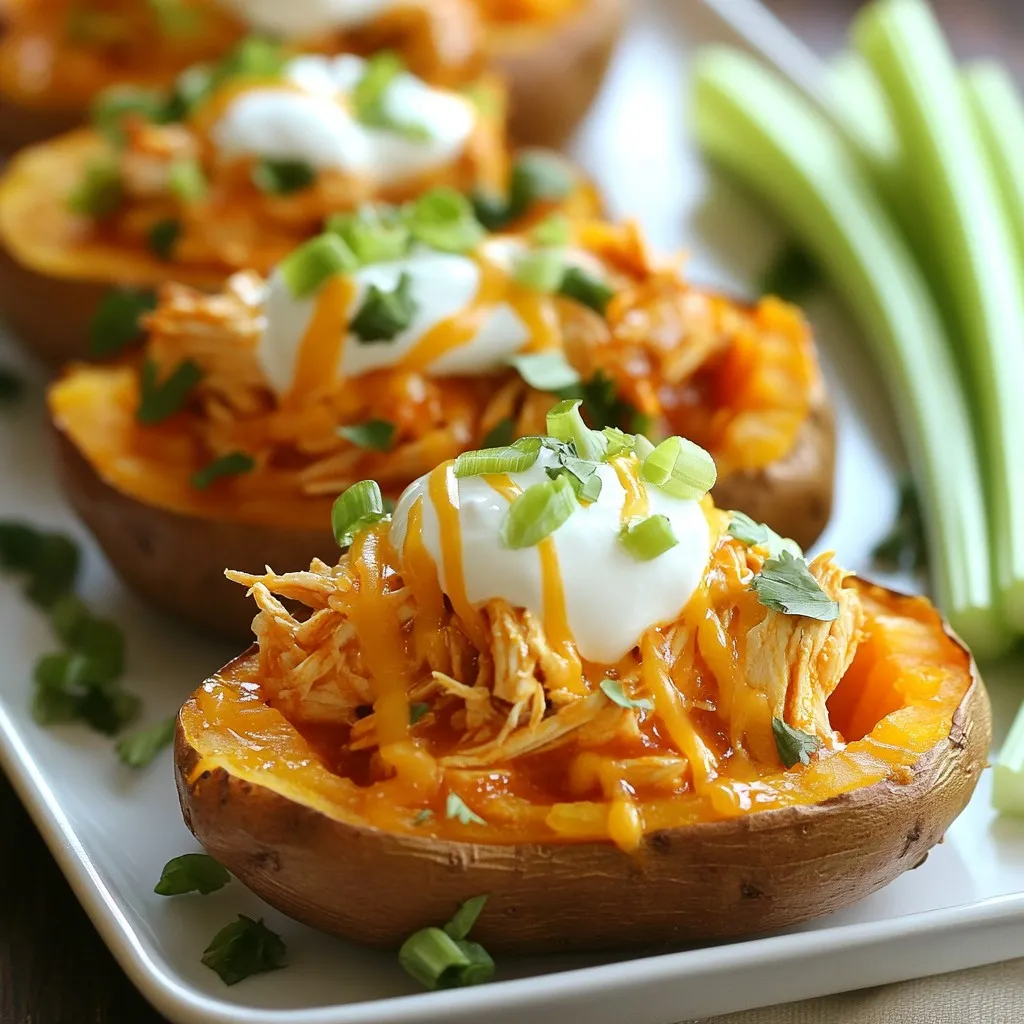
Are you ready to spice up your dinner routine? Buffalo Chicken Stuffed Sweet Potatoes Delight is a game-changing dish that

- 1 pound ground turkey - 1 medium onion, chopped - 2 cloves garlic, minced - 1 bell pepper (any color), chopped - 1 can (15 oz) black beans, drained and rinsed - 1 can (15 oz) kidney beans, drained and rinsed - 1 can (28 oz) crushed tomatoes - 2 tablespoons tomato paste - 2 tablespoons chili powder - 1 teaspoon cumin - 1 teaspoon smoked paprika - 1/2 teaspoon cayenne pepper (adjust to taste) - Salt and pepper to taste - 1 cup corn (fresh, frozen, or canned) - 1 tablespoon olive oil - Fresh cilantro, for garnish - Optional toppings: sour cream, shredded cheese, diced green onions This chili packs a healthy punch. Each serving offers: - Calories: 300 - Protein: 24g - Carbohydrates: 34g - Fiber: 10g - Fat: 10g This dish is high in protein from the turkey and beans. Plus, it has fiber from the beans and corn, making it filling. You can swap ingredients for a twist: - Use ground chicken instead of turkey for a lighter option. - Replace black beans with pinto beans for a different taste. - If you can’t find crushed tomatoes, diced tomatoes work well too. - Fresh herbs like parsley can replace cilantro for a milder flavor. These changes keep the chili tasty while catering to your pantry. {{ingredient_image_1}} First, gather all your ingredients. You will need: - 1 pound ground turkey - 1 medium onion, chopped - 2 cloves garlic, minced - 1 bell pepper, chopped - 1 can (15 oz) black beans, drained and rinsed - 1 can (15 oz) kidney beans, drained and rinsed - 1 can (28 oz) crushed tomatoes - 2 tablespoons tomato paste - 2 tablespoons chili powder - 1 teaspoon cumin - 1 teaspoon smoked paprika - 1/2 teaspoon cayenne pepper - Salt and pepper to taste - 1 cup corn - 1 tablespoon olive oil - Fresh cilantro, for garnish Chop the onion, garlic, and bell pepper. This will add texture and flavor. Drain and rinse the beans to remove excess sodium. Heat a skillet on medium. Add the olive oil. Sauté the onion and bell pepper for about five minutes. Then, add the minced garlic and cook for one more minute. Transfer these veggies to the slow cooker. In the same skillet, brown the ground turkey until fully cooked. This should take about 7 to 10 minutes. Add the turkey to the slow cooker. Now, add the black beans, kidney beans, crushed tomatoes, tomato paste, chili powder, cumin, smoked paprika, cayenne pepper, and corn. Stir everything until mixed well. This step is key for even flavor. Season with salt and pepper to taste. Cover the slow cooker with its lid. Cook on low for 6 to 8 hours. If you’re short on time, you can cook on high for 3 to 4 hours. The chili is done when it’s heated through and the flavors meld together. Serve hot and garnish with fresh cilantro. You can also offer toppings like sour cream or cheese for extra flavor. Enjoy your meal! To boost the flavor of your slow cooker turkey chili, think layers. Start with sautéing the onion and bell pepper in olive oil. This step brings out their natural sweetness. Add garlic at the end to keep its punch. Try using fresh herbs like cilantro or parsley. They add brightness at the end. If you want more heat, adjust the cayenne pepper. Add lime juice for a fresh twist. You can also add a splash of soy sauce or Worcestershire sauce for depth. These small tweaks make a big difference in taste. If your chili turns out too watery, try adding more beans or corn. You can also mix in a little cornmeal to thicken it. If it tastes bland, add more chili powder, cumin, or salt. Taste as you go! If your chili is too spicy, balance it with a dollop of sour cream. It cools down the heat nicely. Don’t worry if the beans are hard. They just need more time to cook. For best results, choose a good slow cooker. Make sure it holds heat well. Always chop your veggies into even pieces. This helps them cook evenly. Layer your ingredients for a richer taste. Start with meat and spices at the bottom, then add veggies and beans. This method keeps flavors strong. Avoid lifting the lid while cooking. Every time you peek, you let heat escape. Lastly, let your chili rest for a few minutes before serving. This allows the flavors to meld beautifully. Pro Tips Use Lean Turkey: Opt for lean ground turkey to keep the chili healthy without sacrificing flavor. Customize the Heat: Adjust the cayenne pepper to your spice preference; start with less and add more if desired. Add Extra Veggies: Enhance nutrition and flavor by adding extra vegetables like zucchini or spinach. Let It Rest: For the best flavor, let the chili sit for 30 minutes after cooking before serving, allowing the flavors to meld. {{image_2}} You can easily make a vegetarian version of slow cooker chili. Start with the same base. Replace the ground turkey with a mix of beans. Use more black beans, kidney beans, or even chickpeas. Add extra veggies like zucchini or mushrooms for texture. You can also add lentils for a hearty feel. Adjust the spices to keep the flavor punchy. You can control the heat level of your chili. For a spicy chili, add more cayenne pepper or diced jalapeños. You could also use hotter chili powder. If you prefer mild, cut the cayenne completely. You can even leave out the chili powder. Always taste as you go to find your perfect balance. Chili is a great dish for using up veggies. Feel free to mix in corn, carrots, or even sweet potatoes. Bell peppers add color and sweetness, but you can try others, too. Green beans or spinach stir in nicely right before serving. Experimenting with veggies keeps each pot unique and delicious. After cooking your chili, let it cool first. Place it in an airtight container. Store it in the fridge for up to five days. Make sure to label the container with the date. This will help you keep track of how long it has been stored. You can freeze chili for longer storage. Use freezer-safe containers or bags. Chili can last up to three months in the freezer. When you're ready to eat it, thaw it in the fridge overnight. Reheat in the microwave or on the stove until it's hot. Stir well to ensure even heating. Always store leftovers within two hours of cooking. This keeps your food safe to eat. If you leave it out longer, bacteria can grow. Divide large amounts into smaller containers. This helps cool the chili faster and keeps it fresh. Enjoy your tasty leftovers! To add more heat, use more cayenne pepper. Start with one teaspoon. Taste it. If you want more spice, add more. You can also add chopped jalapeños or hot sauce. Both will boost the heat and flavor. Adjust to fit your taste! Yes, you can use ground beef, chicken, or turkey. Each meat gives a different flavor. If you use beef, choose lean cuts to keep it healthy. For chicken, use ground or diced breast. Each option will still taste great in the chili. Turkey chili pairs well with many sides. Try serving it with cornbread or rice. You can also serve it with tortilla chips for a nice crunch. A fresh salad is a great side too. Top your chili with cheese or sour cream for extra flavor! Turkey chili lasts about 3 to 4 days in the fridge. Store it in an airtight container. Make sure it cools down first before you store it. If you can’t eat it in time, freeze it! It will last 2 to 3 months in the freezer. In this blog post, we explored how to make delicious slow cooker turkey chili. We covered all the key ingredients, helpful cooking steps, and gave specific tips to enhance flavor. You learned about tasty variations and safe storage methods. Slow cooking is a fun way to create tasty meals easily. With the right tips, you’ll impress your family and friends with your chili skills. Enjoy your cooking adventure!

Savory Slow Cooker Turkey Chili Simple Flavor Booster

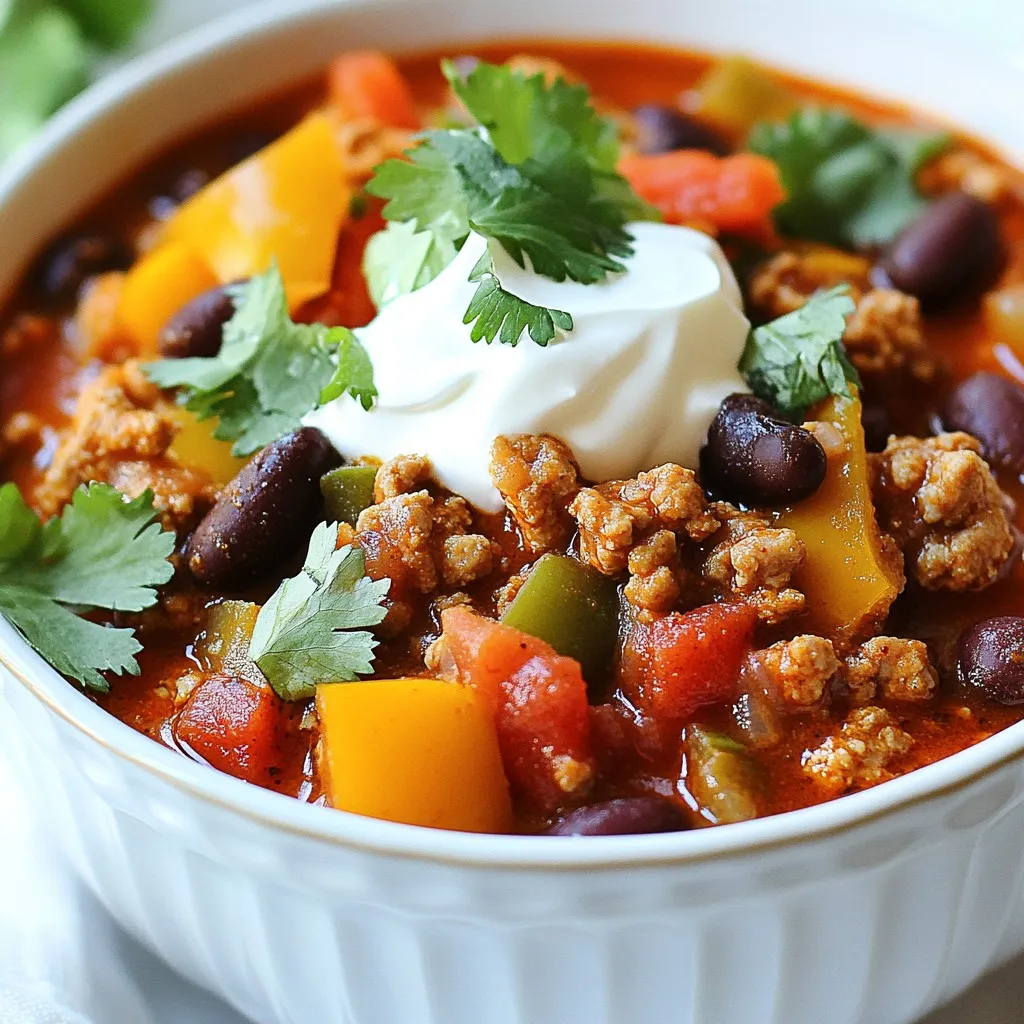
Get ready for a cozy meal! Today, I’ll show you how to make savory Slow Cooker Turkey Chili. This dish

- 2 large sweet potatoes, diced - 1 lb chicken sausage or turkey sausage, sliced The star of this dish is the sweet potatoes. Their natural sweetness pairs well with the savory sausage. I love using chicken or turkey sausage for a lighter option. The sausage brings great flavor and protein to the meal. - 1/4 cup honey - 4 cloves garlic, minced - 2 tablespoons olive oil - 1 teaspoon smoked paprika - 1/2 teaspoon cayenne pepper (optional, for heat) - Salt and pepper to taste These seasonings make the dish truly special. Honey adds sweetness, while garlic gives depth. Olive oil helps everything roast nicely. Smoked paprika adds a hint of smokiness. Cayenne pepper gives a bit of heat, but you can skip it if you prefer milder flavors. Don’t forget the salt and pepper; they balance the dish. - Fresh parsley, chopped (for garnish) - Optional spices Fresh parsley adds a pop of color. It also brightens the flavors. You may add other spices if you like. Experiment with what you have on hand. Keep it simple or get creative! {{ingredient_image_1}} - Dicing Sweet Potatoes Start by peeling the sweet potatoes. Cut them into small cubes. Aim for even pieces. This helps them cook quickly and evenly. - Slicing Sausage Take your chicken or turkey sausage. Slice it into rounds. You want each piece to be about half an inch thick. This size ensures they cook well. - Mixing Ingredients Together In a bowl, add honey, minced garlic, olive oil, smoked paprika, and cayenne pepper if you like heat. Stir everything together until combined. This mixture is key for flavor. - Adjusting Flavors Taste the mixture. If you want more sweetness, add a bit more honey. If you like spice, add more cayenne. Keep adjusting until it suits your taste. - Preparing the Baking Sheet Line a baking sheet with parchment paper. This makes for easy cleanup later. Spread the diced sweet potatoes and sausage on the sheet evenly. - Roasting Time and Temperature Preheat your oven to 400°F (200°C). Roast the mixture for 25-30 minutes. Stir halfway through to ensure even cooking. The sweet potatoes should be tender and slightly caramelized. The sausage should be heated through and flavorful. When picking sausage, I often choose between chicken and turkey. Both options are tasty and lean. Chicken sausage has a milder flavor. Turkey sausage offers a slightly richer taste. You can also try flavored varieties. Look for options with herbs or spices for extra zest. Spacing is key on the baking sheet. Make sure to spread the sweet potatoes and sausage evenly. This helps them cook well without steaming. I always leave some space between pieces. It allows hot air to circulate. To check for doneness, pierce a sweet potato with a fork. It should be soft and tender. The sausage should be heated through and slightly browned. Pair this dish with a fresh salad or steamed veggies. The bright flavors complement the sweetness of the potatoes. For plating, arrange the sausage and sweet potatoes neatly. Sprinkle fresh parsley on top for a pop of color. This adds a nice touch and freshness to your meal. Pro Tips Choose the Right Sausage: Opt for chicken or turkey sausage that is flavorful and juicy to enhance the overall taste of the dish. Cut Sweet Potatoes Evenly: Dicing the sweet potatoes into uniform pieces ensures they cook evenly and achieve the perfect texture. Check Roasting Progress: Stir the mixture halfway through roasting to ensure even caramelization and prevent burning. Fresh Herbs for Garnish: Adding fresh parsley just before serving brightens the dish and adds a refreshing flavor contrast. {{image_2}} You can switch up the sweet potatoes. Try other root veggies like carrots or parsnips. They give a nice twist. You can also add bell peppers or onions. These choices add color and a fresh taste. If you want a change, use pork sausage instead of chicken or turkey. Pork adds a rich flavor. For a meatless meal, consider plant-based sausage. It has great taste and works well with the other ingredients. You can change the sweetness level of the dish. Add more or less honey based on your taste. If you like heat, increase the cayenne pepper. This will give the dish a spicy kick. Adjust these to make this meal just right for you. - Refrigeration Tips: Place any leftover honey garlic sausage sweet potatoes in an airtight container. Store them in the fridge for up to three days. Make sure to let them cool before sealing. This keeps the flavors fresh. - Freezing Instructions: To freeze, portion the leftovers into freezer-safe bags. Squeeze out any air and seal tightly. You can freeze them for up to three months. When ready to eat, thaw overnight in the fridge before reheating. - Best Techniques for Retaining Flavor: The best way to reheat is in the oven. Preheat it to 350°F (175°C). Spread the sweet potatoes and sausage on a baking sheet. Heat for about 15-20 minutes until hot. This method keeps everything crispy and tasty. - Suggested Kitchen Appliances: You can also use a microwave for quick reheating. Place the dish in a microwave-safe bowl and cover it. Heat in 1-minute intervals, stirring in between. This helps avoid cold spots. A skillet works well too. Just add a bit of oil and heat over medium heat until warm. Yes, you can use regular sausage. Just keep in mind, it will change the taste. Honey garlic sausage adds sweetness and flavor. You might miss the sweet notes. Try adding a bit of honey to regular sausage. This will mimic the flavor of honey garlic sausage. Absolutely! This dish is great for meal prep. You can make it ahead of time and store it. Just follow these tips: - Cook in bulk: Make a double batch to have plenty of servings. - Cool before storing: Let the dish cool down before placing it in containers. - Use airtight containers: This keeps the food fresh and tasty in the fridge. - Reheat properly: Use the oven or microwave to reheat, not the stove. This dish pairs well with many sides. Here are some ideas: - Steamed broccoli: Adds a nice crunch and color. - Green salad: A fresh side to balance the meal. - Rice or quinoa: For a hearty finish. - Crusty bread: Great for soaking up the sauce. These sides make the meal even more filling and enjoyable. This dish blends honey garlic sausage with sweet potatoes for tasty comfort food. You can easily prep the ingredients, make a flavorful mixture, and roast them perfectly. Remember to choose the right sausage and ensure everything cooks evenly. Feel free to experiment with different vegetables and proteins. Store leftovers properly, and enjoy reheating them later. With these tips and variations, you can create a delicious meal tailored to your taste. Try it out and discover your favorite combinations!

Honey Garlic Sausage Sweet Potatoes Flavorful Meal

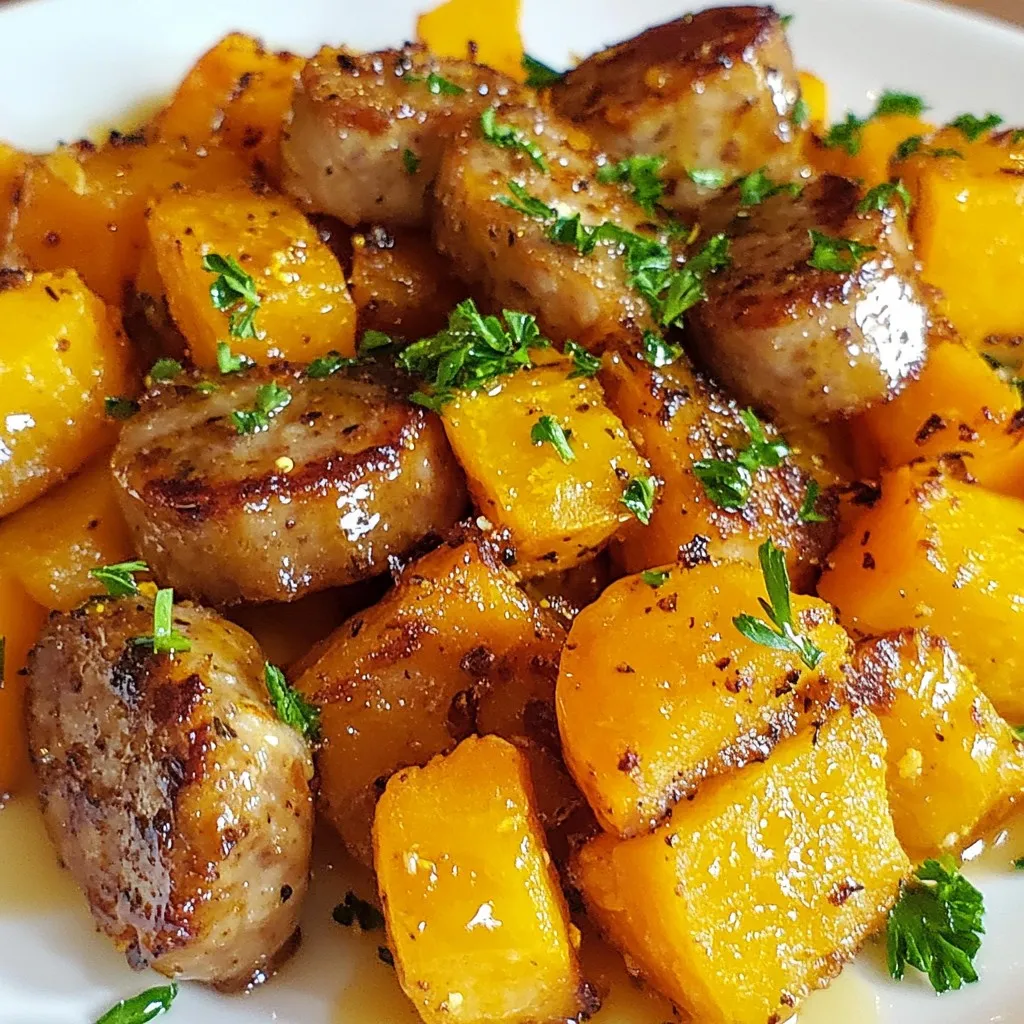
Are you ready to elevate your dinner game? Honey Garlic Sausage Sweet Potatoes combines rich flavors and simple prep for

- 1 cup elderflower syrup - 2 cups sparkling water - 1 cup fresh orange juice - 1/2 cup fresh lemon juice - Zest of 1 lemon - Fresh mint leaves for garnish - Ice cubes To create this bright and refreshing drink, I love using elderflower syrup. It brings a sweet, floral note that pairs well with citrus. For the bubbles, sparkling water is a must. I choose fresh orange juice for sweetness and fresh lemon juice for that zesty kick. Don't forget the lemon zest; it adds a burst of flavor! Fresh mint leaves make a lovely garnish and add a bright aroma. Ice cubes are essential to keep this drink cool and refreshing. - Large pitcher - Measuring cups - Mixing spoon - Serving glasses You will need a large pitcher to mix everything together. Measuring cups help you get the right amounts of each ingredient. A mixing spoon will ensure that all flavors combine well. Finally, have some serving glasses ready to pour your delightful drink into. {{ingredient_image_1}} First, take a large pitcher. In it, combine 1 cup of elderflower syrup, 1 cup of fresh orange juice, and 1/2 cup of fresh lemon juice. Stir well to mix all the flavors together. This step is key for a balanced taste. The elderflower brings sweetness, while the citrus adds freshness. Next, add the zest of 1 lemon into the pitcher. This adds a nice citrus kick. Stir the mixture again to blend the zest in well. Now, fill each glass with ice cubes. Pour the elderflower citrus mixture over the ice until each glass is about half full. This will keep your drink cool and refreshing. Now it’s time for the fizz! Top each glass with 2 cups of sparkling water. This adds a bubbly finish. You can adjust the amount based on how fizzy you like your drink. Stir gently with a spoon to mix everything, but be careful not to lose the fizz. Finally, garnish each drink with a few fresh mint leaves. This adds a pop of color and a lovely aroma. Enjoy your Winter Gin Elderflower Cocktail! To make the best Winter Gin Elderflower Cocktail, you can adjust the fizz level. If you like more bubbles, add more sparkling water. For less fizz, use less water. This gives you control over how refreshing the drink is. Choosing the right glassware also matters. Tall glasses show off the pretty colors. They also give room for the drink to breathe. Use clear glass to let the bright drink shine. Decorative garnishes add charm to your cocktail. Fresh mint leaves not only look nice but also smell great. You can also use slices of orange on the rim. This gives guests a hint of what’s inside. Visual appeal is key. Adding a slice of lemon or orange inside the drink brightens it. These touches make your cocktail look festive and inviting. This cocktail is perfect for winter gatherings. Serve it at holiday parties or cozy nights in. It brightens up any occasion with its fresh taste. Pair your cocktail with winter snacks. Cheese platters or roasted nuts work well. They enhance the drink and make for a delightful snack while you sip. Pro Tips Chill Your Ingredients: For the best refreshment, ensure that your elderflower syrup, juices, and sparkling water are chilled before mixing. This keeps your drink cool and enjoyable without diluting it with too much ice. Experiment with Flavors: Feel free to add other citrus juices like grapefruit or lime for a unique twist. Mixing different flavors can enhance the drink's complexity and appeal. Use Fresh Ingredients: Always opt for fresh juices and mint leaves over bottled options. Fresh ingredients not only taste better but also add a vibrant color and aroma to your drink. Presentation Matters: To impress your guests, serve the drink in elegant glasses with garnishes like citrus slices or edible flowers. A beautiful presentation elevates the overall drinking experience. {{image_2}} You can change the flavors to make it unique. Try using grapefruit juice instead of orange juice. It gives a nice tang. You can also use lime juice for a different taste. If you want herbs, add fresh rosemary. It pairs well with elderflower. Just a sprig will do. Want to enjoy this drink without alcohol? You can make a mocktail version. Use the same elderflower syrup and juices. Just leave out the gin. For added sweetness, use agave syrup or honey syrup. These will keep it tasty even without alcohol. Winter is a great time to get creative. You can add spices like cinnamon or nutmeg. A pinch will warm up your drink. For a holiday touch, garnish with cranberries or a cinnamon stick. This makes the drink festive and fun. To keep your Winter Gin Elderflower Cocktail fresh, store leftovers right. Use an airtight container for best results. A glass jar works well. Make sure to seal it tightly to keep out air. This helps maintain the flavor and fizz. The cocktail stays fresh for about 2 days in the fridge. After that, it may lose some sparkle. Watch for signs of spoilage like off smells or a change in color. If it smells bad or looks cloudy, it’s time to toss it. You can get creative with leftover ingredients! Use extra elderflower syrup in yogurt or drizzle it over pancakes. You can also mix leftover citrus juices into smoothies. For a fun twist, make a refreshing sorbet using the extra juices. You can use a mix of honey and lemon juice. This blend gives a sweet and tart taste. Another option is to try rose syrup. It adds a floral note too. You might also consider simple syrup with a splash of lemon. Each choice changes the drink’s flavor, so pick what you like best! Yes, you can prep the juice mix early. Just mix the elderflower syrup, orange juice, and lemon juice. Store it in the fridge. When ready to serve, add the sparkling water and ice. This keeps the fizz fresh and bubbly. Just remember to garnish with mint right before serving! For a winter cocktail, I recommend using a gin with a strong flavor. Look for one with herbal or spice notes. A good choice is a London dry gin. It blends well with elderflower. Another excellent option is a floral gin. This type enhances the drink's bright and refreshing taste. This guide covered how to make a refreshing elderflower cocktail. We explored key ingredients, equipment, and steps, ensuring a flavorful mix. I shared tips on serving, different variations, and storage advice. Remember, you can get creative with flavors and garnishes. Enjoy this drink at any gathering or cozy night in. Mix it up and let your taste shine!

Winter Gin Elderflower Cocktail Refreshing and Bright

Looking for a bright cocktail to lift your spirits this winter? The Winter Gin Elderflower Cocktail combines refreshing elderflower syrup

- 1 lb ground chicken - 1/2 cup breadcrumbs - 1/4 cup feta cheese, crumbled - 1/4 cup tzatziki sauce - 1/4 cup fresh parsley, finely chopped - 2 cloves garlic, minced - 1 teaspoon dried oregano - 1 teaspoon lemon zest - Salt and pepper to taste Ground chicken is the star of this dish. It is lean and tender. Fresh herbs and spices give these meatballs their Greek flair. Feta cheese adds a creamy bite, while breadcrumbs help bind the meatballs. Tzatziki sauce, a cool yogurt dip, adds flavor and moisture. Garlic, oregano, and lemon zest bring a fresh taste. Be sure to season with salt and pepper for balance. - 1 tablespoon olive oil - Tzatziki sauce (for serving) Olive oil is crucial for cooking these meatballs. It prevents sticking and adds richness. Tzatziki sauce is perfect for dipping. It enhances the flavor and makes each bite special. - Alternative meats or vegetables - Gluten-free options for breadcrumbs You can swap ground chicken for turkey or beef if you want. For a veggie option, try mashed chickpeas or lentils. If gluten is a concern, use gluten-free breadcrumbs. This way, everyone can enjoy these tasty meatballs. {{ingredient_image_1}} To make Greek chicken meatballs, start by mixing the meatball mixture. In a large bowl, combine: - 1 lb ground chicken - 1/2 cup breadcrumbs - 1/4 cup feta cheese, crumbled - 1/4 cup tzatziki sauce - 1/4 cup fresh parsley, finely chopped - 2 cloves garlic, minced - 1 teaspoon dried oregano - 1 teaspoon lemon zest - Salt and pepper to taste Mix everything well. Be gentle while mixing. Overmixing can make the meatballs tough. Next, shape the mixture into 1-inch meatballs. Make sure they are even in size for even cooking. Now, let’s move on to the cooking process. Preheat a large skillet over medium heat. Add 1 tablespoon of olive oil. Once the skillet is hot, add the meatballs. Do not overcrowd the skillet. Cook in batches if necessary. Sear the meatballs for about 5-7 minutes. Turn them occasionally. You want them golden brown on all sides. After searing, reduce the heat to low. Cover the skillet and let the meatballs cook for another 5-10 minutes. They should reach an internal temperature of 165°F. This ensures they are fully cooked and safe to eat. Once cooked, remove the meatballs from the skillet. Let them rest for a couple of minutes. This step keeps them juicy. Serve the meatballs drizzled with additional tzatziki sauce. You can also garnish with extra parsley for a fresh touch. Enjoy your flavorful Greek chicken meatballs! To make your meatballs tender, avoid overmixing the meat. When you mix the ingredients, combine them just until they come together. If you mix too much, the meatballs can become tough. The cooking temperature is key. Start with medium heat to get a nice sear on the outside. After that, lower the heat to let them cook through. The inside should reach 165°F for safety. Want more flavor? Consider adding spices like paprika or cumin. These spices add warmth and depth. You can also try fresh mint or dill for a more vibrant taste. For Greek flair, add more lemon zest or a splash of lemon juice. This brightens the dish and brings out the other flavors. Pair your Greek chicken meatballs with a fresh Greek salad. The crisp veggies and tangy dressing balance the meatballs well. For drinks, consider serving a crisp white wine or a light beer. These drinks complement the flavors without overpowering them. Pro Tips Don’t Overmix: Mix the ingredients until just combined to keep the meatballs tender and avoid a dense texture. Use Fresh Ingredients: Fresh parsley and garlic enhance the flavor significantly, making your meatballs more aromatic and delicious. Cook in Batches: Avoid overcrowding the skillet to ensure even cooking and browning of the meatballs. Check Doneness: Always use a meat thermometer to confirm the internal temperature reaches 165°F for safe consumption. {{image_2}} For these Greek chicken meatballs, you can mix things up with different meats. If you want a leaner option, try ground turkey. For a richer taste, ground beef works well too. If you prefer plant-based meals, use lentils or chickpeas. These substitutes keep the meatballs tasty and satisfying. You can change the flavor of your meatballs by using different herbs. Try fresh dill or mint for a bright twist. You can also add veggies like grated zucchini or chopped spinach to the mix. This boosts nutrition and adds moisture, making your meatballs even better. There are many fun ways to serve your meatballs. Wrap them in a warm pita with fresh veggies and tzatziki for a flavorful meal on the go. You can also create a meatball bowl. Place the meatballs over rice or quinoa, and top with tzatziki and a sprinkle of herbs. This makes for a hearty, satisfying dish. To store leftovers, let the meatballs cool first. Place them in an airtight container. You can keep them in the fridge for 3 to 4 days. Make sure to label the container with the date. This way, you know when to use them. For freezing, wrap the meatballs in plastic wrap or foil. Then, place them in a freezer-safe bag. They can stay frozen for up to 3 months. When you want to eat them, thaw them in the fridge overnight. Reheat them in a skillet over low heat until hot. You can also microwave them for a quick option. You can make the meatballs ahead of time. Prepare them and store them in the fridge for up to 24 hours before cooking. For quick reheating, use the microwave or a skillet. Just heat until warmed through. This makes it easy to enjoy a tasty meal on a busy day! You can cook chicken meatballs in two main ways: in the oven or on the skillet. - Oven: Baking meatballs in the oven gives them a nice, even cook. Preheat your oven to 400°F. Place the meatballs on a baking sheet lined with parchment paper. Bake for about 20 minutes or until golden brown. - Skillet: Cooking meatballs on the skillet allows for a great sear. Heat olive oil in a skillet over medium heat. Sear the meatballs for 5-7 minutes until they turn golden. Then, lower the heat, cover, and cook for another 5-10 minutes. Both methods work well, but I prefer the skillet for extra flavor from the searing. Yes, you can make Greek chicken meatballs ahead of time. Here are some options for meal prep: - Cook and Store: Prepare and cook the meatballs. Once cooled, place them in an airtight container. They can stay in the fridge for about 3-4 days. - Raw and Freeze: Shape the meatballs but do not cook them. Place them on a baking sheet to freeze for a couple of hours. After they are firm, transfer them to a freezer bag. You can freeze them for up to 3 months. Making them ahead saves time and is great for busy days. To check if meatballs are fully cooked, here are two methods: - Checking Internal Temperature: Use a meat thermometer. The internal temperature needs to reach 165°F for safety. - Visual Cues: Look for a nice golden brown color on the outside. The juices should run clear when you cut one open. If the meat is still pink, cook it a bit longer. These steps help ensure your meatballs are safe to eat and delicious! In this post, we explored the art of making Greek chicken meatballs. We discussed the key ingredients, like ground chicken, fresh herbs, and spices. I showed you how to prepare and cook the meatballs, plus tips for perfect tenderness and flavor. Remember, you can customize these meatballs to suit your tastes. Try different meats or add veggies. Store leftovers properly for later enjoyment. With these steps, you’ll create tasty meatballs your family will love. Enjoy cooking!

Greek Chicken Meatballs Flavorful and Easy Recipe

If you’re looking for a delicious yet simple recipe, I’ve got you covered! Greek chicken meatballs are packed with flavor

Older posts
Newer posts
← Previous Page1 … Page140 Page141 Page142 … Page150 Next →

dsad

© 2025 Emmas Dish • Built with GeneratePress

Our Policies

  • Copyright Policy
  • Cookie Policy
  • GDPR Policy
  • Privacy Policy
  • Disclaimer
  • Terms Of Use

More Information

  • Home
  • About
  • Contact
  • Appetizers
  • Dessert
  • Dinner
  • Drinks
©2025, Emmas Dish About Back To Top