Skip to content
DisclaimerTerms Of UseGDPR PolicyCookie Policy

Emmas Dish

  • Home
  • Drinks
  • Appetizers
  • Dinner
  • Dessert
  • About
  • Contact
  • Privacy Policy
DisclaimerTerms Of UseGDPR PolicyCookie Policy

Emma

Here’s what you need to make Coconut Lime Chicken. Each ingredient brings its own special taste. - 4 boneless, skinless chicken breasts - 1 can (13.5 oz) coconut milk - 2 tablespoons fresh lime juice - Zest of 1 lime - 2 garlic cloves, minced - 1 tablespoon fresh ginger, grated - 2 teaspoons honey - 1 teaspoon ground cumin - Salt and pepper to taste - 2 tablespoons fresh cilantro, chopped (for garnish) - Lime wedges (for serving) This list gives you the flavors for a bright and tasty dish. The chicken is tender and juicy. The coconut milk adds creaminess while the lime adds a zing. Fresh garlic and ginger lift the taste. Honey balances the flavors, and cumin adds warmth. Don't forget the cilantro for freshness and lime wedges to serve. This dish is simple yet full of fun flavors. Enjoy cooking! {{ingredient_image_1}} To make the marinade, start by gathering your ingredients. You need coconut milk, fresh lime juice, lime zest, minced garlic, grated ginger, honey, ground cumin, salt, and pepper. In a bowl, whisk these ingredients together until they blend well. The coconut milk gives a creamy base while lime adds a bright flavor. This mix will make your chicken taste amazing. Next, take your chicken breasts and place them in a resealable plastic bag or a dish. Pour the prepared marinade over the chicken. Make sure all the chicken is covered. Seal the bag or cover the dish. For best results, let it marinate in the fridge for at least 30 minutes. If you have time, marinate it for up to 2 hours. This step makes the chicken juicy and flavorful. Now it’s time to cook! Preheat your grill or skillet over medium heat. If you are grilling, lightly oil the grates to prevent sticking. Remove the chicken from the marinade and let any excess drip off. Grill or cook the chicken for about 6-7 minutes on each side. The chicken is done when it reaches an internal temperature of 165°F (75°C). This ensures it is safe and tender. While the chicken cooks, take the leftover marinade and pour it into a small saucepan. Bring it to a boil, then lower the heat and let it simmer for about 5 minutes. This process helps the sauce thicken and intensify the flavors. Once your chicken is cooked, drizzle this thickened sauce over it. Garnish with chopped cilantro and serve with lime wedges on the side. This adds a fresh touch to each bite. Marinating is key for tasty Coconut Lime Chicken. Use a mix of coconut milk, lime juice, lime zest, garlic, ginger, honey, cumin, salt, and pepper. This blend adds great flavor. It’s best to marinate the chicken for at least 30 minutes. For more taste, try marinating for up to 2 hours. Always keep the chicken in the fridge while marinating. This helps keep it safe and fresh. You can cook Coconut Lime Chicken in two ways: grilling or using a skillet. Grilling gives it a nice smoky flavor. Make sure to lightly oil the grill grates first. Cook each side for about 6-7 minutes. Use a meat thermometer to check that it's 165°F (75°C). If you choose a skillet, preheat it over medium heat. Add a little oil before placing the chicken in the pan. Both methods work well, so choose what you prefer! To serve Coconut Lime Chicken, drizzle the thickened marinade over the chicken for extra taste. Garnish with fresh cilantro. The bright green color looks lovely and adds fresh flavor. Serve with lime wedges on the side for a zesty kick. Pair this dish with rice or a fresh salad. This adds texture and balance. Enjoy your meal with family or friends; it’s sure to impress! Pro Tips Marinate for Maximum Flavor: Allow the chicken to marinate for the full 2 hours if possible to enhance the flavor and tenderness. Choose the Right Cooking Method: Grilling adds a wonderful smoky flavor, but you can also use a skillet or oven if you prefer. Thicken the Sauce: Simmering the reserved marinade not only thickens it but also ensures it’s safe to eat as it cooks off any raw chicken juices. Garnish for Presentation: Fresh cilantro and lime wedges not only add color but also enhance the dish's flavor profile. {{image_2}} You can swap chicken for other proteins. Tofu works well for a veggie option. It absorbs flavors nicely. Use firm tofu for the best result. Just cut it into cubes. Marinate it like chicken for 30 minutes. Then grill or sauté until golden. Shrimp is another tasty choice. Use large shrimp for this recipe. They cook quickly and add a nice touch. Marinate them for just 15 minutes. Then grill or stir-fry until they turn pink. Want to spice things up? Add chili flakes or fresh herbs to the marinade. Chili flakes give a warm kick. Start with a pinch and adjust to taste. Fresh herbs like basil or mint can brighten the dish. Add them to the marinade or as a garnish. They add a fresh, vibrant flavor. You can bake Coconut Lime Chicken for an easy option. Preheat your oven to 375°F (190°C). Place the marinated chicken in a baking dish. Bake for 25-30 minutes or until cooked through. Slow cooking is another great method. Place the chicken and marinade in a slow cooker. Cook on low for 4-6 hours. This method makes the chicken very tender. Feel free to experiment with these variations. Each method and protein brings its own flavor twist! To keep your Coconut Lime Chicken fresh, place any leftovers in an airtight container. Make sure the chicken is cooled down before sealing. This helps prevent moisture buildup. Store the container in the fridge for up to three days. If you want to keep it longer, freezing is a great option. When you're ready to eat your leftovers, reheating is simple. You can use the oven or a skillet. If using the oven, set it to 350°F (175°C). Place the chicken in a baking dish and cover it with foil. Heat for about 15-20 minutes. If you choose a skillet, heat on medium until warm. Add a splash of water to keep it moist. Avoid microwaving, as it can make the chicken tough. Freezing is a great way to save the chicken for later. First, let the chicken cool completely. Place it in a freezer-safe bag or container. Remove as much air as possible. This prevents freezer burn. You can freeze the chicken for up to three months. When ready to enjoy, thaw it overnight in the fridge before reheating. The best way to marinate chicken is to use a mix of flavors. Start with a base like coconut milk, add acid like lime juice, and include herbs and spices. Make sure to coat the chicken well. A resealable bag works great for this. Seal it tightly and let the chicken soak for at least 30 minutes. For more flavor, marinate for up to 2 hours. Yes, you can use low-fat coconut milk. It will still add flavor. However, the sauce might be less creamy. If you want a rich taste, full-fat coconut milk works best. Adjust the other ingredients to balance the flavors if needed. You can store the marinaded chicken in the fridge for up to 2 hours. If it sits longer, it may become too salty or mushy. Always keep it covered to prevent cross-contamination with other foods. Coconut Lime Chicken pairs well with rice, like jasmine or basmati. You can also serve it with fresh veggies, like a salad or grilled zucchini. For a tropical vibe, add pineapple salsa or mango chutney. Don't forget lime wedges for extra zing! This post covered the key steps to make a great Coconut Lime Chicken. You learned about the essential ingredients, how to prepare and cook the dish, and useful tips for best results. I also shared ways to customize the recipe and how to store leftovers safely. You can use these methods to create tasty meals that fit your taste. Enjoy experimenting with flavors and cooking techniques. Simple changes can make each meal unique and fun!

Coconut Lime Chicken Flavorful and Simple Recipe

Are you ready to make a dinner that wows? My Coconut Lime Chicken recipe is here to bring a burst

- 1 pound ground beef or turkey - 1 cup breadcrumbs - 1 large egg - 2 tablespoons green onions, finely chopped - 1 tablespoon soy sauce - 1 teaspoon garlic powder - 1 teaspoon ginger powder - 1 cup sweet chili sauce - 1 tablespoon rice vinegar - 1 teaspoon sesame oil - Salt and pepper to taste - Sesame seeds (for garnish) You need simple and fresh ingredients to make Sweet Chili Crockpot Meatballs. For the main part, choose either ground beef or turkey. Both work great and taste delicious. You will also need breadcrumbs to bind the meat together. The egg helps hold everything in place, so don’t skip it. Next, let’s add some flavor. Chop green onions for a fresh bite. Soy sauce adds a salty depth that makes everything better. Garlic powder and ginger powder bring warmth and zest to the dish. This mix makes each meatball a flavor bomb. Finally, let’s talk sauce. Sweet chili sauce gives a nice sweetness and heat. Combine it with rice vinegar for a tangy twist. Sesame oil adds a nutty note that rounds out the flavors. Don't forget to add salt and pepper to taste. For a pretty finish, sprinkle some sesame seeds on top when serving. This mix of ingredients makes these meatballs a hit every time! {{ingredient_image_1}} - In a large bowl, combine: - 1 pound ground beef or turkey - 1 cup breadcrumbs - 1 large egg - 2 tablespoons green onions, finely chopped - 1 tablespoon soy sauce - 1 teaspoon garlic powder - 1 teaspoon ginger powder - Salt and pepper to taste Mix all these ingredients well. This step is key for great flavor. You want every bite to taste good. Use your hands to mix if needed. - Shape the mixture into small meatballs, about 1 inch in diameter. - Use a baking tray to keep them organized. This helps with easy handling. Try to keep the meatballs the same size. This way, they cook evenly in the crockpot. - In a separate bowl, prepare the sauce by mixing: - 1 cup sweet chili sauce - 1 tablespoon rice vinegar - 1 teaspoon sesame oil - Layer the meatballs in the crockpot. - Pour the sweet chili sauce mixture over the meatballs. Make sure all meatballs are well coated. Cover the crockpot. Cook on low for 6-8 hours or on high for 3-4 hours. The meatballs should be tender and fully cooked. After cooking, gently stir the meatballs in the sauce. This will coat them nicely before serving. Enjoy! To make perfect meatballs, size matters. Aim for each meatball to be about 1 inch wide. This size helps them cook evenly. If they are too big, they may be raw inside. If they are too small, they may dry out. Always use a consistent size for the best results. Cooking in the crockpot can be tricky. Make sure to layer the meatballs gently. Avoid stacking them too high. This helps them cook evenly. You want them to soak up all that tasty sauce without burning. To boost the flavor of your meatballs, try adding fresh herbs. Chopped cilantro or basil can add a nice touch. You can also mix in a splash of lime juice. This gives a bright taste that balances the sweetness of the sauce. Using fresh ingredients improves taste. Fresh green onions give a crisp bite. They also add a pop of color. Fresh garlic instead of garlic powder can deepen the flavor too. Don’t be afraid to experiment! Serving is just as important as cooking. Place the meatballs in a shallow bowl. Drizzle some sauce over them for a nice look. This adds a glossy finish that is very appealing. For garnishing, sprinkle sesame seeds on top. They add crunch and a nutty flavor. Chopped green onions also work well. They give a fresh, vibrant touch. This simple presentation makes your dish look gourmet! Pro Tips Use Fresh Ingredients: Fresh green onions and quality meat will enhance the flavor of your meatballs significantly. Customize the Spice Level: Adjust the amount of sweet chili sauce based on your heat preference; add some crushed red pepper for extra kick. Make Ahead: These meatballs can be made ahead of time and frozen. Just thaw and reheat in the crockpot for a quick meal! Perfect Pairings: Serve your meatballs with steamed rice or noodles and a side of stir-fried vegetables for a complete meal. {{image_2}} You can easily switch up the meat in this recipe. Instead of ground beef, you can use ground turkey. Turkey gives a lighter taste but stays juicy. You can also try ground chicken. This option is lean and still packed with flavor. If you want a plant-based option, look for plant-based meat alternatives. They work well and absorb the sweet chili sauce nicely. The sauce is key to this dish. You can mix sweet chili sauce with pineapple juice for a fruity twist. This adds a nice sweetness and a touch of acidity. Another option is to use mango puree. It brings a tropical flavor that pairs well with the meatballs. If you like heat, experiment with different sauces. You can use spicy chili sauce or add red pepper flakes. This gives you control over the heat level. If you need gluten-free meatballs, you can swap regular breadcrumbs for gluten-free ones. Many brands offer great options that taste just as good. For those watching sodium, try low-sodium soy sauce. This keeps the flavors intact while reducing salt. These small changes make the dish fit your dietary needs without losing taste. After cooking, let the meatballs cool down. Place them in an airtight container. This keeps them fresh. You can store them in the fridge for up to four days. Make sure to label the container with the date. This helps you keep track of freshness. To freeze meatballs, first cool them completely. Then, arrange them in a single layer on a baking sheet. Freeze until solid, about one hour. Once frozen, transfer them to a freezer bag. Remove as much air as possible before sealing. This keeps them fresh for up to three months. When you want to eat them, thaw in the fridge overnight. Reheat them in a saucepan over low heat. You can also use the microwave. Make sure they are warm all the way through. Plan ahead for busy days. You can make these meatballs on the weekend. Store them in the fridge or freeze them for later. They are great for quick meals. Pair them with rice or noodles for a full meal. You can also serve them with veggies. This gives you variety throughout the week. Enjoy different flavors by changing the sides! Yes, you can use frozen meatballs. Cooking from frozen takes longer. For frozen, cook on low for about 8 hours or high for 4-5 hours. Fresh meatballs cook faster and taste better. They take about 6-8 hours on low or 3-4 hours on high. Check the meatballs for a safe internal temperature. They should reach 165°F (74°C). Use a meat thermometer to ensure they are fully cooked. When they are done, they will look brown and juicy. If you cut one open, the center should not be pink. Serve these meatballs with steamed rice or noodles. Both pair well with the sweet chili sauce. You might also add a side of stir-fried veggies for balance. A fresh salad can brighten the meal. For a hearty touch, serve with crusty bread to soak up the sauce. In this article, we explored how to make sweet chili crockpot meatballs. We covered the key ingredients, steps for cooking, and tips for perfecting flavor. I shared storage tips and meal prep ideas, along with answers to common questions. Remember, you can customize this dish to your taste. Make it your own with different proteins and sauces. Enjoy creating tasty meals that are easy and quick!

Sweet Chili Crockpot Meatballs Simple and Tasty Recipe

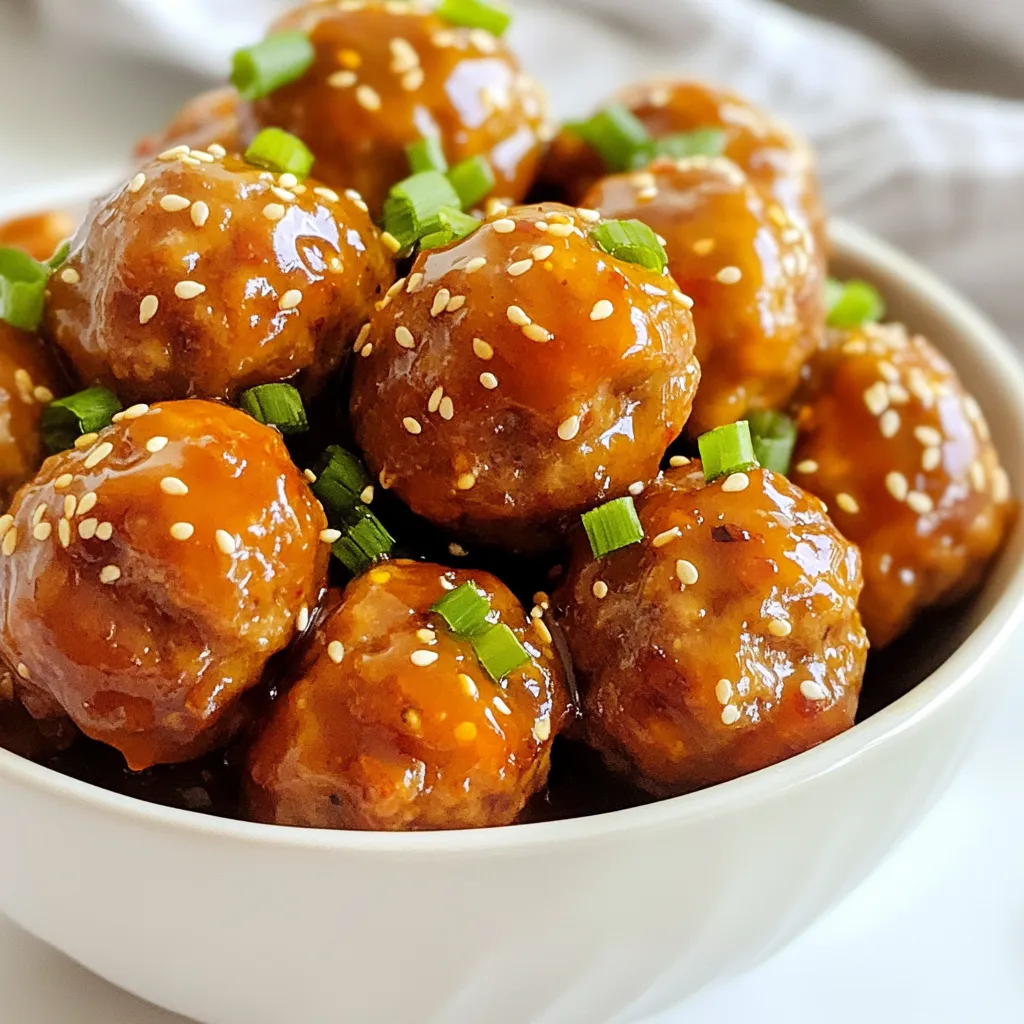
Looking for a quick and tasty dinner idea? My Sweet Chili Crockpot Meatballs recipe is just what you need! With

- 1 cup cornmeal - 1 cup all-purpose flour - 1 tablespoon baking powder - 1/2 teaspoon salt - 1/2 cup shredded sharp cheddar cheese - 1/2 cup jalapeños, finely chopped (fresh or pickled) - 1/4 cup sugar - 1 cup buttermilk - 1/4 cup vegetable oil - 2 large eggs Each ingredient plays a key role in the flavor and texture. The cornmeal gives a nice crunch. The all-purpose flour adds structure. Baking powder helps the muffins rise. Salt enhances the other flavors. The sharp cheddar cheese brings a bold taste. Jalapeños add heat and a bit of bite. Sugar balances the savory flavors. Buttermilk keeps the muffins soft and moist. Vegetable oil adds richness. Eggs bind everything together, making it fluffy. When you gather your ingredients, choose fresh jalapeños for a vibrant taste. If you want less heat, pickled jalapeños work great too. This mix creates a delightful blend of flavors that everyone will love. Make sure to measure each ingredient carefully. This helps ensure the best results. Cooking is about precision as much as it is about creativity. Each bite of these muffins will burst with flavor, making your cooking experience rewarding. {{ingredient_image_1}} - Preheat the oven to 400°F (200°C). - Prepare the muffin tin by lining it with paper liners or greasing it lightly. - In a large bowl, combine 1 cup cornmeal, 1 cup all-purpose flour, 1 tablespoon baking powder, and 1/2 teaspoon salt. Mix these dry ingredients well. - Stir in 1/4 cup sugar, 1/2 cup shredded sharp cheddar cheese, and 1/2 cup finely chopped jalapeños. Make sure everything is evenly mixed. - In a separate bowl, whisk together 1 cup buttermilk, 1/4 cup vegetable oil, and 2 large eggs. Mix until smooth. - Pour the wet ingredients into the dry mixture. Gently fold them together until just combined. It’s okay if the batter has a few lumps. - Divide the batter evenly among the muffin cups, filling each about 2/3 full. - Bake for 15-18 minutes. Check for doneness by inserting a toothpick into the center. It should come out clean. - Let the muffins cool in the pan for about 5 minutes, then transfer them to a wire rack to cool completely. This method gives you soft, flavorful Cheddar Jalapeño Cornbread Muffins. Enjoy these delightful bites fresh from the oven! Mixing is key to a great texture. Overmixing gives you dense muffins. You want a light and fluffy muffin. The ideal consistency is a bit lumpy. A few lumps are okay; they will bake out. You can change the cheese for fun twists. Try pepper jack for more spice. For less heat, use mild cheddar. Adjusting the jalapeño spice level is easy. Use fewer jalapeños for a milder taste. If you want more heat, add extra jalapeños or use fresh ones. These muffins shine with honey butter. A spicy dip pairs well too. For a fun touch, garnish with a jalapeño slice. Serve them warm for the best taste. They look great on a platter, too! Pro Tips Use Fresh Jalapeños: Fresh jalapeños will provide a vibrant flavor and a nice kick. If you prefer less heat, remove the seeds before chopping. Cheese Options: While sharp cheddar is recommended for its bold flavor, feel free to mix in other cheeses like pepper jack or Monterey Jack for a different twist. Don’t Overmix: Overmixing the batter can result in dense muffins. Mix until just combined for a light and fluffy texture. Storage Tips: Store any leftover muffins in an airtight container at room temperature for up to 3 days, or freeze them for longer storage. {{image_2}} You can swap out the all-purpose flour for whole wheat flour. This gives your muffins a nutty taste and adds fiber. If you need gluten-free options, try almond flour or a gluten-free blend. Both work well in this recipe. Adding extra vegetables can enhance your muffins. Chopped bell peppers add sweetness and color. Corn kernels give a nice crunch and sweetness. You can even mix in shredded zucchini for extra moisture. Herbs and spices can boost flavor in your muffins. Try adding a teaspoon of cumin for warmth or a pinch of smoked paprika for a smoky kick. Fresh herbs like cilantro or chives can add a bright note. For a sweet twist, mix in honey or maple syrup. This balances the spice from the jalapeños. You can also add more jalapeños for more heat or use milder peppers for a gentler flavor. If you want mini muffins, bake them for about 10-12 minutes. They cook faster, so check for doneness with a toothpick. Mini muffins are perfect for snacks or parties. Regular muffins work great for breakfast or brunch. Each muffin is a satisfying size, and they look lovely on a serving tray. You can serve them warm, with honey butter or a spicy dip for extra flavor. To keep your Cheddar Jalapeño Cornbread Muffins fresh, store them in an airtight container. This helps maintain their moisture and flavor. You can keep them at room temperature for up to three days. If you want to keep them longer, the fridge is a good option. They can last about a week in the fridge. However, the fridge may dry them out a bit. Freezing is a great way to save muffins for later. To freeze, let the muffins cool completely first. Then, wrap each muffin tightly in plastic wrap. Place them in a freezer-safe bag or container. They can stay fresh in the freezer for about three months. When you want to enjoy a muffin, simply take one out of the freezer. Let it thaw at room temperature for about 30 minutes. You can also heat it in the microwave for about 20 seconds. This makes the muffin warm and soft again, just like fresh! You can make a quick substitute for buttermilk. Mix 1 tablespoon of vinegar or lemon juice with 1 cup of milk. Let it sit for about five minutes. This method works well in recipes. If you have yogurt, you can thin it with some water to use instead. The heat level of the muffins depends on the jalapeños you use. Fresh jalapeños bring a nice kick. If you prefer less heat, choose pickled jalapeños. You can also remove the seeds to lower the spice. These muffins offer a warm, flavorful experience without being overwhelming. Yes, you can make these muffins ahead of time! They stay fresh for a couple of days. Store them in an airtight container at room temperature. If you want to keep them longer, freeze them. Just reheat them in the oven for a few minutes before serving. To check if the muffins are done, insert a toothpick in the center. If it comes out clean or with a few crumbs, they are ready. The tops should also look golden. You can trust your eyes and the toothpick test to avoid underbaking. Absolutely! You can use different cheeses for unique flavors. Monterey Jack or pepper jack adds creaminess and spice. Feta or goat cheese gives a tangy twist. Choose a cheese that you enjoy, and it will work well in these muffins. You now have a clear guide on making delicious jalapeño cheddar muffins. With simple ingredients and steps, baking can be fun. Remember to avoid overmixing for the best texture. Feel free to experiment with flavors and ingredient swaps to match your taste. Store them right, and they’ll stay fresh longer. These muffins are perfect for snacks or gatherings. Enjoy your baking and share your tasty creations with others!

Cheddar Jalapeño Cornbread Muffins Flavorful Delight

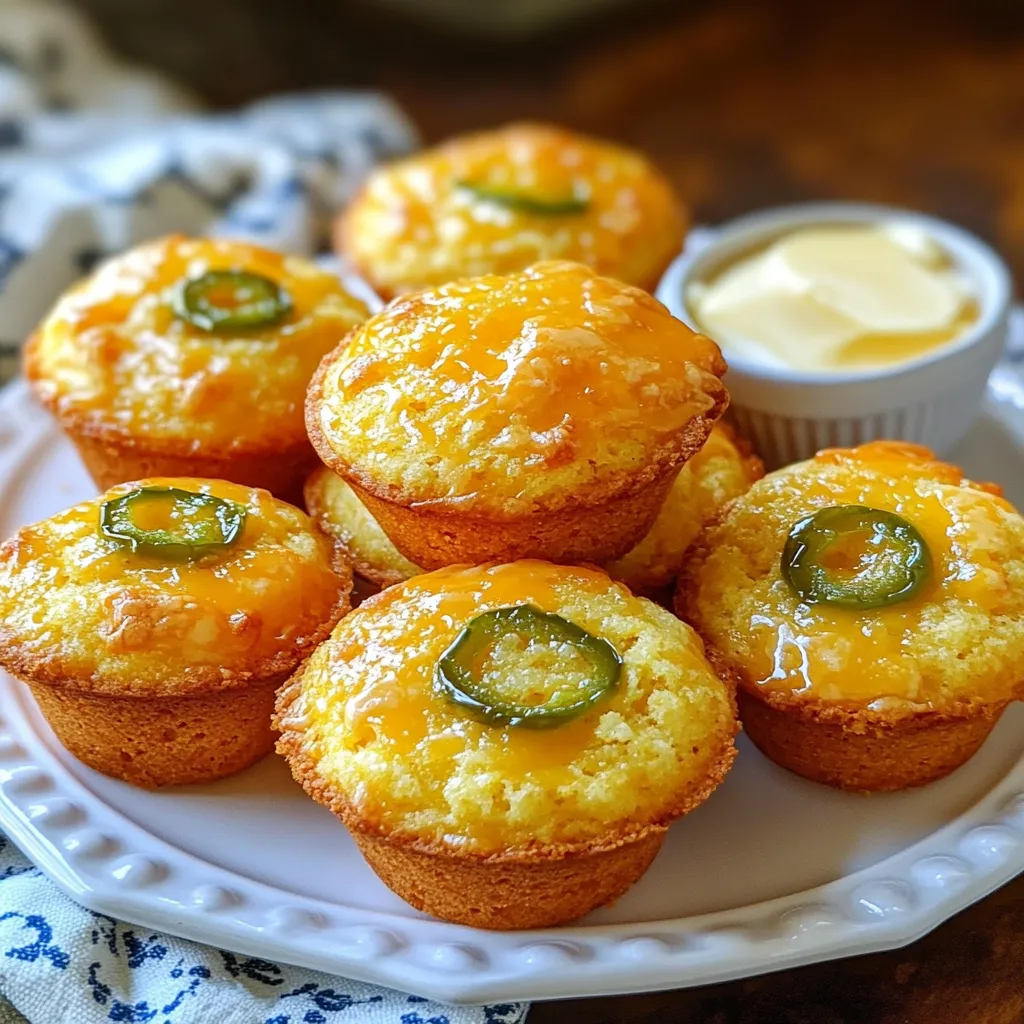
Get ready to spice up your meal with delicious Cheddar Jalapeño Cornbread Muffins! These muffins bring a burst of flavor,

- 2 boneless, skinless chicken breasts - 8 oz fettuccine pasta - 1 tablespoon olive oil - 4 cloves garlic, minced - 1 teaspoon red pepper flakes (optional) - 1 cup heavy cream - 1 cup grated Parmesan cheese - Salt and pepper to taste - Fresh parsley, chopped (for garnish) For this dish, I love using boneless, skinless chicken breasts. They cook fast and stay juicy. Fettuccine pasta works great because it holds onto the sauce well. I add a tablespoon of olive oil to keep the chicken from sticking. Minced garlic adds a rich flavor. If you like a little heat, try red pepper flakes. The creamy sauce comes from heavy cream and grated Parmesan cheese. These ingredients make the dish rich and cheesy. I always season with salt and pepper. Fresh parsley is a must for garnish. It adds color and a nice fresh flavor. Each ingredient plays a key role in making this Garlic Parmesan Chicken and Pasta a favorite family meal. {{ingredient_image_1}} To cook fettuccine pasta, boil a large pot of water. Add a pinch of salt for flavor. Cook the pasta according to the package instructions until it's al dente. This usually takes about 8-10 minutes. Once cooked, drain the pasta but save 1/2 cup of the pasta water. This starchy water helps the sauce stick later. Start by seasoning the chicken breasts with salt and pepper. Heat 1 tablespoon of olive oil in a large skillet over medium heat. Add the chicken breasts and cook for 6-7 minutes on each side. Look for a golden brown color and make sure they are cooked through. After cooking, let the chicken rest for a few minutes. This makes it juicy. Slice the chicken into strips before adding it to the pasta. In the same skillet, lower the heat. Add 4 cloves of minced garlic and 1 teaspoon of red pepper flakes if you like heat. Sauté for about 1 minute. Be careful not to burn the garlic; it should smell great! Next, pour in 1 cup of heavy cream and stir. Bring it to a gentle simmer. Add in 1 cup of grated Parmesan cheese. Stir until it melts into a creamy sauce. If it feels too thick, add a little of that reserved pasta water. Now, it's time to combine everything! Add the cooked fettuccine to the skillet with the sauce. Toss it well to coat each noodle. Finally, stir in the sliced chicken. Mix everything until it’s combined. Taste it, and if needed, add more salt and pepper. Serve hot, and sprinkle with chopped fresh parsley for a bright finish. Enjoy your meal! To make your dish shine, avoid overcooked garlic. Cooking garlic too long makes it bitter. Sauté it just until it turns golden and fragrant. This takes about one minute on low heat. If you see it browning, remove it right away. For the best sauce consistency, start with heavy cream. When you mix in the Parmesan cheese, stir until it melts. If the sauce feels too thick, add a little reserved pasta water. This will help reach your desired creaminess without losing flavor. Meal prepping chicken and pasta can save you time. Cook your chicken breasts ahead of time and store them in the fridge. You can also boil the pasta a day in advance. Just make sure to toss it with a little olive oil to keep it from sticking. For quick cooking methods, use a pressure cooker or an Instant Pot. These tools can cook chicken fast. You can have your meal ready in under 30 minutes, making busy weeknights manageable. For this recipe, use a large skillet. A non-stick skillet works best for easy cleanup. You will also need a pot for boiling the pasta. A good knife and cutting board are must-haves for slicing the chicken. Consider getting a garlic press. It makes mincing garlic easy and fast. A measuring cup for the cream and cheese is also helpful. These tools will streamline your preparation and help you create a delicious meal. Pro Tips Use Fresh Garlic: Freshly minced garlic provides a more vibrant flavor compared to pre-minced options, enhancing the overall taste of your dish. Adjust Creaminess: If the sauce is too thick, gradually add reserved pasta water until you achieve your desired consistency without compromising flavor. Perfectly Cooked Chicken: Ensure the chicken is cooked to an internal temperature of 165°F (75°C) for safety and tenderness, and let it rest before slicing. Garnish for Flavor: Fresh parsley not only adds a pop of color but also a fresh taste that can elevate the dish, so don't skip this step! {{image_2}} You can swap chicken for shrimp or tofu. Shrimp cooks fast and adds a nice flavor. Tofu is a great choice for a vegetarian meal. Both options work well with garlic and cream. For the heavy cream, you can use half-and-half or cashew cream. These alternatives still give a rich texture. If you want less cheese, try using nutritional yeast. It adds a cheesy taste without dairy. Add vegetables to boost nutrition and flavor. Spinach or broccoli are perfect choices. They cook quickly and add color to your dish. You can sauté them with the garlic for a tasty mix. If you like heat, adjust the spice level. Use different peppers like jalapeños or red pepper flakes. This change makes the dish pop and suits your taste. Serve garlic Parmesan chicken over rice or zucchini noodles for a twist. Rice adds a nice base, while zucchini noodles keep it light. Both options pair well with the creamy sauce. You can choose family-style servings or individual plates. Family-style is fun for shared meals. Individual plates can make dinner feel special. Choose what fits your dining style! To store leftovers of garlic Parmesan chicken and pasta, follow these steps: - Cool down: Let the dish cool to room temperature. - Use airtight containers: Place the chicken and pasta in airtight containers. - Refrigerate: Store in the fridge for up to 3 days. This will help keep it fresh. If you want to keep it longer, consider freezing it. In the freezer, it can last up to 3 months. Just remember to label your container with the date. When reheating garlic Parmesan chicken and pasta, keep these tips in mind: - Stovetop method: Place the dish in a skillet over low heat. - Add liquid: Pour in a splash of heavy cream or pasta water. This keeps the sauce creamy. Stir gently until heated through. You can also use the microwave: - Microwave method: Place in a microwave-safe dish. Cover it to prevent drying out. Heat in short intervals, stirring in between. By refreshing the sauce with a bit of liquid, you help restore its smooth texture. Enjoy your meal again! Yes, you can make this dish ahead. Cook the chicken and pasta first. Store them separately in the fridge. This keeps the pasta from getting mushy. You can also prepare the sauce ahead of time. Just reheat it gently when you are ready to serve. To save time, chop the garlic and measure the cheese in advance. This way, your busy week becomes easier. You can easily make this dish gluten-free. Just swap the fettuccine for gluten-free pasta. There are many good brands available now. Look for ones made from rice or chickpeas. These options are tasty and cook well. Always check the package for cooking times, as they may differ from regular pasta. Absolutely! Adding veggies makes your meal healthier. You can toss in spinach, broccoli, or bell peppers. Sauté the veggies with garlic before adding the cream. This way, they stay crisp and colorful. You can also add peas or cherry tomatoes for a sweet bite. Choose your favorites to make it your own. If you need a cheese swap, try these options. Nutritional yeast gives a cheesy flavor without dairy. For a non-dairy option, use cashew cheese. It blends well into the sauce. You can also use pecorino Romano or Grana Padano as substitutes. These cheeses have a similar taste and texture. This blog post covers how to make Garlic Parmesan Chicken and Pasta, step by step. We reviewed key ingredients, cooking methods, and tips for a great meal. You learned about variations, storage, and reheating. In the end, you can make a delicious dish while saving time. Don't hesitate to try your own twists. Cooking should be fun and tasty. Enjoy your kitchen adventure!

Garlic Parmesan Chicken and Pasta Easy Family Meal

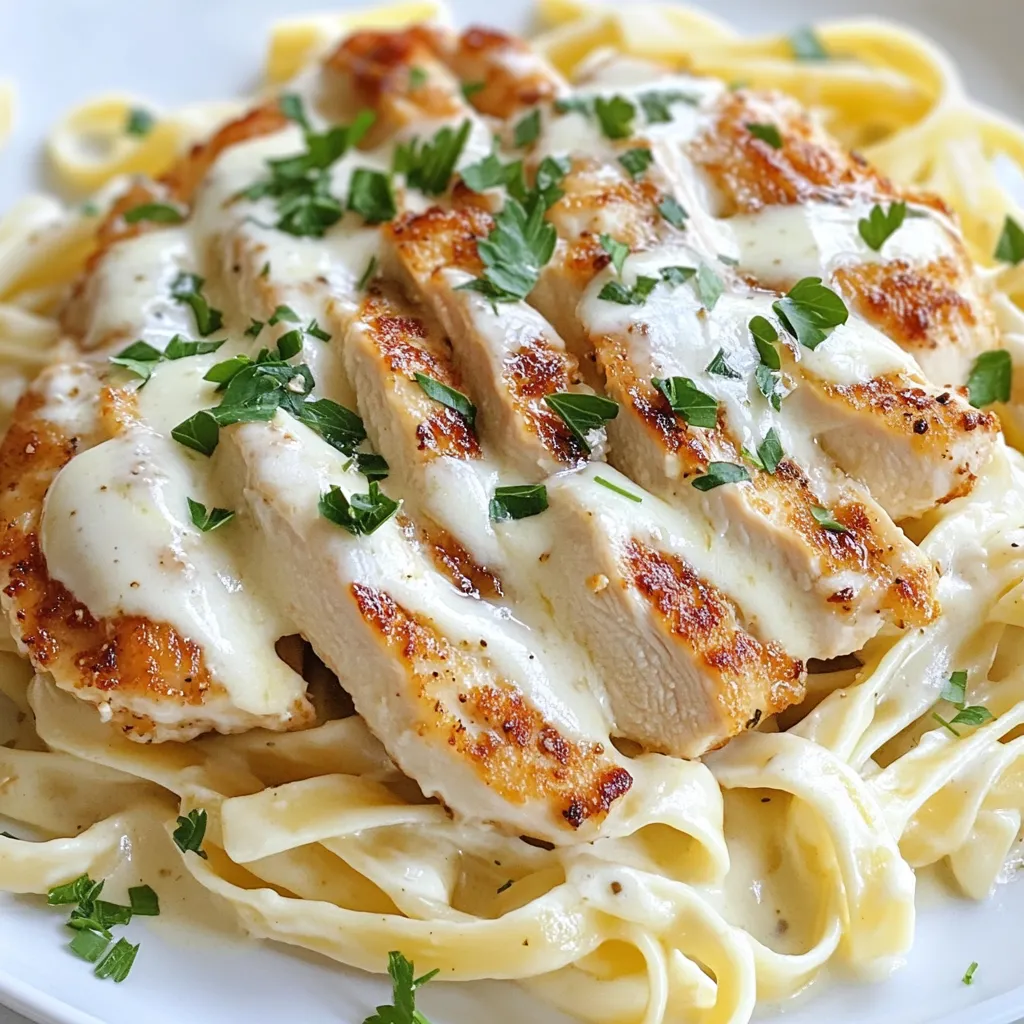
Looking for an easy family meal that pleases everyone? This Garlic Parmesan Chicken and Pasta recipe is your answer! With

- 1 pound smoked sausage, sliced - 4 medium potatoes, diced into small cubes - 1 medium onion, chopped - 2 cloves garlic, minced - 1 tablespoon olive oil - 1/4 cup ranch dressing - 1 teaspoon paprika - 1/2 teaspoon black pepper - Salt to taste - Fresh parsley, chopped (for garnish) - 1 cup shredded cheddar cheese The ingredients in this Cheesy Ranch Potato Sausage Skillet create a great blend of taste and texture. Start with the smoked sausage. It gives your dish a rich, hearty flavor. The diced potatoes add a nice bite, while the onion and garlic give it depth. For the seasonings, ranch dressing is key. It adds creaminess and bold taste. Paprika and black pepper give just the right kick. Salt helps to bring all those flavors together. Do not forget the cheese! The cheddar cheese melts beautifully and adds a gooey richness to the dish. Fresh parsley on top not only looks nice but also adds a hint of freshness. This mix of ingredients makes your skillet a true delight. You can easily adapt it to your taste if you want. {{ingredient_image_1}} - Heat olive oil in the skillet over medium-high heat. - Add potatoes, salt, and paprika to the skillet. Stir well. - Cook for about 10-15 minutes until the potatoes turn golden and tender. - Add the chopped onion and sliced sausage to the skillet. - Cook together for 5-7 minutes. Stir often. - Ensure the sausage is browned and the onions are soft and translucent. - Lower the heat to medium and stir in minced garlic. - Cook for 1-2 minutes until fragrant. - Drizzle in the ranch dressing and toss everything to combine. - Cook for an additional 2-3 minutes to let the flavors meld. - Sprinkle the shredded cheddar cheese on top of the mixture. - Cover the skillet with a lid and cook for 3-5 minutes. - Allow the cheese to melt and become bubbly. - Once melted, remove from heat and garnish with fresh parsley. For this skillet dish, I recommend using russet potatoes. They are starchy and will give you a nice, fluffy texture. You can also use Yukon gold potatoes for a creamier feel. To get even browning, cut the potatoes into small, uniform cubes. This way, they cook at the same rate. Stir them often while cooking to prevent sticking and burning. This cheesy ranch potato sausage skillet pairs well with a simple side salad. A fresh green salad with a light vinaigrette balances the richness of the dish. You can also serve it with steamed veggies like broccoli or green beans for added color and nutrients. For garnishing, sprinkle fresh parsley on top. It adds a pop of color and freshness. You can also add sliced green onions for extra flavor and crunch. To save time, you can precook the potatoes. Boil them for about 10 minutes, then cool and cube them. This cuts down the skillet cooking time. Another great tip is to slice the sausage ahead of time. If you meal prep for the week, this dish is easy to assemble quickly on busy nights. Just combine your prepped ingredients and follow the cooking steps. Pro Tips Choose the Right Sausage: For a flavorful dish, opt for a smoked sausage with a good seasoning blend. Kielbasa or andouille sausages work great! Perfect Potato Texture: Make sure to cut the potatoes into uniform cubes to ensure even cooking. Parboiling them for a few minutes can also speed up the cooking process. Customize Your Cheese: While cheddar is delicious, feel free to mix in other cheeses like mozzarella or pepper jack for an extra kick and creaminess. Herb Variations: Experiment with different herbs and spices, such as thyme or Italian seasoning, to elevate the flavor profile of your skillet dish. {{image_2}} You can swap the sausage for chicken or turkey. This change keeps the dish light and tasty. If you want a meat-free meal, use plant-based sausage. It gives a similar texture and flavor, making it a great choice for vegetarians. Try changing the ranch dressing to a different dressing for new flavors. A zesty Italian dressing adds a nice twist. You can also add spices like cumin or herbs like thyme. These changes can give your dish a whole new taste. Using different types of cheese can change the flavor too. Try mozzarella or pepper jack for a fun kick. For a dairy-free option, use vegan cheese. It melts well and keeps the dish creamy without dairy. To keep your Cheesy Ranch Potato Sausage Skillet fresh, store it in the fridge. Use an airtight container. Glass or plastic containers with tight lids work best. Make sure it cools down before sealing it. This way, it stays tasty for up to three days. When you want to enjoy leftovers, reheat gently. The microwave is quick, but it can dry out the dish. Instead, use a skillet on low heat. Add a splash of water or ranch dressing to keep it moist. Stir often until heated through. This keeps all the flavors alive. Yes, you can freeze this dish! Just let it cool completely first. Use a freezer-safe container or a heavy-duty freezer bag. Label it with the date. To defrost, move it to the fridge overnight. Reheat in a skillet, adding a little water or dressing to help it warm evenly. Cheesy Ranch Potato Sausage Skillet lasts about 3 to 4 days in the fridge. Store it in an airtight container. Make sure to let it cool before you seal it. This helps keep the flavors fresh and tasty. Yes! You can cook this dish in advance. Prepare it, then let it cool. Store it in the fridge for up to 3 days. When you are ready to eat, just reheat it on the stove or in the microwave. If you want to swap out ranch dressing, try these options: - Italian dressing for a zesty twist - Blue cheese dressing for a richer flavor - Homemade yogurt sauce for a lighter choice Yes, you can make this recipe in the oven. Here’s how: 1. Preheat your oven to 375°F (190°C). 2. Follow the skillet steps but transfer everything to a baking dish before adding the cheese. 3. Cover with foil and bake for 30 minutes. Remove the foil and add cheese. Bake for an extra 10 minutes until bubbly. This dish is great for meal prep! Here are some ideas: - Divide the skillet into single servings for easy lunches. - Pair it with a salad for a full meal. - Serve with crusty bread for added texture. This skillet dish combines smoked sausage, seasoned potatoes, and melted cheese for a tasty meal. You can easily swap ingredients, use different dressings, or change up the cheese. Store leftovers well and reheat them for the best flavor. This recipe is adaptable for your needs and quick to make, making it perfect for busy days. Enjoy creating your own version that suits your taste!

Cheesy Ranch Potato Sausage Skillet Delightful Dish

If you’re looking for a quick, tasty dinner, you’ve found it! My Cheesy Ranch Potato Sausage Skillet is a winning

- 1 lb (450g) ground beef - 3 tablespoons gochujang (Korean red chili paste) - 2 tablespoons soy sauce - 1 tablespoon sesame oil - 2 cups mixed vegetables (broccoli, carrots, bell pepper) - 1 tablespoon brown sugar - 2 cloves garlic, minced - 1 teaspoon ginger, grated - 2 cups cooked rice (white or brown) - Sesame seeds for garnish - 4 green onions, chopped To make Spicy Korean Beef Bowls, gather these main ingredients first. Ground beef is the star of this dish. It cooks quickly and absorbs flavors well. Gochujang adds the heat and umami. Soy sauce gives it depth, while sesame oil adds a nice nutty flavor. The mixed veggies bring color and crunch. Next, you’ll need the additional ingredients. Brown sugar balances the heat of the gochujang. Garlic and ginger boost flavor, making the dish aromatic and tasty. Cooked rice serves as a perfect base. Finally, sesame seeds and green onions add texture and freshness. This combination of ingredients makes for a simple yet tasty meal. You can adjust the veggies based on what you have at home. Enjoy the process of gathering and preparing these vibrant ingredients! {{ingredient_image_1}} 1. Start by heating a large skillet on medium-high heat. 2. Add 1 pound of ground beef to the skillet. 3. Cook the beef for about 5 to 7 minutes. 4. Break the meat apart with a spatula as it cooks. 5. Once the beef is browned, drain any extra fat if needed. 6. Lower the heat to medium and add the following: - 3 tablespoons gochujang - 2 tablespoons soy sauce - 1 tablespoon sesame oil - 1 tablespoon brown sugar - 2 cloves of minced garlic - 1 teaspoon grated ginger 7. Mix well to coat the beef evenly. 8. Let it simmer for another 2 to 3 minutes. 1. In a separate pot or steamer, add your veggies. - Use 2 cups of broccoli florets - 1 julienned carrot - 1 sliced bell pepper 2. Cook the vegetables until just tender, about 3 to 5 minutes. 3. You can also sauté the veggies in a bit of sesame oil for more flavor. 4. Once done, combine the veggies with the beef mixture in the skillet. 1. Take serving bowls and add a scoop of rice to each. - You can use 2 cups of cooked rice (white or brown). 2. Top the rice with the spicy beef and vegetable mix. 3. For a nice touch, garnish with chopped green onions and sesame seeds. 4. Enjoy your delicious Spicy Korean Beef Bowls! To get the best taste, gochujang is key. This Korean chili paste brings heat and depth. Use it in the right amount, three tablespoons, for balance. When cooking, keep the heat medium. This helps the beef soak up the flavors. Stir the mixture often. This way, all ingredients blend well. Prep your ingredients in advance. Chop veggies and measure sauces ahead of time. This makes cooking quick and easy. You can use leftover rice for this dish. It saves time and adds flavor. Just warm it up before serving. Pair your beef bowls with fresh sides. I love serving pickled cucumbers or a simple salad. These add a nice crunch. Drizzle some extra sesame oil on top for flavor. If you want more heat, add hot sauce. Enjoy your meal with friends or family! Pro Tips Quality of Beef: Choose lean ground beef for a healthier option and to reduce excess fat, enhancing the overall flavor and texture of the dish. Adjusting Spice Levels: If you prefer a milder dish, reduce the amount of gochujang or balance it with additional brown sugar to suit your taste. Vegetable Variations: Feel free to mix in your favorite vegetables like snap peas or zucchini for added color and nutrition. Perfect Rice: For the best texture, rinse your rice before cooking to remove excess starch, ensuring fluffy grains that complement the beef and veggies. {{image_2}} To make this dish gluten-free, use tamari instead of soy sauce. Tamari is a great choice that keeps all the flavors intact. For a vegetarian or vegan version, swap out the ground beef for plant-based meat. You can also use mushrooms or lentils to get that hearty texture. If you want to change up the protein, ground turkey works well. Chicken is another option, and it cooks quickly. Tofu absorbs flavors well and gives a nice bite. Shrimp cooks fast, too, and adds a fresh taste. Each protein gives a new twist to this dish. You can boost the flavor with extra spices. Try adding a pinch of red pepper flakes for more heat. A splash of rice vinegar can add a tangy kick. For toppings, think about adding sliced radishes or avocado. They add great color and crunch. You can also drizzle some sesame sauce on top for extra richness. To store your Spicy Korean Beef Bowls, let them cool first. Then, place them in an airtight container. This keeps the flavors fresh and prevents spills. You can store leftovers in the fridge for up to 3 days. Always check for any off smells or changes before eating. If you want to save some for later, freezing works well. Divide the dish into portions and place them in freezer-safe bags. Remove as much air as possible to prevent freezer burn. You can freeze the beef and veggies together or separately. They will keep well for about 2 months. To thaw, move the container to the fridge overnight. If you're in a hurry, you can use the microwave. Reheat in short bursts, stirring in between. Make sure it's hot all the way through before serving again. Enjoy your meal just as much the second time! Serve Spicy Korean Beef Bowls hot. Start with a bed of warm rice. Then, add the spicy beef mix on top. Next, pile on the sautéed veggies. Finish with a sprinkle of green onions and sesame seeds. This adds color and crunch. You can also serve kimchi on the side for extra flavor. Yes, you can make this dish ahead of time. Cook the beef and veggies, then store them in the fridge. Keep the rice separate to avoid sogginess. Reheat everything before serving. This way, you save time on busy nights. If you can't find gochujang, you can use sriracha or chili paste. Mix it with a bit of sugar to mimic the sweetness of gochujang. Adjust the amount based on your spice level. You can also try mixing red pepper flakes with miso paste for a different taste. Yes, you can make it spicy without gochujang. Use chili flakes or hot sauce instead. Start with a small amount and taste as you go. This way, you control the heat. You can also add fresh chilies for a fresh kick. To feed more people, simply double or triple the ingredients. Use a larger skillet to cook the beef. Make sure to adjust the cooking time a bit. You can also keep the rice warm in a rice cooker for easy serving. This recipe for Spicy Korean Beef Bowls blends tasty ingredients and easy steps. We explored key components like gochujang and found ways to save time. You can also modify it for different diets. Remember, proper storage keeps leftovers fresh. With simple techniques and enjoyable flavors, cooking this dish should be fun. Try it and impress your family with a new favorite meal!

Spicy Korean Beef Bowls Simple and Tasty Recipe

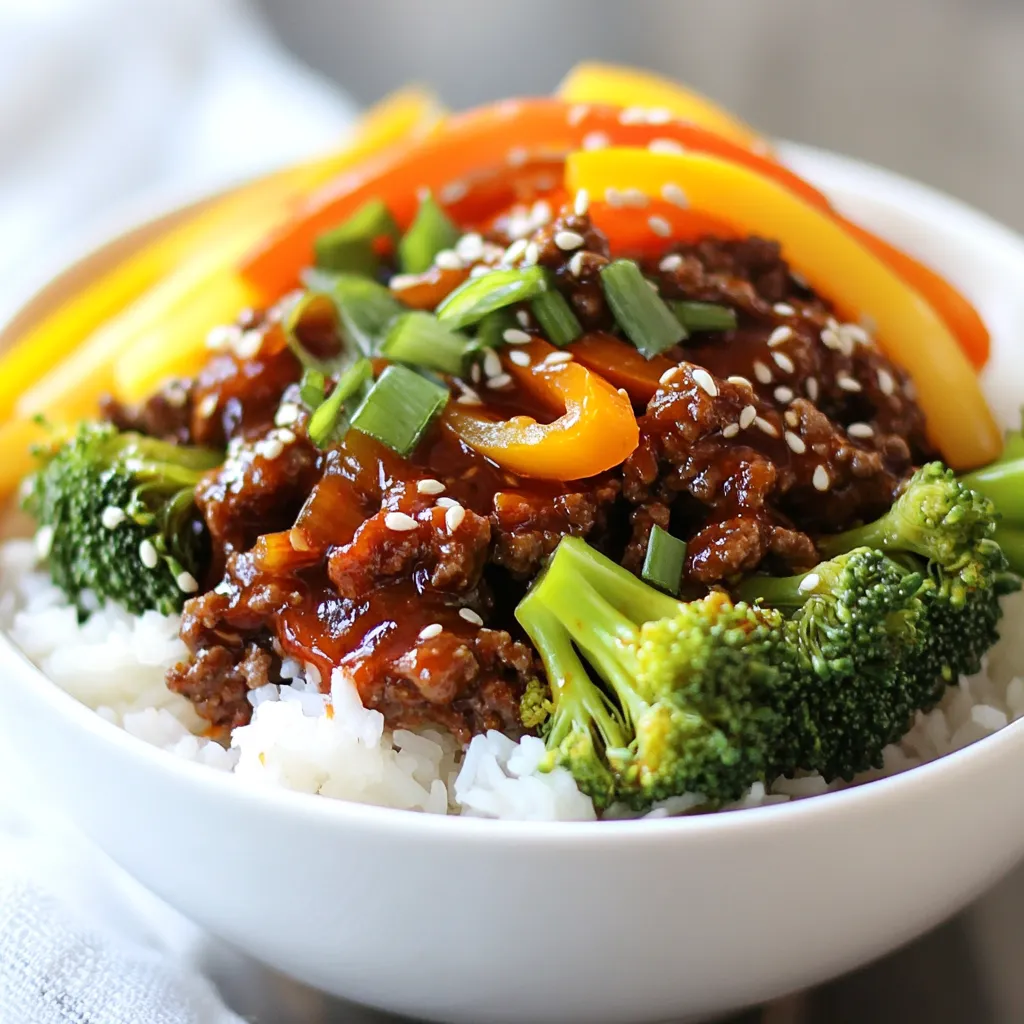
Are you craving a dish that packs a punch? Spicy Korean Beef Bowls are the answer! This quick and easy

To make Smothered Chicken and Rice, you need some key ingredients. Here’s what to gather: - 4 boneless, skinless chicken thighs - 1 cup long-grain white rice - 2 cups low-sodium chicken broth - 1 medium onion, diced - 3 cloves garlic, minced - 1 green bell pepper, diced - 1 teaspoon smoked paprika - 1/2 teaspoon cayenne pepper - 1 teaspoon dried thyme - 1 tablespoon olive oil - Salt and pepper to taste - 1 cup heavy cream - Fresh parsley, chopped (for garnish) Each ingredient plays a big role in creating the dish’s rich flavor. Why these ingredients? - Chicken thighs provide juiciness and depth. - Rice absorbs the broth and cream, soaking up flavors. - Onion, garlic, and bell pepper add sweetness and aroma. - Spices like smoked paprika and cayenne bring warmth and zest. - Heavy cream makes the dish creamy, adding a nice finish. Gather these items before you start cooking. Having everything ready helps the process go smoothly. Plus, it sets you up for success in making a comforting meal! {{ingredient_image_1}} First, heat olive oil in a large skillet over medium-high heat. Season the chicken thighs with salt, pepper, smoked paprika, and cayenne pepper. Once the oil is hot, add the chicken. Cook for about 5-7 minutes on each side until nicely browned. This step gives the chicken a great flavor. Remove the chicken from the skillet and set it aside. In the same skillet, add the diced onion and green bell pepper. Sauté for about 5 minutes. You want the onion to be translucent. This makes the dish taste better. Add minced garlic and cook for another minute until it smells good. The garlic adds a nice aroma. Next, add the rice to the skillet with the veggies. Stir it well to coat the rice with the oil and veggies. This step takes about 2 minutes. It helps the rice absorb flavors while cooking. Pour in the low-sodium chicken broth and stir everything together. Lay the seared chicken thighs back on top of the rice mixture. This way, the chicken flavors the rice as it cooks. Bring it to a gentle simmer. After the rice is cooked, take the skillet off the heat. Stir in the heavy cream carefully. Mix it well with the chicken and rice. Let it sit for a few minutes to heat through. You can use half-and-half or a lighter cream if you prefer. Finally, sprinkle fresh parsley over the top just before serving. This adds color and freshness to the dish. Serve it warm and enjoy! To make Smothered Chicken and Rice truly special, spices are key. Here are my favorites: - Smoked paprika adds depth. - Cayenne pepper gives it heat; adjust to taste. - Dried thyme brings a nice herbal note. To control heat, start with less cayenne. You can always add more later. Taste as you go. Use a large, heavy skillet. A cast-iron skillet works great. It holds heat well and browns the chicken evenly. Always cover the skillet while cooking. This keeps steam in and helps the rice cook perfectly. One common mistake is overcooking the rice. To avoid this, keep an eye on the liquid. If it looks dry, add a splash of broth. To ensure juicy chicken, don’t overcook it. Sear it just until golden. It will finish cooking with the rice. Pro Tips Use Bone-In Chicken: For extra flavor, consider using bone-in chicken thighs. The bones will add richness to the dish as it cooks. Adjust the Spices: Feel free to adjust the amount of cayenne pepper based on your heat preference. Start with less and add more if desired! Let it Rest: After cooking, let the dish sit for a few minutes before serving. This allows the flavors to meld and the rice to firm up slightly. Garnish for Freshness: Adding fresh parsley not only enhances the presentation but also adds a bright, fresh flavor to the dish. {{image_2}} You can easily make this dish healthier. For cream, you can use Greek yogurt or coconut milk. These swaps keep the dish rich but cut calories. If you want a lighter option, try using low-fat milk. For gluten-free options, use rice that is certified gluten-free. Most long-grain rice is safe. Ensure your broth is also gluten-free. Many brands offer great low-sodium choices. You can mix up the flavors by adding different vegetables. Try carrots, peas, or even spinach. These veggies add nutrition and color. Each brings its own taste, making your dish unique. If you want to switch proteins, consider using chicken breasts or turkey. You could also try pork or beef. Just adjust the cooking time based on the protein you choose. Pair this dish with some tasty sides. A simple green salad adds freshness. You could also serve steamed broccoli or green beans for a healthy touch. For something heartier, consider cornbread or garlic bread. These sides soak up the creamy sauce well. They make your meal feel extra special. To store leftovers, let the dish cool to room temperature first. This helps prevent moisture build-up in the container. Use airtight containers to keep the chicken and rice fresh. You can store Smothered Chicken and Rice in the fridge for up to three days. You can freeze this dish for longer storage. Divide it into portions and place them in freezer-safe containers. Make sure to leave space at the top of the container for expansion. Smothered Chicken and Rice can last up to three months in the freezer. When ready to eat, thaw it overnight in the fridge before reheating. You can reheat your dish on the stovetop or in the microwave. For the stovetop, place it in a skillet over low heat. Stir often to heat evenly. If you choose the microwave, use a microwave-safe bowl. Cover it with a lid or microwave-safe wrap to keep moisture in. Adding a splash of chicken broth or water helps retain moisture as it heats. Smothered chicken and rice is a hearty dish. It features tender chicken thighs cooked with rice, broth, and veggies. The chicken gets a rich, creamy sauce, making it very comforting. The dish is perfect for family dinners or cozy nights in. To add heat, use more cayenne pepper. You can also add diced jalapeños or crushed red pepper flakes. Another option is to use hot sauce in the cream. Start small and taste as you go to find your perfect spice level. Yes, you can use brown rice. Brown rice takes longer to cook, so adjust the broth and time. Use 2 ½ cups of broth and cook for about 40-45 minutes. Check the rice often to avoid overcooking. Absolutely! Smothered chicken and rice works great for meal prep. Make a big batch and store it in individual portions. Use airtight containers to keep it fresh in the fridge for up to four days. You can use turkey, pork, or even tofu. If using turkey or pork, adjust the cook time slightly. For tofu, sauté it until golden before adding it to the dish. Each protein adds a unique flavor to this comforting meal. This blog post shared a simple way to make Smothered Chicken and Rice. We covered ingredients, cooking steps, and tips for flavor. I also shared ways to adjust the recipe for your tastes. Remember to season well and avoid overcooking. Keep experimenting with flavors. This dish is versatile and great for meal prep. Enjoy making it your own! Your journey in the kitchen is just beginning, so keep cooking and have fun.

Smothered Chicken and Rice Flavorful Comfort Dish

Looking for a warm and filling meal that hits the spot every time? Smothered Chicken and Rice is the perfect

You need fresh fruits for this jam. I use: - 4 cups strawberries, hulled and halved - 2 cups raspberries - 2 cups blueberries These fruits give the jam its bright color and sweet taste. Strawberries add a lovely base. Raspberries bring a tangy kick. Blueberries add depth and balance. Choose ripe fruit for the best flavor. Next, gather sugar and lemon juice. You will need: - 5 cups sugar - 1/4 cup lemon juice Sugar helps the jam thicken and sweetens it. Lemon juice brightens the flavors and balances the sweetness. It also acts as a natural preservative. Lastly, don't forget the pectin. You need: - 1 packet (1.75 oz) fruit pectin Pectin is important for creating that perfect jam texture. It helps the jam set well. Without it, your jam may be runny, so make sure to add it when boiling the mixture. {{ingredient_image_1}} First, gather your fruit. You need 4 cups of hulled strawberries, 2 cups of raspberries, and 2 cups of blueberries. Combine the strawberries, raspberries, and blueberries in a large pot. Use a potato masher to lightly mash the fruit. This step helps release their natural juices. Let the fruit mixture sit for 15 minutes. This allows the flavors to meld together beautifully. After 15 minutes, add 5 cups of sugar and 1/4 cup of lemon juice to the fruit. Stir well to dissolve the sugar. Let the mixture sit for another 10 minutes. This time helps the fruit soak up the sugar. Next, place the pot over medium heat. Bring the mixture to a rolling boil, stirring constantly. Once it boils, add the packet of fruit pectin. Boil for 1 to 2 more minutes, stirring all the time. This step thickens your jam. When done boiling, remove the pot from heat. Skim off any foam that forms on top. Carefully pour the hot jam into sterilized jars. Leave about 1/4 inch of space at the top of each jar. Wipe the rims of the jars with a clean cloth. Seal each jar with a lid and band. If you want, process the jars in a boiling water bath for 5 to 10 minutes. This ensures they seal well for long storage. Let the jars cool completely at room temperature. After that, store them in your fridge or pantry. To make Amish Christmas Jam truly shine, use ripe fruits. The sweeter the fruit, the better the jam. You can mix different berries, like blackberries or cranberries, for new tastes. Adding a pinch of cinnamon or nutmeg can bring warmth to the jam. Just a small amount can make a big difference. Proper sealing keeps your jam fresh. After you fill the jars, wipe the rims with a clean cloth. This helps the lid seal well. If you choose to process the jars in a boiling water bath, it adds extra safety. Make sure the water covers the jars completely for five to ten minutes. Store your jam in a cool, dark place. It lasts longer this way. Once opened, keep the jar in the fridge. It should stay fresh for up to three weeks. For longer storage, you can freeze the jam. Just leave some space in the jar for expansion when it freezes. Pro Tips Fresh Ingredients: Use freshly picked or frozen fruits for the best flavor. The quality of your fruits will directly impact the taste of your jam. Proper Sterilization: Ensure your jars are properly sterilized before filling them to prevent spoilage. You can sterilize jars by boiling them in water for 10 minutes. Testing for Set: To check if your jam has set, place a small amount on a cold plate and let it sit for a minute. Run your finger through it; if it holds its shape, it's ready! Creative Flavor Variations: Experiment with adding other fruits or spices, such as cinnamon or vanilla, to create unique flavor combinations that suit your taste. {{image_2}} You can change up the fruit in Amish Christmas Jam. For example, try using peaches or cherries. These fruits give a unique taste. You can also mix in blackberries or cranberries for extra flavor. Each fruit adds its own charm. This lets you make a jam that fits your taste. Just remember to keep the same amounts of fruit. Adding spices can make your jam special. You can stir in cinnamon or nutmeg for warmth. This adds a cozy feel, perfect for the holidays. Vanilla or almond extract can also work wonders. Just a drop or two can change the whole taste. These flavors can bring the joy of Christmas to your kitchen. If you prefer less sugar, you can still enjoy this jam. Use a sugar substitute like stevia or erythritol. This gives you a sweet taste without the calories. You can also use less sugar overall. Just remember that it may not set as firmly. Keep an eye on the cooking time. The flavors will still shine through, making a tasty treat. To keep your Amish Christmas jam fresh, store it in clean jars. After sealing, place the jars in a cool, dark place. Avoid direct sunlight. If you have opened a jar, put it in the fridge. Use a clean spoon each time to keep it safe. Amish Christmas jam can last up to a year if stored properly. Unopened jars keep well in a pantry. Once opened, the jam stays good for about three weeks in the fridge. Always check for signs of spoilage before using. You can freeze Amish Christmas jam for longer storage. Freezing keeps the jam fresh for up to a year. Use freezer-safe containers and leave space for expansion. Refrigerating is best for short-term use. Each method has its perks, so choose what works for you. You can use cornstarch or gelatin if you want a pectin-free jam. Cornstarch will thicken the jam, but you need to cook it longer. Gelatin works well, but it may change the texture a bit. I like to use fruit that is high in natural pectin, like apples or citrus. This way, you can skip the pectin altogether. Yes, you can! Feel free to swap in your favorite fruits. Peaches, blackberries, or cherries work well. Just remember that the flavor will change based on what you choose. Mixing different fruits can also create a fun new taste. Experiment and find what you love most. To check if your jam has set, use the spoon test. Dip a spoon into the jam and let it cool for a moment. If it holds its shape and runs off slowly, it's ready. Another great way is to put a plate in the freezer for a few minutes. Spoon a bit of jam onto the cold plate and tilt it. If it stays in place, your jam is set! In this blog post, we explored how to make Amish Christmas Jam. We covered the key ingredients, step-by-step instructions, and useful tips to perfect your jam. You can also try fun variations like different fruits and flavors. Making this jam brings sweet joy to your holiday season. With proper storage, it lasts long and can be shared with loved ones. Enjoy this tasty treat and make it your own!

Amish Christmas Jam Festive and Flavorful Delight

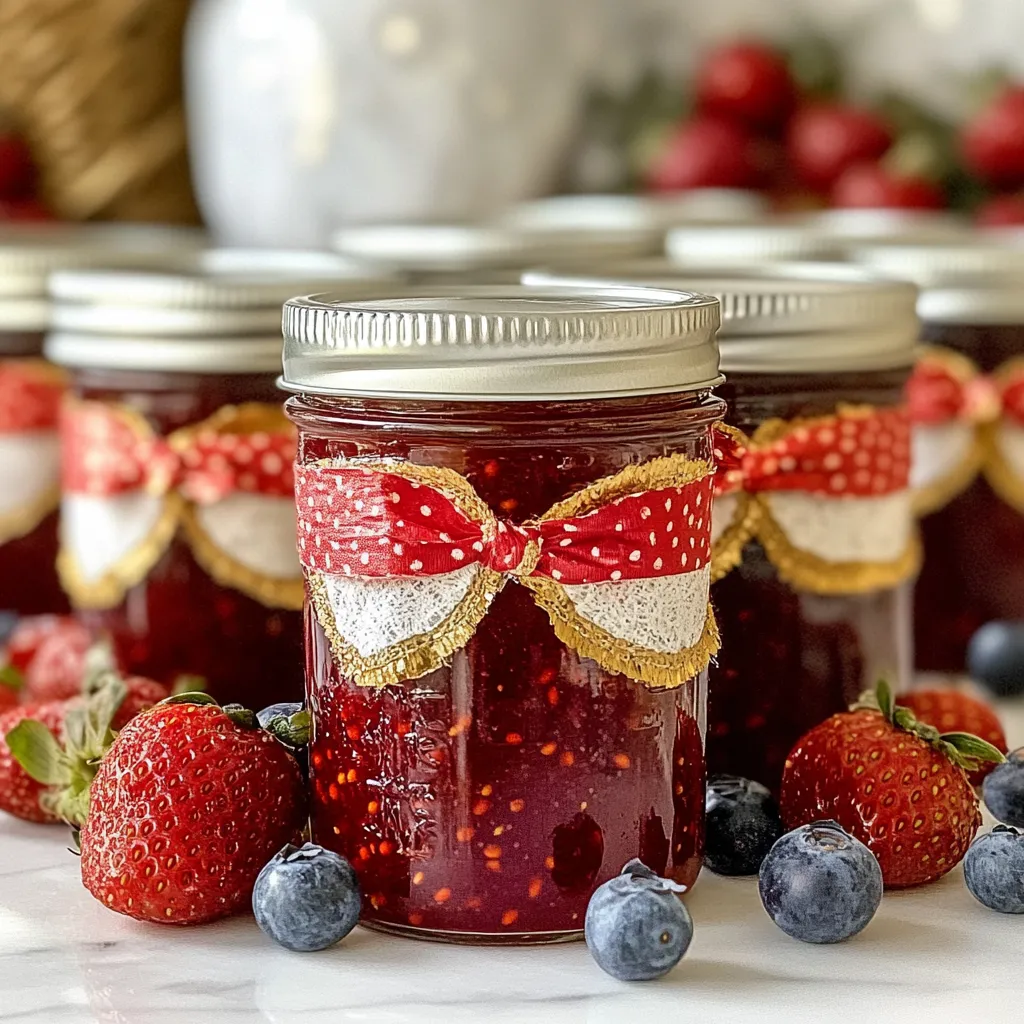
Are you ready to spread some joy this holiday season? Amish Christmas Jam brings festive flavors to your table, perfect

For this tasty dish, you will need: - 8 oz cheese tortellini - 2 cups broccoli florets - 1 cup cooked, shredded chicken - 2 cups chicken broth - 1 cup heavy cream - 1 teaspoon garlic powder - 1 teaspoon onion powder - 1 cup shredded mozzarella cheese - 1/2 cup grated Parmesan cheese - 2 tablespoons olive oil - Salt and pepper to taste - Fresh parsley for garnish These main ingredients create a creamy and filling meal that is easy to make. The tortellini adds a cheesy bite, while the chicken gives it a nice protein boost. The broccoli not only adds color but also brings in a healthy crunch. To enhance the flavor and texture, consider using: - Fresh garlic cloves, minced - Chopped fresh herbs like basil or thyme - Red pepper flakes for a bit of heat These extra ingredients can provide a burst of flavor that can take your dish to the next level. Fresh garlic will make the sauce aromatic, while herbs can add freshness. Feel free to explore these optional ingredients: - Spinach or peas for added greens - Sun-dried tomatoes for a sweet touch - Additional cheese varieties like cheddar - Lemon zest for brightness Garnishing with fresh parsley not only adds a pop of color but also a fresh taste. A sprinkle of extra cheese on top makes the dish look inviting and delicious. Enjoy playing with these ingredients to make this dish your own! {{ingredient_image_1}} To start, boil salted water in a large pot. Once it bubbles, add 8 oz cheese tortellini. Cook according to the package. Aim for al dente texture; it should be firm yet tender. After cooking, drain the tortellini and set it aside. This step is key for a perfect bite. Next, grab a separate pot and bring water to a boil. Add 2 cups of broccoli florets. Cook for about 2-3 minutes. The broccoli should turn bright green but remain crisp. Drain it well, then rinse under cold water. This halts the cooking and keeps the color vivid. Now, heat 2 tablespoons of olive oil in a large skillet over medium heat. Add 1 cup of cooked, shredded chicken and sauté for about 2 minutes. Next, pour in 2 cups of chicken broth and 1 cup of heavy cream. Stir in 1 teaspoon each of garlic powder and onion powder, along with salt and pepper. Let this mixture simmer gently for a few minutes. The sauce will begin to thicken and smell amazing. Once your sauce is ready, it’s time to unite the flavors. Add the drained tortellini and blanched broccoli into the skillet. Gently stir everything together, ensuring each piece is coated in that creamy goodness. For a beautiful presentation, scoop the Chicken Tortellini Delight into shallow bowls. Top with 1 cup of shredded mozzarella and 1/2 cup of grated Parmesan cheese. As the cheese melts, it adds a lovely texture. Finish with a sprinkle of fresh parsley for color. Serve it warm, and enjoy your delightful dish! To cook tortellini just right, start with boiling water. Add a pinch of salt for flavor. Toss in the tortellini and stir gently. Follow the package instructions, usually about 3-5 minutes. Look for the tortellini to float. This shows they are done. Drain them well and set aside. To keep broccoli crisp, blanch it briefly. Boil water in a pot and add florets for 2-3 minutes. This brightens the color and softens slightly. After that, rinse the broccoli in cold water. This stops the cooking and locks in the crunch. You want that nice bite in your dish. For a creamy sauce, start with heavy cream. Heat it slowly with chicken broth. Stir in garlic and onion powder for flavor. Keep the sauce on low heat until it simmers. Add cheese gradually, and stir until it melts. If it gets too thick, add a bit more broth. The best cheeses for this dish are mozzarella and Parmesan. Mozzarella gives great meltiness. Parmesan adds a sharp flavor that enhances the dish. You can mix in other cheeses too, like Gouda or Fontina, for fun twists. Just remember to shred them for easy melting. Pro Tips Use Fresh Ingredients: For the best flavor, use fresh broccoli and high-quality chicken. Fresh ingredients enhance the overall taste of the dish. Customize the Cheese: Feel free to mix different types of cheeses, like cheddar or gouda, to create a unique flavor profile that suits your taste. Make It Ahead: You can prepare this dish in advance and reheat it when ready to serve. Just be sure to add a splash of cream to loosen the sauce when reheating. Garnish for Color: Adding fresh parsley not only brightens the dish visually but also adds a fresh flavor that complements the creamy sauce. {{image_2}} You can make this dish vegetarian by using different proteins. Tofu works well as a meat substitute. It absorbs flavors nicely and adds protein. Just sauté the tofu until golden before adding it to the sauce. You can also try chickpeas or lentils for a hearty twist. These options offer great taste without meat. To enhance the flavor, consider adding spices and herbs. A pinch of red pepper flakes adds heat. Dried oregano or thyme can add an earthy taste. Fresh herbs like basil or thyme can elevate the dish even more. Mixing in some lemon juice brightens the flavors, making the dish more vibrant. Experiment with these additions to find your perfect flavor. If you need a gluten-free option, look for gluten-free tortellini. Many brands offer rice or corn-based versions. You can also use gluten-free pasta shapes like fusilli or penne. Just cook them according to package directions. This way, everyone can enjoy the creamy goodness without gluten. To store leftovers, let the dish cool down. Transfer it into an airtight container. Make sure to seal it tightly. This keeps the flavors fresh and prevents spills. Place it in the fridge. Chicken Tortellini Delight can last up to three days in the refrigerator. When you are ready to enjoy your leftovers, scoop out what you want. Place it in a microwave-safe bowl. Add a splash of chicken broth or cream to keep it moist. Cover the bowl with a lid or microwave-safe wrap. Heat for about 1-2 minutes, stirring halfway through. You can also reheat it on the stove. Just warm it over low heat, stirring gently until hot. If you want to freeze the dish, let it cool completely first. Then, portion it into freezer-safe bags or containers. Remove as much air as you can. Label each bag with the date. This helps you track how long it’s been frozen. Chicken Tortellini Delight can stay fresh in the freezer for about three months. To thaw, place it in the fridge overnight before reheating. Yes, you can make this dish ahead. Prepare it fully and store it in the fridge. Reheat before serving. This helps the flavors blend and taste even better. You can use milk mixed with butter as a lighter option. Another choice is coconut cream for a dairy-free version. Both will give a nice creamy texture. The Chicken Tortellini Delight will last about three to four days in the fridge. Store it in an airtight container for best results. Yes, you can use fresh chicken. Just cook it fully before adding it to the sauce. Cut it into pieces to help it cook faster. To add spice, include red pepper flakes or a dash of hot sauce. You can also use spicy sausage instead of chicken for more heat. Great side dishes include a fresh salad or garlic bread. You can also serve it with steamed vegetables for a healthy touch. To make Chicken Tortellini Broccoli, we covered key ingredients and detailed steps. You learned how to prepare tortellini, blanch broccoli, and create a creamy sauce. I shared tips for perfecting each element, including healthy variations and proper storage methods. In conclusion, this dish is tasty and easy to prepare. Enjoy experimenting with flavors and options to make it your own. Happy cooking!

Chicken Tortellini Broccoli Delightful Creamy Dish

Are you ready to whip up a tasty meal? My Chicken Tortellini Broccoli dish is creamy, rich, and packed with

- Ground Beef: You need 1 pound of ground beef. This is the main protein. - Teriyaki Sauce and Soy Sauce: Use 2 tablespoons of teriyaki sauce and 1 tablespoon of soy sauce. These add sweet and salty flavors. - Vegetables: You’ll want 1 cup of broccoli florets, 1 sliced bell pepper (red or yellow), and 1 small carrot, julienned. These veggies add color and crunch. - Aromatics: Grab 2 cloves of minced garlic and 1 teaspoon of grated fresh ginger. These give the dish a fragrant kick. - Cooking Oil: Use 1 tablespoon of sesame oil for cooking. It adds a nice nutty flavor. - Seasoning: Keep salt and pepper on hand to taste. These help enhance all the flavors. - Serving Options: Prepare cooked rice or noodles to serve with your stir-fry. These are great for soaking up the sauce. These ingredients make your Teriyaki Ground Beef Stir-Fry quick and full of flavor. Using fresh veggies and quality sauces makes a big difference. Enjoy cooking! {{ingredient_image_1}} Heating the Skillet Start by placing a large skillet or wok on the stove. Set the heat to medium-high. Pour in the sesame oil. Let it heat for about a minute. You want the oil to shimmer. Cooking Ground Beef Next, add 1 pound of ground beef to the hot skillet. Use a spatula to break it apart. Cook it for about 5 to 7 minutes. Stir until the beef is brown and no longer pink. Draining Excess Fat Once the beef is cooked, check for fat. If there is too much, carefully drain it. You want a leaner dish, so remove as much fat as you can. Incorporating Garlic and Ginger Now, it’s time to add more flavor! Toss in 2 cloves of minced garlic and 1 teaspoon of grated fresh ginger. Stir these in for about 30 seconds. You want to smell that great aroma. Stir-Frying Vegetables Add your veggies next. Toss in 1 cup of broccoli florets, sliced bell pepper, and 1 small julienned carrot. Stir-fry these for about 3 to 4 minutes. You want them to be tender but still crisp. Adding Sauces Now, pour in 2 tablespoons of teriyaki sauce and 1 tablespoon of soy sauce. Mix well to coat the beef and veggies. Cook for an extra 2 minutes, stirring often. Seasoning and Garnishing Finally, season with salt and pepper to taste. Remove from heat and sprinkle with chopped green onions. This adds a nice touch and bright color to your dish. - Best Practices for Stir-Frying: Use a hot skillet or wok. This helps the food cook fast. Keep stirring the food to avoid burning it. Add ingredients in stages. Start with the meat, then add veggies. This way, everything cooks evenly. - Cooking Ground Beef Efficiently: Break the beef apart as it cooks. This lets it brown well. Cook it until there is no pink left. This usually takes about 5 to 7 minutes. Drain any extra fat for a leaner dish. - Suggestions for additional spices or sauces: Try adding a pinch of red pepper flakes for heat. You can also add a splash of rice vinegar for tang. Mix in some hoisin sauce for extra sweetness. - Importance of fresh ingredients: Fresh veggies make a big difference. They add color, crunch, and taste. Use fresh ginger and garlic for the best flavor. They can uplift the whole dish. - Serving Suggestions: Serve the stir-fry over rice or noodles for a filling meal. This adds a nice base to soak up the sauce. - Garnishing Options: Top your dish with chopped green onions and sesame seeds. This adds a nice touch and a bit of crunch. You can also add some cilantro for fresh flavor. Pro Tips Use Fresh Veggies: Fresh vegetables not only enhance the flavor of your stir-fry but also provide more nutrients and crispness. Choose seasonal produce for the best taste. Customize the Sauce: Feel free to adjust the amount of teriyaki and soy sauce according to your taste preferences. For a spicier kick, add some chili flakes or sriracha. Protein Alternatives: This stir-fry works well with other proteins like chicken, turkey, or tofu. Just adjust the cooking time accordingly to ensure everything is cooked through. Meal Prep Friendly: This dish is perfect for meal prepping! Make a double batch and store leftovers in the fridge for quick lunches or dinners throughout the week. {{image_2}} You can switch the ground beef for chicken or tofu. Ground chicken is lean and cooks fast. It absorbs flavors well. Tofu is a great choice for a vegetarian option. Use firm tofu for the best texture. Press it to remove excess moisture before cooking. This helps it crisp up nicely when you fry it. You can add more veggies to your stir-fry. Try snap peas, mushrooms, or zucchini. They bring different flavors and textures. Seasonal vegetables work great too. In spring, add asparagus. In fall, try sweet potatoes or squash. This keeps your dish fresh and colorful. You can make your own teriyaki sauce at home. Mix soy sauce, honey, and a splash of rice vinegar. This gives you control over the flavor. If you want to try something new, experiment with different sauces. A spicy chili sauce can add heat. A sweet hoisin sauce can give a rich taste. - Proper Storage Techniques for Leftovers: Store your Teriyaki Ground Beef Stir-Fry in an airtight container. Let it cool down before sealing. This helps keep flavors fresh. - Storage Containers Recommendations: Use glass or BPA-free plastic containers. These materials keep food safe and are easy to clean. - Best Methods for Reheating Stir-Fry: The best way to reheat is on the stove. Heat a pan over medium heat, add a splash of water or oil, and stir until warm. You can also use a microwave. Cover the dish to keep moisture in while reheating. - Tips for Avoiding Overcooking: Keep an eye on the stir-fry as it heats. Stir often to ensure even warming. Stop reheating as soon as it's warm to avoid losing that nice texture. Teriyaki Ground Beef Stir-Fry lasts about 3 to 4 days in the fridge. Store it in an airtight container. This keeps the flavors fresh and safe to eat. Yes, you can freeze Teriyaki Ground Beef Stir-Fry. Place it in a freezer-safe bag or container. It can last for up to 3 months in the freezer. Just thaw it overnight in the fridge before reheating. Serve Teriyaki Ground Beef Stir-Fry with cooked rice or noodles. You can also add a side of steamed vegetables for extra color and nutrition. A sprinkle of sesame seeds enhances the dish too. Yes, you can make this dish ahead of time. Cook it fully, then store it in the fridge. Reheat it when you're ready to serve. This saves time for busy weeknights. You can use pre-cooked beef, but adjust cooking time. Heat the beef until warm, then add the sauces and vegetables. This method cuts down on cooking time and still gives you great flavor. This blog post covered how to create a tasty Teriyaki Ground Beef Stir-Fry. We discussed key ingredients, step-by-step cooking instructions, helpful tips, and delicious variations. Each part adds to the flavor and enjoyment of the dish. Remember, fresh ingredients make a big difference. Feel free to customize your stir-fry to fit your tastes. Whether using different proteins or sauces, the possibilities are endless. Happy cooking!

Teriyaki Ground Beef Stir-Fry Quick and Flavorful Meal

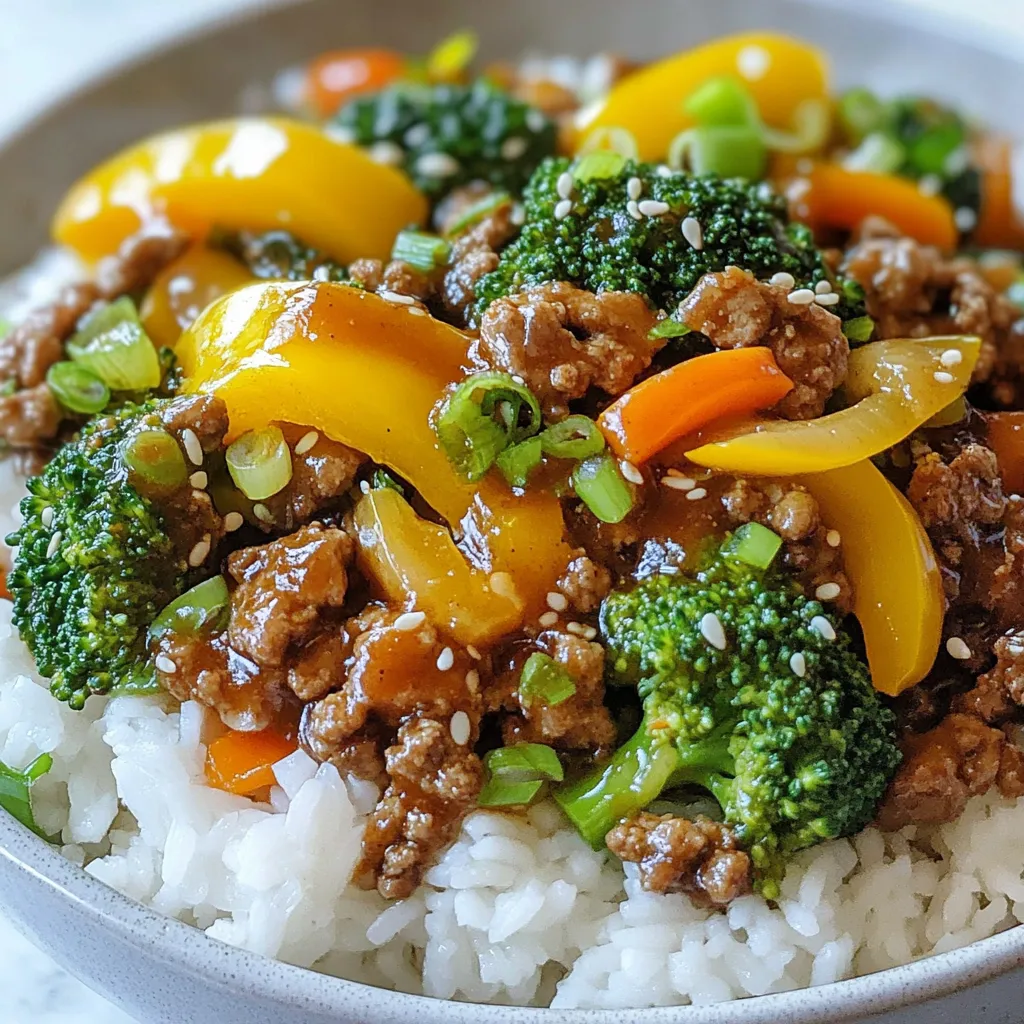
Looking for a quick and tasty meal? You’ve landed in the right place! This Teriyaki Ground Beef Stir-Fry is easy

Older posts
Newer posts
← Previous Page1 … Page147 Page148 Page149 Page150 Next →

dsad

© 2025 Emmas Dish • Built with GeneratePress

Our Policies

  • Copyright Policy
  • Cookie Policy
  • GDPR Policy
  • Privacy Policy
  • Disclaimer
  • Terms Of Use

More Information

  • Home
  • About
  • Contact
  • Appetizers
  • Dessert
  • Dinner
  • Drinks
©2025, Emmas Dish About Back To Top