
Sesame Chicken Bowls Flavorful and Easy Weeknight Meal
Looking for a quick, tasty dinner that will impress your family? Try my Sesame Chicken Bowls! This easy weeknight meal
Looking for a quick, tasty dinner that will impress your family? Try my Sesame Chicken Bowls! This easy weeknight meal

Looking for a quick and tasty snack? Try my No Bake Peanut Butter Oatmeal Bites! This easy recipe combines wholesome
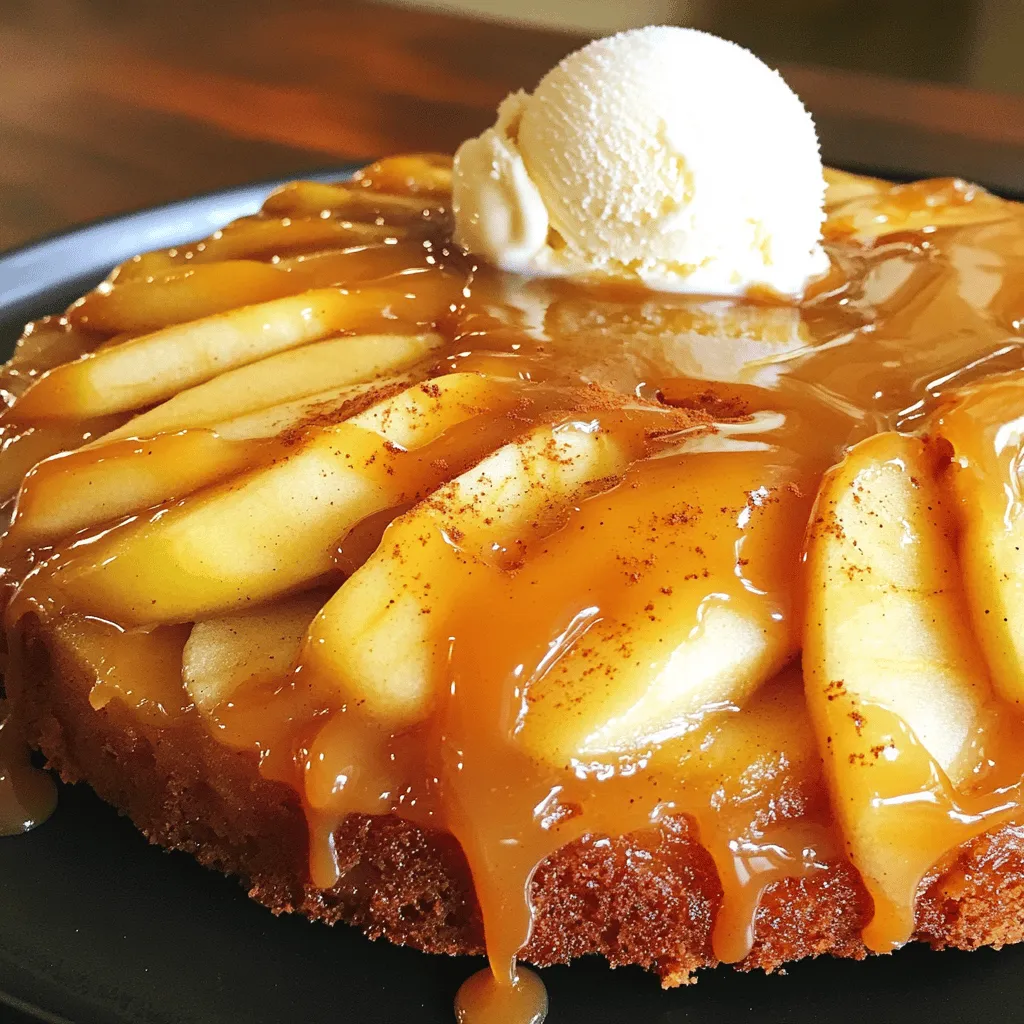
Get ready to indulge in a sweet treat that’s easy and fun to make! My Caramel Apple Upside Down Cake

Have you ever craved warm, bakery-style chocolate chip scones? You can make them at home! In this post, I’ll guide
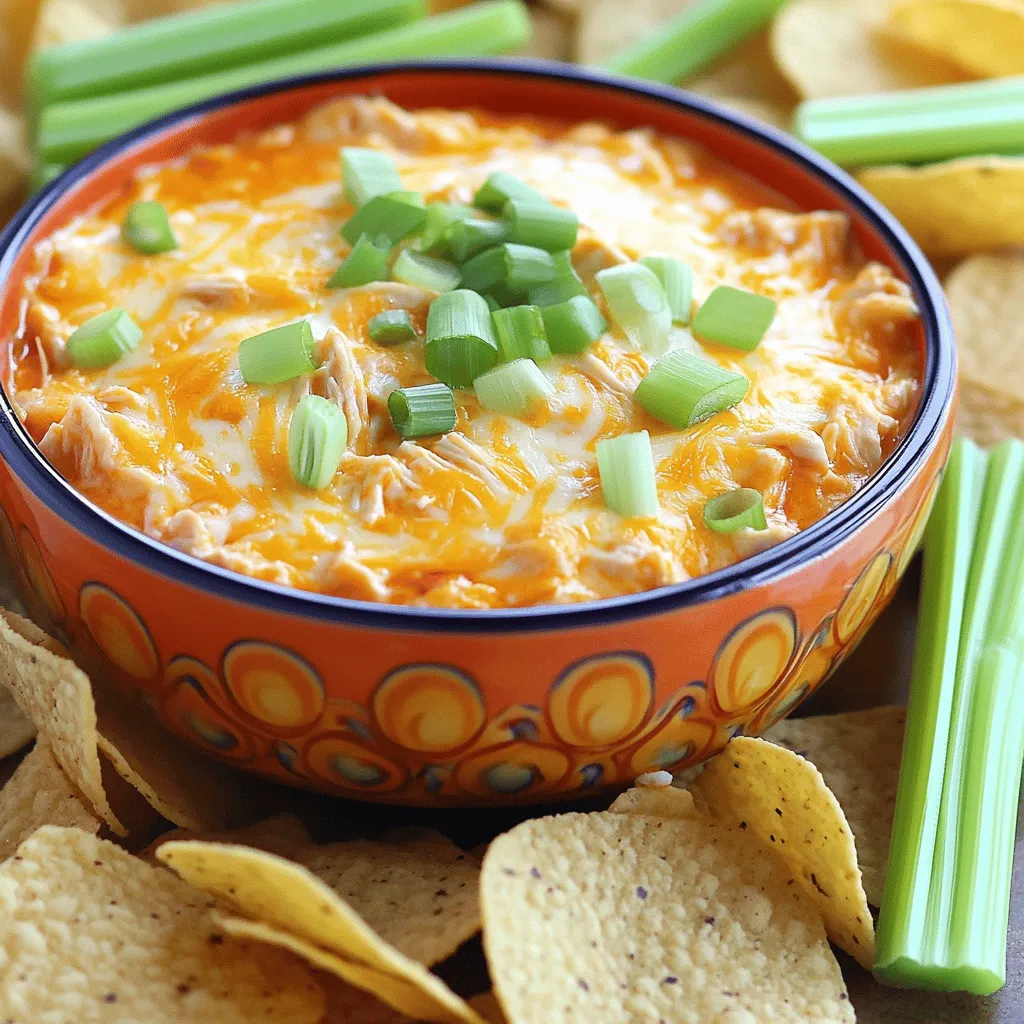
If you’re looking for a mouthwatering snack for game day, you’ve found it! This Slow Cooker Buffalo Chicken Dip is

Are you ready for a tasty meal that’s easy to make? This One Pot Creamy Spinach Artichoke Pasta Delight is

Looking for a quick and tasty meal? The Ground Turkey Pepper Skillet is just what you need! Packed with colorful
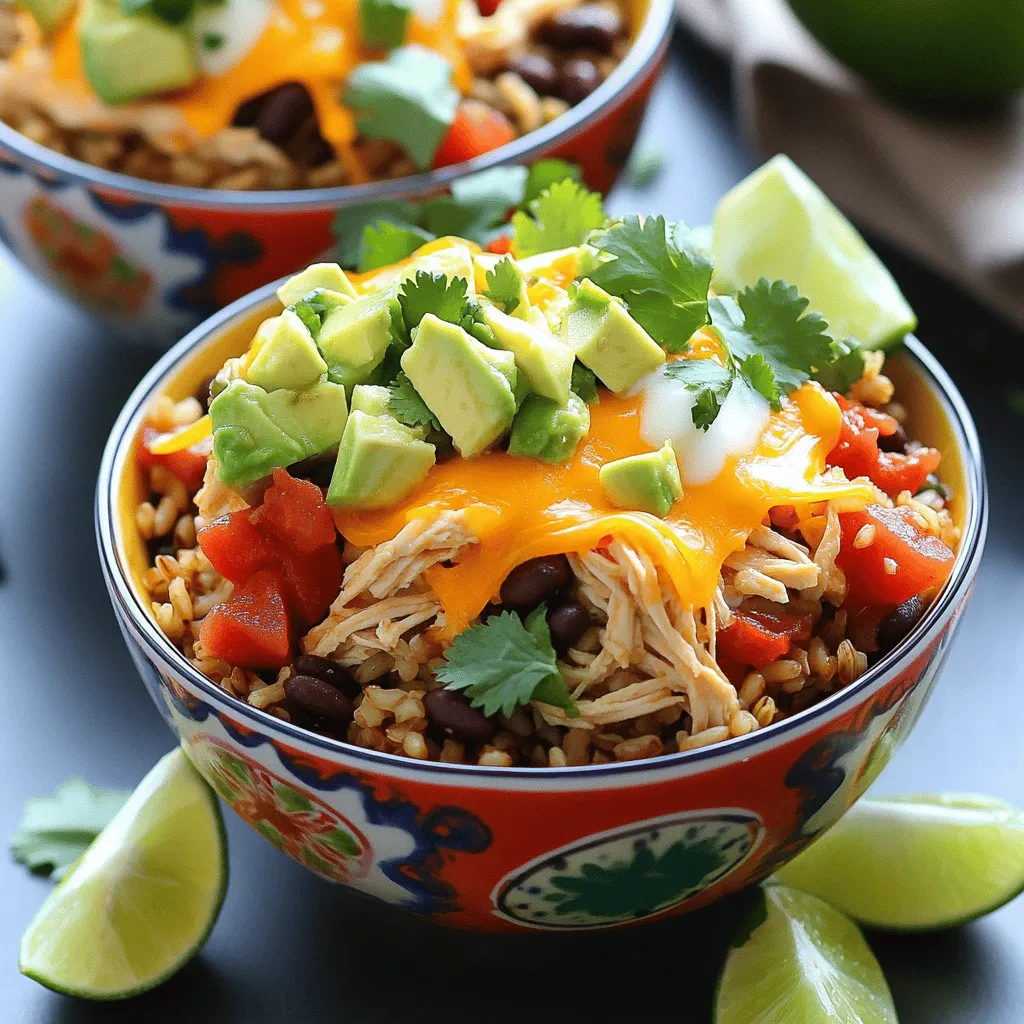
Ready to whip up a meal that’s quick, tasty, and full of flavor? These Instant Pot Chicken Burrito Bowls are

Looking for a warm, cozy treat that combines the flavors of fall? You’ve found it! This Chocolate Chip Pumpkin Bread

Craving a fresh and flavorful meal? Let me introduce you to cilantro lime chicken tacos! These delicious tacos are packed
