Skip to content
DisclaimerTerms Of UseGDPR PolicyCookie Policy

Emmas Dish

  • Home
  • Drinks
  • Appetizers
  • Dinner
  • Dessert
  • About
  • Contact
  • Privacy Policy
DisclaimerTerms Of UseGDPR PolicyCookie Policy

Emma

- 2 cups all-purpose flour - 1 teaspoon baking powder - 1 teaspoon baking soda - 1 teaspoon ground cinnamon - 1 teaspoon ground nutmeg - ½ teaspoon ground ginger - ½ teaspoon salt - 1 cup granulated sugar - ½ cup unsalted butter, softened - 2 large eggs - 1 cup canned pumpkin puree - 1 teaspoon vanilla extract - ½ cup brewed coffee, cooled - 1 cup brown sugar (for crumb topping) - 1 teaspoon ground cinnamon (for crumb topping) - 1 cup oats (for crumb topping) - ½ cup chopped walnuts (optional, for crumb topping) This list gives you all you need to make your Pumpkin Spice Latte Crumb Cake. Let’s dive into why each ingredient is important! - All-purpose flour: This forms the base of your cake. It gives structure and holds everything together. - Baking powder and baking soda: These are your leavening agents. They help the cake rise and stay light. - Spices: Ground cinnamon, nutmeg, and ginger bring warmth and flavor. They make your cake taste like fall! - Salt: Just a bit enhances the sweet flavors. It balances the cake nicely. - Granulated sugar: This sweetens the cake and helps it brown. - Unsalted butter: Softened butter adds richness and moisture. It helps create a fluffy texture. - Eggs: They bind the ingredients and add moisture. They also help the cake rise. - Pumpkin puree: This gives the cake its name! It adds flavor and keeps the cake moist. - Vanilla extract: Vanilla adds a sweet note. It enhances all the flavors in your cake. - Brewed coffee: This gives a slight boost of flavor. It complements the pumpkin and spices. - Brown sugar: Used for the crumb topping, it adds a nice caramel flavor. - Oats: They add crunch to the topping. They make it more rustic and hearty. - Chopped walnuts: These are optional but add a nice texture and nutty taste. With these ingredients, you can create a delightful treat that combines the best flavors of fall. Happy baking! First, set your oven to 350°F (175°C). This step is key for even baking. Next, grease a 9x13-inch baking dish. If you prefer, line it with parchment paper. This makes for easy removal later. In a medium bowl, whisk together the dry ingredients. Use 2 cups of all-purpose flour, 1 teaspoon of baking powder, and 1 teaspoon of baking soda. Add 1 teaspoon of ground cinnamon, 1 teaspoon of ground nutmeg, and ½ teaspoon of ground ginger. Finally, mix in ½ teaspoon of salt. Set this bowl aside for later. In a large bowl, cream together ½ cup of softened unsalted butter and 1 cup of granulated sugar. Beat until the mixture is light and fluffy. Next, add 2 large eggs one at a time. Mix well after each addition. Then, add 1 cup of canned pumpkin puree and 1 teaspoon of vanilla extract. Gradually mix the dry ingredients into the wet ingredients. Stir until just combined. Then, pour in ½ cup of cooled brewed coffee. Mix until the batter is smooth and fully blended. In a separate bowl, combine 1 cup of brown sugar, 1 cup of oats, and 1 teaspoon of ground cinnamon. If you like, add ½ cup of chopped walnuts for extra crunch. Mix this crumb topping until well combined. Pour the batter into your prepared baking dish. Spread it out evenly. Next, sprinkle the crumb topping evenly over the batter. Bake in the oven for 35 to 40 minutes. To check if it’s done, insert a toothpick into the center. It should come out clean. After baking, let the cake cool in the pan for about 10 minutes. This helps it set up nicely. Once cooled, slice the cake and serve. For a fun touch, drizzle a simple glaze made from powdered sugar and a bit of coffee over each slice. Enjoy! To keep your crumb cake moist, use quality ingredients. Fresh eggs and real butter add richness. Canned pumpkin puree is key, as it brings moisture and flavor. When mixing, don't overdo it. Mix until just combined for a soft texture. If you want more flavor, add a bit of brewed coffee. It enhances the pumpkin and spice notes. Sweetness can vary based on personal taste. Start with the recipe's sugar amounts. If you want less sweetness, cut back on the granulated sugar. For the spices, feel free to adjust. If you love cinnamon, add more! Try using different spices like allspice or cardamom for a unique twist. Just remember, start small and taste as you go. The crumb topping is what makes this cake special. Use cold butter for a crumbly texture. Combine brown sugar, oats, and cinnamon well. If you add walnuts, chop them finely. This gives a nice crunch. Don't skip the topping; it balances the cake's moistness. Spread it evenly over the batter for even baking. {{image_2}} You can make this crumb cake gluten-free. Use a 1:1 gluten-free flour blend. This swap keeps the texture light and fluffy. Always check that the blend contains xanthan gum. This helps mimic the stretch of gluten. Follow the same steps in the recipe. You will still get that warm pumpkin and spice flavor. To make a vegan pumpkin spice latte crumb cake, swap the eggs for flax eggs. Mix one tablespoon of ground flaxseed with three tablespoons of water for each egg. Let it sit for five minutes to thicken. Use plant-based butter instead of regular butter. Replace the milk coffee with a non-dairy option. Almond or oat milk works great here. The cake will still taste amazing and moist. You can add fun mix-ins to your crumb cake. Chocolate chips are a tasty option. Use semi-sweet or dark chocolate for a rich flavor. Nuts like pecans or almonds add a nice crunch. Dried fruits like cranberries or raisins can also work well. Just fold in your mix-ins when combining the wet and dry ingredients. This makes every bite even more delightful! To keep your cake fresh, store it in an airtight container. This keeps moisture in and prevents it from drying out. If you do not have a container, wrap it tightly with plastic wrap. Store the cake at room temperature for up to three days. If you want it to last longer, consider refrigerating it. Just remember to let it sit at room temperature for a bit before serving. You can freeze leftovers to enjoy later. First, slice the cake into pieces. Wrap each slice in plastic wrap. Then, place the wrapped slices in a freezer bag or container. This method helps to keep the cake fresh. You can freeze the cake for up to three months. When you are ready to eat, thaw it overnight in the fridge. After thawing, warm it in the oven at 350°F for about 10 minutes. This step brings back the fresh-baked taste. For the best taste, serve the cake warm. If you stored it in the fridge, let it sit out for about 30 minutes before serving. A drizzle of glaze made from powdered sugar and coffee can add a nice touch. You might also add whipped cream or a sprinkle of pumpkin spice on top. These additions enhance the flavors even more, making each slice a delight! Yes, you can use fresh pumpkin. Just cook and mash it first. This gives a richer taste. Fresh pumpkin has more moisture, so you may need to adjust the flour. Use about 1.5 cups of fresh pumpkin for this recipe. To get a crispy crumb topping, use cold butter. Cut it into the dry mix, so it stays chunky. Adding oats and nuts also helps with crunch. Bake it longer if needed, but watch it closely. This cake goes well with coffee or tea. It also pairs nicely with whipped cream or ice cream. A drizzle of caramel sauce adds sweetness and flavor. You can serve it with fresh fruit for a bright touch. Yes, you can make this cake a day early. Just store it in an airtight container. If you want, you can freeze it too. Wrap it well and keep it for up to three months. Thaw overnight in the fridge before serving. This blog post covered how to make a delicious Pumpkin Spice Latte Crumb Cake. We talked about the key ingredients, step-by-step baking instructions, and tips to ensure your cake turns out moist and full of flavor. We also explored variations for dietary needs and how to store leftovers properly. Remember, this cake is great for gatherings or cozy evenings at home. Enjoying your creation will be a treat for you and those you share it with. Happy baking!

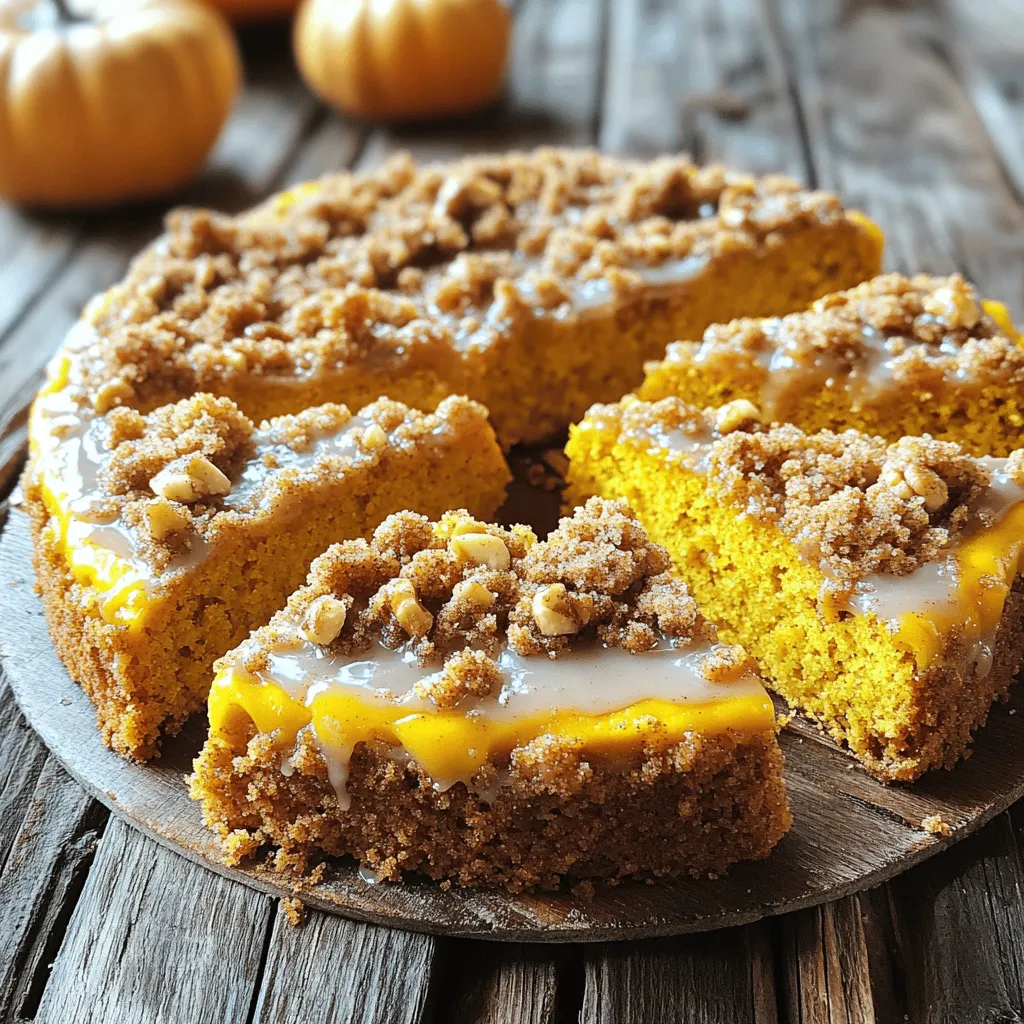
Pumpkin Spice Latte Crumb Cake Delightful Treat

Are you ready for a cozy, fall-inspired treat that pairs perfectly with your morning brew? This Pumpkin Spice Latte Crumb

- 1 cup cottage cheese - 1/2 cup natural peanut butter - 1/4 cup honey or maple syrup - 1 teaspoon vanilla extract - 1/4 teaspoon cinnamon - A pinch of salt - Chopped nuts - Chocolate chips - Sliced bananas 1. In a mixing bowl, combine the cottage cheese and natural peanut butter. 2. Use a hand mixer or whisk to blend until smooth and creamy. 3. Add honey or maple syrup, vanilla, cinnamon, and a pinch of salt. 4. Mix again until all ingredients are well combined. 1. Once creamy, transfer the dip to a serving bowl. 2. Top with chopped nuts, chocolate chips, or sliced bananas if you want. 3. Serve with fresh fruit slices, pretzels, or graham crackers for dipping. To get that smooth and creamy dip, start by blending the cottage cheese and peanut butter. I like to use a hand mixer for this. It makes the dip fluffy and light. You can also use a whisk if you want a workout! Just blend until there are no lumps. If you want a creamier dip, feel free to add a splash of milk or yogurt. This extra liquid makes all the difference. Mix it in until you reach the texture you enjoy. Balancing the sweetness is key. I often start with the honey or maple syrup in the recipe. After mixing, taste the dip. If it's not sweet enough, add more sweetener a little at a time. This way, you control the flavor better. For a different twist, try using agave syrup or stevia. These can add sweetness without extra calories. Just remember to adjust the amount, as they can be sweeter than honey. You can change the flavor of your dip to make it more fun. One tasty option is chocolate peanut butter dip. To make this, simply add 1/4 cup of cocoa powder to your mix. Blend it well with the cottage cheese and peanut butter. This gives a rich, chocolatey taste that pairs well with apples or pretzels. Another option is a fruit-infused cottage cheese dip. You can blend in 1/2 cup of your favorite fruit puree. Think strawberries, blueberries, or even bananas. This adds natural sweetness and a burst of flavor. You can enjoy it with fresh fruit slices or graham crackers. If you follow a vegan diet, you can still enjoy this dip. Replace cottage cheese with silken tofu. It has a smooth texture and takes on flavors well. Use almond or cashew butter instead of peanut butter. Maple syrup works great as a sweetener too. For those watching sugar intake, you can make a low-sugar version. Use a sugar substitute like stevia or monk fruit. You can also skip the honey or syrup altogether. Just make sure to taste as you mix. Adjust the flavors to your liking, and you’ll have a dip that fits your needs. {{image_2}} Store the Cottage Cheese Peanut Butter Frosting Dip in the fridge. Use an airtight container to keep it fresh. This dip stays good for about three to five days. Make sure to check for any changes in smell or texture before you eat it. You can freeze the dip for later use. Just place it in a freezer-safe container. Leave some space at the top because the dip will expand when frozen. It can last up to three months in the freezer. To thaw the dip, move it to the fridge a day before you want to use it. Once thawed, stir it well. If it seems a bit thick, mix in a small amount of milk. Enjoy your creamy dip even after freezing! Can I use low-fat cottage cheese? Yes, you can use low-fat cottage cheese. It will still taste great. The dip may be a bit less creamy but still delicious. Low-fat options cut some calories but keep the protein. How long does the dip last in the fridge? The dip lasts about 3 to 5 days in the fridge. Store it in an airtight container. Make sure to check for any change in smell or texture before eating. What to dip with? You can dip fresh fruit slices like apples or pears. Pretzels or graham crackers work well, too. For a fun twist, try it with celery sticks or carrot sticks. Can I use this as a frosting? Yes, this dip makes a tasty frosting! Spread it on cakes or cupcakes for a fun treat. The creamy texture adds a nice twist to your desserts. You can also top it with chocolate chips or nuts for extra flair. This post covered how to make a tasty cottage cheese dip. We looked at the main ingredients like cottage cheese, peanut butter, and sweeteners. I shared tips on mixing and serving your dip, plus ways to adjust texture and sweetness. We explored fun flavor options and dietary choices. Lastly, I provided storage advice to keep your dip fresh. Now, you can enjoy this dip your way and share it with friends. Have fun experimenting and making it your own!

Cottage Cheese Peanut Butter Frosting Dip Delight

Looking for a tasty treat that’s both fun and healthy? You’ll love this Cottage Cheese Peanut Butter Frosting Dip! It’s

- 4 Italian chicken sausages, sliced - 1 red bell pepper, diced - 1 yellow bell pepper, diced - 1 zucchini, sliced - 1 red onion, chopped - 2 cups baby spinach - 3 tablespoons balsamic vinegar - 2 tablespoons olive oil - 1 teaspoon garlic powder - 1 teaspoon dried oregano - Salt and pepper to taste In this recipe, the Italian chicken sausages stand out with their rich flavors. They add a savory touch that pairs well with fresh veggies. Use fresh bell peppers for sweetness and color. Zucchini brings in a nice texture, while red onion gives a hint of sharpness. The baby spinach adds vibrant greens and a slight earthiness. The balsamic vinegar and olive oil create a tangy and rich glaze that coats everything beautifully. Garlic powder and oregano boost the flavors with warmth and depth. - Fresh basil Fresh basil leaves make a great garnish. They add a burst of color and fresh flavor. Just sprinkle them on top before serving for that added touch of gourmet. - Alternate sausage types - Other vegetables to include Feel free to switch out the sausages if you like. Turkey or plant-based sausages work well too. You can also try other veggies like carrots, broccoli, or asparagus. Each veggie brings its unique taste and texture to your dish. This makes the recipe flexible and fun! - Preheat your oven to 425°F (220°C). This high heat helps the veggies roast nicely. - Chop your veggies: dice the red and yellow bell peppers, slice the zucchini, and chop the red onion. This makes everything cook evenly and look great. - In a large bowl, combine the sliced Italian chicken sausages with all the chopped veggies. - Drizzle 2 tablespoons of olive oil and 3 tablespoons of balsamic vinegar over the mix. This adds a rich flavor. - Sprinkle 1 teaspoon of garlic powder, 1 teaspoon of dried oregano, salt, and pepper. Toss everything well so all the pieces are coated nicely. - Spread the sausage and veggie mix evenly on a large sheet pan. Make sure they have space to roast fully. - Roast in the oven for 20-25 minutes. Stir halfway through to help them cook evenly. The sausages should be cooked through and the veggies tender. - In the last 5 minutes, add 2 cups of baby spinach to the pan. Toss gently until the spinach just wilts. This adds color and nutrition. To ensure even cooking, cut all vegetables to similar sizes. This way, they roast at the same rate. Use a large sheet pan to give enough space. If you crowd the pan, your veggies may steam instead of roast. Stir the ingredients halfway through cooking. This helps everything cook evenly and get a nice color. For added flavor, try different spices like smoked paprika or thyme. A pinch of red pepper flakes adds a nice kick. You can also experiment with marinades. For a tangy twist, mix balsamic vinegar with honey or mustard. Let the sausages marinate for a bit before cooking to soak up those flavors. Pair this dish with garlic bread or quinoa for a complete meal. A fresh salad adds a nice crunch and balances the hearty dish. For presentation, serve it on a large platter, garnished with fresh basil leaves. This adds color and makes it look gourmet. Don't forget to drizzle a little more balsamic on top for extra flavor! {{image_2}} You can easily adjust this recipe for different diets. - Vegetarian version: Replace the chicken sausages with plant-based sausages or roasted chickpeas. This keeps the meal filling and tasty without meat. - Gluten-free alternatives: Use gluten-free sausages and ensure your balsamic vinegar is gluten-free. This way, everyone can enjoy this dish. Changing the spices and ingredients can create new flavors. - Mediterranean twist: Use Italian herbs like rosemary or thyme. Add olives and feta cheese for a bright, tangy taste. - Spicy version with peppers: Toss in some jalapeños or crushed red pepper. This will give your dish a nice kick that warms you up. Using what's fresh can make this dish even better. - Using seasonal vegetables: In summer, add fresh corn or cherry tomatoes. In fall, use butternut squash or Brussels sprouts. Each season brings new tastes. - Holiday-inspired adaptations: For a festive touch, include cranberries or sweet potatoes during the holidays. This adds color and seasonal flavor. To keep your Sheet-Pan Balsamic Sausage & Veggies fresh, place leftovers in an airtight container. This helps prevent moisture loss and keeps flavors intact. Store the container in the fridge for up to three days. If you want to enjoy it later, freezing is a great option. You can reheat your dish in the microwave or oven. For the microwave, place the meal in a safe dish and heat for about two minutes. Stir halfway to ensure even heating. If you prefer the oven, preheat it to 350°F and bake for about 10-15 minutes. This method helps keep the veggies crisp. To keep the veggies fresh, cover them lightly with foil while reheating. To freeze the dish, let it cool completely before transferring it to a freezer-safe container. Label and date the container for easy reference. You can freeze it for up to three months. When ready to eat, thaw in the fridge overnight. For reheating, use the oven method mentioned earlier for the best results. Enjoy your tasty meal again! You can store this dish in the fridge for 3 to 4 days. Keep it in a sealed container. This helps keep it fresh and tasty. If you want to keep it longer, consider freezing it. Just make sure to use an airtight container. When ready to eat, thaw it overnight in the fridge. Yes, you can use any kind of sausage you like. Chicken, pork, or turkey sausages all work well. Feel free to try spicy sausages for a kick. Just remember to adjust the cooking time if you use thicker sausages. Always ensure the sausages reach a safe internal temperature. Absolutely! This recipe is perfect for meal prep. You can make a big batch and divide it into portions. It reheats well, making it easy for busy days. Just store it in individual containers for quick meals. This blog post showed you how to make a tasty sheet-pan meal with Italian chicken sausages and fresh veggies. You learned about main ingredients, cooking steps, and tips for great flavor. Remember, you can switch the sausage or vegetables to suit your taste. Try the different variations and storage tips for easy meal prep. Enjoy the fun of cooking and make it your own! The result will be delicious and satisfying. Happy cooking!

Sheet-Pan Balsamic Sausage & Veggies Flavor Boost

Looking for a quick and tasty meal? My Sheet-Pan Balsamic Sausage & Veggies is the answer! It’s easy to make

To make these tasty cups, gather these ingredients: - 1 cup white chocolate chips - 1/4 cup coconut oil - 1/2 cup fresh raspberries - 1/2 cup crushed digestive biscuits or graham crackers - 1 tablespoon powdered sugar - 1 teaspoon vanilla extract - Pinch of salt - Extra raspberries and white chocolate shavings for garnish You will need a few simple tools for this recipe: - Muffin tin - Cupcake liners or silicone molds - Microwave-safe bowl - Mixing spoon - Measuring cups and spoons - Refrigerator For great flavor, pick fresh and high-quality ingredients. Here are my top tips: - White Chocolate: Look for chips with real cocoa butter. Avoid cheap brands with fillers. - Raspberries: Choose firm, bright red berries. They should smell sweet. Check for any mold. - Coconut Oil: Use refined coconut oil for a neutral taste. Unrefined adds a coconut flavor. - Biscuit Base: Digestive biscuits give a great texture. If you prefer, graham crackers work well too. - Vanilla Extract: Pure vanilla gives the best flavor. Avoid imitation vanilla if possible. Using quality ingredients makes a big difference in taste! Start by lining a muffin tin with cupcake liners or silicone molds. This makes it easy to remove the cups later. Choose colorful liners for a fun touch. Make sure they fit snugly in the tin. This helps keep the shape while you fill them. In a microwave-safe bowl, mix white chocolate chips and coconut oil together. Heat it in the microwave. Do this in 30-second bursts. Stir after each interval until it is smooth. Watch closely to avoid burning the chocolate. The mixture should be glossy and creamy when done. First, pour about 1 tablespoon of the melted chocolate into each cup. This forms a base layer. Next, add a few fresh raspberries right on top. Then, take the crushed biscuits and mix them with 2 tablespoons of the melted chocolate. Spoon this mixture over the raspberries, pressing down gently. Now, pour another layer of melted chocolate over the biscuit mix. Ensure you cover the raspberries well. Repeat the layers until you fill each cup to the top. When all cups are full, place the muffin tin in the fridge. Chill them for at least 2 hours. This lets the chocolate set properly. Once they are firm, carefully take the cups out of the molds. You can garnish with extra raspberries and white chocolate shavings if you like. Enjoy your tasty treats! To melt white chocolate, use a microwave-safe bowl. Combine the white chocolate chips with coconut oil. Heat in short bursts of 30 seconds. Stir after each burst. This keeps the chocolate smooth. Avoid overheating, as it can seize up. If it looks grainy, add a bit more coconut oil. Keep stirring until it’s silky and warm. You can change the flavors easily. Try adding orange zest for a citrus twist. You can mix in a bit of almond extract for a nutty taste. For a berry blend, use mixed berries instead of just raspberries. You can also fold in mini marshmallows for extra texture. Get creative and see what you like! Serve these cups chilled for the best taste. Place them on a nice platter to impress. Add fresh mint leaves around the cups for a pop of color. You can drizzle some extra melted chocolate on top for flair. These cups are perfect for parties or simple treats. Enjoy them with friends and family! {{image_2}} You can switch raspberries for other fruits. Try strawberries, blueberries, or blackberries. Each fruit adds its own flavor. Use fresh or frozen fruit. If you use frozen fruit, let it thaw first. You can even mix different fruits for fun blends. While white chocolate shines here, you can use milk or dark chocolate. Each type will change the taste. Milk chocolate gives a creamier flavor, while dark chocolate adds richness. Just melt it the same way as the white chocolate. Adjust the sugar if needed to balance the taste. To make these cups gluten-free, choose gluten-free biscuits. Many brands offer great options. You can use gluten-free graham crackers or even ground nuts. This way, everyone can enjoy these treats without worry. Always double-check labels when buying ingredients. To keep your No-Bake White Chocolate Raspberry Cups fresh, store them in an airtight container. This helps keep moisture out and prevents them from absorbing other odors. If you use cupcake liners, leave them in the liners for easier serving. Place a piece of parchment paper between layers if stacking. These delicious cups last up to five days in the fridge. After that, the chocolate may lose its creamy texture. To maintain the best flavor and texture, enjoy them within this time frame. Always check for any signs of spoilage before eating. If you want to save some cups for later, freezing is a great option. Wrap each cup tightly in plastic wrap. Then, place them in a freezer-safe bag or container. They can last up to three months in the freezer. When ready to eat, thaw them in the fridge overnight before serving. This method keeps them tasting fresh and delightful! Yes, you can use dark chocolate. It will change the taste and color. Dark chocolate has a richer flavor. This will balance the tartness of the raspberries. If you love dark chocolate, give it a try! If you do not have coconut oil, you can use butter or vegetable oil. Both options will work well. Butter will add a creamy taste. Vegetable oil is neutral and won’t change the flavor. Choose what you have on hand. To make these cups vegan, switch to dairy-free chocolate. Look for brands that are plant-based. You can also use coconut oil instead of butter. Make sure the biscuits are vegan too. This way, everyone can enjoy these treats! In this post, we covered how to make delicious chocolate cups. We discussed key ingredients and tools needed for success. I shared tips for choosing quality items and outlined a simple step-by-step process. You learned about melting chocolate, assembling the cups, and enhancing flavor. We also explored different variations and storage methods to keep your treats fresh. Remember, using good ingredients makes a big difference! Enjoy your sweet creations and have fun experimenting!

No-Bake White Chocolate Raspberry Cups Delightful Treat

If you’re craving a sweet treat without the fuss of baking, you’re in the right place! These No-Bake White Chocolate

- 1 pound large shrimp, peeled and deveined - 8 ounces fettuccine pasta - 2 tablespoons Cajun seasoning - 1 tablespoon olive oil - 3 cloves garlic, minced - 2 cups chicken broth - 1 cup heavy cream - 1 cup grated Parmesan cheese - 1 cup cherry tomatoes, halved - 1 cup spinach leaves - Salt and pepper to taste - Fresh parsley, chopped (for garnish) Each ingredient plays a key role in the dish. The shrimp adds protein, while the pasta provides a hearty base. Cajun seasoning brings a kick of flavor. Olive oil helps to sauté the garlic, which adds a lovely aroma. The chicken broth adds depth and keeps the pasta moist. Heavy cream makes the sauce rich and creamy. Parmesan cheese adds a savory note, while cherry tomatoes and spinach give color and freshness. When you season with salt and pepper, it enhances the flavors. Fresh parsley on top makes it look nice. Each bite will be a tasty mix of flavors, making this a meal to remember. First, heat 1 tablespoon of olive oil in a large pot over medium heat. Next, add 3 cloves of minced garlic and sauté for 1-2 minutes. You want the garlic fragrant, not burnt. Then, take 1 pound of shrimp, peeled and deveined, and sprinkle 2 tablespoons of Cajun seasoning over them. Toss the shrimp until they are coated well. Add the seasoned shrimp to the pot and cook for 2-3 minutes on each side. Look for the shrimp to turn pink and curl up. Once cooked, remove them from the pot and set them aside. In the same pot, pour in 2 cups of chicken broth and bring it to a simmer. This will add flavor to your pasta. Add 8 ounces of fettuccine pasta to the pot. Cook according to the package directions, which usually takes about 8-10 minutes. Stir the pasta occasionally to prevent sticking. When it is al dente, lower the heat to prepare for the sauce. Now it's time to make the creamy sauce. Stir in 1 cup of heavy cream and 1 cup of grated Parmesan cheese. Mix everything until the cheese melts and the sauce thickens. It should look smooth and creamy. Next, add 1 cup of halved cherry tomatoes and 1 cup of fresh spinach leaves. Stir until the spinach wilts and the tomatoes soften. This adds color and nutrients to your meal. Return the cooked shrimp to the pot. Mix everything gently until it is all combined and heated through. Taste the dish, and adjust the seasoning with salt and pepper to your liking. This is the moment to make it perfect for your palate. Let the dish rest for a couple of minutes to thicken, if desired. Now, you’re ready to serve a delicious bowl of One-Pot Cajun Shrimp Alfredo! - How to achieve perfectly cooked shrimp: Cook shrimp quickly over medium heat. When they turn pink and curl up, they are done. Avoid overcooking, as this makes them tough. Keep an eye on them! - Ensuring creamy Alfredo sauce consistency: To get a smooth sauce, add heavy cream slowly. Stir well to combine with cheese. If the sauce is too thick, add a splash of chicken broth. - Adding more Cajun seasoning for spice: If you love heat, don’t hold back! Add more Cajun seasoning for a stronger flavor. Just sprinkle a little at a time and taste as you go. - Incorporating other vegetables or proteins: Mix in bell peppers, zucchini, or mushrooms for added flavor and nutrition. You can also swap shrimp for cooked chicken or sausage for a tasty twist. - Serving suggestions with garnishes: Serve your dish in deep bowls. Top with fresh parsley and extra Parmesan cheese. This makes it look fancy and appetizing. - Storing leftovers for later enjoyment: Store any leftovers in an airtight container. Keep them in the fridge for up to three days. Reheat gently to enjoy again! {{image_2}} You can swap shrimp for chicken or sausage. Both options add great flavor. Chicken works well if you cook it until golden. Sausage gives a nice spice kick. For a vegetarian option, use plant-based proteins like tofu or tempeh. These proteins soak up the sauce well. Fettuccine is classic for this dish, but feel free to try others. Penne or linguine can work just as well. If you need a gluten-free choice, look for gluten-free pasta. Many brands taste great and hold up in the sauce. Want to switch up the taste? Try adding new herbs like basil or thyme. You can also spice it up with crushed red pepper flakes. If you crave a different sauce flavor, mix in some pesto or sun-dried tomatoes. These tweaks can take your dish to a whole new level. To keep your One-Pot Cajun Shrimp Alfredo fresh, store it properly. Use airtight containers to prevent moisture loss. Glass or plastic containers work well. Let the dish cool before sealing. This helps avoid condensation inside the container. You can keep it in the fridge for up to three days. For longer storage, freeze it in portions. It can last up to three months in the freezer. When reheating, I recommend using the stovetop for the best texture. Heat a pan over medium-low heat. Add a splash of chicken broth or cream to keep it moist. Stir frequently to prevent sticking. Reheat for about five to seven minutes until warm. You can also use the microwave. Heat in short bursts of one minute, stirring in between. This ensures even heating without overcooking the shrimp. The total time for this dish is about 30 minutes. You will need 10 minutes for prep. Cooking the pasta and shrimp takes about 20 minutes. It is quick and easy! Yes, you can make this dish ahead of time. Cook the shrimp and pasta, then cool them. Store in airtight containers. Keep the sauce separate. Reheat them before serving for best results. You can serve this meal with simple sides. Here are some ideas: - Garlic bread - Green salad - Steamed vegetables - Roasted asparagus These sides complement the creamy Alfredo well. Yes, you can make it healthier. Here are some tips: - Use whole wheat pasta. - Substitute light cream for heavy cream. - Add more vegetables like bell peppers or zucchini. - Reduce cheese for fewer calories. These changes keep the dish tasty while cutting calories. This blog post covers everything you need to make a delicious Cajun Shrimp Alfredo. We explored the key ingredients, step-by-step instructions, cooking tips, and variations. You learned how to enhance flavor and store leftovers. This dish is not just tasty; it’s adaptable to your needs. Whether you want to experiment with proteins or make it healthier, the options are endless. Enjoy the cooking journey and savor your creamy, spicy masterpiece!

One-Pot Cajun Shrimp Alfredo Easy and Flavorful Meal

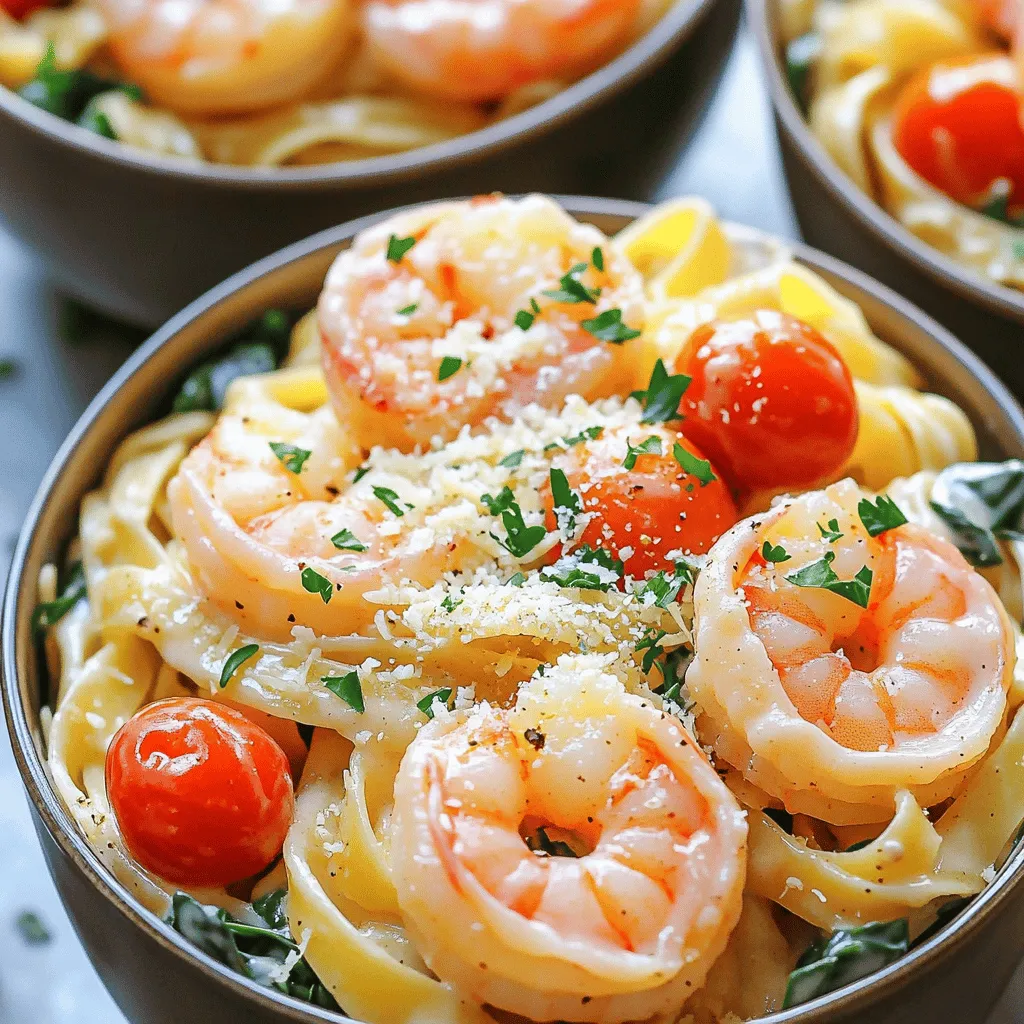
If you’re craving a dish that’s both easy and bursting with flavor, you’ve come to the right place! This One-Pot

- 8 oz white chocolate, chopped - 1/2 cup crushed peppermint candies (or candy canes) - 1/4 cup dark chocolate chips (for drizzling) - Pinch of sea salt - Mini cupcake liners (for serving) White chocolate is the star of this treat. It melts creamy and sweet. I love using high-quality chocolate for the best taste. The crushed peppermint adds a fun crunch and bright flavor. A pinch of sea salt balances the sweetness. Mini cupcake liners make serving easy and neat. - Other types of chocolate (like milk or dark) - Sprinkles for extra color - Different flavored extracts, like vanilla or almond You can switch up the chocolate if you want. Dark chocolate gives a richer taste. Sprinkles can make these bites more festive. Adding a little extract can add a new twist to the flavor. Get creative and make them your own! - Look for high-quality white chocolate with cocoa butter. - Buy fresh peppermint candies for the best flavor. - Choose dark chocolate chips with at least 60% cocoa for richness. When shopping, always check the labels. Fresh ingredients make a big difference. Quality chocolate will melt nicely and taste great. Don't hesitate to ask store staff for recommendations if you are unsure. Start by getting your baking sheet ready. Line it with parchment paper. This keeps the bites from sticking. Next, place mini cupcake liners on the sheet. They will hold your peppermint bark bites. Make sure to space them out evenly. Grab a microwave-safe bowl. Add 8 ounces of chopped white chocolate to it. Heat in the microwave for 30 seconds. Take it out and stir well. Repeat this until the chocolate is smooth. Watch closely so it doesn't overheat. If it gets too hot, it may become lumpy. Once the white chocolate melts, add in 1/3 cup of crushed peppermint candies. Stir the mixture until it blends well. Then, use a spoon to fill the cupcake liners halfway. This will give your bites a nice shape. Don't forget to sprinkle some of the leftover crushed peppermint on top of each bite. A tiny pinch of sea salt adds flavor too. Next, place the baking sheet in the fridge. Let the bites set for about 30 minutes. This helps the chocolate firm up. While you wait, melt the dark chocolate chips in the same way as before. After the bites are firm, drizzle the dark chocolate over them. You can use a fork or a piping bag for this. It gives a pretty finish. Return the baking sheet to the fridge for another 15 minutes. Once the dark chocolate sets, take the bites out of the cupcake liners. Enjoy your festive treats! To melt white chocolate well, use a microwave-safe bowl. Cut the chocolate into small pieces. Heat it in 30-second bursts. Stir the chocolate after each interval. Stop when it is mostly melted, then stir until smooth. This method keeps the chocolate from burning. Avoid using high heat; it can ruin the chocolate. Use mini cupcake liners to serve these bites. They make cute, individual portions. Place them on a festive platter. For a fun touch, sprinkle more crushed peppermint around the bites. You can also add a few chocolate shavings on top. This adds elegance and makes the bites look special. Do not overheat the chocolate when melting. It can become thick and grainy. Make sure to stir well to combine flavors. When adding toppings, sprinkle gently to avoid clumping. Lastly, let the bites set in the fridge until firm. This step is key for a great texture. {{image_2}} You can easily change the flavor of your bark bites. Try adding a splash of vanilla or almond extract to the melted white chocolate. Just a few drops can make a big difference. You might also use orange or raspberry extract for a fruity twist. These small changes add a new layer of taste and surprise. Toppings can change the look and feel of your bark bites. Instead of crushed peppermint, consider using crushed nuts like almonds or hazelnuts. These add a crunchy bite that pairs well with the creamy chocolate. You can also sprinkle in some mini marshmallows or colorful sprinkles for a fun touch. Mixing textures keeps each bite exciting and unique. If you prefer dark chocolate, it’s easy to switch! Use dark chocolate instead of white chocolate. Melt it just like you did with the white chocolate. You can still add peppermint candies for that classic flavor. The dark chocolate will give a richer taste, perfect for chocolate lovers. Just follow the same steps, and you’ll have a delicious dark chocolate peppermint bark. To keep your White Chocolate Peppermint Bark Bites fresh, use an airtight container. Place parchment paper between layers to prevent sticking. Store them in a cool, dry place. Avoid sunlight, as it can cause melting. This way, they will stay tasty and good-looking. These bites can last about two weeks in the fridge. The cold helps keep them firm and fresh. Make sure to check for any signs of spoilage before eating. If you notice any changes in texture or smell, it’s best to discard them. You can freeze these bites for longer storage. Place them in a single layer on a baking sheet first. Once frozen, transfer them to an airtight bag. They will stay good for up to three months. When you want to eat them, let them thaw in the fridge for a few hours. This keeps them from melting too quickly. Yes, you can use milk chocolate. It will change the taste. Milk chocolate is creamier and sweeter. The peppermint will still shine through, but it won’t be as bright. To avoid grainy chocolate, melt it slowly. Use short bursts in the microwave. Stir it often to keep the heat even. If chocolate gets too hot, it can seize. Adding a bit of vegetable oil can help smooth it out. Absolutely! These bites store well. Make them a week ahead of time. Just keep them in the fridge in an airtight container. You can also freeze them. Just let them thaw in the fridge before serving. You can find pre-made peppermint bark bites at many grocery stores. Look in the holiday section. Local candy shops may also sell them. Online retailers often have great options too. We covered the key ingredients for white chocolate peppermint bark bites, customization options, and smart shopping tips. I shared step-by-step instructions to make these bites perfect, along with tips for melting chocolate and common mistakes to avoid. We explored variations like adding different flavors and how to store your treats properly. In the end, these bites are easy and fun to make. Enjoy experimenting with flavors and sharing them with friends. They will love the taste and your creativity. Happy baking!

White Chocolate Peppermint Bark Bites Festive Treats

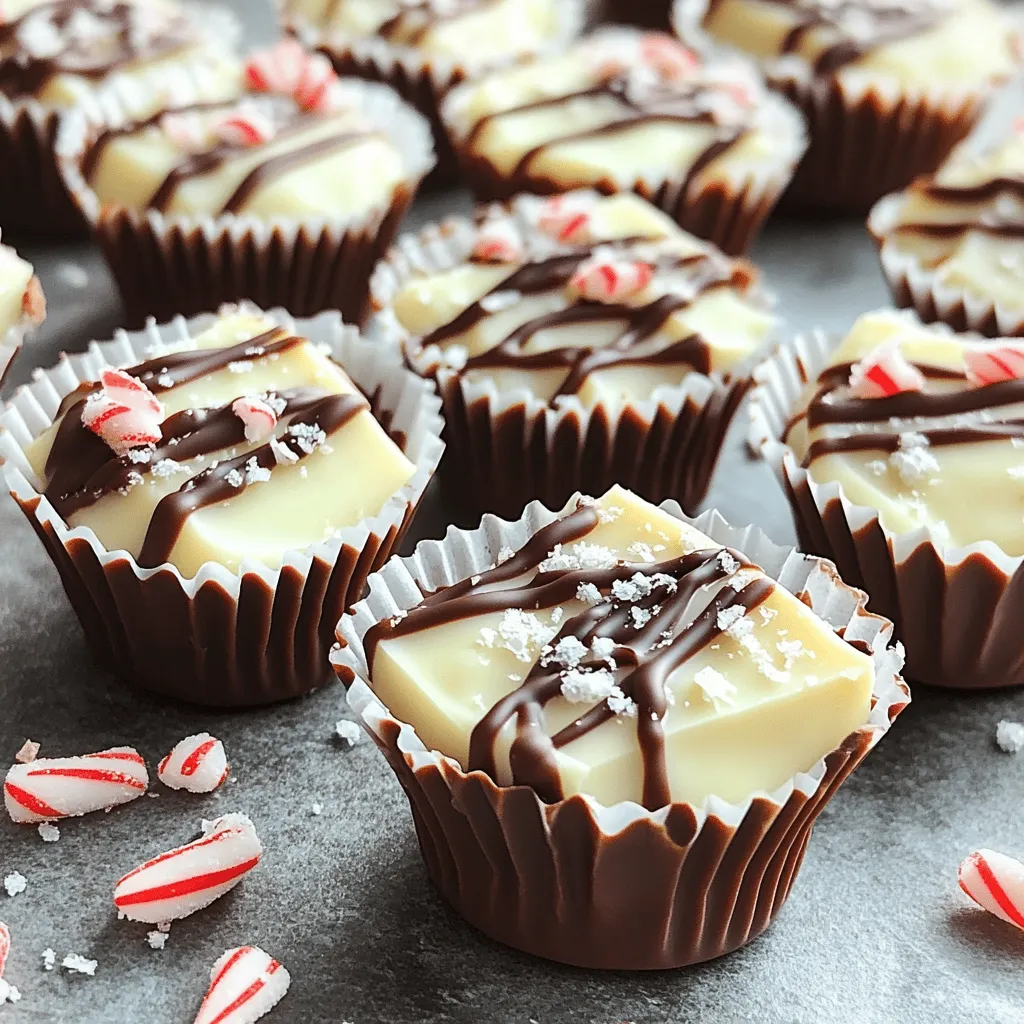
Are you ready to wow your friends and family with a festive treat? White Chocolate Peppermint Bark Bites are simple

To make Apple Cinnamon Overnight Oats, gather these simple ingredients: - 1 cup rolled oats - 1 ½ cups almond milk (or any milk of choice) - 1 medium apple, diced (preferably a sweet variety like Honeycrisp or Fuji) - 1 tablespoon chia seeds - 1 tablespoon maple syrup (or honey) - 1 teaspoon cinnamon - ½ teaspoon vanilla extract - A pinch of salt - Optional toppings: sliced almonds, additional apple slices, or a dollop of yogurt Each ingredient plays a key role in flavor and texture. The rolled oats offer a hearty base. Almond milk gives a creamy touch. Diced apples add natural sweetness and crunch. Chia seeds help thicken the mix while providing extra nutrition. Maple syrup or honey offers just the right amount of sweetness. Cinnamon and vanilla extract bring warmth and depth to each bite. A pinch of salt enhances all the flavors. Finally, toppings like sliced almonds or yogurt add a delightful finish. These elements work together to create a tasty and satisfying breakfast. You can mix and match based on your tastes and what you have at home. - Mixing the Ingredients First, grab a large mixing bowl. Add in 1 cup of rolled oats. Pour in 1 ½ cups of almond milk. Then, sprinkle in 1 tablespoon of chia seeds. Drizzle in 1 tablespoon of maple syrup and mix in 1 teaspoon of cinnamon. Add ½ teaspoon of vanilla extract and a pinch of salt. Stir all the ingredients until they blend well. - Incorporating the Apples Next, take your medium apple and dice it into small pieces. I suggest using a sweet apple like Honeycrisp or Fuji. Gently fold the diced apple into the oat mixture. This step helps spread the apple flavor throughout the oats. - Dividing into Jars After mixing, it's time to portion the oats. Divide the mixture evenly into two jars or airtight containers. Make sure to secure the lids tightly. This keeps the oats fresh while they chill in the fridge. - Duration for soaking overnight Place the jars in the fridge and let them soak overnight or for at least 6 hours. This soaking time is key. It allows the oats and chia seeds to absorb the liquid. - Importance of soaking for texture Soaking changes the texture of the oats. It softens them, creating a creamy base. Chia seeds also swell up, adding a nice thickness to the mix. - Adjusting consistency with milk In the morning, take the jars out and give the oats a good stir. If the mixture is too thick, add a splash of almond milk. This will help reach your preferred consistency. - Ideal toppings for enhancing flavor To make your oats even better, consider adding toppings. Sliced almonds add crunch. Extra apple slices bring freshness. A dollop of yogurt offers creaminess. Feel free to get creative with your toppings! You can make your apple cinnamon overnight oats unique. Here are some fun ways to tweak the recipe: - Variations on sweeteners: You can swap maple syrup for honey or agave. Try using brown sugar for a richer taste. - Different types of milk: Almond milk works well, but you can also use oat milk, soy milk, or even cow's milk. Each type gives a different flavor. - Flavor enhancements: Add nutmeg for a warm spice kick. You can also mix in some nut butter for extra creaminess and protein. Storing overnight oats is simple. Here are my best tips: - Best practices for storing overnight oats: Use airtight jars or containers. This keeps your oats fresh and prevents odors from other foods. - Shelf life and freshness tips: Overnight oats last up to five days in the fridge. Just keep them sealed. If they start to look dry, add a splash of milk. Prepping your oats in advance saves time. Here’s what you need to know: - How long can you prep in advance: You can prepare these oats up to five days ahead. This makes busy mornings easier. - Ideal time frames for flavors to meld: Let the oats sit in the fridge for at least six hours. This gives the oats and apple time to soak and blend flavors. {{image_2}} You can mix up the fruits in your overnight oats. Try using bananas or berries. Both add great flavor and nutrition. You can also use pears for a sweet touch. Seasonal fruits work well too. In fall, add chopped figs or pomegranate seeds. In summer, use peaches or cherries. Get creative! Let the seasons guide your choices. If you want a dairy-free option, use almond or oat milk. Both give a nice creaminess. For gluten-free oats, make sure to choose certified gluten-free oats. This way, you can enjoy your meal without worries. You can also swap chia seeds for ground flaxseed if you prefer. These small changes help fit different diets. Spices are a fun way to change the flavor. Try adding nutmeg or ginger for warmth. You can also mix in a dash of cocoa powder for a chocolate twist. Sweetness is a personal choice. Adjust the maple syrup or honey to fit your taste. If you like it sweeter, add more. For a less sweet version, reduce the syrup. These small tweaks will make your oats just right for you. Each serving of apple cinnamon overnight oats has about 300 calories. This dish includes: - 54 grams of carbohydrates - 9 grams of protein - 7 grams of fat The main ingredients offer many nutrients. Rolled oats provide energy and fiber. They help keep your tummy full longer. Apples add vitamins and natural sweetness. Chia seeds boost protein and healthy fats. Almond milk is low in calories and dairy-free. Oats are great for heart health. They lower cholesterol and provide steady energy. Chia seeds are tiny powerhouses. They help with digestion and hydration. Apples are rich in antioxidants. They are good for your skin and immune system. This dish is high in fiber and protein. This mix is perfect for staying full and satisfied. Apple cinnamon overnight oats fit well into any balanced breakfast. You can pair them with a glass of almond milk or a cup of tea. For extra taste, serve with yogurt or nuts. You can also enjoy them as a snack or dessert. The options are endless! Overnight oats are a no-cook way to prepare oatmeal. You mix oats with liquid and let them sit overnight. This makes the oats soft and creamy. They soak up the flavors and nutrients. You can add fruits, nuts, and seeds for extra taste. It’s a quick and healthy breakfast option. Yes, you can use quick oats. Quick oats cook faster and have a finer texture. They absorb liquid quickly, which makes them mushier. Rolled oats are thicker and give a chewier bite. Choose rolled oats for the best texture in overnight oats. Overnight oats last about 3 to 5 days in the fridge. Store them in airtight containers to keep them fresh. Check for any signs of spoilage before eating. If they look or smell off, it’s best to toss them. Yes, you can enjoy overnight oats warm. Just heat them in the microwave for 30 to 60 seconds. Stir well and add a splash of milk for creaminess. Warm oats can feel cozy on chilly mornings. You can top your oatmeal with many tasty options. Here are some ideas: - Sliced almonds - Additional apple slices - A dollop of yogurt - Berries or bananas - A drizzle of honey or maple syrup - A sprinkle of nuts or seeds Feel free to mix and match toppings to your taste! In this article, we explored how to make delicious overnight oats from simple ingredients. You learned about mixing oats, milk, and fruit, then letting them soak overnight for the best texture. I shared tips for customizing the recipe with different fruits and sweeteners. You also discovered storage best practices and nutritional benefits. Overnight oats are a quick, tasty, and healthy breakfast choice. With some creativity, you can make them your own! Enjoy experimenting with flavors!

Apple Cinnamon Overnight Oats Simple and Tasty Treat

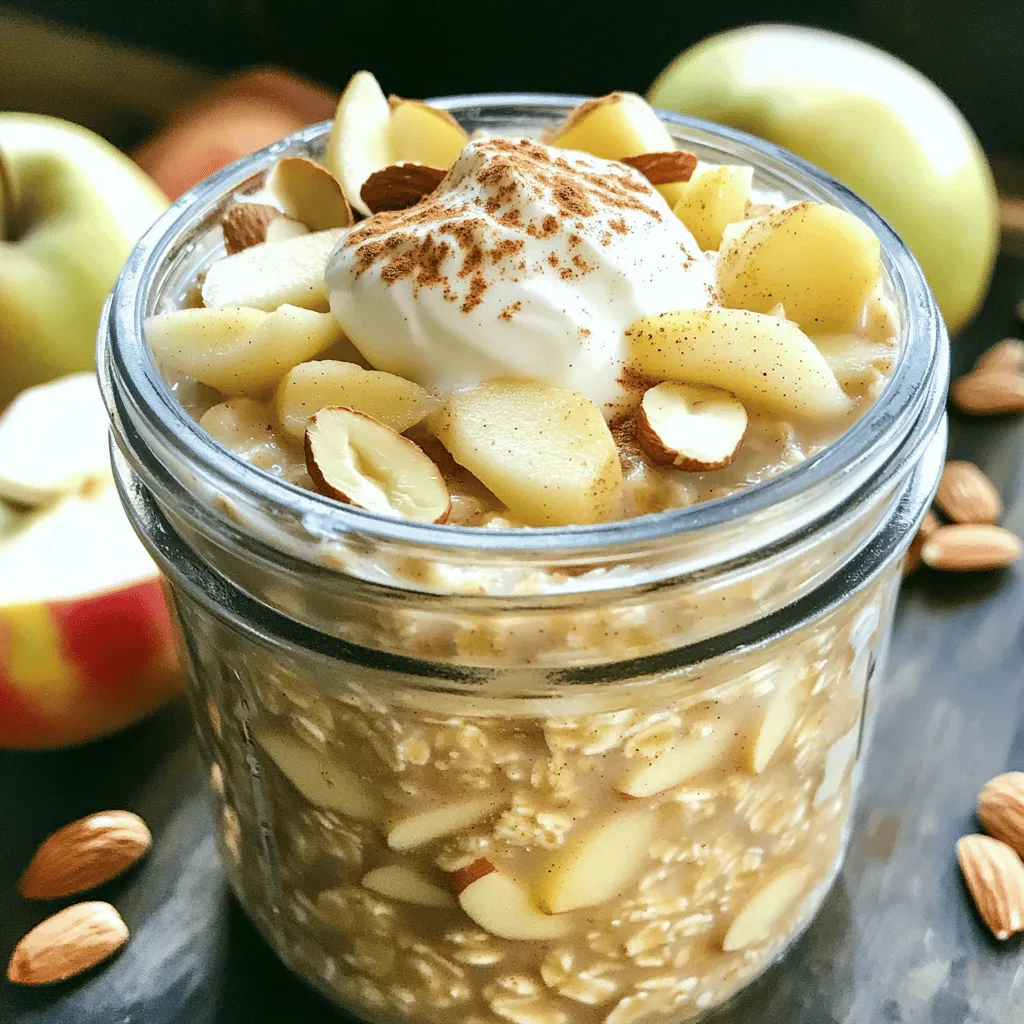
Start your morning right with Apple Cinnamon Overnight Oats—a fun and easy treat! This simple recipe combines crunchy apples, warm

To make these tasty cups, you will need: - 2 cups Greek yogurt (plain or vanilla-flavored) - 1/2 cup salted caramel sauce (store-bought or homemade) - 1/4 cup crushed graham crackers - 1/4 cup chopped nuts (like pecans or walnuts) - Sea salt flakes for garnish Each of these ingredients plays a key role. The Greek yogurt gives a creamy base. The salted caramel adds sweetness and a salty kick. Graham crackers bring a crunchy texture, while nuts add extra flavor and crunch. You can make your cups even better with these extras: - Fresh fruit (like banana slices or berries) - A drizzle of chocolate sauce - A sprinkle of cinnamon These toppings not only look good but also add more flavor. Fresh fruit can brighten the dish and make it healthier. Choosing the right ingredients makes a big difference. Look for: - Thick, creamy Greek yogurt without added sugar - Rich, smooth salted caramel sauce - Fresh, crunchy nuts that smell good When you use high-quality items, your dessert tastes better. Always check labels to avoid extra additives. First, grab a mixing bowl. Add 2 cups of Greek yogurt to the bowl. You can use plain or vanilla yogurt. Next, pour in half a cup of salted caramel sauce. Stir gently. Mix until the yogurt and caramel blend well. This step adds a sweet and salty flavor to your yogurt. Now, take four serving cups or bowls. Start by adding half of the yogurt mixture to the bottom of each cup. Spread it evenly. Then, sprinkle a layer of crushed graham crackers on top. Use about 1/4 cup of graham crackers. After that, add a layer of chopped nuts. You can use pecans or walnuts for a nice crunch. Repeat the layers with the remaining yogurt, graham crackers, and nuts. This makes each cup exciting and textured. Once your cups are layered, drizzle the rest of the salted caramel sauce on top. This adds a beautiful shine and flavor. Don’t forget to sprinkle a pinch of sea salt flakes on each cup. This is vital for that perfect salted caramel taste. If you want, top with fresh fruit like banana slices or berries. This gives your cups a colorful look and fresh flavor. Serve these cups right away for the best taste. To get the best flavor, use high-quality Greek yogurt. I recommend plain yogurt for a creamy base. Mixing in salted caramel adds a sweet and salty touch. Use just the right amount of caramel. Too much can make it too sweet. A pinch of sea salt on top enhances all the flavors. You can prepare these cups ahead of time. Layer the yogurt, graham crackers, and nuts in cups. Cover them and store in the fridge. This saves time when you want a quick snack. Just add the salted caramel sauce and sea salt before serving. You can also top with fresh fruit for a nice finish. If you're dairy-free, swap Greek yogurt for coconut yogurt. It gives a similar texture with a hint of coconut flavor. For a gluten-free option, use gluten-free graham crackers or skip them altogether. If you want less sugar, use a sugar-free caramel sauce. This way, you can enjoy a tasty treat that fits your needs. {{image_2}} You can switch up the Greek yogurt flavor for fun. Try using honey yogurt for a sweet twist. A coconut yogurt adds a tropical feel. For something tart, use a lemon-flavored yogurt. Each choice brings new tastes to your cups. Toppings can change your Salted Caramel Greek Yogurt Cups. Try adding mini chocolate chips for extra sweetness. Fresh berries give a nice pop of color and flavor. You can also sprinkle some shredded coconut for a chewy texture. Chopped dark chocolate adds richness and depth. To make lighter cups, you can use low-fat Greek yogurt. This keeps the flavor but cuts calories. Swap the salted caramel for a fruit puree, like mango or strawberry. You can use nuts sparingly or switch to seeds. This way, you still enjoy tasty cups without the extra calories. Store your Salted Caramel Greek Yogurt Cups in airtight containers. This keeps them fresh and tasty. Make sure to separate layers with parchment paper if they stack. Avoid mixing in fresh fruit until you serve. This way, the fruit stays fresh and doesn't make the yogurt soggy. These yogurt cups last up to three days in the fridge. After that, the flavor and texture may change. Check for any off smells or changes in color before eating. If you notice anything odd, it’s best to discard them. You can freeze these yogurt cups, but they may lose some creaminess. If you want to freeze them, use freezer-safe containers. Layer yogurt and toppings, but skip the caramel drizzle. This helps keep everything fresh. When you’re ready to eat, thaw them in the fridge overnight. Enjoy them cold for a refreshing treat! Yes, you can use any yogurt you like. Greek yogurt works best for a thick texture. You can choose plain or vanilla-flavored yogurt based on your taste. If you prefer other types, like regular yogurt, they will work too. Just remember, the flavor might change a bit. Making salted caramel is simple. You need sugar, butter, heavy cream, and sea salt. Start by heating sugar in a pan until it melts and turns golden brown. Then, add butter and stir until melted. Slowly mix in heavy cream and a pinch of sea salt. Let it cool before using it in your yogurt cups. Greek yogurt is versatile and tasty. You can use it in smoothies, parfaits, or dressings. You can also mix it with honey or fruit for a snack. It’s great in savory dishes too, like dips or sauces. The options are endless! Yes, these cups are perfect for meal prep. You can make them ahead and store them in the fridge. Just layer and cover them tightly with plastic wrap. They stay fresh for a few days. Enjoy them as a quick breakfast or snack anytime! You learned how to make delicious Salted Caramel Greek Yogurt Cups. We discussed the key ingredients, steps for making them, and tips for the best results. You saw fun variations and useful storage details. Remember, you can customize flavors and toppings to fit your taste. Feel free to prepare them in advance for quick snacks. These cups are easy to make and great for sharing. Enjoy your tasty treats and impress your friends with this simple recipe!

Salted Caramel Greek Yogurt Cups Delightful Treats

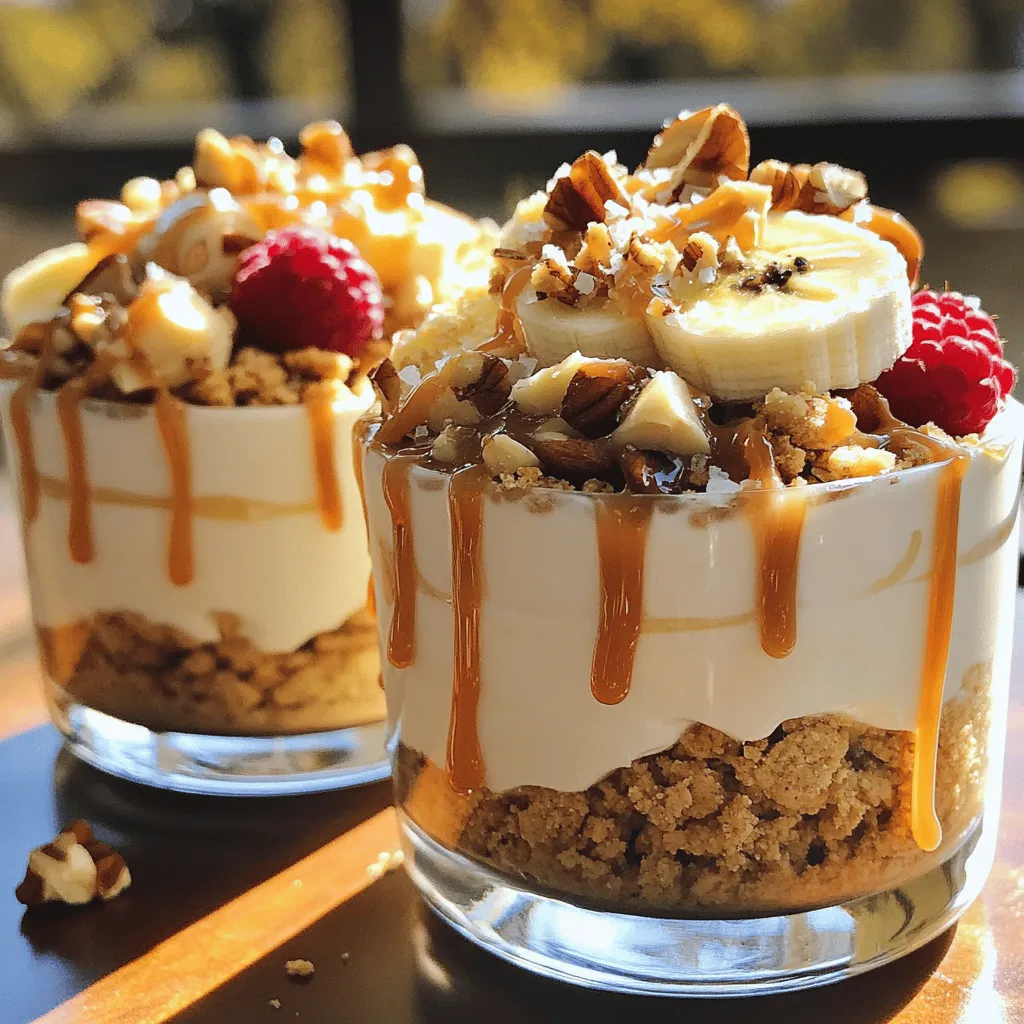
Are you ready to indulge in a sweet, creamy treat? These Salted Caramel Greek Yogurt Cups are the perfect blend

For Crispy Lemon Herb Potatoes, gather these simple ingredients: - 2 pounds baby potatoes, halved - 1/4 cup olive oil - 2 tablespoons fresh lemon juice - Zest of 1 lemon - 2 teaspoons garlic powder - 1 teaspoon smoked paprika - 1 tablespoon fresh rosemary, chopped - 1 tablespoon fresh thyme, chopped - Salt and pepper to taste - Fresh parsley, for garnish Using baby potatoes gives a nice texture and flavor. You can swap them for Yukon Gold or red potatoes if needed. Olive oil is best for roasting, but you can use avocado oil for a different taste. Fresh lemon juice adds a bright zing. If you don’t have fresh lemon, bottled juice works too, but fresh is always best. Garlic powder adds depth, while smoked paprika gives a hint of smokiness. If you like heat, add cayenne pepper instead. Fresh herbs like rosemary and thyme bring flavor, but dried herbs can work in a pinch. Fresh herbs make a huge difference in taste. They add brightness and freshness, enhancing the dish. Dried herbs lack the same flavor punch. When you chop fresh rosemary and thyme, their oils release, making your potatoes taste amazing. Plus, they add a lovely green color that makes the dish pop. When you use fresh herbs, you elevate your cooking and impress your guests. Trust me, it's worth the effort! Start by washing your baby potatoes well. Halve each potato to help them cook faster. This step is key for even cooking. Preheat your oven to 425°F (220°C). Line a baking sheet with parchment paper. This makes cleanup easier and helps the potatoes crisp up nicely. In a large bowl, combine the halved potatoes, olive oil, fresh lemon juice, and lemon zest. The lemon adds a bright flavor. Sprinkle in garlic powder, smoked paprika, chopped rosemary, and thyme. Season with salt and pepper to taste. Toss everything well until the potatoes are fully coated. This ensures every bite is packed with flavor. Spread the potatoes in a single layer on the baking sheet. Make sure not to overcrowd them. This helps them roast properly and become crispy. Roast in the oven for 30-35 minutes. Flip them halfway through to get an even golden brown color. Keep an eye on them as they cook. Once they look crispy and golden, they are ready to come out. Let them cool for a few minutes. Garnish with fresh parsley before serving. Enjoy your crispy lemon herb potatoes warm! To make crispy lemon herb potatoes, you need 10 minutes to prep. This includes washing and cutting the baby potatoes. The cooking time is 30 to 35 minutes in the oven at 425°F (220°C). So, the total time from start to finish is about 45 minutes. This quick timeline makes it easy to fit into any meal plan. These crispy potatoes shine as a side dish. They work well with grilled meats, fish, or a fresh salad. You can serve them at barbecues or family dinners. They are also great for brunch with eggs. Don't forget to serve them warm for the best taste. Pair these potatoes with a few different foods. They go well with roasted chicken, beef, or shrimp. Try them with a light lemon sauce for extra zest. You can also enjoy them with creamy dips or sauces. Fresh herbs like parsley add a nice touch too. This dish is a crowd-pleaser and complements many flavors. {{image_2}} To get the best crispiness, you want to follow a few key steps. First, make sure to cut the baby potatoes in half. This increases their surface area. Second, don't overcrowd the baking sheet. Give each potato space to breathe. This allows the hot air to circulate. Lastly, flipping them halfway through cooking helps them crisp evenly. If you want extra crunch, you can broil them for a minute at the end. Avoid using wet potatoes. Always dry them well after washing. Moisture can prevent them from getting crispy. Another common mistake is not seasoning enough. The lemon juice and herbs add flavor, but you need salt and pepper, too. Lastly, don’t forget to preheat your oven. A hot oven ensures a good roast. If you have leftovers, store them in an airtight container. Keep them in the fridge for up to three days. To reheat, place them on a baking sheet and warm in the oven. This helps restore their crispiness. You can also use an air fryer for quick reheating. It gives them that fresh-out-of-the-oven crunch again! You can spice up your crispy lemon herb potatoes in many ways. Try using dried herbs like oregano or basil. They add a nice twist. You can also swap garlic powder for fresh garlic. Fresh garlic gives a stronger taste. If you like heat, sprinkle in some red pepper flakes. This will give your potatoes a fun kick. Adding other vegetables can make this dish even better. Carrots, bell peppers, or zucchini work great. Just cut them into similar sizes as the potatoes. Toss them in the same mix of oil and herbs. They will roast well together and soak up all the flavors. This makes your meal colorful and tasty. These crispy lemon herb potatoes are naturally vegan and gluten-free. This means anyone can enjoy them. If you want a creamier texture, try mixing in a little tahini. It adds a rich flavor without any dairy. You can also serve them with a tahini sauce or a vegan dip. This makes for a fun twist on a classic dish. Yes, you can use other types of potatoes. Red potatoes and Yukon Gold work well too. These potatoes have a similar texture and flavor. Just keep in mind that cooking time may vary. You want them crispy and golden. If you use larger potatoes, chop them smaller for even cooking. You will know the potatoes are done when they are golden brown and crispy. They should be tender inside. Use a fork to test them. If the fork goes in easily, they are ready. The cooking time is about 30-35 minutes. Remember to flip them halfway for even crispiness. Yes, you can prepare the potatoes in advance. You can wash and cut them a day before. Store them in water to keep them fresh. When you are ready to cook, just drain and season as usual. You can also roast them ahead of time. Store in an airtight container. Reheat them in the oven for the best crispiness. In this post, we explored how to make crispy lemon herb potatoes. We covered the best ingredients and how to prepare them. We discussed roasting tips, cooking times, and serving ideas. I shared helpful tips for crispiness and common mistakes to avoid. You'll find variations for different tastes and ingredient substitutions. Enjoy making this dish with fresh herbs and perfect textures. These potatoes can easily become a favorite side. With what you learned, you can create tasty meals that impress. Happy cooking!

Crispy Lemon Herb Potatoes Perfect for Any Meal

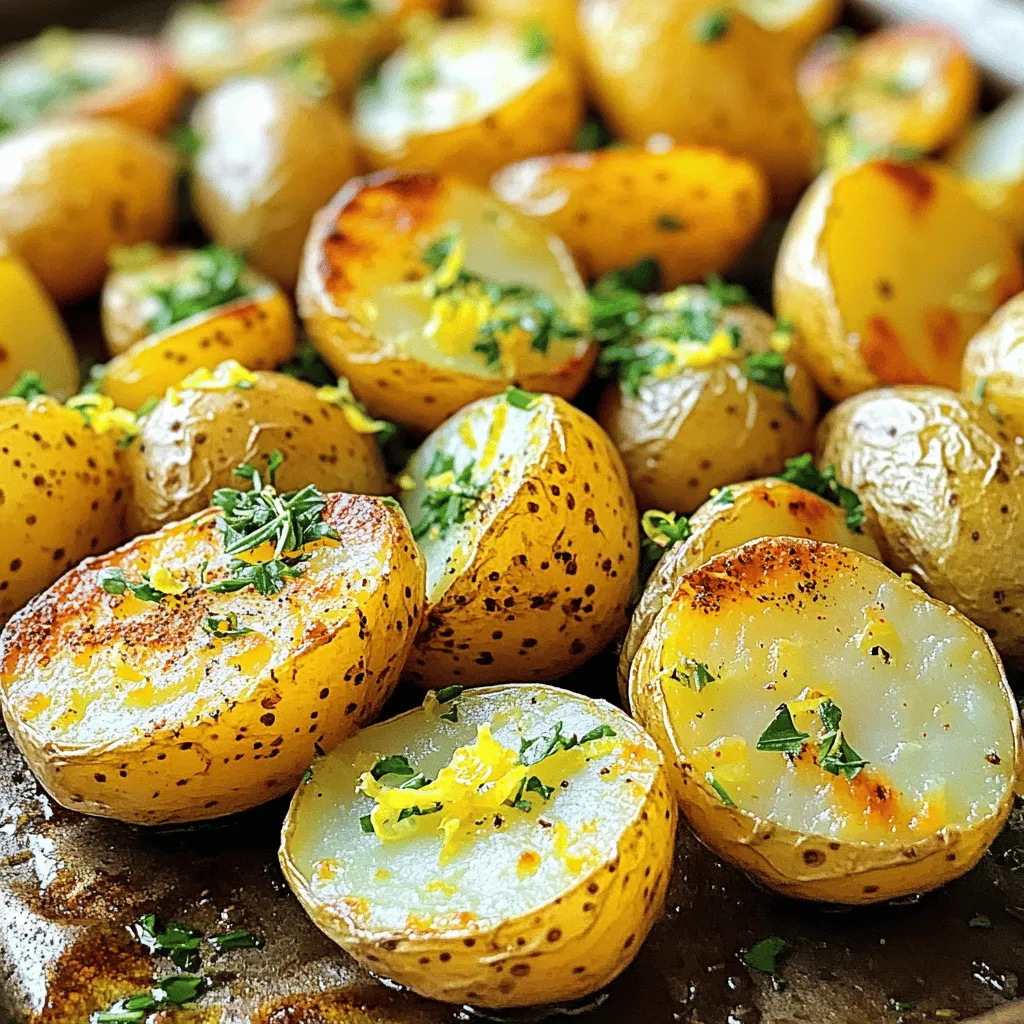
Are you ready to elevate your meals? Crispy Lemon Herb Potatoes are the ultimate side dish. With a zesty flavor

- 1 cup pumpkin puree - ½ cup brown sugar - ½ cup granulated sugar - ½ cup vegetable oil - 2 large eggs - 1 teaspoon vanilla extract These ingredients form the base of our muffins. Pumpkin puree gives a rich flavor and moist texture. The sugars add sweetness and help with browning. Vegetable oil keeps the muffins soft. Eggs bind the mixture, while vanilla adds depth. - 1 ½ cups all-purpose flour - 1 teaspoon baking powder - 1 teaspoon baking soda - ½ teaspoon salt - 1 teaspoon ground cinnamon - ½ teaspoon ground nutmeg - ½ teaspoon ground ginger All-purpose flour gives structure. Baking powder and baking soda are key for rising. Salt enhances flavor, while spices add warmth and a hint of spice. Cinnamon, nutmeg, and ginger create that cozy fall vibe. - 1 cup chocolate chips - ½ cup chopped walnuts Chocolate chips bring sweetness and richness. They melt slightly, making each bite delightful. Walnuts add crunch and a nutty flavor. You can mix and match these add-ins to suit your taste. First, set your oven to 350°F (175°C). This temperature ensures our muffins bake evenly. While the oven heats, line a muffin tin with paper liners. You can also grease it lightly if you prefer. This step helps the muffins come out easily after baking. In a large bowl, whisk together the pumpkin puree, brown sugar, granulated sugar, vegetable oil, and eggs. Add in the vanilla extract for extra flavor. Mix until everything is smooth and blended. This mixture is the heart of your muffins, giving them moisture and sweetness. In a separate bowl, sift together the all-purpose flour, baking powder, baking soda, salt, cinnamon, nutmeg, and ginger. Gradually add this dry mix into the wet mixture. Stir gently until just combined. It’s key to avoid overmixing here. Overmixing can make your muffins tough instead of soft. Spoon the batter into the prepared muffin tin, filling each cup about ¾ full. Bake in your preheated oven for 18-20 minutes. To check for doneness, insert a toothpick into the center of a muffin. If it comes out clean, your muffins are ready. Let them cool in the pan for five minutes before moving them to a wire rack. How to Avoid Soggy Muffins To keep your muffins from getting soggy, always use fresh pumpkin puree. If you use canned puree, check for added water. Adding too much liquid can make your muffins dense. Make sure to fill the muffin cups about three-quarters full. This allows them to rise nicely without spilling over. Importance of Not Overmixing Overmixing can lead to tough muffins. When you mix the wet and dry ingredients, stop as soon as they blend together. A few lumps are okay. This keeps the muffins light and fluffy. Remember, gentle folding is key when adding chocolate chips and nuts. Presentation Tips for Serving Muffins To make your muffins look great, dust the tops with powdered sugar. This adds a nice touch. Serve them on a rustic wooden board for a cozy feel. You can also place them in a pretty muffin stand to impress guests. Enjoying Warm or Room Temperature These muffins taste best warm from the oven. You can also enjoy them at room temperature. For a nice treat, spread a little butter on top. It melts and adds richness to each bite. Recommended Tools for Easier Baking Using a good muffin tin is crucial for even baking. I recommend a non-stick or silicone muffin pan. This helps muffins pop out easily. A whisk and mixing bowls are also key for smooth batter. Lastly, a toothpick is great for checking if muffins are done. {{image_2}} To make gluten-free pumpkin chocolate chip muffins, you can substitute all-purpose flour with a gluten-free flour mix. Look for a blend that includes rice flour, tapioca starch, and potato starch. This mix will help keep the muffins light and fluffy. You can use a 1:1 ratio, meaning if the recipe calls for 1 ½ cups of flour, use the same amount of gluten-free mix. To make these muffins vegan, replace the eggs with flaxseed meal or applesauce. For flaxseed, mix 1 tablespoon of ground flaxseed with 2.5 tablespoons of water. Let it sit for a few minutes until it thickens. You can also use ¼ cup of applesauce for each egg. For a dairy-free option, use almond milk or coconut milk instead of regular milk. This keeps the muffins moist while ensuring they are plant-based. You can boost the flavor of your muffins by adding spices or extracts. Try adding a pinch of cloves or a teaspoon of allspice for a warm, spicy kick. You can also enhance the flavor with a splash of maple syrup or orange zest. This simple addition will brighten the taste and make your muffins even more special. To keep your pumpkin chocolate chip muffins fresh, store them in an airtight container. This helps prevent them from drying out. You can use a plastic container or a resealable bag. Just make sure to seal it tightly. You can store them at room temperature for up to three days. If you want them to last longer, consider freezing them. To freeze muffins for long-term storage, first let them cool completely. This keeps ice crystals from forming. Wrap each muffin in plastic wrap. Then, place the wrapped muffins in a freezer-safe bag. Squeeze out as much air as possible before sealing. Label the bag with the date. They can stay in the freezer for up to three months. When you're ready to enjoy your muffins, reheating them is easy. For best results, use the oven. Preheat it to 350°F (175°C). Place the muffins on a baking sheet and heat for about 10 minutes. This method keeps them soft and warm. If you're in a hurry, a microwave works too. Heat each muffin for about 15-20 seconds. Just be careful not to overheat them, or they may become dry. Enjoy your delicious muffins anytime! To make your muffins more moist, you can add extra pumpkin puree. This makes the muffins soft and rich. Another tip is to avoid overmixing. Mix just until the dry ingredients blend with the wet ones. This keeps the muffins light and fluffy. Adding a bit of yogurt or sour cream can also help. These ingredients add moisture and flavor. Yes, you can use fresh pumpkin instead of pumpkin puree. First, cook the pumpkin by steaming or roasting it. After it’s soft, mash it until smooth. Strain it to remove excess water. This helps keep your muffins from getting soggy. Use the same amount as the recipe calls for. Fresh pumpkin will bring a lovely, earthy flavor. The best way to check if your muffins are done is by using a toothpick. Insert it into the center of a muffin. If it comes out clean or with a few crumbs, they are ready. Another sign is the tops should look golden brown and spring back when touched. If they feel wet or sticky, they need more time. You can store your pumpkin chocolate chip muffins for about 3 to 5 days at room temperature. Place them in an airtight container to keep them fresh. If you want to store them longer, they freeze well. Just wrap them tightly in plastic wrap and place them in a freezer bag. They can last up to 3 months in the freezer. Absolutely! You can use mini chocolate chips in place of regular ones. They melt nicely and spread throughout the muffins. This gives every bite a sweet surprise. Plus, they look cute and can add a fun touch to the muffins. Feel free to adjust the amount to your taste. In this guide, we covered how to make pumpkin muffins, focusing on key ingredients and steps. You learned to mix wet and dry ingredients, avoid sogginess, and explore fun variations. Remember, your muffins can be gluten-free or vegan with simple swaps. Proper storage helps keep them fresh, while reheating preserves their taste. With these tips, you can enjoy delicious muffins anytime. Happy baking!

Pumpkin Chocolate Chip Muffins Soft and Flavorful Treat

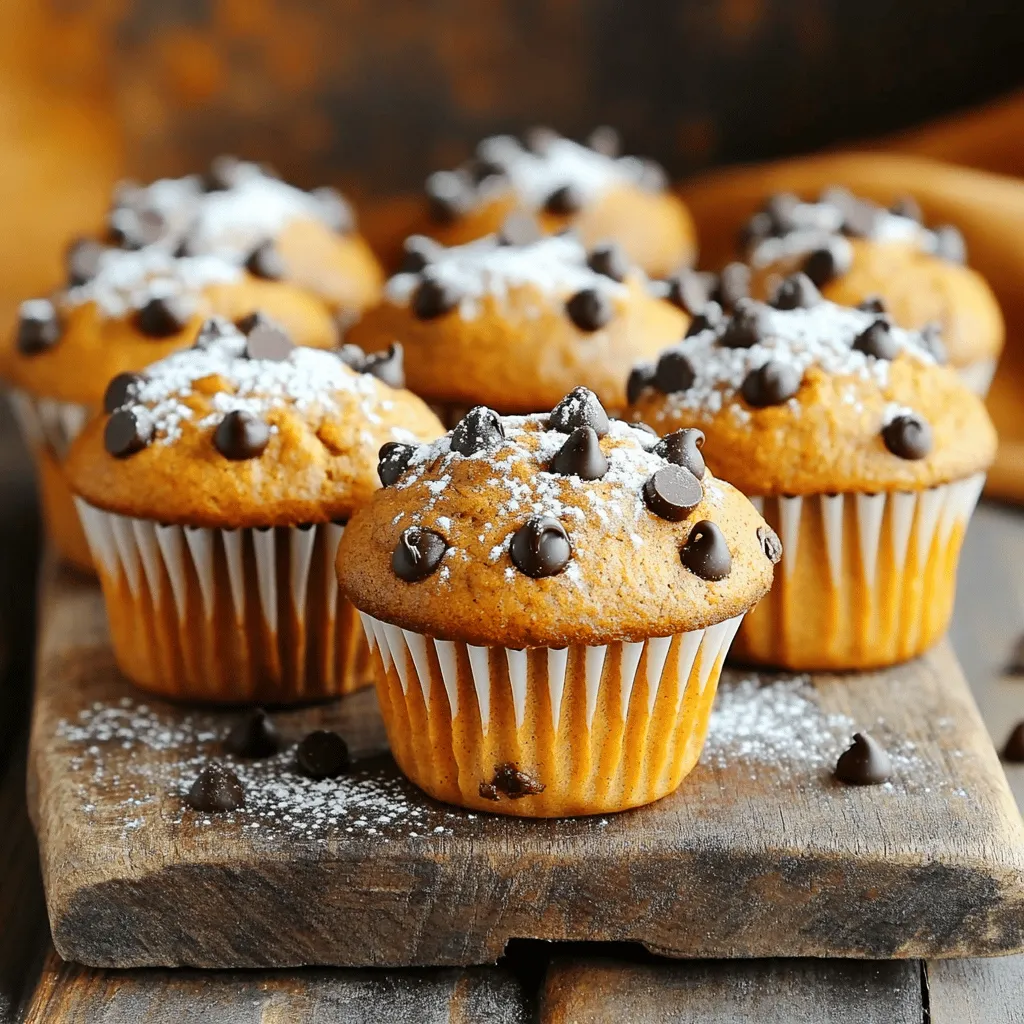
Are you ready to bake a delicious treat that blends sweet chocolate and cozy pumpkin flavors? In this guide, I’ll

Older posts
Newer posts
← Previous Page1 … Page21 Page22 Page23 … Page131 Next →

dsad

© 2025 Emmas Dish • Built with GeneratePress

Our Policies

  • Copyright Policy
  • Cookie Policy
  • GDPR Policy
  • Privacy Policy
  • Disclaimer
  • Terms Of Use

More Information

  • Home
  • About
  • Contact
  • Appetizers
  • Dessert
  • Dinner
  • Drinks
©2025, Emmas Dish About Back To Top