Skip to content
DisclaimerTerms Of UseGDPR PolicyCookie Policy

Emmas Dish

  • Home
  • Drinks
  • Appetizers
  • Dinner
  • Dessert
  • About
  • Contact
  • Privacy Policy
DisclaimerTerms Of UseGDPR PolicyCookie Policy

Emma

To make these tasty bars, gather these key items: - 1 ½ cups graham cracker crumbs - ½ cup unsalted butter, melted - 1 tablespoon sugar - 1 teaspoon ground cinnamon - 16 oz cream cheese, softened - ¾ cup sugar - 2 large eggs - 1 cup canned pumpkin puree - 1 teaspoon vanilla extract - 1 teaspoon ground nutmeg - 1 teaspoon ground ginger - ¼ teaspoon salt These ingredients create a rich and creamy dessert that brings fall flavors to life. For an extra touch, consider these optional items: - Whipped cream Adding whipped cream gives your bars a light and fluffy finish. It makes each bite feel special. If you need to swap some items, here are great options: - Use crushed oats instead of graham cracker crumbs for a gluten-free crust. - Replace cream cheese with mascarpone for a richer taste. - Use coconut sugar instead of white sugar for a unique flavor. These substitutions help you customize the recipe to fit your needs while keeping it delicious. Start by preheating your oven to 350°F (175°C). Next, grab an 8x8 inch baking pan. Line it with parchment paper, leaving some paper hanging over the sides. This makes it easy to lift out the bars later. In a mixing bowl, combine 1 ½ cups of graham cracker crumbs, ½ cup of melted unsalted butter, 1 tablespoon of sugar, and 1 teaspoon of ground cinnamon. Mix well until the crumbs are coated. Press this mixture firmly into the bottom of the pan to form a crust. Bake for 8-10 minutes, or until golden. Once done, remove it and let it cool. In a large bowl, beat 16 oz of softened cream cheese using an electric mixer. Mix until it’s smooth and creamy. Gradually add in ¾ cup of sugar, mixing until combined. Add 2 large eggs one at a time, blending well after each addition. Next, mix in 1 cup of canned pumpkin puree, 1 teaspoon of vanilla extract, 1 teaspoon of ground nutmeg, 1 teaspoon of ground ginger, and ¼ teaspoon of salt. Blend until everything is well combined. Pour the pumpkin cheesecake mixture over the cooled crust. Spread it evenly with a spatula. Bake the bars for about 30-35 minutes. The center should be set but still slightly jiggly. After baking, turn off the oven and crack the door open. Let the cheesecake bars cool inside for 1 hour. This helps prevent cracking. Once cooled, transfer them to the refrigerator. Chill for at least 4 hours or overnight for the best flavor. When ready to serve, lift the bars out using the parchment paper. Cut into squares and enjoy! To get a creamy texture, use room-temperature cream cheese. Cold cream cheese will leave lumps. Mix it well until smooth before adding any other ingredients. Bake the bars until the center is just slightly jiggly. This ensures the bars finish setting as they cool. Let them cool in the oven to prevent cracks on the surface. One common mistake is overbaking the cheesecake bars. This can lead to a dry texture. Always check around the 30-minute mark. If the top starts to brown, it’s time to take them out. Another mistake is not letting the bars chill long enough. Four hours in the fridge helps the flavors meld and the texture firm up. To boost the flavor, add a pinch of salt to the pumpkin mixture. It enhances sweetness and balances flavors. You can also mix in some chopped nuts or chocolate chips for added texture. If you like spice, try adding more cinnamon or nutmeg. A little zest from an orange can brighten the taste, too. {{image_2}} You can make these bars gluten-free. Use gluten-free graham cracker crumbs for the crust. Check the label to ensure they are truly gluten-free. This small change allows everyone to enjoy this treat. The flavor remains rich and creamy. The texture stays just as delightful. Want to add something special? Try chocolate or nuts on top. Melted chocolate drizzled over the bars tastes amazing. You can also sprinkle chopped nuts like pecans or walnuts. They add a nice crunch. This twist makes the bars even more tempting. For a spiced pumpkin cheesecake, add more spices. Try a bit of allspice or cloves. They enhance the pumpkin flavor and give warmth. Adjust the nutmeg and ginger to your taste. This variation brings a cozy vibe, perfect for fall. To store leftover pumpkin pie cheesecake bars, cut them into squares. Place the squares in an airtight container. Make sure to chill them in the fridge. They taste great for up to five days. If you want to keep them longer, freezing is a good option. To freeze these bars, wrap each square in plastic wrap. Then, place the wrapped bars in a freezer-safe bag or container. This keeps them fresh for about three months. When you’re ready to eat them, let them thaw in the fridge overnight. After storing, serve the cheesecake bars chilled. You can top them with whipped cream for extra flair. If they seem a bit dense after storage, let them sit at room temperature for 10 minutes. This helps improve the texture. Enjoy your delicious fall treat! Yes, you can use fresh pumpkin. Start with a sugar pumpkin. Cut it in half, scoop out the seeds, and roast it until soft. Blend the flesh until smooth. Use this in place of canned pumpkin. Fresh pumpkin may taste richer and more vibrant. Just make sure to measure the same amount for your recipe. To check if your cheesecake is done, look for a slight jiggle in the center. It should not be watery. A knife inserted should come out mostly clean. The edges will look set, while the center remains soft. Remember, it will firm up as it cools. To cut cheesecake bars neatly, use a sharp knife. Dip the knife in hot water, then wipe it dry. This helps make clean cuts. Cut the bars while they are cold for the best results. You can also run the knife under warm water between cuts to keep edges smooth. We explored how to make delicious pumpkin pie cheesecake bars. You learned about key ingredients, step-by-step instructions, and helpful tips. Variations allow you to personalize your bars, whether gluten-free or chocolate-topped. Storing leftovers properly ensures you can enjoy them later. Remember, fresh pumpkin works, and checking for doneness is simple. Master these basics, and you’ll impress everyone with your baking skills. Enjoy your journey to the perfect pumpkin treat!

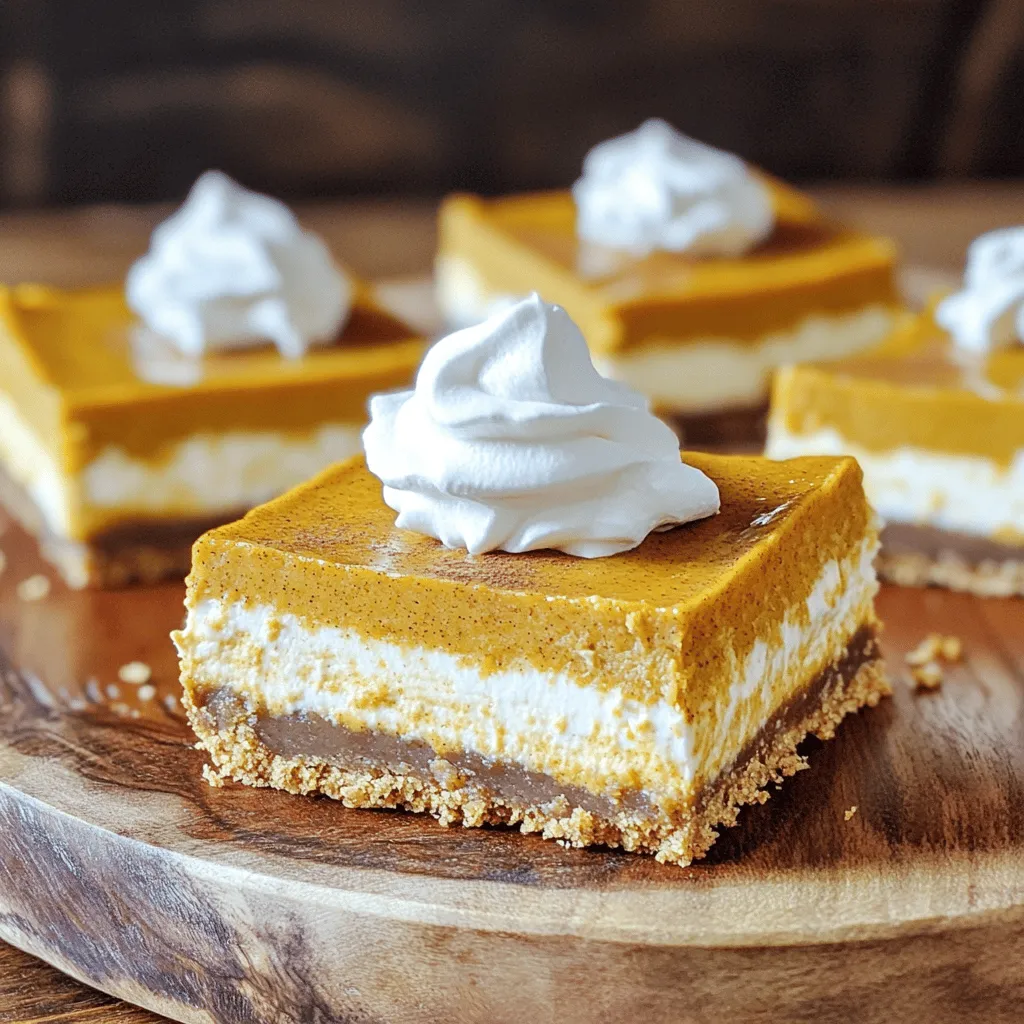
Pumpkin Pie Cheesecake Bars Delightful Fall Treat

Are you ready for a fall treat that will wow your taste buds? Pumpkin Pie Cheesecake Bars blend creamy cheesecake

To make bakery-style chocolate chip scones, you will need a few key ingredients. Here’s a simple list: - 2 cups all-purpose flour - 1/4 cup granulated sugar - 1 tablespoon baking powder - 1/2 teaspoon salt - 1/2 cup unsalted butter, cold and cubed - 3/4 cup heavy cream - 1 teaspoon vanilla extract - 1 cup semi-sweet chocolate chips - 1 egg (for egg wash) - Coarse sugar for sprinkling on top These ingredients work together to create a rich and flaky scone. The cold butter is key; it helps make the scones tender. The chocolate chips provide that sweet burst in every bite. Don't forget the coarse sugar on top; it adds a nice crunch. Gather these items, and you’re ready to bake! Start by preheating your oven to 400°F (200°C). This heat is important for a nice rise. Line your baking sheet with parchment paper. This keeps the scones from sticking. In a large mixing bowl, whisk together the dry ingredients. Combine 2 cups of all-purpose flour, 1/4 cup of granulated sugar, 1 tablespoon of baking powder, and 1/2 teaspoon of salt. Make sure they mix well. This step is key for even flavor. Next, add 1/2 cup of cold, cubed unsalted butter to the bowl. Use a pastry cutter or your fingers to work the butter into the flour. Keep mixing until it looks like coarse crumbs. This gives the scones that flaky texture we love. Now, pour in 3/4 cup of heavy cream and 1 teaspoon of vanilla extract. Stir gently until the mixture starts to come together. Be careful not to overmix. Overmixing can make the scones tough. Transfer the dough to a floured surface. Knead it gently a few times. You want it to form a ball. Pat the dough into a circle that is about 1 inch thick. This shape helps the scones bake evenly. Cut the circle into 8 equal wedges. Place the wedges on your prepared baking sheet. Leave some space between each scone. Beat 1 egg and brush it on the tops for a golden finish. Sprinkle coarse sugar on top for some extra crunch. Bake in the preheated oven for about 15-20 minutes. They should be lightly golden when done. Remove them and let them cool slightly before serving warm. To get the right texture, use cold butter. Cold butter helps create flaky layers. It stays solid during mixing, which makes the scones rise well. If the butter is too warm, your scones will not be light and fluffy. Avoiding overmixing is also key. Once you add the cream and vanilla, stir just until combined. If you mix too much, the dough will become tough. This can lead to scones that are dense instead of tender. You can make your scones even more special with added flavors. Try adding 1/2 cup of chopped nuts for a nice crunch. You can also mix in dried fruit, like cranberries or blueberries, for extra sweetness. A pinch of cinnamon can add warmth, too. Serve your scones warm for the best taste. Dust them lightly with powdered sugar for a sweet touch. Arrange them on a nice platter for a beautiful display. You can add a small bowl of whipped cream or clotted cream on the side. This gives a rich, creamy contrast to the scones. Enjoy them with your favorite tea or coffee for a perfect treat. {{image_2}} You can easily change the taste of your scones. Adding fruit or nuts can add fun flavors. Try mixing in fresh blueberries or diced strawberries. These fruits add sweetness and moisture. Nuts like walnuts or pecans add crunch and richness. Just fold in about 1/2 cup of fruit or nuts with your chocolate chips. This will make your scones even more special. If you need gluten-free scones, there are great options. You can use a gluten-free flour blend instead of all-purpose flour. Look for blends that include xanthan gum for a good rise. You can also use almond flour or coconut flour. Just remember, these flours may change the texture. You may need to adjust the liquid in your recipe slightly. Start with less and add more as needed. Switching sweeteners can change the flavor profile. Instead of granulated sugar, you can use brown sugar or honey. Brown sugar gives a deeper, richer taste. If you use honey, reduce the heavy cream slightly. Honey is sweeter than sugar, so you may want to use less. Adjust to your taste and enjoy the new flavor of your scones. To keep your scones fresh, store them in an airtight container. Place parchment paper between layers to prevent sticking. This way, they stay soft and tasty for longer. You can keep them at room temperature for up to two days. If you want to store them longer, consider refrigerating them. When you want to enjoy leftover scones, preheat your oven to 350°F (175°C). Place the scones on a baking sheet. Warm them for about 5-10 minutes. This method keeps them soft and brings back that fresh-baked taste. You can also use a microwave, but the oven is best for texture. Bakery-style chocolate chip scones will stay fresh for about two days at room temperature. If you store them in the fridge, they can last up to a week. For longer storage, freeze them for up to three months. Just remember to wrap them tightly to prevent freezer burn. To make scones less crumbly, add more heavy cream. The liquid helps bind the dough. You can also knead gently. This keeps the texture soft. Avoid overmixing, as this can lead to dryness. Yes, you can freeze the scone dough. Form the dough into a circle and cut it into wedges. Wrap each piece tightly in plastic wrap. Place them in a freezer bag. When ready, bake them straight from the freezer. Just add a few extra minutes to the baking time. You can use milk mixed with butter as a substitute. Combine 3/4 cup of milk with 1/4 cup of melted butter. This gives a similar richness. You can also try coconut cream for a dairy-free option. Yes, scones are best served warm. The chocolate chips stay melty, and the texture is soft. Warm scones pair well with butter or jam. Serve them fresh out of the oven for the best taste. Scones are done when they are lightly golden on top. You can also check by tapping the bottom. It should sound hollow. If they feel firm to the touch, they are ready to come out of the oven. Now you have a complete guide to making delicious scones. We covered the key ingredients, step-by-step instructions, and helpful tips. You learned about flavor variations, storage methods, and answers to common questions. Use this knowledge to bake fresh, perfect scones at home. Enjoy sharing them with family and friends or treating yourself. Happy baking!

Bakery-Style Chocolate Chip Scones Simple to Make

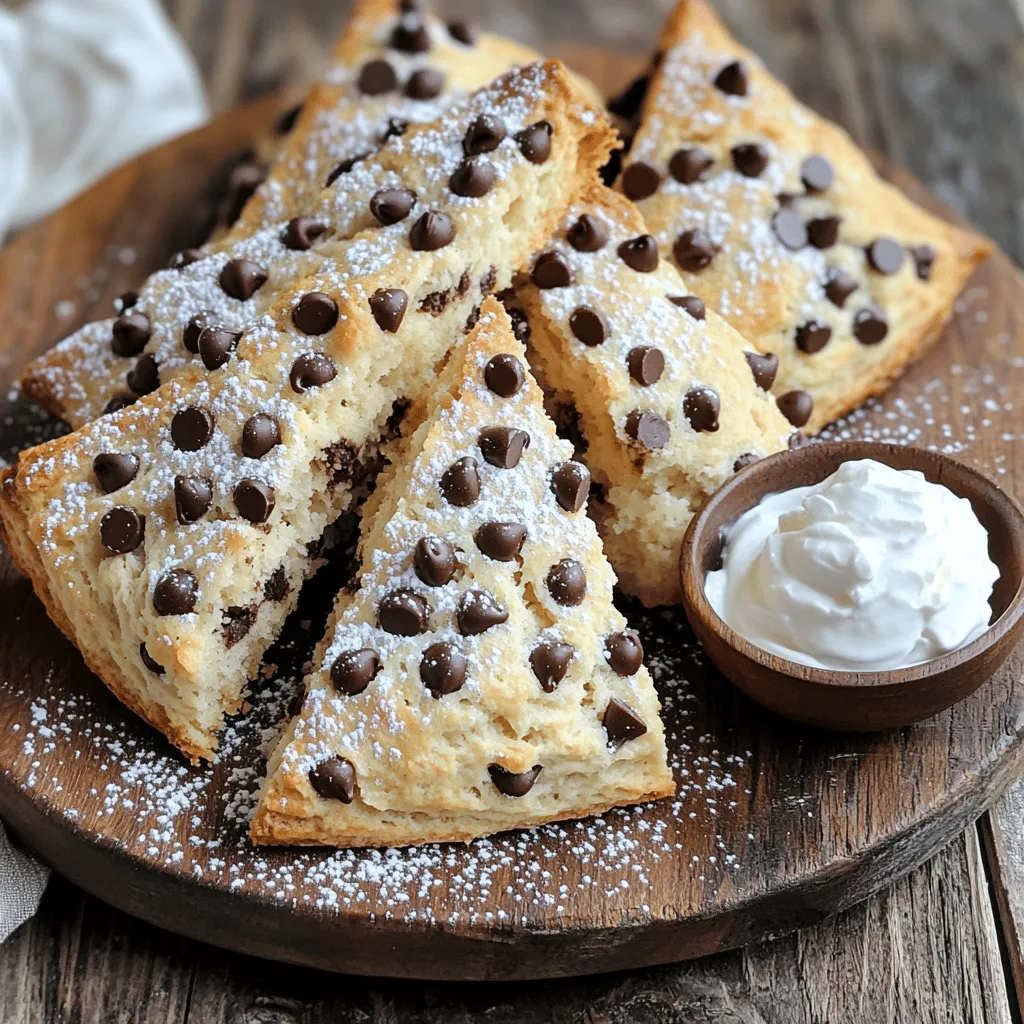
Do you love the rich, buttery taste of bakery-style chocolate chip scones? You’re in the right place! In this guide,

- Apples: I recommend using Granny Smith or Honeycrisp apples. They add a nice tartness and hold their shape when baked. - Dry Ingredients: - 1 cup all-purpose flour - 1 cup rolled oats - 1/2 cup brown sugar - 1/4 cup granulated sugar - 1 teaspoon baking powder - 1/2 teaspoon baking soda - 1/2 teaspoon cinnamon - 1/4 teaspoon salt - Wet Ingredients: - 1/2 cup unsalted butter, softened - 2 large eggs - 1 teaspoon vanilla extract - 1/2 cup caramel sauce (store-bought or homemade) - Extra caramel sauce for drizzling on top Using these simple ingredients, you can create a cake that is both comforting and delicious. The apples bring moisture and flavor, while the dry ingredients create a great texture. The caramel sauce adds a sweet touch that makes the cake truly special. 1. Preheat the Oven: Start by preheating your oven to 350°F (175°C). Grease and flour a 9-inch round cake pan. You can also line it with parchment paper for easy removal. 2. Toss the Apples: Take 2 large apples, peel, core, and dice them. In a bowl, toss the diced apples with 1/2 teaspoon of cinnamon. Set them aside to soak up that flavor. 3. Mix Dry Ingredients: In another bowl, mix together 1 cup of all-purpose flour, 1 cup of rolled oats, 1/2 cup of brown sugar, 1/4 cup of granulated sugar, 1 teaspoon of baking powder, 1/2 teaspoon of baking soda, and 1/4 teaspoon of salt. This mix will give your cake great texture. 1. Cream the Butter and Sugars: In a large mixing bowl, cream together 1/2 cup of softened unsalted butter with the sugars until the mixture is light and fluffy. 2. Add Eggs and Vanilla: Crack in 2 large eggs, adding them one at a time. Mix well after each addition. Then stir in 1 teaspoon of vanilla extract to enhance the flavor. 3. Incorporate Dry Ingredients: Gradually add the dry mixture to the butter mixture. Mix gently until just combined. Be careful; overmixing will make the cake tough. 4. Fold in Apples: Gently fold the cinnamon-coated apples into the batter. Make sure they are evenly distributed to get that apple goodness in every slice. 1. Pour Batter into the Pan: Carefully pour the batter into the prepared cake pan. Use a spatula to smooth it out evenly. 2. Prepare the Crumble Topping: In a small bowl, mix together 1/2 cup of rolled oats, 1/4 cup of flour, 1/4 cup of brown sugar, and 1/4 cup of melted butter. Stir until the mixture is crumbly. 3. Top the Cake: Evenly sprinkle the crumble topping over the batter in the pan. This will create a delicious, crunchy layer. 4. Bake the Cake: Place the cake in the preheated oven. Bake for 35 to 40 minutes. To check doneness, insert a toothpick into the center. If it comes out clean, the cake is ready. 5. Cool and Drizzle: After baking, let the cake cool in the pan for about 10 minutes. Carefully remove it and let it cool on a wire rack. Once cool, drizzle generously with caramel sauce before serving. To avoid overmixing, mix just until the batter is smooth. Overmixing makes the cake tough. You want it fluffy and light. When choosing apples for baking, select firm varieties. Granny Smith and Honeycrisp are great options. They hold their shape and add a nice tartness. For presentation, serve slices on individual plates. Add a dollop of whipped cream on the side. A few fresh apple slices make it look festive. Drizzle extra caramel sauce on top for a sweet touch. Pair this cake with vanilla ice cream for a warm and cold treat. The creaminess of ice cream complements the warm cake well. To modify sugar content, reduce the granulated sugar by a few tablespoons. You can also use less brown sugar. This adjustment keeps the flavor while lowering sweetness. If you want alternatives to caramel sauce, try maple syrup or a fruit sauce. These can give a new sweet twist to your cake. {{image_2}} You can make your caramel apple crumble cake even better by adding spices. Nutmeg and ginger add warmth and depth. Just a pinch of each can really boost the flavor. You can also try adding nuts. Walnuts and pecans give a nice crunch and extra richness. Simply chop them and mix them into the batter or sprinkle them on top. If you need a gluten-free option, almond flour works great. You can also use a gluten-free flour blend. Both options keep the cake tasty and moist. For those who prefer vegan recipes, swap out the butter for plant-based butter. Use flax eggs or applesauce instead of regular eggs. This way, everyone can enjoy this delicious cake! You can store your Caramel Apple Crumble Cake at room temperature or in the fridge. If you plan to eat it within two days, keep it covered on the counter. Use a cake dome or plastic wrap to keep it fresh. If you want it to last longer, store it in the fridge. Just make sure to cover it well. The cold can help keep the apples from going bad. This cake stays fresh for about three days at room temperature. In the fridge, it can last up to a week. You will know it’s time to toss it if you see mold or if it smells off. If the cake feels dry or crumbly, it’s best not to eat it. With these tips, you can enjoy your sweet treat for longer! Can I use frozen apples for this recipe? Yes, you can use frozen apples. Thaw them first and drain excess moisture. This way, your cake won’t be too soggy. How can I make my caramel sauce from scratch? To make caramel sauce, melt 1 cup of sugar in a saucepan over medium heat. Stir until it melts and turns golden. Then, add 1/2 cup of heavy cream and 4 tablespoons of butter. Stir until smooth. Let it cool before using. Is it possible to make this cake ahead of time and freeze it? Yes, you can freeze the cake. Make sure it cools completely. Wrap it tightly in plastic wrap and then in foil. It can last up to three months in the freezer. What type of caramel sauce works best? Both store-bought and homemade caramel sauces work well. Use what you prefer. Homemade adds a special touch, while store-bought saves time. Can I substitute ingredients for dietary restrictions? Yes, you can substitute ingredients. Use gluten-free flour for a gluten-free option. Swap eggs with applesauce or flaxseed meal for a vegan version. Adjust sugar if needed for dietary concerns. You now have all the steps to create a delicious apple cake. We explored the essential ingredients, from the right apples to the perfect spices. I shared tips on mixing and baking, ensuring you achieve the best texture. We even discussed how to store your cake for freshness. With these insights, you can enjoy a delightful treat for any occasion. Don't hesitate to get creative with variations. Happy baking!

Caramel Apple Crumble Cake Irresistible Dessert Treat

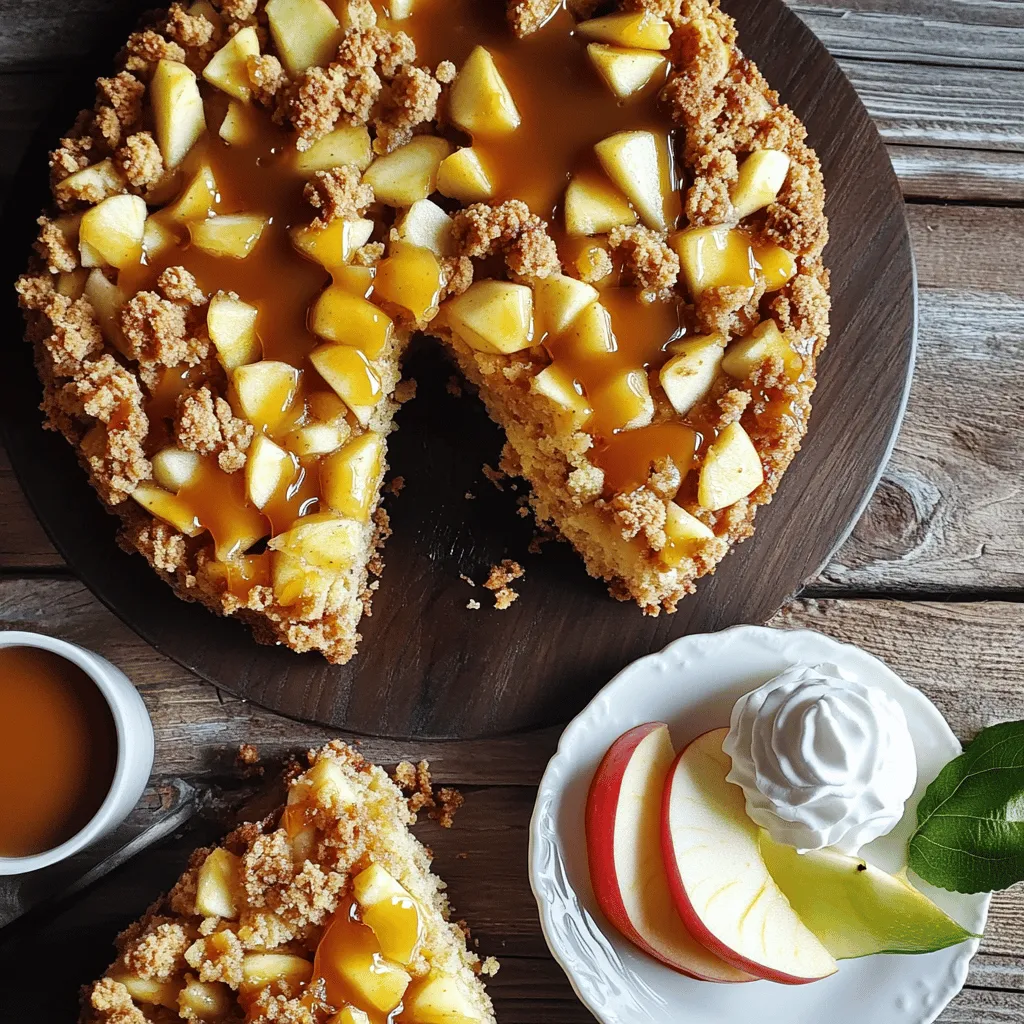
If you’re craving a warm, sweet dessert that brings comfort to your taste buds, you’ve found it! This Caramel Apple

To make crispy garlic Parmesan cauliflower bites, gather these ingredients: - 1 medium head of cauliflower, cut into bite-sized florets - 1 cup all-purpose flour - 1 teaspoon garlic powder - 1 teaspoon onion powder - 1/2 teaspoon smoked paprika - 1/2 teaspoon salt - 1/4 teaspoon black pepper - 1 cup buttermilk (or dairy-free alternative) - 1 cup breadcrumbs (preferably panko for extra crunch) - 1/2 cup grated Parmesan cheese - 2 tablespoons fresh parsley, chopped (for garnish) - Olive oil spray or 2 tablespoons olive oil You can make these bites fit your taste. Here are some options: - Use almond flour instead of all-purpose flour for a gluten-free version. - Swap buttermilk with plant-based milk, like almond or oat milk, to keep it dairy-free. - Try nutritional yeast instead of Parmesan for a vegan option. - Use Italian seasoning in place of individual spices for a different flavor. To prepare these tasty bites, you’ll need a few key tools: - Large mixing bowl for combining ingredients. - Whisk for mixing the batter smoothly. - Baking sheet lined with parchment paper for easy cleanup. - A shallow dish for the breadcrumbs. - Tongs for flipping the cauliflower without mess. - Oven mitts to handle the hot baking sheet safely. These ingredients and tools set the stage for a delicious snack that everyone will love! Start by preheating your oven to 425°F (220°C). This step is key for getting those bites crispy. Next, prepare a baking sheet with parchment paper. This will keep your bites from sticking. In a large bowl, mix the flour, garlic powder, onion powder, smoked paprika, salt, and black pepper. Whisk them together until they blend well. Now, slowly add the buttermilk to this mix. Stir until it becomes a smooth batter. Take each cauliflower floret and dip it into the batter. Make sure each piece is fully coated. After that, roll it in the breadcrumb and Parmesan mix. This step adds crunch and flavor. Place the coated florets on the baking sheet, leaving space between them. This helps them cook evenly. Once your oven is hot, it's time to bake. Put the baking sheet in the oven and set a timer for 25-30 minutes. Flip the cauliflower halfway through baking. This ensures both sides get golden and crispy. Keep an eye on them as they bake. You want that perfect golden brown color. When the cauliflower is done, take it out of the oven. It should look crispy and inviting. To make it pop, sprinkle fresh parsley over the top. This adds color and a fresh taste. If you like, serve them in a chic bowl or on a nice platter. Pair them with marinara or ranch dip for extra flavor. Enjoy your delicious crispy garlic Parmesan cauliflower bites! To get that perfect crunch, use panko breadcrumbs. They are lighter and crispier than regular ones. Make sure to coat each floret well in the batter. This helps the breadcrumbs stick better. A light spray of olive oil adds more crispiness. Bake them on parchment paper to keep them from sticking. Flip the bites halfway through baking. This ensures even browning on all sides. For more flavor, add herbs or spices to the batter. Try Italian seasoning or crushed red pepper for a kick. You can also mix in some grated cheese into the batter. This adds a rich, cheesy taste. If you love garlic, use minced garlic instead of garlic powder. It brings a fresh taste that pairs well with cauliflower. Don’t forget to adjust the salt to balance the flavors. Serve your cauliflower bites in a stylish bowl or on a bright platter. This makes them look appealing. A side of marinara or ranch dip adds a fun touch. For a final garnish, sprinkle extra parsley and Parmesan on top. This adds color and makes your dish pop. Use small bowls for dips to keep everything neat. Your guests will love the look and taste! {{image_2}} You can change the flavor of your cauliflower bites easily. For a spicy kick, add cayenne pepper or chili powder to the batter. If you love Italian flavors, mix in dried oregano and basil. For a tangy twist, try adding lemon zest into the breadcrumb mix. Each flavor adds something unique. You can make these bites fit your diet. For gluten-free options, use gluten-free flour and breadcrumbs. To make them dairy-free, swap buttermilk with unsweetened almond milk or oat milk. Nutritional yeast can replace Parmesan cheese for a cheesy flavor without dairy. These changes help everyone enjoy this tasty treat. Presentation makes a difference! Serve the crispy bites in a stylish bowl or on a plate. Pair them with marinara sauce or ranch for dipping. You can also add fresh veggies on the side. A sprinkle of extra parsley or Parmesan on top adds a nice touch. These bites are great for parties or as a snack. You can store leftover cauliflower bites in an airtight container. Let them cool first. Place a paper towel at the bottom of the container to absorb moisture. This helps keep them crispy. Store them in the fridge for up to three days. To reheat your bites, use an oven or air fryer. Preheat the oven to 350°F (175°C). Place the bites on a baking sheet. Heat for about 10 minutes or until crispy again. If using an air fryer, set it to 350°F (175°C) and heat for about 5 minutes. This method keeps them crunchy. You can freeze these cauliflower bites for later. First, let them cool completely. Spread them out on a baking sheet and freeze for one hour. Once frozen, transfer them to a freezer bag. They can stay in the freezer for up to three months. When ready to eat, bake them straight from the freezer. Just add a few extra minutes to the cooking time. Yes, you can use frozen cauliflower. Just thaw it first and pat it dry. This helps the batter stick better. Remember, frozen cauliflower may cook faster. Check for doneness a few minutes early. To make these bites vegan, swap buttermilk for a plant-based milk. Almond or soy milk works great. You can also use a flax egg or chia egg for binding. Just mix one tablespoon of flaxseed meal with three tablespoons of water. Let it sit until it thickens. Use a vegan cheese substitute instead of Parmesan for the topping. Cauliflower bites go well with many dips. My favorites include marinara, ranch, and garlic aioli. You can also try hummus or a spicy sriracha mayo. Each dip adds its own fun flavor. In this blog post, I shared how to make tasty cauliflower bites. You learned about the best ingredients and swaps. I provided step-by-step cooking instructions and shared tips for great flavor and crispiness. I also covered fun variations you can try. Finally, I explained how to store leftovers and answered common questions. Enjoy experimenting with these bites; they are easy and fun! Happy cooking!

Crispy Garlic Parmesan Cauliflower Bites Delight

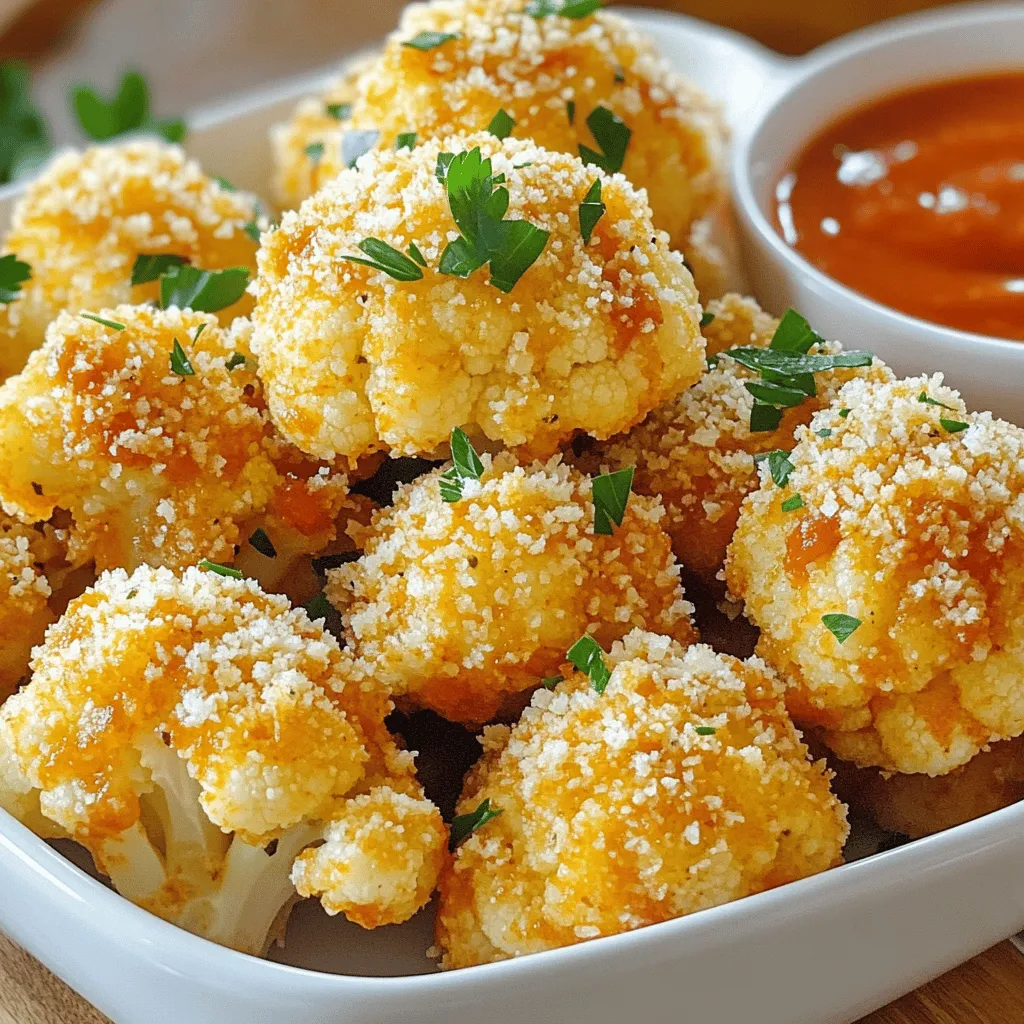
Are you ready to savor a crunchy, cheesy delight? These Crispy Garlic Parmesan Cauliflower Bites are perfect for a snack

- 1 cup dried cannellini beans (or 2 cans, drained and rinsed) - 3 tablespoons olive oil - 1 medium onion, diced - 3 cloves garlic, minced - 2 medium carrots, diced - 2 celery stalks, diced - 1 teaspoon dried thyme - 1 teaspoon dried rosemary - 4 cups vegetable broth - 1 can (14 oz) diced tomatoes, with juices - 2 cups kale, chopped - Salt and pepper to taste - Fresh basil for garnish - Grated Parmesan cheese (optional) for serving When I make this cozy Tuscan white bean soup, I love using fresh, quality ingredients. Fresh vegetables give the soup a bright flavor. I often choose dried beans for a heartier texture, but canned beans work just as well. You can add more veggies like zucchini or bell peppers for extra taste. If you want some protein, consider adding diced chicken or sausage. For a spicy kick, a pinch of red pepper flakes can elevate the soup. Fresh herbs add a burst of flavor. I always top the soup with fresh basil. It looks nice and tastes great. You can also sprinkle some grated Parmesan cheese on top for added richness. A drizzle of olive oil before serving gives it a lovely finish. If you choose dried cannellini beans, start by soaking them overnight. This helps soften the beans. The next day, drain and rinse them. Boil the beans in water for about one hour. You want them tender but not mushy. If you use canned beans, just drain and rinse them. They are ready to go. In a large pot, pour in three tablespoons of olive oil. Heat the oil over medium heat. Add one diced onion and cook for about five minutes. You want it to turn translucent. Then, stir in three minced garlic cloves, two diced carrots, and two diced celery stalks. Cook this mix for about five to seven minutes. The veggies should start to soften and smell great. Next, sprinkle in one teaspoon each of dried thyme and rosemary. Stir it well and cook for one minute. This step boosts the flavors. Now, pour in four cups of vegetable broth and one can of diced tomatoes, including their juices. Bring the pot to a gentle simmer. Add the prepared cannellini beans. Allow the soup to simmer for about 20 to 25 minutes. Stir occasionally to mix the flavors. After simmering, stir in two cups of chopped kale. Cook for another five to ten minutes until the kale wilts. Now, taste the soup and add salt and pepper as needed. When ready to serve, ladle the soup into bowls. If you like, top with grated Parmesan cheese and fresh basil. This adds a lovely touch to your cozy soup. To boost flavors in your Cozy Tuscan White Bean Soup, use fresh herbs. Fresh basil adds a nice touch. Try using fresh thyme or rosemary, too. These herbs create depth and warmth. Drizzle extra olive oil on top before serving. It will give the soup a rich finish. You can also add a splash of lemon juice. This adds brightness and contrasts the beans' creaminess. One common mistake is not soaking the dried beans. Soaking helps them cook evenly. If you skip this step, they may take longer to soften. Avoid adding too much salt too early. This can make the beans tough. Let the soup simmer gently for the best flavors. Don't rush; quality takes time. Stir often to prevent sticking on the bottom. Serve the soup in rustic bowls for a cozy feel. Ladle in generous portions for a hearty meal. Top with grated Parmesan cheese for creaminess. Fresh basil on top adds color and flavor. Pair the soup with crusty Italian bread for a satisfying experience. This meal warms you up and brings a taste of Tuscany right to your table. {{image_2}} You can switch up the beans. Try navy beans or great northern beans. These beans work well and add different textures. You can also use black beans for a twist. Each type gives the soup its own unique flavor. Want to make it heartier? Add proteins like chicken or sausage. Cook the meat in the pot before adding veggies. You can use shredded rotisserie chicken for quick prep. Tofu cubes are a great choice for a vegetarian option. They absorb the flavors well and add protein. If you like heat, add red pepper flakes or diced jalapeños. Start with a small amount and taste as you go. If you prefer a milder soup, skip the spicy additions. You can also add smoked paprika for a warm, smoky flavor. This adds depth without too much heat. To keep your Cozy Tuscan White Bean Soup fresh, store it in an airtight container. Make sure the soup cools down before sealing it. Place it in the fridge if you plan to eat it within a few days. The soup stays good for about three to four days in the fridge. Always label the container with the date so you know when you made it. When you’re ready to enjoy your soup again, reheat it on the stove. Pour the soup into a pot and warm it over medium heat. Stir often to prevent sticking. You can also use a microwave. Transfer the soup to a microwave-safe bowl and heat it in short intervals, stirring in between. This ensures even heating. If you want to save some for later, freezing is a great option. Let the soup cool completely, then pour it into freezer-safe bags or containers. Remove as much air as possible to prevent freezer burn. The soup can last up to three months in the freezer. When you’re ready to eat, thaw it overnight in the fridge before reheating. Yes, you can use canned beans. They save time and are easy to use. Just drain and rinse them before adding to the soup. Canned beans are soft and ready to eat. If using them, skip the soaking and boiling steps. This makes your cooking faster, which is great for busy days. This soup lasts about 4 to 5 days in the fridge. Be sure to store it in an airtight container. Let it cool down first, then place it in the fridge. If you want to keep it longer, you can freeze it. Just remember to label the container with the date. Absolutely! Using a slow cooker is a great option. Start by sautéing the onion, garlic, carrots, and celery on the stove. Then, add all the ingredients to the slow cooker. Cook on low for 6 to 8 hours or on high for 3 to 4 hours. The flavors will blend beautifully over time, creating a warm, hearty meal. This blog post covered all you need to know to make a great soup. We discussed key ingredients, gave step-by-step directions, and shared helpful tips. You can experiment with various beans and spices to make it your own. Remember to follow storage tips for long-lasting flavor. Enjoy your cooking journey!

Cozy Tuscan White Bean Soup Simple and Nourishing Recipe

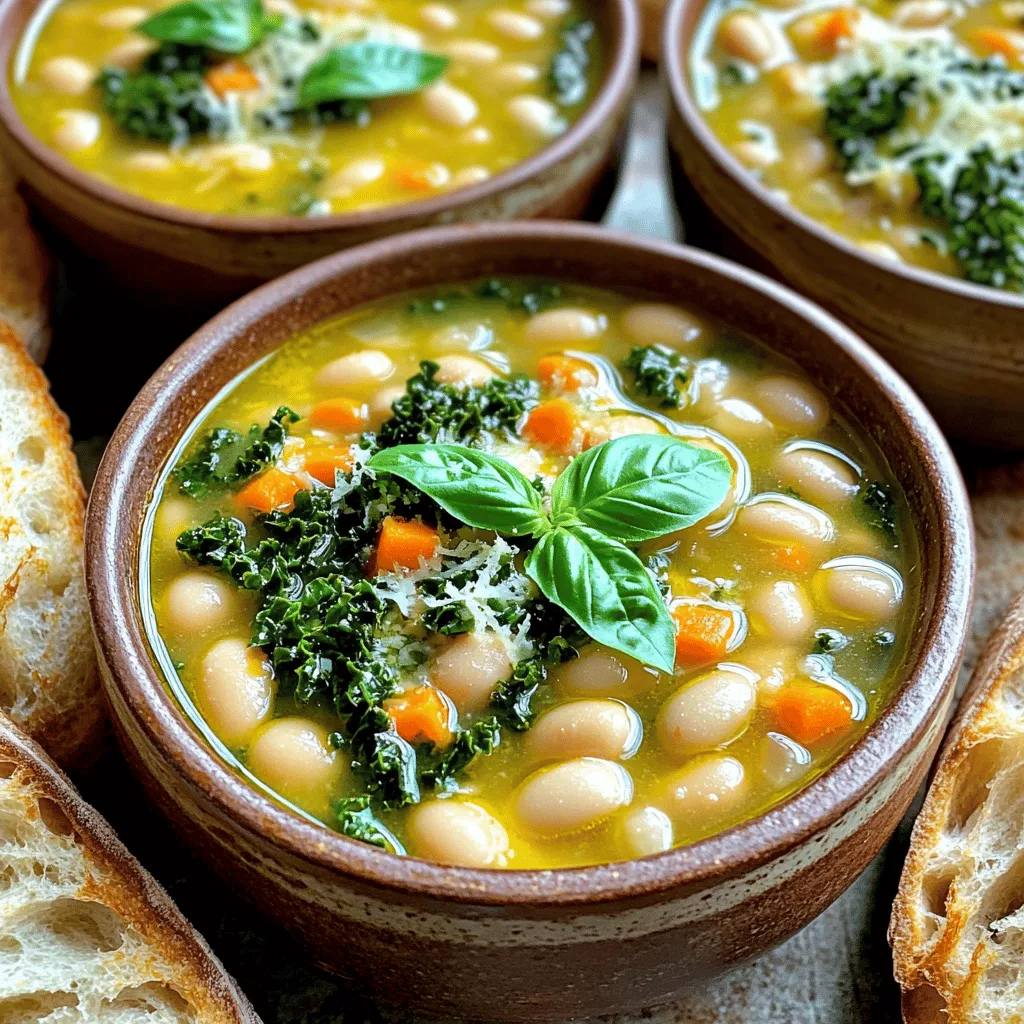
Warm up your kitchen with my Cozy Tuscan White Bean Soup. This simple and nourishing recipe is perfect for chilly

- 1 cup unsalted butter, melted - 1 1/2 cups packed brown sugar - 1/4 cup granulated sugar - 2 large eggs - 1 teaspoon vanilla extract - 2 cups all-purpose flour - 1 teaspoon baking powder - 1/2 teaspoon baking soda - 1/2 teaspoon salt - 1 teaspoon ground cinnamon - 1/2 cup apple cider - 1/2 cup chopped apples (preferably Granny Smith for tartness) - 1/2 cup caramel sauce (store-bought or homemade) This recipe creates a rich and flavorful treat. The unsalted butter gives the blondies a smooth texture. Using both brown sugar and granulated sugar adds depth to the sweetness. Eggs act as a binder, while vanilla extract enhances the flavor. Flour, baking powder, baking soda, and salt provide structure and help the blondies rise. Ground cinnamon adds warmth and spice. Apple cider gives a hint of fruitiness, and chopped apples add texture. Caramel sauce is key to that luscious finish. You can choose store-bought for ease or make your own for a personal touch. Each ingredient plays an important role in creating a delightful dessert that bursts with flavor. First, set your oven to 350°F (175°C). This is the perfect heat for baking. Next, grab a 9x13 inch baking pan. Grease it well, then line it with parchment paper. Leave some paper hanging over the edges. This makes it easy to lift out the blondies later. In a large bowl, add one cup of melted unsalted butter. Then, mix in one and a half cups of packed brown sugar and a quarter cup of granulated sugar. Whisk these together until they look smooth and creamy. Now, crack in two large eggs, adding them one at a time. Whisk well after each egg. Finally, stir in one teaspoon of vanilla extract for that rich flavor. In another bowl, combine two cups of all-purpose flour, one teaspoon of baking powder, half a teaspoon of baking soda, half a teaspoon of salt, and one teaspoon of ground cinnamon. Whisk these dry ingredients together until they are well mixed. Now, slowly add this dry mix to the wet ingredients. Stir gently until everything is just combined. Next, fold in half a cup of apple cider and half a cup of chopped Granny Smith apples. The batter will feel thick and hearty. Pour half of the batter into your prepared pan. Spread it out evenly. Now, drizzle half of the caramel sauce over this layer. This will give it a sweet touch. Carefully spoon the rest of the batter on top, spreading it with a spatula. Drizzle the remaining caramel sauce over this layer. Use a knife to swirl the caramel lightly into the batter. This adds a lovely design. Now, place your pan in the preheated oven. Bake for 25 to 30 minutes. The edges should turn golden brown. To test if they are done, stick a toothpick in the center. It should come out clean, or with a few moist crumbs. After baking, let the blondies cool in the pan for about 10 minutes. Then, use the parchment paper to lift them out. Let them cool completely on a wire rack. To get the perfect texture in your Apple Cider Caramel Blondies, start with melted butter. This helps keep the blondies dense and chewy. Mix the sugars in well. This gives a rich flavor. Use room temperature eggs for a better blend. When baking, check at 25 minutes. If the edges are golden, they are likely done. A toothpick should come out with a few moist crumbs. You can swap out sugars for a different taste. Try coconut sugar or maple sugar for a unique twist. If you need a gluten-free option, use almond flour or a gluten-free blend. For apple cider, you can use apple juice in a pinch. Adding nuts like walnuts or pecans can add a nice crunch. Chopped apples can be replaced with pears for a different flavor. To make your blondies look great, cut them into even squares. Serve them on a fun platter. Drizzle extra caramel sauce on top. A sprinkle of cinnamon adds a nice touch. You can also add a scoop of vanilla ice cream for a treat. Consider using small apple slices as a garnish for a fresh look. {{image_2}} You can change up the flavor of your blondies easily. Adding spices like nutmeg or cloves gives warmth. A dash of nutmeg adds a cozy feel, perfect for fall. Cloves bring a sweet, aromatic touch. These spices create layers of flavor and make the blondies extra special. Mix-ins can also change the game. Chocolate chips add richness and sweetness. You can use dark, milk, or even white chocolate for fun. For a fruity twist, try adding dried cranberries or walnuts. These simple changes keep each batch exciting. If you need gluten-free options, it's easy to swap out the flour. Use a gluten-free blend that works for baking. This keeps the blondies soft and chewy, just like the original. For vegan adaptations, replace the eggs with flaxseed meal or applesauce. Use a plant-based butter instead of regular butter. This keeps the same creamy texture while making it vegan-friendly. You can still enjoy those rich flavors without any animal products. You can store your blondies at room temperature. Place them in an airtight container. They will stay fresh for about three days. If you plan to eat them soon, this method works well. Keep them away from direct sunlight. This helps maintain their soft texture and rich flavor. For longer storage, refrigerate the blondies. Wrap them tightly in plastic wrap or place them in a sealed container. They will stay fresh for up to a week in the fridge. Refrigeration helps keep the caramel from becoming too gooey. When you're ready to enjoy them, let them sit at room temperature for a bit. This restores their soft, chewy texture. Want to save blondies for later? Freezing is a great option. Cut the blondies into squares. Wrap each piece in plastic wrap and then place them in a freezer-safe bag. They can last up to three months in the freezer. When you’re ready to eat, let them thaw in the fridge overnight. You can also warm them in the microwave for a few seconds. Enjoy your sweet treat whenever you like! I recommend using Granny Smith apples. They add a nice tartness. This contrast works well with the sweet caramel. Other apples like Honeycrisp or Fuji can also work. They bring a sweet flavor, but they are softer. Yes, you can make them ahead. Bake them a day before serving. Let them cool completely, then cover them tightly. This keeps them fresh. You can also freeze them for up to three months. Just thaw them in the fridge before serving. Look for golden edges and a firm center. A toothpick test is key. Insert a toothpick into the center. If it comes out clean or with a few crumbs, they are done. If it has wet batter, bake a few more minutes. Absolutely! You can use store-bought or homemade caramel sauce. You can also try flavors like salted caramel or chocolate caramel. Just remember, the flavor can change the taste of your blondies. These blondies are a great treat, packed with flavor and easy to make. You learned about the main ingredients, step-by-step instructions, helpful tips, and fun variations. Remember, you can switch ingredients based on your taste or needs. These blondies are simple to store and perfect for sharing. Enjoy every bite, knowing you've baked something special!

Apple Cider Caramel Blondies With Rich Flavor Burst

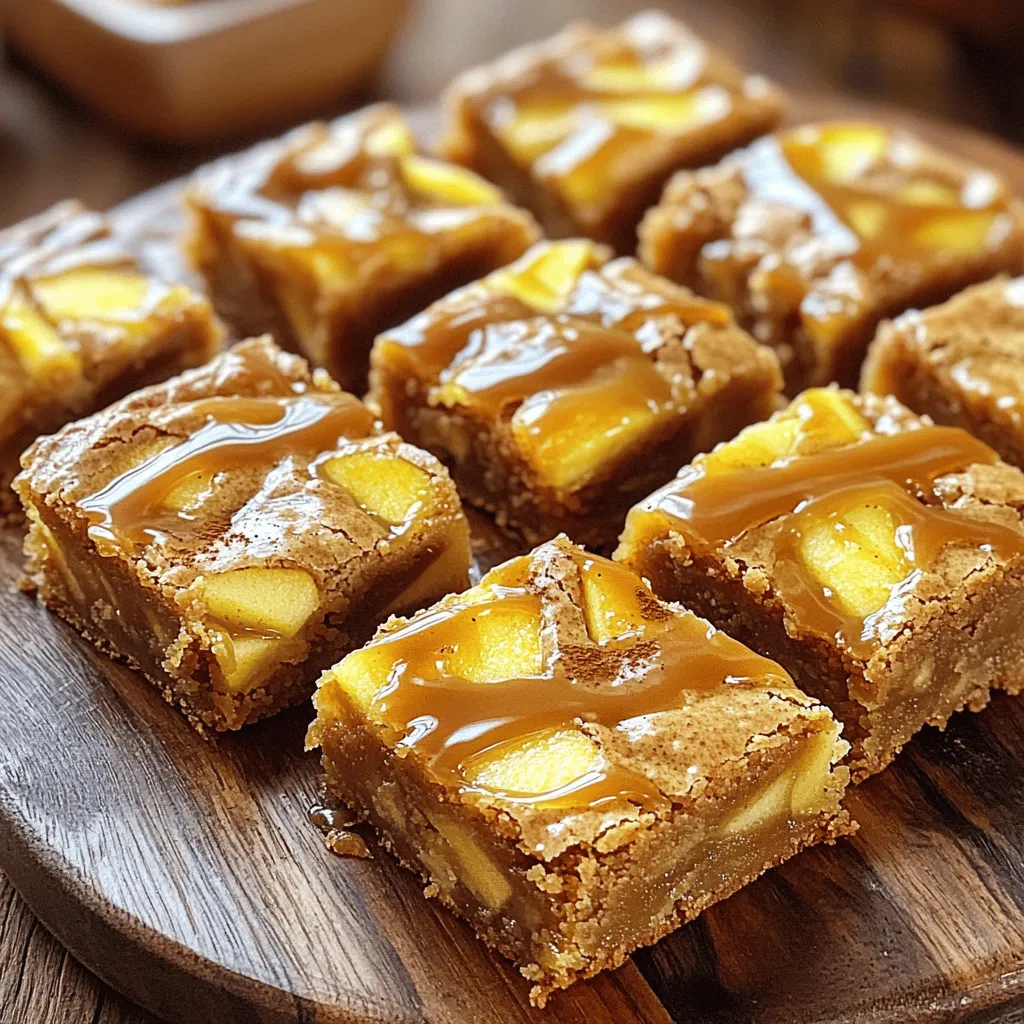
Ready to indulge in a sweet autumn treat? Apple Cider Caramel Blondies are here to delight your taste buds! With

- 1 cup canned pumpkin puree - 1 cup almond flour - 1/2 cup shredded unsweetened coconut - 1/2 cup maple syrup - 1/4 cup cocoa powder - 1 teaspoon vanilla extract - 1/2 teaspoon cinnamon - 1/4 teaspoon nutmeg - Pinch of salt - Extra shredded coconut for rolling You can add a few fun extras to these truffles. Consider using: - Dark chocolate for drizzling - Chopped nuts for a crunchy topping - A pinch of sea salt for contrast Choosing the right ingredients makes a big difference. Here are some tips: - Use pure pumpkin puree, not pumpkin pie filling. - Make sure your almond flour is fresh and finely ground. - If you can't find unsweetened coconut, you can use sweetened, but cut back on maple syrup. - For a nut-free option, substitute almond flour with sunflower seed flour. These choices help you create the best flavor and texture. Enjoy experimenting! Start by gathering all your ingredients. You need 1 cup of canned pumpkin puree, 1 cup of almond flour, and 1/2 cup of shredded unsweetened coconut. Measure out 1/2 cup of maple syrup, 1/4 cup of cocoa powder, and add 1 teaspoon of vanilla extract. Next, grab 1/2 teaspoon of cinnamon, 1/4 teaspoon of nutmeg, and a pinch of salt. In a large mixing bowl, combine all these ingredients. Use a spatula or your hands to mix until you have a smooth dough. The goal is to blend everything well. If you want a sweeter truffle, taste the dough. You can add more maple syrup if needed. Once your mixture is well-blended, it’s time to chill. Place the bowl in the fridge for about 30 minutes. This step helps the dough firm up. A firmer dough makes it easier to scoop and roll into truffles. It’s a simple trick but very effective. After chilling, take the mixture out. Use a tablespoon or a cookie scoop to portion the dough. Roll each portion into a ball about 1 inch in diameter. This part can be fun! Next, roll each ball in extra shredded coconut. This coating adds flavor and texture. Make sure each truffle is evenly coated. Finally, place the truffles on a lined baking sheet. Refrigerate them for at least an hour. This allows them to set and makes them even tastier. To get the right texture for your truffles, mix well. The dough should be smooth and firm. If it feels too sticky, add a little almond flour. If it’s too dry, a touch of pumpkin puree works wonders. Chilling the mixture for 30 minutes helps it set. This makes rolling easier and keeps the truffles from falling apart. Taste your mixture before rolling. If you'd like it sweeter, add more maple syrup. Start with a tablespoon and mix well. Remember, the sweetness can change when chilled. So, taste again after chilling. Finding the perfect balance makes each bite delightful. Make your truffles stand out! Roll them in extra shredded coconut for a fun look. You can place them in small paper cups on a nice plate. For a fancy touch, drizzle melted dark chocolate over the top. This adds flavor and visual appeal. Enjoy showing off your tasty creations! {{image_2}} You can use many different coatings for the truffles. Instead of shredded coconut, try chopped nuts. Almonds, walnuts, or pecans all work well. You can also roll them in cocoa powder for a rich flavor. If you want a colorful twist, use crushed freeze-dried fruits. They add color and taste. Want to mix it up? Add a pinch of sea salt for a sweet-salty taste. You can also mix in some mini chocolate chips for extra chocolatey goodness. A dash of espresso powder can give a nice kick. For a tropical vibe, add a bit of pineapple juice. These small changes can really enhance the flavor! This recipe is already close to vegan and gluten-free. Use maple syrup as your sweetener. Almond flour is naturally gluten-free. Make sure your cocoa powder is also gluten-free. If you need it to be completely vegan, ensure the chocolate coating is dairy-free. These small swaps make the truffles fit many diets! Keep your no-bake chocolate coconut pumpkin truffles in the fridge. Use an airtight container. This keeps them fresh and tasty. They will stay good for about a week. Always check for any signs of spoilage before eating. You can freeze these truffles for longer storage. Place them in a single layer on a baking sheet. After they freeze for a few hours, move them to a freezer-safe bag. They can last up to three months in the freezer. Thaw them in the fridge before serving. When stored properly, these truffles have a great shelf life. In the fridge, they last about seven days. In the freezer, they can be good for three months. Always enjoy them at their best. Yes, you can use other sweeteners. Honey or agave syrup work well. You can also try stevia for a low-calorie option. Just remember to adjust the amount based on sweetness level. Taste as you go to find your perfect balance. To make these truffles vegan, simply use maple syrup. This recipe is already dairy-free. Make sure your cocoa powder is vegan too. With these swaps, you can enjoy a tasty treat without animal products. If you need a substitute for almond flour, try oat flour or sunflower seed flour. Both options work well and keep the texture nice. You can also use coconut flour but use less, as it absorbs more liquid. Adjust the moisture in your mix if needed. In this post, we covered key ingredients and clear steps for making truffles. We explored mixing, chilling, and rolling for the best results. I shared tips for perfect texture and sweetness, along with creative presentation ideas. You can also try various flavors and dietary changes. Lastly, I provided storage tips to keep your truffles fresh. With these insights, you're ready to enjoy making delicious truffles that fit your style and needs. Dive in and have fun!

No-Bake Chocolate Coconut Pumpkin Truffles Delight

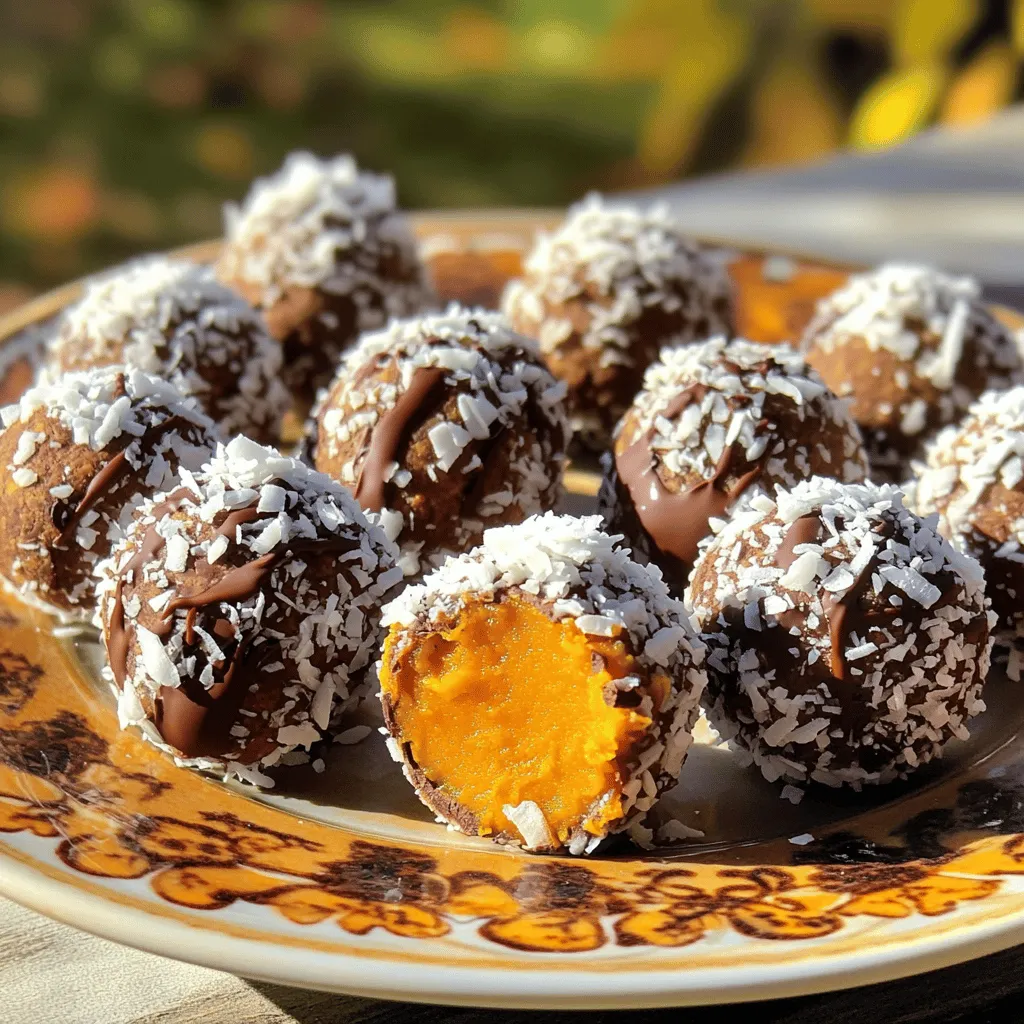
Are you ready to enjoy a tasty treat without turning on the oven? In this post, I’ll guide you through

- 1 pound gnocchi (fresh or store-bought) - 2 cups fresh spinach, chopped - 1 cup heavy cream - 1 cup grated Parmesan cheese - 3 cloves garlic, minced - 2 tablespoons butter - 1 tablespoon olive oil - Salt and pepper to taste - Pinch of nutmeg (optional) - Fresh parsley, chopped (for garnish) Use fresh spinach for the best flavor. Look for bright green leaves. Aged Parmesan gives a richer taste. Choose heavy cream instead of light cream for a thicker sauce. Ensure the garlic is fresh for a strong aroma. If using store-bought gnocchi, pick a high-quality brand for better texture. For a lighter option, use half-and-half instead of heavy cream. You can swap Parmesan for a dairy-free cheese if needed. For gluten-free diets, use gluten-free gnocchi. If you prefer, replace spinach with kale or Swiss chard. You can also use garlic powder if you don’t have fresh garlic. First, fill a large pot with water and add salt. Bring the water to a boil. Add the gnocchi. If you use fresh gnocchi, they will float in about 2-3 minutes. This means they are ready. Drain the gnocchi well and set them aside for later. In a large skillet, heat olive oil and butter over medium heat. Add minced garlic and cook for about one minute. You want the garlic to smell good but not brown. Pour in the heavy cream and let it simmer gently. Stir it well to mix. Gradually add the grated Parmesan cheese. Keep stirring until the sauce looks creamy and smooth. Add the chopped spinach to the skillet, cooking it until it wilts, which takes about 2-3 minutes. Season with salt, pepper, and a pinch of nutmeg if you like. Now it's time to bring it all together. Add the cooked gnocchi to the skillet. Gently toss them in the creamy sauce. Cook for another 2 minutes to heat everything. Finally, remove from heat and garnish with fresh parsley. Enjoy your creamy garlic Parmesan spinach gnocchi! To get a creamy sauce, start with fresh ingredients. Use heavy cream for rich flavor. Heat the cream slowly; this helps it mix well with cheese. Stir in the Parmesan cheese gradually. This way, it melts smoothly. If the sauce is too thick, add a splash of pasta water. It adds creaminess and helps the sauce cling to the gnocchi. Cooking gnocchi is simple. Boil them in salted water until they float. This usually takes about 2-3 minutes. Don’t overcrowd the pot; cook in batches if needed. Once they float, drain them gently. Avoid overcooking, as they can become mushy. Toss the gnocchi in the sauce right after draining for the best flavor. Garnishing makes your dish look great. Use fresh parsley for a pop of color. It adds freshness too. You can drizzle extra cream on top for a fancy touch. A sprinkle of Parmesan cheese enhances the flavor and looks appealing. Serve in shallow bowls to show off the creamy sauce. {{image_2}} You can boost the protein in your creamy garlic Parmesan spinach gnocchi by adding chicken or shrimp. For chicken, use cooked, shredded pieces. Sauté the chicken in the skillet before adding the cream. For shrimp, add them directly to the sauce. Cook them until they turn pink. This adds flavor and makes the dish more filling. If you want a vegetarian option, skip the meat and enjoy the dish as is. For a vegan choice, replace the heavy cream with coconut milk or cashew cream. Use nutritional yeast instead of Parmesan for that cheesy flavor. You can also try tofu or tempeh for added protein. This way, everyone can enjoy this creamy delight. Enhance the flavor with fresh herbs like basil or thyme. Add these when you toss the spinach in the sauce. A pinch of red pepper flakes can give it a nice kick. For a unique twist, try adding lemon zest. It brightens up the dish and adds freshness. Experiment with different spices to find your favorite combo! To store your creamy garlic parmesan spinach gnocchi, let it cool first. Place the leftovers in an airtight container. This dish keeps well in the fridge for up to three days. When you want to enjoy it again, just take it out and reheat. If you want to freeze your dish, it is best to freeze the gnocchi and sauce separately. Cooked gnocchi can freeze well for up to two months. Use a freezer-safe bag or container. Make sure to remove as much air as possible. For the sauce, let it cool, then pour it into a freezer-safe container. This can also freeze for up to two months. When you are ready to eat your leftovers, use the stove for the best results. Add a splash of cream or water to the sauce to help it return to its creamy state. Heat over medium heat until warm. Stir often to avoid burning. If you use the microwave, cover the dish and heat in short bursts, stirring between each. Enjoy your meal just like the first time! Yes, you can use frozen gnocchi. Just cook it straight from the freezer. Follow the package directions for the best results. The cooking time may be a bit longer. When it floats, it’s ready. You can use half-and-half or whole milk. For a dairy-free option, try coconut cream. These substitutes will change the taste a bit. Adjust your seasoning to match. This creamy garlic parmesan spinach gnocchi lasts about three days in the fridge. Store it in an airtight container. Reheat gently on the stove or microwave. The sauce may thicken, so add a splash of milk or cream to loosen it. This blog post covered everything from ingredients to storage tips for gnocchi. You learned about key components for both the dish and its sauce. I shared tricks for creamy sauces and perfect cooking. You can also find ways to adapt this meal for different diets. Now, you have the tools to make a delicious gnocchi dish. Embrace your culinary creativity and enjoy cooking!

Creamy Garlic Parmesan Spinach Gnocchi Delight

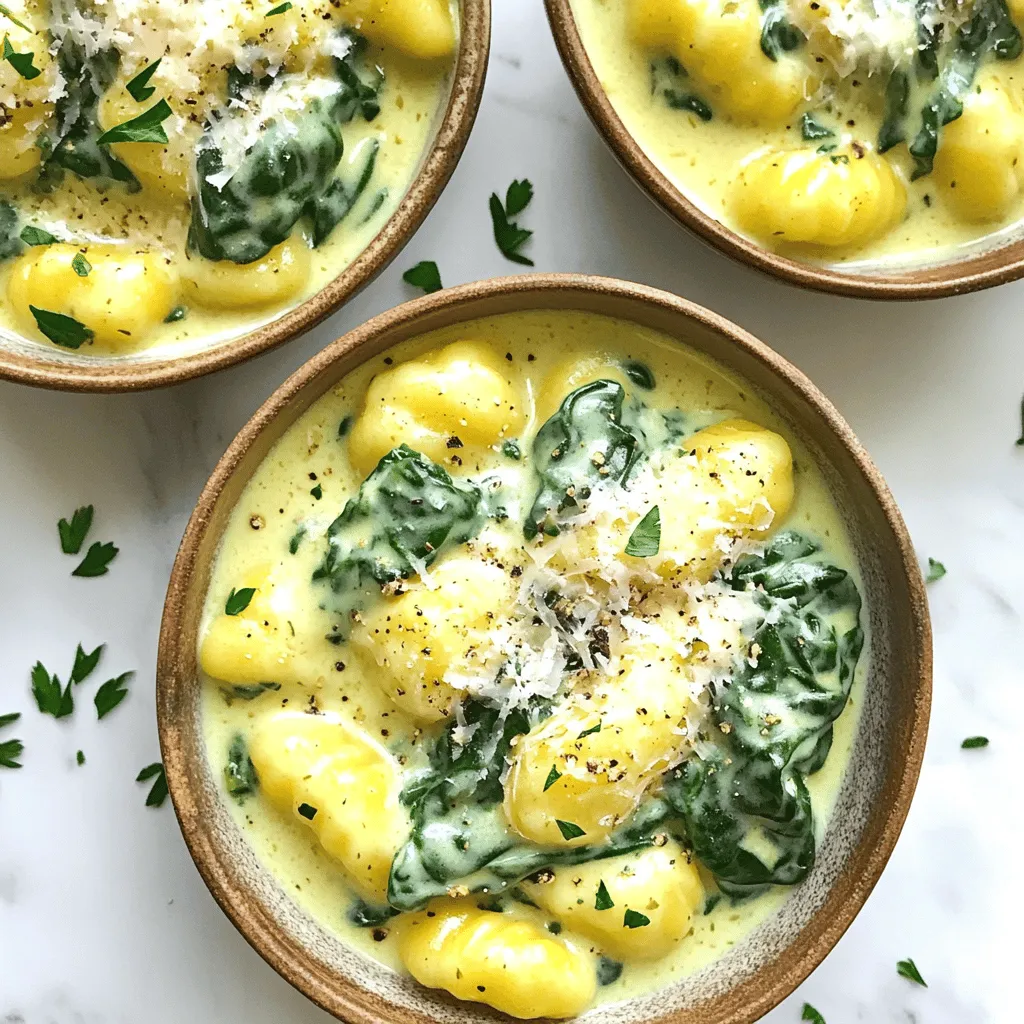
If you’re craving a dish that’s both simple and delicious, you’ve found it! My Creamy Garlic Parmesan Spinach Gnocchi Delight

- 1 ½ cups all-purpose flour - 1 teaspoon baking soda - 1 teaspoon baking powder - ½ teaspoon salt - 1 teaspoon ground cinnamon - ½ teaspoon ground nutmeg - 1 cup granulated sugar - ½ cup brown sugar, packed The dry ingredients are the base of your cupcakes. Flour gives them structure, while baking soda and baking powder help them rise. Salt enhances the flavors, and spices like cinnamon and nutmeg add warmth. - ½ cup vegetable oil - 2 large eggs - 1 cup canned pumpkin puree - 1 teaspoon vanilla extract The wet ingredients keep your cupcakes moist. Oil adds richness, and eggs help bind everything together. Pumpkin puree brings in that lovely fall flavor. Vanilla adds just the right touch of sweetness. - 8 oz cream cheese, softened - ½ cup unsalted butter, softened - 3 cups powdered sugar - 1 teaspoon vanilla extract - A pinch of salt - Chopped pecans or walnuts for garnish (optional) The cream cheese frosting is a star. It’s creamy, tangy, and sweet. Cream cheese and butter create a smooth base. Powdered sugar sweetens it up nicely. A pinch of salt balances the flavors. You can top it with nuts for a nice crunch. Start by preheating your oven to 350°F (175°C). This helps the cupcakes bake evenly. Next, take a 12-cup muffin tin and line it with paper liners. This makes it easy to remove the cupcakes later. In a medium bowl, whisk together the dry ingredients. Combine 1 ½ cups of all-purpose flour, 1 teaspoon of baking soda, 1 teaspoon of baking powder, ½ teaspoon of salt, 1 teaspoon of ground cinnamon, and ½ teaspoon of ground nutmeg. Mixing these well adds flavor and ensures even rising. In a large bowl, mix the granulated sugar and brown sugar with ½ cup of vegetable oil. Stir until smooth. Then, add 2 large eggs one at a time. Mix well after each egg. This helps the batter become light and fluffy. Next, stir in 1 cup of canned pumpkin puree and 1 teaspoon of vanilla extract. Make sure it blends well. The pumpkin adds moisture and a lovely flavor to the cupcakes. Gradually add the dry ingredients to the wet mixture. Stir gently until just combined. Be careful not to overmix, as this can make the cupcakes tough. You want a smooth batter with a few lumps. Now it's time to fill the cupcake liners! Divide the batter evenly, filling each about 2/3 full. Bake in the preheated oven for 18-20 minutes. To check if they are done, insert a toothpick in the center. If it comes out clean, they are ready. Let them cool in the tin for 5 minutes, then transfer to a wire rack to cool completely. While the cupcakes cool, make the cream cheese frosting. In a mixing bowl, beat together 8 oz of softened cream cheese and ½ cup of softened butter. Mix until smooth and creamy. Gradually add 3 cups of powdered sugar. Beat until fluffy, then mix in 1 teaspoon of vanilla extract and a pinch of salt for flavor. Once the cupcakes are cool, frost them generously with the cream cheese mixture. You can use a knife or a piping bag for a fun design. For a little extra crunch, sprinkle chopped pecans or walnuts on top. This adds a nice texture and flavor contrast. Enjoy your delicious Pumpkin Cream Cheese Frosted Cupcakes! To keep your cupcakes light and fluffy, mix the batter gently. When you add the dry ingredients, stir just until everything blends. Overmixing can make your cupcakes dense. If you see a few flour streaks, that’s okay! They will bake perfectly. Make sure your cream cheese and butter are at room temperature. This step helps them blend smoothly. Beat the cream cheese and butter together until creamy. Gradually add the powdered sugar to avoid a sugar cloud. Mix until the frosting is light and fluffy. Don’t forget the pinch of salt for extra flavor! Start with fresh ingredients for the best results. Use a light hand when filling the cupcake liners; 2/3 full is just right. Keep an eye on the baking time. Every oven is different, so check your cupcakes a minute early. When a toothpick comes out clean, they are done! {{image_2}} You can make these cupcakes gluten-free. Use a gluten-free flour blend in place of all-purpose flour. Many brands work well for baking. Just ensure it has a good mix of starches and proteins. This swap keeps the texture light and fluffy. To make vegan pumpkin cupcakes, swap the eggs for flax eggs. Mix one tablespoon of ground flaxseed with three tablespoons of water. Let it sit for a few minutes to thicken. Use coconut oil instead of vegetable oil for a rich flavor. Make sure to choose a non-dairy milk, like almond or oat milk, for the wet mix. You can change the cream cheese frosting to match your taste. Add a splash of maple syrup for a sweet twist. You could mix in cocoa powder for a mocha flavor. For a spiced touch, try adding a little more cinnamon or nutmeg to the frosting. You can also use lemon zest for a refreshing kick. Each option gives a unique spin to your cupcakes. To keep your pumpkin cream cheese frosted cupcakes fresh, store them in an airtight container. Place a piece of parchment paper between layers if you stack them. This will prevent the frosting from sticking. Keep the container in the fridge. The cool air will help the frosting stay firm. You can freeze these cupcakes for later. First, let them cool completely. Then, wrap each cupcake tightly in plastic wrap. Place them in a freezer-safe bag or container. They can last up to three months in the freezer. When ready to eat, thaw them in the fridge overnight. These cupcakes stay fresh for about four days in the fridge. If you leave them out at room temperature, they will last about two days. To keep them tasty, avoid exposing them to heat or sunlight. Always check for any signs of spoilage before enjoying. Yes, you can use fresh pumpkin. Start with a small pumpkin. Cook it by roasting or boiling until soft. Then, mash it well. Measure one cup for your recipe. Fresh pumpkin gives a bright flavor. It may also add more moisture. You might need to adjust other wet ingredients. You can use Greek yogurt or silken tofu. Both give a creamy texture. Greek yogurt adds a tangy taste, while silken tofu is mild. If you want a sweeter option, use mascarpone cheese. These substitutes work well in frosting, but flavors may change. To check if your cupcakes are done, use a toothpick. Insert it into the center of a cupcake. If it comes out clean or with a few crumbs, they are done. If it has wet batter, bake for a few more minutes. Keep an eye on them to avoid overbaking. Yes, you can make the batter ahead of time. Store it in the fridge for up to 24 hours. When ready to bake, let it sit at room temperature for about 30 minutes. This helps achieve even baking. Just remember to mix gently before filling your liners. In this post, we explored how to make delicious pumpkin cupcakes. We covered ingredients, step-by-step baking, and helpful tips for success. You can even customize your cupcakes with various options. Remember to store them right to keep them fresh. Baking can be fun and rewarding. So go ahead, try this recipe, and enjoy your tasty treats! Happy baking!

Pumpkin Cream Cheese Frosted Cupcakes Delightful Treat

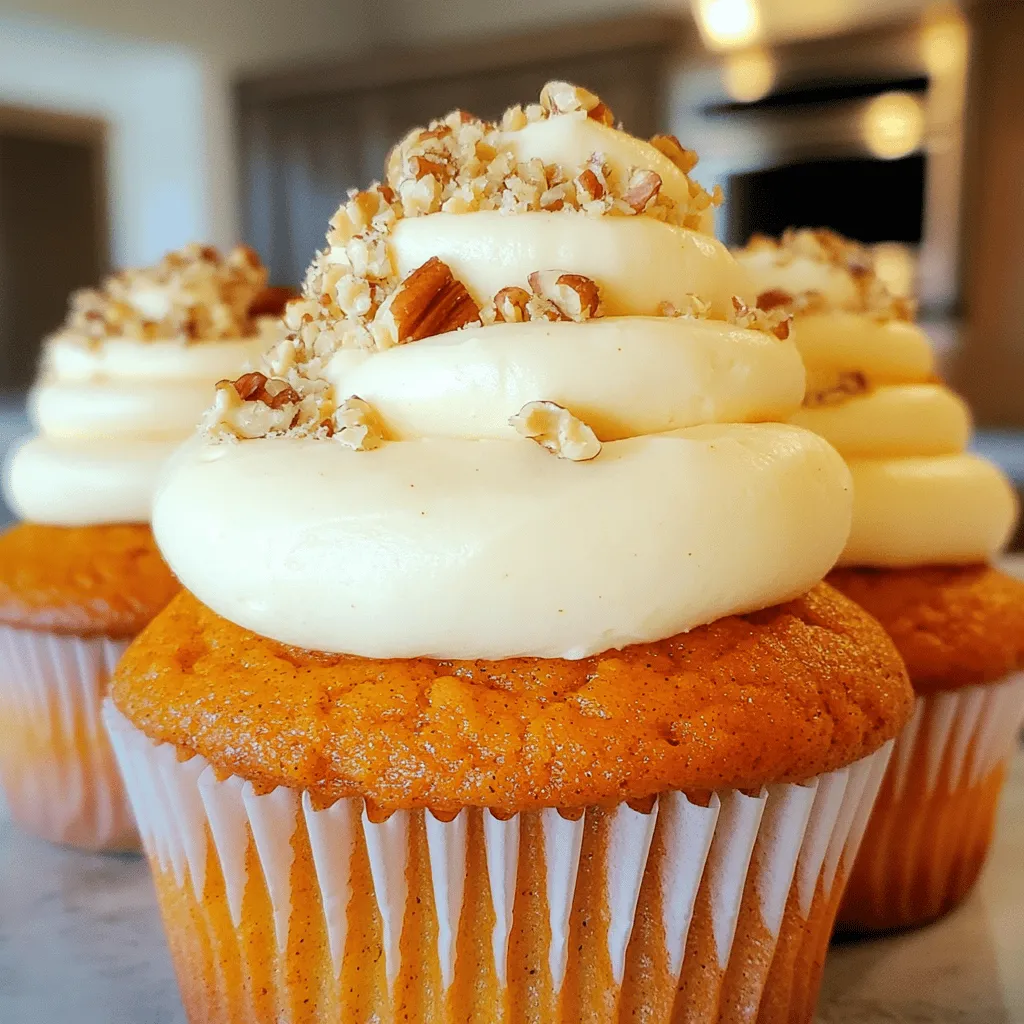
If you’re craving a cozy treat that screams fall, you’ve found it! Pumpkin Cream Cheese Frosted Cupcakes blend warm pumpkin

For this dish, you need 8 chicken drumsticks. They are juicy and full of flavor. Choose fresh chicken for the best taste. The skin will turn crispy and golden when roasted. Use 4 cloves of minced garlic for a bold taste. Add 1 tablespoon each of chopped rosemary, thyme, and parsley. These herbs bring life to the chicken. Their aroma fills your kitchen as they cook. You will need 1 pound of halved baby potatoes and 2 cups of trimmed green beans. Potatoes add heartiness, while green beans give a nice crunch. For seasoning, use 1 tablespoon of olive oil, the juice of 1 lemon, salt, and pepper to taste. The lemon juice brightens the dish. For an extra kick, add the zest of 1 lemon at the end. Start by gathering your ingredients. You need chicken drumsticks, garlic, fresh herbs, and olive oil. In a big bowl, mix minced garlic, chopped rosemary, thyme, parsley, olive oil, lemon juice, salt, and pepper. Stir it well. This mix is your marinade. Add the chicken drumsticks to the bowl. Make sure each piece is covered in the marinade. Let it sit for at least 15 minutes. You can also marinate overnight for more flavor. While the chicken marinates, prepare your sheet pan. Grab a large sheet pan and add halved baby potatoes. Drizzle them with olive oil, salt, and pepper. Toss the potatoes around to coat them. This step helps them cook evenly. Spread the potatoes out so they have space. This helps them get crispy. Preheat your oven to 425°F (220°C). Place the marinated chicken drumsticks on the sheet pan with the potatoes. Make sure they are not too crowded. Now, put the pan in the oven and roast for 20 minutes. After that, add trimmed green beans to the pan. Toss everything gently to mix. Return the pan to the oven for another 15 to 20 minutes. Check if the chicken is cooked. The juices should run clear, and the inside should reach 165°F (75°C). Once done, take the pan out and sprinkle lemon zest over the dish. This adds a fresh taste. Let it rest for a few minutes before serving. Enjoy your meal! To make your marinade shine, use fresh herbs. I love using rosemary, thyme, and parsley. They add great flavor to the chicken. Mix the minced garlic with olive oil and lemon juice. This combo brings out the best in the meat. Let the chicken soak in the marinade for at least 15 minutes. If you have more time, marinate it overnight. This makes the chicken taste even better! For crispy skin, space the drumsticks well on the pan. Crowding them can trap steam, making them soggy. Before roasting, pat the skin dry with a paper towel. This helps the skin crisp up nicely. Broil the drumsticks for the last few minutes if you want extra crunch. Just watch closely to avoid burning! Cooking time may vary based on your oven and drumstick size. Start with 20 minutes at 425°F. Then, add the green beans and roast for 15-20 more minutes. Check the chicken with a meat thermometer. It should reach 165°F to be safe. If you have larger drumsticks, add a few extra minutes. Always trust your thermometer for the best results! {{image_2}} You can change the herbs to suit your taste. Try using basil or oregano for a twist. You can also mix in some dill for a fresh taste. Each herb brings its own flavor to the dish. This flexibility lets you enjoy the recipe in new ways. Experiment with dried herbs if fresh ones are not available. Just use less of them since dried herbs are stronger. You can switch out the baby potatoes and green beans for other veggies. Carrots, bell peppers, and zucchini work great. Just cut them into similar sizes for even cooking. Root vegetables like sweet potatoes add natural sweetness. This allows you to use what you have on hand. Mixing in a variety of vegetables makes the dish colorful and tasty. If you like heat, add some red pepper flakes to the marinade. You can also use a spicy sauce like Sriracha. Start with a small amount and taste as you go. This way, you can find the right heat for your palate. For a milder taste, skip the spicy additions. Your garlic herb chicken will still taste amazing without the heat. Store any leftover garlic herb chicken drumsticks in an airtight container. They will stay fresh for up to three days. Place the chicken and veggies in the fridge as soon as they cool down. This helps keep them safe to eat later. Before serving again, check for any off smells or changes in color. To freeze the drumsticks, first let them cool. Place them in a freezer-safe bag or container. Be sure to remove as much air as possible. They can last up to three months in the freezer. When you're ready to eat, thaw them in the fridge overnight. This keeps the texture nice. You can reheat the chicken drumsticks in the oven for best results. Preheat your oven to 350°F (175°C). Place the chicken on a baking sheet and cover it with foil. Heat for about 15-20 minutes or until warm. You can also use a microwave, but the skin won't be as crispy. Just heat for 2-3 minutes, checking to make sure it is hot throughout. Enjoy the flavors! Yes, you can marinate the chicken overnight. This gives the drumsticks a deeper flavor. The longer they sit in the marinade, the better they taste. Just remember to cover the bowl with plastic wrap. This keeps the chicken fresh and full of flavor. You can serve garlic herb chicken drumsticks with many sides. Here are some great options: - Creamy mashed potatoes - Rice pilaf - A fresh green salad - Roasted carrots or zucchini These sides balance well with the chicken's rich taste. They add color and nutrition to your meal. To check if the chicken is fully cooked, use a meat thermometer. Insert it into the thickest part of the drumstick. The temperature should reach 165°F (75°C). You can also cut into the chicken. The juices should run clear, not pink. If they are clear, your chicken is ready to eat. You learned how to make tasty garlic herb chicken drumsticks. We covered all the key steps, from marinating to cooking. You can spice it up with different herbs or veggies. Remember to store leftovers properly for later meals. With these tips, you'll make juicy drumsticks every time. Enjoy your cooking and happy eating!

Garlic Herb Chicken Drumsticks Sheet Pan Delight

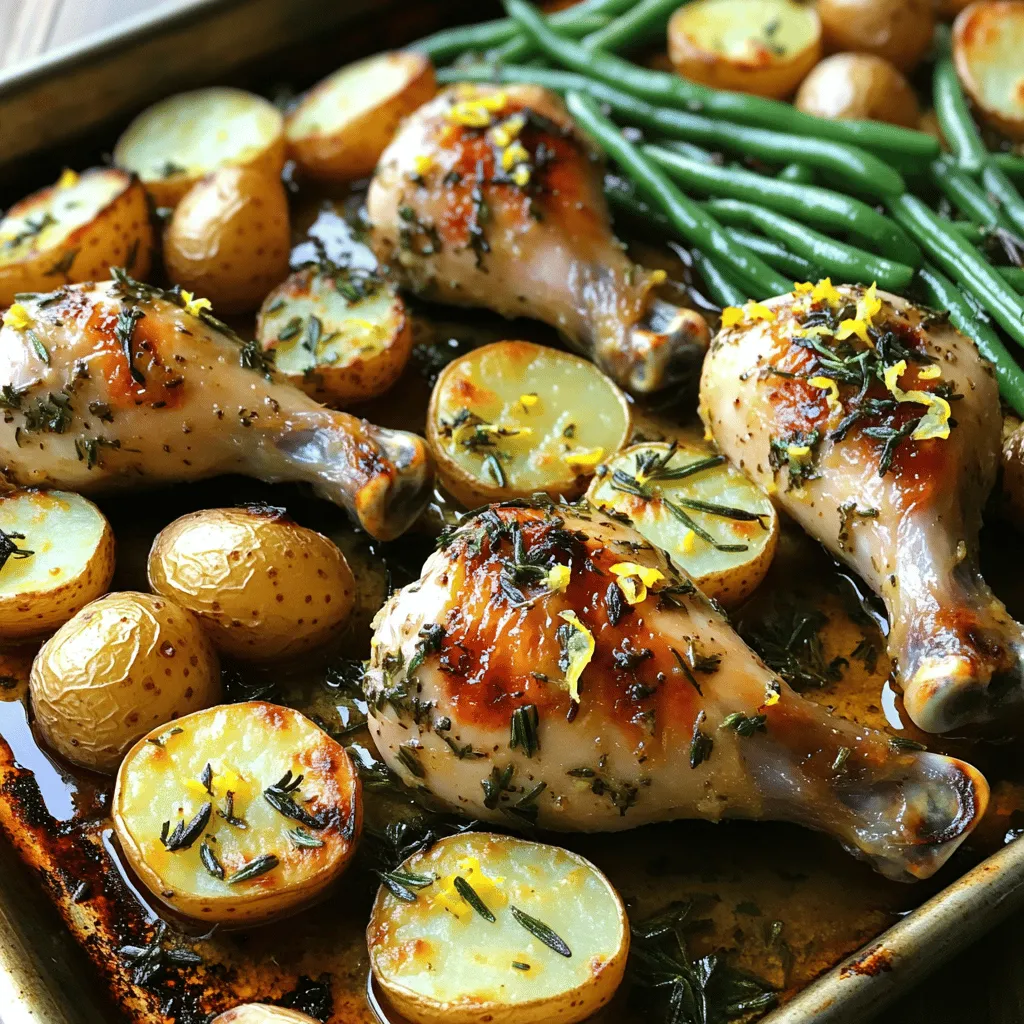
When you’re craving a simple yet delicious meal, Garlic Herb Chicken Drumsticks Sheet Pan Delight is the answer. This recipe

Older posts
Newer posts
← Previous Page1 … Page25 Page26 Page27 … Page132 Next →

dsad

© 2025 Emmas Dish • Built with GeneratePress

Our Policies

  • Copyright Policy
  • Cookie Policy
  • GDPR Policy
  • Privacy Policy
  • Disclaimer
  • Terms Of Use

More Information

  • Home
  • About
  • Contact
  • Appetizers
  • Dessert
  • Dinner
  • Drinks
©2025, Emmas Dish About Back To Top