Skip to content
DisclaimerTerms Of UseGDPR PolicyCookie Policy

Emmas Dish

  • Home
  • Drinks
  • Appetizers
  • Dinner
  • Dessert
  • About
  • Contact
  • Privacy Policy
DisclaimerTerms Of UseGDPR PolicyCookie Policy

Emma

To make One-Pot Lemon Garlic Pasta, gather these ingredients: - 12 oz spaghetti - 4 cups vegetable broth - 4 cloves garlic, minced - 1 medium onion, finely chopped - 1 lemon (zest and juice) - 1 cup cherry tomatoes, halved - 1/2 cup fresh parsley, chopped - 1/2 teaspoon red pepper flakes (optional) - Salt and pepper to taste - 2 tablespoons olive oil - Grated Parmesan cheese for serving (optional) You can swap ingredients if needed. Here are some ideas: - Use penne or fettuccine instead of spaghetti. - Swap vegetable broth for chicken broth for a richer taste. - If you don't have fresh parsley, use basil or spinach. - For a creamier dish, add a splash of cream or cashew milk. - If you want a kick, use crushed red pepper or fresh chili instead of red pepper flakes. Choose your ingredients wisely for the best flavor. Here are some tips: - Look for firm, bright cherry tomatoes without blemishes. - Pick lemons that feel heavy for their size; they’re juicier. - Choose garlic that is firm and has no green shoots; it’s fresher. - When buying parsley, look for vibrant green leaves with no wilting. - For onions, select those that are firm and dry without soft spots. These simple steps help you create a delicious meal with fresh flavors! For the full recipe, check out the [Full Recipe]. To start, gather all your ingredients. This makes cooking easier. You will need spaghetti, vegetable broth, garlic, onion, lemon, cherry tomatoes, parsley, and olive oil. Get your salt, pepper, and red pepper flakes ready too. 1. Heat the olive oil in a large pot over medium heat. 2. Add the chopped onion and cook for 3-4 minutes. The onion should turn soft and clear. 3. Next, add the minced garlic. Stir it for about 1-2 minutes. Be careful not to let it burn. 4. Now, add the spaghetti, vegetable broth, red pepper flakes, lemon zest, salt, and pepper. Bring everything to a boil. 5. Once it boils, lower the heat. Cover the pot and let it simmer for 10-12 minutes. Stir occasionally. The spaghetti should be al dente. 6. Add the halved cherry tomatoes and lemon juice. Cover the pot and let it sit for 2-3 minutes. The tomatoes will soften up. 7. Finally, take it off the heat and mix in the chopped parsley. Taste and adjust the salt and pepper if needed. 8. Serve hot and sprinkle grated Parmesan cheese on top if you like. You will know the pasta is done when it feels firm but tender. The liquid should mostly be absorbed, leaving a nice sauce. The tomatoes will be soft, and the dish should smell great. Enjoy your meal! For the full recipe, check the earlier section. To boost the taste of your One-Pot Lemon Garlic Pasta, use fresh herbs. Fresh parsley adds a bright note. You can also add basil or thyme for more depth. Don’t skip the lemon zest! It gives a punch of flavor. If you like heat, add more red pepper flakes. For a richer taste, use vegetable broth instead of water. A splash of white wine can also elevate the dish. Finally, finish with a drizzle of high-quality olive oil. One common mistake is overcooking the pasta. Always check it a minute before the time is up. Remember, it will continue to cook off the heat. Another mistake is not seasoning enough. Taste and adjust the salt and pepper. Skipping the lemon juice will dull the flavor. Lastly, don’t forget to stir. Stirring helps the pasta cook evenly and prevents sticking. You need a large skillet or pot to make this dish. A wooden spoon helps mix the ingredients well. Use a microplane or zester for the lemon zest. A good knife is key for chopping garlic and onion. For serving, have shallow bowls ready. They show off the pasta nicely. If you want, use a cheese grater for the Parmesan cheese. These tools will make cooking easier and more fun. For the full recipe, check out the One-Pot Lemon Garlic Pasta. {{image_2}} You can easily add protein to your One-Pot Lemon Garlic Pasta. Chicken is a great choice. Simply cut it into small pieces and cook it with the onions. Shrimp works well too. Toss in some shrimp during the last few minutes of cooking. For a hearty dish, add cooked sausage or even chickpeas for a plant-based option. Each adds flavor and makes the meal more filling. If you want a vegetarian version, skip the meat and focus on veggies. You can add spinach, zucchini, or bell peppers. These veggies blend well with the lemon and garlic. You can also use mushrooms for a rich taste. Just sauté them with the onions. They will soak up all the lovely flavors. To boost the flavor, think about adding spices. Fresh herbs like basil or thyme can brighten the dish. A dash of cayenne pepper adds heat without overpowering. For a fun twist, try a splash of soy sauce or balsamic vinegar. These give a unique depth to the pasta. Always taste and adjust to your liking. You want each bite to burst with flavor! For the complete process, don’t forget to check the Full Recipe! Store your leftover One-Pot Lemon Garlic Pasta in an airtight container. Let it cool first. Once cooled, seal the container and place it in the fridge. This pasta dish can stay fresh for up to three days. When you're ready to enjoy your leftovers, use a pot or microwave. If using a pot, add a splash of vegetable broth or water. Heat it on low, stirring often. If using a microwave, heat in short bursts. Stir it every 30 seconds until hot. To freeze One-Pot Lemon Garlic Pasta, let it cool completely first. Then, pack it tightly in freezer-safe bags or containers. Remove any air before sealing. This dish can freeze well for about two months. When ready to eat, thaw it in the fridge overnight before reheating. For best flavor, consume it sooner rather than later. Yes, you can use other pasta types. Penne, fusilli, or fettuccine work well. Just keep an eye on the cooking time. Each pasta varies slightly, so check package instructions. You want it al dente, which means firm but not hard. This ensures every bite stays tasty. To change the spice level, add more or less red pepper flakes. For mild pasta, skip the flakes. If you love heat, double the amount! You can also add black pepper for a different spice. Taste as you cook. This way, you find the perfect balance for your meal. Many side dishes pair well with this pasta. A simple green salad brings freshness. Garlic bread adds a nice crunch and flavor. Roasted vegetables like zucchini or bell peppers complement the dish well. You can even serve a light soup as a starter. The options are endless! Check out the Full Recipe for more ideas. In this blog post, we explored important ingredients and their substitutions. I shared tips for selecting fresh items and provided clear steps for cooking. You learned how to enhance flavors and avoid common mistakes. Variations included protein options and vegetarian alternatives, plus storage strategies for leftovers. Always remember, cooking should be fun and creative. Use these tips to make your dishes shine and enjoy every bite!

One-Pot Lemon Garlic Pasta Flavorful and Easy Meal

Get ready for a meal that bursts with flavor and is super easy to make! This One-Pot Lemon Garlic Pasta

- 1 cup quinoa, rinsed - 1 can (15 oz) black beans, drained and rinsed - 1 red bell pepper, diced - 1 cup cherry tomatoes, halved - 1 small red onion, finely chopped Quinoa forms the base of this dish. It is high in protein and gluten-free. Black beans add fiber and a creamy texture. Fresh vegetables bring crunch and color. The bell pepper and cherry tomatoes add sweetness, while the onion gives a bit of sharpness. - 1 teaspoon cumin - 1 teaspoon chili powder - Juice of 2 limes - 2 tablespoons olive oil - Salt and pepper to taste Cumin and chili powder pack a punch. They add warmth and depth. Lime juice brightens the dish and adds acidity. Olive oil brings richness. Salt and pepper balance the flavors, making everything pop. - 1 jalapeño, deseeded and minced - 1 avocado, diced - 1/4 cup fresh cilantro, chopped If you want more heat, add jalapeño. Avocado gives creaminess and healthy fats. Cilantro adds a fresh, herbal note. These optional ingredients can elevate your salad. You can mix and match based on your taste. For the full recipe, check out the details! Start by rinsing the quinoa. This removes the bitter coating called saponin. Rinse it under cold water in a fine-mesh strainer. Swirl it around for a minute until the water runs clear. Next, cook the quinoa. In a medium saucepan, add the rinsed quinoa and 2 cups of vegetable broth or water. Bring it to a boil over medium heat. Once it boils, reduce the heat to low. Cover the pot and let it simmer for about 15 minutes. After that, all the liquid should be absorbed. Remove it from heat and let it sit covered for 5 minutes. Finally, fluff it with a fork to get the perfect texture. While the quinoa cooks, chop your vegetables. Dice the red bell pepper, halve the cherry tomatoes, and finely chop the red onion. For added heat, deseed and mince the jalapeño. Then, dice the avocado and set everything aside in a large mixing bowl. Now, make the dressing. In a small bowl, whisk together the juice of 2 limes, 2 tablespoons of olive oil, 1 teaspoon of cumin, 1 teaspoon of chili powder, and salt and pepper to taste. This dressing adds a zesty kick to the salad. Once the quinoa is ready, add it to the large bowl with the chopped veggies. Pour the dressing over everything. Gently toss all the ingredients together until they are well combined. Finally, fold in the chopped cilantro. This adds freshness and color to your dish. Taste the salad and adjust the seasoning if needed. You can add more lime juice or salt to suit your taste. Enjoy this flavorful and healthy dish, perfect for any meal. For the full recipe, check the earlier section. Quinoa cooking tips To cook quinoa, rinse it first. This helps remove bitter saponins. Use a 2:1 ratio of liquid to quinoa. I prefer vegetable broth for more flavor. Bring it to a boil, then cover and reduce the heat. Let it simmer for about 15 minutes. After that, let it sit for 5 minutes. Fluff it with a fork for a light texture. Dressing tips For the dressing, I mix lime juice, olive oil, cumin, and chili powder. This blend adds a zesty punch. You can adjust the salt and pepper to taste. Make sure to whisk the dressing well before adding it to the salad. This helps combine the flavors nicely. Best pairings This salad shines on its own. It also pairs well with grilled chicken or shrimp. You can serve it alongside tortilla chips for a crunchy touch. A dollop of sour cream can add creaminess too. Presentation tips Serve the salad in a large, colorful bowl. Add extra lime wedges on the side for a fresh look. Garnish with chopped cilantro for a vibrant finish. This makes the dish appealing and fun to eat. Health benefits of ingredients Quinoa is a complete protein and rich in fiber. Black beans support heart health and digestion. Fresh veggies like bell peppers and tomatoes provide vitamins. Avocado adds healthy fats, which are good for your skin. Calorie breakdown Each serving of this salad has about 300 calories. It is low in saturated fat and high in nutrients. This dish is great for a light lunch or dinner. You can enjoy it guilt-free while still feeling full. {{image_2}} You can easily switch beans in this salad. Try kidney beans or chickpeas for a new twist. Each bean brings a different taste and texture. You can also change the spices. Instead of cumin, use smoked paprika. This swap adds a nice depth of flavor. If you want more heat, add cayenne pepper. This can really spice things up! This salad is great for everyone. It’s already vegan, so you can enjoy it without dairy. If you follow a gluten-free diet, this salad is safe. Just make sure your broth is gluten-free. This keeps the dish light and healthy, while still being full of flavor. Using seasonal veggies makes this dish fresh and fun. In summer, add corn or zucchini for crunch. In fall, roasted sweet potatoes are a tasty addition. You can also change it for different occasions. Make it a main dish for a picnic or a side for a barbecue. The options are endless! For the full recipe, check the main section! To keep your spicy quinoa black bean salad fresh, use airtight containers. Glass or plastic containers work well. Store the salad in the fridge for up to three days. After this time, the salad may lose its taste and crunch. You can prep this salad in advance. Cook the quinoa and chop the veggies a day before. Store each ingredient separately to keep them fresh. Mix everything together right before serving. This way, you enjoy the best flavors and textures. Got leftovers? You can use them in many fun ways. Try adding the salad to wraps or tacos. You can also mix it into scrambled eggs for breakfast. Another idea is to top a baked potato with it. Each option makes a tasty meal! Check out the Full Recipe for more ideas! To reduce the heat, you can skip the jalapeño. If you want a milder flavor, you can also use less chili powder. Another great option is to add more avocado. Avocado has a creamy texture that cools the spice. You can also serve the salad with a dollop of yogurt or sour cream. This will balance out the heat and make each bite smooth. Yes, you can make this salad ahead of time! It actually tastes better after sitting for a while. The flavors mix and get richer. Store the salad in an airtight container in the fridge. It will stay fresh for up to three days. Just remember to keep the avocado separate if you want it to stay green. Add it just before serving. This salad pairs well with many dishes. You can serve it with grilled chicken or fish for a complete meal. It also tastes great with tortilla chips or wraps. If you want a light lunch, enjoy it with a side of soup. For a fun twist, you can use it as a filling in tacos. This salad is so versatile! You can find the full recipe above to get started. This blog post covered how to make a delicious Spicy Quinoa Black Bean Salad. We discussed essential ingredients, like quinoa and black beans, and flavorful spices, such as cumin and lime juice. You learned step-by-step instructions for making the salad and tips for perfecting it. We explored variations, storage info, and answers to common questions. Enjoying this salad makes for a healthy meal that can fit any diet. Keep experimenting with ingredients to find what you love most. Happy cooking!

Spicy Quinoa Black Bean Salad Flavorful and Healthy Dish

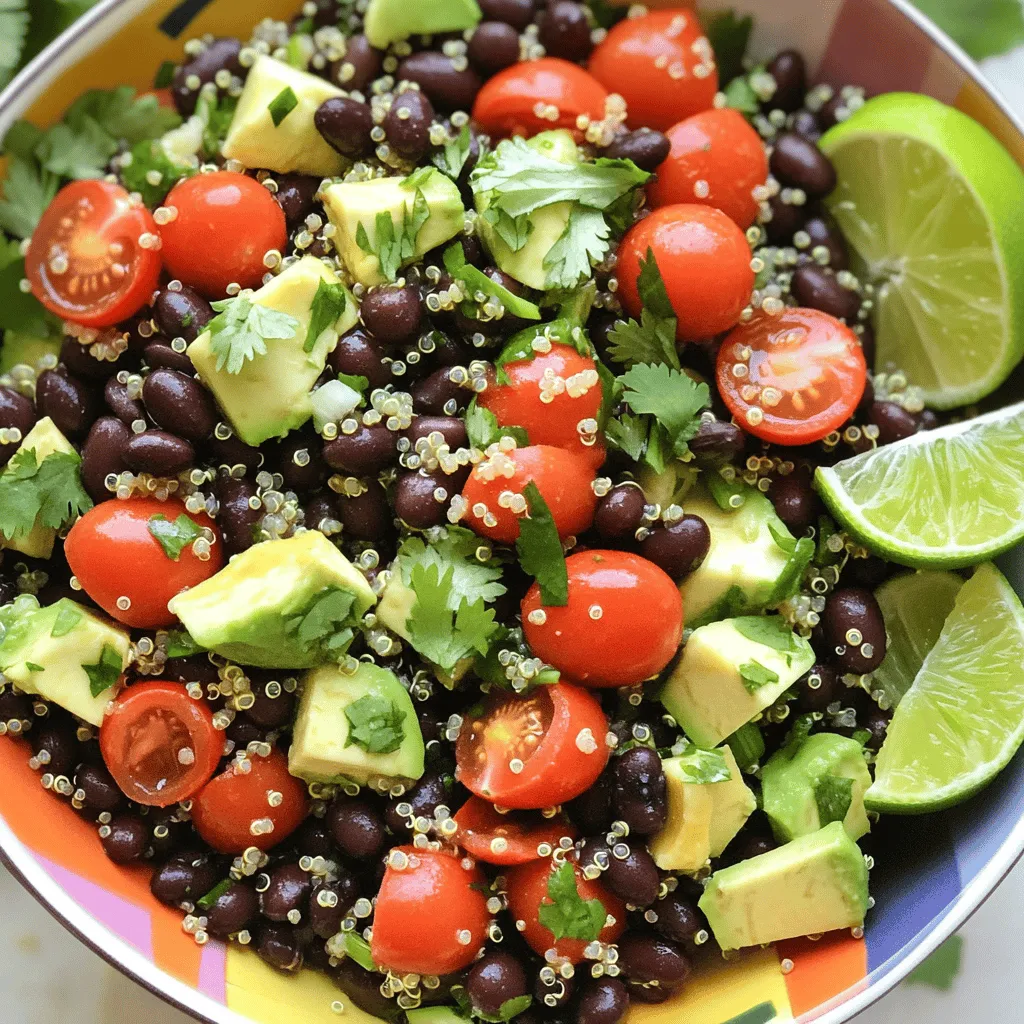
If you’re looking for a dish that’s both tasty and healthy, you’ve found it! My Spicy Quinoa Black Bean Salad

- 1 cup rolled oats - 1 ripe banana, mashed - 1 tablespoon maple syrup (optional) - 1 cup almond milk (or any milk of your choice) - 1 teaspoon vanilla extract - 1 teaspoon ground cinnamon - 1 tablespoon chia seeds - Pinch of salt - ¼ cup chopped walnuts (or pecans) - Slices of banana and additional walnuts for topping Banana bread overnight oats are both tasty and healthy. You just need a few simple ingredients to create this delightful breakfast. Start with rolled oats. They give the base a hearty texture. Next, add a ripe banana. The banana not only adds sweetness but also makes the oats creamy. If you want a bit more sweetness, you can use maple syrup. It’s optional but great. For the liquid, I like almond milk. You can use any milk that you prefer. It helps to blend all the flavors together. Now for the flavor enhancers! Vanilla extract adds a warm touch. Ground cinnamon brings that cozy banana bread flavor to life. Chia seeds add fiber and a nice crunch. A pinch of salt balances the sweetness. Finally, let’s talk toppings. Chopped walnuts or pecans add a nice crunch. Plus, some banana slices make it look pretty and tasty. You can find the full recipe [here]. Enjoy this simple and healthy breakfast! - In a medium bowl, combine 1 cup rolled oats, 1 ripe banana (mashed), and 1 tablespoon maple syrup, if you want a touch of sweetness. Mix well until the banana is evenly spread. - Next, add 1 cup almond milk, 1 teaspoon vanilla extract, 1 teaspoon ground cinnamon, 1 tablespoon chia seeds, and a pinch of salt. Stir until everything is well mixed. - Now, gently fold in ¼ cup chopped walnuts. This adds a nice crunch. - Divide the mixture into two jars or containers with tight lids. Cover them and place them in the refrigerator overnight. - In the morning, take the jars out of the fridge. If the oats look too thick, add a splash of almond milk for your desired creaminess. - Top with banana slices and extra walnuts before serving. Enjoy your Banana Bread Overnight Oats! For the full recipe, click here. To get the best texture, adjust the almond milk based on your taste. If you want creamier oats, add more milk. For thicker oats, use less. Letting the mixture sit overnight helps the oats absorb all the flavors. This step is key for a tasty breakfast. Don't be afraid to mix things up! You can try different nuts or seeds. Chopped almonds or sunflower seeds work great. You can also add chocolate chips for a sweet twist. Dried fruits like raisins or cranberries add a nice touch too. Be creative! For a yummy breakfast, pair your oats with yogurt. A drizzle of honey makes it even better. You can also enjoy them with fresh fruit. Slices of strawberries or blueberries add color and flavor. These toppings make your meal more fun and tasty! For the complete recipe, check out the [Full Recipe]. {{image_2}} If you want a vegan twist, here are some easy swaps. - Skip the maple syrup for an unsweetened version. - Replace almond milk with oat milk. These small changes keep it plant-based and still tasty. You can enjoy the same creamy texture without losing flavor. Feel free to mix in a bit of nut butter for extra richness. Want to boost the protein? Here’s how: - Add Greek yogurt for extra protein. - Include protein powder in the mixture. This version helps you start the day strong. Greek yogurt gives a creamy texture and a protein punch. Just mix it in with the other ingredients. It makes your breakfast more filling and satisfying. You can switch up the flavor easily! Try these ideas: - Substitute mashed banana with applesauce for apple cinnamon oats. - Use pumpkin puree for a seasonal twist. These variations keep breakfast exciting. Applesauce gives a cozy apple flavor, while pumpkin adds warmth and spice. Each option makes your overnight oats unique and fun to eat. Try them out and see what you like best! Store your Banana Bread Overnight Oats in airtight containers. This keeps them fresh and tasty. I find that they are best eaten within 3 to 5 days. The flavors mix well over time, but they won't last forever. You can freeze these oats for longer storage. Just divide them into single servings and seal them tightly. When you want to eat them, thaw in the fridge overnight. Stir well before serving. This helps bring back their creamy texture. To warm them up, use the microwave. Add a splash of almond milk for moisture. You can enjoy your oats cold or warm, depending on your mood. Both ways taste great! Generally, they last for up to 5 days when stored properly. To keep them fresh, use airtight containers. You can also check for any changes in smell or texture before eating. Yes, you can prepare them up to 5 days in advance. This makes them a great option for busy mornings. Just make sure to store them in the fridge. Grab a jar and enjoy a quick, healthy breakfast. Steel-cut oats will require significantly more soaking time and may alter the texture. They are chewier and take longer to soften. If you prefer the texture of rolled oats, stick with them for this recipe. In this post, we covered how to make Banana Bread Overnight Oats with simple ingredients. You learned about the main components, flavor enhancers, and how to store them. I also shared tips for great texture and fun variations. Try different nuts, fruits, or sweeteners to make this recipe your own. These oats are an easy way to enjoy a healthy breakfast. Experiment with flavors and discover your favorite combination!

Banana Bread Overnight Oats Simple Healthy Recipe

If you love banana bread, you’ll adore these Banana Bread Overnight Oats! With just a few simple ingredients, this recipe

- 2 cups cooked jasmine rice - 1 cup mixed bell peppers (diced) - 1 cup broccoli florets - 1 cup snap peas - 1 medium carrot (julienned) - 3 green onions (sliced) - 3 cloves garlic (minced) - 2 tablespoons soy sauce - 1 tablespoon sesame oil - 1 tablespoon vegetable oil - 1 teaspoon fresh ginger (grated) - Salt and pepper to taste - Sesame seeds for garnish - Fresh cilantro leaves for garnish Gather these ingredients for a vibrant and tasty dish. I prefer using day-old jasmine rice. It separates better and gives a nice texture. Chop the bell peppers, broccoli, snap peas, and carrot into bite-sized pieces. This helps them cook evenly and look great in the final dish. Minced garlic and grated ginger add depth to the flavor. They create a fragrant base when cooked in hot oil. Soy sauce and sesame oil bring the perfect umami taste to the mix. Don’t forget the green onions for a fresh crunch and spring flavor. The sesame seeds and cilantro add a lovely finish. They make your dish pop visually and add extra taste. With these ingredients, you’re ready to create a colorful Vegetable Fried Rice. For the complete details, refer to the Full Recipe. To make a great vegetable fried rice, you must prep your veggies well. Start by washing all your vegetables. For the bell peppers, remove the seeds and dice them into small pieces. For the carrot, slice it into thin strips, known as julienne. Next, trim the snap peas by removing the ends. This makes them easier to eat. Using day-old rice is key. It dries out a bit in the fridge, making it perfect for frying. Fresh rice can be sticky, which is not what you want. If you don’t have day-old rice, spread freshly cooked rice on a tray. Let it cool for about 30 minutes. This also helps it dry out a little. Heat your skillet or wok on medium-high. Add vegetable oil and let it get hot. Now, toss in minced garlic and grated ginger. Stir them for about 30 seconds. This brings out their flavors. Next, add the broccoli florets. Stir-fry them for about 2 minutes. You want them to brighten in color. Then, add the carrot, snap peas, and bell peppers. Keep stirring for 3 to 4 minutes. They should be tender yet still crisp. Push the vegetables to one side of the skillet. Add the cooked rice to the other side. Drizzle soy sauce and sesame oil over the rice. Use a spatula to break up any clumps. Mix the rice and veggies thoroughly. Stir in the sliced green onions, and add salt and pepper to taste. Cook for about 2 more minutes. This helps the flavors blend together nicely. Once cooked, remove the skillet from the heat. Garnish your fried rice with sesame seeds and fresh cilantro. This adds color and a fresh taste. For serving, use a large bowl or plate. This makes the dish look inviting. You can serve it alone or with a side of your favorite protein. Enjoy your colorful and tasty vegetable fried rice! For the complete recipe, check out the Full Recipe section. To avoid soggy rice in fried rice, always use day-old rice. Freshly cooked rice has too much moisture. If you don’t have day-old rice, spread fresh rice on a tray to cool it. This helps it dry out a bit. Use vegetable oil for frying. It has a high smoke point and works well for stir-frying. Sesame oil is great too, but use it sparingly. It adds flavor but burns easily. Adding spices can make your fried rice pop! Try adding chili flakes or a dash of five-spice powder. Soy sauce is key for flavor, but you can also add hoisin or oyster sauce for depth. Adjusting salt levels is easy. Start with a small amount, then taste it. Add more if needed, but remember, soy sauce is salty! Prepping ingredients ahead saves time. Chop your veggies and store them in the fridge. This way, they are ready to go when you start cooking. A time-saving kitchen hack is to use a food processor. It speeds up chopping and slicing. Just be careful not to over-process your veggies! Keep them chunky for texture. {{image_2}} If you want a vegan dish, skip the eggs. Use only vegetables and rice. The full recipe is perfect as it stands. To make it gluten-free, use tamari instead of soy sauce. This keeps the flavor while making it suitable for those with gluten issues. Feel free to change the vegetables based on what you have. You can swap bell peppers for zucchini or carrots for green beans. Want more protein? Try adding tofu or edamame. These options boost the meal and add more nutrition. Fried rice is popular all over the world. In Thailand, they add shrimp and spicy sauces. In Indonesia, they use sweet soy sauce and chili. You can mix flavors too! Try adding pineapple or cashews for a sweet crunch. These ideas make your fried rice unique and fun. To store leftover fried rice, let it cool first. Place it in an airtight container. This keeps air out and helps it stay fresh. Store it in the fridge for up to four days. If you want to keep it longer, freeze it. Pack it tightly in a freezer-safe bag or container. This prevents freezer burn and keeps the flavor intact. To reheat fried rice, the stove is best. Heat a bit of oil in a pan. Add the rice and stir often. This keeps it from sticking and helps it stay fluffy. If using a microwave, put a wet paper towel on top. This adds steam and helps avoid dryness. Stir halfway through to heat evenly. Yes, you can freeze vegetable fried rice! For successful freezing, follow these steps: - Cool the rice completely before freezing. - Portion it into bags or containers. - Label with the date for easy tracking. When you want to eat it, thaw in the fridge overnight. Reheat using the stove for the best texture. Avoid refreezing once it has been thawed. Enjoy your meal with fresh flavors! What type of rice works best for fried rice? I recommend using jasmine rice. It has a great texture and flavor. Day-old rice works best. Fresh rice can be too moist. Let it cool before using. This helps it fry better and stay fluffy. Can frozen vegetables be used in this recipe? Yes, frozen vegetables are a great option. They save time and are easy to use. Just make sure to thaw them first. This helps them cook evenly. They can add color and nutrition to your dish. How to calculate the nutritional value of vegetable fried rice? To calculate the nutritional value, add up the ingredients. Look at the serving size to divide the totals. You can use online tools or apps. They can help you find detailed information. This way, you can tailor the recipe to meet your dietary needs. Health benefits of the ingredients used This fried rice is packed with nutrients! - Bell peppers: Rich in vitamins A and C. - Broccoli: Great source of fiber and antioxidants. - Carrots: High in beta-carotene, good for vision. - Snap peas: Low in calories and high in vitamins. Using fresh vegetables boosts health and flavor. What to serve with vegetable fried rice? This dish pairs well with many foods. You can serve it with a protein like tofu or chicken. A light soup or salad complements it nicely. Try a tangy dipping sauce for extra flavor. Ideas for complementary dishes to enhance the meal Consider serving spring rolls or dumplings. They add crunch and taste. A simple cucumber salad can refresh your palate. You can also try a spicy chili sauce for a kick. Enjoy mixing flavors to create a fun meal! In this blog post, I shared a simple guide to making delicious vegetable fried rice. You learned about the essential ingredients and how to prepare and cook them step by step. I also provided tips for storage and reheating to keep your dish fresh. Adding variations and personal twists can make this meal unique and exciting. Now, with this knowledge, you can create your own tasty fried rice that suits your taste buds and needs. Enjoy cooking and sharing this dish with family and friends!

Vegetable Fried Rice Flavorful and Easy Recipe

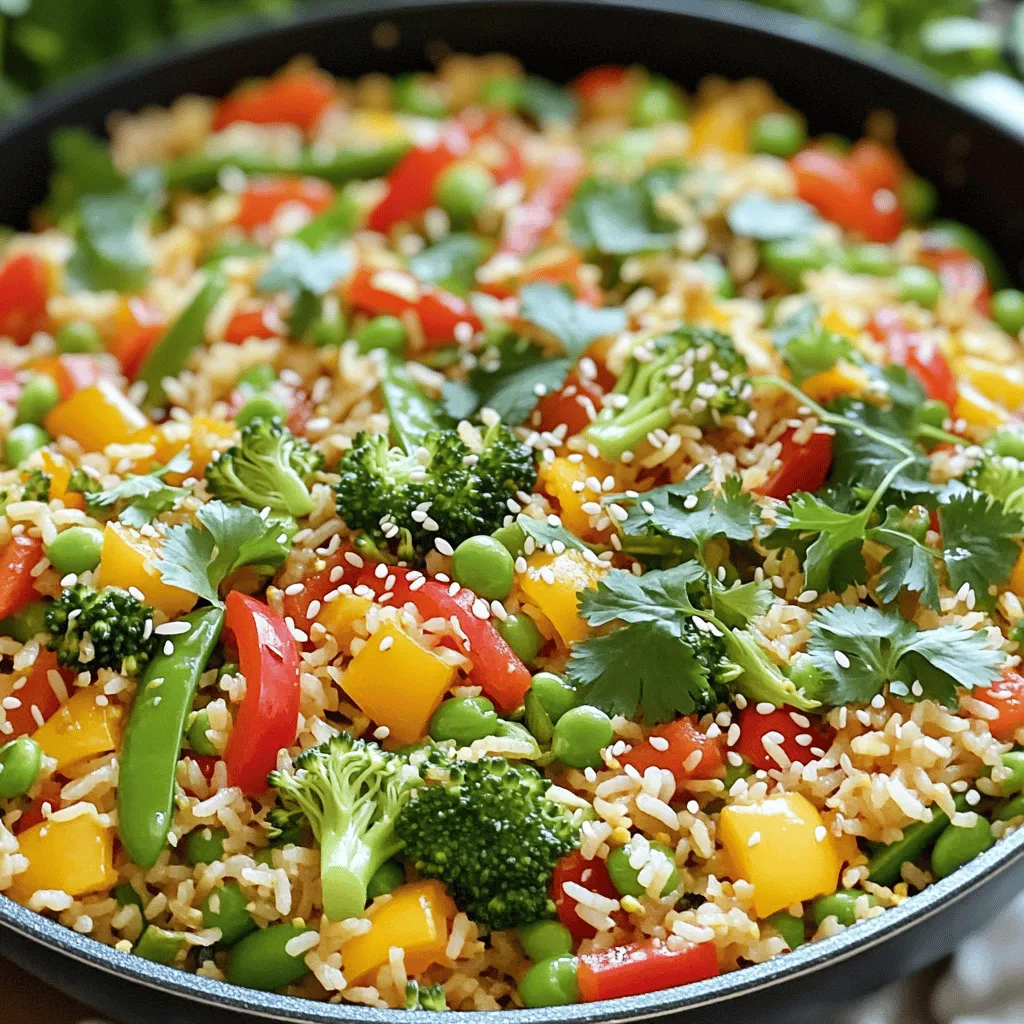
Are you craving a dish that’s both colorful and bursting with flavor? My Vegetable Fried Rice recipe is not just

- 2 tablespoons olive oil - 1 medium onion, diced - 3 cloves garlic, minced - 2 cans (14.5 oz each) diced tomatoes (with juice) - 2 cups vegetable broth - 1 cup heavy cream (or coconut milk for a vegan option) - 1 tablespoon sugar (to balance acidity) - Salt and pepper to taste - 1 teaspoon dried oregano - Fresh basil leaves, roughly chopped (reserve some for garnish) If you want to make this soup vegan, you can swap heavy cream for coconut milk. This keeps the soup rich and creamy. If you are avoiding gluten, ensure your vegetable broth is gluten-free. You can also use fresh herbs instead of dried for a brighter taste. Using fresh tomatoes can make the soup taste bright and fresh. If you use fresh tomatoes, you may need about 6-8 ripe ones. Peel, seed, and chop them before adding to your pot. Canned tomatoes are great for convenience. They are already cooked and seasoned, which saves time. Both options work well, but canned tomatoes give you a richer flavor without extra work. For the full recipe, check out the Creamy Tomato Basil Delight! Start by heating olive oil in a large pot. Use medium heat for this. Add the diced onion and stir. Let it cook for about five minutes. You want it to look clear, not brown. Next, add the minced garlic and cook for one to two minutes. You will smell a nice aroma. Now, pour in the canned tomatoes with their juice. Add the vegetable broth, sugar, and oregano. Bring everything to a boil. After that, reduce the heat. Let it simmer for twenty minutes. Stir it occasionally to keep it from sticking. Once the soup has simmered, it’s time to blend. Use an immersion blender if you have one. Carefully blend the soup until it is smooth. If you don’t own an immersion blender, use a standard blender. Be careful when transferring the hot soup. Blend it in small batches. This helps prevent spills and burns. After blending, make sure it is nice and creamy. Return the smooth soup to the pot if you used a standard blender. Now, stir in the heavy cream or coconut milk. Heat the soup on low. Taste it and season with salt and pepper. This is your chance to adjust the flavor. Just before serving, mix in the chopped fresh basil. Set aside some leaves for garnish. Serve the soup hot. Drizzle some olive oil on top and add the reserved basil leaves. Enjoy your creamy tomato basil soup! For the full recipe, check out the details above. To boost flavor, add fresh basil leaves at the end of cooking. They bring a bright, fresh taste. You can also try adding a pinch of red pepper flakes for heat. If you want a deeper flavor, include some dried oregano. Spice up the soup with a dash of your favorite hot sauce, too. Experiment with herbs like thyme or parsley for unique twists. For a creamy texture, use heavy cream or coconut milk. Heavy cream gives a rich taste, while coconut milk is great for vegan diets. Add the cream slowly and stir well to mix. If you want a lighter soup, use half-and-half instead. Blending the soup well is key, as it helps create a smooth base. One common mistake is not sautéing the onions enough. They should be soft and translucent for the best flavor. Another error is adding too much acid, like lemon juice, too early. Always taste as you go, and adjust seasoning last. Watch the heat when blending, as hot soup can splatter. Lastly, remember to save some fresh basil for garnish; it makes the soup look beautiful. For the full recipe, check out the detailed steps and enjoy your delicious meal! {{image_2}} You can easily make this soup vegan. Just swap the heavy cream with coconut milk. It adds a nice creaminess and rich flavor. Use fresh basil and diced tomatoes for vibrant taste. This option keeps the soup light yet satisfying. Want to boost nutrition? Add protein like cooked beans or lentils. You can also mix in vegetables. Spinach, zucchini, or bell peppers work great. They add color and health benefits. Just chop and toss them in during the simmering stage. For a unique taste, try adding spices like cumin or smoked paprika. A splash of balsamic vinegar gives a sweet twist. You can also stir in some pesto for depth. Each addition brings new life to the soup, making it fun to explore. Check the Full Recipe for more ways to customize it! To store your creamy tomato basil soup, let it cool first. Then, pour it into an airtight container. Make sure to seal it well. You can keep it in the fridge for up to five days. If you want to keep it longer, freezing is a great option. For long-term storage, freeze the soup in freezer-safe bags or containers. Leave some space at the top, as the soup will expand when frozen. You can freeze it for up to three months. Label your containers with the date to keep track. When you’re ready to enjoy your soup, thaw it in the fridge overnight. You can reheat it on the stove over low heat. Stir it often to avoid burning. If the soup seems too thick, add a splash of broth or water. You can also use a microwave. Heat it in a microwave-safe bowl, stirring every minute until hot. Enjoy your delicious soup! Yes, you can use fresh tomatoes. You will need about 10 to 12 ripe tomatoes. Start by blanching them in hot water for a minute. Then, remove the skins and chop them. Fresh tomatoes can add a bright flavor. Just remember to adjust the cooking time. You may need to cook them longer to break down. To add heat, try these simple methods: - Add a pinch of red pepper flakes while cooking. - Stir in chopped fresh jalapeños or serranos. - Mix in a dash of hot sauce just before serving. Each option gives a nice kick. Just be careful not to overpower the soup. This soup pairs well with many dishes. Here are some tasty options: - Grilled cheese sandwiches. - Crusty bread or baguette. - A fresh green salad. - Garlic bread for extra flavor. These sides enhance the meal and make it more filling. Enjoy the soup with your favorite pairings. Check out the Full Recipe for more ideas! In this blog post, you learned how to make a delicious creamy tomato basil soup. I shared a complete list of ingredients and offered substitutions for different dietary needs. You now know how to prepare the soup, blend it smoothly, and add the perfect seasoning. I also provided tips to enhance flavor and avoid common mistakes. Lastly, I covered variations, storage, and answered key FAQs. Enjoy your cooking and experimenting with this recipe! Trust me, it’s worth it. Happy cooking!

Creamy Tomato Basil Soup Simple and Satisfying Recipe

Craving a warm, comforting bowl of soup? Let me show you how to make my creamy tomato basil soup. This

When making lemon blueberry muffins, using fresh and quality ingredients is key. Here’s what you need: - 1 ½ cups all-purpose flour - 1 cup fresh blueberries - ½ cup granulated sugar - ½ cup unsalted butter, melted - 2 large eggs - 1 teaspoon vanilla extract - 1 teaspoon baking powder - ½ teaspoon baking soda - ½ teaspoon salt - Zest of 1 lemon - 2 tablespoons fresh lemon juice - ¼ cup milk Each ingredient plays a role in creating that delightful taste. The flour provides structure, while the sugar adds sweetness. Blueberries bring bursts of flavor and antioxidants, making these muffins both tasty and healthy. The butter adds richness and moisture. Eggs help bind everything together, giving the muffins a fluffy texture. Vanilla extract enhances the overall flavor. Baking powder and baking soda are crucial for that perfect rise. The lemon zest and juice give a bright, zesty flavor that pairs wonderfully with blueberries. Finally, milk adds the right amount of liquid to keep the muffins soft. With this full recipe, you can create a batch of muffins that are fresh, fluffy, and bursting with flavor. Enjoy the process of mixing and baking, and get ready for a treat! - Preheat your oven to 375°F (190°C). - Line a muffin tin with paper liners or spray it with cooking spray. - In a large bowl, whisk together 1 ½ cups of all-purpose flour, 1 teaspoon of baking powder, ½ teaspoon of baking soda, and ½ teaspoon of salt. - In another bowl, mix ½ cup of melted butter and ½ cup of sugar. - Add 2 large eggs, 1 teaspoon of vanilla extract, the zest of 1 lemon, and 2 tablespoons of fresh lemon juice. Mix well. - Gradually add the dry mix to the wet mix, alternating with ¼ cup of milk. - Fold in 1 cup of fresh blueberries gently. - Fill each muffin cup about 2/3 full with batter. - Bake for 18 to 22 minutes. - Check doneness by inserting a toothpick into the center. It should come out clean. You can find the full recipe for Lemon Blueberry Muffins in this article. To ensure even distribution of blueberries, add them last. Gently fold them into the batter. This keeps them whole and juicy. If you mix too hard, they can break apart. Avoiding overmixing is key for fluffy muffins. When you combine wet and dry ingredients, mix just until you see no dry flour. Lumps in the batter are okay. This will help your muffins rise well. Dusting muffins with powdered sugar makes them look extra special. This adds a sweet touch and a nice contrast to the lemon zest. Use a fine sieve for even coverage. For serving, add fresh blueberries and lemon slices. This makes your plate pop with color. You can also place the muffins on a rustic wooden board. It gives a cozy, inviting feel. If you need alternatives for butter, try using coconut oil. It gives a nice flavor. For milk, almond or oat milk works well. These swaps can make the muffins dairy-free. You can also use other berries or flavorings. Try raspberries or strawberries for a twist. A dash of almond extract can add a nice layer of flavor too. {{image_2}} Sticking with the traditional recipe gives you a cozy, familiar taste. The classic version is simple and uses fresh blueberries and zesty lemon. You will love the sweet and tart mix in every bite. This version is light and fluffy, making it a perfect snack or breakfast. Using the [Full Recipe], you can create these delightful muffins easily. Want a better twist? Use whole wheat flour instead of white flour. This adds fiber and makes the muffins more filling. You can also swap sugar for natural sweeteners like honey or maple syrup. These changes keep the muffins tasty while making them a bit more nutritious. They still taste great and are a fun way to enjoy a classic. If you like to mix it up, try adding poppy seeds or coconut. Poppy seeds add a nice crunch and a bit of nutty flavor. Coconut gives a tropical touch, making each bite unique. You can also experiment by adding spices like cinnamon or nutmeg for extra warmth. These variations make your muffins stand out and keep things exciting! Let your muffins cool in the pan for about 5 minutes. This helps them set properly. After that, move them to a wire rack. Cooling completely is key before storage. Once they are cool, store them in an airtight container. This keeps them fresh and soft. You can also use a resealable plastic bag. Make sure to remove as much air as possible. Freezing muffins is a great way to enjoy them later. To freeze, wrap each muffin tightly in plastic wrap. Place the wrapped muffins in a freezer bag. Label the bag with the date. When you want to eat one, remove it from the bag. Let it thaw at room temperature. You can also reheat it in the microwave for about 20-30 seconds. Lemon blueberry muffins stay fresh at room temperature for about 2-3 days. If you store them in the fridge, they can last up to a week. However, for the best taste and texture, eat them within a few days. For longer storage, freezing is the best option. This way, you can enjoy the flavors whenever you want. For the full recipe, check out the earlier section. To keep your lemon blueberry muffins moist, here are some key tips: - Use butter: Melted butter adds rich flavor and moisture. - Do not overmix: Mix just until combined. This helps keep them fluffy. - Add yogurt or sour cream: These ingredients boost moisture. - Store properly: Keep muffins in an airtight container. This prevents drying out. Yes, you can use frozen blueberries. They work well in muffins. They may make the batter a bit blue, but the taste stays great. When using frozen, no need to thaw. Just add them directly to the batter. This keeps them intact and juicy. Pair lemon blueberry muffins with these tasty options: - Yogurt: A side of Greek yogurt adds protein and creaminess. - Scrambled eggs: The savory taste of eggs balances the sweetness. - Fresh fruit: Serve with sliced bananas or strawberries for color and freshness. - Coffee or tea: A hot drink complements the muffins nicely. For the full recipe, check out the zesty lemon blueberry bliss muffins. Enjoy baking! Making lemon blueberry muffins is simple and fun. You learned the key ingredients, steps to bake, and tips for the best results. Remember to fold in your blueberries gently and not to overmix. Feel free to explore variations and substitutions for more unique flavors. Proper storage lets your muffins stay fresh longer. Enjoy your baking and share them with family and friends. These muffins will surely brighten your day!

Lemon Blueberry Muffins Fresh and Fluffy Delight

If you crave a sweet and tangy treat, you’re in for a real delight! These Lemon Blueberry Muffins are fresh,

For a delicious baked ratatouille, you will need these fresh ingredients: - 1 medium zucchini, sliced into thin rounds - 1 medium eggplant, sliced into thin rounds - 1 bell pepper (red or yellow), sliced - 1 medium onion, thinly sliced - 2 cups cherry tomatoes, halved - 3 cloves garlic, minced - 1 teaspoon fresh thyme leaves - 1 teaspoon fresh basil, chopped - ½ teaspoon dried oregano - 4 tablespoons olive oil - Salt and pepper to taste - 1 tablespoon balsamic vinegar (for drizzling) - Fresh basil leaves for garnish To enhance your dish, consider adding: - Grated cheese like mozzarella or goat cheese - Extra fresh herbs like parsley or rosemary - Spices such as crushed red pepper for a kick If you want some swaps, try these ideas: - Use yellow squash instead of zucchini - Swap eggplant for mushrooms or bell peppers - For a vegan option, skip the cheese or use a dairy-free alternative - Choose low-sodium vegetable broth instead of salt for seasoning These ingredients and options help make your baked ratatouille flavorful and colorful. You can find the full recipe for Ratatouille Delight and enjoy cooking this vibrant dish! To start, preheat your oven to 400°F (200°C). This step is key for even cooking. Next, heat 2 tablespoons of olive oil in a large skillet over medium heat. Once hot, add the sliced onion and minced garlic. Sauté until the onions look clear, about 5 minutes. Season this mix with salt, pepper, and dried oregano to bring out the flavors. Now, grab a 9x13 inch baking dish. Spread the sautéed onion and garlic mixture evenly on the bottom. This will create a tasty base for your ratatouille. Now comes the fun part: layering the vegetables! Slice the zucchini and eggplant into thin rounds. Take your red or yellow bell pepper and slice it into strips. Halve the cherry tomatoes. Start by standing the zucchini, eggplant, bell pepper, and cherry tomatoes upright in the dish. Alternate them in a spiral pattern for a beautiful look. This not only makes it pretty but also helps the flavors blend. Once arranged, drizzle the remaining 2 tablespoons of olive oil over the top. Then, sprinkle fresh thyme leaves, chopped basil, salt, and pepper evenly across the veggies. Cover your baking dish tightly with aluminum foil. This helps steam the vegetables, making them soft and tasty. Bake for 30 minutes. After that, remove the foil and continue baking for another 15-20 minutes. This allows the vegetables to caramelize a bit. To finish, drizzle balsamic vinegar over the baked ratatouille for a burst of flavor. You can enjoy this dish hot or at room temperature. For the full recipe, check out Ratatouille Delight . To avoid overcooking your vegetables, focus on timing. Start by slicing all your veggies evenly. This helps them cook at the same speed. When you layer them, place the denser ones, like eggplant and zucchini, on the bottom. They will take longer to cook. Bake your ratatouille covered for the first half. This keeps moisture in and helps soften the veggies. After 30 minutes, remove the foil. This step allows the top to caramelize and develop great flavor. Check your dish often in the last few minutes. You want it tender but not mushy. Baked ratatouille pairs well with crusty bread or a fresh salad. You can also serve it with a dollop of yogurt or a drizzle of balsamic glaze. For a heartier meal, serve it alongside grilled chicken or fish. Consider adding a sprinkle of feta cheese for a salty bite. Fresh herbs like basil or parsley can enhance the dish. They add freshness to every bite. Visual aids can help you nail the presentation. Look for images showing the layered veggies. You want to see vibrant colors and nice textures. Video demonstrations can guide you step-by-step. They make it easier to replicate the dish. Seeing the baking process can also help you understand doneness. Check out the Full Recipe for more details and visual support! {{image_2}} You can make ratatouille your own by swapping ingredients. Use seasonal vegetables like butternut squash or asparagus. They add unique flavors and colors. Fresh herbs can also change the taste. Try tarragon or parsley for a fresh twist. You can even add spices like smoked paprika for warmth. Each swap gives your dish a new personality. Ratatouille is not just for baking. You can make it on the stovetop too. Start by sautéing the onions and garlic in a pan. Then, add the vegetables and cook until tender. This method is quick and easy. You can also use a slow cooker. Just layer the veggies, add olive oil, and set it on low for several hours. Both methods offer delicious results. Ratatouille has many versions around the world. In Italy, they make a similar dish called Caponata. It includes eggplant, tomatoes, and capers for a salty kick. In Spain, you might find a ratatouille-like dish with chorizo and olives. Each culture adds its own touch, making ratatouille a global delight. Explore these variations to find your favorite twist! After enjoying your baked ratatouille, store leftovers in the fridge. Place the dish in an airtight container. This keeps it fresh for up to three days. Make sure to let it cool down first. If you want to keep flavors strong, cover it tightly. For long-term storage, you can freeze ratatouille. Use freezer-safe containers or bags. Portion it into single servings for easy meals later. Label each container with the date. To reheat, thaw in the fridge overnight. Then, warm it in a skillet over low heat. Stir gently until heated through. Ratatouille stays good in the fridge for up to three days. If you freeze it, use it within three months. Check for changes in smell or texture before eating. If it looks or smells off, it’s best to discard it. Enjoy your colorful dish while it's fresh! Ratatouille comes from France, especially the region of Provence. It started as a peasant dish. People made it to use their garden vegetables. The dish shows how simple food can be full of flavor. Today, ratatouille is loved worldwide. It represents the essence of summer with its bright colors and fresh taste. Yes, making ratatouille ahead is a great idea. You can prepare it a day before serving. Just follow these best practices: - Cook the ratatouille as directed. - Let it cool and store it in the fridge. - Reheat it gently before serving. This allows the flavors to blend well, making it taste even better. To check if your ratatouille is done, look for these signs: - The vegetables should be tender. - They should not be mushy. - The edges may caramelize slightly. You can test by piercing the vegetables with a fork. If it goes in easily, it’s ready. For detailed cooking instructions, check out the complete guide for Ratatouille Delight . This blog post covered the key ingredients for ratatouille, from zucchini to onions. I shared steps to prepare and bake your dish perfectly. You learned tips for serving and storing, plus variations to try. Ratatouille is versatile and fun to make. Use fresh ingredients for the best flavor. Remember, creativity adds joy to cooking. Enjoy making your ratatouille and exploring different twists on this classic dish!

Baked Ratatouille Flavorful and Colorful Dish

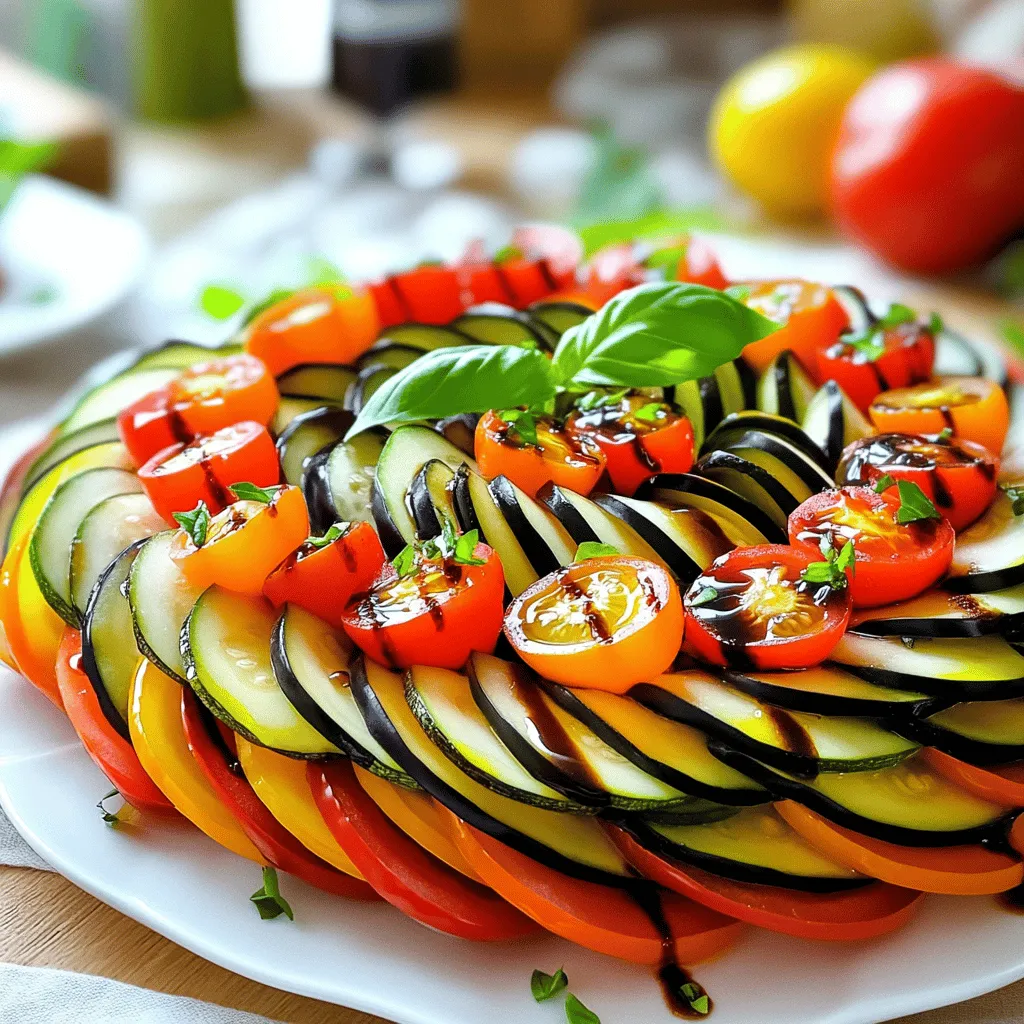
Ready to enjoy a dish that’s as vibrant as it is tasty? Baked ratatouille is a beautiful mix of veggies

To start, you need a few key items. These will help you create the perfect mini quiche cups. - 6 large eggs - 1 cup milk - 1 cup shredded cheese (cheddar or your choice) - 1 package (1 roll) of refrigerated pie crusts or puff pastry Each ingredient plays a big role. Eggs give the quiche its rich base. Milk adds creaminess, while cheese provides flavor and texture. The pie crust or puff pastry forms a delightful shell for your filling. You can add extra flavors with these optional ingredients. Here are some tasty options: - 1 cup diced vegetables (bell peppers, spinach, and mushrooms work well) - 1/2 cup diced cooked ham or cooked bacon (optional) - 1 teaspoon garlic powder - 1 teaspoon onion powder - Salt and pepper to taste Adding vegetables boosts nutrition. Ham or bacon gives a savory twist. You can also use various seasonings to enhance the taste. Finally, garnishing your mini quiches makes them look special. Consider these ideas: - Fresh herbs (chives or parsley) for garnish - Additional toppings like a dollop of sour cream or a sprinkle of paprika Garnishes add color and freshness. They also make your dish more appealing. For the full recipe, check out the Mini Quiche Cups guide online. First, you need to preheat your oven to 375°F (190°C). This step is key for even baking. Next, take your pie crust or puff pastry out of the fridge. Roll it out on a clean surface. Use a round cutter or a glass to cut out circles. Make sure these circles are big enough to fit into a greased muffin tin. Gently press each cut-out dough into the muffin tin cups. Ensure there are no gaps so the filling won’t leak. In a large mixing bowl, whisk together 6 large eggs and 1 cup of milk. Add 1 teaspoon of garlic powder and 1 teaspoon of onion powder for flavor. Season with salt and pepper to taste. Now, stir in 1 cup of shredded cheese and 1 cup of diced vegetables. Bell peppers, spinach, and mushrooms are great choices. If you like, add 1/2 cup of diced cooked ham or bacon. Mix everything well until it is evenly distributed. Now, it’s time to fill the crusts. Pour the egg mixture into each prepared crust. Fill them about 3/4 of the way full to allow for rising. Place the muffin tin in the preheated oven. Bake for 18-20 minutes. You want the quiche cups to be set and the tops golden brown. Once done, take them out and let them cool for a few minutes. Gently remove the quiche cups from the tin. You can garnish with fresh herbs like chives or parsley before serving. Enjoy your delicious mini quiche cups! To keep your crusts from getting soggy, pre-bake the crusts for five minutes. This step gives them a head start. Use a fork to poke small holes in the crust. This allows steam to escape while baking. For even cooking, fill the cups no more than three-quarters full. This helps them cook evenly. Rotate the muffin tin halfway through baking for consistent heat. Use fresh herbs like chives or parsley to boost flavor. Mix and match your favorite veggies, like spinach, bell peppers, or mushrooms. Add garlic or onion powder for extra taste. Try different cheese options, such as feta or goat cheese. Combining flavors can make your quiche unique. For a twist, add crumbled bacon or diced ham for more depth. Serve your mini quiches warm. They look great on a colorful plate. Garnish with fresh herbs for a vibrant touch. Arrange quiche cups on a tiered stand for a fun display. This setup makes them easy to grab and enjoy at parties. Place small labels next to each type to inform guests about the flavors. {{image_2}} Vegetarian mini quiche cups are a great choice for plant lovers. You can use many veggies to make them tasty. Some popular vegetable choices include: - Bell peppers - Spinach - Mushrooms - Zucchini - Broccoli These vegetables add flavor and color. They also pack in nutrients. If you want to try different cheese, consider: - Feta cheese - Goat cheese - Mozzarella These cheese options can add a unique taste to your quiches. If you love meat, you can make a meat-lovers version. Different meat options work well in mini quiche cups, such as: - Cooked ham - Crispy bacon - Sausage - Diced chicken Pair these meats with complementary flavors. Try adding onions or peppers to enhance the taste. These combinations create rich and hearty bites. To make your mini quiche cups stand out, add unique spices or ingredients. Here are a few ideas: - Smoked paprika for a smoky touch - Fresh herbs like basil or thyme - Sun-dried tomatoes for a burst of flavor - Jalapeños for a spicy kick Get creative with your mix-ins. Consider adding olives, artichokes, or even a dash of hot sauce. These choices can take your quiche to new levels. To keep your mini quiche cups fresh, store them correctly. First, let them cool completely. This step is key to maintaining their texture. Then, place them in an airtight container. You can keep them in the fridge for up to four days. If you want to save them longer, consider freezing. Wrap each quiche cup in plastic wrap, then place them in a freezer-safe bag. This method helps avoid freezer burn. You can freeze them for up to three months. Reheating your mini quiche cups is easy. The best way is to use an oven. Preheat the oven to 350°F (175°C). Place the quiche cups on a baking sheet. Heat them for about 10-15 minutes. This method keeps the crust crispy. You can also use a microwave if you’re in a hurry. Heat on medium power for 30 seconds to 1 minute. Be careful not to overheat, as this can make them soggy. In the fridge, mini quiche cups last about four days. In the freezer, they can last up to three months. Always check for signs of spoilage. If they smell off or have a strange texture, it’s best to toss them. Keeping track of storage times helps ensure you enjoy every bite of these fluffy and flavorful treats. You can find the full recipe for preparation and more tips on making these delightful snacks. Yes, you can make Mini Quiche Cups ahead of time. Prepare them and bake as usual. After they cool, store them in the fridge. Use an airtight container to keep them fresh. You can also freeze them for later. To reheat, use the oven. Preheat to 350°F (175°C). Bake for about 10-15 minutes or until hot. This keeps them fluffy and tasty. If you want to avoid eggs, there are good substitutes. You can use a mix of silken tofu and water. Blend them until smooth. Another option is unsweetened applesauce. Use 1/4 cup applesauce for each egg. You can also try chickpea flour. Mix 1 tablespoon of chickpea flour with 2 tablespoons of water per egg. These options will keep your quiche cups tasty and hold them together well. To prevent overcooking, watch the time and temp. Bake your quiche cups at 375°F (190°C) for 18-20 minutes. Check them around the 15-minute mark. The cups should be set but still slightly jiggly in the middle. If they look too brown, take them out. Let them cool a bit before serving. This helps keep them fluffy and soft. Yes, you can find the full recipe for Mini Quiche Cups online. It includes all the steps and tips you need to make these tasty treats. Just follow this [link to the Mini Quiche Cups full recipe](#). Mini quiche cups are easy to make and fun to enjoy. This guide covers key ingredients, step-by-step instructions, and handy tips to perfect your dish. You can explore variations to suit any taste, from vegetarian to meat-lover options. Remember to store extras properly and follow reheating tips for the best flavor. Mini quiche cups can add joy to any meal. With these insights, you’ll impress your family and friends with your skills. Now, grab your ingredients and get cooking!

Mini Quiche Cups Fluffy and Flavorful Bite-Sized Treats

Are you ready to whip up something delicious and easy? Mini quiche cups are the perfect bite-sized treat for any

To make sweet potato and black bean chili, you need: - 2 medium sweet potatoes, peeled and diced - 1 can (15 oz) black beans, drained and rinsed - 1 can (14 oz) diced tomatoes with green chilies - 1 medium onion, chopped - 2 cloves garlic, minced - 1 red bell pepper, diced - 2 tablespoons olive oil - 1 tablespoon chili powder - 1 teaspoon cumin - 1 teaspoon smoked paprika - 1/2 teaspoon cayenne pepper (adjust to taste) - Salt and pepper to taste - 2 cups vegetable broth You can make your chili pop with these tasty toppings: - Fresh cilantro leaves - Avocado slices If you need to change ingredients, here are some ideas: - Use sweet potatoes with butternut squash for a different flavor. - Swap black beans with kidney beans or pinto beans. - Change the vegetable broth to chicken broth for a non-vegetarian option. - Use fresh tomatoes instead of canned, if you prefer. - For a spicier kick, add jalapeños or a hotter chili powder. These options keep the dish flavorful and fun! You can find the full recipe in the article. First, gather all your ingredients. You will need sweet potatoes, black beans, diced tomatoes, onion, garlic, and red bell pepper. Chop the onion and red bell pepper. Peel and dice the sweet potatoes. Mince the garlic. Drain and rinse the black beans. This prep helps the cooking process go smoothly. In a large pot, heat the olive oil over medium heat. Add the chopped onion and cook until it turns clear, about 5 minutes. Next, stir in the minced garlic and diced red bell pepper. Cook these for another 2-3 minutes until they soften. Now, add the diced sweet potatoes to the pot. Sprinkle in the chili powder, cumin, smoked paprika, cayenne pepper, salt, and pepper. Mix well to coat the sweet potatoes in the spices. Pour in the can of diced tomatoes with green chilies and the vegetable broth. Bring everything to a gentle boil. Once boiling, lower the heat and cover the pot. Let it simmer for about 20 minutes. Stir occasionally until the sweet potatoes are soft. When they are tender, stir in the black beans. Heat for another 5 minutes. Taste and adjust the seasoning if needed. Serve the chili hot. I recommend garnishing it with fresh cilantro leaves. You can also add avocado slices for a creamy contrast. This adds flavor and makes the dish look great. Enjoy your delicious creation! For the full recipe, check out the details above. When making sweet potato and black bean chili, avoid overcooking the sweet potatoes. They should be tender but not mushy. Also, don't skip on the spices. They add depth to the dish. Lastly, be mindful of your salt. Taste as you go to find the right balance. To boost flavor, try adding a splash of lime juice before serving. This brightens the dish. Fresh herbs, like cilantro, add freshness. For heat, consider adding sliced jalapeños or extra cayenne. You can also top with avocado for creaminess. A sturdy pot or Dutch oven works best for this chili. It helps cook evenly. A good knife is key for chopping veggies. Use a cutting board to keep your workspace tidy. Lastly, a can opener is necessary for those canned ingredients. For a smoother texture, consider using an immersion blender, but that’s optional. For the complete recipe, check the Full Recipe link. {{image_2}} This chili is already vegetarian and vegan. You can enjoy it without any meat. The sweet potatoes and black beans give it a rich taste. This dish is filling and satisfying. You can serve it with rice or bread. These options make it even better! You can swap ingredients to fit your needs. If you want low-sodium, use low-sodium black beans. Need it spicier? Add more cayenne or some jalapeños. For a creamy touch, try coconut milk instead of broth. You can also use quinoa in place of black beans. It adds protein and a unique taste. You can add regional flavors to spice things up. If you like a Mexican twist, try adding corn or lime juice. For a Southern flair, add smoked sausage or okra. Want a sweet touch? Toss in some diced mango or pineapple. These tweaks make the dish your own. For the full recipe, check out the Spicy Sweet Potato & Black Bean Chili . To keep your sweet potato and black bean chili fresh, let it cool first. Once cooled, place it in an airtight container. You can store it in the fridge for up to five days. Be sure to label the container for easy identification. If you want the best flavor, eat it within three days. When you are ready to enjoy your chili again, reheat it gently. You can use a pot on the stove or the microwave. If you use the stove, heat on low. Stir often to avoid burning. In the microwave, heat in short bursts. Stir between each burst until warm. Add a splash of broth if it seems too thick. You can freeze sweet potato and black bean chili for longer storage. Use freezer-safe containers or bags. Be sure to leave some space at the top, as the chili will expand when frozen. It can last for up to three months in the freezer. When you're ready to eat, thaw it in the fridge overnight. Reheat it on the stove or microwave before serving. For the full recipe, check out the detailed instructions provided above. Sweet Potato and Black Bean Chili has a mild to medium spice level. The cayenne pepper adds warmth, but you can adjust it to your taste. If you want more heat, add extra cayenne or a dash of hot sauce. For less spice, use less cayenne or skip it altogether. Yes, you can make this chili in a slow cooker. Just follow these steps: - Sauté the onion, garlic, and bell pepper in a pan. - Add all ingredients to the slow cooker, including the sautéed veggies. - Cook on low for 6-8 hours or on high for 4 hours. This method will let the flavors blend well and make the chili even tastier. Great sides for this chili include: - Cornbread - Rice or quinoa - A simple green salad - Tortilla chips with salsa These sides complement the chili's flavors and add texture to your meal. Yes, Sweet Potato and Black Bean Chili is gluten-free. All the ingredients used, like sweet potatoes, black beans, and spices, do not contain gluten. Always check labels to be sure, especially for canned goods. This chili is a hearty option for those avoiding gluten. For the full recipe, you can refer to the instructions and ingredients listed above. This blog post covered everything you need for making Sweet Potato and Black Bean Chili. We explored the key ingredients and optional garnishes, plus some easy substitutions. The step-by-step guide made preparation simple, and tips helped you avoid common cooking mistakes. We also looked at tasty variations and smart ways to store leftovers. Remember, you can adapt this chili to fit any diet. Enjoy experimenting with flavors. Your kitchen adventure awaits!

Sweet Potato and Black Bean Chili Flavorful and Easy

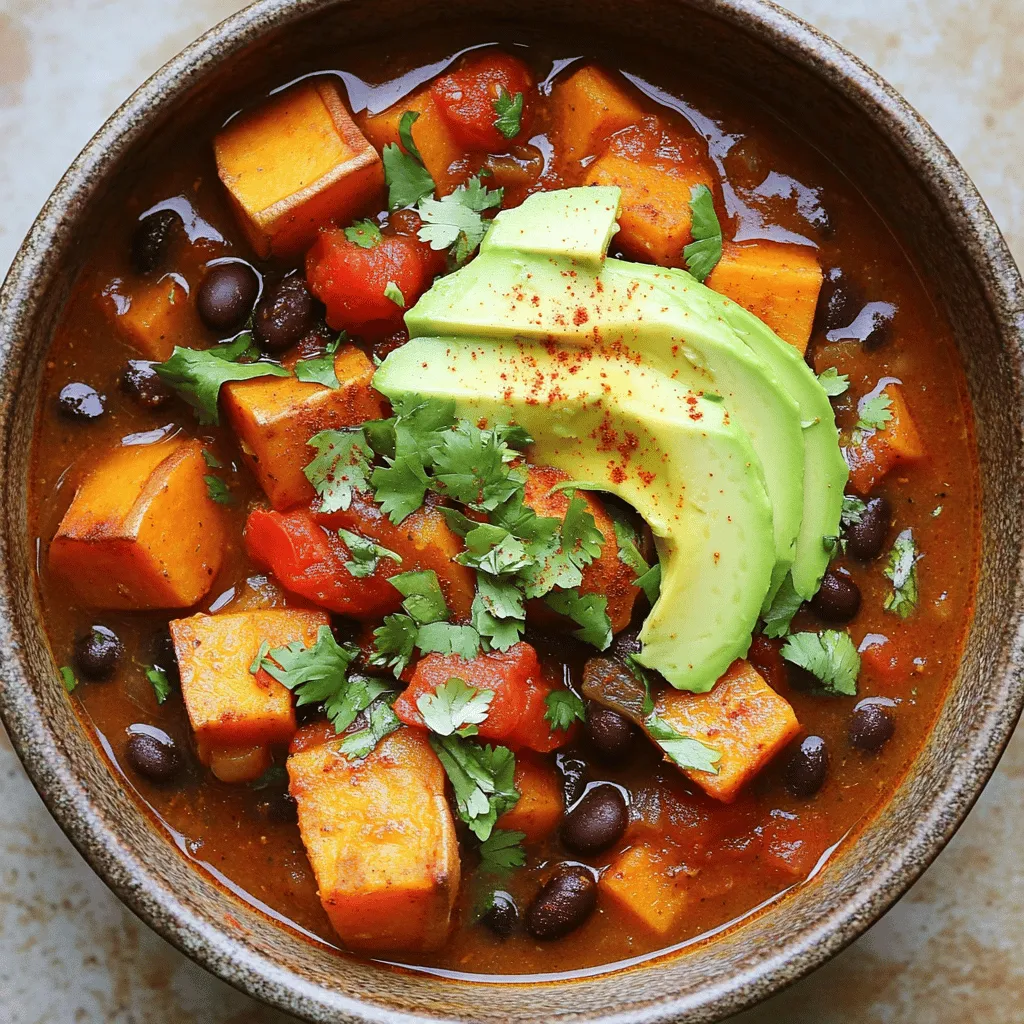
Looking for a warm, tasty meal that’s easy to make? Sweet Potato and Black Bean Chili is your answer! Packed

To make great vegetable samosas, you need a few key items. Here’s what you’ll need: - 2 cups all-purpose flour - 1/4 cup vegetable oil - 1/2 teaspoon salt - 6-8 tablespoons water (as needed) - 2 tablespoons oil (for filling) - 1 medium onion, finely chopped - 1 teaspoon ginger, grated - 2 green chilies, finely chopped (adjust to taste) - 2 medium potatoes, boiled and mashed - 1/2 cup green peas (fresh or frozen) - Fresh coriander leaves, chopped (for garnish) - Oil for deep-frying Spices make your samosas tasty and fragrant. Here are the spices you will use: - 1 teaspoon cumin seeds - 1 teaspoon garam masala - 1/2 teaspoon turmeric powder - Salt to taste These spices add warmth and depth to the filling. Adjust the spices based on your taste. You will need some basic items to cook the samosas: - A large mixing bowl - A frying pan - A rolling pin - A slotted spoon - Paper towels for draining Having the right tools makes cooking easier and more fun. Check that you have everything ready before you start. For the full recipe, you can follow the detailed steps to enjoy this crunchy and spicy treat! To start, mix the all-purpose flour, salt, and vegetable oil in a large bowl. Slowly add water, kneading it until you have a firm dough. Cover the dough with a damp cloth and let it rest for 30 minutes. This resting time helps the dough become easier to roll out later. Next, heat 2 tablespoons of oil in a pan over medium heat. Add the cumin seeds and wait for them to splutter. Then, toss in the chopped onion and cook until it turns golden brown. Stir in the grated ginger and green chilies, cooking for one more minute. Now, add the mashed potatoes, green peas, garam masala, turmeric, and salt. Mix everything and cook for 2-3 minutes. Once done, remove from heat and let it cool slightly. Don’t forget to garnish with fresh coriander leaves! Divide the rested dough into small balls, about 10-12 pieces. Roll each ball into a thin oval shape. Cut each oval in half to form two semi-circles. Take one semi-circle and create a cone by bringing the straight edges together. Seal the edge with a little water. Now, stuff the cone with your vegetable filling. Press the open edge firmly to seal. Heat oil in a deep frying pan over medium heat. Fry the samosas in batches, making sure not to overcrowd the pan. Cook them until they turn golden and crispy, about 5-7 minutes. Once they are ready, use a slotted spoon to remove them and place on paper towels to drain excess oil. Serve the samosas on a bright platter. Pair them with mint chutney and tamarind sauce for tasty dipping. A sprinkle of fresh coriander on top adds a nice touch. Enjoy your crunchy and flavorful vegetable samosas! You can find the full recipe for crunchy and spicy vegetable samosas in our recipe section. To make crispy samosas, use the right amount of water in your dough. A firmer dough helps hold its shape. Rest it for at least 30 minutes. This allows the gluten to relax. Roll the dough thin for a crispier shell. When you fry, ensure the oil is hot enough. If the oil is too cool, the samosas absorb more oil and become soggy. Fry them in small batches for even cooking. One common mistake is not sealing the samosas well. If they are not sealed, the filling leaks out during frying. Another mistake is overfilling them. This can also lead to leaks. Make sure to keep an eye on the heat while frying. If the oil is too hot, the outside cooks too fast, leaving the inside raw. Lastly, avoid using cold dough. Warm dough rolls out better and fries up crispier. Serve your samosas hot and crisp. A colorful platter makes them look even better. Pair them with mint chutney or tamarind sauce. These dips add a burst of flavor and freshness. You can also sprinkle some fresh coriander leaves on top for a touch of color. If you want a twist, try serving them with yogurt or a spicy salsa. For the full recipe, refer back to the earlier section. {{image_2}} You can easily make vegan vegetable samosas. Just swap the ghee for vegetable oil. This keeps the filling tasty and plant-based. Use mashed potatoes and peas as your base. You can add other veggies like carrots or corn for extra flavor. For gluten-free samosas, use rice flour or chickpea flour instead of all-purpose flour. These flours give a nice texture. Make sure to adjust the water amount as needed. The filling stays the same, so you can enjoy your favorite flavors without gluten. Vegetable samosas vary by region. In North India, they are spicy and filled with potatoes and peas. In East Africa, you might find them with lentils and spices like coriander. Each variant offers a unique taste experience. Experiment with different spices to find your favorite profile. Add nutmeg for warmth or lemon zest for brightness. Each twist can bring a new delight to your plate. To store uncooked samosas, place them on a tray. Make sure they do not touch. Cover them with plastic wrap. You can keep them in the fridge for up to 24 hours. For longer storage, freeze them. Place them in a freezer-safe bag or container. They can last for about a month in the freezer. Once cooked, let your samosas cool down. Place them on a plate lined with paper towels. This helps absorb extra oil. Store the cooled samosas in an airtight container. Keep them in the fridge for up to three days. If you want to keep them longer, freeze them. Place them in a freezer-safe bag, separating layers with parchment paper. To reheat cooked samosas, you have a few options. For the best texture, use an oven. Preheat your oven to 350°F (175°C). Place the samosas on a baking sheet and heat for about 10-15 minutes. If you prefer the microwave, heat them for about 30 seconds to 1 minute. Be careful, as the microwave may make them soft. Enjoy your samosas with your favorite dips! For the full recipe, check out the Crunchy & Spicy Vegetable Samosas. Vegetable samosas come from South Asia, mainly India. They grew popular in the Middle East and beyond. The dish dates back to the 10th century. Samosas were first made with meat, but vegetarian versions emerged later. Today, they are a favorite snack around the world. Yes, you can bake samosas! Baking is a healthier way to enjoy them. Preheat your oven to 400°F (200°C). Brush the samosas with oil and place them on a baking sheet. Bake for 25-30 minutes until golden brown. They may not be as crispy as fried ones, but they taste great. To make samosas spicier, add more green chilies to the filling. You can also include red chili powder or cayenne pepper. Adjust the spice to your taste. Remember to balance the heat with the other flavors in the filling. You can find the full recipe for crunchy and spicy vegetable samosas. Here are the key ingredients: - 2 cups all-purpose flour - 1/4 cup vegetable oil - 1/2 teaspoon salt - 6-8 tablespoons water (as needed) - 2 tablespoons oil (for filling) - 1 teaspoon cumin seeds - 1 medium onion, finely chopped - 1 teaspoon ginger, grated - 2 green chilies, finely chopped (adjust to taste) - 2 medium potatoes, boiled and mashed - 1/2 cup green peas (fresh or frozen) - 1 teaspoon garam masala - 1/2 teaspoon turmeric powder - Salt to taste - Fresh coriander leaves, chopped (for garnish) - Oil for deep-frying This recipe leads you to a delicious treat! In this guide, we covered everything about making vegetable samosas. We explored ingredients, key spices, and essential tools. I shared step-by-step instructions, from dough to frying. You also learned tips for crispiness and common mistakes to avoid. We discussed vegan and gluten-free options, plus storage tips. Samosas are fun and tasty to make. With practice, you’ll impress everyone with your skills. Dive in and enjoy the process!

Vegetable Samosas Crispy and Flavorful Delicacy

Are you ready to elevate your snacks with crispy, flavorful vegetable samosas? These beloved treats are filled with a delicious

Older posts
Newer posts
← Previous Page1 … Page30 Page31 Page32 … Page62 Next →

dsad

© 2025 Emmas Dish • Built with GeneratePress

Our Policies

  • Copyright Policy
  • Cookie Policy
  • GDPR Policy
  • Privacy Policy
  • Disclaimer
  • Terms Of Use

More Information

  • Home
  • About
  • Contact
  • Appetizers
  • Dessert
  • Dinner
  • Drinks
©2025, Emmas Dish About Back To Top