Skip to content
DisclaimerTerms Of UseGDPR PolicyCookie Policy

Emmas Dish

  • Home
  • Drinks
  • Appetizers
  • Dinner
  • Dessert
  • About
  • Contact
  • Privacy Policy
DisclaimerTerms Of UseGDPR PolicyCookie Policy

Emma

- Ripe Bananas You need three ripe bananas. They should be soft and brown. The riper, the better! This adds natural sweetness. - Unsweetened Applesauce Use half a cup of unsweetened applesauce. This keeps the bread moist. It also adds a nice flavor. - Sugars: Brown and Granulated Combine half a cup of brown sugar and a quarter cup of granulated sugar. Brown sugar gives a deeper taste. Granulated sugar adds sweetness. - Eggs and Vanilla Extract You will need two large eggs and one teaspoon of vanilla extract. The eggs help bind the mix. Vanilla gives a warm, comforting flavor. - Baking Components: Baking Soda, Baking Powder, Salt Use one teaspoon of baking soda, half a teaspoon of baking powder, and a quarter teaspoon of salt. These help the bread rise and flavor the recipe. - All-Purpose Flour and Semi-Sweet Chocolate Chips You need one and a half cups of all-purpose flour. Add one cup of semi-sweet chocolate chips. The flour gives structure, and the chocolate adds richness. - Optional Ingredients: Cinnamon, Toppings If you like, add half a teaspoon of cinnamon for warmth. You can also top the bread with nuts or extra chocolate chips before baking. This adds texture and looks great! For the complete recipe, check the [Full Recipe]. First, you need to preheat your oven. Set it to 350°F (175°C). This ensures even baking. Next, grab a 9x5-inch loaf pan. Grease it well so the bread does not stick. You can use butter or cooking spray for this. In a large bowl, mash 3 ripe bananas until smooth. Add 1/2 cup of unsweetened applesauce. Then, mix in 1/2 cup of brown sugar and 1/4 cup of granulated sugar. Stir until the mixture is well blended. Now, crack in 2 large eggs and pour in 1 teaspoon of vanilla extract. Mix again until everything is combined. In a separate bowl, whisk together your dry ingredients. You need 1 teaspoon of baking soda, 1/2 teaspoon of baking powder, and 1/4 teaspoon of salt. If you like, add 1/2 teaspoon of cinnamon for warmth. Gradually fold this mix into your wet ingredients. Be careful not to overmix; just combine until you can’t see the flour. Now, gently fold in 1 cup of semi-sweet chocolate chips. Save a handful to sprinkle on top later. Pour the batter into your greased loaf pan. Smooth the top with a spatula and sprinkle the reserved chocolate chips. Bake it in the preheated oven for 60-65 minutes. Check doneness with a toothpick; it should come out clean. Once done, let it cool in the pan for 10 minutes. Then, move it to a wire rack to cool completely before slicing. For the full recipe, check the section above! Alternatives to Eggs and Sugars If you want to skip the eggs, use flaxseed meal. Mix 1 tablespoon of flaxseed meal with 2.5 tablespoons of water. Let it sit for a few minutes to thicken. For sugar, try maple syrup or coconut sugar. This keeps the flavors rich while making it healthier. Gluten-Free Flours and Chocolate Options For a gluten-free version, use almond flour or a gluten-free baking mix. These flours work well and keep the bread moist. As for chocolate, dark chocolate chips are a great swap. They add a deeper flavor. Look for dairy-free options if you want to keep it vegan. Avoiding Overmixing Mix your batter gently. Overmixing can make your banana bread tough. Blend just until the dry and wet ingredients combine. This keeps your bread light and fluffy. Checking Doneness and Cooling Tips To check if your bread is ready, stick a toothpick in the center. If it comes out clean, it’s perfect. Let the bread cool in the pan for 10 minutes before moving it to a wire rack. This helps keep the crust nice. Serving Suggestions Slice your banana bread and serve it warm. It pairs well with cream cheese or butter. You can also enjoy it with a cup of coffee or tea. Adding Toppings for Extra Flavor For a special touch, add chopped nuts or a sprinkle of cinnamon on top. You can even drizzle melted chocolate for a sweet finish. This makes your banana bread look and taste amazing. Check out the Full Recipe for more ideas! {{image_2}} You can make this tasty banana bread gluten-free. Use a gluten-free flour blend. Look for blends that have a mix of rice flour, tapioca starch, and potato starch. These blends work best for baking. Baking time may change slightly. Start checking for doneness a few minutes early. Use a toothpick to test the center. If it comes out clean, your bread is ready. To make this recipe vegan, swap the eggs. Use flax eggs or chia eggs. Mix one tablespoon of flaxseed meal or chia seeds with three tablespoons of water. Let it sit for a few minutes until it thickens. You can also use unsweetened plant milk in place of dairy. Add some extra flavor with vanilla or almond extract. This gives a nice twist while keeping it plant-based. Want to customize your banana bread? You have many options! Add nuts like walnuts or pecans for a crunchy bite. Dried fruits like raisins or cranberries can add sweetness. You can also sprinkle in spices like nutmeg or allspice. Adjust the flavors to suit your taste. This makes your banana bread unique and personal. Try the Full Recipe for more details! To keep chocolate chip banana bread fresh, store it in an airtight container. This helps maintain moisture and flavor. Keep it at room temperature, away from direct sunlight. For best taste, enjoy it within three days. To freeze your banana bread, first let it cool completely. Then, wrap it tightly in plastic wrap. For extra protection, place it in a freezer bag. This helps prevent freezer burn. Your bread will stay fresh for about three months. When you're ready to eat, thaw the bread in the fridge overnight. For quick defrosting, you can use the microwave. Just set it on low power for a few minutes. Chocolate chip banana bread lasts about a week at room temperature. If stored in the fridge, it can last up to two weeks. Check for signs of spoilage. Look for mold or a sour smell. If the bread feels dry and crumbly, it might be past its prime. Always trust your senses! Yes, you can use frozen bananas. They work great in banana bread. Just thaw them first. Their soft texture makes them easy to mash. This helps blend into the batter. Plus, frozen bananas are often sweeter. They add more flavor to your bread. Just remember to drain any extra liquid after thawing. This keeps your bread from being too wet. If you don’t have applesauce, try these options: - Mashed ripe bananas - Yogurt (plain or Greek) - Pureed pumpkin or sweet potato These choices also add moisture. They keep your banana bread soft and tasty. Each option has a unique flavor. You can experiment with what you have on hand. To check if your banana bread is ready, follow these tips: - Insert a toothpick in the center. - If it comes out clean, the bread is done. - If it has wet batter, bake a bit longer. Also, look for a golden-brown top. The edges may pull away from the pan slightly. These signs mean your banana bread is perfect. Enjoy the delicious aroma while it bakes! In this post, we covered how to make delicious chocolate chip banana bread. You learned about the key ingredients, like ripe bananas and unsweetened applesauce. We also walked through simple steps to mix, bake, and customize your bread. Don't forget the great tips for storage and variations. Whether you want gluten-free or vegan options, you can tweak the recipe to fit your needs. Enjoy your baking journey, and share this delightful treat with others!

Chocolate Chip Banana Bread Tasty and Simple Recipe

If you love the sweet taste of chocolate and the soft texture of banana bread, you’re in for a treat!

- 1 pound ground beef (or a mix of beef and pork) - 1/2 cup breadcrumbs - 1/4 cup grated Parmesan cheese - 1 egg - 2 cloves garlic, minced - 1 tablespoon fresh ginger, minced - 1/4 cup chopped green onions - Salt and pepper to taste - 1/2 cup honey - 1/4 cup soy sauce - 1 tablespoon rice vinegar - 1 teaspoon sesame oil - 1 teaspoon cornstarch mixed with 1 tablespoon water To create the best honey garlic meatballs, you need quality ingredients. Start with fresh ground beef. Feel free to mix in some ground pork for added flavor. The breadcrumbs and Parmesan cheese will help bind the meatballs and add a nice taste. Don't skip the egg; it holds everything together. Next, fresh garlic and ginger bring warmth and depth. Chopped green onions add a burst of freshness and crunch. Season everything with salt and pepper for balance. For the honey garlic sauce, use pure honey for sweetness. Soy sauce adds a savory kick. Rice vinegar brightens the sauce while sesame oil gives it that nutty flavor. Finally, the cornstarch mixed with water helps thicken the sauce, ensuring it coats your meatballs perfectly. You can find the full recipe for these delicious meatballs to guide you. Enjoy the cooking journey! - Combine the meatball ingredients in a large bowl. - Mix well until just combined. - Shape into bite-sized meatballs, about one inch wide. Making meatballs is fun and easy. You want to mix the ground beef, breadcrumbs, cheese, egg, garlic, ginger, green onions, salt, and pepper in a bowl. Be gentle when mixing. If you mix too much, the meatballs can get tough. Once mixed, roll the meat into small balls. This size is perfect for snacking or serving. - Preheat the oven to 400°F (200°C). - Line a baking sheet with parchment paper. - Bake the meatballs for 15-20 minutes until golden brown. Preheating the oven is key for great meatballs. It helps them cook evenly. When the oven is ready, place the meatballs on the lined sheet. Give them space, so they cook well. They should turn golden brown and be cooked through. - Prepare the honey garlic sauce while the meatballs bake. - In a small saucepan, combine honey, soy sauce, rice vinegar, and sesame oil. - Bring to a simmer over medium heat. - Stir in the cornstarch mixture to thicken the sauce. While your meatballs bake, it’s time to make the sauce. This sauce is sweet and savory. Mix honey, soy sauce, rice vinegar, and sesame oil in a pan. Heat it gently. When it simmers, add the cornstarch mix. Stir it for a few minutes until thick. This sauce will coat your meatballs perfectly. After baking, drizzle the honey garlic sauce over the meatballs. Make sure each one gets a good coat of sauce. This adds flavor and makes the dish shine. Enjoy your delicious meal! For the full recipe, check out the earlier sections. To make the best honey garlic meatballs, I recommend using a mix of meats. A blend of ground beef and pork gives a richer taste. This mix adds depth and keeps the meatballs juicy. Be careful not to overmix your meatball mixture. Just combine the ingredients until they hold together. Overmixing can make them tough. Remember, tender meatballs are what we want! Adjust the sweetness or saltiness of your sauce to match your taste. If you like it sweeter, add more honey. If you love salty flavors, a bit more soy sauce works well. You can also add spices for extra flavor. Try a pinch of garlic powder, ground ginger, or even some chili flakes. These will make the sauce more exciting! Serving the meatballs with toothpicks makes them easy to eat. This is perfect for parties or gatherings. Guests can grab them without fuss. Garnish your meatballs with sesame seeds and extra green onions. This adds a nice pop of color and crunch. Drizzle some extra sauce on top for a glossy finish. It makes the dish look even more inviting. For more details on the recipe, check out the Full Recipe. {{image_2}} You can easily switch up the meat in this dish. Try ground turkey or chicken for a lighter option. These choices are just as tasty and lower in fat. If you need gluten-free options, use gluten-free breadcrumbs instead of regular ones. This keeps the recipe inclusive for everyone. Want to spice things up? Add chili flakes to the honey garlic sauce for a kick. This balance of sweet and spicy will excite your taste buds. You can also add fresh herbs like cilantro or parsley. These herbs add a burst of color and flavor, making every bite more interesting. For a complete meal, pair these meatballs with rice or noodles. They soak up the sauce well, making every bite delicious. You can also serve them as appetizers at parties or gatherings. Just pop a toothpick in each meatball for easy eating. If you drizzle extra honey garlic sauce on top, they will look and taste amazing. For the full recipe, check out the detailed instructions above. After enjoying your honey garlic meatballs, store any leftovers in an airtight container. This keeps them fresh and safe to eat. You can keep them in the fridge for up to 3 days. Just make sure the lid is tight to avoid any smells from other foods. If you want longer storage, freeze the meatballs before adding the sauce. This helps keep their flavor intact. To use them later, thaw the meatballs in the refrigerator overnight. This method ensures they defrost evenly and stay juicy. To reheat the meatballs, you can use the oven or microwave. The oven is best for keeping their texture. If you choose the microwave, add a splash of water or some sauce. This extra liquid helps keep the meatballs moist during reheating. For the full recipe, check the section above. Yes, you can prepare the meatballs in advance. Just make the meatball mixture and shape them into balls. You can store them in the fridge for up to a day. When you're ready, bake them straight from the fridge. This saves time and makes meal prep easier. To add some heat, mix in red pepper flakes or sriracha. Start with a small amount and taste the sauce. You can always add more if you want it spicier. This small change can add a fun twist to your dish. Serve these meatballs with rice, noodles, or a fresh salad. Rice soaks up the sauce well. Noodles add a nice texture. A salad gives a refreshing crunch. Choose what you like best for a balanced meal. For the full recipe, check out the details above. This post shared how to make delicious honey garlic meatballs. You learned the main ingredients and how to mix them. I covered baking tips, sauce preparation, and variations. Remember, you can adjust flavors and switch ingredients as needed. Store leftovers safely for later. Making these meatballs is fun and rewarding. Enjoy them as a meal or appetizer. Experiment with flavors to make your dish unique. Happy cooking!

Honey Garlic Meatballs Savory and Simple Recipe

Looking for a dish that’s both savory and simple? Honey Garlic Meatballs are the answer! This easy recipe packs sweet

To make pulled chicken tacos, you need some key ingredients. Here’s what you will need: - 1 lb boneless, skinless chicken thighs - 1 tablespoon olive oil - 1 tablespoon taco seasoning - 1 cup chicken broth - 1 tablespoon lime juice - 8 small corn tortillas - 1 cup shredded cabbage (green or purple or both) - 1 carrot, grated - 1/4 cup fresh cilantro, chopped These ingredients come together to create a tasty meal. The chicken thighs are perfect for shredding. They stay juicy and absorb all the flavors. The tacos are also light with the crunchy slaw. You can add some fun flavors to make your tacos unique. Here are some optional ingredients: - 1 jalapeño, thinly sliced - Salt and pepper to taste - 1/4 cup Greek yogurt or sour cream (for topping) - Lime wedges (for serving) These optional ingredients allow you to adjust the heat and creaminess. You can add jalapeños for spice. The yogurt or sour cream gives a cool touch to the tacos. Seasonings can change your taco game. The best choice is taco seasoning. You can also use: - Cumin - Paprika - Garlic powder - Onion powder When it comes to toppings, fresh herbs make a big difference. Cilantro adds a bright flavor. You can also use avocado slices or fresh salsa for more taste. For the complete recipe, check out the Full Recipe. Enjoy your cooking and have fun with these flavors! To start, gather your chicken thighs and season them. Use taco seasoning, salt, and pepper. Heat one tablespoon of olive oil in a large skillet over medium-high heat. Once hot, add the chicken thighs. Sear them for about 3 to 4 minutes on each side. You want them golden brown. This step gives flavor and texture. Next, it’s time to cook the chicken. Pour in one cup of chicken broth. Bring it to a boil, then lower the heat to a simmer. Cover the skillet and let it cook for 20 to 25 minutes. The chicken should be tender and easy to shred. After cooking, remove the chicken from the skillet. Use two forks to shred the chicken into pieces. Return the shredded chicken to the skillet. Add one tablespoon of lime juice and mix well. Let it simmer for another 5 minutes, allowing the flavors to blend. While the chicken cooks, prepare the slaw. In a bowl, combine one cup of shredded cabbage and one grated carrot. If you like heat, add a thinly sliced jalapeño. Throw in a quarter cup of chopped cilantro for freshness. Drizzle with lime juice and season with salt and pepper. Toss everything together. This slaw adds crunch and brightness to your tacos. You can find the complete recipe [Full Recipe] for more details on the cooking process. To shred chicken perfectly, start by cooking it until tender. I use chicken thighs for their rich flavor. After cooking, remove the chicken from the pan. Let it cool for a few minutes. Then, take two forks and pull the chicken apart. This method keeps the chicken juicy and flavorful. Warming tortillas adds great taste. I prefer using a skillet for this. Heat the skillet on medium heat. Place the tortillas in the skillet for about 30 seconds. Flip them and warm for another 30 seconds. You can also warm them over an open flame for a smoky flavor. Just be careful not to burn them! For a great look and taste, serve your tacos on a colorful platter. Add lime wedges for a fresh pop. A small bowl of extra slaw lets guests customize their tacos. Top each taco with a dollop of Greek yogurt or sour cream. This adds creaminess and helps balance the spices. Enjoy every bite! For the full recipe, check out the Zesty Pulled Chicken Tacos with Crunchy Slaw. {{image_2}} You can swap chicken for other proteins. Try pork, beef, or turkey. For a plant-based option, use jackfruit or tofu. These choices keep the dish fun and tasty. Each protein absorbs flavors well, making it versatile. While cabbage is great, you can mix it up. Use kale, broccoli slaw, or even carrots only. Add fruits like apples or pineapple for a sweet twist. You can also toss in nuts for crunch. Each slaw variation brings its own flair to the tacos. To make these tacos gluten-free, select corn tortillas. Many brands are safe for those with gluten issues. For a vegan option, use tofu or tempeh instead of chicken. Replace Greek yogurt with avocado or a cashew cream. These swaps ensure everyone can enjoy this dish. To store leftover pulled chicken tacos, wrap them in plastic wrap or foil. You can also use an airtight container. Make sure to keep the tacos and slaw separate. This helps maintain their crunch and flavor. Refrigerate the leftovers for up to three days. To reheat the pulled chicken, place it in a skillet over medium heat. Add a splash of chicken broth to keep it moist. Stir until heated through, about five minutes. For the tortillas, warm them on a skillet for a few seconds on each side. This keeps them soft and pliable. The pulled chicken can last up to three days in the fridge. The slaw should be eaten within two days for the best texture. If you freeze the chicken, it can last for up to three months. Just thaw it in the fridge before reheating. For the best flavor, always check your ingredients before use. You can find the full recipe to enjoy this meal again. Yes, you can use chicken breasts. They may cook faster than thighs. Breasts are leaner, so they may dry out. Keep an eye on them while cooking. Adjust the cooking time to about 15-20 minutes. You can still enjoy great flavor with chicken breasts. To add heat, use more jalapeños. You can also add hot sauce to the chicken. Another option is to sprinkle chili powder into the slaw. Try using spicy taco seasoning for extra kick. Mix in diced fresh peppers for more flavor. Adjust the spice to your taste for a perfect meal. Great sides include Mexican rice or black beans. You can also serve with corn on the cob. A fresh avocado salad pairs well too. Consider tortilla chips with salsa or guacamole for crunch. These sides balance the meal and add fun flavors. Try them with your tacos for a full spread. For the full recipe, check the details above and get started on your delicious tacos! You now have all you need to make delicious pulled chicken tacos. Remember the main ingredients and spices for great flavor. Follow the step-by-step guide for cooking and making slaw. Use tips for perfect chicken and warming tortillas. Explore variations to suit your taste and dietary needs. Store leftovers properly to enjoy later. Pulled chicken tacos are fun, easy, and can fit any meal. Your friends and family will love them. Get creative and make this dish your own!

Pulled Chicken Tacos with Slaw Flavorful and Easy Meal

Get ready to spice up your dinner with Pulled Chicken Tacos with Slaw! This flavorful and easy meal is perfect

To make delicious raspberry lemonade bars, you need these main items: - 1 cup all-purpose flour - 1/4 cup powdered sugar - 1/2 cup cold unsalted butter, cubed - 1 cup granulated sugar - 2 large eggs - 1 tablespoon lemon zest - 1/2 cup fresh lemon juice - 1 cup fresh raspberries (or frozen, thawed) - 2 tablespoons cornstarch - 1/4 teaspoon salt - Extra powdered sugar for dusting These ingredients create a sweet and tangy taste. The butter makes the crust rich. The lemon juice and zest give it that bright flavor. Fresh raspberries add a burst of fruity goodness. You can add more flavors to enhance your bars. Consider these options: - A splash of vanilla extract - A pinch of ginger for warmth - A few mint leaves for freshness These extra flavors can create a unique twist. Try different combinations to see what you like best! If you have allergies, there are ways to adjust the recipe. Here are some ideas: - Use gluten-free flour instead of all-purpose flour. - Replace butter with coconut oil for a dairy-free option. - Swap granulated sugar with a sugar substitute, like stevia or monk fruit. These substitutions help you enjoy raspberry lemonade bars without worry. You can still savor the tangy taste while meeting your dietary needs. For the full recipe, check [Full Recipe]. Start by preheating your oven to 350°F (175°C). Grease a 9x9-inch baking dish or line it with parchment paper. This makes it easy to take out the bars later. In a mixing bowl, combine 1 cup of all-purpose flour and 1/4 cup of powdered sugar. Cut in 1/2 cup of cold, cubed unsalted butter. Use your fingers or a pastry cutter to mix until it looks like coarse crumbs. Press this mixture evenly into the bottom of your dish. Bake for 15 minutes or until it turns lightly golden. When done, remove it from the oven and let it cool slightly. While the crust cools, you can make the filling. In another bowl, whisk together 1 cup of granulated sugar, 2 large eggs, 1 tablespoon of lemon zest, and 1/2 cup of fresh lemon juice. Mix until everything is well combined. Now, take 1 cup of fresh raspberries (or thawed frozen ones) and toss them with 2 tablespoons of cornstarch and a pinch of salt in a small bowl. Gently fold the raspberry mix into the lemon mixture. This will create a colorful and tangy filling. Pour the raspberry lemon filling over the baked crust. Spread it evenly with a spatula. Bake for an additional 25 to 30 minutes. The center should set and the edges will pull away from the sides. Once baked, take it out and let it cool completely at room temperature. After cooling, refrigerate the bars for at least 2 hours. This helps them firm up for cutting. Before serving, dust the top with extra powdered sugar for a nice finish. Enjoy these fresh and tangy delights! For the full recipe, refer to the earlier section. To bake evenly, preheat your oven fully. This step ensures your bars cook well from the start. Also, use a light-colored baking dish. Dark pans can overcook the edges while leaving the center soft. Remember to avoid opening the oven door too often. This can cause uneven heat and extend baking time. Fresh lemon juice and zest are key for bright flavor. Use a microplane to zest the lemon. This keeps the zest fine, mixing well into the batter. When juicing, roll the lemon on the counter to soften it. This helps release more juice. Taste the mixture before baking. If it’s too tart, add a little more sugar. One common mistake is overmixing the filling. This can make the bars tough. Mix just until combined for a light texture. Another mistake is skipping the cooling time. Cutting the bars too soon can lead to a messy finish. Let them cool completely before slicing. For more helpful tips, check the Full Recipe. {{image_2}} You can swap raspberries for other fruits. Try strawberries, blueberries, or blackberries. Each fruit adds its own flavor and color. Mix and match to find your favorite combo. Just remember to adjust the sugar if the fruit is sweeter or tarter. To make these bars gluten-free, use almond flour or gluten-free flour. For a dairy-free option, replace butter with coconut oil or vegan butter. This keeps the bars delicious while meeting dietary needs. Check labels to ensure all ingredients are free from gluten and dairy. Serving these bars can be fun and unique. Try drizzling a berry sauce on top. You could also add a dollop of whipped coconut cream. Fresh mint leaves make a nice garnish, too. Serve them chilled for a refreshing treat on hot days. To keep your Raspberry Lemonade Bars fresh, store them in an airtight container. Place a piece of parchment paper between layers to prevent sticking. They stay good in the fridge for up to five days. If you love them cold, they taste great straight from the fridge. For long-term storage, you can freeze these bars. First, let them cool completely. Then, cut them into squares. Wrap each square in plastic wrap and then in aluminum foil. This keeps them safe from freezer burn. They can last up to three months in the freezer. To enjoy, just thaw them in the fridge overnight. If you prefer your Raspberry Lemonade Bars warm, reheating is easy. Place the bars on a microwave-safe plate. Heat them in the microwave for about 10 to 15 seconds. This warms them without making them soggy. Enjoy the fresh taste as if they just came out of the oven! Yes, you can use bottled lemon juice. However, fresh juice offers a better flavor. Fresh lemons come with bright notes that bottled juice lacks. If you want the best taste, always choose fresh lemons when making these bars. To reduce the sweetness, cut back on granulated sugar. You can lower it by 1/4 cup. Another option is to add more lemon juice. The tartness from the lemon will balance the sweetness. You will still enjoy a zesty treat without the extra sugar. Lemon and raspberries make a great pair in many desserts. You can create a refreshing lemon raspberry sorbet. A lemon raspberry cheesecake is also a delightful option. For a quick treat, try lemon raspberry muffins. Each dessert brings out the bright flavors of both ingredients. For the full recipe, check out the Zesty Raspberry Lemonade Bars section. This blog post covered how to make delicious raspberry lemonade bars. We talked about essential and optional ingredients, plus substitutions for allergies. I shared step-by-step instructions for the crust and filling, along with baking tips for perfect results. You learned about fun variations and best storage practices. In the end, these bars are a tasty treat that you can customize. Experiment with flavors and share these delightful desserts with others. Enjoy baking and creating your own unique versions!

Raspberry Lemonade Bars Fresh and Tangy Delight

If you’re craving a dessert that strikes the perfect balance between sweet and tangy, you’ve come to the right place.

For this dish, you need simple, fresh ingredients. Here’s what you will use: - 500g boneless chicken thighs, sliced - 1 cup fresh Thai basil leaves - 2 tablespoons vegetable oil - 4 cloves garlic, minced - 2 bird's eye chilies, sliced (adjust to taste) - 1 red bell pepper, sliced - 1 cup green beans, trimmed and halved - 3 tablespoons soy sauce - 1 tablespoon oyster sauce - 1 tablespoon fish sauce - 1 teaspoon sugar - Fresh lime wedges for serving These ingredients come together to make a tasty meal that’s quick to prepare. You can customize this dish to your liking. Here are some ideas: - Add sliced carrots or snap peas for extra crunch. - Use chicken breast instead of thighs for a leaner option. - Swap Thai basil with regular basil or cilantro if needed. - Adjust the amount of chilies for more or less heat. Feel free to experiment with what you have on hand! Serve your Thai Basil Chicken Stir-Fry hot. I recommend: - Pairing it with steamed jasmine rice for a complete meal. - Adding a side of fresh cucumber salad for a crisp contrast. - Drizzling with lime juice for a zesty kick. These options will enhance your dining experience and balance the flavors beautifully. For the complete recipe, check out the Full Recipe. First, gather all your ingredients. You need: - 500g boneless chicken thighs, sliced - 1 cup fresh Thai basil leaves - 2 tablespoons vegetable oil - 4 cloves garlic, minced - 2 bird's eye chilies, sliced (adjust to taste) - 1 red bell pepper, sliced - 1 cup green beans, trimmed and halved - 3 tablespoons soy sauce - 1 tablespoon oyster sauce - 1 tablespoon fish sauce - 1 teaspoon sugar - Fresh lime wedges for serving Next, wash the Thai basil leaves and cut the chicken into thin pieces. Mince the garlic and slice the chilies, bell pepper, and green beans. This helps everything cook evenly. Now, heat the vegetable oil in a large wok or skillet over medium-high heat. Add the minced garlic and sliced chilies. Sauté for about 30 seconds until it smells great. Then, increase the heat to high. Add the sliced chicken to the wok. Stir-fry for about 4-5 minutes, or until the chicken is cooked through and browned. Next, toss in the sliced red bell pepper and green beans. Cook for another 2-3 minutes until the veggies are tender but still crisp. In a small bowl, mix the soy sauce, oyster sauce, fish sauce, and sugar. Pour this sauce over the chicken and veggies, stirring well. Finally, add the fresh Thai basil leaves. Toss everything together for about 1 minute, just until the basil wilts. Remove the wok from heat. Serve your Thai Basil Chicken Stir-Fry hot, with fresh lime wedges on the side for squeezing over the dish. This meal is quick, tasty, and full of flavor. You can find the Full Recipe for more details if needed. Enjoy! To make your Thai basil chicken shine, use fresh ingredients. Fresh Thai basil makes a huge difference. The smell alone brings joy. Adding lime juice at the end adds a zesty kick. You can also sprinkle some sesame seeds for crunch. If you like heat, adjust the chilies to your taste. More chilies mean more spice! For juicy chicken, start with high heat. This helps to sear the meat and locks in moisture. Cut the chicken into even pieces for uniform cooking. Stir-fry quickly, so the chicken cooks fast. Avoid overcrowding the pan, as this can steam the meat. Stirring often ensures even cooking and browning. A large wok or skillet is best for this dish. It gives enough space for the chicken and veggies to fry well. Use a wooden spatula to stir without scratching your pan. A sharp knife and cutting board help with quick prep. Ensure you have a strong stove that can handle high heat. This setup will help you make the best Thai basil chicken stir-fry! For the complete cooking process, check out the Full Recipe. {{image_2}} You can easily make this dish vegetarian or vegan. Swap the chicken for tofu or tempeh. Use the same cut size. This change gives you a nice texture. Make sure to press the tofu first to remove water. This helps it absorb flavors better. You can also add more veggies like mushrooms or carrots. They add great taste and color. If you want to try different proteins, go for shrimp, beef, or pork. These options cook quickly and pair well with basil. Slice them thin to help them cook evenly. For shrimp, cook until they turn pink. For beef or pork, ensure they reach a safe temperature. Each protein adds a unique flavor to the dish. You can adjust the spice level based on your taste. Add more bird's eye chilies for heat. If you prefer mild, use fewer chilies or remove the seeds. For a different kind of heat, try adding black pepper or chili flakes. You can also serve chili sauce on the side for those who like it hot. This way, everyone can enjoy their meal just how they like it. To store your Thai Basil Chicken Stir-Fry, let it cool first. Place it in an airtight container. This keeps the dish fresh for up to three days. Store it in the fridge. If you want to keep it longer, freezing is a great option. When you are ready to eat your leftovers, use a skillet. Heat it over medium heat. Add a splash of water or oil to keep it moist. Stir often until it’s hot. You can also use a microwave for quick reheating. Just cover it to avoid drying out. To freeze, make sure your stir-fry is cool. Place it in a freezer-safe container. It can last up to three months in the freezer. When you want to eat it, thaw it in the fridge overnight. Reheat it using the instructions above. Enjoy your meal even after some time! Yes, you can use other herbs. Sweet basil works well in a pinch. You might also try cilantro or mint. Each herb gives a different taste. Experiment to find what you like best. To reduce spiciness, use fewer bird's eye chilies. You can also remove the seeds from the chilies. Another option is to add sugar. This will balance the heat and make it milder. This dish pairs well with jasmine rice or noodles. You can also serve it with a fresh salad. For a crunchy side, try spring rolls. Each option complements the flavors nicely. Yes, this recipe can be gluten-free. Use gluten-free soy sauce and oyster sauce. Always check labels to ensure no gluten is present. This way, you can enjoy it without worry. For the complete steps and ingredients, check out the Full Recipe. It covers everything you need to make this tasty dish at home. Thai basil chicken stir-fry is simple, tasty, and versatile. We explored key ingredients, serving tips, and cooking steps for the best results. You can boost flavors and choose from many protein options. Storing leftovers or freezing them is easy too. The recipe suits all tastes, plus, it's gluten-free. Enjoy making this dish your own! With these tips, you’ll impress everyone at the table. Happy cooking!

Thai Basil Chicken Stir-Fry Flavorful Quick Meal

If you’re craving a quick meal that bursts with flavor, you’ve landed in the right spot! Thai Basil Chicken Stir-Fry

- 1 cup rolled oats - 1/2 cup almond butter - 1/4 cup honey or maple syrup - 1/2 cup unsweetened shredded coconut - 1/4 cup dark chocolate chips - 1/2 cup chopped almonds - 1/2 teaspoon vanilla extract - 1/4 teaspoon sea salt These ingredients are simple yet powerful. The rolled oats give a nice base and lots of fiber. Almond butter adds healthy fats and protein. Honey or maple syrup gives sweetness. Unsweetened shredded coconut brings a tropical touch, while dark chocolate chips add that little bit of joy in each bite. Chopped almonds add crunch. Vanilla extract enhances flavor, and sea salt balances the sweetness. - Calories per serving: About 150 calories - Protein, fat, and carbohydrate breakdown: Each serving has around 4g protein, 9g fat, and 14g carbohydrates. - Health benefits of key ingredients: - Rolled oats: Great for digestion and heart health. - Almond butter: Supports brain health and keeps you full. - Coconut: Provides quick energy and helps boost immunity. - Dark chocolate: Rich in antioxidants and good for mood. - Almonds: High in vitamin E, they support skin health. These bites not only taste great but also fuel your body with healthy nutrients. For the full recipe, check out the details above! 1. Mixing ingredients Start by grabbing a large mixing bowl. Add 1 cup of rolled oats, 1/2 cup of almond butter, and 1/4 cup of honey or maple syrup. Stir until all ingredients blend well together. 2. Forming energy bites Next, add 1/2 cup of shredded coconut, 1/4 cup of dark chocolate chips, and 1/2 cup of chopped almonds. Don't forget the 1/2 teaspoon of vanilla extract and 1/4 teaspoon of sea salt. Mix everything until evenly distributed. Then, use your hands to form small balls, about 1 inch in size. If the mixture sticks to your hands, wet them slightly. 3. Chilling instructions Place the formed energy bites on a parchment-lined baking sheet. Once you have all the bites ready, refrigerate them for at least 30 minutes. This helps them set and stay firm. After chilling, move them to an airtight container. They can stay fresh in the fridge for up to a week. - Adjusting sweetness If you like your bites sweeter, add a bit more honey or maple syrup. Taste the mixture before forming the bites. - Ensuring proper consistency The mixture should be thick enough to hold its shape. If it’s too dry, add more almond butter. If it’s too wet, add a touch more oats. - Handling sticky mixtures Use a little water on your hands when forming the bites. This simple trick helps prevent sticking and makes the process easier. You can make these Almond Joy Energy Bites even better. Here are some ideas: - Adding protein powder or superfoods: Boost the nutrition by adding a scoop of protein powder. You can also try adding chia seeds or flaxseeds for extra fiber and nutrients. Both options help keep you full longer. - Alternative nut butters: If you want a new flavor, swap almond butter for peanut butter or cashew butter. Each nut butter brings its own taste and texture, making your bites special. - Different types of chocolate: Choose your favorite chocolate style. Dark chocolate adds richness, while milk chocolate is sweeter. You can even use white chocolate for a fun twist! How you enjoy these energy bites matters. Here are some great ideas: - Pairing with fruits or yogurt: Serve these bites with fresh fruit like bananas or berries. You can also dip them in yogurt for a creamy treat. This adds flavor and more nutrition to your snack. - Best times to enjoy them: These bites are perfect for many moments. Try them before a workout for energy, or have one as a quick breakfast. They also work well as an afternoon snack to curb hunger. {{image_2}} You can change the flavor of your Almond Joy Energy Bites easily. Here are three fun ideas: - Coconut-Almond Crunch: Add more shredded coconut and use toasted almonds. This gives a nice crunch. - Peanut Butter & Chocolate: Swap almond butter for peanut butter and use milk chocolate chips. This adds a rich taste that many love. - Matcha Almond Bites: Mix in a tablespoon of matcha powder for a unique twist. It adds a lovely green color and a hint of earthiness. Each variation keeps the energy boost you want while offering new tastes. You can make these energy bites fit different diets. Here are some options: - Vegan options: Use maple syrup instead of honey. Ensure the chocolate chips are dairy-free. This keeps it plant-based and delicious. - Gluten-free considerations: Confirm that your rolled oats are certified gluten-free. This way, everyone can enjoy these bites without worry. These adaptations help you cater to your friends' and family’s needs, making Almond Joy Energy Bites a snack for all! For the complete recipe, check out the Full Recipe. To keep your Almond Joy Energy Bites fresh, choose airtight containers. Glass jars work well. You can also use plastic containers with tight lids. These options prevent air from getting in and keep them tasty. Place a piece of parchment paper between layers if stacking. This will stop them from sticking together. Store your bites in the fridge. The cool temperature keeps them firm and fresh. It also helps maintain flavor. Make sure the lid is sealed tight to avoid moisture. When stored at room temperature, these energy bites last about two days. Keep them in a cool, dry place. Avoid direct sunlight, as it can melt the chocolate and make them too sticky. For longer storage, freeze your energy bites. Place them in airtight bags or containers, leaving space for air. They can stay fresh for up to three months in the freezer. When you're ready to eat them, just take them out and let them thaw. Enjoy their great taste anytime! Can I use different nuts? Yes, you can use different nuts! Try walnuts, cashews, or pecans. Each nut brings a unique taste and texture. Just chop them up like the almonds. How long do they take to energize? Almond Joy Energy Bites energize quickly. You’ll feel the boost in about 30 minutes. They provide a good mix of carbs and protein for quick energy. Are Almond Joy Energy Bites healthy? Yes, they are quite healthy! They pack fiber, protein, and healthy fats. The oats and nuts support heart health. Plus, dark chocolate adds antioxidants. Are they suitable for kids? Absolutely! Kids love these bites. They are a fun and tasty snack. Just make sure there are no nut allergies before serving. Can I make them ahead of time? Yes, you can make them ahead! These bites store well in the fridge. They stay fresh for up to a week in an airtight container. What's the best way to serve them? Serve them chilled or at room temperature. They make great snacks for lunchboxes or after-school treats. You can also pair them with yogurt or fruit for extra fun. For more details, check the Full Recipe to see how to make these tasty bites! These energy bites are easy to make and fun to customize. We went over key ingredients like oats, almond butter, and chocolate. You learned how to prepare and store them safely. You can tweak flavors and meet dietary needs to fit your tastes. I hope you enjoy making these tasty snacks. They’re perfect for a quick energy boost anytime you need it. Choose your favorite mix-ins, and get creative!

Almond Joy Energy Bites Tasty and Energizing Snack

Looking for a tasty and energizing snack? Almond Joy Energy Bites are the perfect solution! These little bites are packed

- 1 ripe pineapple, diced - 2 ripe mangoes, diced - 1 cup strawberries, hulled and halved - 1 cup kiwi, peeled and sliced - 1 ripe banana, sliced - 1 orange, segmented - 2 tablespoons fresh mint, chopped - 3 tablespoons honey - 2 tablespoons fresh lime juice - Zest of 1 lime - A pinch of salt When making tropical fruit salad, choosing the best fruits is key. Each fruit brings its own flavor and texture. I love using ripe pineapple because it adds sweetness. Mangoes enhance the tropical vibe, while strawberries bring a bright color. Kiwi adds a nice tang, and bananas give creaminess. Oranges provide juiciness, and mint adds a fresh taste. The combination creates a colorful and tasty dish. For the honey lime dressing, I mix honey, fresh lime juice, lime zest, and a pinch of salt. The honey adds sweetness, while lime juice gives a zesty kick. This dressing brings all the fruits together. It’s quick and easy to prepare, making it perfect for any occasion. You can find the full recipe above to guide you through each step. This salad is a delight for the eyes and the taste buds! - Combine diced pineapple, mango, strawberries, kiwi, banana, and orange segments. - Gently toss to combine without mashing the fruits. To make a great tropical fruit salad, I start by preparing the fruits. I choose ripe and colorful fruits. Ripe pineapple adds sweetness, while mango brings a juicy texture. Strawberries offer a bright flavor, and kiwi gives a fun twist. Bananas make the salad creamy, and oranges add a citrus kick. I take a large mixing bowl. I add all the diced fruits. Then, I gently toss them together. It's important not to mash the fruits. You want each piece to stay whole for the best look and taste. - Whisk together honey, lime juice, lime zest, and salt until smooth. Next, I prepare the dressing. In a small bowl, I whisk together honey, fresh lime juice, lime zest, and a pinch of salt. The honey adds sweetness, while the lime juice gives a nice tang. The zest enhances the flavor, making it bright and fresh. I want the dressing to be smooth and well mixed. - Drizzle dressing over mixed fruits. - Toss to coat all fruits evenly with the dressing. Now it’s time to combine everything. I drizzle the honey-lime dressing over the mixed fruits. Then, I carefully toss the salad. The goal is to coat all the fruits evenly with the dressing, without squishing them. - Scatter chopped mint on top. - Refrigerate for about 30 minutes for enhanced flavors. Finally, I garnish the salad. I scatter chopped mint on top for a fresh finish. If I have time, I cover the bowl and refrigerate it for about 30 minutes. Chilling helps the flavors blend together, making each bite even better. This step-by-step guide makes it easy to create a tropical fruit salad that looks beautiful and tastes delicious. You can find the full recipe [here]. To make a great fruit salad, you want the best fruits. - Select ripe fruits for optimal flavor: Ripe fruits taste better. They are sweet and juicy. Check for color and feel. - Mix and match seasonal fruits for variety: Using different fruits adds color and taste. Try local fruits that are in season. If you want to prepare the fruit salad early, here are some tips. - Preparation tips for storing and serving later: You can cut fruits a few hours ahead. Just store them in a bowl with a lid. - Best practices for fruit freshness: Keep the fruit in the fridge. It stays fresh and cool before serving. How you serve the fruit salad makes it more fun. - Ideas for plating and presentation: Use clear cups for a pretty look. You can also layer the fruits for a rainbow effect. - Pairing options with meals or snacks: This salad goes well with grilled meat or fish. It also makes a tasty snack on its own. For the full recipe, check out Tropical Paradise Fruit Salad. {{image_2}} You can play with flavors by adding different fruits. Consider using tropical options like papaya or starfruit. Their unique tastes can elevate your salad. You might also try adding berries. Blueberries or raspberries can give a fun texture and a pop of color. If you want a vegan fruit salad, it’s easy to adjust. Simply swap honey for agave syrup or maple syrup. This change keeps the sweetness while making it plant-based. You can also reduce the sugar by using less dressing. This way, you can enjoy the fruit's natural sweetness. Want to make your salad more festive? Try adding a splash of coconut milk. This twist works well for tropical parties. Pair the salad with themed drinks, like a coconut mojito or a tropical punch. These drinks will complement the flavors and create a fun experience. For the full recipe, check this [Full Recipe]. To keep your tropical fruit salad fresh, follow these simple steps. First, use an airtight container. This helps to keep moisture out and flavors in. Glass containers work best. They do not absorb odors. You can also use plastic containers, but choose those labeled as airtight. If you have leftover honey lime dressing, store it in a separate container. This keeps the fruit crisp and tasty. Fruit salad generally lasts about 3 days in the fridge. After that, the fruits may start to get mushy. Look for signs of spoilage. If the fruits smell sour or have a slimy texture, it’s time to toss them. The vibrant colors of fresh fruits fade too. If they look dull, they’re no longer fresh. Always trust your senses when deciding if your salad is good to eat. You can store the Tropical Fruit Salad with Honey Lime Dressing in the fridge for up to three days. To keep it fresh, use an airtight container. This helps prevent the fruits from browning. If you notice any mushy pieces, remove them before serving. The honey lime dressing can also keep the fruits tasting great for longer. Yes, you can use frozen fruits, but there are pros and cons. Frozen fruits are convenient and last longer. They can also be less expensive. However, they may lose some texture when thawed. Fresh fruits usually taste better and have a firmer bite. If you choose frozen, let them thaw and drain excess water before mixing. You can use maple syrup or agave nectar as substitutes for honey. Both will add sweetness but have different flavors. Maple syrup gives a rich taste, while agave is milder. Experiment with these options to find what you like best. Just remember, it will change the flavor of the dressing. For the best results, try these substitutes in small amounts first. You now have a clear view of making a Tropical Fruit Salad with Honey Lime Dressing. Start with fresh, ripe fruits, and mix them just right. The honey lime dressing brings out the best flavors. Remember, you can customize it with seasonal fruits or dietary needs. Store the leftovers properly to enjoy them later. This salad is not just tasty; it’s fun to make. Enjoy experimenting with variations and impressing your friends and family with your skills. Your delicious fruit salad journey begins now!

Tropical Fruit Salad with Honey Lime Dressing Delight

Are you ready to brighten your day with a burst of flavors? My Tropical Fruit Salad with Honey Lime Dressing

To make this cinnamon roll casserole, you need: - 1 can (16 oz) refrigerated cinnamon rolls, cut into quarters - 4 large eggs - 1 cup milk - 1/2 cup brown sugar - 1 tablespoon vanilla extract - 1 teaspoon ground cinnamon - 1/2 teaspoon nutmeg - 1 cup pecans or walnuts, chopped (optional) - 1/2 cup maple syrup - Powdered sugar for dusting These ingredients create a soft, sweet base with lovely flavors. The cinnamon rolls bring comfort, while the eggs and milk add richness. You can add more fun to your dish with these optional ingredients: - Chopped apples or bananas for fruity flavor - Cream cheese for a richer taste - Chocolate chips for a sweet twist These additions can change the flavor and texture. They make your casserole even more exciting! To serve your cinnamon roll casserole, follow these tips: - Cut it into squares for easy serving. - Drizzle with extra maple syrup for added sweetness. - Dust with powdered sugar for a pretty touch. - Pair it with coffee or milk for a perfect breakfast combo. These serving ideas will impress everyone at your breakfast table. Enjoy the warm, gooey goodness of your cinnamon roll casserole! For the complete recipe, check out the Full Recipe. Start by gathering all your ingredients. You will need: - 1 can (16 oz) refrigerated cinnamon rolls, cut into quarters - 4 large eggs - 1 cup milk - 1/2 cup brown sugar - 1 tablespoon vanilla extract - 1 teaspoon ground cinnamon - 1/2 teaspoon nutmeg - 1 cup pecans or walnuts, chopped (optional) - 1/2 cup maple syrup - Powdered sugar for dusting Preheat your oven to 350°F (175°C). Grease a 9x13 inch casserole dish to keep the casserole from sticking. In a large bowl, whisk the eggs, milk, brown sugar, vanilla extract, ground cinnamon, and nutmeg. Mix until well combined. Next, add the cinnamon roll pieces to this mixture. Make sure all the pieces are coated nicely. If you like nuts, fold in the chopped pecans or walnuts now. This adds a nice crunch to your casserole. Pour the entire mixture into the prepared casserole dish. Spread it out evenly for even cooking. Drizzle the maple syrup on top of the casserole. This will give it a sweet flavor as it bakes. Place the dish in the oven and bake for 25-30 minutes. You want the casserole to be puffed and golden brown. To check if it is done, insert a toothpick into the center. It should come out clean if it's ready. After baking, let the casserole cool for a few minutes. Drizzle the icing that came with the cinnamon rolls over the top. This adds a sweet finish. For an extra touch, dust with powdered sugar before serving. Present it warm, cut into squares. It looks great with a sprinkle of powdered sugar and a drizzle of extra maple syrup. Enjoy this divine breakfast delight with coffee or milk! For the full recipe, check out the earlier section. To get a fluffy cinnamon roll casserole, use fresh cinnamon rolls. They puff up better. Cut them into small pieces to help them soak up the egg mixture. Make sure to mix the eggs and milk well. This ensures every piece gets coated. Let the mixture sit for a few minutes before baking. This allows the flavors to blend nicely. One common mistake is overbaking the casserole. Keep an eye on it in the oven. If it turns too brown, it may dry out. Avoid skipping the maple syrup drizzle. It adds a sweet layer that enhances the flavor. Don’t forget to let it cool for a few minutes before serving. This helps the casserole set and makes it easier to cut. Add a pinch of salt to the egg mixture. This small touch can enhance the sweetness. You can also mix in some vanilla extract for a richer taste. If you want more spice, try adding a bit of ginger or allspice. For a nutty crunch, include chopped pecans or walnuts. They provide a nice texture contrast. For the full recipe, check out the recipe section above. {{image_2}} You can change the flavor of your cinnamon roll casserole easily. Try adding fresh fruit like blueberries or sliced bananas for a fruity twist. You can also mix in chocolate chips for a rich, sweet touch. If you prefer a nutty flavor, use almond extract instead of vanilla. For a spicier kick, add more ground cinnamon or a pinch of ginger. If you want a lighter version, use egg whites instead of whole eggs. You can also swap whole milk for almond milk or oat milk. For a lower sugar option, reduce the brown sugar or use a sugar substitute. If you are gluten-free, choose gluten-free cinnamon rolls. These adjustments keep the dish tasty while fitting different diets. You can switch ingredients based on what you have. Instead of cinnamon rolls, use croissants for a flakier texture. If you don’t have maple syrup, honey or agave nectar works well too. For a nut-free option, leave out the nuts or use seeds like sunflower seeds. Each swap can create a new twist on this classic dish. Check out the Full Recipe for more details and ideas! Store leftover cinnamon roll casserole in an airtight container. It stays fresh for up to three days in the fridge. Let it cool completely before storing. This helps keep the texture nice and soft. When ready to eat, simply take it out and enjoy! You can freeze the casserole if you have extra. Cut it into squares and wrap each piece tightly in plastic wrap. Place the wrapped pieces in a freezer bag. They can last up to three months in the freezer. Just remember to label the bag with the date! To reheat, take a piece from the fridge or freezer. If frozen, let it thaw overnight in the fridge. For warm cinnamon roll casserole, place it in the microwave. Heat it in 30-second bursts until warm. For a crispier top, you can also reheat it in the oven at 350°F for about 10 minutes. Enjoy the tasty goodness again! You can tell the casserole is done by its color and texture. It should look puffed and golden brown. Insert a toothpick into the center. If it comes out clean, the casserole is ready. This usually takes about 25-30 minutes in the oven. Yes, you can prepare this casserole the night before. Simply follow the steps until you pour it into the baking dish. Cover it tightly and place it in the fridge. When you are ready to bake, let it sit out for about 30 minutes. Then, bake as normal. This casserole pairs well with many items. You can serve it with coffee or a glass of milk. Fresh fruit adds a nice touch too. If you want something extra, whip cream or yogurt works great. You can explore more serving ideas in the Full Recipe. This blog post covered the ingredients needed for a tasty casserole, step-by-step instructions, and handy tips. You learned about flavor variations and how to store leftovers. Keep these points in mind, and your casserole will shine at your next meal. Enjoy creating your dish, and remember to have fun in the kitchen! Happy cooking!

Cinnamon Roll Casserole Divine Breakfast Delight

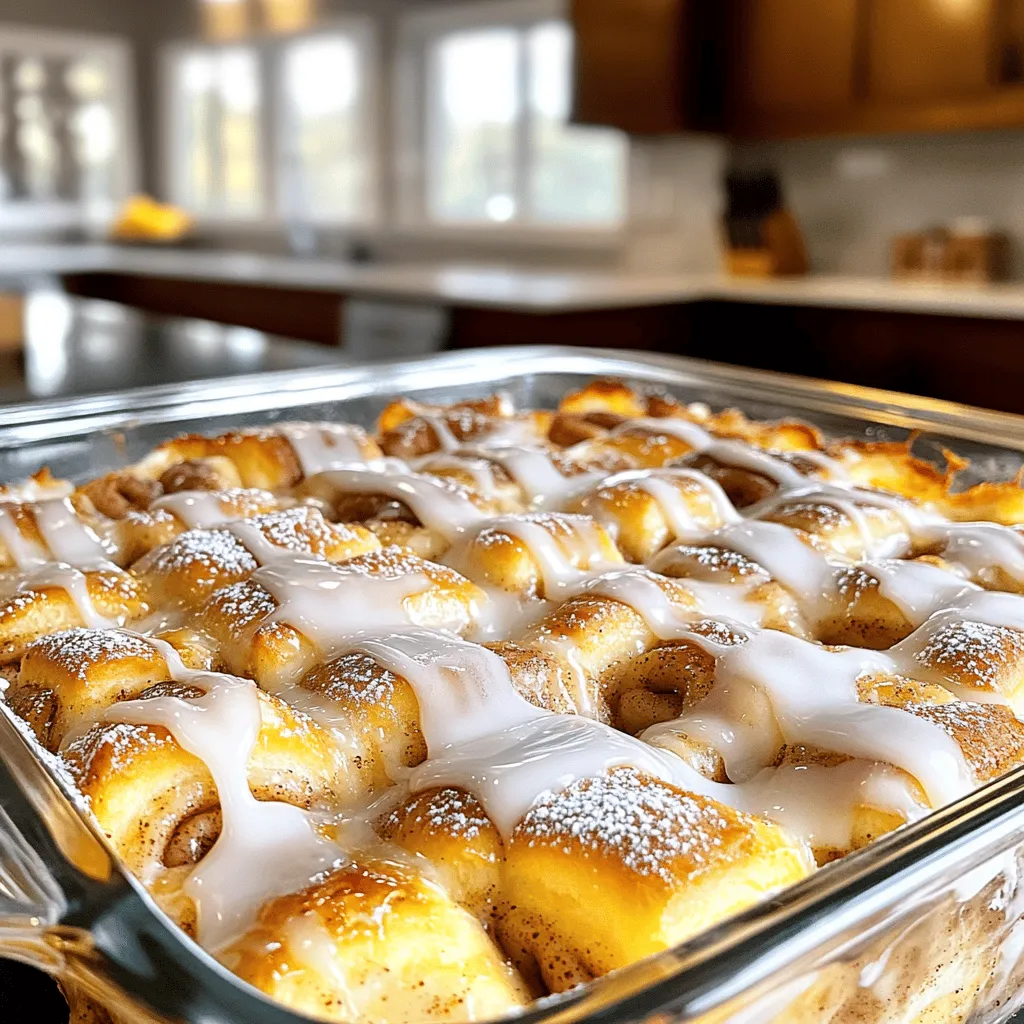
Cinnamon Roll Casserole is your new favorite breakfast hero. It’s simple, warm, and oh-so-delicious! Imagine fluffy, sweet bites drizzled with

- 4 large bell peppers (red, yellow, or green) - 1 cup quinoa, rinsed - 1 can (15 oz) black beans, rinsed and drained - 1 cup corn (fresh or frozen) - 1 medium onion, diced - 2 cloves garlic, minced - 1 cup diced tomatoes (canned or fresh) - Fresh cilantro or parsley for garnish - 2 cups vegetable broth - 1 teaspoon cumin - 1 teaspoon smoked paprika - 1 teaspoon oregano - Salt and pepper to taste - 1 cup shredded cheese (cheddar or a blend, optional) - Fresh cilantro or parsley for garnish Gathering these fresh ingredients is key for great flavor. The bright colors of the peppers will make your dish pop. Quinoa adds a healthy twist, while black beans and corn bring texture. Don't forget to rinse the quinoa to remove its natural coating, which can taste bitter. You can use canned tomatoes for ease, but fresh ones add a nice touch. If you like cheese, have some shredded cheese ready for that melty goodness on top. Using fresh herbs like cilantro or parsley adds a burst of flavor and color. Check out the Full Recipe for all the steps to create this delicious meal! Start by rinsing the quinoa. This helps remove any bitter taste. In a medium saucepan, bring two cups of vegetable broth to a boil. When the broth boils, add one cup of rinsed quinoa. Reduce the heat and cover the pot. Let it simmer for about 15 minutes. The quinoa is ready when it's fluffy and the liquid is gone. Set it aside for now. Grab your four large bell peppers. You can use red, yellow, or green ones for color. Cut the tops off each pepper and remove the seeds. This makes space for the filling. Drizzle a little olive oil on the outside of the peppers. Place them in a baking dish with the open side facing up. This will help them cook evenly. In a large skillet, heat one tablespoon of olive oil over medium heat. Add a diced onion and two minced garlic cloves. Sauté for about three to four minutes. You want them soft and fragrant. Next, add the cooked quinoa, one can of black beans, one cup of corn, and one cup of diced tomatoes. Stir in one teaspoon each of cumin, smoked paprika, and oregano. Season with salt and pepper to taste. Cook this mixture for about five minutes until it's warm. Carefully spoon the filling into each bell pepper, packing it down gently. If you like, sprinkle cheese on top. Cover the dish with foil and bake at 375°F (190°C) for 25 minutes. Then, remove the foil and bake for another 10 to 15 minutes. The peppers should be tender, and the cheese should look bubbly and golden. Let them cool a bit before serving. Enjoy your tasty stuffed bell peppers! For the complete recipe, check out the Full Recipe. To make perfect quinoa, rinse it well before cooking. This washes away the bitter taste. Use two cups of vegetable broth for one cup of quinoa. This gives it flavor. Bring the broth to a boil, then lower the heat. Cover and simmer for about 15 minutes. You'll know it's done when the grains are fluffy and the liquid is gone. When preparing the bell peppers, cut the tops off and remove the seeds. Make sure they sit flat in the baking dish. Drizzle olive oil on the outside for added taste. Cover the dish with foil while baking for the first 25 minutes. This keeps the peppers moist and helps them cook evenly. Remove the foil for the last 10 to 15 minutes to allow the tops to brown nicely. Cheese adds a rich flavor to your stuffed peppers, but you can mix it up. Try mixing different cheeses like mozzarella or feta. If you want a healthier option, use dairy-free cheese. You can also skip the cheese entirely for a lighter meal. Just focus on the wonderful flavors of quinoa and veggies. You can find many other options in the full recipe to suit your taste. {{image_2}} You can easily add ground meat to your stuffed peppers. Chicken, turkey, or beef all work well. Start by browning the meat in your skillet before adding the onions and garlic. This step adds flavor and keeps the meat juicy. Once cooked, mix in the other filling ingredients. The meat will add a hearty touch that many enjoy. For a vegan twist, skip the cheese or use dairy-free cheese. There are many tasty options available. Look for brands made from nuts or soy. These can melt and taste great in your stuffed peppers. You can also sprinkle nutritional yeast on top for a cheesy flavor without dairy. It adds extra nutrients too! If you want to change the grain, consider using rice or farro. Both are simple swaps that can give a new taste. Cook them according to package instructions before adding them to your filling. You can also mix different grains for a more complex flavor profile. This flexibility makes the recipe fun and adaptable. Feel free to explore these variations to create your perfect stuffed bell peppers. For the complete recipe, check out the Full Recipe section. After you enjoy your stuffed bell peppers, store any leftovers in the fridge. Place them in an airtight container. They will stay fresh for about three to four days. To make sure they taste great, eat them within this time. Always let the peppers cool to room temperature before sealing them up. If you want to keep your stuffed peppers for a longer time, freezing is a great option. Wrap each pepper tightly in plastic wrap or aluminum foil. Then, place them in a freezer bag or container. They can last up to three months in the freezer. When you're ready to eat them, just thaw in the fridge overnight. To reheat your stuffed peppers, start by preheating your oven to 350°F (175°C). Remove the peppers from the fridge or freezer and let them sit for a few minutes. Place them in a baking dish and cover with foil to keep them moist. Heat in the oven for about 20-30 minutes. If frozen, they may take longer. You can also microwave them for a quicker option. Just be sure to cover them to prevent drying out. Enjoy your delicious meal again! Yes, you can use many kinds of peppers. Bell peppers are the best choice. They are sweet and hold their shape well. You can try poblano or Anaheim peppers for a twist. These peppers may be spicier but offer a nice flavor. To spice up your stuffed peppers, add chili powder or cayenne pepper. You can mix in jalapeños or diced green chilies. For a flavor boost, use pepper jack cheese instead of cheddar. You can also drizzle hot sauce on top before serving for extra heat. Quinoa is packed with protein and fiber. It has all nine essential amino acids, making it a complete protein. This grain is also gluten-free, making it great for many diets. Quinoa is high in vitamins and minerals, like magnesium and iron. It can help keep you full and satisfied, making it a smart choice for any meal. For the full recipe, check out the details above. You learned about the key ingredients and steps to make stuffed peppers. I shared tips to perfect your dish, from quinoa texture to cheese swaps. Variations let you customize based on your diet, while storage info keeps leftovers fresh. Remember, with these guidelines, you can create your own tasty version. Enjoy exploring flavors, and have fun cooking!

Stuffed Bell Peppers with Quinoa Flavorful Recipe

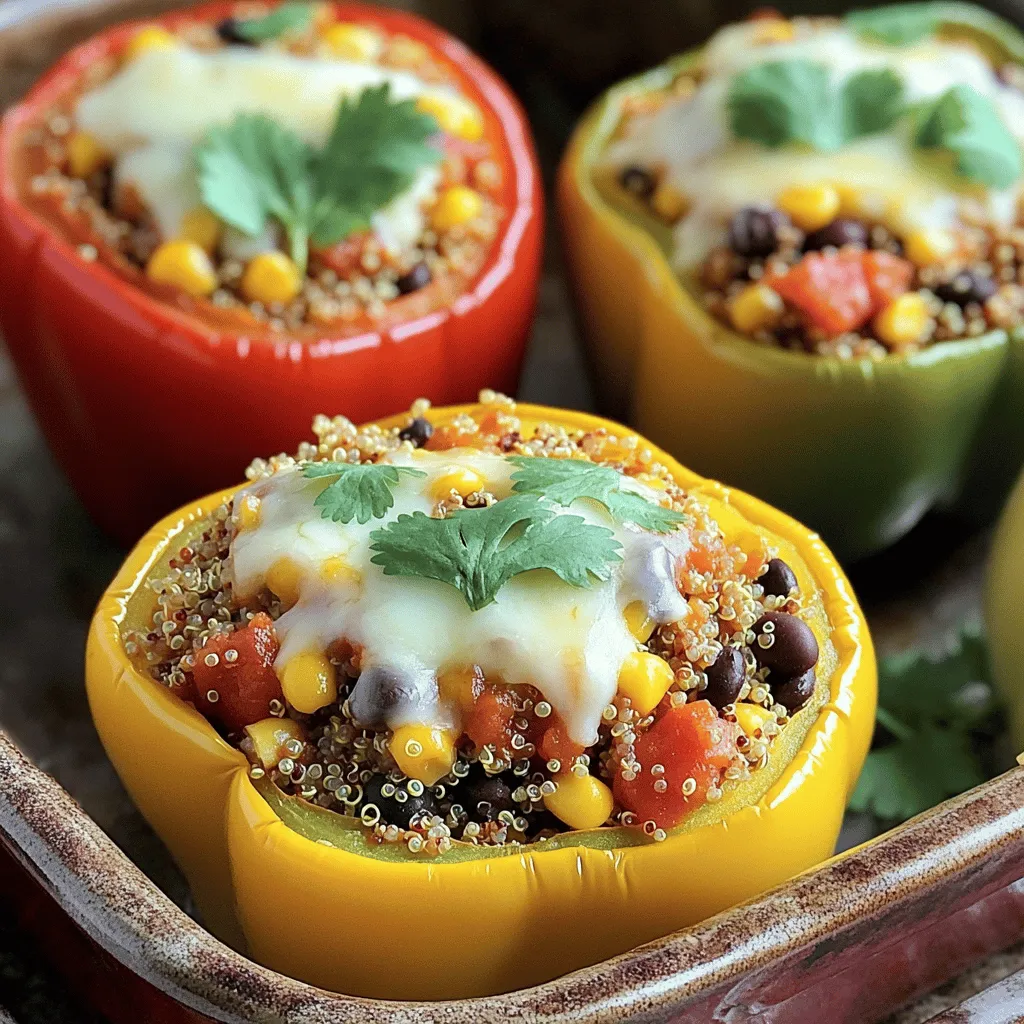
Are you ready to create a dish that bursts with flavor and color? Stuffed bell peppers with quinoa are not

To make oven-baked chicken parmesan, you need the following main ingredients: - 4 boneless, skinless chicken breasts - 1 cup breadcrumbs (preferably Italian-seasoned) - ½ cup grated Parmesan cheese - 1 teaspoon garlic powder - 1 teaspoon Italian seasoning - 2 large eggs - 1 cup marinara sauce - 1½ cups shredded mozzarella cheese - Fresh basil leaves for garnish - Salt and pepper to taste - Olive oil spray These ingredients create a delicious dish with great flavor. The chicken breasts will become tender and juicy while the breadcrumbs form a crispy coating. The combination of Parmesan and mozzarella adds a rich, cheesy taste. While the main dish shines on its own, a few garnishes and sides can elevate your meal. Here are some ideas: - Fresh basil leaves for a pop of color - Extra marinara sauce drizzled on top - A side of spaghetti or fettuccine - A simple green salad with vinaigrette These options add freshness and balance to your plate. A salad brings a nice crunch, while pasta soaks up the sauce. Seasonings can turn a good dish into a great one. Here are key seasonings for this recipe: - Garlic powder adds a savory note - Italian seasoning gives an herby taste - Salt and pepper enhance all flavors Using these seasonings makes the chicken flavorful and aromatic. You can also add a pinch of red pepper flakes for heat if you like. Each seasoning plays a role in making your oven-baked chicken parmesan taste amazing. For the full recipe, refer to the earlier sections. To make Oven-Baked Chicken Parmesan, start by prepping your chicken. First, preheat your oven to 400°F (200°C). Line a baking sheet with parchment paper or foil. This makes cleanup easy. Next, gather your ingredients. You need 4 boneless, skinless chicken breasts, 1 cup of breadcrumbs, and ½ cup of grated Parmesan cheese. Add in 1 teaspoon of garlic powder and 1 teaspoon of Italian seasoning. Don’t forget salt and pepper to taste. In a shallow bowl, mix the breadcrumbs, Parmesan, garlic powder, Italian seasoning, salt, and pepper. In another bowl, beat 2 large eggs until they are well mixed. Take each chicken breast and dip it in the egg mixture. Let any extra egg drip off. Then, coat it in the breadcrumb mix. Press the breadcrumbs onto the chicken so they stick well. Once your chicken is well coated, place the pieces on the prepared baking sheet. Lightly spray the tops with olive oil. This helps the chicken get that nice crispiness. Now, bake the chicken in the oven for about 25-30 minutes. Keep an eye on the chicken. You want it to reach an internal temperature of 165°F (75°C). The coating should turn golden brown. After baking, take the chicken out of the oven. Now it’s time to add the sauce and cheese. Spoon marinara sauce evenly over each piece of chicken. Use about 1 cup of marinara sauce. After that, sprinkle 1½ cups of shredded mozzarella cheese on top. Return the chicken to the oven for another 5-7 minutes. You want the cheese to melt and bubble. Once it looks good, take it out, and let it rest for a couple of minutes. Garnish with fresh basil leaves. This adds a nice touch to your dish. For the full recipe, check out the complete list of steps and ingredients. Enjoy your flavorful Oven-Baked Chicken Parmesan! To get that perfect crunchy texture, use Italian-seasoned breadcrumbs. They add flavor! Make sure to press the breadcrumbs onto the chicken. This helps them stick better while baking. A light spray of olive oil on top will also help create a golden crust. Don't skip this step! Set your oven to 400°F (200°C). This temperature is just right for baking chicken. Bake the chicken for 25-30 minutes. You want it to reach an internal temperature of 165°F (75°C). Use a meat thermometer for accuracy. The chicken should look golden brown when done. Serve your Oven-Baked Chicken Parmesan on a big platter. Drizzle extra marinara sauce on top. Add fresh basil leaves for a nice touch. Pair it with a side of spaghetti or a green salad. This combo makes a filling and balanced meal. Want the full recipe? Check out the Full Recipe for more details! {{image_2}} If you're looking for gluten-free options, you can swap out traditional breadcrumbs. Use gluten-free breadcrumbs made from rice or nuts. You can even crush gluten-free crackers or oats. These options still give great crunch and flavor. Make sure to check labels for any hidden gluten. If you want to cut down on calories, try using less cheese or a lighter marinara sauce. You can switch up the sauce and cheese to create new flavors. Instead of marinara, try pesto or a creamy Alfredo sauce. Each sauce adds a different taste to the dish. For cheese, experiment with provolone, gouda, or even feta. Each cheese brings its own unique flavor and texture. Mixing cheeses can also give a fun twist! For a vegetarian version, replace chicken with eggplant or zucchini. Slice them thick, and coat them just like the chicken. You can bake them until golden and soft. Another option is using portobello mushrooms. They have a meaty texture and soak up flavors well. With the right sauce and cheese, you get a dish that's just as tasty. For recipes, check the Full Recipe link for more details! After enjoying your Oven-Baked Chicken Parmesan, store leftovers in an airtight container. Make sure the chicken has cooled down before sealing. This keeps moisture in and prevents your dish from drying out. You can store it in the fridge for up to three days. If you want to keep it longer, freezing is the best option. To reheat your chicken, preheat the oven to 350°F (175°C). Place the chicken on a baking sheet. Cover it with foil to keep it from drying out. Heat for about 15-20 minutes, or until warmed through. You can also microwave it, but this may make the coating less crispy. If you choose to microwave, heat it in short bursts, checking often. If you want to freeze your chicken, wrap each piece tightly in plastic wrap. Then, place them in a freezer-safe bag. They can last up to three months in the freezer. When you're ready to eat, thaw them in the fridge overnight. After thawing, reheat in the oven for the best texture. Enjoy your delicious meal anytime! For the complete recipe, check out the Full Recipe. To make Oven-Baked Chicken Parmesan less greasy, use a light hand with oil. Instead of soaking the chicken, spray just enough olive oil on top. Opt for whole-grain breadcrumbs. They absorb less oil than regular ones. Baking the chicken on a wire rack allows excess oil to drip off. This keeps the chicken crispy and tasty without being too oily. Yes, you can use chicken thighs instead of breasts. Thighs stay juicy and tender during cooking. They have a richer flavor, which some people prefer. Just make sure to adjust the cooking time. Thighs may take a few extra minutes to cook through. Always check that the internal temperature reaches 165°F (75°C) for safety. Oven-Baked Chicken Parmesan goes well with many sides. Here are a few great options: - Spaghetti with marinara sauce - Garlic bread for a crunchy bite - A fresh green salad with vinaigrette - Roasted vegetables like broccoli or zucchini - Creamy mashed potatoes for comfort These sides balance the flavors and add variety to your meal. For the complete recipe, check the Full Recipe section. To make Oven-Baked Chicken Parmesan, we covered key ingredients, cooking steps, and tips for success. You learned about healthy options and fun variations. Storing leftovers and reheating correctly keeps the meal enjoyable. In conclusion, this dish is simple and satisfying. With a few tweaks, you can make it your own. Enjoy experimenting with flavors and sides for a tasty family meal. Happy cooking!

Oven-Baked Chicken Parmesan Flavorful and Easy Recipe

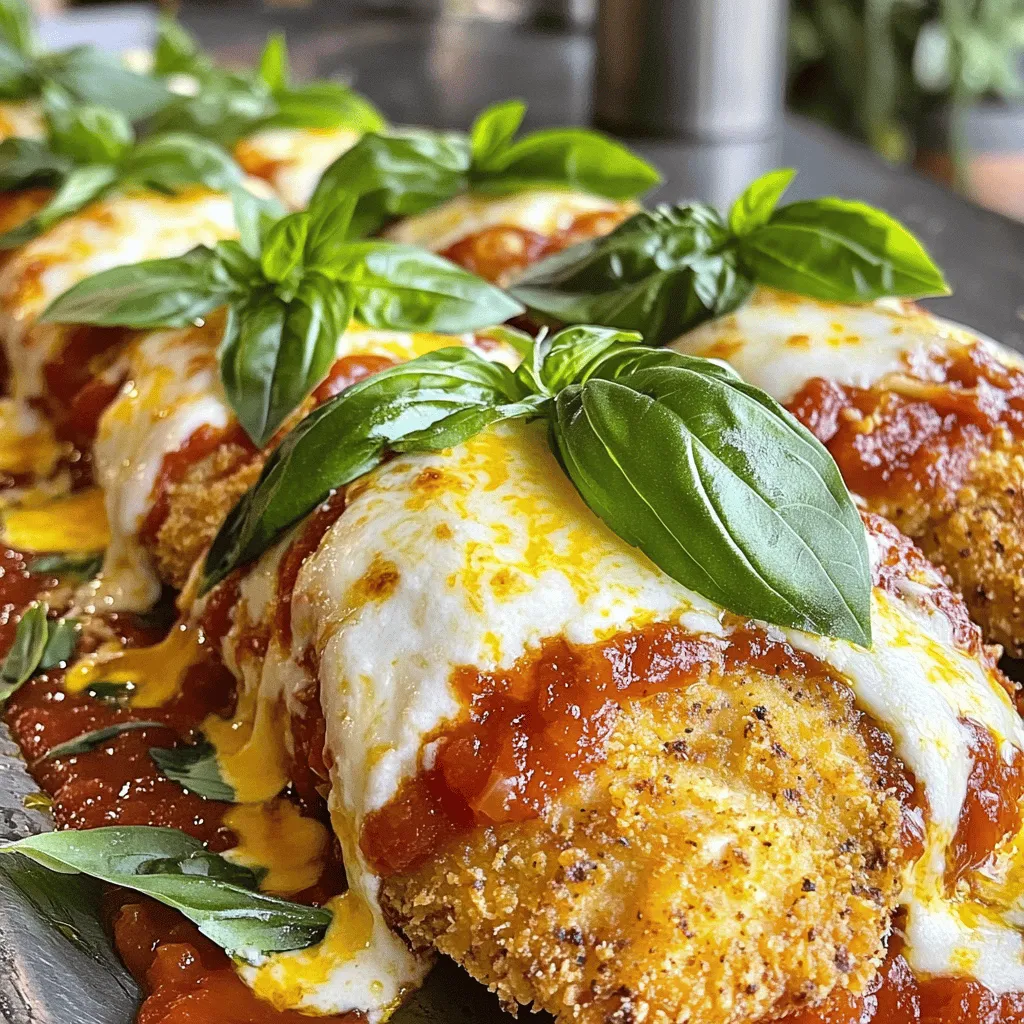
Are you ready to make a meal that impresses? My Oven-Baked Chicken Parmesan is simple yet bursting with flavor. Whether

Older posts
Newer posts
← Previous Page1 … Page33 Page34 Page35 … Page62 Next →

dsad

© 2025 Emmas Dish • Built with GeneratePress

Our Policies

  • Copyright Policy
  • Cookie Policy
  • GDPR Policy
  • Privacy Policy
  • Disclaimer
  • Terms Of Use

More Information

  • Home
  • About
  • Contact
  • Appetizers
  • Dessert
  • Dinner
  • Drinks
©2025, Emmas Dish About Back To Top