Skip to content
DisclaimerTerms Of UseGDPR PolicyCookie Policy

Emmas Dish

  • Home
  • Drinks
  • Appetizers
  • Dinner
  • Dessert
  • About
  • Contact
  • Privacy Policy
DisclaimerTerms Of UseGDPR PolicyCookie Policy

Emma

- 1 lb large shrimp, peeled and deveined - 2 tablespoons olive oil - 1 tablespoon chili powder - 1 teaspoon cumin - 1 teaspoon smoked paprika - 1/2 teaspoon cayenne pepper - Salt and pepper to taste - 8 small corn tortillas - 1 cup shredded cabbage - 1/2 cup sour cream or Greek yogurt - 1 ripe mango, diced - 1/2 red onion, finely chopped - 1 jalapeño, deseeded and minced - 1/4 cup fresh cilantro, chopped - Juice of 1 lime - Salt to taste - Skillet - Mixing bowls - Tongs When I make spicy shrimp tacos, I focus on fresh, tasty ingredients. The shrimp should be large and juicy, as they are the star of the dish. The spices add a great kick. I love using chili powder, cumin, smoked paprika, and cayenne pepper. You can adjust the cayenne for your spice level. Salt and pepper round out the flavor. For the tacos, I prefer small corn tortillas. They are perfect for holding the filling and add a nice texture. I like to add shredded cabbage for crunch. It complements the shrimp well. Lastly, a dollop of sour cream or Greek yogurt adds creaminess. For the mango salsa, select a ripe mango for the best flavor. The sweetness from the mango pairs beautifully with the spicy shrimp. Finely chopped red onion and minced jalapeño add texture and heat. Fresh cilantro brightens the salsa, while lime juice gives it a zesty kick. A pinch of salt enhances all the flavors. You can find the full recipe for these delightful tacos that I love making. - In a medium bowl, mix chili powder, cumin, smoked paprika, cayenne, salt, and pepper. - Add the shrimp to the bowl and toss them to coat with the spice mix. - Heat one tablespoon of olive oil in a skillet over medium-high heat. - Place the seasoned shrimp in the skillet. Cook them for about three to four minutes. - Remove the shrimp from heat when they turn pink and opaque. Set the shrimp aside. - In another bowl, combine diced mango, red onion, jalapeño, cilantro, lime juice, and a pinch of salt. - Mix the ingredients well so they blend nicely. - Let the salsa sit for a bit. This allows the flavors to mix and become even tastier. - Warm the corn tortillas in a dry skillet over medium heat. Do this for about 30 seconds on each side. - On each tortilla, place a good amount of shredded cabbage first. - Next, add the spicy shrimp on top of the cabbage. - Spoon the mango salsa over the shrimp. - Finish with a dollop of sour cream or Greek yogurt, if you like. This method makes each taco a burst of flavor. You can find the full recipe for a more detailed guide. Enjoy every bite! Adjust the spice levels to your own taste. If you like heat, add more cayenne. If you prefer milder flavor, use less. Be careful not to overcook the shrimp. Cook them until they are pink and opaque, about 3-4 minutes. Overcooked shrimp can become tough and chewy. Feel free to experiment with the mango salsa. You can add diced bell peppers or even pineapple for sweetness. A dash of salt helps to bring out the flavors. Let the salsa sit for a while before serving. This resting time allows the flavors to blend and deepen. Pair your tacos with lime wedges for extra zest. The lime juice brightens the flavors. You can also serve them with a side of rice or beans. This adds heartiness to the meal and complements the tacos well. For the full recipe, check the complete guide provided above. {{image_2}} You can swap shrimp for chicken or fish. Just cook the chicken until it’s no longer pink. For fish, choose a flaky white fish like tilapia or cod. If you want a vegetarian option, try tofu. Press the tofu to remove water, then cube it. Season and cook it like the shrimp for a tasty twist. For a creamier bite, use avocado or guacamole. They add a rich flavor that pairs well with the spice. You can also add pico de gallo for an extra kick. This fresh salsa brings juicy tomatoes and herbs to your tacos. It makes each bite more exciting. Corn tortillas are classic, but flour tortillas can be softer. They are easy to fold and hold all the fillings. If you want a low-carb option, try lettuce wraps. They give a fresh crunch and are fun to eat. Each choice changes how you enjoy your spicy shrimp tacos. For the full recipe, check out the detailed instructions above! To keep your Spicy Shrimp Tacos and Mango Salsa fresh, store them right. First, refrigerate the shrimp and salsa separately. This helps keep flavors bright and prevents sogginess. Enjoy your leftovers within 2 days for the best taste. When you're ready to enjoy leftovers, warm the shrimp in a skillet. Heat it over medium heat for a few minutes until hot. For the tortillas, briefly reheat them in a dry skillet. This keeps them soft and tasty. You can freeze cooked shrimp if you want to save some for later. Place it in an airtight container. The salsa can also be frozen. Just use a separate airtight container for it. This way, you can enjoy the flavors again later! The total prep and cook time is 25 minutes. This quick meal fits busy days perfectly. Yes, you can use frozen shrimp. Just be sure to thaw them properly before cooking. I recommend serving shrimp tacos with rice, beans, or a fresh salad. These pair well and add balance to your meal. For the full recipe, you can refer to the earlier section. Enjoy your cooking! This blog post shared a simple way to make spicy shrimp tacos with mango salsa. We covered the key ingredients, step-by-step instructions, and helpful tips to make your dish shine. Remember, you can mix and match flavors and proteins to suit your taste. After trying this recipe, I hope you'll enjoy the fresh, bold flavors. Create your own taco night and impress your friends and family with this dish. Cooking should be fun and tasty! Be sure to enjoy every bite.

Spicy Shrimp Tacos with Mango Salsa Recipe Delight

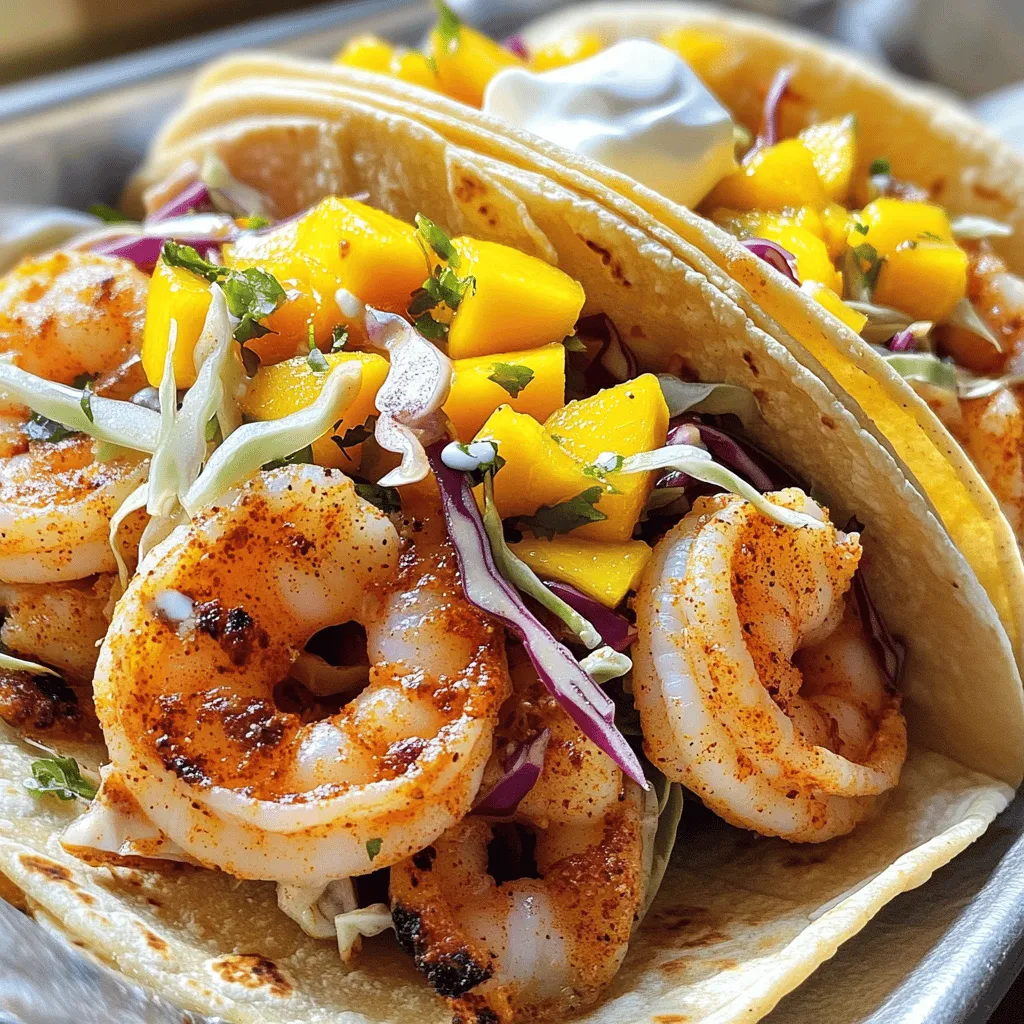
Are you ready to spice up your dinner plans? My Spicy Shrimp Tacos with Mango Salsa are packed with flavor

Chicken and Vegetables - 1.5 lbs boneless, skinless chicken breasts, sliced into thin strips - 2 bell peppers (one red, one yellow), sliced - 1 medium red onion, sliced - 3 cloves garlic, minced These fresh ingredients make the dish vibrant and tasty. The chicken provides protein, while the peppers and onion add color and crunch. Garlic gives depth and aroma. Seasoning and Cooking Essentials - 2 tablespoons olive oil - 2 tablespoons fajita seasoning (homemade or store-bought) - Juice of 1 lime - Salt and pepper to taste The olive oil helps everything cook evenly. Fajita seasoning brings that classic flavor. Lime juice adds a zesty kick, while salt and pepper enhance all the tastes. Garnishes and Serving Suggestions - Fresh cilantro, chopped (for garnish) - Tortillas (for serving) Cilantro adds freshness and makes your dish pop. Tortillas are a must for wrapping the fajitas. You can also serve with guacamole or salsa for added flavor. For the full recipe, check out the details above to guide your cooking journey! 1. Preheat your oven to 425°F (220°C). This high heat makes the chicken juicy and the veggies tender. 2. Line a large sheet pan with parchment paper. This helps with easy cleanup later. 3. Slice 1.5 lbs of boneless, skinless chicken breasts into thin strips. This helps the chicken cook evenly. 4. Slice 2 bell peppers, one red and one yellow, and 1 medium red onion. These add color and flavor. 5. Mince 3 cloves of garlic to bring out a delicious aroma. 1. In a big mixing bowl, combine the chicken, bell peppers, red onion, and minced garlic. 2. Drizzle 2 tablespoons of olive oil over the mixture. This helps the seasoning stick. 3. Add 2 tablespoons of fajita seasoning, juice of 1 lime, and salt and pepper to taste. 4. Toss everything together until the chicken and veggies are well coated. This step mixes the flavors nicely. 1. Spread the mixture evenly onto your prepared sheet pan. Make sure it’s in a single layer for even cooking. 2. Bake in the preheated oven for 20-25 minutes. Stir halfway through to ensure even cooking. 3. Check that the chicken is cooked through and the veggies are tender. The fajitas should smell amazing! 4. Let the pan cool for a few minutes before serving. Enjoy your hot and tasty meal wrapped in warm tortillas. For the full recipe, check out the delicious details. Achieving Optimal Cooking Time For the best chicken fajitas, aim for a cooking time of 20 to 25 minutes. This ensures that the chicken is juicy and tender while the veggies stay crisp. To check if the chicken is ready, use a meat thermometer. It should read 165°F. If you don’t have one, cut into a piece of chicken. It should be white and no longer pink inside. Ensuring Even Flavor Distribution To get great flavor in every bite, coat your chicken and veggies well with seasoning. Mix them in a bowl before spreading them on the sheet pan. Toss them thoroughly with the olive oil, fajita seasoning, lime juice, salt, and pepper. This helps ensure that every piece has that bold taste. Stir halfway through baking too for even cooking. Recommended Equipment You need a few key items to make this dish shine. A large sheet pan is essential for even cooking and easy cleanup. A mixing bowl helps combine the ingredients. A meat thermometer ensures your chicken is perfectly cooked. Helpful Utensils Having the right utensils makes cooking smoother. Use a sharp knife for slicing chicken and veggies. A spatula helps flip and serve the fajitas. Tongs are great for mixing and serving too. Garnishes for Visual Appeal Adding garnishes makes your dish look fun and fresh. Sprinkle chopped cilantro on top for a pop of green. You can also add lime wedges on the side for a zesty finish. Serving Style Suggestions Serve your fajitas in warm tortillas. You can place all the ingredients on a platter for a family-style meal. Let everyone build their own fajitas. This not only looks great but also makes eating more fun! For the complete recipe, check out the Full Recipe. {{image_2}} Protein Alternatives You can switch the chicken for other proteins. Shrimp, beef, or tofu work well. Shrimp cooks fast and adds a nice touch. Beef gives a richer flavor. For a vegan option, tofu absorbs spices well. Seasonal Vegetable Options Feel free to mix in seasonal veggies. Zucchini, corn, or asparagus can add color and taste. Use what you have on hand. This keeps the meal fresh and exciting. Spicy Enhancements If you like heat, add sliced jalapeños or cayenne pepper. You can also use a spicy marinade. This will kick the flavor up a notch. Marinades and Seasoning Alternatives Experiment with different marinades. A citrus-based marinade brings brightness. Or try a smoky chipotle seasoning for depth. Mixing and matching keeps the dish lively. Gluten-Free Alternatives To make this gluten-free, use corn tortillas. Check labels on seasonings, too. Many brands offer gluten-free options. Vegetarian/Vegan Substitutions For a vegetarian option, use black beans or lentils. They add protein and texture. Tofu or tempeh can also replace chicken for a vegan meal. Enjoy the full flavors without meat. For the full recipe, be sure to refer back to the main section. After cooking, let your fajitas cool. This step is key for safe storage. Place them in an airtight container. Store them in the fridge. They will stay fresh for up to three days. Make sure to label the container with the date. This helps you keep track of freshness. For reheating, I recommend using the oven. Preheat it to 350°F (175°C). Spread the fajitas on a baking sheet. Heat them for about 10-15 minutes. This method keeps the chicken juicy and the veggies crisp. If you use a microwave, place fajitas in a microwave-safe dish. Cover it with a damp paper towel. Heat in 30-second bursts to avoid overcooking. You can freeze fajitas before or after cooking. If freezing before cooking, place the mixture in a freezer bag. Remove as much air as possible. If freezing after cooking, let them cool and pack them in a container. To thaw, place the bag in the fridge overnight. For reheating, use the oven or microwave as mentioned above. This keeps the flavor and texture intact. How long do chicken fajitas take to cook? Chicken fajitas cook in about 20 to 25 minutes in the oven. Set the oven to 425°F (220°C). The chicken should be cooked through and the veggies tender. Can I use frozen chicken? Using frozen chicken is not the best choice for this recipe. It may not cook evenly and could take longer. Thaw the chicken first for best results. What can I serve with chicken fajitas? You can serve chicken fajitas with tortillas, guacamole, or salsa. Add fresh cilantro for flavor. A side salad also pairs well. Can I make fajitas in advance? Yes, you can prep chicken and veggies ahead of time. Store them in the fridge. Cook them when you are ready to eat. This saves time on busy nights. How do I know when the chicken is done? Check if the chicken is no longer pink inside. Use a meat thermometer to ensure it reaches 165°F (74°C). This keeps your meal safe and tasty. What can I use instead of fajita seasoning? If you lack fajita seasoning, mix chili powder, cumin, garlic powder, and paprika. This blend gives a similar flavor to your fajitas. Are there any low-carb alternatives for tortillas? Yes, you can use lettuce wraps for a low-carb option. They hold the filling well and add a fresh crunch. Zucchini or bell pepper slices also work great. For the complete cooking guide, check the Full Recipe for more details. To sum up, making sheet pan chicken fajitas is simple and fun. We covered the key ingredients, step-by-step cooking instructions, and great tips for success. You can customize your dish with various proteins and veggies to suit your taste. Remember to store leftovers properly and use reheating methods that keep flavors strong. Now, grab your ingredients and enjoy cooking a delicious meal that everyone will love!

Sheet Pan Chicken Fajitas Fast and Flavorful Meal

Looking for a quick and tasty dinner? You’re in the right place! This Sheet Pan Chicken Fajitas recipe packs flavor

- 1 pound baby carrots, rinsed and trimmed - 3 tablespoons honey - 3 tablespoons olive oil - 4 cloves garlic, minced - 1 teaspoon fresh thyme leaves (or ½ teaspoon dried thyme) - Salt and pepper to taste - Lemon zest for garnish - Honey alternatives: agave syrup, maple syrup - Olive oil substitutions: vegetable oil, melted butter When I make honey garlic roasted carrots, I love using fresh baby carrots. They are sweet and tender. Rinsing and trimming them helps remove dirt and ensures they cook evenly. For the sweet glaze, I use honey. It adds a lovely touch. If you need a change, agave syrup or maple syrup works well too. They bring sweetness without losing flavor. Olive oil is my go-to for roasting. It helps the carrots caramelize nicely. But if you run out, vegetable oil or melted butter works too. Each option will still taste great. Garlic brings a rich flavor to the dish. I use fresh minced garlic for the best taste. You can also swap it with garlic powder in a pinch, but fresh is always better. Thyme adds a nice herbal note. I prefer fresh thyme leaves, but dried thyme will do. Just remember to use less when using dried, as it’s more potent. Salt and pepper are essential for balance. Add them to your taste. Lastly, lemon zest gives a bright finish. It makes the dish pop with freshness. With these ingredients, you can whip up a delicious side dish that everyone will love. For the full recipe, check out the detailed steps. - Preheat the oven to 400°F (200°C). - Line a baking sheet with parchment paper for easy cleanup. - In a large bowl, mix honey, olive oil, minced garlic, thyme, salt, and pepper. Whisk until it’s smooth. - Add the baby carrots to the bowl. Toss them well in the honey-garlic mixture. - Spread the carrots out in a single layer on the baking sheet. Roast them in the oven for 25-30 minutes. Stir them halfway through for even cooking. - When the carrots are tender and caramelized, take them out of the oven. - Drizzle any leftover honey-garlic sauce over the carrots. - For a fresh touch, sprinkle lemon zest on top before serving. For the full recipe, refer to the Honey Garlic Roasted Carrots section. To get that nice, sweet caramelization, follow these simple steps. First, make sure your oven is preheated to 400°F (200°C). This heat helps the carrots cook and brown well. Next, spread the carrots in a single layer on the baking sheet. This allows hot air to move around each carrot, giving you a perfect roast. Remember, if the carrots are crowded, they will steam instead of roast. Even coating with the honey-garlic mixture is crucial. When you mix the honey, olive oil, garlic, and spices, really toss the carrots well. You want each carrot to get a good amount of flavor. If some carrots have more sauce than others, they may not roast evenly. So, take your time mixing to achieve that delicious taste throughout. Honey garlic roasted carrots pair well with many dishes. They make a great side for roasted chicken, grilled fish, or even a hearty veggie main dish. The sweet and savory taste complements savory meals perfectly. For a stunning presentation, use a nice serving dish. Arrange the carrots in a colorful way. Drizzle any leftover sauce over the top and sprinkle some lemon zest for a pop of color and flavor. This small touch makes your dish look fancy and inviting. For the full recipe, check out the detailed instructions above. {{image_2}} You can elevate the taste of honey garlic roasted carrots with some simple tweaks. Adding spices like paprika, cumin, or cayenne can enhance the flavor. Each spice brings its own unique kick. For a sweet and smoky flavor, try smoked paprika. If you want some heat, a pinch of cayenne does the trick. Another fun idea is to incorporate nuts or seeds for crunch. Chopped walnuts or sunflower seeds add texture. Just sprinkle them on before serving. This mix of flavors and textures makes the dish even more enjoyable. You can also change how you cook honey garlic carrots for different flavors. Try grilling them for a smoky taste. Just toss the carrots in the honey-garlic mix and place them on the grill. They cook fast and get great grill marks. If you need a quick method, try using an Instant Pot. This method cooks the carrots fast and keeps them tender. Just add the carrots and the honey-garlic mix into the pot. Pressure cook for about 3 minutes, and you have a tasty side dish in no time! For the full recipe, check out the details above. To keep your honey garlic roasted carrots fresh, use airtight containers. Glass or plastic containers work well. Make sure they are sealed tightly. Store them in the fridge for up to four days. This way, you can enjoy them later without losing flavor. When you're ready to enjoy your leftovers, the best way to reheat them is in the oven. Preheat the oven to 350°F (175°C). Spread the carrots on a baking sheet. Bake for about 10-15 minutes. This method helps them stay crisp and warm. To avoid sogginess, don’t cover the carrots while reheating. If you’re short on time, you can use the microwave. Heat them in short bursts, stirring in between. Just be careful not to overdo it, or they may become mushy. For more details, check the Full Recipe for this tasty dish! Can I use other types of carrots? Yes, you can use other carrots. Regular carrots work well, too. Just cut them into similar sizes for even cooking. You can also try rainbow carrots for a colorful dish. How to make honey garlic roasted carrots vegan? To make this dish vegan, replace honey with maple syrup or agave syrup. This swap keeps the sweet taste while making it plant-based. You can use the same amount for the best flavor. Can I prepare this dish ahead of time? Yes, you can prep the carrots ahead of time. Just toss them in the honey-garlic mixture and store them in the fridge. Roast them just before serving for the best taste. What are the nutritional benefits of carrots? Carrots are rich in vitamins A, K, and C. They support eye health and boost your immune system. They are low in calories and high in fiber, making them great for digestion. How to tell if roasted carrots are done? Roasted carrots are done when they are tender and caramelized. You can test this by piercing them with a fork. If it goes in easily, they are ready. Look for a nice golden color, too. You learned how to make delicious honey garlic roasted carrots. We covered ingredients, cooking steps, and tips. You can swap honey for agave or use vegetable oil instead. Try these carrots with your favorite dishes for a tasty side. Remember the storage tips to keep leftovers fresh. Feel free to experiment with flavors or cooking methods to make it your own. Enjoy roasting!

Honey Garlic Roasted Carrots Easy and Flavorful Dish

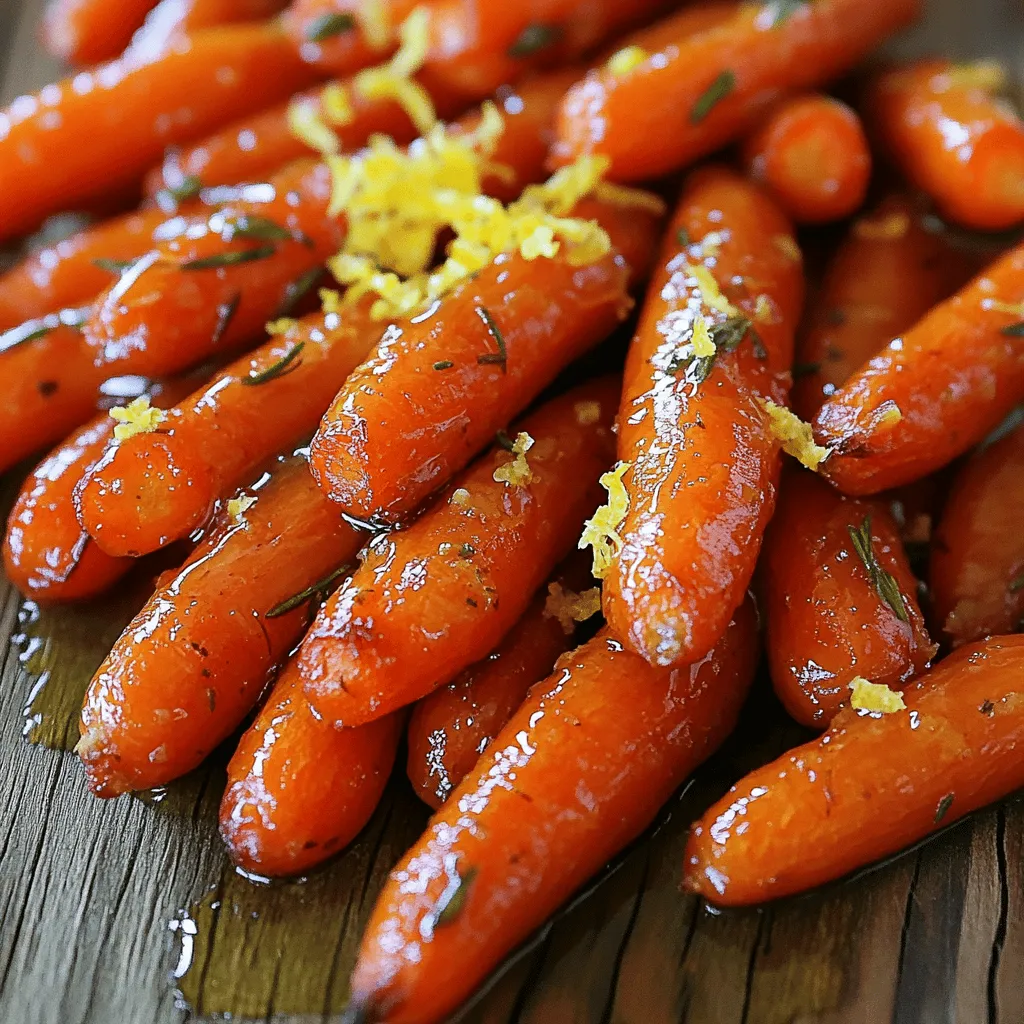
Looking for a simple yet delicious way to elevate your vegetable game? Honey Garlic Roasted Carrots are the perfect answer!

- Whole-grain bread - Ripe avocado - Eggs For this avocado toast with poached egg, the main ingredients are simple yet flavorful. The whole-grain bread gives a hearty base. It adds fiber and nutrients to your meal. Choose fresh, ripe avocado for the best taste. It should be creamy and slightly soft. Eggs are the star of this dish. They provide protein and richness. - Lemon juice - Red chili flakes - Fresh herbs You can add lemon juice for a bright flavor. It also helps the avocado stay fresh. Red chili flakes add a nice kick. Use fresh herbs like parsley or cilantro for a burst of color and taste. These optional add-ins let you customize your toast to your liking. - Salt and pepper Don’t forget the basics: salt and pepper. These seasonings will enhance all the flavors. Just a pinch of each is enough to make your dish shine. Season your avocado spread to suit your taste. This step is key for a delightful meal. For the full recipe, check the Avocado Toast Delight with Poached Egg section. Enjoy your cooking! Start by toasting two slices of whole-grain bread. Use a toaster or skillet to make them golden and crispy. Whole grain adds flavor and texture. It also gives you fiber and nutrients. I like to toast my bread just until it has a nice crunch. This will hold the avocado well. Next, grab a ripe avocado. Cut it in half and remove the pit. Scoop the green flesh into a bowl. Mash it up with a fork until creamy. Add one tablespoon of lemon juice. This keeps the avocado fresh and bright. Season it with salt and pepper to taste. You can also add red chili flakes for some heat if you like. Now, let’s poach the eggs. Fill a pot with about three inches of water. Bring it to a gentle simmer. Add one tablespoon of white vinegar. This helps the eggs keep their shape. Crack each egg into a small bowl. Gently slide the egg into the water. Do this one at a time. Poach the eggs for about three to four minutes. You want the whites set and yolks runny. Use a slotted spoon to remove the eggs. Let any excess water drain off. Now that you have your toast, avocado spread, and perfectly poached eggs, it’s time to assemble! Spread the mashed avocado on each slice of toast, then top with the poached egg. Enjoy your tasty and simple meal! For the full recipe, check the previous section. To get that perfect runny yolk, timing is key. Cook the egg for just 3-4 minutes. The whites should set, while the yolk stays soft. This gives you that delightful, creamy texture. Using vinegar helps the egg whites stay together. It makes a neater poached egg. Add about one tablespoon of white vinegar to your simmering water. This small step can really make a difference. You can get creative with your toppings! Here are some ideas: - Sliced radishes for a crunchy bite. - Feta cheese adds a creamy and salty flavor. - Smoked salmon gives a rich taste that pairs well with avocado. - Sliced tomatoes bring freshness and color. - Diced jalapeños for a spicy kick. Mix and match these toppings to make your toast unique. Pair your avocado toast with drinks like: - Freshly squeezed orange juice for a bright start. - A cup of herbal tea for a calming touch. - Smoothies packed with fruits for a nutrient boost. You can also serve it with a side of mixed greens. This adds a fresh crunch to your meal. Enjoy your tasty avocado toast with poached egg! For the full details and steps, check the Full Recipe. {{image_2}} This dish packs a punch with flavor and nutrition. Each serving of avocado toast with poached egg contains around 350 calories. The whole-grain bread adds fiber, while the avocado contributes healthy fats. The egg provides protein, making this meal both filling and satisfying. Avocados are nutrient powerhouses. They are rich in monounsaturated fats, which are good for your heart. They also contain vitamins E, K, and B6, which help support skin and brain health. Eggs are a great source of protein and contain choline, which is vital for brain function. Whole-grain bread adds fiber, aiding digestion and keeping you full longer. If you follow a gluten-free diet, you can easily swap the whole-grain bread for gluten-free bread. Many brands offer tasty alternatives that provide a similar texture and flavor. This meal can fit into various diets, making it a versatile choice for everyone. If you want to keep things light, you can also enjoy the avocado and poached egg on its own, skipping the bread altogether. For the full recipe, check out the [Full Recipe]. To keep your avocado toast fresh, store it in separate parts. Avocado turns brown quickly. To slow this down, place the leftover avocado in an airtight container. Squeeze a bit of lemon juice over it. This helps keep the color bright. For the toast, wrap it tightly in plastic wrap or place it in a container. This keeps it from getting stale. When reheating, aim to maintain the toast's crispiness. Preheat your oven to 350°F (175°C). Place the toast on a baking sheet. Heat for about 5-7 minutes until warm. Avoid microwaving, as this can make the bread soggy. If you've stored the poached eggs, you can reheat them in hot water. Just drop them in for about 1-2 minutes to warm them up without cooking them further. Freezing poached eggs is not recommended. The texture changes when thawed. Instead, cook the eggs fresh as needed. If you want to freeze avocado, mash it first and add lemon juice. Place it in a freezer-safe bag, removing as much air as possible. This keeps it good for about 3-6 months. You can then thaw it in the fridge before using. For the full recipe, check the link for details. You can poach eggs without vinegar by using a few easy tricks. One method involves using a silicone mold. Place the mold in simmering water, crack an egg into it, and cover. This keeps the egg's shape neat. Another method is to stir the water to create a whirlpool. Crack the egg in the center. The motion helps the egg white wrap around the yolk. For both methods, keep the water at a gentle simmer. This helps cook the eggs evenly. You want the whites firm and the yolks runny. Yes, you can use many types of bread for avocado toast. Sourdough adds a nice tang. Rye bread gives a hearty flavor. Gluten-free bread is great for those with dietary needs. You can also try bagels or English muffins. Each choice can change the taste and texture. Experiment to find your favorite! There are many tasty ways to add protein to your avocado toast. Here are some ideas: - Eggs: Poached, fried, or scrambled eggs work well. - Greek yogurt: Spread it on top for creaminess. - Nuts or seeds: Sprinkle chia seeds or chopped nuts for crunch. - Cottage cheese: This adds flavor and protein. - Smoked salmon: A rich, savory topping. Mix and match toppings to keep your meals exciting. For more ideas, check out the Full Recipe! Avocado toast is simple to make with main ingredients like whole-grain bread, ripe avocado, and eggs. Optional add-ins, such as lemon juice or fresh herbs, take it to the next level. Remember to toast your bread and master poaching eggs for the best results. In summary, this dish is quick, tasty, and healthy. Experiment with variations and toppings to suit your taste. Enjoy exploring options that fit your diet and elevate your avocado toast game!

Avocado Toast with Poached Egg Tasty and Simple Meal

Looking for a quick, tasty meal that packs a punch? Avocado Toast with Poached Egg might be your new go-to!

- Pasta of your choice (8 oz) - Olive oil (1 tablespoon) - Garlic (3 cloves, minced) - Diced tomatoes (1 can, 14 oz, undrained) - Fresh spinach (1 cup, chopped) - Heavy cream or coconut cream (1/2 cup) - Grated Parmesan cheese (1/2 cup) - Nutritional yeast (for vegan option) - Salt and pepper to taste - Red pepper flakes (1/4 teaspoon, optional) - Fresh basil leaves for garnish For this creamy tomato spinach pasta, I love to keep it simple and fresh. First, I choose my pasta, usually penne or fettuccine, for that perfect bite. Then, I heat olive oil in a pan and add minced garlic, which fills the room with a warm, inviting aroma. The diced tomatoes add a burst of flavor, and I let them simmer to blend all the goodness. Next, I toss in fresh spinach. It wilts down quickly, adding a lovely color and nutrients. Heavy cream or coconut cream gives that rich, creamy texture. Parmesan cheese melts in beautifully, making the dish even more indulgent. I always keep salt and pepper handy for seasoning. A dash of red pepper flakes can bring a little heat if you like. Finally, I finish it off with fresh basil leaves for a pop of freshness. This simple yet tasty recipe captures the essence of comfort food, perfect for any night of the week. You can find the full recipe [here](#). - Start by boiling salted water in a large pot. - Add 8 oz of your favorite pasta. - Cook the pasta until it is al dente, about 8-10 minutes. - Before draining, reserve about 1/2 cup of the pasta water. - Drain the pasta and set it aside. - In the same pot, heat 1 tablespoon of olive oil over medium heat. - Add 3 cloves of minced garlic and sauté for 30 seconds. - Stir in 1 can of diced tomatoes, undrained. - Let the mixture simmer for about 5 minutes, stirring occasionally. - Lower the heat and pour in 1/2 cup of heavy cream. - Stir well and let it simmer for 2-3 minutes until thick. - Add 1 cup of chopped fresh spinach and stir until it wilts. - Mix the cooked pasta into the sauce, coating it well. - If the sauce is too thick, add some reserved pasta water to adjust. - Finally, stir in 1/2 cup of grated Parmesan cheese and season with salt and pepper. - Serve hot, garnished with fresh basil leaves. For more details and variations, check the Full Recipe. To make your sauce thick and creamy, you can use a few techniques. First, let the sauce simmer longer. This helps reduce the liquid and concentrate the flavors. You can also use less cream. Try adding a bit of flour or cornstarch mixed with water for thickness. To boost flavor without adding calories, think about using herbs and spices like basil or oregano. A squeeze of lemon juice can also brighten the sauce without extra fat. Cooking pasta is key to your dish’s success. Always boil your pasta in salted water. This adds flavor from the start. Cook it until it is al dente, which means firm to the bite. This gives the best texture. Remember to save some pasta water before draining. This water is starchy and can help adjust the sauce’s thickness later. Presentation matters! Serve your creamy tomato spinach pasta in a wide bowl to show off its colors. Top it with fresh basil leaves for a pop of green. Sprinkling extra cheese on top adds a nice touch too. For side dishes, consider a crisp salad or garlic bread. These add texture and balance to your meal. Looking for something lighter? A simple steamed vegetable can be a perfect match. For the full recipe, check out the steps to create this delicious dish! {{image_2}} You can make this dish even tastier with more veggies. Add mushrooms for an earthy taste. Bell peppers bring a nice crunch and sweetness. Try mixing in zucchini or asparagus for color and flavor. For cheese, you have choices! Use mozzarella for a gooey texture. Feta adds a salty kick. Goat cheese can give a tangy twist to your pasta. Pick what you like best. If you want a vegan version, swap heavy cream for coconut cream. This gives a rich, creamy feel. Nutritional yeast is a great cheese substitute and adds a nutty flavor. You can also use herbs like oregano and thyme. These add depth to the dish. A pinch of smoked paprika will give a hint of warmth. Want to boost the protein? Add grilled chicken or shrimp for a savory touch. Cook them in the pan before adding the sauce. You can also use beans like chickpeas for a plant-based option. Just stir them in when you mix the pasta and sauce. This keeps everything simple and quick. For all the variations, I suggest checking the full recipe for details. Store your creamy tomato spinach pasta in a tight container. This keeps it fresh. It will last for up to three days in the fridge. Make sure it cools down before sealing it. This step helps prevent sogginess. To reheat pasta, use a pan on low heat. Add a splash of water or cream. This helps keep the pasta moist. Stir gently to mix the sauce back in. If you use the microwave, cover the bowl. This traps steam and helps warm the dish evenly. Yes, you can freeze creamy tomato spinach pasta! To freeze, let it cool completely first. Lay it flat in a freezer bag to save space. When you’re ready to eat, take it out and thaw overnight in the fridge. Reheat on the stove with a bit of water or cream for best results. To get the full recipe, click [Full Recipe]. Yes, you can use whole wheat pasta. It adds more fiber and nutrients. The taste is a bit nuttier. Cook it the same way as regular pasta. You may need extra water for the sauce. Whole grain pasta can be a healthy choice. You have many options. For a dairy-free choice, use coconut cream. It gives a nice flavor. You can also try cashew cream or almond milk. Both can work well. If you want low-fat, use half-and-half for a lighter sauce. To add heat, use red pepper flakes. Add more if you like it spicy. You can also use hot sauce or diced jalapeños. Other spices like cayenne pepper work too. These will enhance the flavor and kick up the heat. Salads are great with this pasta. A fresh green salad with a light dressing works well. Garlic bread is another tasty option. It’s perfect for soaking up the sauce. Grilled chicken or shrimp can add protein and make a fuller meal. Yes, you can make this recipe gluten-free. Use gluten-free pasta made from rice or corn. Always check the label to ensure it’s safe. For the sauce, make sure no gluten-containing ingredients are used. This way, everyone can enjoy the dish. For the full recipe, check out the detailed instructions above. This blog post shared all you need for making creamy tomato spinach pasta. We covered key ingredients, from pasta to spices. I detailed step-by-step instructions, tips for better sauce, and serving ideas. You also learned storage tips and fun recipe variations. Incorporating these elements will help you create a delicious dish that fits your taste. Enjoy experimenting with flavors and sharing this meal with others. Cooking can be simple and fun!

Creamy Tomato Spinach Pasta Simple and Tasty Recipe

Are you ready to whip up a delicious dish in no time? My Creamy Tomato Spinach Pasta is a simple,

To make a rich and creamy chocolate avocado mousse, you only need a few key ingredients: - 2 ripe avocados - 1/2 cup unsweetened cocoa powder - 1/4 cup maple syrup (or honey) - 1/4 cup almond milk (or any milk of choice) - 1 teaspoon vanilla extract - A pinch of salt - Dark chocolate shavings (for garnish) - Fresh mint leaves (for garnish) Each ingredient plays a role in creating a luscious dessert. The avocados give the mousse its smooth texture and healthy fats. Cocoa powder brings that deep chocolate flavor. Maple syrup sweetens the mix, while almond milk helps blend everything together. Avocados are not just tasty; they also pack a health punch. They are high in good fats, vitamins, and fiber. Eating avocados can help with heart health and weight control. They add creaminess without using heavy cream. This makes them a great choice for desserts. In this mousse, avocados provide nutrients while keeping the dessert light. You get to enjoy a sweet treat without the guilt. Plus, it’s a fun way to sneak in some healthy ingredients. While the mousse is delicious on its own, you can make it even better with some garnishes. Here are a few ideas: - Dark chocolate shavings add a rich touch and look beautiful. - Fresh mint leaves give a pop of color and a fresh taste. - A sprinkle of sea salt can enhance the chocolate flavor. You can also mix in some spices like cinnamon for a warm twist. Or, try adding a scoop of nut butter for extra creaminess. Get creative and make this mousse your own! For the complete recipe, check out the Full Recipe section. Gather your ingredients first. You need: - 2 ripe avocados - 1/2 cup unsweetened cocoa powder - 1/4 cup maple syrup (or honey) - 1/4 cup almond milk (or any milk of choice) - 1 teaspoon vanilla extract - A pinch of salt - Dark chocolate shavings (for garnish) - Fresh mint leaves (for garnish) Next, slice the avocados in half. Remove the pits carefully. Use a spoon to scoop the green flesh into a blender or food processor. This step is vital for a creamy texture. Add the cocoa powder to the avocados in the blender. Pour in the maple syrup, almond milk, vanilla extract, and a pinch of salt. This mix creates a rich flavor. Blend everything until it is smooth. Stop to scrape the sides as needed. Make sure all ingredients blend well. Taste the mousse. If you want it sweeter, add more maple syrup. Blend again for a few seconds. The mousse should be thick and creamy, just like a dessert should be. Transfer it into serving bowls or cups. Chill the mousse in the refrigerator for at least 30 minutes. This wait helps the flavors blend and the mousse thicken. Serve it in elegant bowls for a treat. Before serving, garnish with dark chocolate shavings and fresh mint leaves. This adds a nice touch. Enjoy this rich and creamy delight! For the full recipe, check out the details above. To get that rich and creamy texture, blend the ingredients well. Use ripe avocados for the best results. They add a smoothness that you just can't beat. If the mousse is too thick, add a bit more almond milk. Blend again until it’s silky and light. Remember, you want a texture that feels like a cloud on your tongue. Taste your mousse after blending. If you want it sweeter, add more maple syrup. Start with a tablespoon and blend again. You can also try honey for a different flavor. If you like it less sweet, skip the extra syrup. This recipe is flexible, so make it your own! Presentation is key to impressing your guests. Serve the mousse in small cups or bowls to make it look fancy. Top it with dark chocolate shavings and fresh mint leaves for a pop of color. You can also add berries for a fun twist. This mousse is great for parties, or just a treat for yourself. For the full recipe, check out the details above. {{image_2}} You can make chocolate avocado mousse even better by adding spices. A pinch of cinnamon gives warmth. You might also try cayenne pepper for a little heat. Cardamom can add a nice floral note. Just add a small amount and taste as you go. If you need a vegan option, this recipe is already vegan-friendly. Use maple syrup and almond milk to keep it plant-based. For a nut-free version, swap almond milk for oat or soy milk. This way, everyone can enjoy the mousse without worry. Maple syrup is a great choice, but you have options. You can use agave nectar for a thinner sweetener. Honey works too, but it is not vegan. If you like a lower-calorie option, try stevia or monk fruit sweetener. Adjust the amount based on your taste. I recommend trying these variations to find your perfect flavor! For the full experience, check the Full Recipe. To keep your leftover mousse fresh, store it in an airtight container. Make sure to cover the surface with plastic wrap to avoid air exposure. This helps prevent browning and keeps the mousse creamy. You can store it in the fridge for up to three days. When you're ready to enjoy it again, give it a little stir for a smooth texture. The mousse lasts about three days in the fridge. If you want to save it longer, you can freeze it. Place the mousse in a freezer-safe container. It’s best to leave some space at the top since it will expand when frozen. You can freeze it for up to one month. When you’re ready to eat it, move it to the fridge to thaw overnight. If you have leftover mousse, use it creatively! Spread it on toast or pancakes for a rich treat. You can also layer it in parfaits with yogurt and granola. Want something fun? Use it as a filling for cupcakes or pastries. The options are endless! Yes, you can use regular chocolate. Just melt it first. Use about 4 ounces. This gives a rich flavor. However, cocoa powder keeps the mousse lighter. Both options taste great. Absolutely! This recipe is vegan-friendly. It uses avocados, cocoa powder, and maple syrup. These ingredients are all plant-based. You can enjoy this mousse without any animal products. Avocados add a creamy texture. They have a mild taste that blends well. You won't taste the avocado much. Instead, the chocolate shines through. It makes the mousse rich and smooth. Yes, you can make this mousse ahead of time. It keeps well in the fridge. Just cover it with plastic wrap. It tastes even better after chilling. You can enjoy it later, too! For the full recipe, check out the recipe section above. This blog post shared how to make a delicious mousse with avocado. We covered the key ingredients and their health benefits. You learned step-by-step instructions and helpful tips to create the perfect dessert. Variations let you customize this treat to your taste or diet. Finally, we discussed storage tips to keep leftovers fresh. You now have all the tools to enjoy this healthy dessert. Get creative and share your tasty results. Enjoy your mousse and the benefits of avocados!

Chocolate Avocado Mousse Rich and Creamy Delight

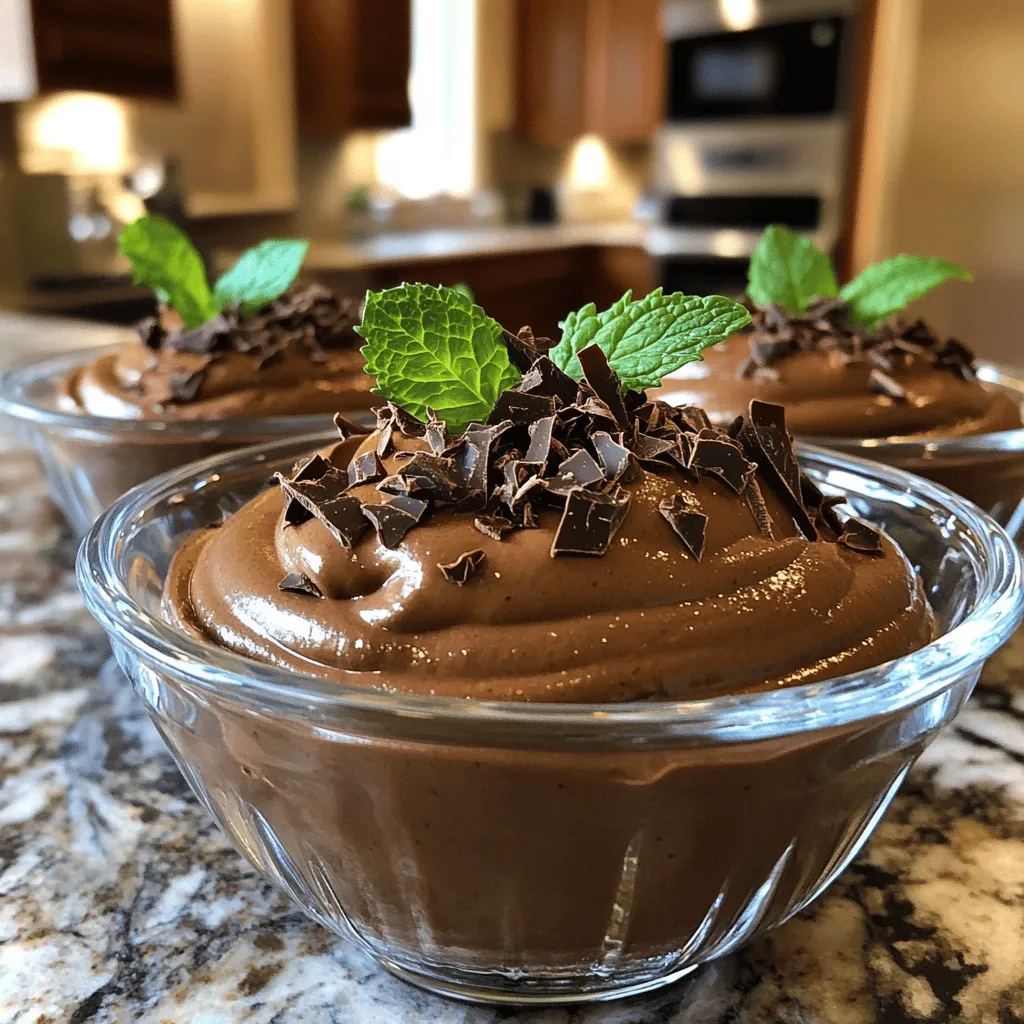
Indulging in a rich, creamy dessert doesn’t have to mean compromising on health. This Chocolate Avocado Mousse combines delicious chocolate

- 1 can (15 oz) chickpeas, drained and rinsed - 1 cucumber, diced - 1 cup cherry tomatoes, halved - 1 red bell pepper, diced - 1/4 red onion, finely chopped - 1/2 cup Kalamata olives, pitted and sliced - 1/4 cup feta cheese, crumbled - 1/4 cup fresh parsley, chopped - 2 tablespoons olive oil - 1 tablespoon lemon juice - 1 teaspoon dried oregano - Salt and pepper to taste When I make Mediterranean Chickpea Salad, I love using fresh, high-quality ingredients. The chickpeas are the star, bringing protein and a creamy texture. Rinsing them well makes all the difference. The cucumber adds crunch and coolness, while cherry tomatoes bring sweetness. Red bell pepper provides color and a hint of spice. Each bite bursts with flavor. For extra depth, I add finely chopped red onion. It gives a nice sharpness. Kalamata olives introduce a briny taste, making the salad feel more authentic. Crumbled feta cheese adds creaminess and tang, which I adore. The fresh parsley brightens everything up, making each forkful vibrant. To dress this salad, I simply whisk together olive oil, lemon juice, dried oregano, salt, and pepper. This mix ties everything together. The lemon juice adds a fresh zing that balances the richness of the feta. I often let the salad sit for a bit. This way, all the flavors meld together beautifully. If you want to make it even more special, check the [Full Recipe] for tips on preparation and serving. Enjoy this fresh and colorful dish! To start, gather your ingredients. You will need chickpeas, cucumber, tomatoes, bell pepper, and onion. Combine them in a large bowl. This mix gives the salad a fresh crunch. Next, add olives and feta cheese to the mixture. The olives add a salty bite, while the feta gives a creamy touch. Now, let’s make a simple dressing. In a small bowl, whisk together olive oil, lemon juice, oregano, salt, and pepper. This dressing is the heart of the salad. It brings all the flavors together. The lemon juice adds brightness, while the oregano adds that classic Mediterranean taste. Finally, pour the dressing over your mixture. Toss gently to coat everything evenly. Be careful not to mash the chickpeas. After tossing, fold in the fresh parsley. This adds a pop of green and freshness. You can now taste the salad and adjust the seasoning if needed. Let it sit for 15 minutes. This allows all the flavors to meld perfectly. For the full recipe, check the instructions above. For a lovely presentation, serve the salad in a large shallow bowl. Sprinkle extra parsley on top for a fresh look. You can add whole Kalamata olives as a colorful touch. This dish pairs well with warm pita bread or grilled chicken. You can also serve it alongside a light soup for a delightful meal. To deepen the flavors, let the salad marinate for at least 15 minutes. This resting time allows the ingredients to mix well. You can adjust the seasoning for your taste. If you like it zesty, add more lemon juice. For a saltier kick, sprinkle in more feta cheese or olives. To save time, chop all your veggies before mixing. You can prepare the salad dressing while you cut the vegetables. For batch preparation, double the recipe and keep extra in the fridge. The salad will stay fresh for up to three days. Just remember to add the parsley right before serving for the best taste. {{image_2}} You can swap chickpeas for other beans if you want. Black beans or white beans work well. If you need a nut-free option, try using cooked quinoa instead of chickpeas. This keeps the texture nice while changing the flavor. Adding more veggies boosts nutrition and taste. Think about adding carrots, spinach, or even zucchini. These veggies blend well with the salad and add color. You can also use avocados for a creamy touch and healthy fats. A good dressing makes the salad shine. Try a balsamic vinaigrette for a sweet twist. You can also use tahini for a nutty flavor. Blend in garlic for a bold kick. Spice levels can change your salad's vibe. Add chili flakes for heat or herbs for freshness. Fresh basil or mint can bring a lovely aroma. Experimenting with spices keeps it exciting and fun! This salad is already vegan and gluten-free! To keep it vegan, skip the feta cheese or use a plant-based alternative. For added protein, toss in some nuts or seeds. Want to add superfoods? Chia seeds or hemp seeds are great options. They boost nutrition without altering the flavor too much. This makes your salad even healthier and more satisfying. To keep your Mediterranean Chickpea Salad fresh, store it in an airtight container. This helps keep out air and moisture. Glass containers work best, but plastic ones are fine too. Place the salad in the fridge right after serving. This slows down spoilage and keeps the flavors intact. You can serve the salad cold or at room temperature. If it’s been in the fridge, let it sit for about 10 minutes before serving. This helps the flavors blend again. You may want to add a splash of olive oil or lemon juice after storage. This can revive the taste and texture. The salad stays fresh for about three days in the fridge. After this time, it may lose its crispness. Check for signs of spoilage. If it smells sour or looks slimy, it’s best to toss it. Trust your senses; they guide you well in the kitchen. For more details on making this dish, check out the Full Recipe. Can I use dried chickpeas instead of canned? Yes, you can use dried chickpeas. Just soak them overnight and cook them until soft. This takes more time but adds a fresh taste. How long can I make this salad in advance? You can make this salad a day ahead. It stays fresh for about three days in the fridge. Just keep the dressing separate until serving. What can I substitute for feta cheese? If you can't eat feta, try using goat cheese or a dairy-free cheese. Both options will keep the salad tasty. What are the health benefits of chickpeas? Chickpeas are great for health! They provide fiber, iron, and folate. These nutrients help with digestion and keep your heart strong. Is Mediterranean Chickpea Salad a good source of protein? Yes, this salad is a good source of protein. Chickpeas offer plant-based protein, making it a filling meal option. How can I make this salad more filling? To make this salad more filling, add quinoa or cooked grains. You can also include diced avocado or grilled chicken for added protein. Can I omit any ingredients and still keep the flavor? Yes, you can leave out some ingredients. If you skip the feta, use extra olives. This will keep the flavor rich and delicious. You now have a tasty Mediterranean Chickpea Salad recipe. This salad combines fresh veggies, chickpeas, and a zesty dressing. Remember, you can customize it to fit your taste. Try different dressings or swap ingredients for variety. Proper storage keeps it fresh longer, making it easy to enjoy anytime. Overall, this salad is not only healthy but also fun to make. Enjoy your cooking and exploring different flavors!

Mediterranean Chickpea Salad Fresh and Flavorful Dish

Are you ready for a taste of the Mediterranean? This Fresh Mediterranean Chickpea Salad bursts with vibrant flavors and healthy

To make a savory shrimp and grits casserole, you need the following ingredients: - 1 pound large shrimp, peeled and deveined - 1 cup grits (stone-ground preferred) - 4 cups of chicken broth - 1 cup shredded cheddar cheese - 1/2 cup heavy cream - 1/4 cup butter - 1 medium onion, finely chopped - 1 red bell pepper, diced - 2 cloves garlic, minced - 2 teaspoons Cajun seasoning - Salt and pepper to taste - 2 green onions, sliced (for garnish) When choosing your ingredients, some brands stand out for quality: - For shrimp, look for Wild American Shrimp. They are fresh and tasty. - For grits, I recommend Anson Mills. Their stone-ground grits are top-notch. - For chicken broth, Swanson’s Natural Goodness is a great choice. - Use Cabot cheddar cheese for a sharp flavor. - For Cajun seasoning, Tony Chachere’s is a classic and adds the right kick. You can swap out some ingredients if needed: - If you don’t have shrimp, try using chicken or a plant-based protein. - If you want a lighter version, substitute heavy cream with half-and-half. - You can use vegetable broth instead of chicken broth for a vegetarian option. - For a dairy-free choice, use vegan cheese and butter alternatives. - If you prefer milder flavors, skip the Cajun seasoning and use Italian herbs instead. Feel free to check the Full Recipe for more details and cooking tips! 1. Preheat your oven to 350°F (175°C). This helps the casserole cook evenly. 2. Boil chicken broth in a medium saucepan. Add 1 cup of grits and stir well. 3. Reduce heat to low and let the grits simmer. Stir often for about 20-25 minutes. They should thicken nicely. 4. Remove from heat and mix in 1/4 cup of butter, 1 cup of cheddar cheese, and 1/2 cup of heavy cream. Add 2 teaspoons of Cajun seasoning, salt, and pepper. Set this aside. 5. Heat a large skillet on medium heat. Add 1 medium chopped onion and 1 diced red bell pepper. Sauté until they soften, about 5 minutes. 6. Stir in 2 minced garlic cloves and cook for another minute. Then, add the shrimp. Sauté until they turn pink and curl, about 3-4 minutes. Season with a pinch of salt and pepper. 7. Combine the cooked grits and the shrimp mixture in a large bowl. Stir until everything is well mixed. 8. Pour the mixture into a greased 9x13 inch casserole dish. Smooth the top with a spatula. 9. Bake in the oven for 30 minutes. The top should be slightly golden and bubbly. 10. Let it cool for a few minutes after baking. Garnish with sliced green onions before serving. - Prep Time: 10 minutes - Cooking Time: 30 minutes - Total Time: 1 hour - Oven Temperature: 350°F (175°C) - The casserole should bubble up around the edges. - The top will have a slightly golden color. - If you insert a knife, it should come out clean. This shows the casserole is done. Following these steps will help you create a perfect Shrimp and Grits Casserole that is both tasty and satisfying. For the complete recipe, you can check the Full Recipe section. To make creamy grits, start with good quality grits. I prefer stone-ground grits. Use four cups of chicken broth for the best flavor. Bring the broth to a boil before adding the grits. Stir them in and lower the heat. Cook them for about 20 to 25 minutes. Stir often to avoid lumps. After they thicken, mix in butter, cheese, and heavy cream. This gives the grits a rich taste. For the shrimp, use fresh or frozen shrimp that are already peeled and deveined. Heat your skillet over medium heat to avoid overcooking. Sauté the onions and bell peppers first until soft. This takes about five minutes. Add the garlic next for flavor. Then, toss in the shrimp. Cook them until they turn pink, about three to four minutes. Avoid cooking them too long or they will get tough. One common mistake is using water instead of broth. It can make your grits bland. Another mistake is cooking the shrimp too long. They should be tender and juicy. Also, don’t forget to stir the grits often. This helps keep them smooth. Lastly, always taste for seasoning. Adjust salt and pepper to your liking, especially since the cheese and broth add saltiness. For the full recipe, check the details above. {{image_2}} To make a spicy version, add more Cajun seasoning or hot sauce. You can also mix in diced jalapeños for extra heat. This will give your dish a nice kick. Adjust the spice to suit your taste. Serve with a side of tangy coleslaw to cool things down. For a vegetarian take, swap shrimp with sautéed mushrooms or zucchini. You can use vegetable broth instead of chicken broth. Add some black beans for protein. This version still gives you the creamy grits you love, but without the seafood. Top with fresh herbs for added flavor. Pair your shrimp and grits casserole with a light salad. A fresh green salad dressed in lemon vinaigrette works well. You can also serve it with crusty bread to soak up the sauce. For drinks, a chilled white wine or iced tea complements the dish nicely. For the full recipe, refer to the instructions above. To keep your shrimp and grits casserole fresh, let it cool first. Place the leftovers in an airtight container. This will help keep the flavors intact. Store it in the fridge for up to three days. Always label the container with the date you made it. When you're ready to enjoy your leftovers, preheat the oven to 350°F (175°C). Place the casserole in an oven-safe dish. Cover it with foil to prevent it from drying out. Heat for about 20 minutes or until hot. You can also microwave individual portions for about 2-3 minutes. Stir halfway for even heating. If you want to freeze your casserole, cool it completely first. Then, wrap it tightly in plastic wrap and foil. This helps prevent freezer burn. You can freeze it for up to three months. To bake straight from the freezer, add an extra 15-20 minutes to the cooking time. Thaw in the fridge overnight for best results. For the full recipe, check out the instructions above. Making Shrimp and Grits Casserole takes about one hour. This includes prep and cooking time. You spend ten minutes getting everything ready. The grits need about twenty-five minutes to cook. Then, you’ll sauté the shrimp and mix it all together. Finally, bake the dish for thirty minutes. In total, it’s a quick and easy meal. Yes, you can make this dish ahead of time. Prepare the casserole up to the baking step. Cover it well and store it in the fridge. It will last for about one day. When you are ready to cook, just bake it. You may need to add a few extra minutes to the baking time. If you want to substitute shrimp, you have options. You can use chicken or sausage for a different flavor. For a vegetarian twist, try mushrooms or zucchini. These choices will give you a hearty meal without shrimp. Adjust your cooking time based on the substitute you choose. Yes, there is a gluten-free version of this recipe. Just use gluten-free grits instead of regular ones. Make sure your chicken broth is also gluten-free. This way, you can enjoy a tasty meal without gluten, keeping it safe for those with dietary needs. For the full recipe, check out the detailed cooking instructions. This blog post covered all you need for Shrimp and Grits Casserole. We explored ingredients and the best brands. I shared key steps and handy tips to get it just right. You can try fun variations and learn how to store leftovers well. Remember, cooking is about finding joy in every dish. Enjoy making your shrimp and grits, and bring a taste of comfort to your table.

Savory Shrimp and Grits Casserole Delicious Comfort Dish

If you’re craving a warm, comforting dish, look no further than my Savory Shrimp and Grits Casserole. This Southern classic

To make Spaghetti Aglio e Olio, you need just a few simple ingredients. Here’s what you will need: - 400g spaghetti - 6 cloves garlic, thinly sliced - 1/2 cup extra-virgin olive oil - 1 teaspoon red pepper flakes - 1 lemon, zested and juiced - 1/4 cup fresh parsley, chopped - Salt, to taste - Grated Parmesan cheese (optional) for serving - Lemon wedges for garnish These ingredients create a dish that is both simple and full of flavor. The garlic and olive oil form the base, while the lemon adds a bright touch. The red pepper flakes bring a bit of heat that makes each bite exciting. You can find the full recipe [here]. Make sure to use fresh parsley for the best taste. This dish is quick to make, so having everything ready before you start is key. Now that you know the ingredients, let’s dive into how to cook this delightful meal! - Bring a large pot of salted water to a boil. - Add spaghetti and cook until al dente, about 8-10 minutes. - Reserve 1 cup of pasta water, then drain the spaghetti. Cooking spaghetti is simple but key for a good dish. The water should taste like the sea. This adds flavor while cooking. Al dente means the pasta should still have a little bite to it. This gives the best texture. - Heat olive oil in a skillet over medium heat. - Sauté sliced garlic until golden brown, about 2-3 minutes. - Add red pepper flakes for added flavor. The olive oil should be hot but not smoking. Add the sliced garlic and stir often. You want it golden, not burnt. The red pepper flakes add a nice kick. Adjust the amount based on your taste. - Toss drained spaghetti with garlic oil. - Gradually mix in reserved pasta water. - Add lemon juice and zest, season with salt. This step is where the magic happens. The spaghetti absorbs the garlic oil. Mixing in the pasta water makes the sauce creamy. The lemon juice adds a zesty touch that wakes up the dish. - Stir in chopped parsley. - Serve immediately, garnish with Parmesan and lemon wedges. Chopped parsley adds color and freshness. A sprinkle of Parmesan gives that rich, cheesy flavor. Serve it hot with lemon wedges on the side. This dish is best enjoyed right away. For more details, check the Full Recipe. For authentic Spaghetti Aglio e Olio, I recommend using high-quality spaghetti. Look for thick strands that hold sauce well. If spaghetti isn't available, you can use linguine or fettuccine. Both options work great and still give you that lovely bite. Garlic is key in this dish. To avoid burnt garlic, keep the heat on medium. Stir the garlic often while it cooks. You want it golden, not brown. The perfect shade is light gold. This brings out a sweet flavor that blends well with the oil. Want more heat? Add extra red pepper flakes or even fresh chili. Fresh herbs like basil or thyme can add depth too. For toppings, consider grated Parmesan cheese or toasted breadcrumbs for crunch. Lemon zest brightens the dish, making it even more delicious. These tips will help you create a fantastic Spaghetti Aglio e Olio. For the full recipe, check out the details provided earlier. {{image_2}} To make Spaghetti Aglio e Olio heartier, you can add protein. Shrimp or chicken works well. For shrimp, cook them in olive oil until they turn pink. This takes about 3-4 minutes. For chicken, slice it thin and cook until golden brown. Then, mix it into the pasta when you toss everything together. This adds flavor and makes the meal more filling. You can also add seasonal vegetables to your dish. Think about using broccoli, bell peppers, or spinach. Just chop them up and add them to the boiling pasta for the last few minutes of cooking. This way, they stay bright and crisp. Adjust the cooking time slightly, so they don’t get too soft. Mixing veggies in gives a fresh taste and extra nutrients. To mix things up, add fun ingredients like sun-dried tomatoes or olives. They bring a unique flavor and color to the dish. Another option is to use flavored oils, like chili oil or garlic-infused oil, instead of plain olive oil. This can change the whole taste and make it exciting. Don’t be afraid to get creative with your Spaghetti Aglio e Olio! For the full recipe, check the earlier section. When you have extra spaghetti, store it in the fridge. Use an airtight container to keep it fresh. Make sure to cool it down first. This helps prevent sogginess. Use the leftovers within three days for the best taste. To reheat, use a skillet over low heat. Add a splash of olive oil or a bit of water. This keeps the noodles moist and tasty. Stir gently until heated through. For a fresh touch, add more parsley or lemon juice before serving. Yes, you can freeze Spaghetti Aglio e Olio. First, let it cool completely. Then, place it in a freezer-safe container. Seal it tightly to avoid freezer burn. To thaw, move it to the fridge overnight. Reheat it gently as mentioned above. This keeps your meal delicious! Spaghetti Aglio e Olio hails from Naples, Italy. It began as a simple dish for the poor. Cooks used available ingredients: garlic, olive oil, and pasta. Over time, it gained popularity beyond its roots. This dish celebrates bold flavors and quick prep. It's a staple in homes and restaurants alike. Yes, you can easily make Spaghetti Aglio e Olio vegan. Simply skip the Parmesan cheese or use a vegan alternative. Nutritional yeast offers a cheesy flavor without dairy. You can also use a sprinkle of toasted nuts for texture. This keeps the dish tasty and plant-based. The spice level of Spaghetti Aglio e Olio depends on the red pepper flakes. You can adjust the heat to your liking. For mild, use less red pepper. For a kick, add more. Tasting as you cook helps you find your sweet spot. This dish pairs well with many sides. A fresh green salad adds crunch. Garlic bread complements the flavors perfectly. Roasted vegetables are another great option. You can even serve it with a light soup for a full meal. You can find the complete Spaghetti Aglio e Olio recipe instructions [here](Full Recipe). This will guide you through each step for a perfect dish. Enjoy cooking! Spaghetti Aglio e Olio is simple yet flavorful. We covered essential ingredients and step-by-step cooking. You learned tips for the perfect garlic and seasoning. Variations let you customize, adding protein or veggies. Plus, I shared storage tips to keep it fresh. Final thoughts: This dish can suit anyone’s taste. Enjoy making and sharing it with those you love. Cooking is all about fun and creativity, so experiment!

Spaghetti Aglio e Olio Simple and Quick Delight

Have you ever craved a quick, tasty meal that feels fancy yet simple? Spaghetti Aglio e Olio is your answer!

- 1 ½ lbs boneless, skinless chicken breasts, sliced into thin strips - 1 red bell pepper, sliced - 1 green bell pepper, sliced - 1 yellow onion, sliced - 2 tablespoons olive oil - 2 teaspoons chili powder - 1 teaspoon cumin - 1 teaspoon paprika - 1 teaspoon garlic powder - 1 teaspoon onion powder - Salt and pepper to taste Chicken breast forms the heart of your fajitas. It cooks quickly and remains juicy. Bell peppers add a sweet crunch and vibrant color. Onion gives a flavorful base to the dish. Spices elevate these fajitas. Chili powder gives warmth, while cumin adds depth. Paprika brings smokiness, and garlic and onion powders enhance the taste. Salt and pepper tie it all together. - 8 small flour tortillas - Fresh cilantro, chopped (for garnish) - Lime wedges (for serving) Tortillas hold your fajitas together. Flour tortillas are soft and chewy. You can use corn tortillas if you prefer a gluten-free option. Fresh cilantro adds a bright, herbal note. Lime wedges provide a zesty kick to balance the flavors. - Baking sheet - Mixing bowl A baking sheet helps to roast the chicken and veggies evenly. Line it with parchment for easy cleanup. A mixing bowl is essential for combining the ingredients seamlessly. It makes tossing spices with the chicken and veggies a breeze. For the full recipe, check out the Oven-Baked Chicken Fajitas Full Recipe. 1. Preheating the oven: Set your oven to 400°F (200°C). This will ensure even cooking for your fajitas. 2. Preparing the chicken and vegetables: Slice 1 ½ lbs of chicken breasts into thin strips. Then, chop 1 red bell pepper, 1 green bell pepper, and 1 yellow onion. This mix will add color and taste. 1. Coating and arranging on the baking sheet: In a large bowl, combine the chicken, bell peppers, and onion. Drizzle 2 tablespoons of olive oil over the mix. Add spices: 2 teaspoons of chili powder, 1 teaspoon each of cumin, paprika, garlic powder, onion powder, and some salt and pepper. Toss everything until well coated. Line a baking sheet with parchment paper or foil for easy cleanup. Spread the chicken and veggies evenly in a single layer on the sheet. 2. Baking time and temperature: Place the baking sheet in the oven. Bake for 25-30 minutes. The chicken should be cooked through, and the veggies should be tender and slightly caramelized. 1. Warming tortillas: While the fajitas bake, warm 8 small flour tortillas. You can use a dry skillet over medium heat for about 30 seconds on each side or microwave them for about 20 seconds until soft. 2. Assembling fajitas: Once the chicken and veggies are done, take them out of the oven and let them cool a bit. Serve the mixture in the warm tortillas. Garnish with fresh cilantro and a squeeze of lime juice for added flavor. Enjoy this simple and tasty dish! For more details, check out the Full Recipe. - Ensuring chicken is tender To keep chicken juicy, don’t overcook it. Cook the chicken until it reaches 165°F. Use a meat thermometer for accuracy. Marinating the chicken in olive oil and spices helps too. Let it sit for at least 15 minutes before baking. This step adds flavor and moisture. - Vegetable caramelization tips For sweet, caramelized veggies, spread them evenly on the baking sheet. This allows hot air to circulate. Use high heat, around 400°F, to get a nice char. You can also toss the veggies with a pinch of sugar. This enhances their natural sweetness. - Garnishing ideas Fresh cilantro adds a pop of color and flavor. A squeeze of lime juice brightens the dish. You can also add sliced avocados or diced tomatoes for freshness. Consider crumbled feta or shredded cheese for richness. - Pairing options Serve these fajitas with a side of rice or beans. Guacamole or salsa makes a great dip. You can also add a simple salad for crunch. A cold drink, like lemonade or iced tea, complements the meal perfectly. - Using whole grain tortillas Whole grain tortillas are a great swap. They add fiber and nutrients. This small change makes the dish healthier. They also have a nutty flavor that pairs well with the fajitas. - Adding more vegetables Feel free to add more veggies like zucchini or mushrooms. This boosts the dish's nutrition and flavor. You can also substitute some chicken with beans for a plant-based option. This keeps it filling while reducing calories. {{image_2}} You can switch chicken for beef or shrimp in this recipe. Beef gives a rich flavor, while shrimp cooks fast and adds a nice twist. Just cut the beef into thin strips or use peeled shrimp for quick cooking. You can also try a vegetarian option. Use firm tofu or tempeh as the main protein. This choice makes the dish filling and tasty without meat. Spice up your fajitas with different spices. Try adding cayenne pepper for heat or smoked paprika for a deeper flavor. You can also mix in some oregano for a fresh note. If you love heat, incorporate salsa or hot sauce. A scoop of your favorite salsa adds moisture and tang. Hot sauce brings a spicy kick that can wake up your taste buds. For a fun twist, use lettuce wraps instead of tortillas. Lettuce keeps it light and fresh. Simply lay the cooked chicken and veggies on a large leaf of romaine or butter lettuce. For a heartier meal, create burrito-style fajitas. Just add rice, beans, and cheese inside your tortilla. Roll it up tightly, and you have a filling meal ready to eat! For the full recipe, check out the Oven-Baked Chicken Fajitas Full Recipe. To keep your oven-baked chicken fajitas fresh, store them in the fridge. Place leftovers in an airtight container. This helps prevent drying out. Use them within 3 to 4 days for the best taste. If you want to keep them longer, freezing is a great option. When reheating, the oven works best. Heat your oven to 350°F (175°C). Spread the fajitas on a baking sheet. Cover them with foil to keep them moist. Bake for about 15 minutes. You can also use the microwave. Just place them in a microwave-safe dish and cover. Heat for 1 to 2 minutes on medium power. This keeps the flavor and texture nice. To freeze your fajitas, let them cool first. Then, pack them tightly in freezer-safe bags. Squeeze out the air before sealing. They can last up to 3 months in the freezer. When you're ready to eat, thaw them in the fridge overnight. For a quicker option, use the microwave. Just remember to enjoy them within a few days of thawing for the best flavor. Oven-baked chicken fajitas last about three to four days in the fridge. Store them in an airtight container. This keeps the flavors fresh and prevents spills. Always check for any off smells or changes in color before eating leftovers. Yes, you can make oven-baked chicken fajitas ahead of time. Prepare the chicken and veggies a day before. Just mix them with the spices and oil, then store them in the fridge. On cooking day, simply spread them on a baking sheet and bake. This saves time and makes meal prep easy. Some great sides to serve with oven-baked chicken fajitas include: - Mexican rice - Refried beans - Guacamole - Salsa - Corn on the cob - A fresh salad These sides complement the fajitas and add more flavor to your meal. You can find the full recipe for the oven-baked chicken fajitas [here](#). You now have all you need to make oven-baked chicken fajitas. We covered the main ingredients like chicken, vegetables, and spices. We walked through preparation, cooking, and serving. You learned tips for tender chicken and caramelized veggies. We also explored variations and storage options. Remember, these fajitas are easy to customize. Enjoy these delicious meals with friends and family. Try different flavors and enjoy fresh toppings. You can make this dish your own. Happy cooking!

Oven-Baked Chicken Fajitas Flavorful and Easy Meal

Looking for a quick, tasty dinner? Oven-baked chicken fajitas are perfect for you! With juicy chicken, colorful veggies, and bold

Older posts
Newer posts
← Previous Page1 … Page35 Page36 Page37 … Page61 Next →

dsad

© 2025 Emmas Dish • Built with GeneratePress

Our Policies

  • Copyright Policy
  • Cookie Policy
  • GDPR Policy
  • Privacy Policy
  • Disclaimer
  • Terms Of Use

More Information

  • Home
  • About
  • Contact
  • Appetizers
  • Dessert
  • Dinner
  • Drinks
©2025, Emmas Dish About Back To Top