Hot Honey Chicken Bowl Flavor-Packed Dinner Idea
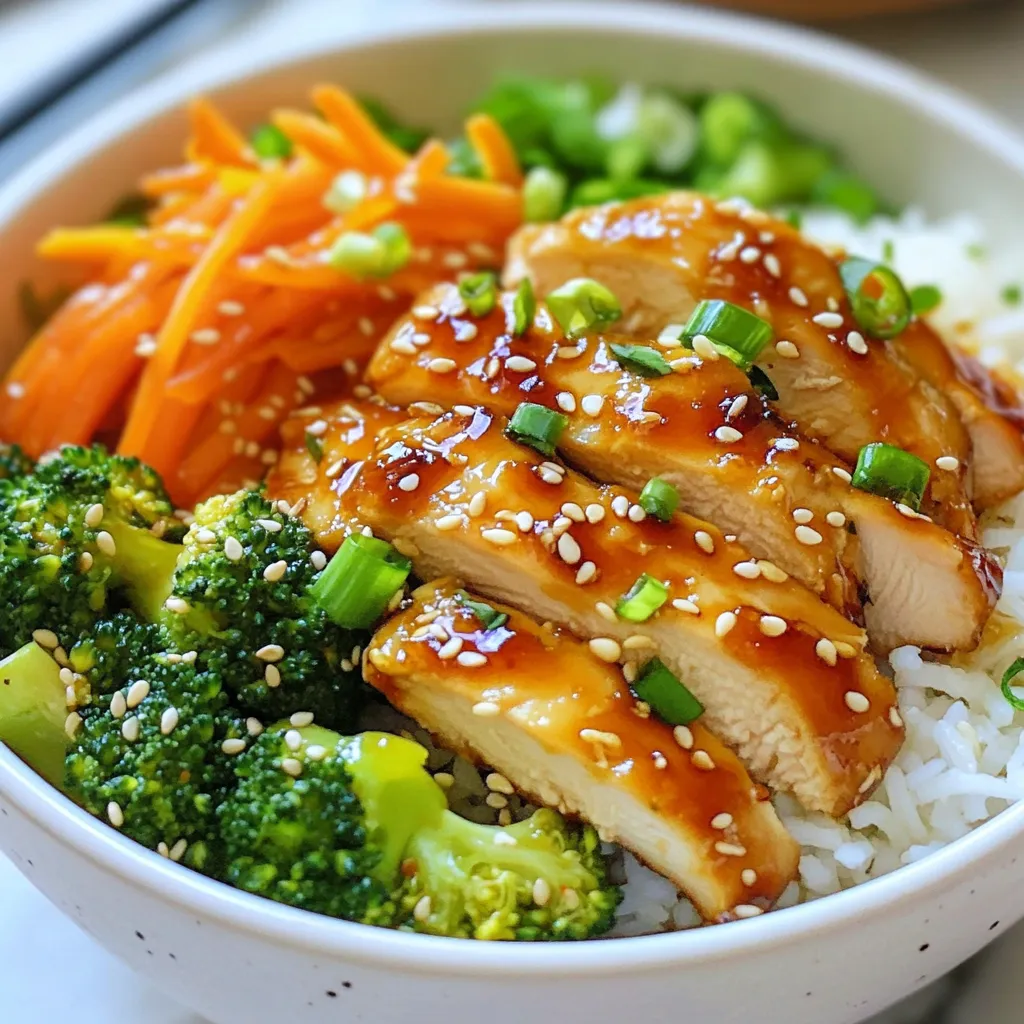
Craving something bold and tasty for dinner? Look no further! The Hot Honey Chicken Bowl is a flavor-packed meal that
Craving something bold and tasty for dinner? Look no further! The Hot Honey Chicken Bowl is a flavor-packed meal that
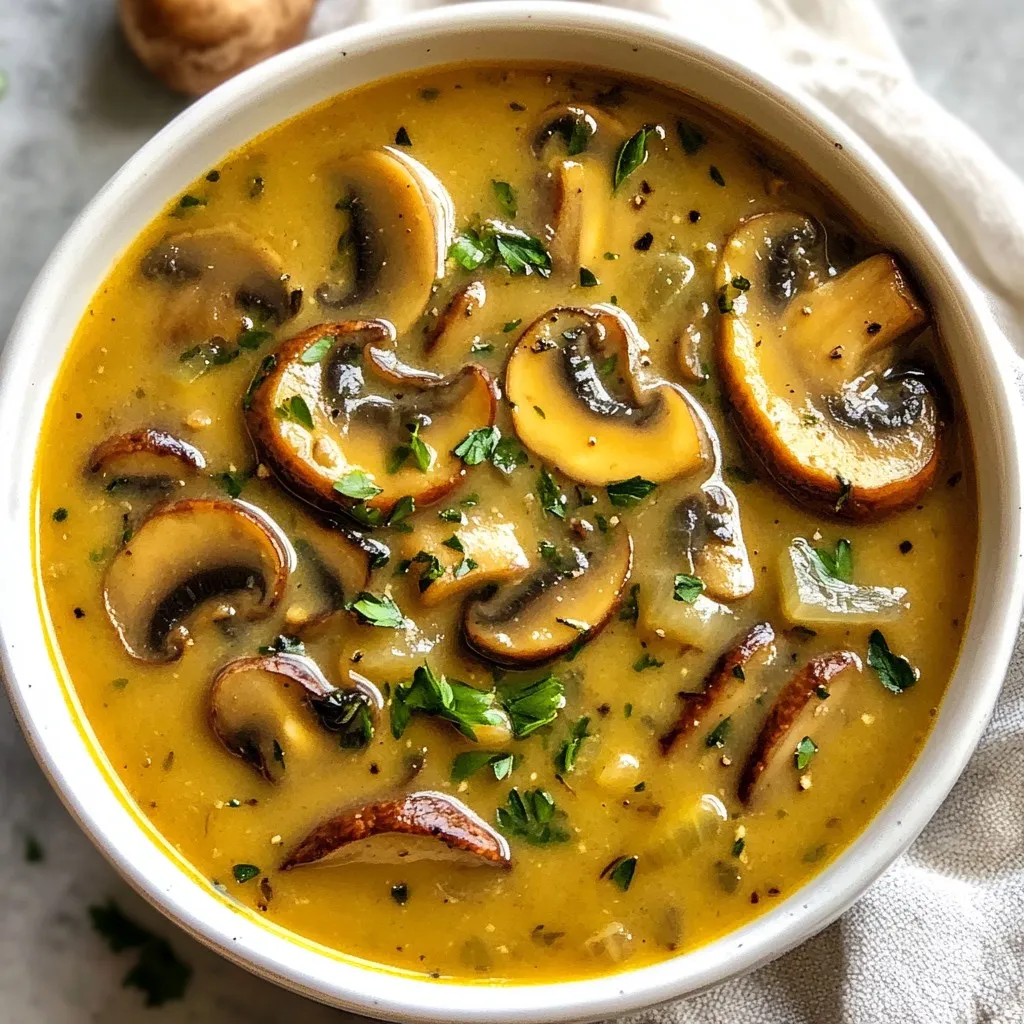
If you’re craving a warm and cozy meal, look no further than Hungarian Mushroom Soup. This creamy and flavorful dish
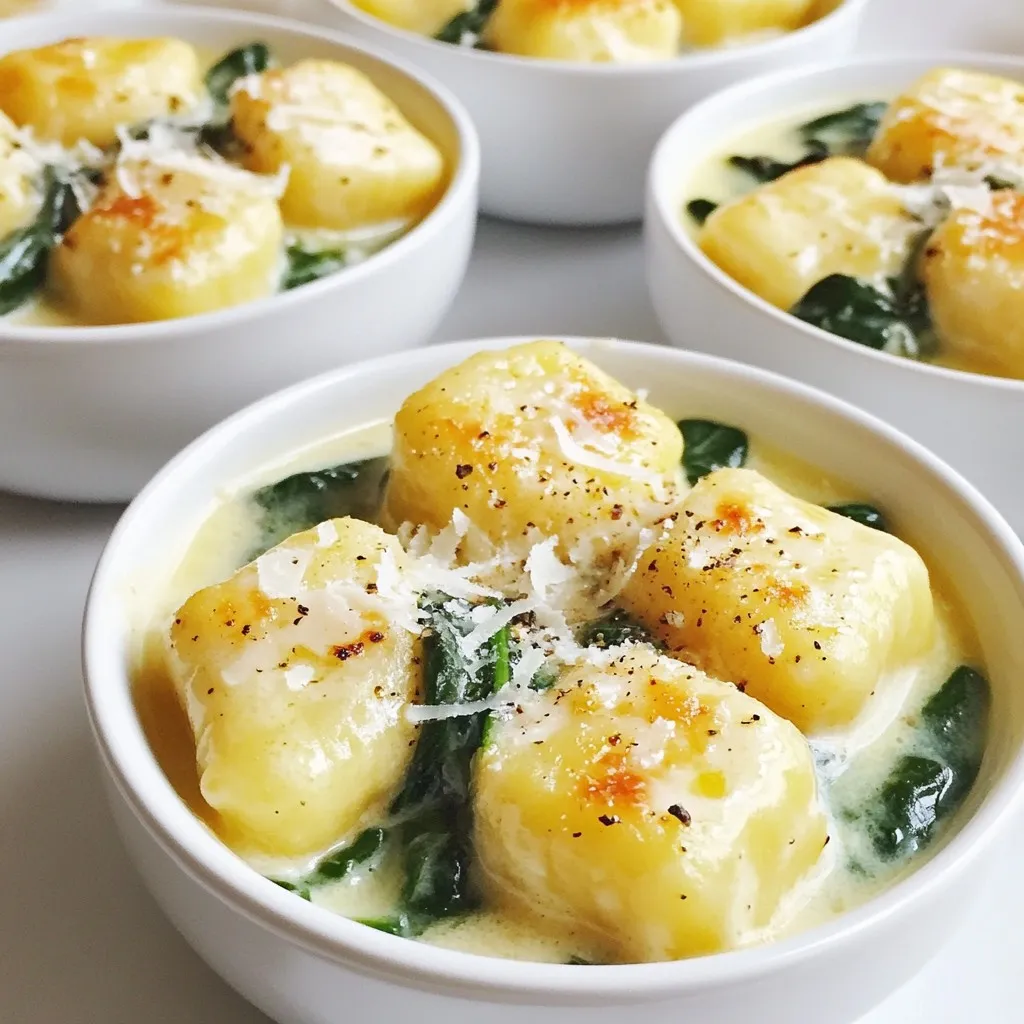
If you’re craving a rich and comforting meal, this Creamy Gnocchi with Spinach recipe is perfect for you. It combines

If you’re looking for an easy and tasty dinner idea, Ground Beef Philly Cheesesteaks are a winner! I’ll guide you
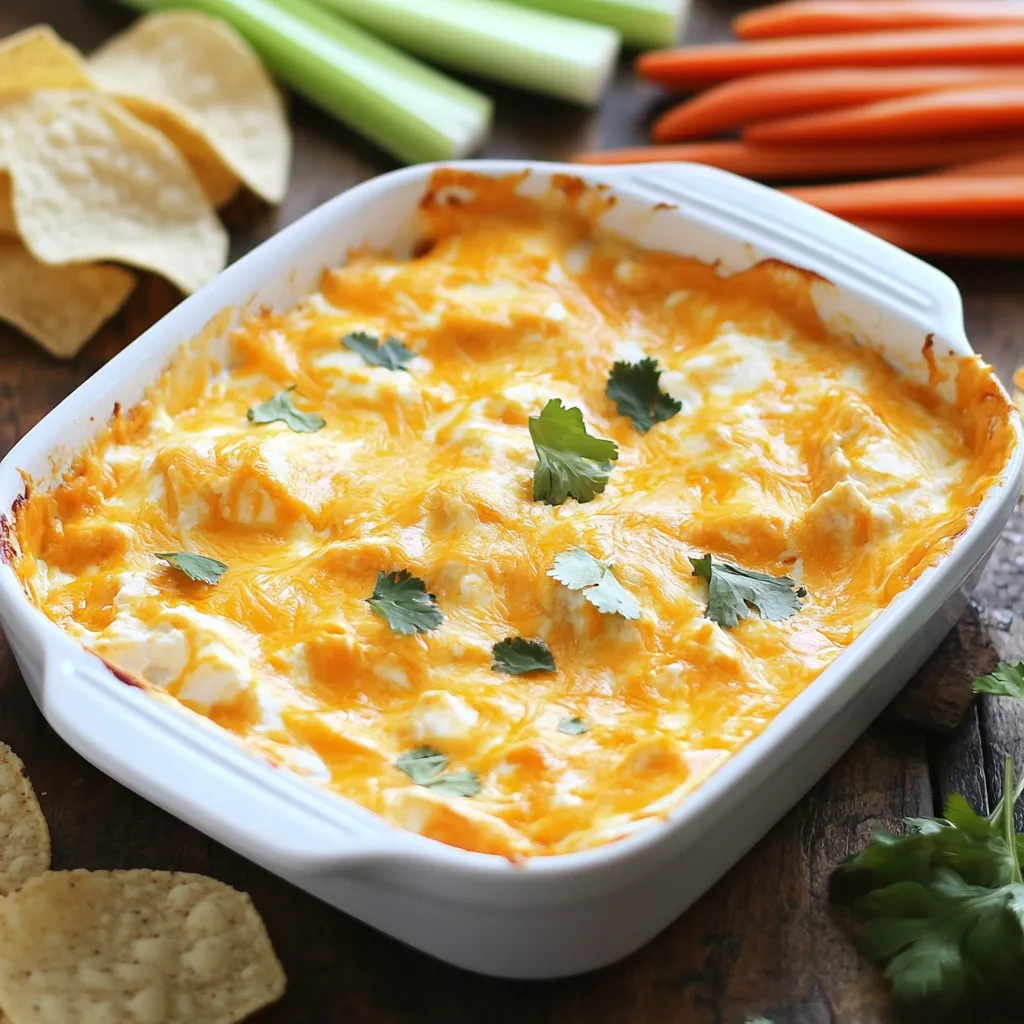
Looking for an easy and tasty party dip? You’re in the right place! This Five Ingredient Buffalo Chicken Dip packs
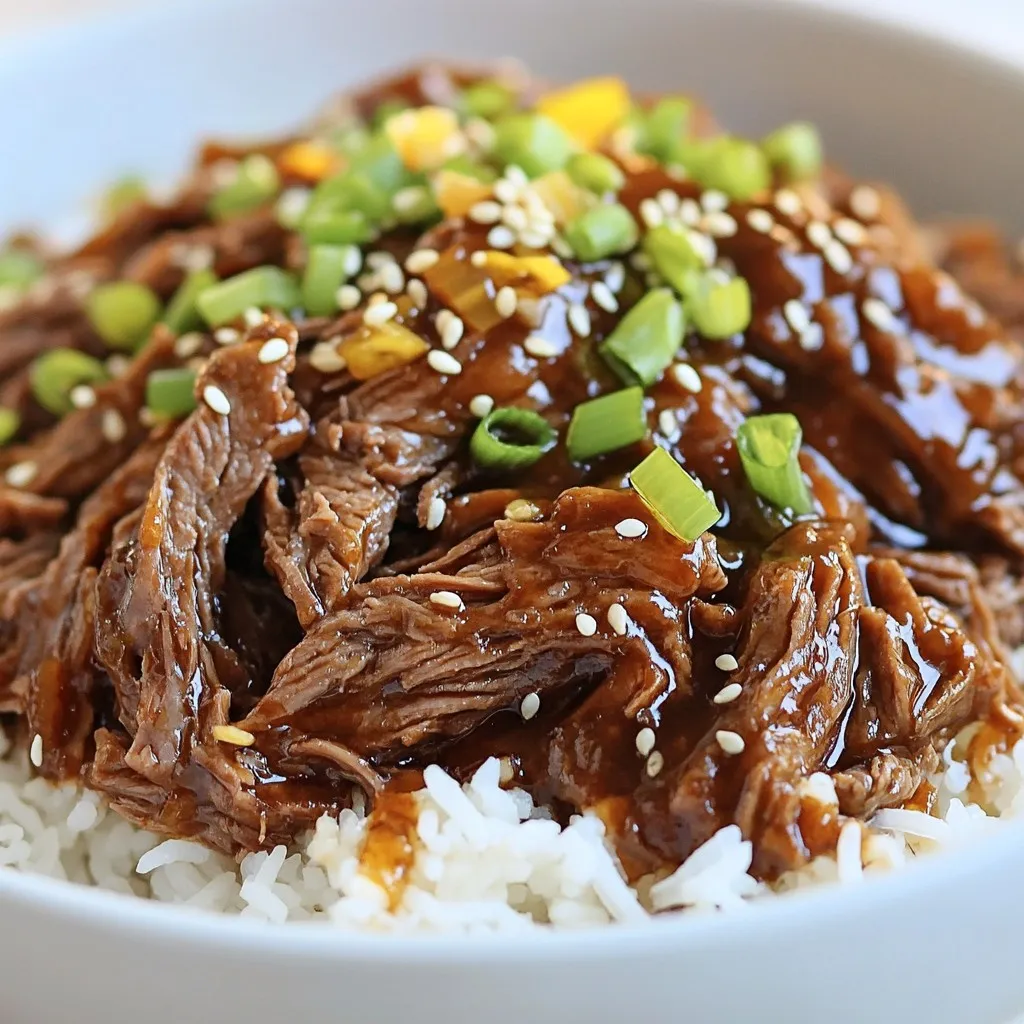
Are you ready to create a tasty and simple meal with Slow Cooker Korean Beef? This dish brings bold flavors
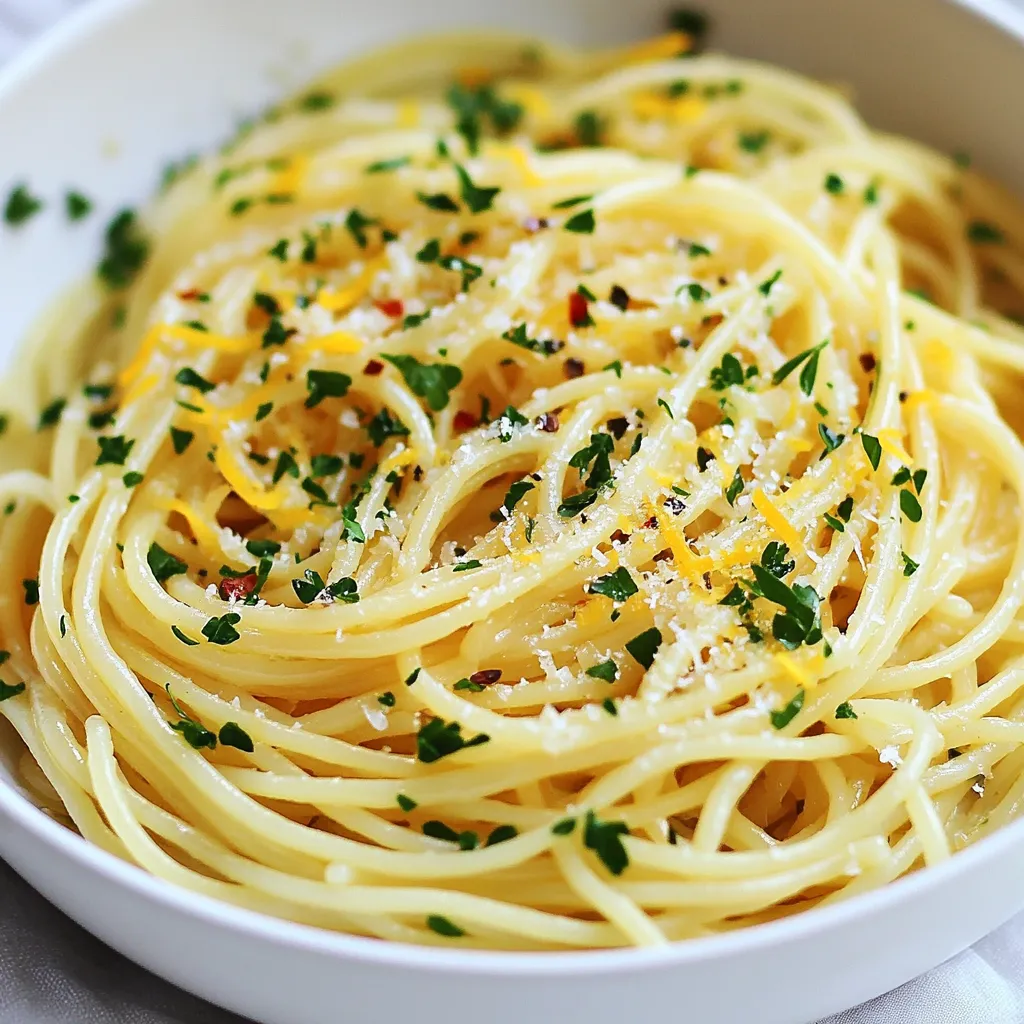
Garlic Olive Oil Spaghetti is a simple yet delicious dish that anyone can make. Its rich flavors will impress your
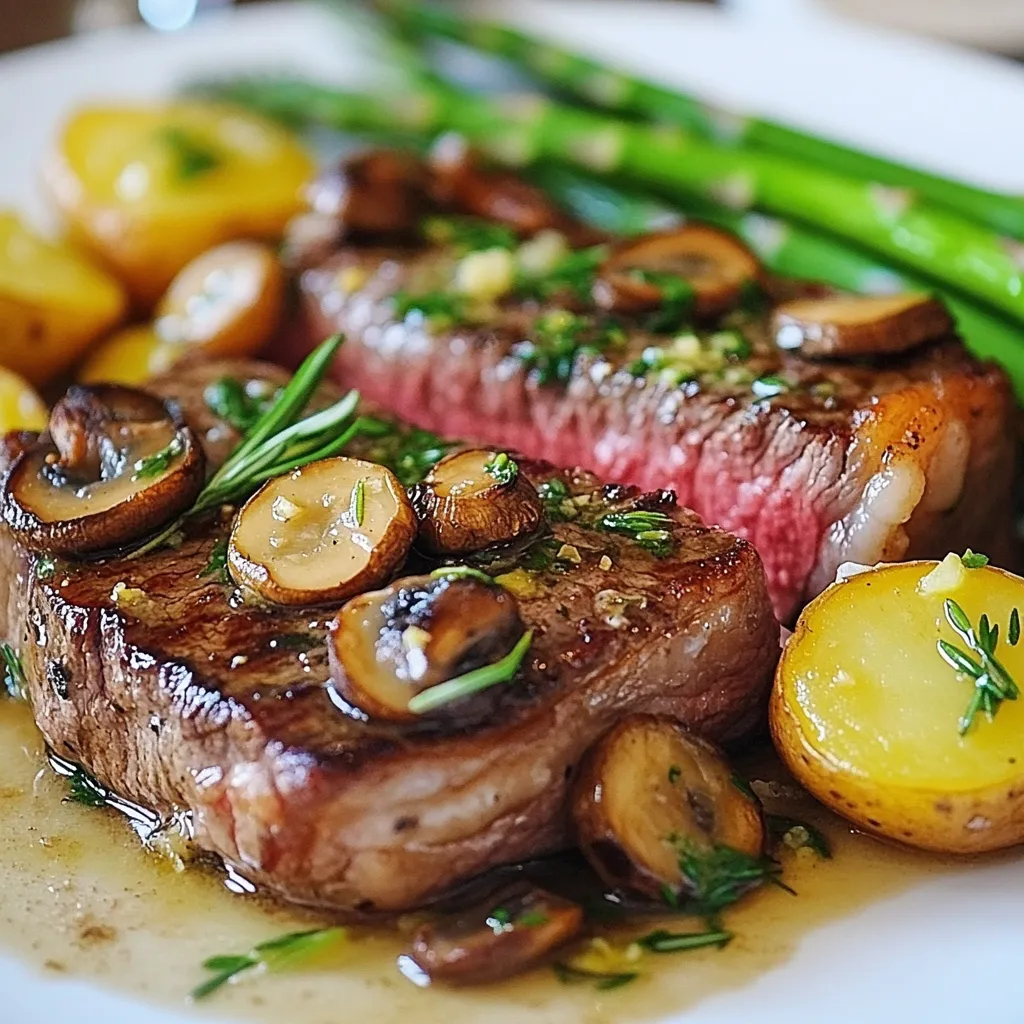
Want to impress your guests with a five-star steak dinner? You can create an unforgettable meal with just a few
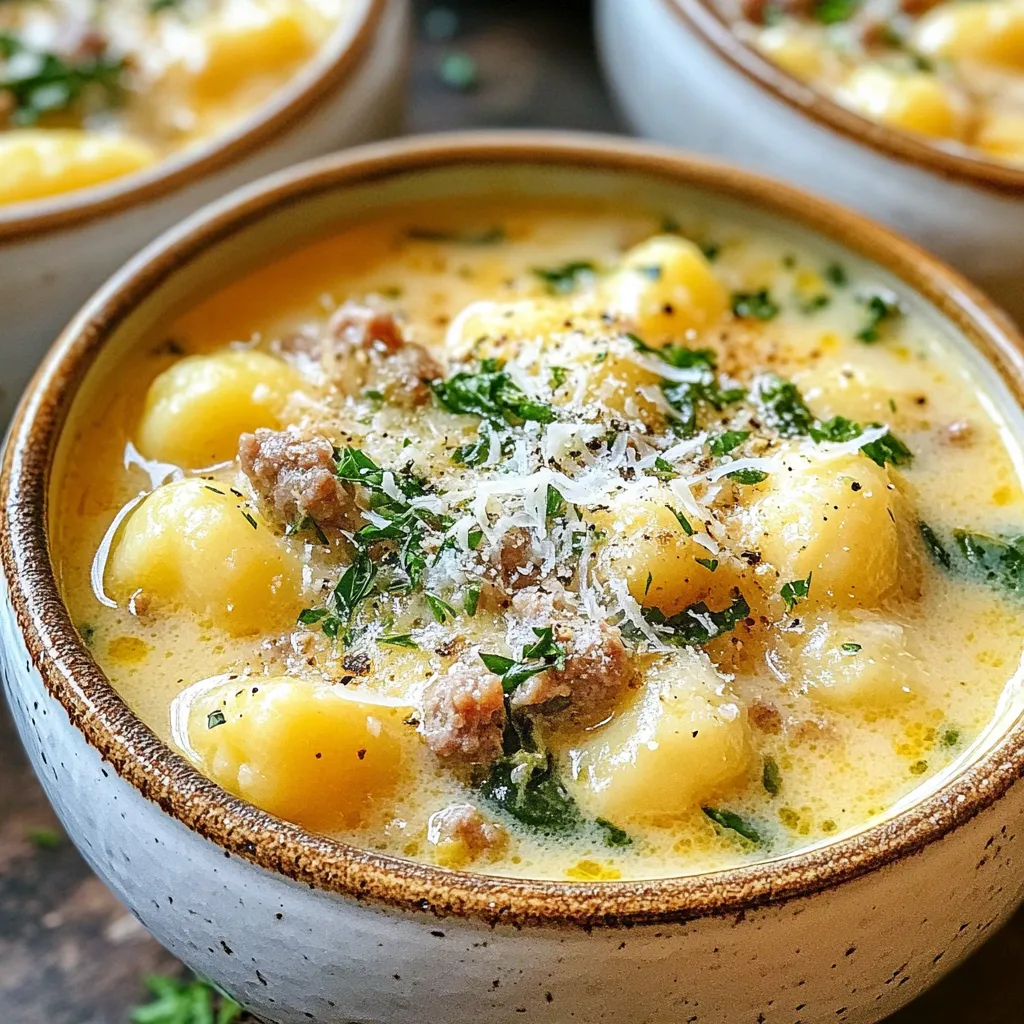
Craving a hearty meal that warms your soul? This Creamy Italian Sausage Gnocchi Soup is your answer! Packed with rich
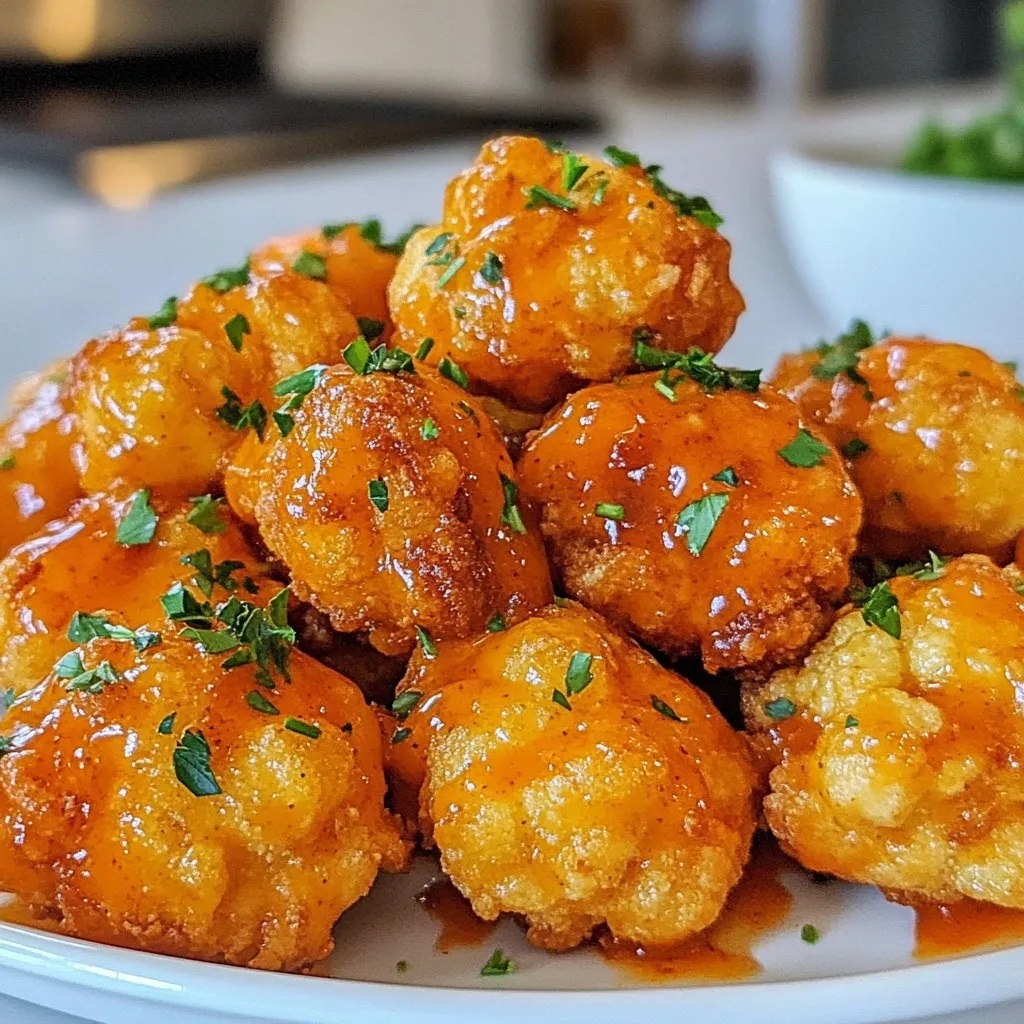
Are you ready for a snack that’s both zesty and satisfying? Say hello to Buffalo Cauliflower Bites! These tasty treats
