![- 1 cup uncooked rice (white or brown) - 2 cups broccoli florets (fresh or frozen) - 2 cups cheddar cheese, shredded - 1 can (10.5 oz) cream of mushroom soup (or homemade equivalent) - 1 cup milk - 1/2 cup onion, finely chopped - 1/2 cup bell pepper, finely chopped (any color) - 1 teaspoon garlic powder - 1 teaspoon onion powder - Salt and pepper to taste - 1/2 cup breadcrumbs (optional for topping) - 2 tablespoons olive oil For those with dietary needs, you can make this dish gluten-free. Use gluten-free rice and find a gluten-free cream soup. I recommend brands like Pacific Foods for a great soup option. If you want a healthier twist, try brown rice instead of white. It adds a nice nutty flavor and holds up well in the casserole. For the cheese, I suggest using a good quality cheddar. Brands like Tillamook or Cabot provide rich taste and melt well. You can also mix in some mozzarella for extra creaminess. If you're looking for a dairy-free option, try using cashew cream and a dairy-free cheese. This mix of ingredients makes the casserole creamy and full of flavor. It’s a comfort food that feels special while being simple to prepare. You can find the full recipe [here]. To start, cook the rice as the package says. You can use white or brown rice. This part is simple. While the rice cooks, chop the onion and bell pepper. Heat olive oil in a large skillet over medium heat. Add the onion and bell pepper, and cook them until soft, which takes about five minutes. Next, toss in the broccoli florets. Cook them for three to four minutes until they’re bright green and tender. Once everything is cooked, grab a large mixing bowl. Combine the rice, sautéed veggies, cream of mushroom soup, milk, garlic powder, onion powder, and half of the shredded cheddar cheese. Mix all the ingredients well. Don’t forget to add salt and pepper to taste. This mixture should be creamy and packed with flavor. Now, preheat your oven to 350°F (175°C). Grease a 9x13 inch baking dish with cooking spray or oil. Pour your rice mixture into the baking dish, spreading it out evenly. Sprinkle the remaining cheddar cheese on top. If you like a crunchy topping, add breadcrumbs now. Bake the casserole in the preheated oven for 25 to 30 minutes. You want the cheese to be bubbly and golden brown. When done, remove it from the oven and let it sit for five to ten minutes before serving. This allows it to set and makes it easier to serve. Enjoy your cheesy broccoli rice casserole! You can find the full recipe [Full Recipe]. To make your cheesy broccoli rice casserole shine, start with the rice. Use a rice cooker for perfectly cooked rice. If you don’t have one, follow package instructions closely. Rinse the rice before cooking to remove extra starch. This helps keep the rice fluffy. Next, let’s talk about the broccoli. If you use fresh broccoli, steam it just until bright green. For frozen broccoli, thaw and drain well. This keeps the casserole from getting watery. For the cheese melt, shred your cheese instead of using pre-shredded. Pre-shredded cheese has anti-caking agents that prevent it from melting smoothly. You want that gooey, stretchy cheese in every bite. One common mistake is overcooking the broccoli. It should be tender, but still crisp. If you cook it too long, it can get mushy in the casserole. Another mistake is not mixing well. Make sure all the ingredients are evenly combined. This ensures each spoonful is packed with flavor. To avoid a soggy casserole, do not skip draining excess liquid from the vegetables. Also, don’t cover the casserole while baking. This allows steam to escape and keeps your topping crispy. For the best results, follow these tips and tricks. You’ll end up with a creamy and flavorful dish that everyone will love! For the full recipe, check out the [Full Recipe]. {{image_2}} You can mix things up with different veggies in your casserole. Try adding peas, carrots, or corn. These add color and flavor. You can also swap the broccoli for cauliflower if you prefer. For cheese, cheddar is a classic, but you can use mozzarella or gouda too. Each cheese gives a unique taste. If you want a twist, add some cream cheese for extra creaminess. Instead of cream of mushroom soup, try cream of chicken or a homemade cream sauce. These choices can change the whole dish. If you need a gluten-free option, use gluten-free rice and a gluten-free cream soup. This way, everyone can enjoy it. For a vegan version, replace the cheese with a plant-based cheese and use coconut milk instead of regular milk. You can also skip the cream soup or make a vegan one. If you're watching carbs, use cauliflower rice instead of regular rice. This swap cuts down on carbs and keeps it tasty. These variations let you enjoy the dish while sticking to your diet. To keep your cheesy broccoli rice casserole fresh, follow these easy steps. First, let the casserole cool completely after baking. This helps prevent condensation in your storage container. Transfer the cooled casserole to an airtight container. You can refrigerate it for up to four days. For longer storage, freeze the casserole. Wrap it tightly in plastic wrap and then in aluminum foil. This will protect it from freezer burn. When stored properly, your casserole can last for about three months in the freezer. When you want to enjoy your leftover casserole, reheating is key. Preheat your oven to 350°F (175°C). Place the casserole in a baking dish. Cover it with foil to keep moisture in. Heat for about 20 to 25 minutes or until it is hot. If you prefer the microwave, place a portion on a microwave-safe plate. Heat it in short bursts of 1 minute, stirring in between. To keep the casserole moist, add a splash of milk before reheating. This will help restore creaminess and keep it delicious. What can I serve with cheesy broccoli rice casserole? You can serve this casserole with a simple salad or garlic bread. Both pair well with its creamy flavor. You might also enjoy it with grilled chicken or fish for a complete meal. The casserole is rich and filling, so lighter sides work best. Can I make this recipe ahead of time? Absolutely! You can prepare the casserole a day before. Just cover it and store it in the fridge. When you are ready, bake it straight from the fridge. It may need a few extra minutes in the oven. How do I know the casserole is done? The casserole is done when the cheese is bubbly and golden brown. A knife inserted in the center should come out hot. If you see steam rising, it’s ready to enjoy! Can I use leftover rice for this recipe? Yes, leftover rice works great! It saves time and adds extra flavor. Just make sure to break up any clumps before mixing it in. This will help it combine well with the other ingredients. For the full recipe, check the detailed steps listed above. You learned how to make a delicious cheesy broccoli rice casserole. We covered the best ingredients, step-by-step instructions, and tips for perfect results. You now know how to store leftovers and avoid common mistakes. This dish is easy to modify for different diets. Remember, adding your twist can make it special. Enjoy your cooking, and share this tasty recipe with others who love comfort food!](https://emmasdish.com/wp-content/uploads/2025/05/8c9739aa-e247-4346-b2de-9d157cc7994f.webp)
Cheesy Broccoli Rice Casserole Creamy and Flavorful Dish
Are you ready to dive into a dish that’s creamy, cheesy, and packed with flavor? My Cheesy Broccoli Rice Casserole
Are you ready to dive into a dish that’s creamy, cheesy, and packed with flavor? My Cheesy Broccoli Rice Casserole
![To make pumpkin spice overnight oats, you need simple and tasty ingredients. Here’s what you will need: - 1 cup rolled oats - 1 cup almond milk (or any milk of your choice) - ½ cup canned pumpkin puree - 1 tablespoon maple syrup (or honey) - 1 teaspoon pumpkin spice blend (cinnamon, nutmeg, ginger, allspice) - ½ teaspoon vanilla extract - Pinch of salt These ingredients blend well to create a warm, cozy flavor. The oats soak up the milk and pumpkin, making them soft and rich. Toppings can make your pumpkin spice overnight oats even better. Here are some fun ideas: - Chopped pecans or walnuts - A dollop of Greek yogurt - A sprinkle of additional pumpkin spice - Sliced bananas or apples - A drizzle of extra maple syrup Feel free to mix and match these toppings. They add crunch and creaminess to your dish. If you have dietary needs, you can easily adjust the recipe. Here are some swaps: - Use coconut milk for dairy-free oats. - Swap maple syrup with agave nectar for a vegan option. - Choose gluten-free oats for a gluten-free meal. - Replace pumpkin puree with applesauce for a lighter taste. These substitutions keep the flavor while fitting your needs. You can enjoy pumpkin spice overnight oats no matter your diet. For the full recipe, check out the recipe section. To make pumpkin spice overnight oats, gather your ingredients. You need rolled oats, almond milk, canned pumpkin puree, maple syrup, pumpkin spice blend, vanilla extract, and a pinch of salt. In a large bowl, combine the rolled oats, almond milk, pumpkin puree, maple syrup, and vanilla extract. Mix them well. Add the pumpkin spice blend and salt. Stir until everything blends smoothly. The goal is to have a creamy and thick mixture. If it feels too thick, add a bit more almond milk. This helps the oats soak up the flavors overnight. Make sure there are no clumps in the mixture. This ensures every bite tastes good. Transfer the oat mixture into jars or airtight containers. Seal them tightly to keep them fresh. Place the containers in the refrigerator overnight, or for at least four hours. When you are ready to serve, stir the oats. This fluffs them up and makes them nice. You can top them with chopped pecans or walnuts, a dollop of Greek yogurt, and a sprinkle of pumpkin spice. Enjoy your cozy and healthy delight! For the complete recipe, check out the Full Recipe. To get creamy oats, use rolled oats. They absorb liquid well. Mix your oats with milk and pumpkin puree. Stir it well to avoid lumps. Let the oats sit overnight. This helps them soak up all the flavors. If your oats seem too thick, add a splash of milk before serving. This makes them smooth and tasty. Make your pumpkin spice overnight oats in advance. Prep them on a Sunday for the week. Store them in jars for easy grab-and-go breakfasts. You can also double the recipe. This means fewer mornings spent cooking. Just remember to keep them in the fridge. They will stay fresh and tasty for you. Want to change up the flavor? Use different milk types. Almond milk adds a nice touch, but try oat or coconut milk too. Add extra toppings like nuts or seeds. They give your oats a nice crunch. Drizzle a bit more maple syrup for added sweetness. You can also sprinkle on some chocolate chips. This makes every bite a little more special. For the full recipe, check out the details above. {{image_2}} I love changing my pumpkin spice overnight oats with the seasons. In winter, try adding cocoa powder for a chocolate twist. In spring, swap pumpkin for mashed bananas. Summer is perfect for mixed berries, which add a fresh taste. Each season brings new flavors, keeping breakfast fun and exciting. If you want to make this dish fit your diet, there are easy swaps. For a gluten-free option, use gluten-free oats. If you're dairy-free, almond milk or coconut milk work great. For a lower sugar option, skip the maple syrup or use a sugar substitute. These swaps make the recipe fit your needs without losing taste. To boost the nutrition of your overnight oats, add protein or fiber. You can stir in a scoop of protein powder or chia seeds. Both options mix well and add extra nutrients. You might also try using Greek yogurt as a topping. It packs protein and makes your bowl even creamier. These small changes help you stay full longer and keep your energy up. To keep your pumpkin spice overnight oats fresh, use airtight containers. Glass jars work well and look pretty too. Just make sure each jar is sealed tight. This prevents air from getting in and keeps your oats tasty. In the fridge, your oats last about 3 to 5 days. They get better as they sit and soak up flavors. If you notice any odd smells or changes in texture, it’s best to toss them out. Always trust your senses! You can freeze your oats for up to 3 months. Just fill the jars or containers, but leave space for expansion. When you’re ready to eat, thaw them in the fridge overnight. You can also heat them up in the microwave or on the stove. This way, you have a cozy and healthy meal ready to go! Enjoy your pumpkin spice overnight oats any time you want! Pumpkin spice overnight oats last for about 3 to 5 days in the fridge. Keep them in sealed jars or containers. This way, they stay fresh and tasty. If they start to smell sour or look off, it’s best to toss them. Yes, you can use steel-cut oats. However, they need more time to soak. Steel-cut oats may take longer to soften, so let them soak overnight or even longer. The texture will be chewier than rolled oats. To make vegan pumpkin spice overnight oats, use almond milk or another plant-based milk. Instead of honey, use maple syrup. All other ingredients in the recipe are already vegan-friendly. Pumpkin spice overnight oats offer many health benefits. They are high in fiber, which helps digestion. Pumpkin adds vitamin A, which is good for your eyes. Oats are great for heart health, too. The nuts on top provide healthy fats and protein. Overall, this dish is a healthy start to your day. For the full recipe, check out [Full Recipe]. Pumpkin spice overnight oats are easy and delicious. We covered the key ingredients, step-by-step prep, and tips to make them creamy. You can customize flavors with toppings and dietary swaps. Remember to store them properly for freshness. These oats fit any diet and save time in the morning. Enjoy a tasty, healthy breakfast that boosts energy. Make them your own with different flavors and toppings. You’ll love how simple and fun they are to prepare.](https://emmasdish.com/wp-content/uploads/2025/05/b0359493-1813-4c84-9e0c-ba12bbc6c83e.webp)
Fall is here, and what better way to embrace the season than with Pumpkin Spice Overnight Oats? These cozy and
![- 2 cups sushi rice - 2 1/2 cups water - 3 tablespoons rice vinegar - 1 tablespoon sugar - 1 teaspoon salt - 4 sheets of nori (seaweed) - 1 small cucumber, julienned - 1 red bell pepper, thinly sliced - 1 yellow bell pepper, thinly sliced - 1 small carrot, julienned - 1 avocado, sliced - 1 cup purple cabbage, finely shredded - Soy sauce, for dipping - Pickled ginger, for serving (optional) - Sesame seeds, for garnish (optional) To make rainbow veggie sushi rolls, gather these fresh ingredients. The sushi rice is the base. Rinse it well to remove excess starch. This will help the rice become sticky. You need to season the rice with vinegar, sugar, and salt. This adds flavor and balances the dish. Next, pick colorful vegetables. The cucumber adds crunch. Red and yellow bell peppers give sweetness and color. The carrot brings a nice snap, while avocado adds creaminess. Finally, the purple cabbage provides a lovely contrast. Don't forget the nori! This seaweed holds everything together. You can serve the rolls with soy sauce and pickled ginger for extra taste. If you like, sprinkle sesame seeds on top for a nice touch. For the full recipe, refer to the section at the end. Enjoy making these tasty and vibrant rolls! 1. Rinsing the rice: First, rinse the sushi rice in cold water. Do this until the water runs clear. This step removes the extra starch. It helps the rice cook better and keeps it from getting too sticky. 2. Cooking the rice and seasoning it: In a medium pot, add your rinsed rice and 2 1/2 cups of water. Bring it to a boil. Once it boils, reduce the heat to low. Cover the pot and let it simmer for about 20 minutes. After that, turn off the heat and let it steam for another 10 minutes. For seasoning, mix 3 tablespoons of rice vinegar, 1 tablespoon of sugar, and 1 teaspoon of salt in a small bowl. Stir until dissolved. Gently fold this mix into the cooked rice. Be careful not to mash the grains. Let the rice cool to room temperature. 1. Preparing the sushi mat: Place a bamboo sushi mat on a clean surface. This mat will help you roll the sushi easily. 2. Spreading the rice: Lay a sheet of nori on the mat, shiny side down. Wet your hands with water to stop the rice from sticking. Take about 1/2 cup of sushi rice and spread it over the nori. Leave about 1 inch at the top edge. 3. Layering the vegetables: Now it’s time for the fun part! Arrange a line of colorful veggies on the rice. Use your cucumber, red bell pepper, yellow bell pepper, carrot, avocado, and purple cabbage. Spread them out nicely across the middle of the rice. 1. Rolling technique: Carefully lift the mat and start rolling the sushi away from you. Tuck the filling in tightly as you go. Keep rolling until you reach the edge of the nori. Wet the top edge with a little water to seal the roll. 2. Slicing the rolls: Take a sharp knife and slice the roll into bite-sized pieces. Make sure to clean the knife with a damp cloth after each cut. This keeps the rolls neat and helps prevent sticking. 3. Cleaning the knife: It’s important to clean your knife often. This way, your sushi rolls look great and stay intact. Now you have a colorful plate of rainbow veggie sushi! For the full recipe, check out the [Full Recipe]. To make your sushi rolls look great, use a colorful plate. A white plate lets the colors pop. Arrange the rolls neatly, and place a small dish of soy sauce for dipping. Add some pickled ginger on the side. For a final touch, sprinkle sesame seeds on top of the rolls. It adds a nice crunch and looks nice too. A good sushi mat makes rolling easier. I recommend a bamboo rolling mat. It helps you shape the rolls tightly. A sharp knife is key for clean cuts. Use a chef’s knife or a sushi knife. Clean the knife with a damp cloth between cuts. This keeps the rolls from sticking. Pair your sushi with refreshing drinks. Green tea or sparkling water works well. They cleanse your palate. For toppings, use pickled ginger. It adds a zesty flavor. You can also serve soy sauce on the side for dipping. If you want to impress, try making a dipping sauce with soy sauce and a dash of sesame oil. These tips ensure your Rainbow Veggie Sushi Rolls are not just tasty but also beautiful! For the full recipe, check out the recipe section above. {{image_2}} You can easily make these sushi rolls vegan. Just skip any fish or meat. Use more veggies like carrots and avocados. For gluten-free sushi, swap the soy sauce with tamari. This keeps the flavor without gluten. If you don't have some veggies, use what you have. Try zucchini, radishes, or even spinach. For rice vinegar, you can use apple cider vinegar or lemon juice. These options still add a nice tang. If you can't find nori, use lettuce leaves for wrapping. This gives a fresh crunch. To make your sushi rice special, try adding flavor. Use a little garlic powder or sesame oil in the rice. You can also add herbs like cilantro for a fresh taste. Spices like chili powder can give it a kick. Every twist makes your sushi rolls unique. For the [Full Recipe], follow the steps to create vibrant, tasty rolls! To keep your rainbow veggie sushi rolls fresh, store them in an airtight container. This helps prevent the nori from getting soggy. If you have leftovers, wrap each roll in plastic wrap. This keeps moisture out and keeps the rolls nice. You can also use a bamboo mat to keep them tight. You might wonder, can you reheat sushi? The answer is no for traditional sushi. It tastes best fresh. However, if you need to refresh your sushi rolls, you can let them sit at room temperature for a few minutes. This can help them regain some of their original flavor and texture. How long can sushi be stored? Rainbow veggie sushi rolls can last in the fridge for about 24 hours. After that, they may lose their taste and texture. Watch for signs of spoilage. If the nori becomes too soft or the vegetables look wilted, it's time to toss it. Always trust your senses when it comes to food safety. To make rainbow sushi rolls, you need a few steps. First, cook sushi rice and let it cool. Then, lay a sheet of nori on a mat. Spread rice on the nori, leaving some space at the top. Add a mix of colorful veggies, like cucumber, bell peppers, and avocado. Roll it up tightly and seal the edge with water. Finally, slice the roll into pieces. You can find the full recipe above. Yes, you can use brown rice for sushi. Brown rice has more fiber and nutrients than white rice. However, it takes longer to cook and is chewier. White rice is stickier, which helps keep the rolls together. If you prefer brown rice, rinse it well and adjust your cooking time. Yes, nori sheets are quite healthy. They are low in calories and high in vitamins. Nori is rich in iodine, which helps your thyroid. It also has antioxidants that can boost your immune system. Plus, nori provides some protein and fiber, making it a great addition to your diet. If you don’t have a sushi mat, you can use a clean kitchen towel. Lay the nori on the towel and spread the rice as usual. You can also roll the sushi with your hands, but it may be trickier. Another option is to use a cutting board or a flat plate to help you shape your rolls. Yes, you can prepare sushi rolls in advance. However, they taste best fresh. If you make them ahead, store them in an airtight container in the fridge. To keep them from drying out, wrap each roll in plastic wrap. You can also prepare the ingredients and assemble them later. Just keep everything cool until you're ready to roll. Making sushi is fun and tasty! You learned about key ingredients like sushi rice and fresh veggies. I shared easy steps for preparing and rolling your sushi. You now know tips for how to present and store it well. With variations and storage info, you can enjoy sushi your way. Have fun exploring new flavors and impressing friends with your skills!](https://emmasdish.com/wp-content/uploads/2025/05/588d0668-3fa7-4b8c-bbf9-14edba240981.webp)
If you crave something fresh and colorful, let’s make Rainbow Veggie Sushi Rolls! These vibrant treats are packed with flavor
![- 1 cup jasmine rice - 1 cup coconut milk - 1/2 cup water - Zest of 1 lime - 2 tablespoons lime juice - 1 tablespoon sugar (optional) - 1/4 teaspoon salt - Fresh cilantro for garnish - Lime wedges for serving Coconut lime rice brings tropical joy to your table. The blend of jasmine rice, creamy coconut milk, and zesty lime creates a dish bursting with flavor. You’ll need jasmine rice for its fragrant and fluffy texture. Coconut milk adds a sweet, rich taste. Water helps balance out the coconut milk. Lime zest and juice give a bright, fresh kick. If you want a touch of sweetness, add sugar. A pinch of salt rounds out the flavors. Garnish with fresh cilantro for a pop of color and taste. Serve with lime wedges to squeeze on top. This simple list ensures a delightful side dish that pairs well with many meals. You can find the full recipe for this coconut lime paradise rice above. Happy cooking! - Rinse the rice under cold water. This step helps wash away excess starch. You want the water to run clear. - Combine the rinsed rice with coconut milk, water, lime zest, lime juice, sugar, and salt in a medium saucepan. This mix gives the rice a rich flavor. - Bring the mixture to a boil over medium-high heat. Stir it occasionally to prevent sticking. - Once boiling, reduce the heat to low and cover the saucepan. This traps steam and cooks the rice evenly. - Let it simmer for about 15-18 minutes. The rice should be tender, and the liquid will be absorbed. Do not lift the lid during this time. - After cooking, remove the saucepan from heat. Let it sit covered for another 5 minutes. This steaming step helps make the rice fluffy. - Fluff the rice gently with a fork. This separates the grains and adds air. - Transfer the rice to a serving bowl and garnish it with fresh cilantro. This adds color and flavor. - Serve with lime wedges on the side. A squeeze of lime adds a zesty kick to every bite. For the full recipe, check out Coconut Lime Paradise Rice 🥥. To get fluffy rice, rinsing is key. Rinsing removes excess starch. This helps the rice grains separate while cooking. Rinse the rice under cold water until the water runs clear. This step makes a big difference! Next, pay attention to your cooking time. Bring your rice mixture to a boil first. Then, lower the heat and cover it. Let it simmer for about 15 to 18 minutes. Avoid lifting the lid during this time. The steam helps cook the rice perfectly. You can boost the flavor of your coconut lime rice easily. Try adding spices like cumin or coriander. Fresh herbs like mint or basil also work well. These can add a nice twist to the dish. If you like a sweeter taste, consider adding sugar. Just one tablespoon can enhance the overall flavor. Adjust it based on your taste. Feel free to experiment to find your perfect balance. Garnishing is important for a lovely look. Fresh cilantro adds a pop of green and a fresh taste. You can also add lime wedges on the side. This gives your dish an appealing and bright look. For serving, use a nice bowl. This makes your rice stand out. You can also layer it with colorful veggies for a great contrast. Make your plate as eye-catching as it is tasty! For the full recipe, check the [Full Recipe]. {{image_2}} In summer, I love to add fresh vegetables to coconut lime rice. Try adding bell peppers, corn, or peas for color and crunch. These veggies bring a bright taste that feels light and refreshing. You can also toss in some diced tomatoes for a pop of sweetness. In winter, I prefer comfort versions. Adding roasted root vegetables like sweet potatoes or carrots gives warmth to the dish. You can also stir in some spinach or kale for a healthy boost. The creamy coconut pairs so well with these hearty flavors. If you want a vegan version, you’re in luck! This recipe is already vegan-friendly. Just make sure your coconut milk is labeled vegan, and you're good to go. For those who need gluten-free options, this rice dish fits the bill perfectly. Jasmine rice is naturally gluten-free. Always check your coconut milk for gluten-free labels to ensure safety. Coconut lime rice pairs well with many main dishes. It’s great with grilled chicken, shrimp, or fish. The zesty flavors enhance the taste of these proteins. For a complete meal, serve it with light salads or grilled vegetables. A fresh cucumber salad or a simple avocado salad can balance the richness of the rice. You can find the Full Recipe [here](#). To keep your coconut lime rice fresh, store it in an airtight container. This helps prevent moisture loss and keeps flavors intact. You can refrigerate it for up to 3 days. If you notice any unusual smells or colors, it's best to toss it out. When you're ready to enjoy your leftovers, reheating is easy. The best methods include using a microwave or stovetop. If using a microwave, add a splash of water to keep it moist. Stir halfway through to heat evenly. On the stovetop, add a bit of coconut milk or water in a pan over low heat. Stir often to avoid drying out the rice. This keeps your coconut lime rice fluffy and flavorful. Yes, you can freeze coconut lime rice! To do this, let it cool completely before transferring it to a freezer-safe bag. Squeeze out as much air as possible. It can last up to 2 months in the freezer. When you're ready to eat, thaw it in the fridge overnight. To reheat, follow the same instructions as above, adding a bit of liquid to maintain moisture. Enjoy your tasty rice anytime! For the full recipe, check out the [Full Recipe]. How to fix overcooked coconut lime rice? If your coconut lime rice is overcooked, don't worry! You can try a couple of fixes. First, add a little water to the rice. Stir gently and let it sit covered for a few minutes. This helps the rice absorb moisture. If it’s too sticky, spread it out on a baking sheet. Cool it in the fridge for about 15 minutes. This can help separate the grains. Can I substitute different types of rice? Yes, you can use other rice types! Jasmine rice is great for its aroma and softness, but you can use basmati or long-grain rice. Just remember to adjust the cooking time and liquid amounts. Brown rice also works but needs more water and a longer cooking time. Caloric content and serving sizes One serving of coconut lime rice is about one cup. It has roughly 250 calories. This may vary based on the coconut milk used. Use light coconut milk for fewer calories. Health benefits of coconut and lime Coconut provides healthy fats that can boost energy. Lime adds vitamin C, which is great for your immune system. Together, they create a tasty and nutritious dish. Can I add protein to this dish? Absolutely! You can add shrimp, chicken, or tofu for extra protein. Cook the protein in a separate pan and stir it into the rice just before serving. This makes it a complete meal. Ideas for vegan substitutions in the recipe If you want to keep it vegan, that’s easy! Use plant-based coconut milk. You can also add beans or lentils. They provide protein and fiber, making the dish hearty and healthy. For the full recipe, check out Coconut Lime Paradise Rice 🥥. In this post, we explored how to make a delicious coconut lime rice dish. We covered the ingredients, cooking methods, and tips for achieving fluffy rice. Remember to add your favorite herbs and spices for extra flavor. You can adjust the recipe for seasons and dietary needs, making it easy to enjoy year-round. Proper storage and reheating methods ensure your leftovers stay fresh and tasty. With these insights, you can create a dish that delights every time. Enjoy the cooking!](https://emmasdish.com/wp-content/uploads/2025/05/b736e4d9-3ee6-4f81-b1c8-45601562bb86.webp)
If you’re looking for a quick and tasty side dish, you’ve come to the right place! Coconut Lime Rice is

Do you want a quick, healthy meal that bursts with flavor? These Healthy Spinach and Feta Wraps are perfect for

Looking for a sweet treat that combines gooey Nutella and creamy goodness? Nutella Rolls with Cream Cheese are your answer!
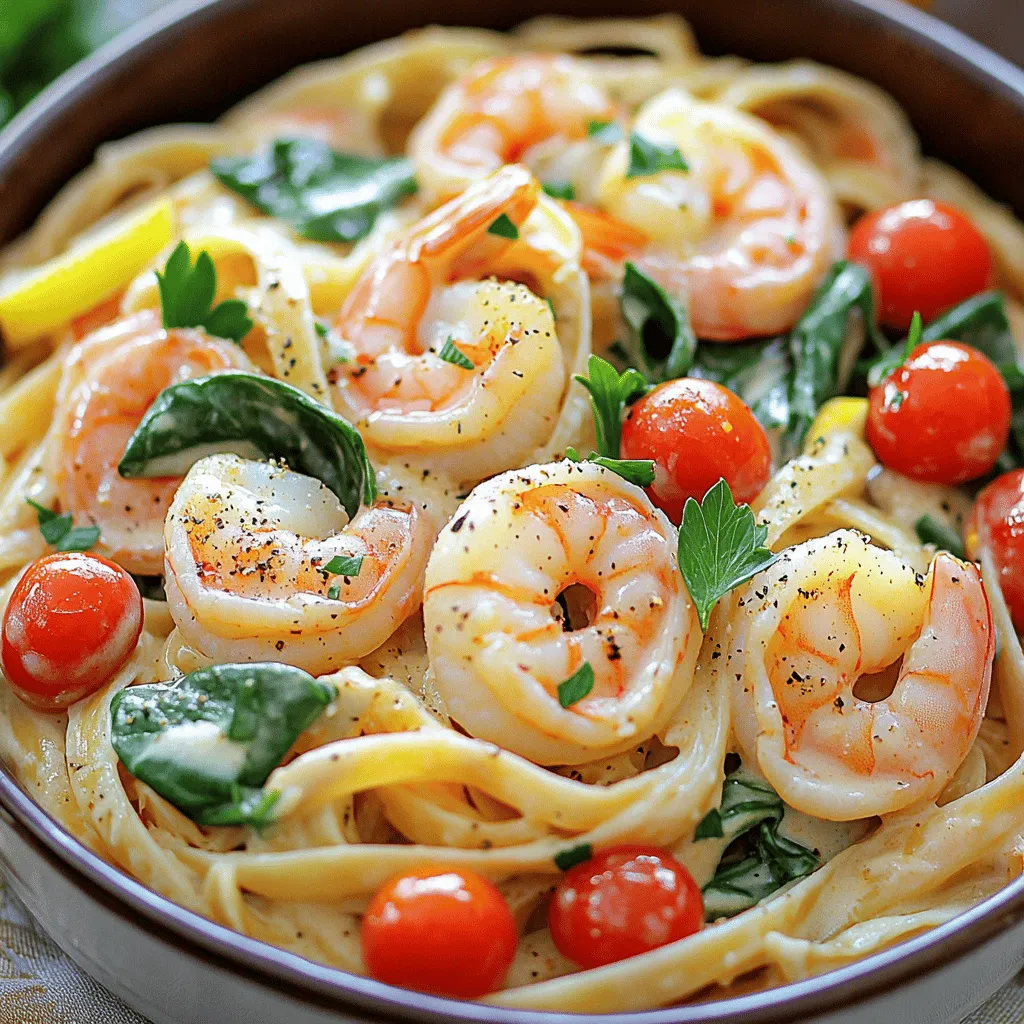
Looking for a quick and tasty dinner option that impresses? Try my creamy shrimp pasta! It’s simple, rich, and packed
![Here is what you need to make Pineapple Heaven Cake: - 2 cups all-purpose flour - 1 ½ cups granulated sugar - 1 cup unsweetened crushed pineapple (drained) - ½ cup unsalted butter, softened - 1 tsp baking powder - 1 tsp baking soda - ½ tsp salt - 4 large eggs - 1 tsp vanilla extract - ½ cup coconut milk - 1 cup shredded sweetened coconut - 1 cup crushed walnuts (optional) - Whipped cream for topping These ingredients come together to create a moist and flavorful cake. Each item plays a key role in the final taste and texture. You can change some ingredients if needed. Here are some options: - Flour: Use whole wheat flour for a healthier choice. - Butter: Coconut oil works well if you want a dairy-free cake. - Sugar: You can swap granulated sugar for brown sugar for a richer flavor. - Coconut milk: Almond milk or oat milk can replace coconut milk. - Eggs: Use flax eggs (1 tbsp ground flaxseed + 3 tbsp water) for a vegan option. These swaps help keep the essence of the cake while catering to different diets or preferences. Here’s a quick look at what one serving of Pineapple Heaven Cake offers: - Calories: 280 - Total Fat: 12g - Saturated Fat: 7g - Cholesterol: 70mg - Sodium: 180mg - Total Carbohydrates: 38g - Dietary Fiber: 1g - Sugars: 22g - Protein: 4g This cake is a lovely treat, perfect for gatherings or celebrations. Remember, moderation is key to enjoying this sweet delight! For the full recipe, check out the details earlier in the article. To make Pineapple Heaven Cake, start by gathering your ingredients. You will need flour, sugar, crushed pineapple, butter, eggs, and more. 1. Preheat your oven to 350°F (175°C). Grease and flour a 9x13 inch baking pan. 2. In a large bowl, cream the softened butter and sugar until light and fluffy. 3. Add the eggs one by one. Mix well after each egg. Stir in the vanilla and coconut milk. 4. In another bowl, sift the flour, baking powder, baking soda, and salt together. 5. Slowly mix the dry ingredients into the wet mixture. Do not overmix; just blend until combined. 6. Fold in the crushed pineapple, shredded coconut, and nuts if you like. 7. Pour the batter into your prepared pan. Smooth the top with a spatula. 8. Bake for 30-35 minutes. To check, insert a toothpick in the center. It should come out clean. 9. Let the cake cool in the pan for 10 minutes. Then, move it to a wire rack to cool completely. To get the best texture in your cake, follow these tips: - Use room temperature ingredients. This helps the batter mix well. - Don’t overmix the batter. Mix just until you see no dry flour. - Let the cake cool completely before frosting. This keeps the whipped cream from melting. Once the cake is cool, it’s time to serve. Top it with whipped cream and extra coconut. - For a lovely presentation, slice the cake and place each piece on colorful plates. - Add a sprig of mint and a few pineapple chunks to each slice for a tropical touch. Enjoy this easy and delightful treat! For the complete recipe, check the [Full Recipe]. When making Pineapple Heaven Cake, avoid overmixing the batter. This can make the cake tough. Make sure to fold in the crushed pineapple gently. Also, check your oven temperature. An oven too hot can burn the cake's edges. Lastly, let the cake cool before adding whipped cream. This keeps the cream from melting. You can boost flavor by adding a few ingredients. For a fruity twist, try adding diced mango or banana. If you love nuts, add some crushed walnuts or pecans. Adding a hint of lime juice gives a refreshing zing. You can also mix in chocolate chips for a sweet surprise. To make this cake, you need some basic tools. A 9x13 inch baking pan is key for even baking. Use a good mixing bowl for combining ingredients. A hand mixer helps cream butter and sugar well. Don’t forget measuring cups and spoons for accuracy. Finally, a wire rack cools the cake perfectly after baking. Check out the Full Recipe for more details. {{image_2}} You can make Pineapple Heaven Cake even better by adding more fruit. Try mixing in mango, banana, or peaches. These fruits pair well with the pineapple and add extra flavor. You can also use fresh fruit instead of canned. Just make sure to chop it up small. This extra fruit makes the cake even more tropical and fun. For those who need gluten-free options, use gluten-free flour instead of all-purpose flour. This swap works well and keeps the cake tasty. To create a vegan version, replace eggs with flaxseed meal mixed with water. Use coconut oil in place of butter too. These changes make the cake fit for everyone, while still keeping it moist and delicious. Frosting can change the whole cake experience! You can use cream cheese frosting for a tangy touch. A coconut whipped cream gives a light and fluffy feel. For a fun twist, try a mango glaze or a simple dusting of powdered sugar. Each frosting brings its own flavor, making every bite a new delight! To keep your Pineapple Heaven Cake fresh, store it in an airtight container. This helps keep the moisture in. If you don't have a container, cover the cake with plastic wrap. Make sure it is sealed tight to prevent drying out. You can keep it at room temperature for up to three days. If you live in a warm area, store it in the fridge to keep it fresh longer. Freezing is a great way to save your Pineapple Heaven Cake for later. First, let the cake cool completely. Then, slice it into pieces if you like. Wrap each slice tightly in plastic wrap. Place the wrapped slices in a freezer-safe bag. Be sure to remove as much air as possible. You can freeze the cake for up to three months. When ready to enjoy, thaw it in the fridge overnight. Pineapple Heaven Cake can last quite a while if stored properly. At room temperature, it stays fresh for about three days. In the fridge, it can last about one week. If you freeze it, the flavor and texture remain good for three months. Always check for any signs of spoilage before eating. Enjoy your cake at its best! To keep your cake moist, use crushed pineapple. The juice adds great moisture. Make sure to drain it well, so it doesn't add too much liquid. Also, don’t overbake it. Check for doneness at 30 minutes. The toothpick should come out clean but not dry. You can add coconut milk for a rich texture. This gives the cake a nice, soft bite. I often serve it warm with whipped cream on top. Yes, you can use fresh pineapple! It offers a bright flavor and a firmer texture. Just chop it into small pieces and crush it a bit. Make sure to drain any extra juice, similar to canned pineapple. This way, your cake won't become soggy. Fresh pineapple makes the cake taste even more vibrant and tropical. If you want a more intense flavor, grill the fresh pineapple before adding it to the batter. Pineapple Heaven Cake pairs well with many treats. Top it with whipped cream for a light finish. You can also add a scoop of vanilla ice cream for a creamy contrast. A sprinkle of toasted coconut can enhance the tropical vibe. Serve it on colorful plates to make it more fun. Fresh mint leaves or pineapple chunks can add a nice touch too. For a drink, try a tropical fruit punch or a light lemonade. For the full recipe, check here: [Full Recipe]. In this blog, we explored how to make Pineapple Heaven Cake. We covered the key ingredients, including substitutions and nutritional info. The step-by-step instructions helped you prepare, bake, cool, and serve the cake perfectly. I shared tips to avoid common mistakes and enhance flavors. We also discussed fun variations and storage tips for leftovers. Lastly, I answered frequent questions to help you succeed. Remember, with a few simple steps, you can create a delicious treat everyone will love. Enjoy your baking and the tasty results!](https://emmasdish.com/wp-content/uploads/2025/05/3b7aadb5-380e-46c2-bff3-88a3964694c3.webp)
Welcome to your new favorite dessert: Pineapple Heaven Cake! If you love fluffy, fruity treats, this recipe checks all the

Craving a dish that combines rich flavors with a touch of elegance? Dive into this Savory Seafood Lasagna, where layers
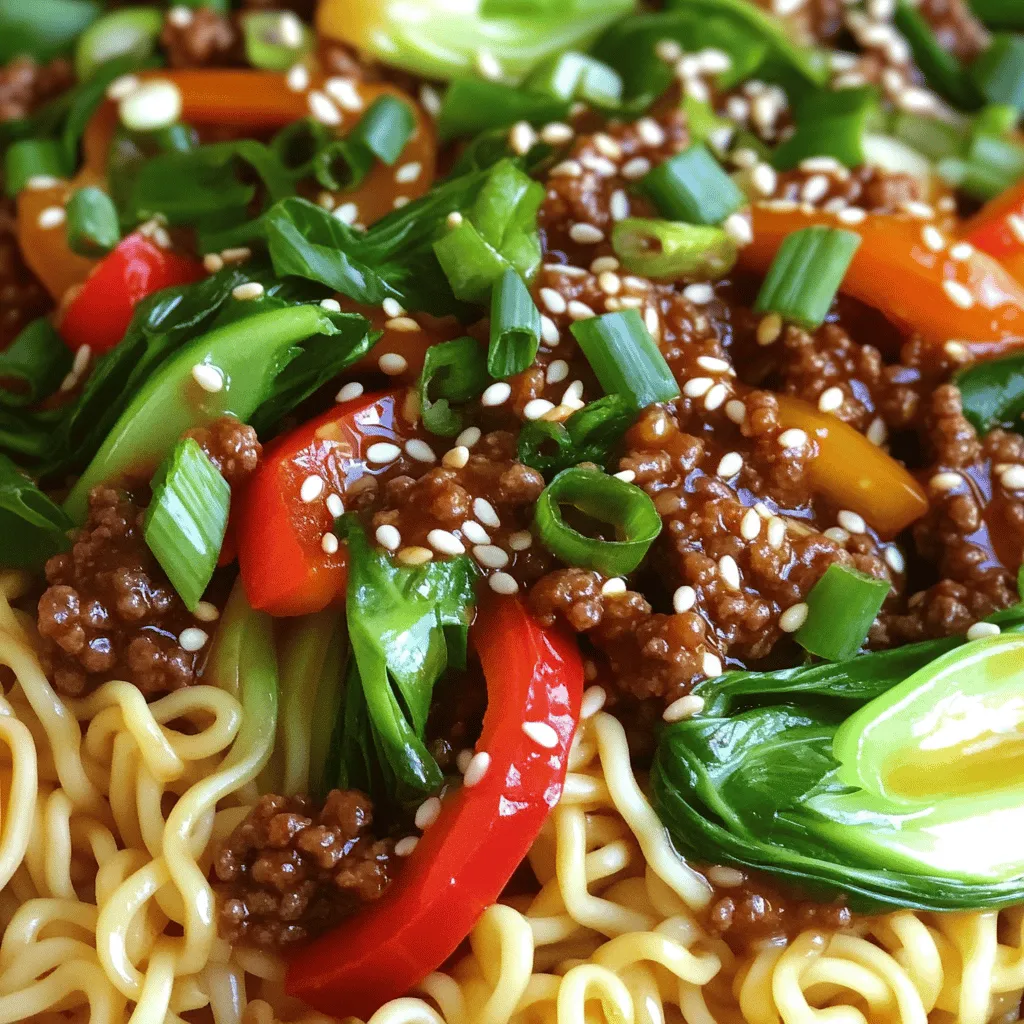
Are you ready to enjoy a quick, flavorful meal? Mongolian Ground Beef Noodles are your answer! This dish combines tender
