Skip to content
DisclaimerTerms Of UseGDPR PolicyCookie Policy

Emmas Dish

  • Home
  • Drinks
  • Appetizers
  • Dinner
  • Dessert
  • About
  • Contact
  • Privacy Policy
DisclaimerTerms Of UseGDPR PolicyCookie Policy

Emma

To make a great seafood salad, you need fresh and tasty ingredients. Here’s a list of what you’ll need: - Seafood Options: - 1 cup cooked shrimp, peeled and deveined - 1 cup calamari rings, cooked - 1 cup scallops, cooked and chopped - Vegetables and Mixed Greens: - 1 cup mixed salad greens (arugula, spinach, and baby kale) - 1/2 cup cherry tomatoes, halved - 1/4 cup red onion, finely sliced - 1/2 avocado, diced - 1/4 cup cucumber, diced - 1/4 cup fresh parsley, chopped - Dressing Components: - Juice and zest of 1 lemon - 2 tablespoons extra virgin olive oil - Salt and pepper to taste Using fresh seafood gives the salad its main flavor. The shrimp, calamari, and scallops bring a nice mix of textures. The vegetables add crunch and color. The greens lighten the dish, making it perfect for summer. The dressing ties everything together. Lemon juice adds brightness, while olive oil adds richness. Salt and pepper enhance the flavors. You can find the full recipe in the article. Enjoy creating this fresh and flavorful seafood salad! 1. Start by grabbing a large mixing bowl. Add the cooked shrimp, calamari rings, and chopped scallops. These seafood choices give the salad a nice variety and flavor. Toss them gently to mix. 2. Now, it's time for the veggies! Add the mixed salad greens, cherry tomatoes, red onion, diced avocado, cucumber, and chopped parsley to the bowl. Each of these vegetables adds a fresh crunch and bright color. 3. Next, let’s prepare the dressing. In a small bowl, whisk together the lemon juice, lemon zest, and olive oil. This combination brings a zesty flavor. Don’t forget to season it with salt and pepper to taste. 4. Drizzle the lemon dressing over the seafood and salad mixture. Gently toss everything together until well coated. This step is key to ensuring each bite bursts with flavor. 5. After everything is combined, take a moment to taste it. Adjust the seasoning by adding more salt, pepper, or lemon juice as needed. This lets you customize the salad to your liking. 6. Serve the salad right away for the best texture. If you prefer, you can refrigerate it for 15-20 minutes. This wait allows the flavors to meld beautifully. Present the salad in a large bowl or on individual plates. For a nice touch, garnish with extra parsley leaves and a lemon wedge on the side. Enjoy your Ocean Breeze Seafood Salad! For the full recipe, check out the [Full Recipe]. Using fresh seafood and vegetables is key to a great seafood salad. Fresh flavors give your dish a bright taste that frozen seafood simply can’t match. Always check for the freshest shrimp, calamari, and scallops at your market. This makes a big difference! Adjusting seasoning to your liking is important. Start with a little salt and pepper. After mixing the salad, taste it. If it needs more flavor, add more salt, pepper, or lemon juice. Don’t be afraid to experiment until it’s just right for you. For the best serving and presentation, use a large bowl or individual plates. This makes your salad look inviting. Garnish with extra parsley leaves and a lemon wedge for a pop of color. Place your seafood salad right before serving. This keeps everything crisp and fresh. You can find the full recipe for Ocean Breeze Seafood Salad in the previous sections. Enjoy your cooking! {{image_2}} Seafood salad offers a world of flavors. You can create many tasty versions. - Shrimp salad variations: You can spice it up with jalapeños or add citrus zest for a fresh kick. For a creamy option, mix in some mayonnaise or Greek yogurt. Each choice brings a new taste that can excite your palate. - Crab and tuna salad ideas: Try swapping crab for tuna to change the flavor. Add some diced celery for crunch. Instead of using mayo, mix in a tangy vinaigrette for a lighter touch. This gives you a new twist with common ingredients. - Gluten-free and low-carb options: If you want gluten-free, skip croutons and use crisp lettuce instead. For low-carb choices, substitute pasta with sliced zucchini or radishes. These options make the salad both healthy and filling. These variations allow you to explore and enjoy seafood salad in many ways. Check out the Full Recipe for the perfect base to start your culinary adventure! To keep your seafood salad fresh, use a tight container. Glass or plastic containers with lids work well. These containers keep air out and help the salad stay crisp. You can store seafood salad in the fridge for up to two days. After that, the seafood may lose its taste and texture. Always check for any off smells before eating leftovers. When reheating, it’s best to avoid high heat. Instead, let the salad sit at room temperature for a few minutes before serving. This helps the flavors return without cooking the seafood. If you want to serve it cold again, just add a little fresh dressing. This will brighten the flavors and restore some freshness. Enjoy your Ocean Breeze Seafood Salad! What is the best seafood to use in salads? The best seafood for salads includes shrimp, calamari, and scallops. These options offer great taste and texture. You can mix and match them to find your favorite combo. For a twist, try adding crab or lobster for a special touch. Can seafood salad be made ahead of time? Yes, seafood salad can be made ahead of time. You can prepare it a few hours before serving. Just keep it in the fridge to stay fresh. However, I recommend adding the dressing right before serving to keep the greens crisp. What are some good side dishes to serve with seafood salad? Good side dishes include crusty bread, rice, or a light soup. A refreshing fruit salad or grilled veggies also pair well. These sides balance the seafood salad's flavors and add variety to your meal. For a full meal, consider serving the seafood salad with a nice glass of white wine. Check out the Full Recipe for more ideas! This blog post covered the key parts of making an Ocean Breeze Seafood Salad. We talked about the best seafood and fresh veggies to mix in, plus how to make a tasty dressing. Remember to use fresh ingredients and adjust the flavors to suit your taste. Try different seafood options for fun twists. With the right storage, you can enjoy leftovers, too. Now, get creative in the kitchen and make your perfect seafood salad!

Savory Seafood Salad Fresh and Flavorful Delight

If you crave a fresh and tasty dish, seafood salad is the perfect choice. This savory mix of shrimp, scallops,

Chicken and Dairy Ingredients - 1 pound boneless, skinless chicken breasts, sliced into strips - 1 cup sour cream Vegetables and Seasonings - 1 medium onion, diced - 3 cloves garlic, minced - 8 ounces mushrooms, sliced (button or cremini) - 1 tablespoon Dijon mustard - 1 teaspoon smoked paprika - Salt and pepper to taste - Fresh parsley, chopped (for garnish) Cooking Staples - 2 cups chicken broth - 2 tablespoons all-purpose flour - 2 tablespoons olive oil When I make my homemade chicken stroganoff, I always choose fresh ingredients. The chicken gives a nice protein base. Sour cream adds creaminess and tang. I love using a mix of onions, garlic, and mushrooms for a rich flavor. Dijon mustard brings a subtle kick that makes it stand out. Smoked paprika adds warmth and depth. Don't forget the salt and pepper to enhance all the flavors. For cooking, I use chicken broth to build up the sauce. Flour helps thicken it, while olive oil makes sure everything cooks well. You can find the full recipe to see how all these ingredients come together. Using these fresh ingredients makes a big difference in taste. Each item plays its part to create a dish that is both comforting and delicious. Sautéing Onions and Garlic Start by heating olive oil in a large skillet over medium heat. Add the diced onion and cook for about 3-4 minutes. You want the onion to become soft and clear. Next, stir in the minced garlic. Cook it for another minute until you smell its sweet aroma. This step builds a great base for your stroganoff. Cooking the Mushrooms Now, add the sliced mushrooms to the skillet. You will need to sauté them for about 5 minutes. Look for them to turn golden brown. Stir them often to cook evenly. Once they are done, push the mushroom mix to one side of the skillet. This will make room for the chicken. Seasoning and Browning On the empty side of the skillet, add the chicken strips. Sprinkle salt, pepper, and smoked paprika over them. Cook the chicken for about 5-6 minutes. You want the chicken to be no longer pink inside. This step adds flavor and makes your stroganoff heartier. Adding Broth and Thickening Once the chicken is cooked, sprinkle the flour over the entire mixture. Stir well to coat everything evenly. Cook for an extra 2 minutes to remove the raw flour taste. Then, slowly pour in the chicken broth. Stir constantly as you do this. Bring the mixture to a gentle simmer and let it cook for about 5 minutes. You want it to thicken slightly. Incorporating the Sour Cream Finally, lower the heat and stir in the sour cream and Dijon mustard. Mix well until everything is blended. Heat it gently but avoid boiling. Taste and adjust the seasoning with more salt or pepper if needed. Now, your homemade chicken stroganoff is ready to serve over cooked egg noodles or rice. Check the full recipe for more details! Avoiding Overcooking Chicken To keep chicken juicy, cook it just right. Sauté the chicken until it turns white, about 5-6 minutes. If you cook it too long, it can become dry. Use a meat thermometer if you have one. The chicken should reach 165°F. This helps ensure it stays tender. Enhancing Flavor Profiles To boost flavor, use fresh herbs like parsley. Fresh herbs add a bright taste. Smoked paprika gives a nice depth too. Make sure to season well with salt and pepper. You can also add a splash of lemon juice at the end. This adds a zesty kick that brightens the dish. Gluten-Free Alternatives If you need gluten-free options, replace all-purpose flour with cornstarch. Use the same amount. You can also serve it over rice instead of noodles. Always check labels on broth and other packaged items to ensure they are gluten-free. Substitute Suggestions for Dairy For a dairy-free version, use coconut cream instead of sour cream. It gives a creamy texture without the milk. You can also try a dairy-free yogurt. Just make sure it’s plain to avoid unwanted flavors. These swaps keep your dish creamy and delicious! For the complete recipe and cooking details, check out the Full Recipe. {{image_2}} Using different proteins can change the flavor of your Stroganoff. Try turkey instead of chicken for a unique twist. Turkey has a mild taste that blends well with the sauce. You can even use beef, which adds a rich depth to the dish. Just remember to adjust cooking times based on the protein you choose. For vegan options, swap chicken for mushrooms or tofu. Mushrooms give a meaty texture, while tofu absorbs flavors well. Use a plant-based sour cream for creaminess. This way, you keep the comfort of Stroganoff while catering to different diets. Pair Chicken Stroganoff with side dishes like steamed vegetables or a fresh salad. The crunch from veggies balances the creamy sauce. You can also serve it with roasted potatoes for a hearty meal. For presentation, use a wide, shallow bowl to show off your Stroganoff. Garnish with fresh parsley for a pop of color. Consider adding a lemon wedge on the side to brighten the dish. A sprinkle of smoked paprika adds extra flair, too. For the full recipe, check out the details above. To keep your Chicken Stroganoff fresh, store it properly. First, let it cool to room temperature. Then, transfer it to an airtight container. This helps keep moisture in and air out. You can store it in the fridge for up to three days. If you want to save it longer, freeze it. Use a freezer-safe container or bag. Make sure to remove as much air as possible. Label the container with the date. You can freeze it for up to three months. When it’s time to enjoy your leftovers, reheating is key. The best method is to use a stovetop. Pour the Chicken Stroganoff into a skillet. Add a splash of chicken broth or water to help with moisture. Heat it over medium heat while stirring. This ensures even heating. You can also use a microwave for quick reheating. Place a portion in a microwave-safe bowl. Cover it loosely with a microwave-safe lid. Heat in short bursts, stirring in between. This keeps the dish from drying out. To maintain flavor and texture, avoid overheating. If the sauce gets too thick, add a little broth. This keeps your Chicken Stroganoff creamy and delicious. Enjoy your meal! For the full recipe, click here. You can serve Chicken Stroganoff with several tasty sides. I love pairing it with: - Cooked egg noodles - Rice - Mashed potatoes - Steamed vegetables - A fresh green salad These sides balance the rich flavors of the stroganoff. They also add texture to your meal. The chicken is done when it reaches an internal temperature of 165°F. You can check this with a meat thermometer. The chicken should also be white and no longer pink inside. Yes, you can make Chicken Stroganoff ahead of time. Cook it fully, then let it cool. Store it in the fridge for up to three days. When you're ready to eat, reheat it on low heat. Chicken Stroganoff is a twist on the classic Beef Stroganoff. The dish has roots in Russian cuisine. It became popular in the U.S. in the 1950s. The creamy sauce makes it a comfort food favorite. Absolutely! A slow cooker works well for Chicken Stroganoff. Just add all the ingredients, except the sour cream. Cook on low for 6-8 hours. Stir in the sour cream before serving. This makes a rich and tasty meal. For the full recipe, check out the section above. In this blog post, I shared how to make homemade chicken stroganoff. You learned about the key ingredients, step-by-step cooking methods, and helpful tips. I also covered various ingredient swaps and storage advice for leftovers. Remember, cooking is fun! Don't be afraid to experiment with flavors and textures. Enjoy crafting a meal that warms your heart and delights your taste buds. You can make a delicious chicken stroganoff that suits your taste and needs. Happy cooking!

Homemade Chicken Stroganoff Flavorful Comfort Meal

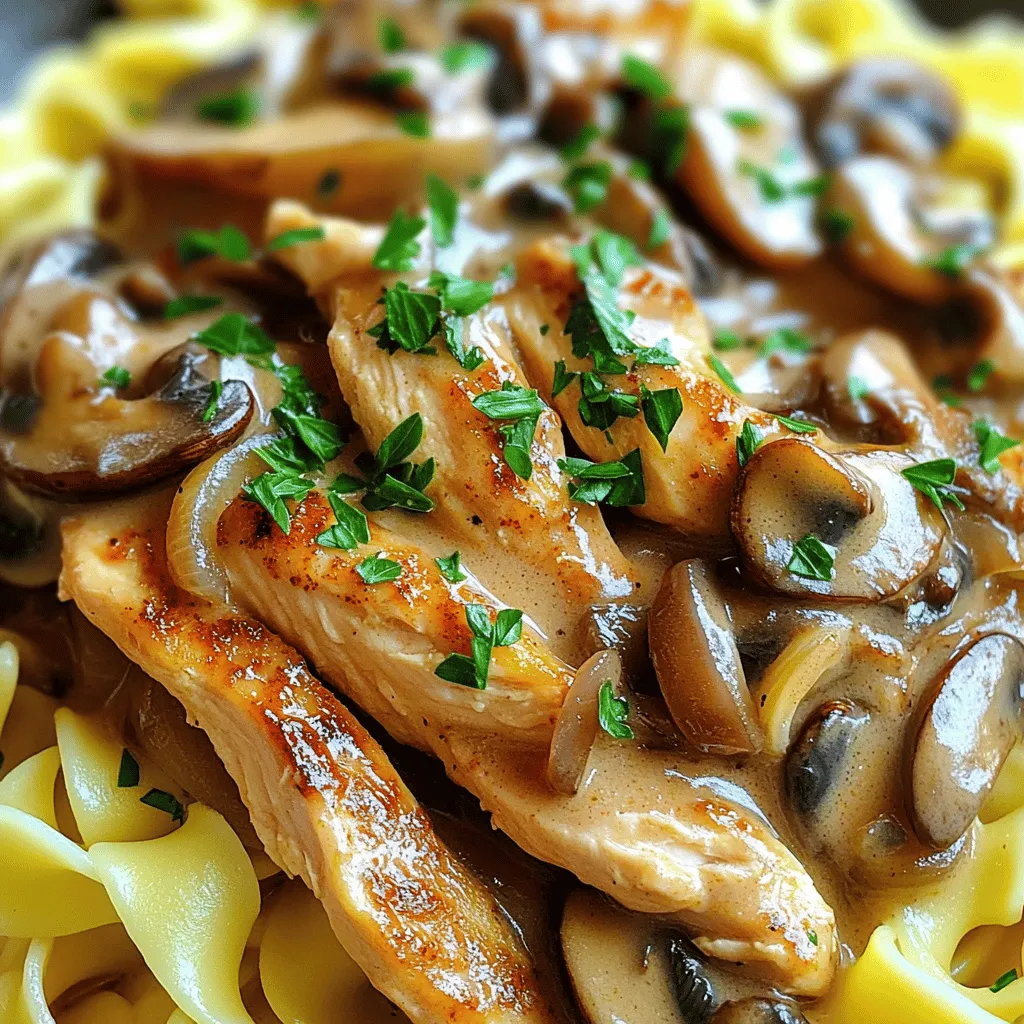
If you’re craving a warm, hearty meal that’s easy to make, Homemade Chicken Stroganoff is your answer. Packed with tender

- 2 cups potato gnocchi (store-bought or homemade) - 2 large russet potatoes - 1/2 cup sour cream - 1 cup shredded sharp cheddar cheese The main ingredients in loaded baked potato gnocchi are simple yet full of flavor. The gnocchi is the heart of the dish. You can choose to buy it or make it from scratch. Using fresh, homemade gnocchi adds a nice touch. The russet potatoes give that classic baked potato taste. Sour cream adds creaminess, and cheddar cheese brings a sharp kick. - 3 strips of bacon, cooked and crumbled - 1/4 cup green onions, sliced - 2 tablespoons olive oil Adding crumbled bacon enhances the dish with a smoky flavor. Green onions add freshness and a pop of color. Olive oil is essential for sautéing and adds richness. Together, they create a balanced flavor profile. - Salt and pepper to taste - Optional: 1/4 cup grated Parmesan cheese for topping Seasoning is key. Salt and pepper enhance all the flavors. If you love cheese, adding grated Parmesan on top is a great choice. It melts perfectly and adds a nice finish. For the full recipe, check out the Loaded Baked Potato Gnocchi recipe. - Preheat your oven to 400°F (200°C). - Wash the russet potatoes and poke holes in them with a fork. Roast them for 45-60 minutes. - Bring a large pot of salted water to a boil. - Cook the potato gnocchi until they float, usually about 2-3 minutes. Drain them well. - Once the potatoes cool, peel and mash them in a bowl. - Mix the mashed potatoes with sour cream and half of the cheddar cheese. - Gently fold in the cooked gnocchi until well combined. - Heat olive oil in a large oven-safe skillet over medium heat. - Add the gnocchi mixture to the skillet, spreading it evenly. - Top with the remaining cheese and crumbled bacon. - Cook on low heat for 5-7 minutes until the bottom is golden. - Transfer the skillet to the oven and bake for 10-15 minutes until bubbly. You can find the full recipe above to see all the details. Enjoy your cooking! - For extra flavor, season the potato mixture with garlic powder or onion powder. - Use a potato ricer for an ultra-smooth texture. This helps make your gnocchi creamy and light. - Serve directly from the skillet for a rustic presentation. It looks great and keeps your dish warm. - Garnish with extra green onions and a dollop of sour cream. This adds color and a nice tangy taste. - Use an oven-safe skillet for easy transferring to the oven. This makes cooking and cleanup easier. - A quality potato masher or ricer will make the mashing process easier. Smooth potatoes mean better gnocchi! These tips help you create the best Loaded Baked Potato Gnocchi. For the full recipe, check the earlier sections. Enjoy cooking! {{image_2}} You can switch things up in this dish easily. Try using sweet potatoes instead of russets. Sweet potatoes add a nice sweetness and a pop of color. If you want a different cheese, swap cheddar for gouda or mozzarella. These cheeses melt beautifully and give a creamier feel. Toppings can make your gnocchi even better. Consider diced tomatoes for a fresh bite. Jalapeños add a spicy kick if you like heat. Fresh herbs, like parsley or cilantro, can brighten the dish. You can also add sautéed veggies like spinach or mushrooms for extra flavor and nutrition. This recipe can fit many diets. To make it vegetarian, just leave out the bacon. You can use plant-based cheese instead of dairy cheese. If you need a gluten-free version, look for gnocchi made from gluten-free flour. This way, everyone can enjoy this tasty dish! For the full details, check out the Full Recipe for Loaded Baked Potato Gnocchi. To keep your loaded baked potato gnocchi fresh, store leftovers in an airtight container. Place it in the fridge where it will stay good for up to 3 days. When you want to enjoy it again, reheat it in the oven or on the stovetop. This helps maintain the best texture. If you want to save some gnocchi for later, you can freeze the unbaked mixture. Use a freezer-safe container to keep it safe from freezer burn. It can last up to a month. When you're ready to bake, make sure to thaw it completely before putting it in the oven. To reheat your gnocchi, preheat the oven to 350°F (175°C). Bake it until heated through. If you want to bring back some creaminess, add a splash of cream or more cheese before reheating. This little trick makes the dish even more delightful! Bake for 10-15 minutes until the cheese is bubbly and golden brown. This step melts the cheese and brings all the flavors together. Keep an eye on it to avoid burning the cheese. Yes, you can prepare the mixture and store it in the fridge or freeze it for later. If you freeze it, let it thaw completely before baking. This makes it easy to enjoy a warm meal with little effort. Pair with a side salad, garlic bread, or steamed vegetables for a complete meal. These sides add freshness and balance to the rich flavors of the gnocchi. Yes, it can be made in advance and stored easily for quick meals throughout the week. Simply reheat in the oven or on the stove for a tasty, comforting dish. Don't forget to check out the Full Recipe for more details! This blog post covered a delicious recipe for Loaded Baked Potato Gnocchi. You learned about the ingredients, cooking steps, tips, and storage advice. Each section helps you create a creamy, cheesy dish packed with flavor. This recipe is perfect for meal prep or dinner with friends. Don't hesitate to experiment with variations to make it your own! Enjoy every bite of your creation.

Loaded Baked Potato Gnocchi Flavorful Comfort Dish

Looking for a cozy dish to warm your soul? Dive into my Loaded Baked Potato Gnocchi, a delightful twist on

To make Bang Bang shrimp pasta, you need: - 8 ounces spaghetti or linguine - 1 lb shrimp, peeled and deveined - 1/2 cup mayonnaise - 1/4 cup sweet chili sauce - 1 tablespoon sriracha (adjust to taste) - 2 tablespoons lime juice - 2 cloves garlic, minced - 1 tablespoon olive oil - 1/2 teaspoon paprika - Salt and pepper to taste - 2 green onions, thinly sliced - Fresh cilantro for garnish You can switch some ingredients based on your taste. For instance: - Use Greek yogurt instead of mayonnaise for a lighter sauce. - If you like more heat, add more sriracha or red pepper flakes. - Swap lime juice with lemon juice if that's what you have. - Any pasta type works; try penne or fettuccine for a fun twist. When buying shrimp, look for these tips: - Choose shrimp with a firm texture and a mild sea smell. - Avoid shrimp that smell strong or have a slimy feel. - If possible, buy shrimp that is wild-caught for better flavor. - Frozen shrimp can be great; just thaw them properly before cooking. For the full recipe, check the [Full Recipe]. Start with a big pot. Fill it with water and add salt. Bring it to a boil. Once boiling, add 8 ounces of spaghetti or linguine. Cook it as the package says until it is al dente. This means it should be firm but not hard. When it’s done, drain the pasta in a colander. Do not forget to save 1/2 cup of the pasta water. You might need this later to make the sauce smoother. Grab a medium bowl. In it, mix 1/2 cup of mayonnaise, 1/4 cup of sweet chili sauce, and 1 tablespoon of sriracha. You can change the amount of sriracha based on how spicy you want it. Next, add 2 tablespoons of lime juice, 2 cloves of minced garlic, and 1/2 teaspoon of paprika. Whisk everything together until it’s smooth. Give it a taste and adjust if you want more heat or sweetness. Heat a large skillet over medium heat. Pour in 1 tablespoon of olive oil. Once hot, add 1 pound of peeled and deveined shrimp. Season it with salt and pepper. Sauté the shrimp for about 2 to 3 minutes on each side. They should turn pink and opaque when done. This step is key to getting tasty shrimp. Now, lower the heat. Add the cooked pasta to the skillet with the shrimp. Pour the Bang Bang sauce over the pasta and shrimp. Gently mix everything to coat it well. If the sauce is too thick, add some of the reserved pasta water to it. This helps make the sauce creamy and easy to mix. Finally, add sliced green onions and stir again. Warm it all for one more minute. Then serve the dish right away. For a pretty touch, garnish with fresh cilantro. For more details on the complete recipe, check out the Full Recipe. To get the best taste from your Bang Bang shrimp pasta, use fresh ingredients. Fresh shrimp adds sweetness and texture. Choose ripe limes for juice; they enhance flavor. Adjust the sriracha for heat. If you like it spicier, add more. Mixing the sauce well is key to a balanced taste. This dish shines with a hint of lime and garlic. Cook shrimp quickly for the best texture. Heat your skillet to medium. Cook shrimp for 2-3 minutes on each side. They should be pink and opaque. For pasta, follow package directions. Aim for al dente for the right bite. Remember to save some pasta water. It helps mix everything smoothly and keeps the dish creamy. Avoid overcooking shrimp. They can turn tough and rubbery. Don't forget to season your shrimp with salt and pepper. This step adds flavor. When mixing the sauce, do it slowly. Too much sauce can overwhelm the pasta. Finally, serve immediately for the best taste and presentation. For more tips, check out the Full Recipe for Bang Bang Shrimp Pasta. {{image_2}} You can easily switch to a vegetarian or vegan dish. Replace shrimp with firm tofu. Cut the tofu into small cubes and sauté until golden. Use vegan mayo for the sauce. Sweet chili sauce is usually vegan, but check the label. This way, you keep the creamy texture and flavor. You control the heat! Want it mild? Use less sriracha or omit it. For more spice, add extra sriracha or red pepper flakes. Taste the sauce as you mix. Adjust it until it’s just right for your palate. This flexibility makes it fun to create your perfect dish. Feeling adventurous with pasta? You can swap spaghetti or linguine for other types. Try penne or fettuccine for a different shape. If you want a healthier option, use whole wheat or zucchini noodles. This change can make the meal lighter and still full of flavor. Leftover Bang Bang shrimp pasta is easy to store. Place it in an airtight container. Let it cool before sealing. This helps keep the flavors fresh. Store it in the fridge for up to three days. If you want to keep it longer, consider freezing. When reheating, aim to keep the pasta moist. Use a microwave-safe dish and add a splash of water. Cover the dish to trap steam. Heat in short bursts, stirring in between. This method helps prevent drying out. You can also reheat on the stove. Add a little olive oil or butter to the pan. Warm up the pasta over low heat, stirring gently. For longer storage, you can freeze the Bang Bang shrimp pasta. Make sure it cools completely. Transfer to a freezer-safe container. It can last up to three months in the freezer. When ready to eat, thaw it in the fridge overnight. Reheat as mentioned earlier. This keeps the flavors and texture nice. For the full recipe, check out the details above. Bang Bang Sauce has a few simple ingredients. You mix mayonnaise, sweet chili sauce, sriracha, lime juice, minced garlic, and paprika. This blend gives the sauce its creamy, sweet, and spicy taste. You can adjust the sriracha to make it hotter or milder. To make Bang Bang Shrimp Pasta gluten-free, use gluten-free pasta. Many brands offer good alternatives that work well. Also, check your sauces. Some sweet chili sauces contain gluten. Look for ones labeled gluten-free to be safe. Yes, you can use frozen shrimp! Just thaw them before cooking. You can do this by leaving them in the fridge overnight or putting them in cold water for about 30 minutes. Once thawed, make sure to pat them dry before you sauté them. Bang Bang Shrimp Pasta goes well with light side dishes. A fresh garden salad works nicely. You can also serve it with garlic bread or sautéed veggies. These add color and balance the meal. It takes about 10 minutes to prepare and 15 minutes to cook. So, you can have this dish ready in about 25 minutes! It's a quick dinner option that's perfect for busy nights. Yes, you can make it spicier! Add more sriracha to the sauce. You can also include red pepper flakes or fresh chopped peppers while sautéing the shrimp. Adjust the heat to your liking for a kick of flavor. This blog post covered everything you need for a great Bang Bang Shrimp Pasta. We discussed key ingredients, substitutions, and tips for choosing shrimp. Next, we walked through step-by-step cooking methods, from perfect pasta to that tasty Bang Bang sauce. I shared helpful tips, variations, and storage information to keep your dish fresh. In the end, you can make this dish your own, and enjoy it any time!

Bang Bang Shrimp Pasta Easy and Quick Dinner Option

Looking for a quick and tasty dinner? Bang Bang Shrimp Pasta checks all the boxes! I’ll guide you through this

For the chorizo and potato egg casserole, you will need: - 1 lb chorizo sausage, casings removed - 3 cups potatoes, peeled and diced (about 4 medium potatoes) - 1 small onion, finely chopped - 1 red bell pepper, diced - 8 large eggs - 1 cup milk - 1 teaspoon garlic powder - 1 teaspoon smoked paprika - Salt and pepper to taste - 1 cup shredded cheddar cheese - 2 tablespoons chopped fresh cilantro (for garnish) These ingredients combine to create a hearty dish. The chorizo adds spice and flavor, while the potatoes provide a filling base. Onions and bell peppers boost the taste and nutrition. You can customize your casserole with these toppings: - Sliced avocado - Fresh salsa - Sour cream - Extra cilantro These toppings add creaminess and freshness. They also help balance the flavors in the dish. Pair your casserole with: - Fresh fruit salad - A light green salad - Toasted bread These sides bring color and crunch to your meal. They also provide a nice contrast to the rich casserole. For the full recipe, check out the detailed instructions above. Start by gathering all your ingredients. You will need chorizo, potatoes, onion, and red bell pepper. Dice the potatoes into small cubes. Chop the onion finely and dice the red bell pepper. This helps them cook evenly. Set everything aside. Heat a large skillet over medium heat. Add the chorizo sausage, breaking it up with a spoon. Cook it for about 5 to 7 minutes until it turns brown. Remove the chorizo from the skillet. Leave the drippings in the pan. Next, add the diced potatoes, chopped onion, and red bell pepper. Sauté them for 10 to 12 minutes. Stir occasionally until the potatoes are tender and slightly golden. In a large bowl, whisk together 8 eggs, 1 cup of milk, 1 teaspoon of garlic powder, and 1 teaspoon of smoked paprika. Add salt and pepper to taste. Grease a 9x13 inch baking dish. Layer the cooked potatoes, chorizo, and vegetables evenly in the dish. Pour the egg mixture over everything, ensuring it covers all ingredients. Finally, sprinkle 1 cup of shredded cheddar cheese on top. Preheat your oven to 375°F (190°C). Bake the casserole for 25 to 30 minutes. You want the eggs to be set and the top to be golden brown. Remove the dish from the oven. Let it cool for a few minutes before slicing into squares. Garnish each slice with fresh cilantro. This dish pairs well with avocado slices or salsa for extra flavor. Enjoy your tasty weekend dish! Don't forget to check the Full Recipe for more details. To get the best texture in your casserole, focus on your potatoes. Cook them until they are tender but not mushy. Dice them evenly to ensure they cook at the same rate. When you layer the cooked potatoes with the chorizo and veggies, this keeps everything balanced. The eggs should be fluffy, so whisk them well with the milk before adding. This gives a nice rise to the casserole as it bakes. Chorizo adds great flavor, but you can boost it even more. Add a pinch of cayenne pepper for heat or a dash of hot sauce in the egg mixture. Fresh herbs like cilantro or parsley can brighten up the dish. For a smoky taste, consider adding some extra smoked paprika. Serving with avocado or fresh salsa also adds a fresh kick. One mistake is overcooking the chorizo. It should be browned but not dry. Another is undercooking the potatoes. Make sure they are tender before layering them. Don't skip greasing the baking dish; this helps with easy serving. Lastly, avoid crowding the oven. Bake until the eggs are just set to keep the dish light and fluffy. For the complete recipe, check out the Full Recipe section. {{image_2}} To make a vegetarian version of the chorizo and potato egg casserole, skip the chorizo. You can add more veggies instead. Try using mushrooms, zucchini, or spinach. These options add flavor and texture. Use plant-based sausage if you want a similar taste. This keeps the dish hearty and satisfying. Cheese adds creaminess and flavor to the casserole. You can switch up the cheese based on your taste. Monterey Jack or pepper jack cheese works well. These cheeses melt nicely and add a bit of spice. Feta cheese gives a salty kick, while goat cheese adds a tangy touch. Feel free to mix different cheeses for a unique flavor. If you love heat, increase the spice level. Add chopped jalapeños or diced green chiles to the mix. You can also sprinkle in crushed red pepper flakes for an extra kick. For a milder version, reduce or omit the smoked paprika. Tailor the spice level to match your taste buds and those of your guests. After you enjoy this chorizo and potato egg casserole, store any leftovers right away. Place them in an airtight container. Let the casserole cool to room temperature first. Then, seal the container tightly. This helps keep the flavors fresh and tasty. You can store it in the fridge for up to 3-4 days. When you’re ready to eat leftovers, you can easily reheat them. Preheat your oven to 350°F (175°C). Place the casserole in an oven-safe dish. Cover it with foil to prevent drying out. Heat for about 15-20 minutes, or until warm. You can also use a microwave. Just warm individual portions for about 1-2 minutes. Always check the temperature to make sure it is hot. If you want to save some for later, freezing is a great option. First, let the casserole cool completely. Cut it into portions for easy thawing. Wrap each piece tightly in plastic wrap, then place them in a freezer bag. Be sure to label the bag with the date. You can freeze it for up to 2-3 months. To enjoy, thaw overnight in the fridge, then reheat as described above. For more details, check the Full Recipe. Yes, you can make this casserole ahead of time. Prepare it the day before and store it in the fridge. Cover it well to keep it fresh. When you are ready to eat, just bake it as directed. This saves time on busy mornings. If you want a different flavor, you can use ground turkey or beef. For a vegetarian option, try black beans or lentils. These will give you protein without the meat. You can also use any spicy sausage you like. You can store leftovers in the fridge for about 3-4 days. Make sure to place them in an airtight container. If you want to keep it longer, consider freezing it. It should last in the freezer for about 2-3 months. Yes, this recipe is gluten-free. All the ingredients listed do not contain gluten. Just make sure to check the labels if you buy pre-made items like sausage or cheese. This way, you can enjoy it without worry. For the full recipe, refer back to the section above. This blog post covered everything you need for a great chorizo casserole. We explored key ingredients, shared step-by-step cooking instructions, and offered tips for perfect texture and flavor. I shared ways to make it vegetarian and how to store leftovers properly. Remember, cooking is fun, and small tweaks can make a big difference. Enjoy your delicious dish, and don’t be afraid to experiment!

Chorizo & Potato Egg Casserole Tasty Weekend Dish

Looking for a tasty weekend dish that packs a punch? This Chorizo & Potato Egg Casserole is your answer! It’s

- 1 1/2 cups graham cracker crumbs - 1/3 cup granulated sugar - 1/2 cup unsalted butter, melted - 16 oz cream cheese, softened - 1 cup granulated sugar - 1 teaspoon vanilla extract - 3 large eggs - 2 ripe bananas, mashed - 1 cup sour cream - 1 cup cold milk - 1 package (3.4 oz) instant banana pudding mix - 1 cup whipped cream (store-bought or homemade) - Fresh banana slices - Additional whipped cream for garnish - Nilla wafers or crushed graham crackers for garnish (optional) When I make this banana pudding cheesecake, I love the mix of flavors and textures. The crust starts with graham cracker crumbs. They give a sweet, crunchy base. Mix them with sugar and melted butter. Press this mix into a springform pan. It holds everything together. For the cheesecake filling, I use softened cream cheese as the star. It gets creamy and smooth when mixed with sugar and vanilla. Adding eggs one at a time keeps the batter light. Then, I fold in mashed bananas and sour cream. This makes the filling rich and tasty. The banana pudding layer is quick to make. I whisk cold milk with the instant pudding mix. It thickens fast! Then, I gently fold in whipped cream for a fluffy touch. For the final look, I top the cheesecake with fresh banana slices. A dollop of whipped cream adds extra fun. If you want, sprinkle Nilla wafers or crushed graham crackers on top. This adds a nice crunch to each bite. For the full recipe, check out the details above. Enjoy the creamy delight of banana pudding cheesecake! Start by preheating your oven to 350°F (175°C). In a bowl, mix together 1 1/2 cups of graham cracker crumbs, 1/3 cup of sugar, and 1/2 cup of melted butter. Stir until it looks crumbly. Press this mixture firmly into the bottom of a 9-inch springform pan. Bake it for about 10 minutes until it turns golden. Remove it from the oven and let it cool completely. In a large bowl, beat 16 oz of softened cream cheese until it’s smooth. Gradually add in 1 cup of sugar, mixing well. Then, mix in 1 teaspoon of vanilla extract. Add 3 large eggs one at a time, mixing well after each. Next, mix in 2 ripe bananas that you have mashed and 1 cup of sour cream. Stir gently until the mixture is smooth. Carefully pour the cheesecake filling over your cooled crust. Smooth the top with a spatula. Bake in the oven for 45 to 50 minutes until the center is set but still slightly jiggly. Turn off the oven, crack the door, and let the cheesecake cool inside for 1 hour. This trick helps prevent cracks. Once cooled, chill it in the refrigerator for at least 4 hours or overnight. In a mixing bowl, whisk together 1 cup of cold milk and 1 package (3.4 oz) of instant banana pudding mix. Whisk for about 2 minutes until it thickens. Gently fold in 1 cup of whipped cream until it is fully mixed. Once your cheesecake is completely chilled, spread the banana pudding layer evenly over the cheesecake. Place it back in the fridge for one more hour to set. Just before serving, top your cheesecake with fresh banana slices, a dollop of whipped cream, and sprinkle crushed Nilla wafers or graham crackers if you like. For an extra touch, serve slices on decorative plates and drizzle with chocolate or caramel sauce. Enjoy this creamy delight! To get the best cheesecake, use room temperature ingredients. This means your cream cheese, eggs, and sour cream should be warm. Cold ingredients can make the batter lumpy. When you add eggs, mix just until blended. Overmixing can make the cheesecake too airy, leading to cracks. A water bath is key for even cooking. It keeps the cheesecake from getting too hot. To make a water bath, wrap your pan in foil and place it in a larger pan filled with hot water. This helps the cheesecake bake slowly and smoothly. After baking, cool your cheesecake slowly. Crack the oven door and let it sit for an hour. This helps prevent cracks. You can elevate your cheesecake by adding sauces like chocolate or caramel. They add a nice touch and flavor boost. Serve it with a hot cup of coffee or tea. The warmth of the drink pairs well with the cool, creamy cheesecake. For more ideas, check the Full Recipe for serving tips. {{image_2}} You can make this cheesecake even more fun! Try adding chocolate or peanut butter. Just mix in 1/2 cup of melted chocolate or creamy peanut butter into the cheesecake filling. This twist gives a rich and tasty flavor. Using different types of pudding is another great option. You can swap the banana pudding for vanilla or butterscotch. Each choice brings a new taste to your cheesecake. Think about what flavors you like best! If you want a gluten-free crust, replace graham crackers with gluten-free cookies or almond flour. This way, everyone can enjoy the dessert. For those cutting back on sugar, you can use alternative sweeteners. Try using stevia or monk fruit sweetener. Just make sure to check the conversion scale, so you use the right amount. Baking mini cheesecakes is a fun idea! Use muffin tins instead of a springform pan. Line each cup with paper liners for easy serving. Adjust the bake time to about 20-25 minutes. Keep an eye on them, as smaller portions cook faster. Once they firm up, let them cool completely before serving. These mini treats are perfect for parties and gatherings! For the full recipe, check out the Full Recipe section! To keep your cheesecake fresh, place it in an airtight container. If you don't have one, cover it tightly with plastic wrap. Store it in the fridge. This helps maintain its creamy texture and flavor. For freezing, wrap individual slices in plastic wrap, then place them in a freezer bag. This keeps them protected from freezer burn. In the fridge, your cheesecake stays fresh for about 5 days. Check for any signs of spoilage before eating. If you see mold or if it smells off, it’s best to toss it out. Always trust your senses! When thawing frozen cheesecake, move it to the fridge for several hours or overnight. This method keeps the texture smooth. After thawing, you can serve it cold, or warm it up gently in the oven. Just be careful not to overheat it, as that can change the texture. Enjoy it with fresh toppings for a delightful treat! Yes, you can make Banana Pudding Cheesecake a day ahead. Doing this helps the flavors blend well. The cheesecake gets creamier as it chills. You can store it in the fridge overnight. Just cover it tightly with plastic wrap. This saves time for your event or dinner party. To keep your cheesecake smooth, follow these tips: - Use room temperature ingredients, especially the cream cheese. - Don’t overmix once you add eggs. This adds too much air and causes cracks. - Bake it at a lower temperature and check for doneness early. - Let the cheesecake cool slowly in the oven with the door slightly open. This helps avoid sudden temperature changes. Yes, you can swap out some ingredients: - For graham cracker crumbs, use crushed cookies or nuts for the crust. - You can use Greek yogurt instead of sour cream for a lighter option. - If you want a dairy-free version, try vegan cream cheese and coconut whipped cream. - For a sugar substitute, use stevia or monk fruit sweetener in place of granulated sugar. Here are some great ways to serve it: - Cut the cheesecake into slices and place them on nice plates. - Top with fresh banana slices and a dollop of whipped cream. - Sprinkle crushed Nilla wafers or graham crackers on top for added crunch. - Drizzle with chocolate or caramel sauce for a fancy touch. For the complete recipe, check out the Full Recipe for Banana Pudding Cheesecake . You learned how to make a tasty Banana Pudding Cheesecake. We covered the ingredients, step-by-step instructions, and helpful tips for perfecting it. Variations offer fun twists to suit different tastes or diets. Remember, proper storage keeps your leftovers fresh longer. Enjoy sharing this delightful cake with family and friends. By following these steps, you'll impress everyone with your baking skills. Happy baking!

Banana Pudding Cheesecake Irresistible Creamy Delight

Looking for a dessert that combines creamy cheesecake with the classic taste of banana pudding? You’ve landed in the right

To make a great shrimp fried rice, you'll need some key ingredients. Here’s what you should gather: - 2 cups cooked jasmine rice (preferably day-old) - 1 cup shrimp, peeled and deveined - 2 tablespoons vegetable oil - 2 eggs, lightly beaten - 1 cup mixed vegetables (carrots, peas, corn) - 2 green onions, chopped - 3 tablespoons soy sauce - 1 teaspoon sesame oil - 1 teaspoon garlic, minced - 1 teaspoon ginger, minced - Salt and pepper to taste These ingredients come together to create a dish full of flavor and texture. I always recommend jasmine rice for this dish. It has a lovely aroma and a fluffy texture. You want to use day-old rice. Fresh rice can be too sticky. If you cook rice the same day, spread it on a pan to cool. This helps it dry out a bit. The rice will fry better this way. Fresh ingredients make a big difference. Use bright, colorful veggies. Carrots, peas, and corn add sweetness and crunch. For the best taste, chop your green onions right before cooking. Fresh garlic and ginger add a punch of flavor. They make the dish smell amazing. Don’t skip these, as they really enhance the taste. For the full recipe, check out the details provided above! First, heat your large pan or wok over medium-high heat. Add 1 tablespoon of vegetable oil. When the oil is hot, toss in the shrimp. Cook them for 2-3 minutes. You want them to turn pink and opaque. Once cooked, remove the shrimp and set them aside. This step gives the shrimp a nice flavor. In the same pan, add another tablespoon of oil. Next, add the minced garlic and ginger. Sauté these for about 30 seconds. This helps release their wonderful aroma. Once fragrant, push them to one side of the pan. This way, you have space for the eggs. Pour the beaten eggs into the pan next. Scramble them gently until just cooked. Mix the eggs with the garlic and ginger. This will let the flavors blend nicely. After that, you can add your mixed vegetables. Stir-fry everything together for another 2 minutes until heated through. This will make your dish colorful and tasty. Now you are ready for the next steps! Check the [Full Recipe] for more details. To get that true taste of Chinese fried rice, start with day-old rice. Fresh rice is too sticky. Day-old rice is dry, making it easier to fry. Use soy sauce for umami. Sesame oil adds a rich, nutty flavor. Don't skip garlic and ginger; they give the dish depth. You can also use oyster sauce for extra flavor. Use a hot wok or pan. High heat helps fry the rice quickly. First, cook the shrimp until pink, then set aside. Sauté garlic and ginger until fragrant. Scramble eggs separately to keep them fluffy. Finally, add the rice and toss everything well. Stir-frying in batches can help. This keeps each grain separate and tasty. One big mistake is using fresh rice. It clumps and won’t fry well. Don't overcrowd the pan. This lowers the heat and causes steaming. Avoid overcooking the shrimp; they should be just pink. Also, be careful with soy sauce. Too much can make the dish too salty. Follow the Full Recipe for best results. {{image_2}} You can switch up the shrimp with other proteins. Chicken, beef, or tofu work great. Just cut them into small pieces. Cook them the same way you do the shrimp. For a veggie option, try using edamame or chickpeas. Each choice adds a unique taste to your dish. Feel free to mix in different vegetables. Broccoli, bell peppers, or snap peas all add flavor and crunch. You can even use leftover veggies from your fridge. Just remember to chop them small for even cooking. This makes your fried rice colorful and fun. If you like heat, add some spice! You can mix in chili paste or hot sauce. Sriracha is a tasty option for those who enjoy a kick. You can also sprinkle red pepper flakes while cooking. Adjust the spice to your taste, and enjoy a fiery twist on the classic dish. For more details, check out the Full Recipe for Chinese Style Shrimp Fried Rice. After you finish your meal, let the shrimp fried rice cool down. Once cool, transfer it to an airtight container. Make sure to seal it tight. This will help keep the flavors fresh. Store it in the fridge for up to three days. If you want to keep it longer, you can freeze it. When you're ready to eat your leftovers, you have a few options. You can use a microwave, a pan, or a wok. For the microwave, place your rice in a bowl. Add a splash of water to keep it moist. Heat it for 1-2 minutes, stirring halfway through. If you prefer a pan, heat some oil over medium heat. Add the rice and stir until hot. This method keeps the rice from getting soggy. If you want to freeze your shrimp fried rice, first cool it completely. Then, scoop it into freezer-safe bags. Press out any air before sealing. Label the bags with the date. You can freeze it for up to three months. When you want to eat it, thaw it overnight in the fridge. Then, reheat it using one of the methods above. Enjoy your shrimp fried rice again with that fresh taste! Yes, you can use frozen shrimp. Just thaw them first. Place the shrimp in cold water for about 15 minutes. This quick method saves time and keeps the shrimp tasty. After thawing, peel and devein them if needed. The shrimp will cook well in the dish. To make shrimp fried rice without eggs, simply skip the eggs. Add more mixed veggies instead. You can also use tofu for extra protein. It gives a nice texture. Just stir-fry the tofu until golden before adding rice. The flavor will still be great! To avoid mushy rice, use day-old jasmine rice. This rice is drier and firmer. If you don't have day-old rice, spread fresh rice on a tray to cool. Let it sit for 30 minutes. This helps keep each grain separate. Also, don't overcook the rice in the pan. Stir gently to keep it fluffy. For more details, check the Full Recipe. In this post, we explored shrimp fried rice, from ingredients to cooking tips. We covered the main ingredients and how to prepare the rice perfectly. We shared step-by-step cooking instructions and discussed common mistakes. You learned about tasty variations and how to store leftovers effectively. With this knowledge, you can make a delicious shrimp fried rice at home. Enjoy experimenting and creating your own favorite version!

Chinese Style Shrimp Fried Rice Flavorful Easy Recipe

Are you ready to whip up a delicious Chinese Style Shrimp Fried Rice? This easy recipe packs tons of flavor

To make tasty German potato dumplings, you need some key items. Here’s what you'll need: - 2 pounds (900g) floury potatoes (like Russet or Yukon Gold) - 1 cup all-purpose flour (plus extra for dusting) - 1 large egg - 1 teaspoon salt - 1 teaspoon garlic powder - ½ teaspoon nutmeg (freshly grated is best) - 2 tablespoons butter (for frying) - Fresh parsley, chopped (for garnish) These ingredients come together to create soft and fluffy dumplings. The floury potatoes are crucial. They give the dumplings the right texture. You can swap ingredients to suit your taste or needs. Here are some ideas: - Potatoes: If floury potatoes are hard to find, you can use starchy potatoes. - Flour: For a gluten-free option, try using gluten-free flour blends. - Egg: If you want a vegan version, you can use a flax egg instead. Mix 1 tablespoon of ground flaxseed with 2.5 tablespoons of water and let it sit for 5 minutes. - Butter: Use olive oil or vegetable oil instead of butter for a lighter option. These swaps still keep the dumplings delicious while catering to different diets. Accurate measuring can make a big difference in your dumpling texture. Here are some tips: - Use a kitchen scale: Weigh your potatoes for precise amounts. - Spoon and level: For flour, spoon it into the measuring cup and level it off with a knife. This avoids packing the flour down. - Room temperature: Make sure your egg is at room temperature. This helps the dough mix better. By measuring correctly, you set your dumplings up for success. First, wash the potatoes well. You want to remove any dirt. Place them in a large pot with salted water. Boil them until they feel soft when poked with a fork. This takes about 30-40 minutes. Once cooked, let them cool for a few minutes. After that, peel off the skins. You can use a potato ricer or a masher to make them smooth. Let the mashed potatoes cool to room temperature. This step is key for the texture of your dumplings. Take a large mixing bowl and combine your cooled mashed potatoes with flour, egg, salt, garlic powder, and nutmeg. Mix it all together until you have a smooth dough. Be careful not to overmix; the dough should be soft but not sticky. If it sticks to your hands, add a little more flour. Once the dough is ready, dust a clean surface with flour. Divide the dough into small pieces and roll each piece into a ball, about the size of a golf ball. Bring a large pot of salted water to a boil. Gently drop in the dumplings in small batches. They are ready when they float to the top, which takes about 5-6 minutes. Use a slotted spoon to take them out and let them drain. Next, melt butter in a large skillet over medium heat. Add your cooked dumplings and sauté them until they turn golden brown and crispy. This should take around 5 minutes. Serve your dumplings hot, garnished with chopped parsley. Enjoy your Cloudy Potato Pillows! Making German potato dumplings can be simple, but some mistakes can ruin them. Here are a few to watch for: - Using the Wrong Potatoes: Choose floury potatoes like Russet or Yukon Gold. Waxier potatoes make the dumplings too dense. - Overworking the Dough: Mix just until combined. Overworking can lead to tough dumplings. - Not Cooling the Potatoes: Let the mashed potatoes cool before mixing. Warm potatoes make a sticky dough. To get fluffy dumplings, focus on texture: - Right Potato Consistency: Use a potato ricer for light, fluffy mashed potatoes. Avoid lumps. - Correct Flour Amount: Add just enough flour to hold the mixture together. Too much makes them heavy. - Gentle Mixing: Mix the ingredients gently. This keeps the dumplings airy and soft. These dumplings are great with many dishes. Here are a few ideas: - Sauces: Serve with rich gravies or creamy sauces. They soak up flavors well. - Sides: Pair with sautéed greens or roasted veggies. This adds color and nutrition. - Toppings: Top with crispy bacon bits, sautéed onions, or a sprinkle of cheese for extra flavor. For the full recipe, check out Cloudy Potato Pillows. Enjoy making these tasty treats! {{image_2}} You can easily change the flavor of your dumplings. Adding cheese makes them creamy and rich. Try mixing in grated cheese like cheddar or mozzarella. Fresh herbs also add a nice touch. Chopped parsley, chives, or thyme can brighten the taste. For a twist, consider adding roasted garlic or sautéed onions for depth. If you need a gluten-free version, you can use gluten-free flour. Look for a blend that works well for baking. Potato starch is another great substitute. The texture will still be soft and fluffy. Just ensure all other ingredients are gluten-free too. German potato dumplings pair wonderfully with many dishes. You can serve them in a rich soup for a warm meal. Try them in a creamy mushroom sauce for added flavor. They also work well with savory gravies. For a light touch, serve them with a drizzle of melted butter and herbs. Enjoy experimenting with different styles! After enjoying your delicious dumplings, store any leftovers promptly. Place them in an airtight container. This helps keep them fresh. You can store them in the fridge. They will last for up to three days. Make sure they cool down before sealing the container. When you're ready to enjoy your leftovers, here’s how to reheat them. You can use a skillet for a great texture. Heat a little butter in the skillet over medium heat. Add the dumplings and sauté until they are warm and crispy. This usually takes about 5 minutes. If you prefer, you can also reheat them in the microwave. Just place them in a microwave-safe dish with a lid. Heat in short bursts, checking often to avoid drying them out. Freezing is a great way to keep dumplings for later. First, let them cool completely. Then, line them on a baking sheet. Make sure they are not touching each other. Freeze them for about 1-2 hours until firm. Once frozen, transfer them to a freezer bag. Be sure to remove as much air as possible. They can last up to three months in the freezer. When you’re ready, cook them directly from frozen. Just add a few extra minutes to the cooking time. Enjoy your Cloudy Potato Pillows whenever you want! The best type of potato for dumplings is a floury potato. I recommend using Russet or Yukon Gold potatoes. These types have a high starch content. This helps create a light and fluffy texture. Waxy potatoes like red or new potatoes do not work well. They tend to make the dumplings dense and heavy. For the best results, stick to floury potatoes. Yes, you can make these dumplings ahead of time. You can prepare the dough and shape the dumplings. After shaping, place them on a floured tray. Make sure they do not touch each other. Cover the tray with plastic wrap and refrigerate. You can keep them in the fridge for a day. If you want to store them longer, freeze them. Just remember to boil them straight from the freezer. Do not thaw them first. You will know the dumplings are done cooking when they float. After you drop them into boiling water, watch closely. It usually takes about 5-6 minutes for them to rise. Once they float to the top, they are ready. Use a slotted spoon to remove them from the pot. Keep an eye on them to avoid overcooking. This helps keep them soft and tasty. You learned about making German potato dumplings from start to finish. We explored the key ingredients, how to prepare them, and tips for perfecting your dish. Remember the common mistakes to avoid and the various serving options. Feel free to try different flavors or gluten-free options. You can store, reheat, or freeze leftovers for later. With these steps, you will enjoy making these dumplings again and again. Happy cooking!

German Potato Dumplings Simple and Tasty Recipe

If you’re ready to dive into a hearty and delightful dish, you’ve come to the right place! German Potato Dumplings

- 1 pound ground beef or turkey - 1 cup fresh spinach, finely chopped - 1 cup mozzarella cheese, shredded - 4 cloves garlic, minced - 1/2 cup breadcrumbs - 1/4 cup grated Parmesan cheese - 1 large egg - 1 teaspoon dried oregano - 1 teaspoon salt - 1/2 teaspoon black pepper - 1/4 teaspoon red pepper flakes (optional) - 1 cup marinara sauce (for serving) - Fresh basil, for garnish The ingredients are simple but pack a big flavor punch. Ground beef or turkey forms the base of the meatballs. I love using ground turkey for a lighter option. Next, add fresh spinach to sneak in some greens. It gives the meatballs a lovely color and taste. Mozzarella cheese adds creaminess and a nice stretch when you bite in. Garlic gives them a punchy flavor. For binding, I use breadcrumbs and an egg. These help the meatballs hold their shape. Parmesan cheese adds depth and savory notes. I always sprinkle in some dried oregano for that classic Italian taste. When it comes to seasoning, salt and black pepper are key. They bring out all the flavors. If you want a little kick, add red pepper flakes. The optional marinara sauce is perfect for serving. It adds moisture and extra flavor. To finish, I like to garnish with fresh basil for a pop of color and freshness. Check out the Full Recipe for all the steps to make these tasty meatballs! - Preheat oven to 400°F (200°C). - Line a baking sheet with parchment paper. - Combine all ingredients in a large mixing bowl. - Mix until just combined and form into 1.5-inch meatballs. To make the meatballs, start by gathering your fresh ingredients like spinach and garlic. You want to chop the spinach finely so it blends well. The garlic should be minced for a strong flavor. In a big bowl, add the ground meat, cheese, and other ingredients. Using your hands, mix everything gently. Don't mix too much; you want your meatballs to stay soft and juicy. - Bake for 20-25 minutes or until golden brown. - Serve in marinara sauce with basil garnish. Once your meatballs are formed, place them on the lined baking sheet. Bake them in your preheated oven. You will know they are done when they turn golden brown and smell amazing. While they bake, heat up your marinara sauce on low heat. Once the meatballs are ready, add them to the sauce. Let them simmer together for a few minutes. This step enhances all those delicious flavors. You can find the full recipe details above! Enjoy your meal! When you mix your meatball ingredients, do it gently. You want to blend them just enough to combine. If you overmix, your meatballs can become tough. Remember, a light touch keeps them tender and juicy. To ensure your meatballs are safe to eat, use a meat thermometer. Cook them until they reach 165°F (74°C). This is the best way to check if they are done. Overcooking can make them dry, so keep an eye on the time. For a beautiful plate, serve your meatballs with extra marinara sauce drizzled on top. Add fresh basil for a pop of color. This not only looks great but also adds flavor. It makes the dish inviting and tasty. For the full recipe, check out the Spinach Garlic Mozzarella Meatballs section above! {{image_2}} You can change the meat in this recipe. Ground turkey or chicken makes a lighter meatball. These options are tasty and lower in fat. They also keep the meatballs moist. Just use the same amount as the beef. You will still enjoy great flavors. Feel free to swap the cheese. Provolone or cheddar adds a new twist. Provolone gives a nice, creamy texture. Cheddar offers a sharp, tangy taste. Both options work well with the spinach and garlic. Try them out to see what you like best. If you want a meat-free dish, lentils or plant-based meat work great. Cooked lentils give a hearty texture. Plant-based meat mimics the taste of beef. Use the same amount as the ground meat. These choices keep the recipe healthy and delicious. You can find the full recipe above to guide you through these tasty variations. After a tasty meal, you might have leftovers. Store them in an airtight container. They will stay fresh in the fridge for up to 3 days. This way, you can enjoy them again without losing flavor. Want to save some for later? Freeze the cooked meatballs. They can last in the freezer for up to 3 months. Just place them in a freezer-safe bag or container. When you are ready to eat, simply thaw them in the fridge overnight. When it’s time to enjoy your meatballs again, reheat them. You can use the oven or the microwave. If they seem a bit dry, add extra sauce for moisture. This keeps them delicious and juicy, just like when they were fresh! Yes, you can prep and refrigerate or freeze for later use. This saves time on busy days. Simply mix your meatball ingredients and form them. Place them in a container or a zip-top bag. If freezing, make sure to label it with the date. They can last up to three months in the freezer. When you're ready, just bake them from frozen or thaw in the fridge overnight. Serve with pasta, a salad, or garlic bread. Pasta pairs well with the meatballs and marinara sauce. A fresh salad adds a nice crunch and balances the meal. Garlic bread is perfect for soaking up any extra sauce. You can also try serving them in a sub for a tasty meatball sandwich. Add more red pepper flakes or a dash of hot sauce to the mix. You can start with half a teaspoon of red pepper flakes. If you want more heat, increase it to one teaspoon. Hot sauce can also add flavor and spice. A little goes a long way, so add it gradually to get your perfect level of heat. Ensure not to overmix and check the bake time regularly. Overmixing can make the meatballs tough. Mix until the ingredients are just combined. Also, keep an eye on your oven. Cooking them for too long can dry them out. Aim for a golden brown color, and use a meat thermometer to check if they reach 165°F (74°C). For the full recipe, check out the Spinach Garlic Mozzarella Meatballs section. These spinach garlic mozzarella meatballs are tasty and easy to make. You learned about the main ingredients needed, how to form and bake them, and tips for the best results. Variations like using different meats or making them vegetarian add fun twists. You can also enjoy them with various sides. By storing and reheating properly, you’ll keep them delicious longer. Try these meatballs, and enjoy a satisfying meal!

Spinach Garlic Mozzarella Meatballs Tasty and Simple

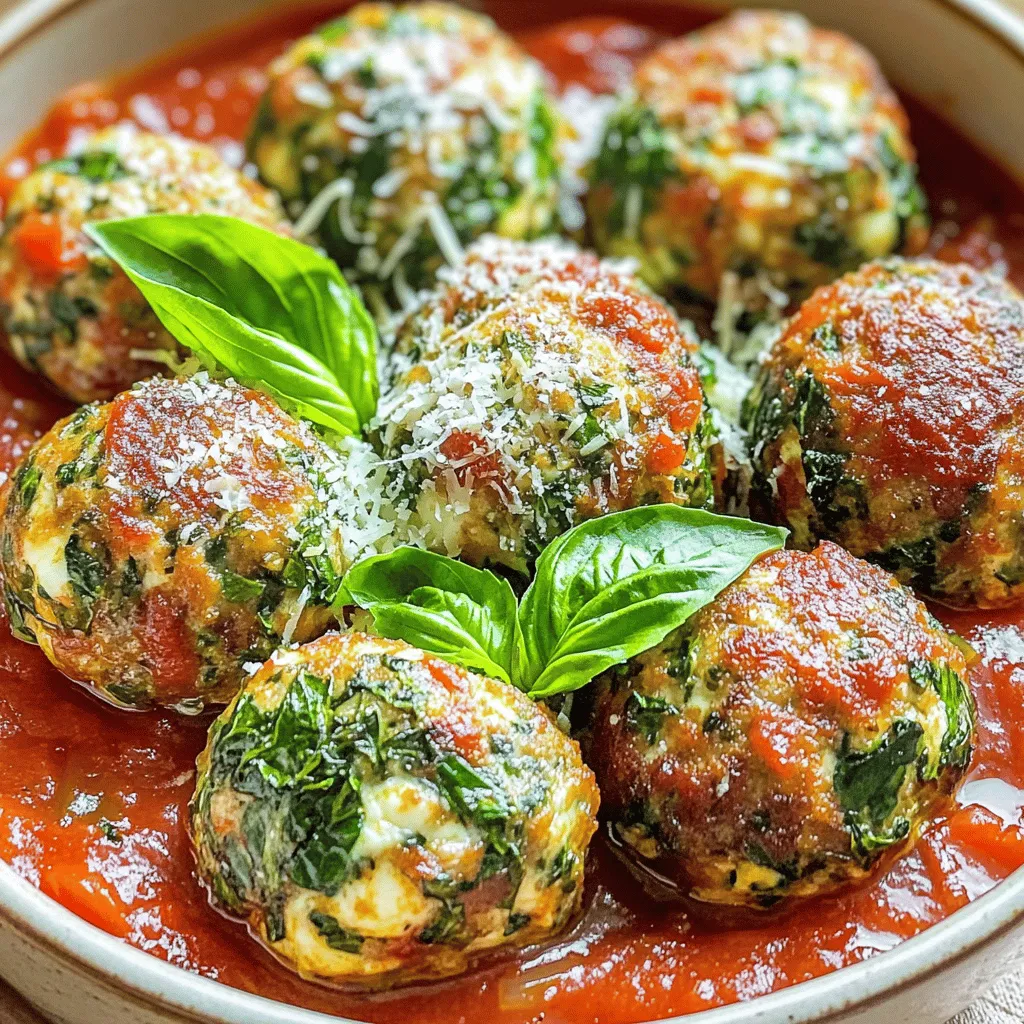
Looking for a tasty and simple recipe that packs a flavor punch? These Spinach Garlic Mozzarella Meatballs are just what

Here are the ingredients you need for this tasty Asian mushroom ramen noodles recipe: - 200g ramen noodles - 300g mixed mushrooms (shiitake, oyster, button), sliced - 4 cups vegetable broth - 1 tablespoon sesame oil - 2 cloves garlic, minced - 1 inch ginger, minced - 2 tablespoons soy sauce - 1 tablespoon miso paste (white or yellow) - 1 tablespoon rice vinegar - 1 teaspoon chili paste (adjust to taste) - 1 cup baby spinach - 2 green onions, sliced - Sesame seeds for garnish - Fresh cilantro leaves for garnish These ingredients come together to create a flavorful and easy dish that warms the soul. The mix of mushrooms adds a deep umami flavor, while the broth ties everything together. You can easily find these items at your local grocery store or farmer's market. For the complete recipe details, check out the Full Recipe link. To cook the ramen noodles, boil water in a pot. Add the ramen noodles and cook them for 3-4 minutes. Check the package for exact times. Once they are tender, drain them and set aside. Timing is key here; undercooking helps keep noodles firm. In a large pot, heat 1 tablespoon of sesame oil over medium heat. Once hot, add 2 cloves of minced garlic and 1 inch of minced ginger. Sauté these for 1-2 minutes until they smell great. This step builds a strong flavor base for your ramen. Next, add 300g of sliced mixed mushrooms to the pot. Stir-fry them for about 5-7 minutes. You want them to be tender and slightly browned. Stir-frying at medium heat helps intensify their flavor. Now, pour in 4 cups of vegetable broth. Add 2 tablespoons of soy sauce, 1 tablespoon of miso paste, 1 tablespoon of rice vinegar, and 1 teaspoon of chili paste. Stir well to mix everything. Let the broth simmer for a few minutes. This mix creates a rich and savory taste. Once your broth is simmering, add 1 cup of baby spinach. Cook it for 2-3 minutes until it wilts. Then, gently add the cooked ramen noodles to the pot. Stir everything to coat the noodles in the broth. Heat for another 2-3 minutes. Ladle the ramen into bowls. Make sure each bowl gets plenty of mushrooms and spinach. For the final touch, garnish with sliced green onions, sesame seeds, and fresh cilantro leaves. This adds color and flavor. For the full recipe, check the details above. To enhance the depth of your broth, use fresh ingredients. Fresh garlic and ginger will add zest. Miso paste gives a rich umami flavor. You can adjust the soy sauce for a saltier kick. Add a splash of rice vinegar to balance the savory notes. This layer of flavors makes every sip tasty. To avoid mushy noodles, cook them just until tender. Follow the package instructions closely. Drain them promptly, and rinse with cold water. This halts the cooking process. Timing is key; add the noodles to the broth right before serving. This keeps them firm and perfect. If you can’t find certain mushrooms, try using portobello or enoki. Both add unique flavors. For added nutrition, toss in veggies like bok choy or carrots. You can also add proteins like tofu or chicken for a heartier meal. Customize your ramen to suit your taste. {{image_2}} To make your ramen spicy, add chili oil. Just a small drizzle can bring heat. You can also mix in red pepper flakes or Sriracha. Adjust the spice to your taste. Some like it hot, while others prefer mild flavors. Adding heat can make the dish more exciting. If you want a punch, use more chili paste. The heat level can change with each bite! If you want a vegan version, choose a plant-based broth. Look for options without animal products. You can even make your own broth with veggies and herbs. For protein, swap in tofu or tempeh. Both options soak up flavor well. You could also add chickpeas for a nice texture. These changes make the dish filling and satisfying. You can enjoy this ramen cold, too! Just cool the noodles after cooking. Mix them with fresh veggies like cucumber and bell peppers. For toppings, add sliced radishes and sesame seeds. A drizzle of soy sauce or sesame dressing adds flavor. This cold version is perfect for warm days or picnics! Looking for the full recipe? Check out the [Full Recipe]. To keep your Asian mushroom ramen fresh, store leftovers in an airtight container. Glass or plastic containers work well. Make sure to cool the ramen to room temperature before sealing. This helps avoid condensation, which can make the noodles soggy. Store your ramen in the fridge for up to three days. When you’re ready to enjoy your leftover ramen, reheating is key. I recommend using the stovetop. Just add a little broth or water to a pot and heat gently. Stir often to keep the noodles from sticking. This method helps preserve the texture and flavor of your ramen. You can also use a microwave if you're short on time. Just cover the bowl and heat in short bursts, stirring in between. If you want to save your ramen for later, you can freeze it. First, cool the ramen completely. Then, separate the noodles from the broth. Place each in a freezer-safe bag or container. This way, the noodles won’t get mushy when thawed. To thaw, simply place in the fridge overnight. For a quick option, you can microwave it, but be gentle to keep the noodles intact. Yes, you can use many types of noodles. If you want gluten-free options, try rice noodles or buckwheat noodles. These choices cook quickly and offer a nice texture. For a healthier option, whole grain noodles work well too. Just remember to check the cooking times for your noodles, as they may differ from regular ramen. To add more heat, use chili paste or chili oil. You can mix it into the broth while cooking. Another option is to sprinkle red pepper flakes on top before serving. If you want a kick, try adding sliced jalapeños or fresh chili peppers. Adjust the spice level to suit your taste! To make your ramen more filling, consider adding protein. Tofu is a great choice for a vegetarian option. You can cube and sauté it until golden before adding it to the broth. If you prefer meat, grilled chicken or beef slices work nicely too. Eggs are another great addition; simply soft-boil them and place on top of your noodles. You can store cooked ramen in the fridge for up to three days. Place it in an airtight container to keep it fresh. When reheating, add a splash of broth or water to keep the noodles from drying out. For longer storage, you can freeze the broth and noodles separately. This way, you can enjoy your ramen later, just like the first time! You've learned how to make delicious ramen from scratch. We covered ingredients, cooking methods, and tips for the best flavor. I shared ideas for variations and how to store leftovers. Ramen is simple yet fun to customize. Whether you enjoy it spicy or as a cold salad, the options are endless. Remember, great ramen starts with good ingredients and careful cooking. Dive in, experiment, and make this dish your own!

Asian Mushroom Ramen Noodles Flavorful and Easy Recipe

Are you craving a warm, hearty bowl of ramen? You’re in for a treat! This Asian Mushroom Ramen Noodles recipe

Older posts
Newer posts
← Previous Page1 … Page49 Page50 Page51 … Page59 Next →

dsad

© 2025 Emmas Dish • Built with GeneratePress

Our Policies

  • Copyright Policy
  • Cookie Policy
  • GDPR Policy
  • Privacy Policy
  • Disclaimer
  • Terms Of Use

More Information

  • Home
  • About
  • Contact
  • Appetizers
  • Dessert
  • Dinner
  • Drinks
©2025, Emmas Dish About Back To Top