
Warm Pumpkin Spice White Mocha Cozy Seasonal Drink
As the chill sets in, nothing warms the heart quite like a Warm Pumpkin Spice White Mocha. This creamy, cozy
As the chill sets in, nothing warms the heart quite like a Warm Pumpkin Spice White Mocha. This creamy, cozy

Looking for a fun, easy treat that’s perfect for any occasion? My No-Bake Chocolate Covered Pumpkin Bites will delight your
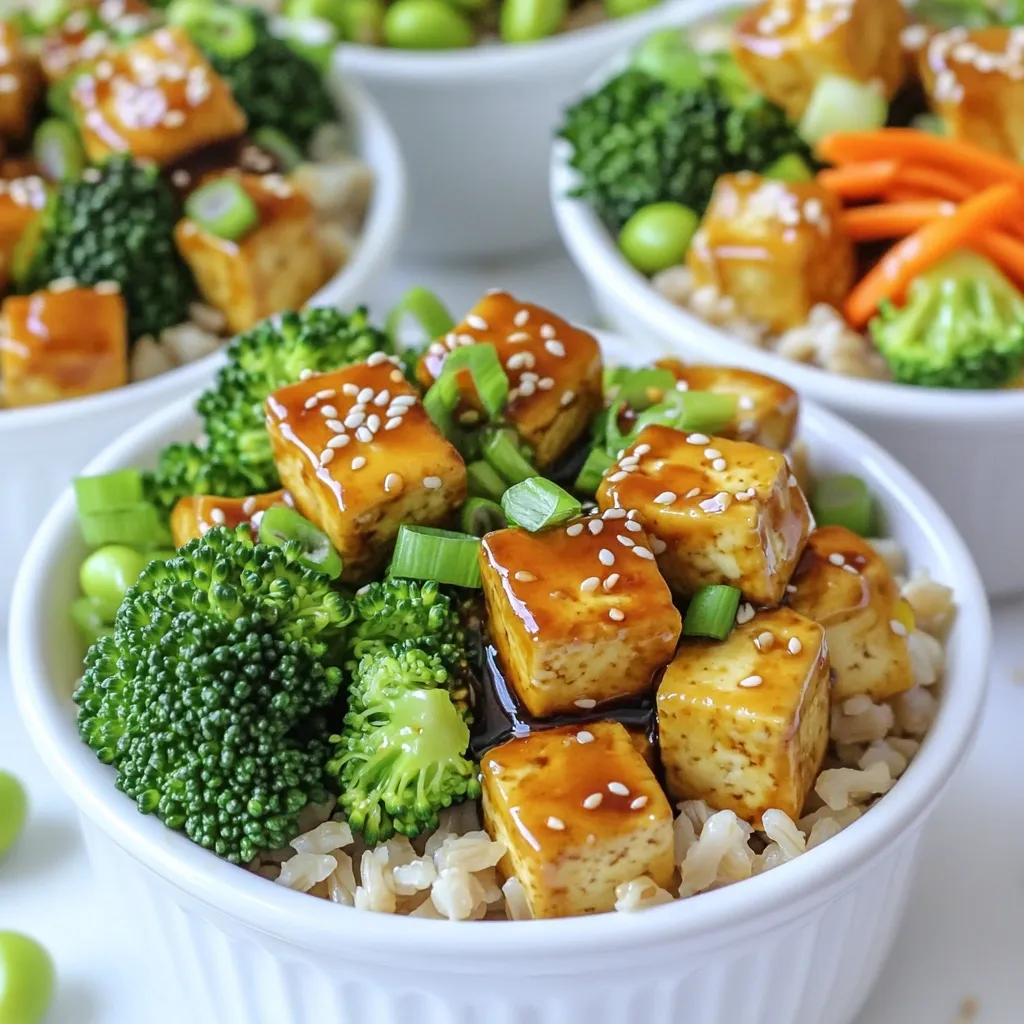
Looking for a quick and tasty meal? You’ve come to the right place! My Minute Sesame Teriyaki Tofu Bowls are
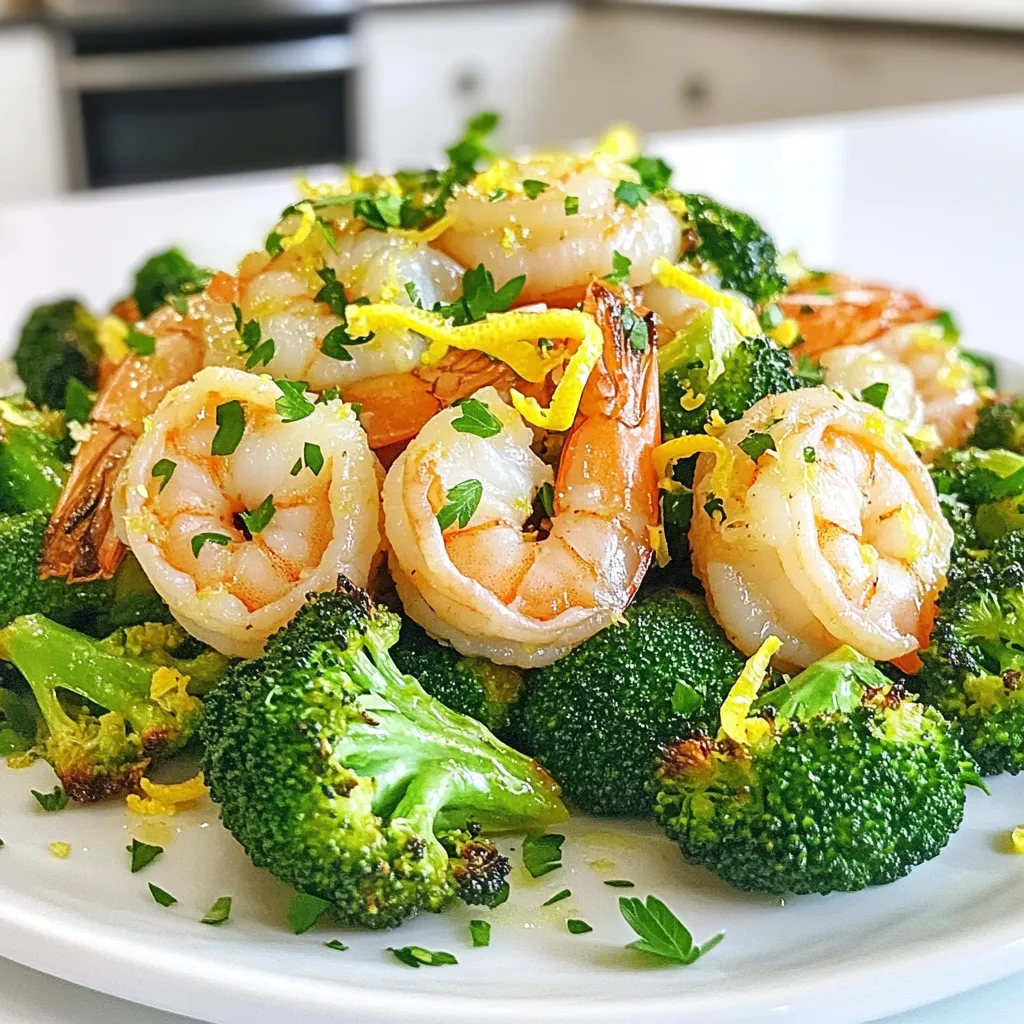
Are you ready to whip up a tasty and easy meal? My Sheet-Pan Lemon Garlic Shrimp and Broccoli Delight is
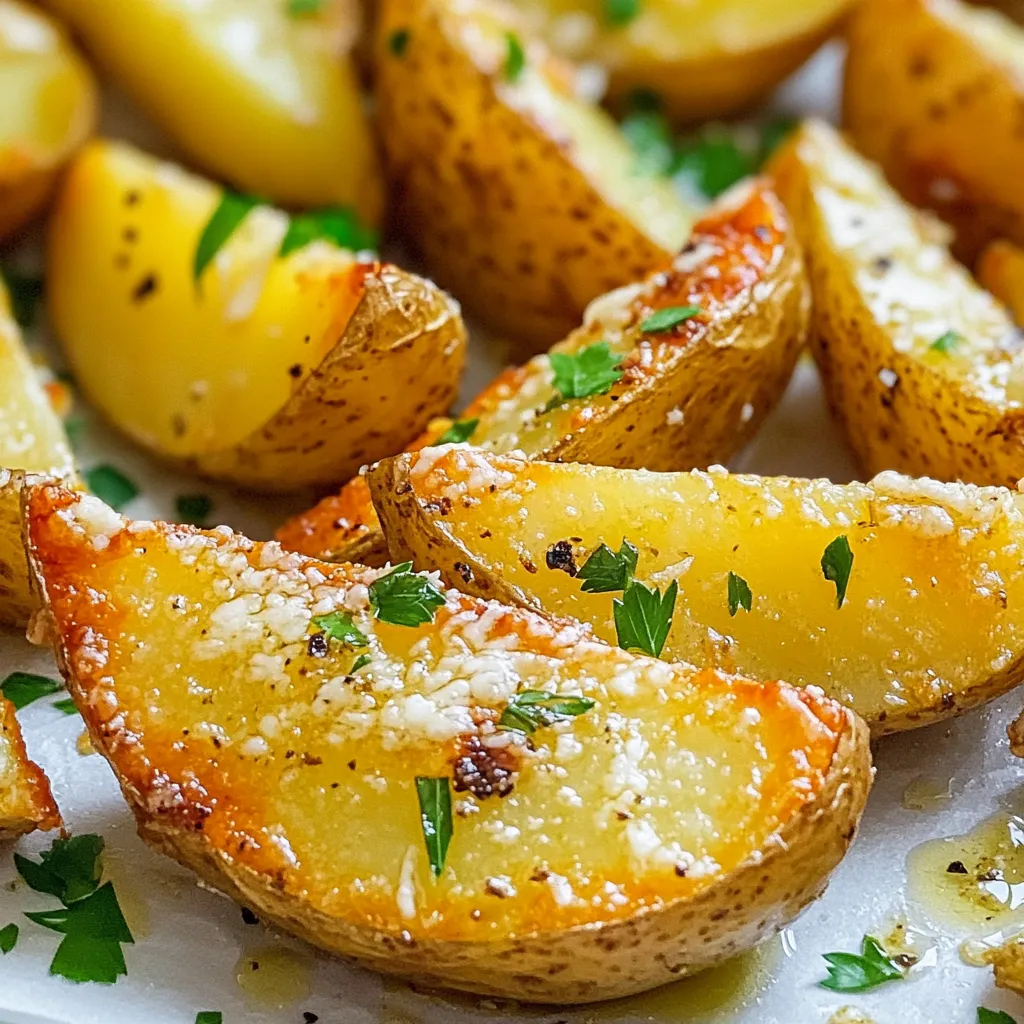
Craving a tasty snack that’s quick and easy? These Air Fryer Garlic Parmesan Potato Wedges are a game-changer! With just
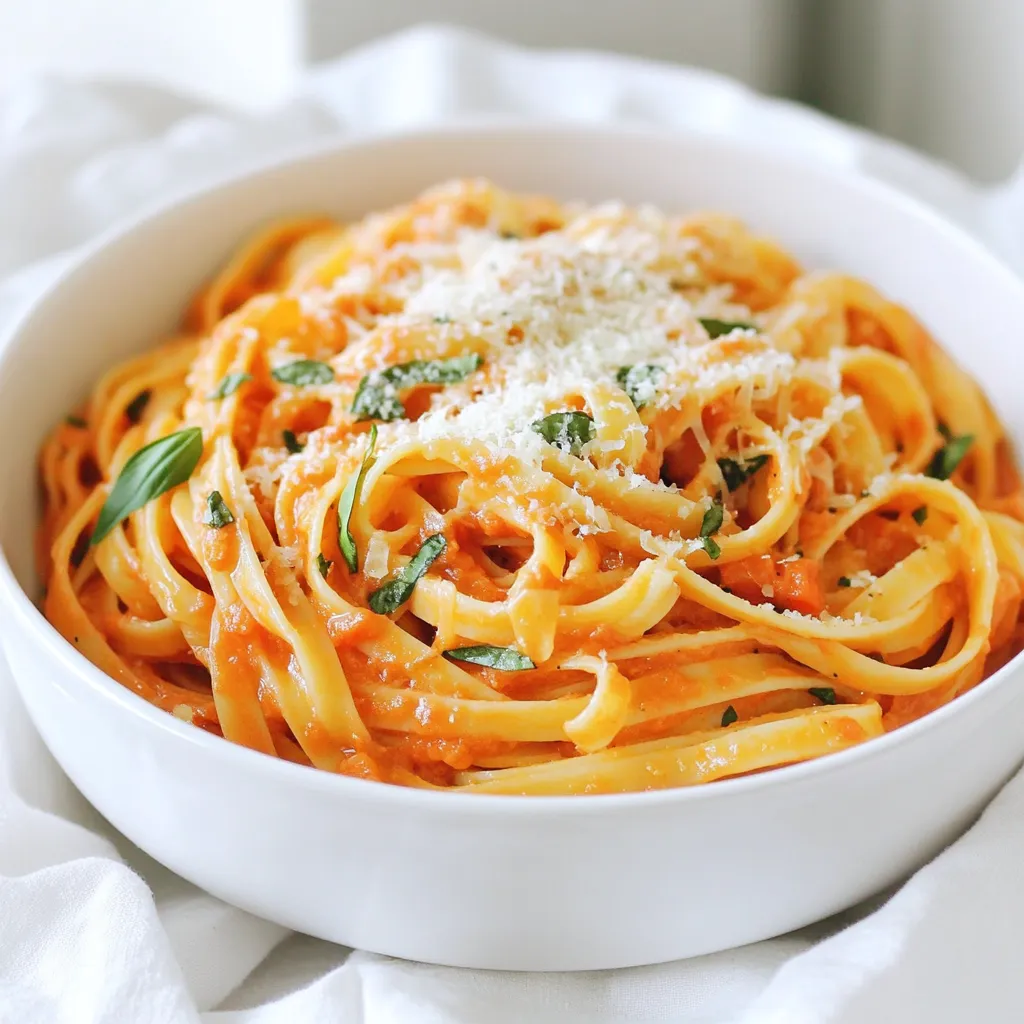
Are you craving a simple yet delicious meal? Look no further! My Creamy Tomato Basil Pasta is easy to make
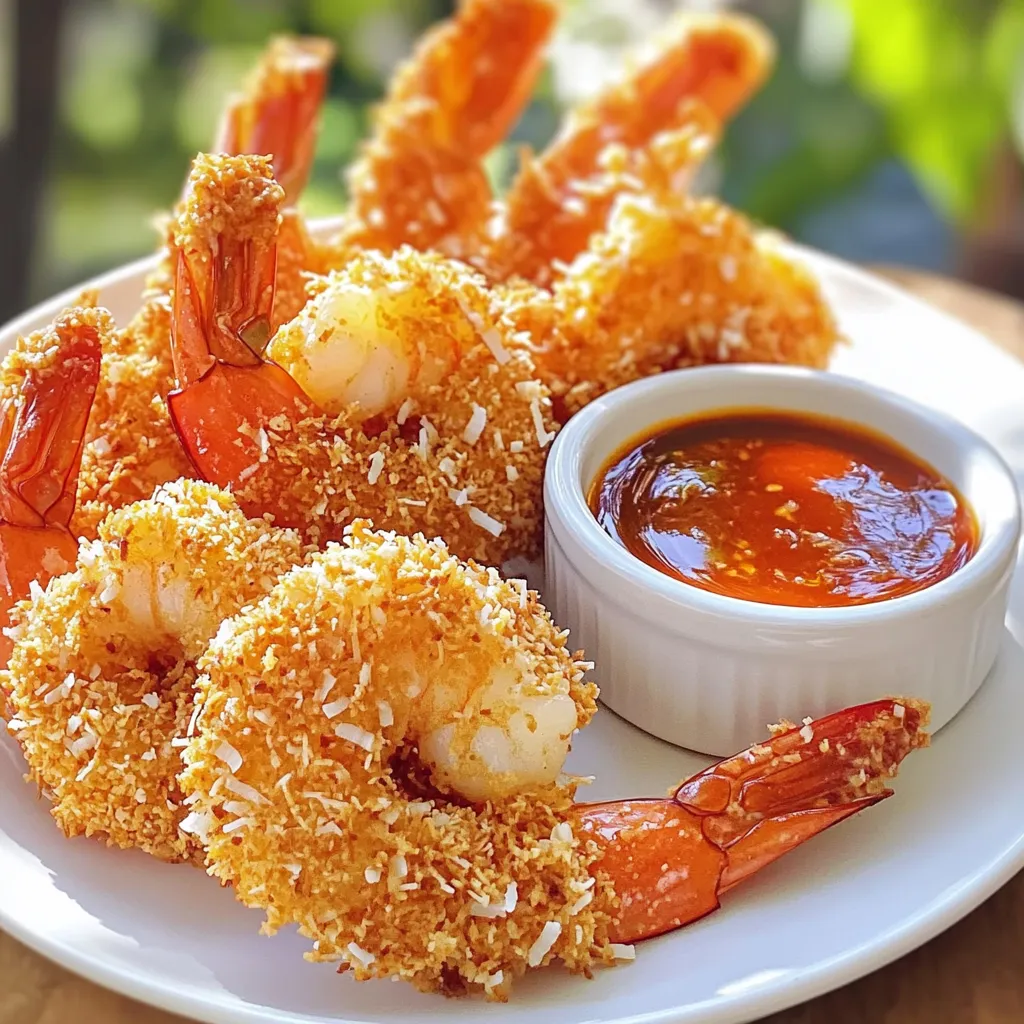
Are you ready to make a deliciously crispy coconut shrimp in your air fryer? This quick and easy recipe brings

Are you craving a warm bowl of comfort? Try my Chicken Enchilada Soup made in a slow cooker. This dish
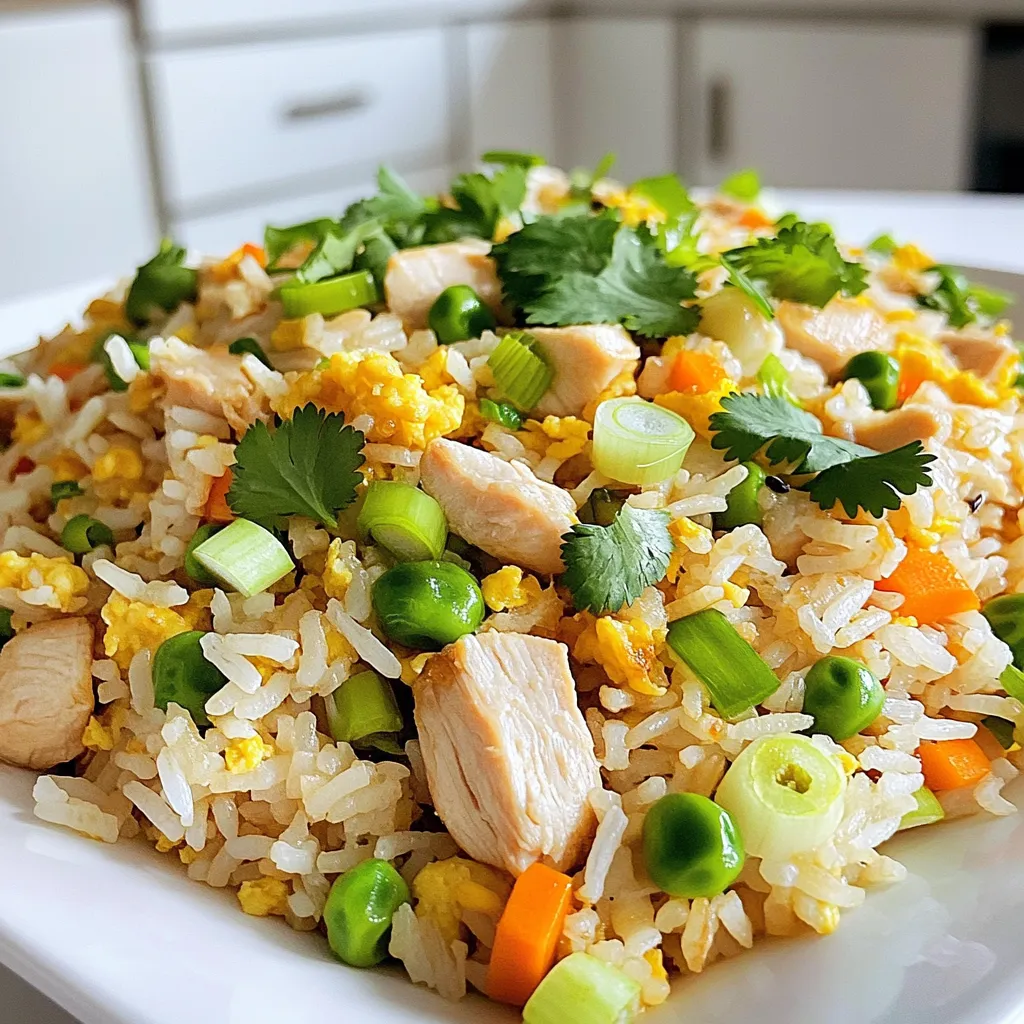
Are you craving a dish that rivals your favorite takeout? I’m here to help you make Chicken Fried Rice Better
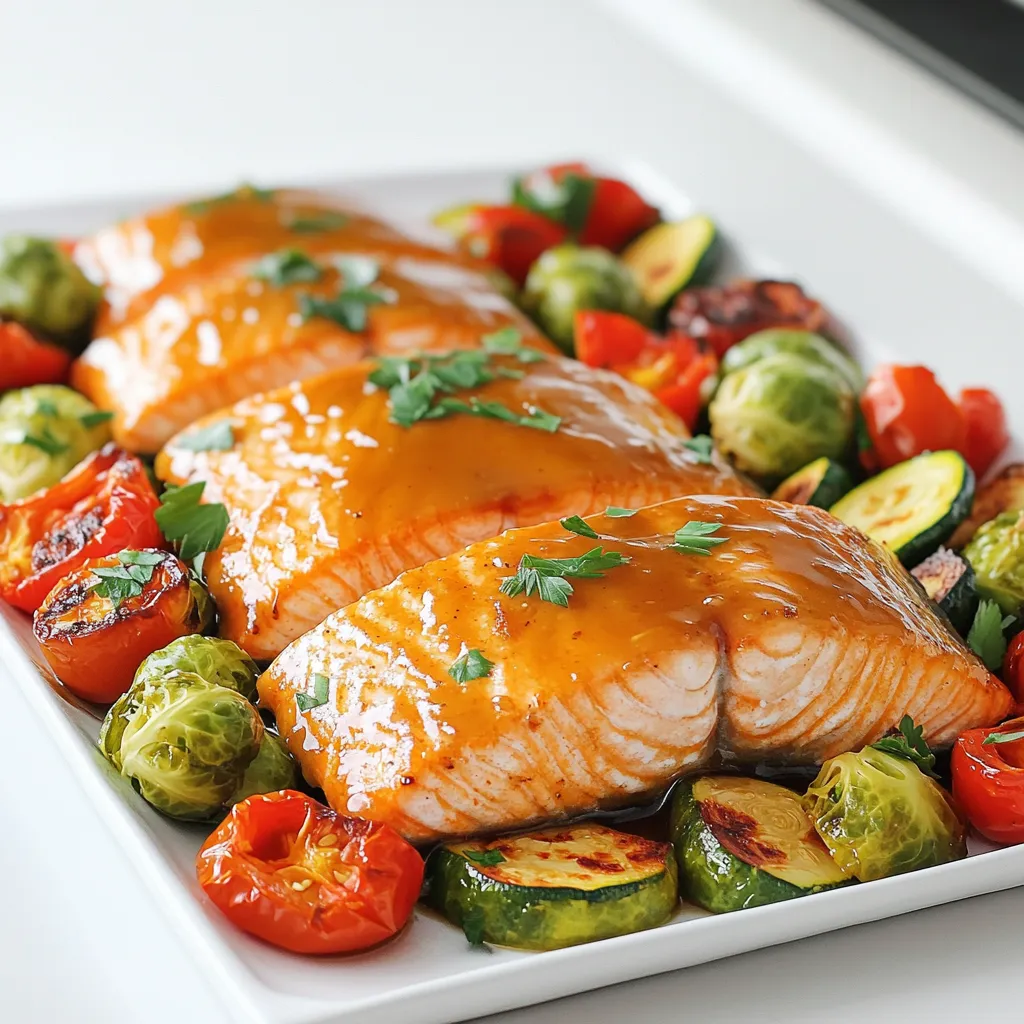
If you’re craving a quick, delightful meal that’s healthy and bursting with flavor, you’re in the right place! My Maple
