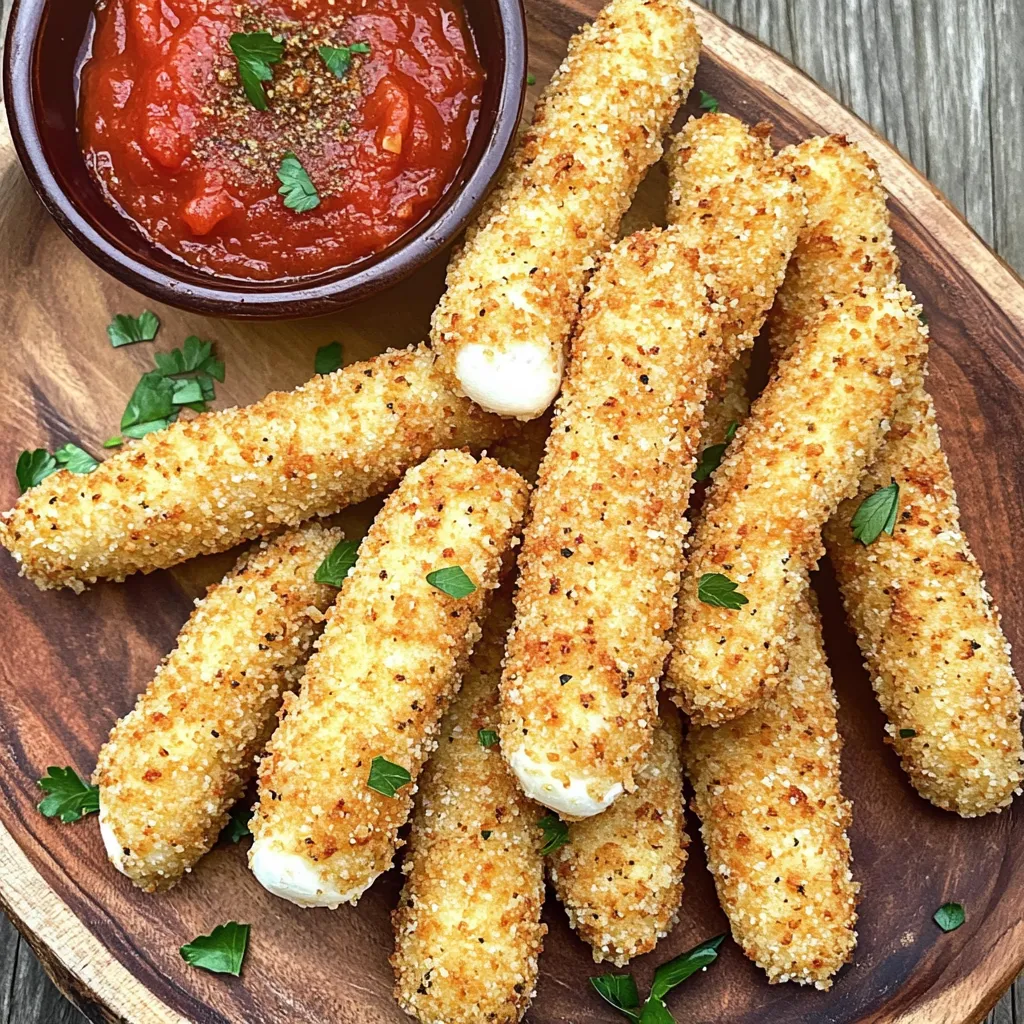
Air Fryer Mozzarella Sticks Crispy and Delicious Snack
Are you craving a crunchy, cheesy snack? Good news! Making air fryer mozzarella sticks at home is simple and fun.
Are you craving a crunchy, cheesy snack? Good news! Making air fryer mozzarella sticks at home is simple and fun.
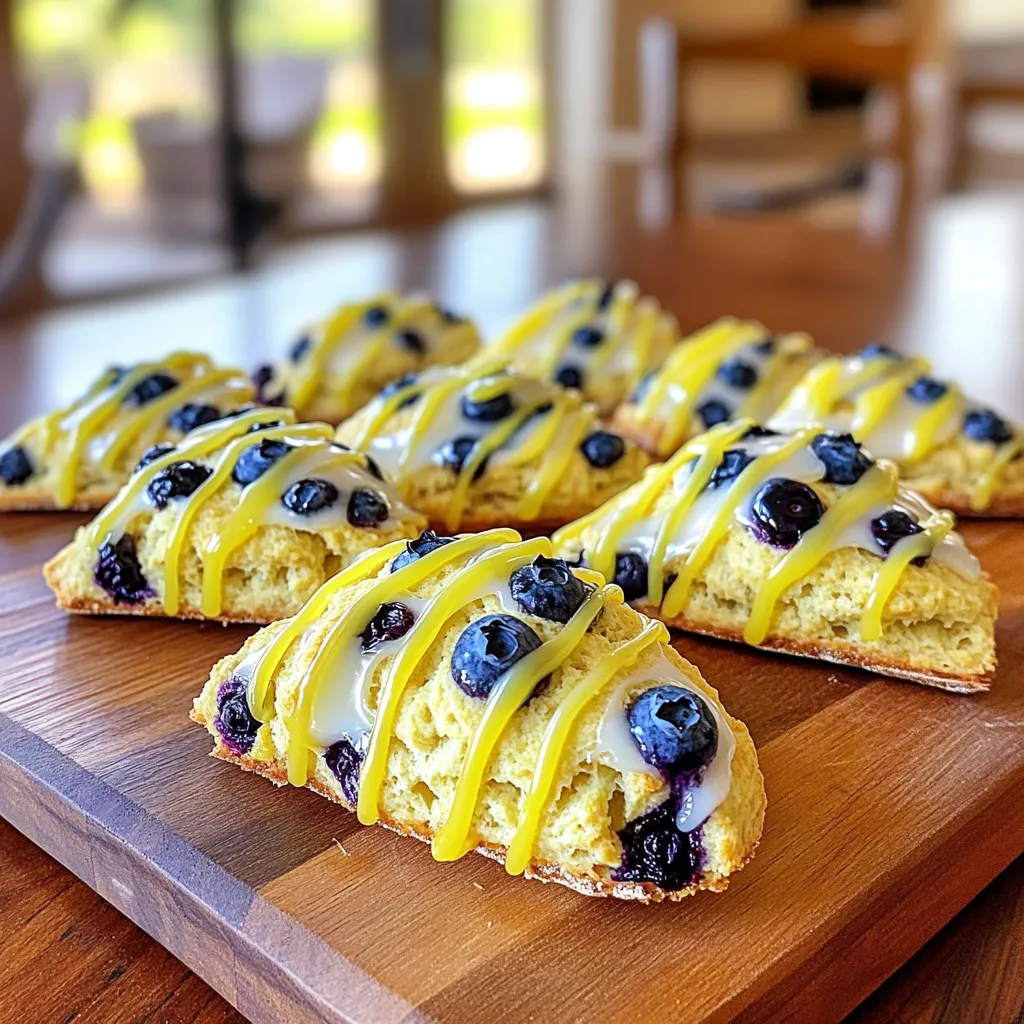
If you’re craving a fresh, zesty treat, you’ve come to the right place! Zesty Lemon Blueberry Scones combine bright citrus
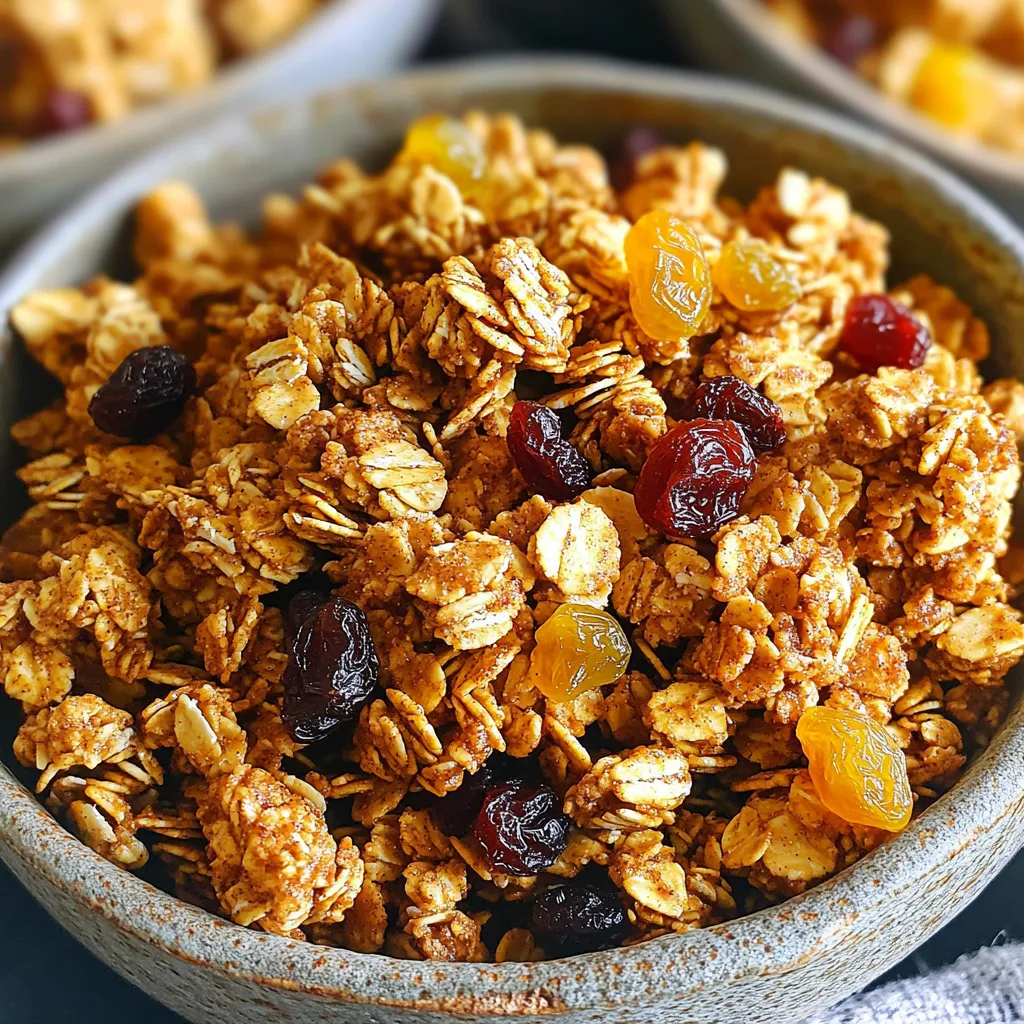
Are you ready to elevate your snack game? Maple Cinnamon Granola Clusters are fresh, crunchy, and oh-so-delicious! In this article,

Craving a delicious way to boost your energy? Try my High-Protein Mocha Espresso Smoothie Delight! This tasty blend packs a
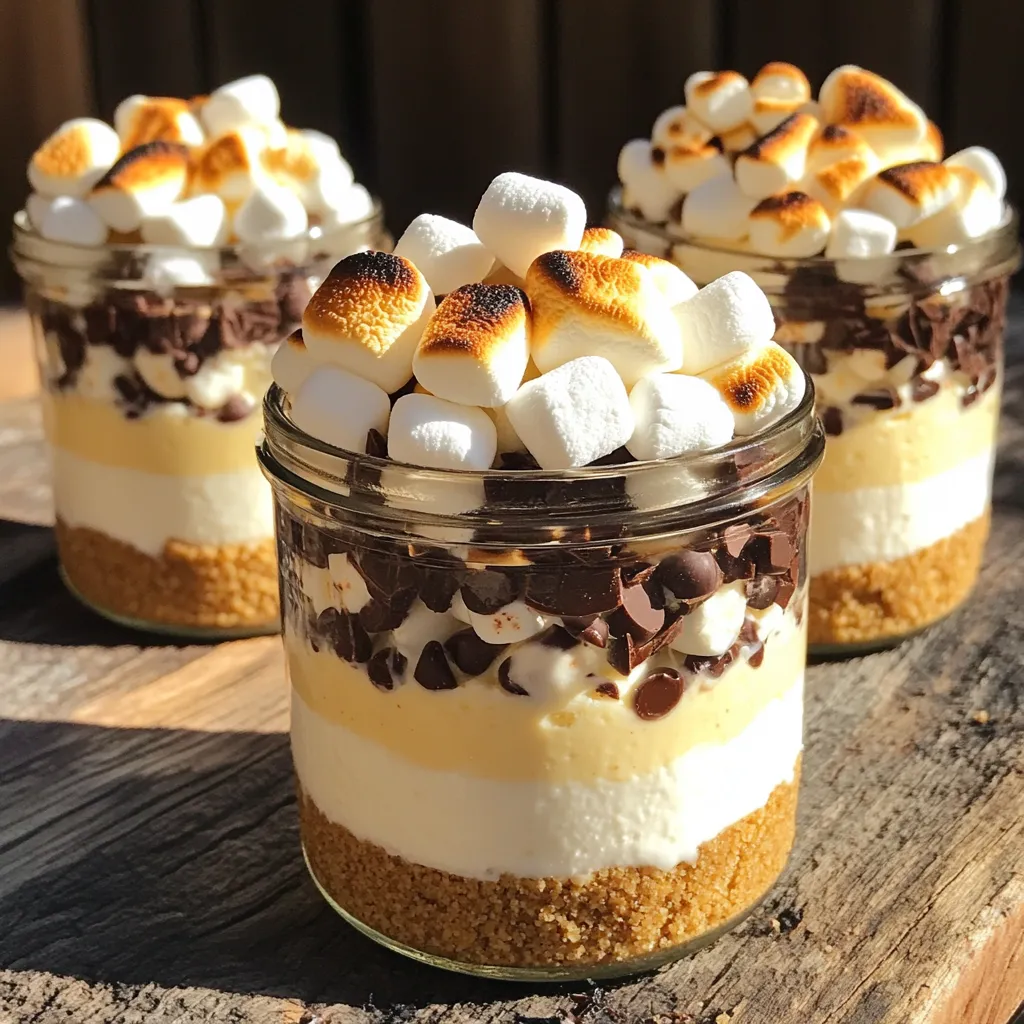
You crave a dessert that’s simple yet indulgent, right? Look no further than these No-Bake S’mores Cheesecake Jars. Imagine creamy
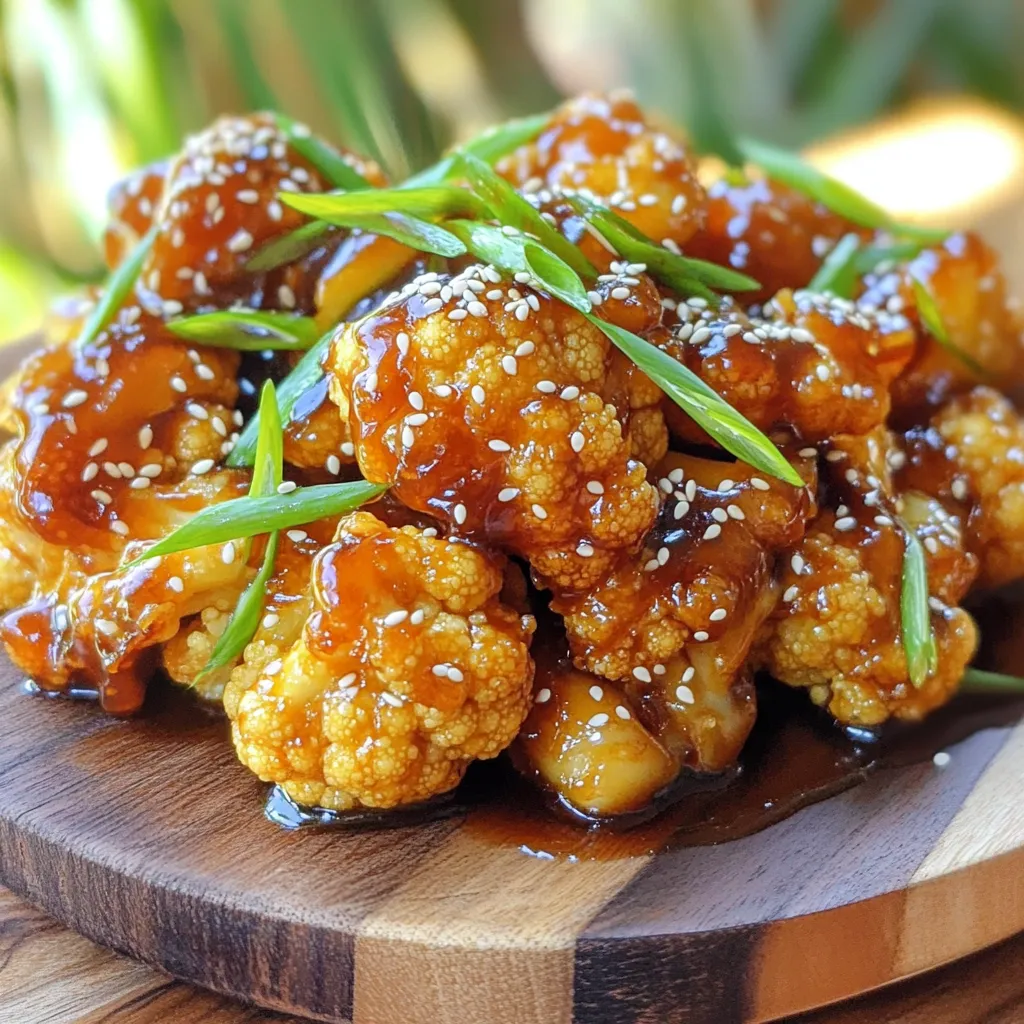
Are you ready to try a dish that bursts with flavor and crunch? My Sticky Sesame Cauliflower is your new
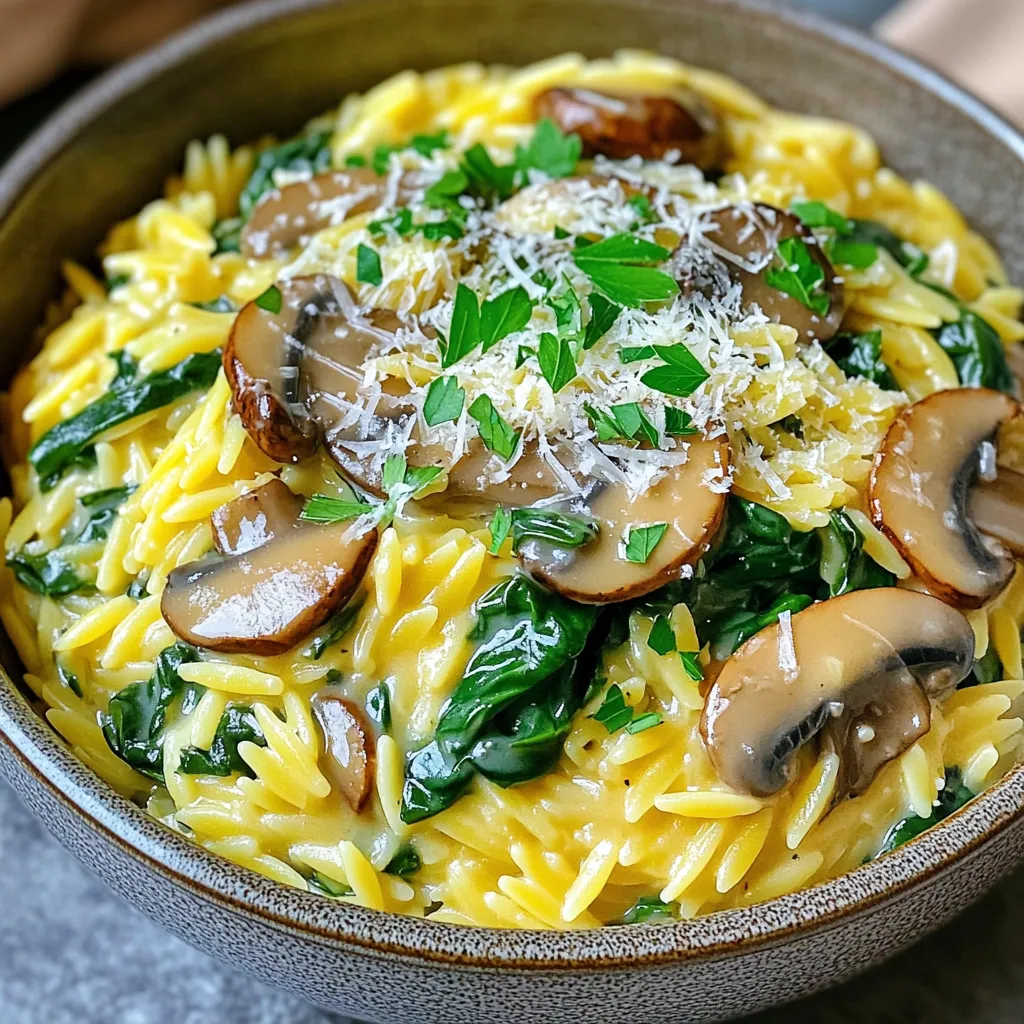
Craving a dish that warms your heart and fills your belly? Look no further than Creamy Mushroom Spinach Orzo! This
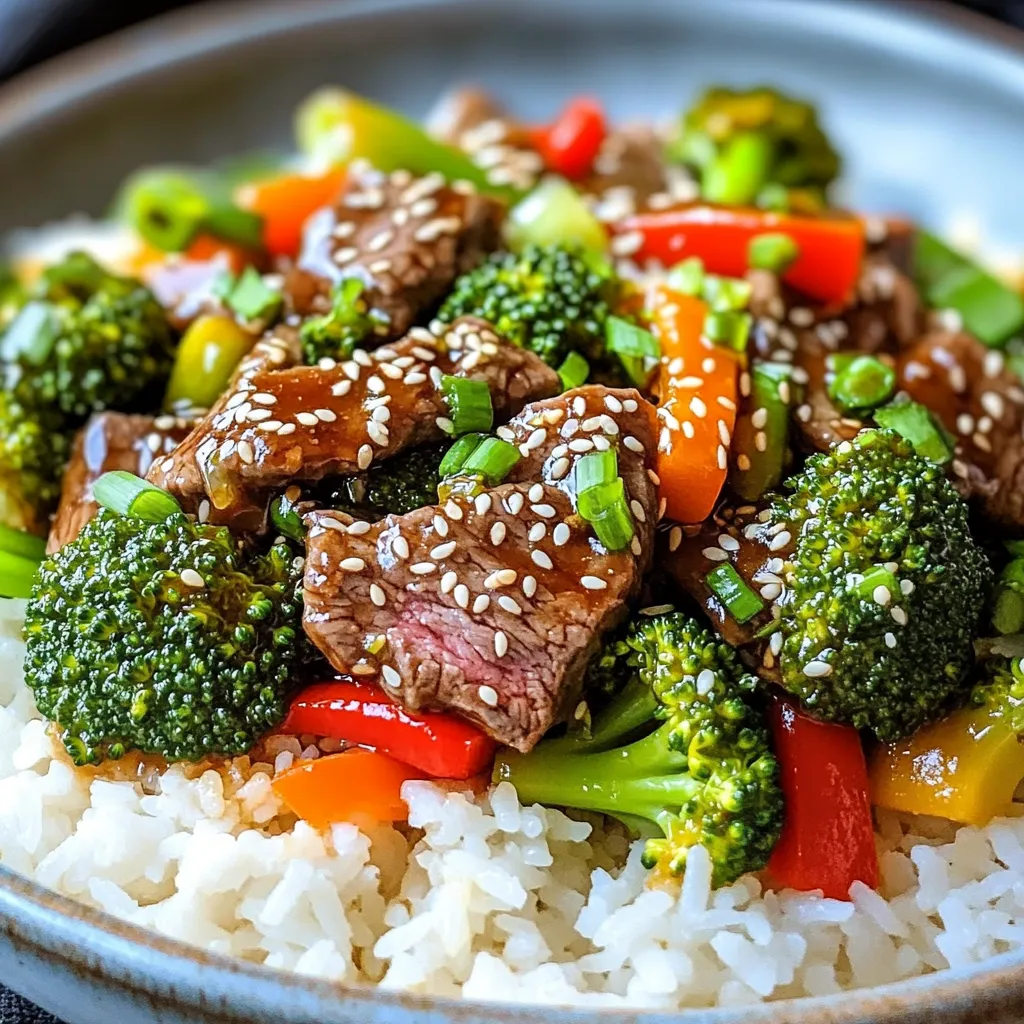
Do you want a delicious meal that you can whip up in minutes? My Minute Teriyaki Beef & Broccoli recipe
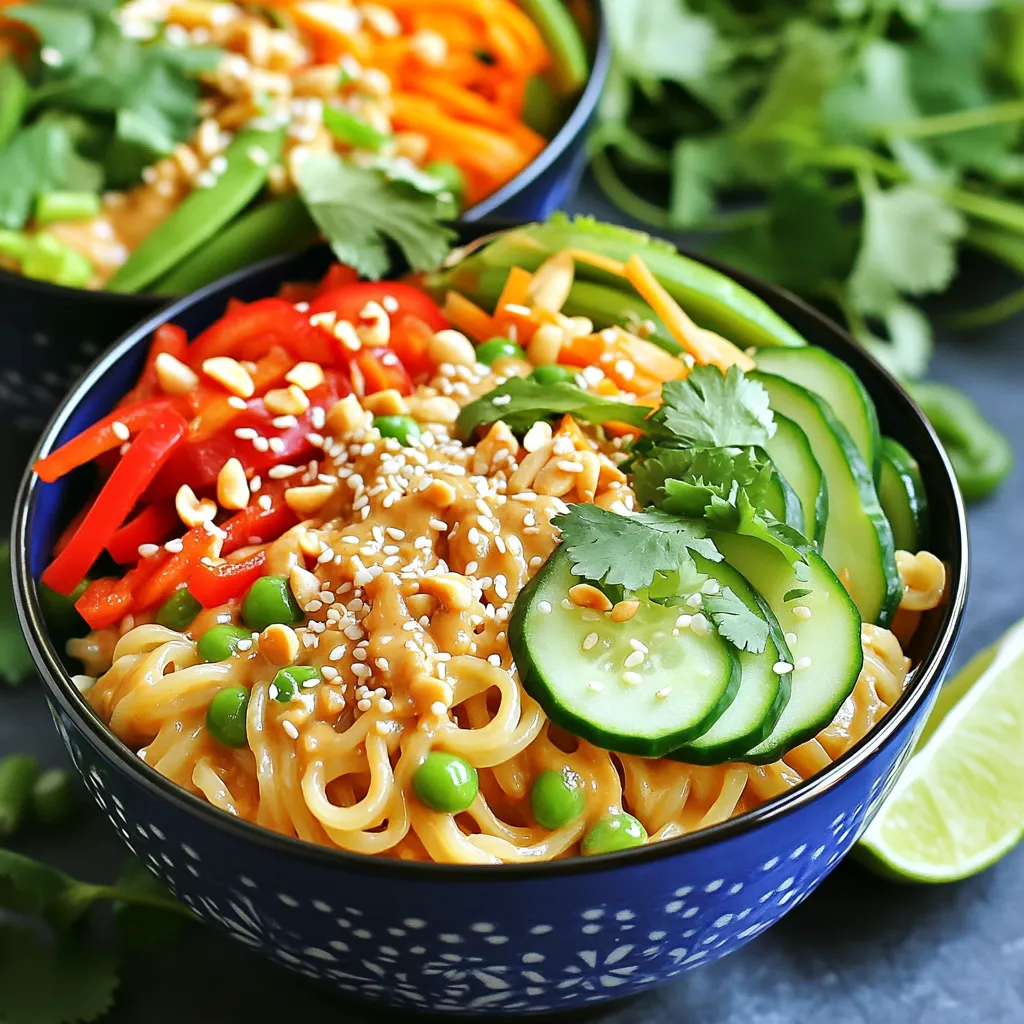
Craving a quick and tasty dinner? Look no further than this Thai Peanut Noodles recipe! It’s packed with flavor, fun
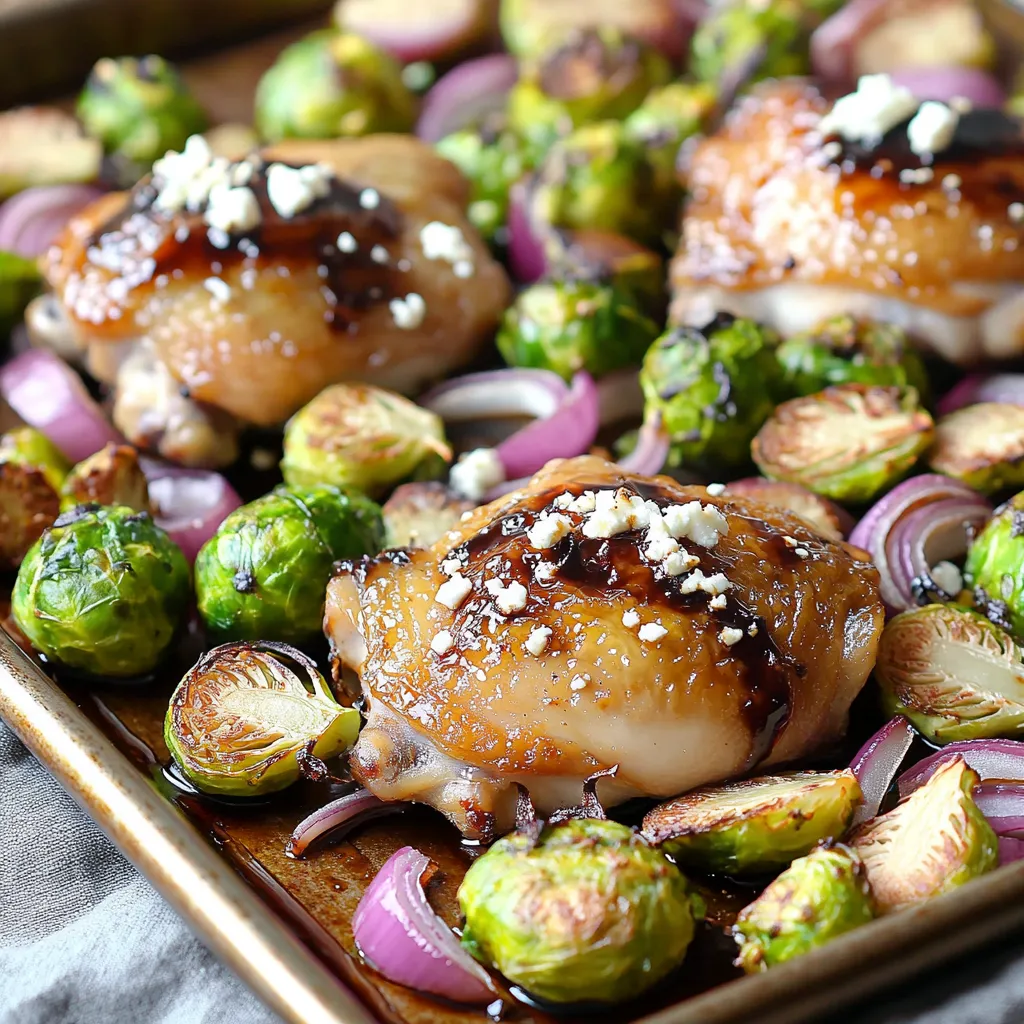
Looking for a tasty, easy meal? You’ll love my Sheet-Pan Balsamic Chicken & Brussels Sprouts Delight! This dish combines juicy
