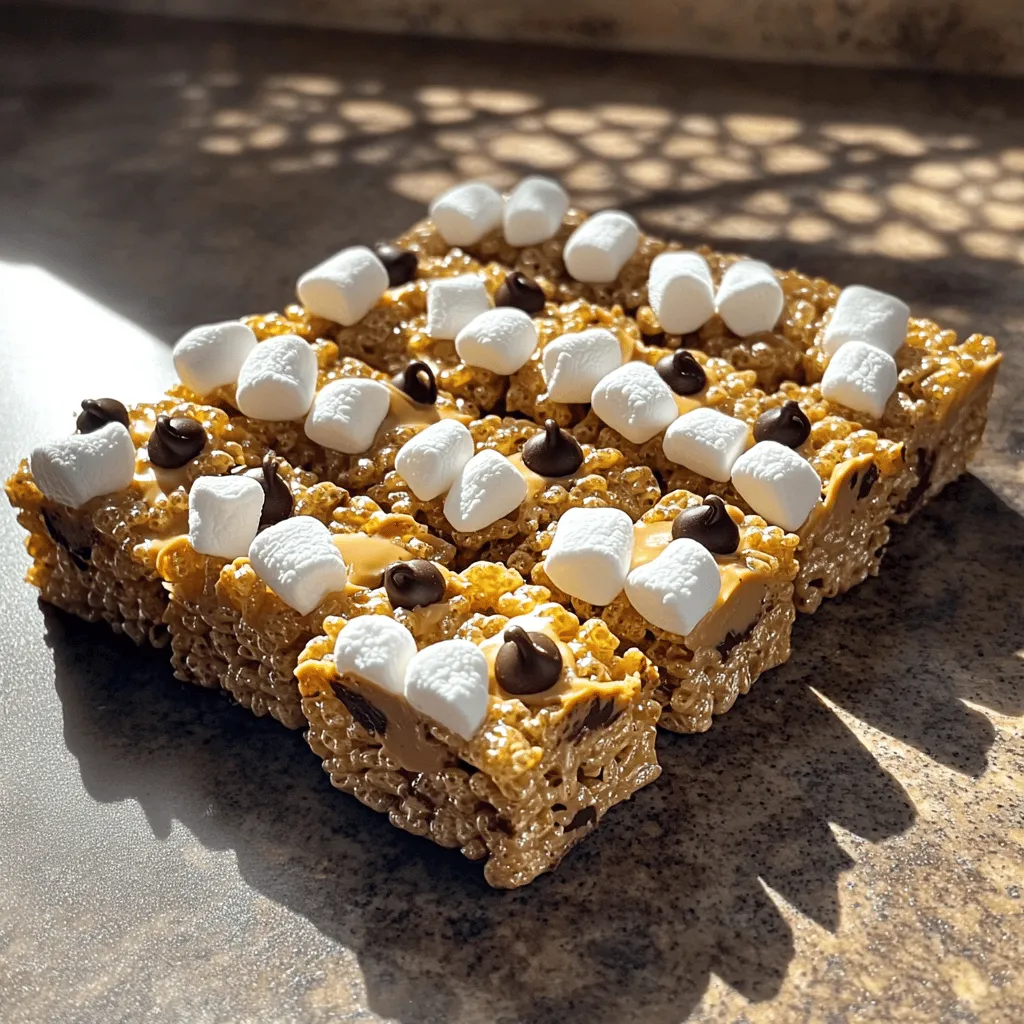
Who doesn’t crave a sweet, chewy treat? My Chewy Rice Krispies Treats recipe is simple, fun, and packed with flavor. With just five main ingredients, you’ll whip up a batch in no time. Plus, I’ll share tips to make them even tastier and variations to suit any occasion. Ready to enjoy delicious, gooey goodness? Let’s get started on this crowd-pleaser that’s sure to delight everyone!
Ingredients
List of Essential Ingredients
– 6 cups Rice Krispies cereal
– 4 cups mini marshmallows
– 1/2 cup unsalted butter
– 1/2 teaspoon vanilla extract
– 1/2 teaspoon salt
Optional Ingredients for Enhanced Flavor
– 1/2 cup creamy peanut butter
– 1/2 cup chocolate chips
Ingredient Substitutions
You can swap Rice Krispies with other puffed cereals. Options include corn puffs or brown rice cereal. If you need a dairy-free option, use coconut oil instead of butter. For marshmallows, try vegan marshmallows, which melt well too. These swaps still keep your treats tasty.
Using these tips, you can customize your chewy Rice Krispies treats to fit your needs.
Step-by-Step Instructions
Preparation Steps
– Greasing the baking dish: Start by greasing a 9×13 inch baking dish. Use butter or cooking spray to prevent sticking. A well-greased dish ensures your treats come out easily.
– Preparing your workspace: Clear your counter and gather all ingredients. This setup helps you cook faster and keeps your space neat.
Melting Process
– Melting the butter and marshmallows together: In a large saucepan, melt the unsalted butter over low heat. Once it melts, add the mini marshmallows. Stir gently until they are smooth and melted. This mixture is the key to your chewy texture.
– Tips for avoiding burning: Always keep the heat low. Stir constantly to avoid the mixture sticking to the bottom and burning. If you notice it getting too hot, remove it from the heat.
Mixing and Setting
– Combining all ingredients: Remove the saucepan from heat. Stir in the vanilla extract and salt. If you want a twist, add creamy peanut butter now. Slowly add the Rice Krispies cereal, stirring until coated.
– Pressing the mixture into the dish: Pour everything into the greased baking dish. Use a spatula to spread it evenly. Lightly butter the spatula or your hands to prevent sticking while pressing down.
– Cooling time specifics: Let the treats cool at room temperature for about 30 minutes. Once cooled and set, cut them into squares or rectangles. Enjoy your chewy Rice Krispies treats as a delightful snack!
Tips & Tricks
Achieving the Perfect Chewy Texture
To get the best chewy Rice Krispies treats, focus on the right ingredient ratio. You need 6 cups of Rice Krispies and 4 cups of mini marshmallows. This balance keeps them soft. When you melt the butter and marshmallows, stir gently. This helps them melt smoothly together. If you rush, you might burn the mixture.
Troubleshooting Common Issues
If your treats turn out too hard, it’s often because the mixture was pressed too tightly. Loosen them by warming them in the microwave for a few seconds. If they are sticky, try adding a bit more Rice Krispies. You can also coat your hands with butter to handle the sticky mixture more easily.
If the mixture is too dry, you can salvage it. Warm it up again and add a splash of melted butter or a little more marshmallow. Stir it well to combine.
Presentation and Serving Suggestions
Get creative when serving your treats! You can cut them into fun shapes using cookie cutters. This makes them great for parties. Consider stacking them on a plate or wrapping them in colorful cellophane for gifts.
Pair your treats with milk, hot chocolate, or even coffee. They also go well with fruits and nuts for a snack mix. The choices are endless!

Variations
Flavor Variations
You can change up your Rice Krispies treats by adding different nut butters. Creamy peanut butter adds a rich taste. Almond or cashew butter can give a new twist. Swapping chocolate chips for other mix-ins also makes it fun. Try adding dried fruit, nuts, or even candies. Each new ingredient can turn a classic into something special.
Themed Treats
You can make themed treats for holidays. For instance, add colorful sprinkles for birthdays. Use colored marshmallows for Halloween or Valentine’s Day. Seasonal flavors can also enhance your treats. In fall, add pumpkin spice. In summer, use fruity flavors like strawberry or lemon. Themed treats add joy to any occasion.
Healthier Alternatives
If you want a healthier version, use whole grain cereals. They add more fiber and taste. You could also think about reducing sugar. Try using less marshmallow or using a sugar substitute. This way, you can enjoy chewy treats while making smarter choices.
Storage Info
Best Practices for Storing
To keep your Chewy Rice Krispies Treats fresh, use an airtight container. This will keep them soft and chewy. You can also wrap them tightly in plastic wrap. If you store them at room temperature, they will last for up to a week. If you prefer to put them in the fridge, be aware they may harden a bit. However, they will still taste great!
Freezing Instructions
If you want to freeze your treats, here’s how: First, let them cool completely. Then, cut them into squares. Wrap each square in plastic wrap. Place the wrapped treats in a freezer-safe bag. They will stay fresh for about three months when frozen. When ready to eat, just take them out and let them thaw at room temperature.
How to Revive Stale Treats
If your treats become hard, don’t worry! You can revive them easily. Place them in the microwave for about ten seconds. This will soften them up. You can also add a slice of bread to the container for a few hours. The bread will help keep the treats fresh and chewy. Enjoy your treats again!
FAQs
How can I make my Rice Krispies treats more chewy?
To make your Rice Krispies treats chewy, adjust your ingredient ratios. Use more marshmallows and less cereal. A solid ratio is 4 cups of mini marshmallows for every 6 cups of Rice Krispies. This increases the gooey factor. Also, melt your marshmallows slowly over low heat. Stir gently to avoid burning. Mixing in creamy peanut butter adds extra chewiness and flavor.
Can I make Chewy Rice Krispies Treats ahead of time?
Yes, you can prepare Chewy Rice Krispies Treats ahead of time. Make them a day or two before you need them. Store them in an airtight container to keep them fresh. You can also wrap them tightly with plastic wrap. This keeps the treats soft and chewy longer.
What is the best way to cut Rice Krispies Treats?
To cut your Rice Krispies treats cleanly, use a sharp knife. Lightly grease the knife or spray it with cooking spray. This helps prevent sticking. Cut them into squares or rectangles. For best results, make smooth, even cuts straight down. Avoid sawing back and forth.
How long do Chewy Rice Krispies Treats last?
Chewy Rice Krispies Treats last about 3 days at room temperature. Keep them in an airtight container to maintain freshness. If you store them in the fridge, they can last up to a week. Just remember, refrigeration may make them a bit firmer. For longer storage, freeze them for up to 3 months. Just thaw at room temperature before enjoying.
Making Chewy Rice Krispies Treats is fun and easy. You learned about key ingredients and how to adjust flavors. I shared tips for perfect texture and creative serving ideas. Use the storage methods to keep your treats fresh longer. Remember, you can customize these treats to suit your taste. Overall, enjoy experimenting with flavors and variations. You’ll impress family and friends with your delicious, chewy treats.