Chocolate Peanut Butter Oat Cups No-Bake Delight

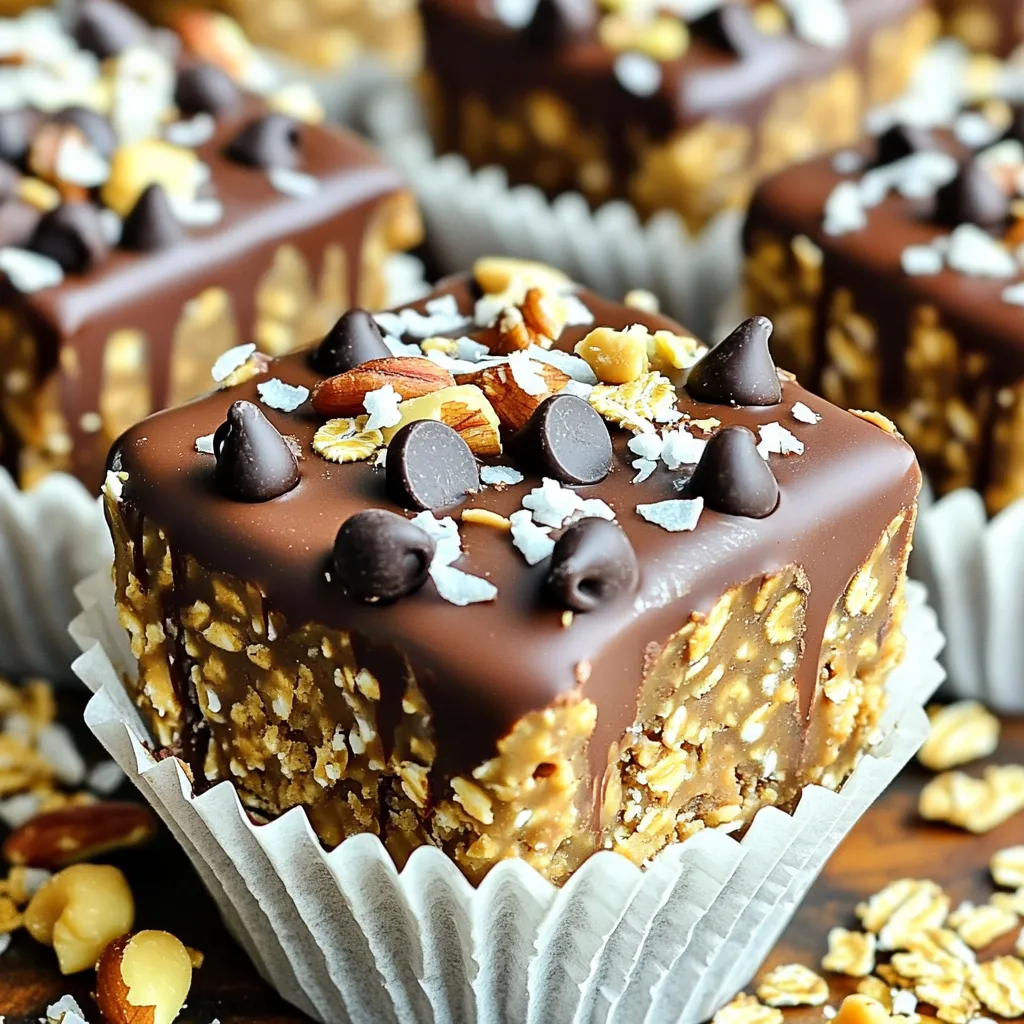
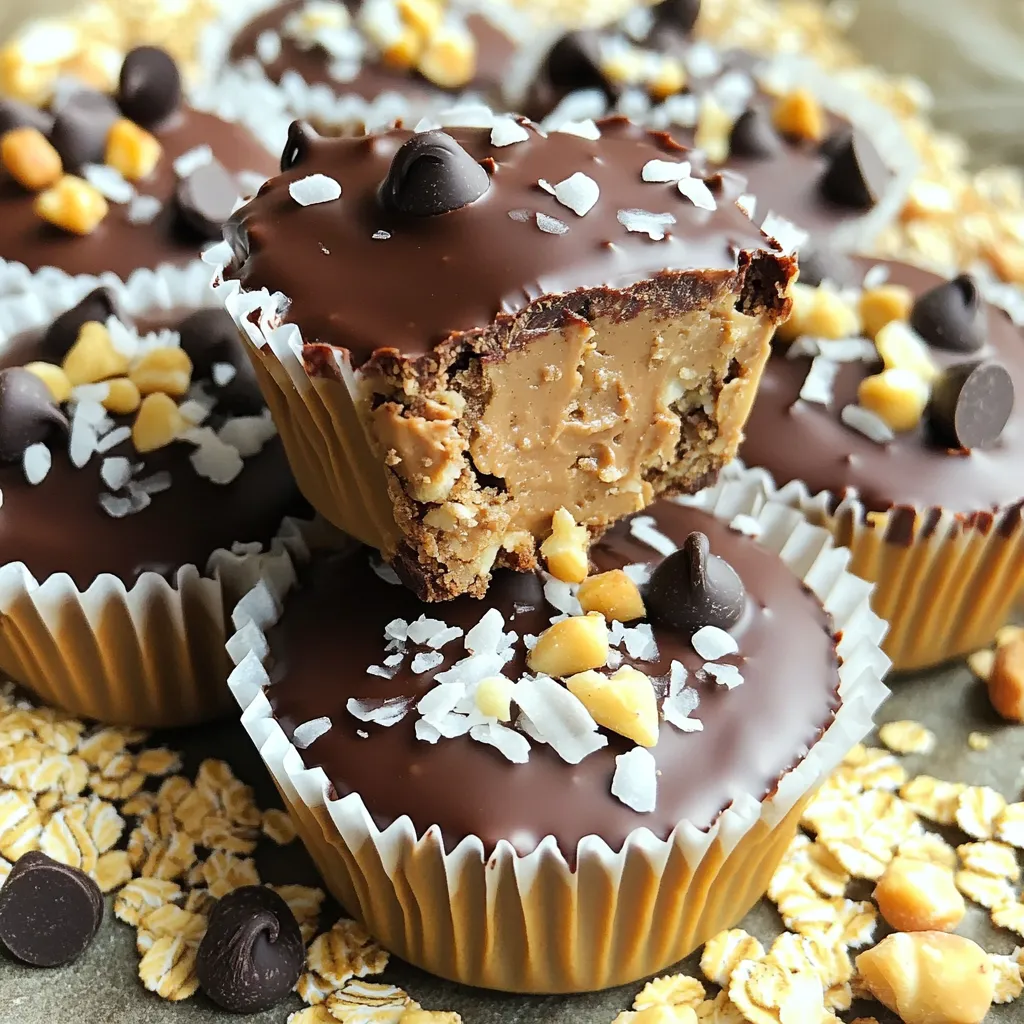
Indulging in a sweet treat can be simple and guilt-free! Join me as I whip up delicious Chocolate Peanut Butter Oat Cups that require no baking at all. With just a few wholesome ingredients like rolled oats, creamy peanut butter, and cocoa powder, you’ll create a snack that’s both satisfying and nutritious. Get ready to impress your taste buds and create an easy recipe that everyone in your home will love!

Ingredients

Main Ingredients

– 1 cup rolled oats

– 1/2 cup creamy peanut butter

– 1/4 cup honey or maple syrup

– 1/3 cup unsweetened cocoa powder

Optional Ingredients

– 1/4 cup chocolate chips (dark or semi-sweet)

– 1/2 teaspoon vanilla extract

– A pinch of salt

– Optional toppings: crushed nuts, shredded coconut, extra chocolate chips

To create these delightful no-bake oat cups, gather the main ingredients first. You need rolled oats for a chewy base. Creamy peanut butter adds richness and flavor. Honey or maple syrup gives the cups a sweet touch. Unsweetened cocoa powder adds that rich chocolate taste.

Next, consider adding optional ingredients for extra fun! Chocolate chips will make them even sweeter and more chocolaty. A splash of vanilla extract enhances the flavors. A pinch of salt balances the sweetness. You can also top them with crushed nuts or shredded coconut for added crunch.

These ingredients come together to make a tasty treat. They are perfect for snacks or dessert. If you don’t have something on hand, feel free to swap it out. Enjoy mixing and creating your own unique version!

Step-by-Step Instructions

Preparing the Dry Ingredients

Start by grabbing a large mixing bowl. Add 1 cup of rolled oats, 1/3 cup of unsweetened cocoa powder, and a pinch of salt. Stir these ingredients until they are mixed evenly. This step is key. The oats give structure, while cocoa adds rich flavor.

Preparing the Wet Mixture

Next, take a microwave-safe bowl. Add 1/2 cup of creamy peanut butter and 1/4 cup of honey or maple syrup. Warm them in the microwave for 20 to 30 seconds. This makes them easier to mix. Once warm, stir until smooth.

Mixing and Assembling

Now, combine the wet and dry mixtures. Pour the peanut butter mixture into the oat mixture. Add 1/2 teaspoon of vanilla extract for extra flavor. Stir until you form a sticky dough. It should hold together well.

Fold in 1/4 cup of chocolate chips, mixing them in evenly. Line a muffin tin with paper liners. Using a spoon or your hands, press the mixture firmly into each cup. Fill them to the top and pack it down tightly. This helps them hold their shape.

Place the muffin tin in the refrigerator for about 30 minutes. This allows the oat cups to set. Once they are firm, gently remove them from the tin. If they stick, run a knife around the edges.

For added flavor, sprinkle any optional toppings, like crushed nuts or shredded coconut, on top. Store the oat cups in an airtight container in the fridge for up to one week. Enjoy your delicious treat!

Tips & Tricks

Ensuring Perfect Texture

To mix ingredients for a sticky dough, start by stirring the dry ingredients first. Mix the rolled oats, cocoa powder, and salt in a bowl. This step helps blend flavors evenly. Next, warm the peanut butter and honey together. This makes it easier to mix with the dry ingredients. Combine them well until the dough sticks together.

When packing the cups, use your hands or a spoon. Press the mixture firmly into each muffin cup. Fill them to the top and pack it down hard. This helps the cups hold their shape once set.

Enhancing Flavor

For extra flavor, consider adding toppings. Crushed nuts, shredded coconut, or more chocolate chips work great. These add texture and make your oat cups more fun.

As for chocolate, I recommend using dark or semi-sweet chips. They give a rich taste that pairs well with peanut butter. You can also mix in some mini chocolate chips if you want a fun twist.

Making it Kid-Friendly

To make this recipe kid-safe, let them help with mixing. They can stir the dry ingredients or add the chocolate chips. It’s a great way to get them involved.

You can also create fun variations. Try adding different toppings or using other nut butters. Kids love to customize their treats, and this recipe is perfect for that!

Variations

Nut-Free Options

If you want to make these oat cups nut-free, there are easy swaps. You can use sunflower seed butter instead of peanut butter. It has a similar creamy texture and a nice taste. You could also try soy nut butter or pumpkin seed butter. Both options work well and still taste great.

Flavor Variations

Spicing things up can make these cups even better. Try adding a dash of cinnamon or nutmeg for warmth. You can also mix in dried fruits like raisins, cranberries, or chopped dates. These add sweetness and a nice chew. Seeds like chia or flaxseed can add crunch and nutrition too.

Gluten-Free Options

To keep these oat cups gluten-free, choose certified gluten-free oats. Not all oats are made the same. Check labels to ensure they are safe. You can also use gluten-free alternatives like quinoa flakes or coconut flakes. They can add different textures and flavors while keeping the recipe safe.

Storage Info

How to Store

To keep your chocolate peanut butter oat cups fresh, use airtight containers. A good container prevents air and moisture from spoiling your treats. Place a layer of parchment paper between layers if stacking. This adds extra protection and keeps the cups from sticking together. Store them in the refrigerator, where it’s cool and dark. This ensures they stay yummy and firm.

Shelf Life

How long do they last in the refrigerator? If stored well, these oat cups last up to one week in the fridge. You can enjoy them as a quick snack or a sweet treat during this time. Can you freeze the oat cups? Yes, you can freeze them! Just wrap each cup in plastic wrap, then place them in a freezer bag. This way, they stay fresh for up to three months. When ready to eat, simply thaw them in the fridge overnight.

FAQs

Can I use natural peanut butter?

Yes, you can use natural peanut butter. The main difference lies in the texture and taste. Creamy peanut butter is smooth and blends easily. Natural peanut butter may have a bit of oil on top. You may need to stir it well before using. Both options work great in this recipe.

Are these oat cups healthy?

These oat cups are quite healthy! Each serving has a nice mix of nutrients. They contain fiber from oats, protein from peanut butter, and healthy fats. The honey or maple syrup adds some natural sweetness. They make a great snack or breakfast option.

Can I make these without cocoa powder?

Yes, you can. If you skip the cocoa powder, the oat cups will be less chocolatey. You can use carob powder or even vanilla extract for a different flavor. Adjust the sweetness if needed, and you still have a tasty treat!

In this blog post, we explored the easy process of making delicious oat cups. We covered the main and optional ingredients, step-by-step instructions, and handy tips for great texture and flavor. You can also try various nut-free and gluten-free options. These oat cups are simple to store and keep fresh for weeks. Enjoy them as a healthy snack or a fun cooking project with kids. You now have the skills and ideas to create your own tasty variations. Dive in and start experimenting with your favorite flavors!

- 1 cup rolled oats - 1/2 cup creamy peanut butter - 1/4 cup honey or maple syrup - 1/3 cup unsweetened cocoa powder - 1/4 cup chocolate chips (dark or semi-sweet) - 1/2 teaspoon vanilla extract - A pinch of salt - Optional toppings: crushed nuts, shredded coconut, extra chocolate chips To create these delightful no-bake oat cups, gather the main ingredients first. You need rolled oats for a chewy base. Creamy peanut butter adds richness and flavor. Honey or maple syrup gives the cups a sweet touch. Unsweetened cocoa powder adds that rich chocolate taste. Next, consider adding optional ingredients for extra fun! Chocolate chips will make them even sweeter and more chocolaty. A splash of vanilla extract enhances the flavors. A pinch of salt balances the sweetness. You can also top them with crushed nuts or shredded coconut for added crunch. These ingredients come together to make a tasty treat. They are perfect for snacks or dessert. If you don’t have something on hand, feel free to swap it out. Enjoy mixing and creating your own unique version! Start by grabbing a large mixing bowl. Add 1 cup of rolled oats, 1/3 cup of unsweetened cocoa powder, and a pinch of salt. Stir these ingredients until they are mixed evenly. This step is key. The oats give structure, while cocoa adds rich flavor. Next, take a microwave-safe bowl. Add 1/2 cup of creamy peanut butter and 1/4 cup of honey or maple syrup. Warm them in the microwave for 20 to 30 seconds. This makes them easier to mix. Once warm, stir until smooth. Now, combine the wet and dry mixtures. Pour the peanut butter mixture into the oat mixture. Add 1/2 teaspoon of vanilla extract for extra flavor. Stir until you form a sticky dough. It should hold together well. Fold in 1/4 cup of chocolate chips, mixing them in evenly. Line a muffin tin with paper liners. Using a spoon or your hands, press the mixture firmly into each cup. Fill them to the top and pack it down tightly. This helps them hold their shape. Place the muffin tin in the refrigerator for about 30 minutes. This allows the oat cups to set. Once they are firm, gently remove them from the tin. If they stick, run a knife around the edges. For added flavor, sprinkle any optional toppings, like crushed nuts or shredded coconut, on top. Store the oat cups in an airtight container in the fridge for up to one week. Enjoy your delicious treat! To mix ingredients for a sticky dough, start by stirring the dry ingredients first. Mix the rolled oats, cocoa powder, and salt in a bowl. This step helps blend flavors evenly. Next, warm the peanut butter and honey together. This makes it easier to mix with the dry ingredients. Combine them well until the dough sticks together. When packing the cups, use your hands or a spoon. Press the mixture firmly into each muffin cup. Fill them to the top and pack it down hard. This helps the cups hold their shape once set. For extra flavor, consider adding toppings. Crushed nuts, shredded coconut, or more chocolate chips work great. These add texture and make your oat cups more fun. As for chocolate, I recommend using dark or semi-sweet chips. They give a rich taste that pairs well with peanut butter. You can also mix in some mini chocolate chips if you want a fun twist. To make this recipe kid-safe, let them help with mixing. They can stir the dry ingredients or add the chocolate chips. It’s a great way to get them involved. You can also create fun variations. Try adding different toppings or using other nut butters. Kids love to customize their treats, and this recipe is perfect for that! {{image_2}} If you want to make these oat cups nut-free, there are easy swaps. You can use sunflower seed butter instead of peanut butter. It has a similar creamy texture and a nice taste. You could also try soy nut butter or pumpkin seed butter. Both options work well and still taste great. Spicing things up can make these cups even better. Try adding a dash of cinnamon or nutmeg for warmth. You can also mix in dried fruits like raisins, cranberries, or chopped dates. These add sweetness and a nice chew. Seeds like chia or flaxseed can add crunch and nutrition too. To keep these oat cups gluten-free, choose certified gluten-free oats. Not all oats are made the same. Check labels to ensure they are safe. You can also use gluten-free alternatives like quinoa flakes or coconut flakes. They can add different textures and flavors while keeping the recipe safe. To keep your chocolate peanut butter oat cups fresh, use airtight containers. A good container prevents air and moisture from spoiling your treats. Place a layer of parchment paper between layers if stacking. This adds extra protection and keeps the cups from sticking together. Store them in the refrigerator, where it’s cool and dark. This ensures they stay yummy and firm. How long do they last in the refrigerator? If stored well, these oat cups last up to one week in the fridge. You can enjoy them as a quick snack or a sweet treat during this time. Can you freeze the oat cups? Yes, you can freeze them! Just wrap each cup in plastic wrap, then place them in a freezer bag. This way, they stay fresh for up to three months. When ready to eat, simply thaw them in the fridge overnight. Yes, you can use natural peanut butter. The main difference lies in the texture and taste. Creamy peanut butter is smooth and blends easily. Natural peanut butter may have a bit of oil on top. You may need to stir it well before using. Both options work great in this recipe. These oat cups are quite healthy! Each serving has a nice mix of nutrients. They contain fiber from oats, protein from peanut butter, and healthy fats. The honey or maple syrup adds some natural sweetness. They make a great snack or breakfast option. Yes, you can. If you skip the cocoa powder, the oat cups will be less chocolatey. You can use carob powder or even vanilla extract for a different flavor. Adjust the sweetness if needed, and you still have a tasty treat! In this blog post, we explored the easy process of making delicious oat cups. We covered the main and optional ingredients, step-by-step instructions, and handy tips for great texture and flavor. You can also try various nut-free and gluten-free options. These oat cups are simple to store and keep fresh for weeks. Enjoy them as a healthy snack or a fun cooking project with kids. You now have the skills and ideas to create your own tasty variations. Dive in and start experimenting with your favorite flavors!

Chocolate Peanut Butter Oat Cups No-Bake

Indulge in the deliciousness of Chocolate Peanut Butter Oat Cups! These easy-to-make treats combine simple ingredients like rolled oats, creamy peanut butter, and rich cocoa for a perfect snack or dessert. In just 40 minutes, you can create 12 scrumptious cups packed with flavor. Ready to satisfy your sweet tooth? Click through to explore the full recipe and discover tips for customizing your oat cups with delicious toppings!

Ingredients
  

1 cup rolled oats

1/2 cup creamy peanut butter

1/4 cup honey or maple syrup

1/3 cup unsweetened cocoa powder

1/4 cup chocolate chips (dark or semi-sweet)

1/2 teaspoon vanilla extract

A pinch of salt

Optional toppings: crushed nuts, shredded coconut, or extra chocolate chips

Instructions
 

In a large mixing bowl, combine the rolled oats, cocoa powder, and salt. Stir until mixed evenly.

    In a separate microwave-safe bowl, gently warm the creamy peanut butter and honey (or maple syrup) together in the microwave for about 20-30 seconds until they are soft and easily mixable.

      Add the warmed peanut butter mixture and vanilla extract to the oat mixture. Stir until all the ingredients are well combined and a sticky dough forms.

        Fold in the chocolate chips until evenly distributed in the mixture.

          Line a muffin tin with paper liners or lightly grease the cups. Using a spoon or your hands, press the mixture firmly into each cup, filling them about to the top and packing it down to ensure they hold shape.

            Pop the muffin tin into the refrigerator for about 30 minutes to allow the oat cups to set.

              Once set, gently remove the cups from the muffin tin. If they are sticking, run a knife around the edges.

                If desired, sprinkle any optional toppings like crushed nuts, shredded coconut, or extra chocolate chips on top of the cups for added flavor and texture.

                  Store the oat cups in an airtight container in the refrigerator for up to one week.

                    Prep Time: 10 minutes | Total Time: 40 minutes | Servings: 12 cups

                      Leave a Comment

                      Recipe Rating