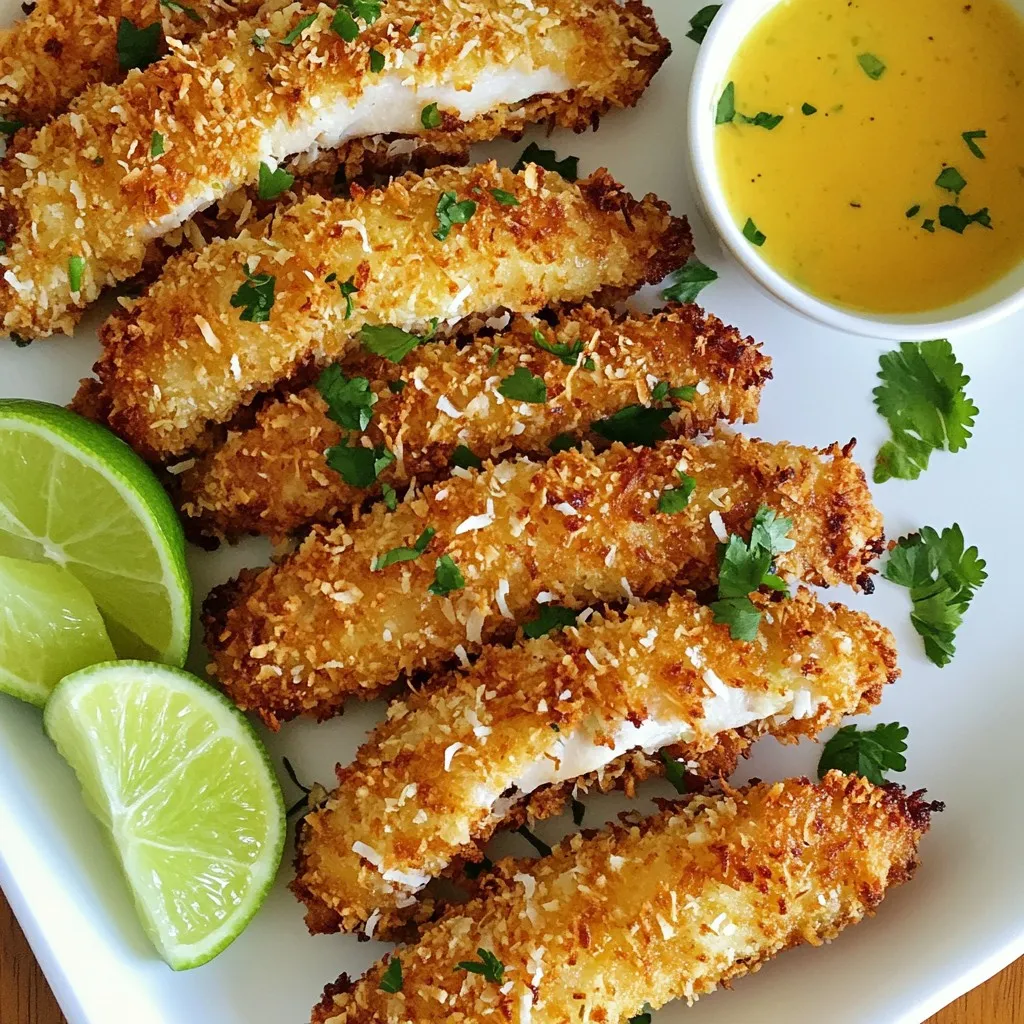
Are you ready to enjoy a crunchy and delightful treat? I’m excited to share my easy recipe for Crispy Coconut Chicken Strips. With just a few simple ingredients, you can whip up a flavorful dish that’s perfect for any occasion. I’ll guide you through each step to ensure your chicken strips come out crisp and delicious every time. Let’s get cooking and bring some tropical flavor to your table!
Why I Love This Recipe
- Unique Flavor Combination: The sweet coconut paired with the savory chicken creates a delightful contrast that is irresistible.
- Crispy Texture: The panko breadcrumbs and coconut provide a satisfying crunch that makes every bite enjoyable.
- Quick and Easy: This recipe can be prepared in just 30 minutes, making it perfect for weeknight dinners.
- Versatile Dish: These chicken strips can be served as an appetizer, snack, or main dish, and pair wonderfully with various dipping sauces.
Ingredients
List of Ingredients for Crispy Coconut Chicken Strips
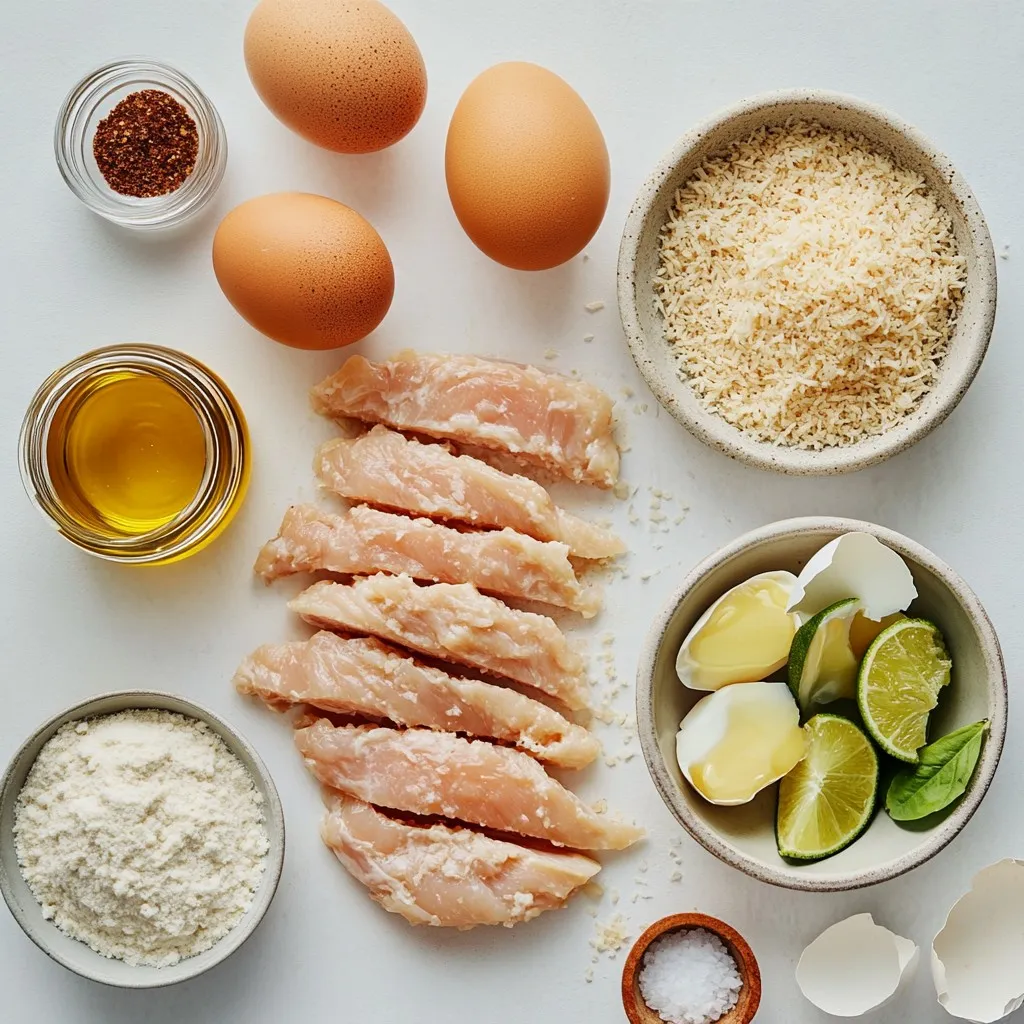
To make crispy coconut chicken strips, you will need:
– 1 lb chicken breast, cut into strips
– 1 cup all-purpose flour
– 2 large eggs
– 1 cup shredded coconut (sweetened or unsweetened)
– 1 cup panko breadcrumbs
– 1 teaspoon garlic powder
– 1 teaspoon paprika
– Salt and pepper to taste
– 1 tablespoon honey
– 1 tablespoon lime juice
– Cooking oil for frying
Measurement Tips for Accurate Cooking
To ensure your chicken strips turn out perfect, measure carefully. Use a dry measuring cup for flour and panko. When measuring liquids, use a liquid measuring cup for the honey and lime juice. This helps you get the right amount. Remember, too much flour can make the coating heavy. Also, check your chicken breast for even strips. Even pieces cook better and more evenly.
Alternative Ingredients for Dietary Needs
If you have specific dietary needs, you can make easy swaps. For a gluten-free version, use gluten-free flour and gluten-free panko. You can also use almond flour as a substitute for regular flour. If you want to skip eggs, try using a flaxseed mixture. Mix 1 tablespoon of ground flaxseed with 2.5 tablespoons of water. Let it sit for five minutes to thicken. This will help the coating stick just like eggs.
Step-by-Step Instructions
Detailed Cooking Process for Crispy Coconut Chicken Strips
To make crispy coconut chicken strips, follow these steps closely. First, prepare your chicken. Cut 1 pound of chicken breast into long strips. This helps them cook evenly. Next, mix your flour, garlic powder, paprika, salt, and pepper in a shallow bowl. This seasoned flour gives great flavor. In a different bowl, whisk together 2 large eggs until they are well blended. This will help the coating stick to the chicken.
Now, in another shallow bowl, mix 1 cup of shredded coconut with 1 cup of panko breadcrumbs. This mixture will create a crunchy coating. You’re ready to coat the chicken!
Start by dipping each chicken strip into the seasoned flour. Make sure the chicken is fully coated. Then, shake off any extra flour. Next, dip the chicken into the egg mixture. Let any extra egg drip off. Finally, coat the chicken in the coconut and panko mix. Press gently so it sticks well. Repeat this for all chicken strips.
Heat about 1 inch of cooking oil in a large skillet over medium-high heat. To check if the oil is ready, drop a bit of the coconut mixture into it. If it sizzles, the oil is hot enough.
Carefully place the coated chicken strips in the hot oil. Fry them for 3 to 4 minutes on each side. They should turn golden brown and be fully cooked. When done, transfer the strips to a plate lined with paper towels. This absorbs any extra oil.
Tips for Each Step to Ensure Optimal Texture
– Coating: Make sure to coat the chicken well at each step. This keeps the flavors locked in.
– Oil Temperature: Keep an eye on the oil temperature. If it’s too hot, the coating can burn. If it’s too cold, the chicken absorbs too much oil.
– Batch Cooking: Fry the chicken in batches. Overcrowding the pan can lower the oil’s temperature, leading to soggy strips.
Visual References: Cooking Tips with Images or Videos
For visual help, you can search for video tutorials online. These can show you the coating process step-by-step. Watching someone else helps you see how the chicken should look at each stage. Look for videos that show frying tips too. Seeing how the chicken turns golden brown gives you a good idea of when it’s done.
Tips & Tricks
How to Achieve Maximum Crispiness
To make your chicken strips extra crispy, use panko breadcrumbs. Panko gives a light, airy crunch. Make sure to press the coconut-panko mix onto the chicken firmly. This helps it stick better. Fry in hot oil, about 350°F. Test the oil with a small piece of the coating. If it sizzles, you are ready to fry. Fry only a few strips at a time. This keeps the oil hot and helps them cook evenly.
Recommended Cooking Oil for Frying
For frying, I recommend using vegetable oil or canola oil. Both have high smoke points, making them great for frying. You can also use coconut oil for added flavor, but it may have a lower smoke point. Be sure to heat about one inch of oil in your skillet. This depth allows the strips to be fully submerged, leading to even cooking.
Common Mistakes to Avoid When Making Chicken Strips
One common mistake is overcrowding the pan. This cools the oil and makes strips soggy. Always fry in small batches. Another mistake is not shaking off excess flour or egg. This excess can create a heavy coating that doesn’t crisp well. Finally, do not skip the paper towel step after frying. This helps absorb any extra oil, keeping your chicken strips light and crispy.
Pro Tips
- Use Fresh Ingredients: Always opt for fresh chicken and coconut for the best flavor and texture in your crispy strips.
- Control the Oil Temperature: Maintaining the right oil temperature is crucial; too hot will burn the coating, while too cool will make them soggy.
- Customize the Seasoning: Feel free to add your favorite spices to the flour mixture for a personal twist on flavor.
- Rest After Frying: Allow the chicken strips to rest on paper towels for a few minutes before serving to ensure they remain crispy.
Variations
Flavor Twists: Adding Spices and Seasonings
You can easily add flavor to your crispy coconut chicken strips. Try mixing in spices like cayenne pepper for heat. You can also use cumin or coriander for a warm taste. Adding a pinch of black pepper gives a nice kick too. These spices will make the chicken even more exciting. Feel free to experiment with your favorite herbs. A dash of dried oregano or thyme can add a nice touch.
Alternative Coatings: Gluten-Free and Wheat-Free Options
If you need gluten-free options, use almond flour instead of regular flour. You can also use coconut flour for a coconut boost. For the breadcrumbs, try crushed gluten-free crackers or cornflakes. They will still give you that crunchy bite. You won’t lose any flavor with these swaps. These options ensure everyone can enjoy your crispy chicken strips.
Serving Suggestions: Pairing with Sides or Dips
Great sides to pair with these chicken strips include fresh salads or rice. A tangy slaw is also a perfect match. For dips, the honey-lime sauce is a must-try. You can also serve it with sweet chili sauce for a different twist. A creamy ranch or garlic aioli adds a nice touch too. Serve on a platter with lime wedges for a fun look. Enjoy your meal with family and friends!
Storage Info
How to Properly Store Leftover Chicken Strips
To keep your crispy coconut chicken strips fresh, let them cool first. Place them in an airtight container. This will help keep them from getting soggy. You can store them in the fridge for up to three days. For best flavor, eat them within this time frame.
Reheating Instructions for Best Results
When you want to eat those strips again, heat your oven to 375°F. Place the chicken strips on a baking sheet. Bake for about 10-15 minutes. This will make them hot and crispy again. Avoid using the microwave. It can make them soft and chewy.
Freezing Tips for Long-Term Storage
If you want to save your chicken strips for later, freezing is a great option. First, let them cool completely. Then, arrange them in a single layer on a baking sheet. Freeze until solid, about 1-2 hours. After that, place them in a freezer bag or container. They can last up to three months in the freezer. When ready to eat, thaw them in the fridge overnight before reheating.
FAQs
Can I Bake the Crispy Coconut Chicken Strips Instead of Frying?
Yes, you can bake the chicken strips! Baking is a healthier option. Preheat your oven to 400°F (200°C). Place the coated strips on a baking sheet lined with parchment paper. Bake for about 20-25 minutes. Flip them halfway through. This will help them get crispy on both sides. Keep an eye on them to avoid burning. If they are golden brown, they are ready to eat!
What Type of Coconut Should I Use: Sweetened or Unsweetened?
You can choose either sweetened or unsweetened coconut. Sweetened coconut adds extra flavor and a hint of sweetness. Unsweetened coconut gives a more natural taste. If you like a sweeter dish, go for sweetened. For a more savory flavor, use unsweetened. Both will give you a delicious crunch.
How Do I Know When the Chicken Strips Are Fully Cooked?
Check the color and temperature to know if the chicken is cooked. The outside should be golden brown. Use a meat thermometer to check the inside. The chicken should reach 165°F (75°C). If you don’t have a thermometer, cut into a strip. The meat should be white and no longer pink.
You learned how to make crispy coconut chicken strips in this guide. We covered ingredients, step-by-step cooking, tips for crispiness, and variations. Remember to store leftovers properly and reheat them for the best taste. Don’t hesitate to experiment with flavors or coatings to match your needs. These chicken strips are sure to impress anyone at your table. Enjoy your cooking journe