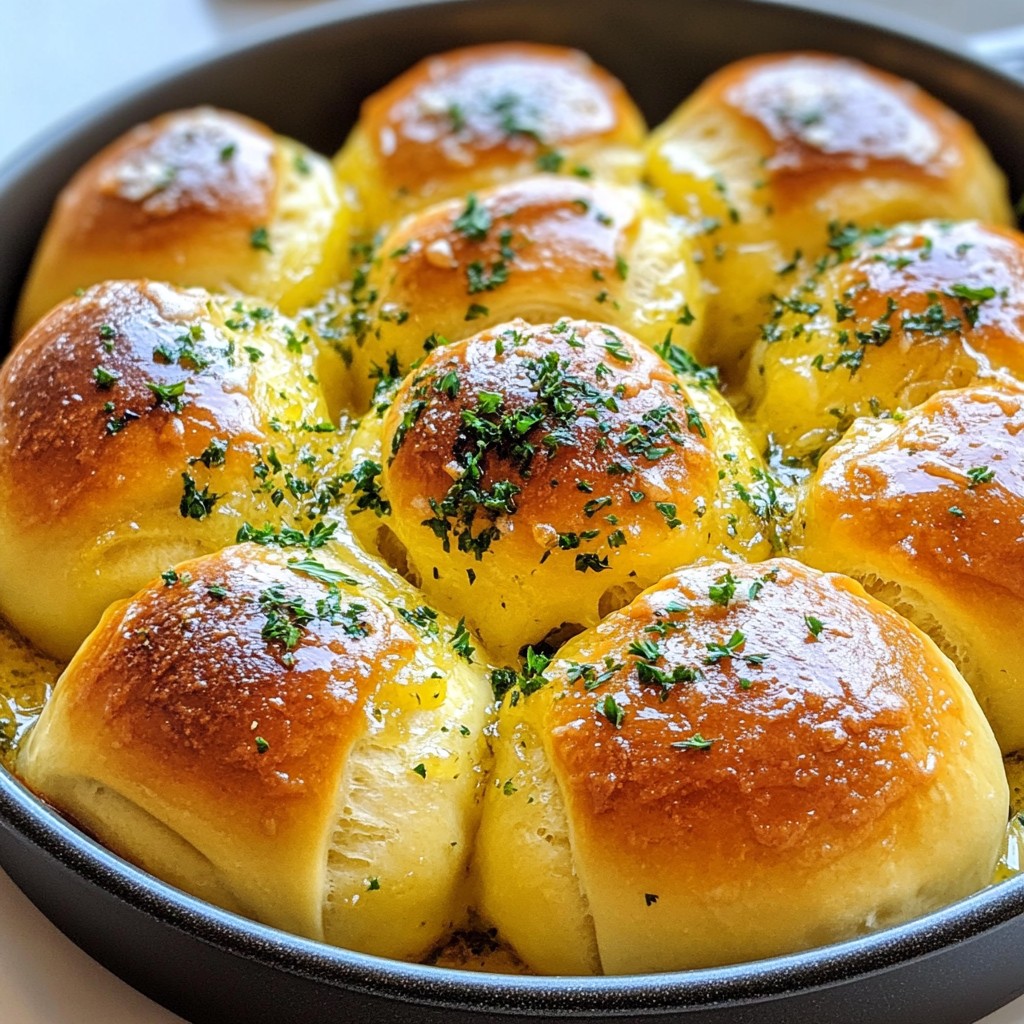
Hot, fluffy, and bursting with flavor, these Garlic Herb Pull-Apart Rolls are a must-try! With just a few simple ingredients, you can create a soft treat everyone will love. Imagine the warm aroma of garlic and fresh herbs wafting through your kitchen. In this post, I’ll guide you step by step to make perfect rolls for any meal. Get ready for a baking adventure that will delight your taste buds!
Why I Love This Recipe
- Delicious Flavor Combination: The mix of garlic, herbs, and Parmesan creates an irresistible flavor that makes these rolls a standout side dish.
- Easy to Make: This recipe involves simple steps that even novice bakers can follow, making it accessible for everyone.
- Perfect for Sharing: Pull-apart rolls are designed for sharing, making them great for family gatherings or parties.
- Customizable: You can easily adjust the herbs or add other ingredients like cheese or spices to make these rolls your own.
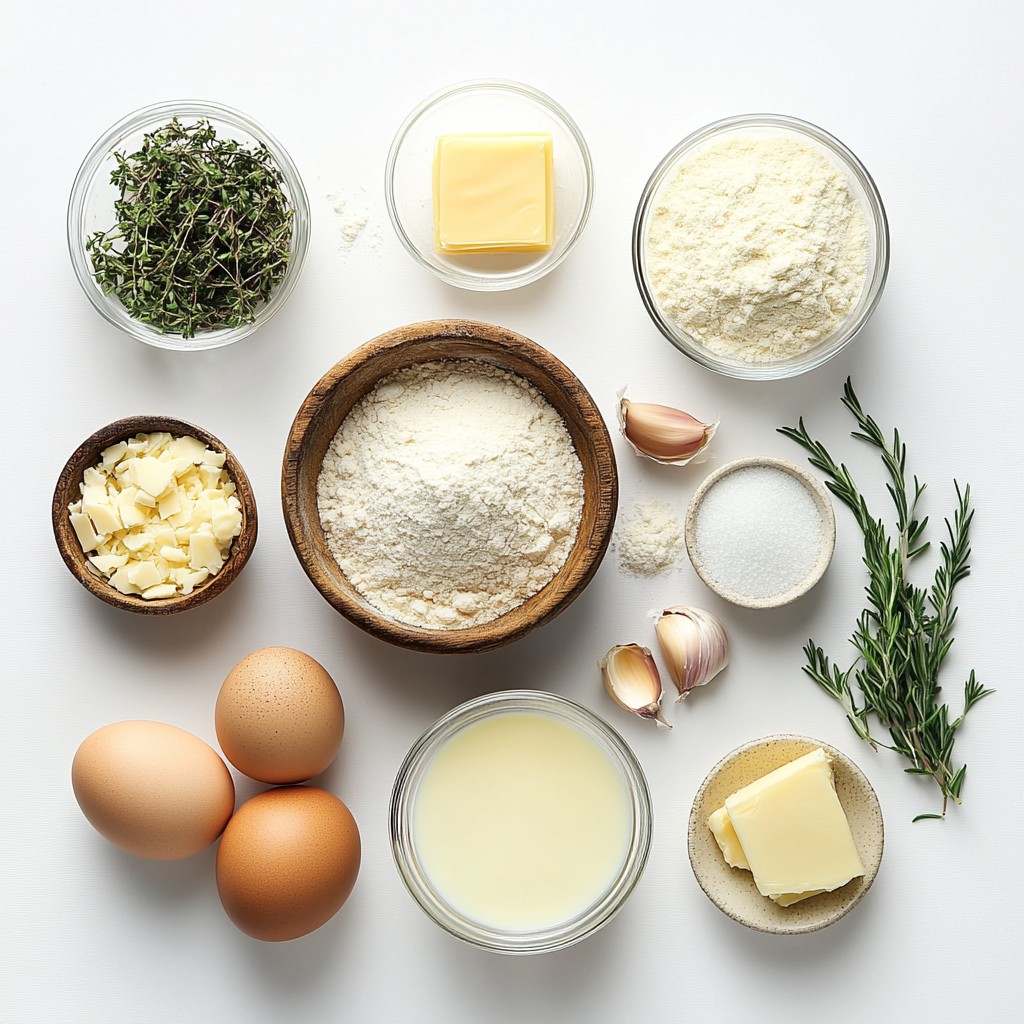
Ingredients
Main Ingredients List
- 4 cups all-purpose flour
- 1 cup warm milk (110°F)
- 2 tablespoons sugar
- 1 packet active dry yeast (2 1/4 teaspoons)
- 1/4 cup unsalted butter, melted
- 2 large eggs
- 6 cloves garlic, minced
Herbs and Cheese
- 1 tablespoon fresh rosemary, finely chopped
- 1 tablespoon fresh thyme, finely chopped
- 1/4 cup grated Parmesan cheese
- 1/4 cup fresh parsley, chopped
Additional Ingredients for Topping
- Extra melted butter for brushing
When making Garlic Herb Pull-Apart Rolls, you want to gather the best ingredients. Each component plays a role in flavor and texture.
I use all-purpose flour for its balance of protein. It gives the rolls structure. The warm milk activates the yeast. It helps the dough rise and become fluffy. Sugar feeds the yeast and adds a touch of sweetness.
The active dry yeast is crucial. It gives the rolls their lift, making them soft. Unsalted butter adds richness and flavor. I love using fresh garlic for its bold taste. It makes the rolls fragrant and delicious.
For the herbs, I opt for fresh rosemary and thyme. They bring a wonderful taste that blends well. Parmesan cheese adds a salty note. Lastly, fresh parsley makes everything look pretty and adds freshness.
Don’t forget the extra melted butter. This will give the rolls a shiny finish and extra taste. Each ingredient works together to create a soft and flavorful treat.
Step-by-Step Instructions
Preparing the Dough
To start, combine warm milk, sugar, and yeast in a large bowl. The milk should be around 110°F. Let it sit for about 5-10 minutes. You want it to foam. This shows the yeast is alive and ready. Next, mix in melted butter, eggs, and salt. Gradually add flour, two cups at first. Stir until it comes together, then add the rest, half a cup at a time, until you form a soft dough.
Kneading and Rising
Now, move the dough to a floured surface. Knead it for about 5-7 minutes. You want the dough to be smooth and elastic. After kneading, place it in a greased bowl. Cover it with a kitchen towel. Let it rise in a warm place for about one hour. The dough should double in size.
Portioning and Coating
While the dough rises, prepare the garlic herb mixture. In a small bowl, mix minced garlic, finely chopped rosemary, thyme, and Parmesan cheese. Once the dough has risen, punch it down. Divide it into 16 equal pieces. Roll each piece into a ball. Dip each ball into the garlic herb mixture to coat it well.
Final Assembly and Baking
Arrange the coated dough balls in a greased round baking pan. Overlap them slightly for a nice look. Cover the pan with a towel and let it rise again for 30 minutes. Preheat your oven to 350°F (175°C) during this time. Brush the tops with melted butter before baking. Bake for 25-30 minutes or until golden brown. Once done, brush with extra melted butter and sprinkle fresh parsley on top. Enjoy your warm, flavorful rolls!
Tips & Tricks
Achieving the Perfect Texture
To get that soft, fluffy roll, kneading is key. Knead the dough for about 5 to 7 minutes. This helps develop gluten, which gives the rolls their chewiness. When you knead, use the heel of your hand to push the dough. Then fold it over and repeat.
Rising times matter too. After you mix the dough, let it rise for about 1 hour. It should double in size. This allows air to form in the dough, making it light. For the second rise, give it another 30 minutes. This step ensures the rolls are airy and tender.
Flavor Enhancements
You can boost flavor with extra spices or herbs. Try adding dried oregano or basil for a twist. Fresh chives or dill can also add a nice touch.
Cheese lovers can experiment with different cheeses. Cheddar gives a sharp bite, while mozzarella adds creaminess. You can even mix cheeses for a unique flavor profile.
Serving Suggestions
Garlic herb pull-apart rolls pair well with many dishes. Serve them alongside soups or stews for a warm meal. They also go great with salads or as a side to grilled meats.
For a fun presentation, stack the rolls in a tall basket. You can sprinkle some extra herbs on top for color. A small bowl of marinara sauce for dipping makes it even more exciting!
Pro Tips
- Use Fresh Herbs: Fresh herbs will elevate the flavor of your rolls significantly compared to dried herbs. Always opt for fresh whenever possible.
- Check Dough Consistency: If the dough is too sticky, add a little more flour, but avoid adding too much to ensure soft and fluffy rolls.
- Let Them Rise Properly: Be patient during the rising times. A warm environment is crucial for the yeast to work, leading to light and airy rolls.
- Brush with Garlic Butter: For an extra burst of flavor, mix minced garlic into the melted butter before brushing it on the rolls before and after baking.
Variations
Cheesy Garlic Herb Rolls
To make cheesy garlic herb rolls, add extra cheese inside or on top. I love using mozzarella or cheddar for a gooey center. Just roll the dough balls, flatten them, and place a piece of cheese before sealing them back up. For a cheesy topping, sprinkle shredded cheese on top before baking. This extra cheese melts and creates a delightful crust. The combination of garlic and cheese makes each bite a savory treat.
Spicy Garlic Herb Rolls
If you crave some heat, try spicy garlic herb rolls. You can easily incorporate red pepper flakes or diced jalapeños into the garlic herb mixture. Start by adding a teaspoon of red pepper flakes to the butter and garlic mix. If you love jalapeños, chop them finely and mix them in. This adds a nice kick to every roll. You can adjust the spice level to suit your taste, making this version fun and exciting.
Whole Wheat Garlic Herb Rolls
For a healthier twist, make whole wheat garlic herb rolls. Substitute all-purpose flour with whole wheat flour. This swap adds fiber and gives the rolls a nutty taste. The dough may feel a bit denser, but the flavor will shine through. Just follow the same steps as the original recipe. These rolls are not only tasty but also a bit more wholesome. Enjoy them warm with your favorite dish!
Storage Info
Storing Leftovers
To keep your pull-apart rolls fresh, store them in the fridge. First, let them cool completely. Then, place the rolls in an airtight container. This helps keep them soft and prevents drying out. If you have a lot, you can layer parchment paper between the rolls. This keeps them from sticking together. Consume them within three days for the best taste.
Freezing Tips
To freeze the rolls, allow them to cool fully after baking. Then, wrap each roll tightly in plastic wrap. Place the wrapped rolls in a heavy-duty freezer bag or container. This will keep them safe from freezer burn. You can freeze them for up to three months.
To reheat frozen rolls, take them out and let them thaw overnight in the fridge. When ready, preheat your oven to 350°F (175°C). Place the rolls on a baking sheet and cover with foil. Heat for about 10-15 minutes until warm. For a crispy top, remove the foil for the last few minutes. Enjoy your rolls just as fresh!
FAQs
How do I know when the dough has risen enough?
You can tell if your dough has risen enough by checking its size. The dough should double in size. You can also press it gently with a finger. If it springs back slowly, it is ready. Another sign is the dough's smooth surface. It should look puffy and airy. These signs show that the yeast is active and working well.
Can I make the dough ahead of time?
Yes, you can make the dough ahead of time. After kneading, let it rise as normal. Then, instead of baking, punch it down and cover it. Place it in the fridge for up to 24 hours. When you are ready to bake, let it sit at room temperature for about 30 minutes. This gives the dough time to warm up. You can also freeze the dough for longer storage. Just thaw it overnight in the fridge before using.
What can I serve with Garlic Herb Pull-Apart Rolls?
These rolls pair well with many dishes. They are great with soups, stews, or salads. You can serve them with garlic butter or marinara sauce for dipping. They also make a lovely side for roasted meats or grilled vegetables. For a fun twist, try them with a cheese platter for gatherings. The soft texture and herbs add a nice touch.
How do I reheat leftover rolls?
To reheat leftover rolls, preheat your oven to 350°F. Wrap the rolls in aluminum foil to keep them soft. Heat them for about 10-15 minutes. You can also use the microwave. Place a damp paper towel over the rolls. Heat them for about 15-20 seconds. Be careful not to overheat, or they may get tough. Enjoy your warm rolls just like fresh!
In this post, I covered how to make delicious Garlic Herb Pull-Apart Rolls. From mixing simple ingredients to baking, each step is crucial for great taste. Remember to knead well and allow the dough to rise. You can change the flavors to suit your taste, too. These rolls are perfect for any meal or gathering. Enjoy them fresh or save leftovers for later. Now, you have the tools to bake something tasty and satisfying at home. Get started and have fun!