Homemade Rainbow Sherbet Delightful and Easy Recipe

WANT TO SAVE THIS RECIPE?

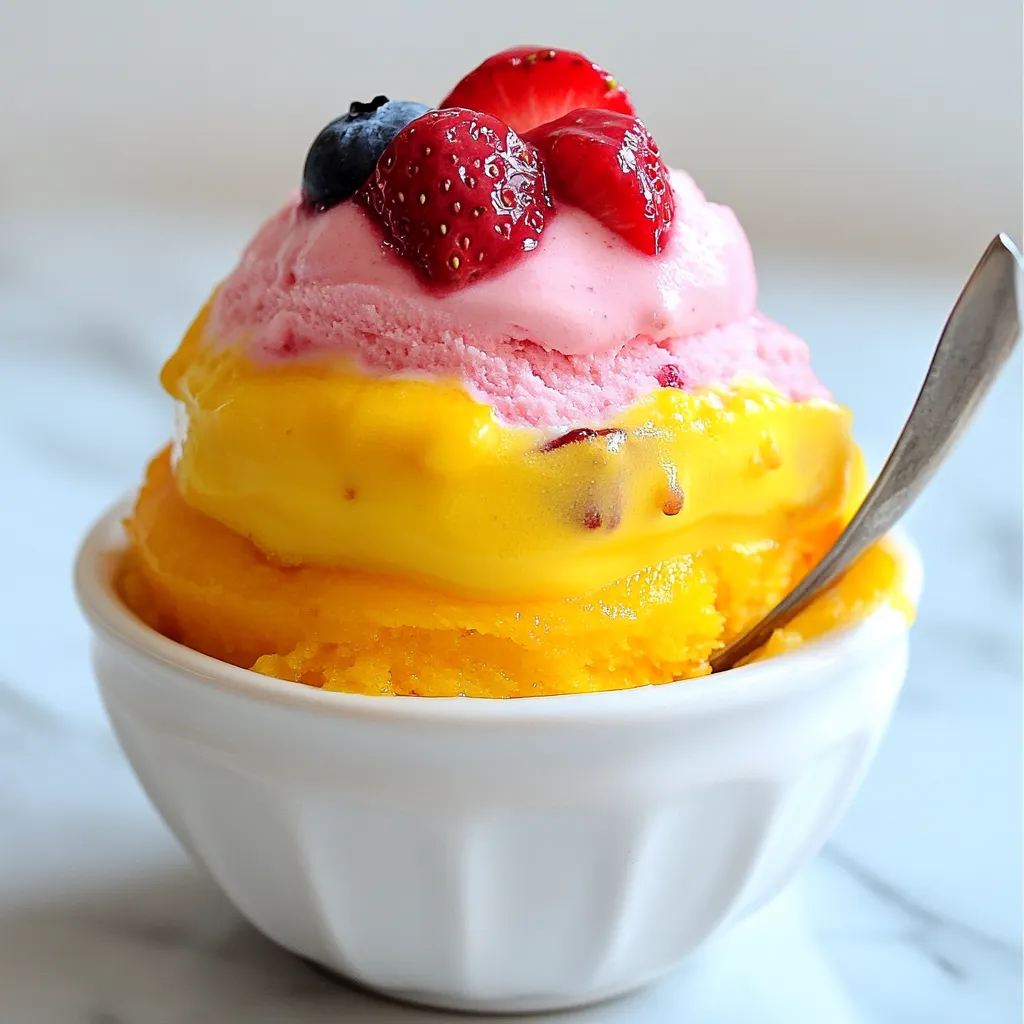
Craving a sweet treat that’s as bright as summer? Homemade rainbow sherbet is just the thing! This delightful and easy recipe brings together vibrant flavors that will make your taste buds dance. In this post, I’ll guide you step-by-step, sharing tips and tricks to perfect your sherbet. Get ready to create a colorful dessert that your family will love! Let’s dive into the fun of making your own rainbow sherbet!

Why I Love This Recipe

  1. Vibrant Colors: This rainbow sherbet brings a beautiful array of colors to your dessert table, making it visually appealing and fun for all ages.
  2. Fresh Ingredients: Using fresh fruits and coconut milk not only enhances the flavor but also provides a healthier alternative to store-bought options.
  3. Simple Process: The step-by-step layering technique is straightforward, making it easy to create this delightful treat at home without any complicated equipment.
  4. Customizable Flavors: You can easily swap out the fruits for your favorites or whatever is in season, allowing for endless flavor combinations!

Ingredients

List of Ingredients

– 2 cups of fresh orange juice

– 1 cup of fresh strawberries, pureed

– 1 cup of fresh blueberries, pureed

– 1 cup of coconut milk

– 1 cup of granulated sugar (divided into 3 parts)

– 2 tablespoons of lemon juice

– 1 teaspoon of vanilla extract

– A pinch of salt

Ingredient Notes

Fresh fruit brings bright flavors to your sherbet. Use ripe oranges, strawberries, and blueberries for the best taste. The coconut milk adds creaminess without dairy. Granulated sugar sweetens each layer, making it delightful. Lemon juice brightens up the flavors.

Substitutions and Alternatives

If you can’t find coconut milk, try almond milk or oat milk. For a lower sugar option, use a sugar substitute. You can also mix up the fruit. Try using raspberries or mangoes instead of strawberries or blueberries.

Step-by-Step Instructions

Preparing the Orange Layer

To start, gather your ingredients for the orange layer. You need:

– 2 cups of fresh orange juice

– 1 cup of coconut milk

– 1/3 cup of granulated sugar

– 2 tablespoons of lemon juice

In a blender, mix the orange juice, sugar, coconut milk, and lemon juice. Blend until smooth. Pour this mixture into a shallow dish. Freeze it for one hour. This helps it soften slightly.

Making the Strawberry Layer

While the orange layer freezes, prepare the strawberry layer. For this layer, you will need:

– 1 cup of fresh strawberries, pureed

– 1 cup of coconut milk

– 1/3 cup of granulated sugar

– 1 teaspoon of vanilla extract

Blend the pureed strawberries with the sugar until smooth. Add the coconut milk and vanilla extract. Once the orange layer is mildly set, pour this strawberry mix over it. Return it to the freezer for another hour.

Creating the Blueberry Layer

Now, it’s time to make the blueberry layer. Here’s what you need:

– 1 cup of fresh blueberries, pureed

– 1 cup of coconut milk

– 1/3 cup of granulated sugar

– A pinch of salt

Blend the pureed blueberries with the sugar and a pinch of salt. Then, stir in the coconut milk. After the strawberry layer is set, pour the blueberry mixture over it. Cover the dish and freeze the entire sherbet for at least four hours, or until fully firm.

Tips & Tricks

Achieving the Perfect Texture

To get a smooth sherbet, blend well. Use fresh juice for a creamy base. Freeze layers at the right time. Let each layer set slightly before adding the next. This helps them blend well together. If you want a creamier texture, mix in a bit more coconut milk. It adds richness without overpowering the flavor.

Flavor Enhancement Tips

Use ripe fruits for the best taste. They are sweeter and more flavorful. Add a splash of fresh lemon juice for brightness. This enhances the fruit flavors and adds a zesty kick. For an extra touch, consider a hint of mint or basil. It adds a fresh note that pairs well with fruit.

Serving Suggestions

Serve your rainbow sherbet in fun bowls or cones. This makes it more exciting. You can layer it in clear cups to show off the colors. Top with fresh fruit or a sprig of mint for a pop. If you want to impress guests, add a drizzle of honey or chocolate sauce. This adds a touch of elegance to your colorful treat.

Pro Tips

  1. Layering Technique: Make sure each layer is slightly set before adding the next to create clean, distinct layers.
  2. Fresh Ingredients: Use fresh, ripe fruits for the best flavor and vibrant colors in your sherbet.
  3. Storage Tips: Store the sherbet in an airtight container to prevent ice crystals from forming.
  4. Serving Suggestions: Serve with fresh fruit or a drizzle of fruit puree for a beautiful presentation.

Variations

Different Fruit Combinations

You can mix and match fruits for your rainbow sherbet. Try using mango instead of orange for a tropical twist. Raspberries can replace strawberries for a tart flavor. Pineapple adds a fun zing! For a berry blend, use blackberries or cherries with blueberries. The key is to keep the fruit fresh. Blend them well for a smooth texture. Each fruit will give your sherbet a unique taste and color.

Dairy-Free Options

If you want a dairy-free treat, use coconut milk like in the recipe. Almond or oat milk works great too. These options keep the sherbet creamy and rich. You can also try nut-based milks for added flavor. Just remember, the milk you choose can change the taste of the sherbet slightly. Make sure to check for any added sugars in your milk choice.

Adding Mix-Ins

Mix-ins can add fun textures and flavors. Try adding mini chocolate chips for a sweet crunch. Chopped nuts, like almonds or walnuts, can also be great. You can even stir in some shredded coconut for extra flavor. Just add your mix-ins after blending the fruit layers. This way, the mix-ins stay crunchy and do not freeze hard. Enjoy experimenting with different combinations to find your favorite!

Storage Info

How to Store Homemade Rainbow Sherbet

Store your homemade rainbow sherbet in an airtight container. This keeps it fresh and prevents ice crystals. If you use a shallow dish, cover it tightly with plastic wrap. Label the container with the date for easy tracking.

Freezing Tips

Freeze your sherbet in layers. This helps each layer set well. After pouring each layer, freeze for about one hour before adding the next. Once the final layer is set, cover the dish or container well. This will keep out air and other odors from your freezer.

Duration for Best Quality

For the best taste and texture, enjoy your rainbow sherbet within two weeks. It can last up to a month in the freezer. However, the flavor may fade over time. Always check for any ice crystals or changes in texture before serving.

FAQs

Can I use frozen fruit instead of fresh?

Yes, you can use frozen fruit for this sherbet. Frozen fruit works well and saves time. Just make sure to thaw it a bit before blending. This helps the fruit blend smoothly. Using frozen fruit can also give you great flavor.

How long does homemade sherbet last?

Homemade sherbet can last up to two weeks in your freezer. Store it in an airtight container. This keeps it fresh and prevents ice crystals. If it starts to taste off, it’s best to throw it away. Enjoy your sherbet while it’s fresh for the best taste.

What is the difference between sorbet and sherbet?

The main difference is that sherbet contains dairy. Sherbet uses milk or coconut milk, which gives it a creamier texture. Sorbet is only fruit and sugar, making it lighter. Both are delicious, but sherbet often feels richer. Choose based on your taste or dietary needs.

You can make delicious homemade rainbow sherbet with fresh fruit. We covered ingredients, step-by-step instructions, and tips for the best texture and flavor. Variations let you use different fruits and make dairy-free options. Storing your sherbet properly ensures it stays fresh and tasty. Answering your questions about fruit choices and shelf life helps you feel confident in your making. Enjoy creating and sharing this delightful treat with friends and family. Your effort will bring joy and refreshment to everyon

- 2 cups of fresh orange juice - 1 cup of fresh strawberries, pureed - 1 cup of fresh blueberries, pureed - 1 cup of coconut milk - 1 cup of granulated sugar (divided into 3 parts) - 2 tablespoons of lemon juice - 1 teaspoon of vanilla extract - A pinch of salt Fresh fruit brings bright flavors to your sherbet. Use ripe oranges, strawberries, and blueberries for the best taste. The coconut milk adds creaminess without dairy. Granulated sugar sweetens each layer, making it delightful. Lemon juice brightens up the flavors. If you can’t find coconut milk, try almond milk or oat milk. For a lower sugar option, use a sugar substitute. You can also mix up the fruit. Try using raspberries or mangoes instead of strawberries or blueberries. {{ingredient_image_1}} To start, gather your ingredients for the orange layer. You need: - 2 cups of fresh orange juice - 1 cup of coconut milk - 1/3 cup of granulated sugar - 2 tablespoons of lemon juice In a blender, mix the orange juice, sugar, coconut milk, and lemon juice. Blend until smooth. Pour this mixture into a shallow dish. Freeze it for one hour. This helps it soften slightly. While the orange layer freezes, prepare the strawberry layer. For this layer, you will need: - 1 cup of fresh strawberries, pureed - 1 cup of coconut milk - 1/3 cup of granulated sugar - 1 teaspoon of vanilla extract Blend the pureed strawberries with the sugar until smooth. Add the coconut milk and vanilla extract. Once the orange layer is mildly set, pour this strawberry mix over it. Return it to the freezer for another hour. Now, it’s time to make the blueberry layer. Here’s what you need: - 1 cup of fresh blueberries, pureed - 1 cup of coconut milk - 1/3 cup of granulated sugar - A pinch of salt Blend the pureed blueberries with the sugar and a pinch of salt. Then, stir in the coconut milk. After the strawberry layer is set, pour the blueberry mixture over it. Cover the dish and freeze the entire sherbet for at least four hours, or until fully firm. To get a smooth sherbet, blend well. Use fresh juice for a creamy base. Freeze layers at the right time. Let each layer set slightly before adding the next. This helps them blend well together. If you want a creamier texture, mix in a bit more coconut milk. It adds richness without overpowering the flavor. Use ripe fruits for the best taste. They are sweeter and more flavorful. Add a splash of fresh lemon juice for brightness. This enhances the fruit flavors and adds a zesty kick. For an extra touch, consider a hint of mint or basil. It adds a fresh note that pairs well with fruit. Serve your rainbow sherbet in fun bowls or cones. This makes it more exciting. You can layer it in clear cups to show off the colors. Top with fresh fruit or a sprig of mint for a pop. If you want to impress guests, add a drizzle of honey or chocolate sauce. This adds a touch of elegance to your colorful treat. Pro Tips Layering Technique: Make sure each layer is slightly set before adding the next to create clean, distinct layers. Fresh Ingredients: Use fresh, ripe fruits for the best flavor and vibrant colors in your sherbet. Storage Tips: Store the sherbet in an airtight container to prevent ice crystals from forming. Serving Suggestions: Serve with fresh fruit or a drizzle of fruit puree for a beautiful presentation. {{image_2}} You can mix and match fruits for your rainbow sherbet. Try using mango instead of orange for a tropical twist. Raspberries can replace strawberries for a tart flavor. Pineapple adds a fun zing! For a berry blend, use blackberries or cherries with blueberries. The key is to keep the fruit fresh. Blend them well for a smooth texture. Each fruit will give your sherbet a unique taste and color. If you want a dairy-free treat, use coconut milk like in the recipe. Almond or oat milk works great too. These options keep the sherbet creamy and rich. You can also try nut-based milks for added flavor. Just remember, the milk you choose can change the taste of the sherbet slightly. Make sure to check for any added sugars in your milk choice. Mix-ins can add fun textures and flavors. Try adding mini chocolate chips for a sweet crunch. Chopped nuts, like almonds or walnuts, can also be great. You can even stir in some shredded coconut for extra flavor. Just add your mix-ins after blending the fruit layers. This way, the mix-ins stay crunchy and do not freeze hard. Enjoy experimenting with different combinations to find your favorite! Store your homemade rainbow sherbet in an airtight container. This keeps it fresh and prevents ice crystals. If you use a shallow dish, cover it tightly with plastic wrap. Label the container with the date for easy tracking. Freeze your sherbet in layers. This helps each layer set well. After pouring each layer, freeze for about one hour before adding the next. Once the final layer is set, cover the dish or container well. This will keep out air and other odors from your freezer. For the best taste and texture, enjoy your rainbow sherbet within two weeks. It can last up to a month in the freezer. However, the flavor may fade over time. Always check for any ice crystals or changes in texture before serving. Yes, you can use frozen fruit for this sherbet. Frozen fruit works well and saves time. Just make sure to thaw it a bit before blending. This helps the fruit blend smoothly. Using frozen fruit can also give you great flavor. Homemade sherbet can last up to two weeks in your freezer. Store it in an airtight container. This keeps it fresh and prevents ice crystals. If it starts to taste off, it’s best to throw it away. Enjoy your sherbet while it’s fresh for the best taste. The main difference is that sherbet contains dairy. Sherbet uses milk or coconut milk, which gives it a creamier texture. Sorbet is only fruit and sugar, making it lighter. Both are delicious, but sherbet often feels richer. Choose based on your taste or dietary needs. You can make delicious homemade rainbow sherbet with fresh fruit. We covered ingredients, step-by-step instructions, and tips for the best texture and flavor. Variations let you use different fruits and make dairy-free options. Storing your sherbet properly ensures it stays fresh and tasty. Answering your questions about fruit choices and shelf life helps you feel confident in your making. Enjoy creating and sharing this delightful treat with friends and family. Your effort will bring joy and refreshment to everyone!

Homemade Rainbow Sherbet

A colorful and refreshing frozen dessert made with layers of orange, strawberry, and blueberry flavors.
Prep Time 30 minutes
Total Time 5 hours
Course Dessert
Cuisine American
Servings 8
Calories 150 kcal

Ingredients
  

  • 2 cups fresh orange juice
  • 1 cup fresh strawberries, pureed
  • 1 cup fresh blueberries, pureed
  • 1 cup coconut milk
  • 1 cup granulated sugar (divided into 3 parts)
  • 2 tablespoons lemon juice
  • 1 teaspoon vanilla extract
  • 1 pinch salt

Instructions
 

  • Start by making the orange layer: In a blender, combine 2 cups of fresh orange juice, 1/3 cup of granulated sugar, 1 cup of coconut milk, and 2 tablespoons of lemon juice. Blend until smooth. Pour the mixture into a shallow dish and freeze for about 1 hour to soften slightly.
  • While the orange layer is freezing, prepare the strawberry layer: Blend the pureed strawberries with 1/3 cup of sugar until smooth. Mix in 1 cup of coconut milk and 1 teaspoon of vanilla extract. Once the orange layer is mildly set, pour the strawberry mixture over it and return to the freezer for another hour.
  • While the second layer is freezing, make the blueberry layer: Blend the pureed blueberries with 1/3 cup of sugar and a pinch of salt. Add the remaining 1 cup of coconut milk and stir well. After an hour, pour this layer over the strawberry layer.
  • Cover the dish with plastic wrap or a lid and freeze the entire mixture for at least 4 hours or until fully firm.
  • To serve, let the sherbet sit at room temperature for a few minutes to soften slightly, then scoop into bowls or cones and enjoy your colorful creation!

Notes

Let the sherbet sit at room temperature for a few minutes before serving to soften slightly.
Keyword dessert, frozen treat, rainbow, sherbet

WANT TO SAVE THIS RECIPE?

Leave a Comment

Recipe Rating