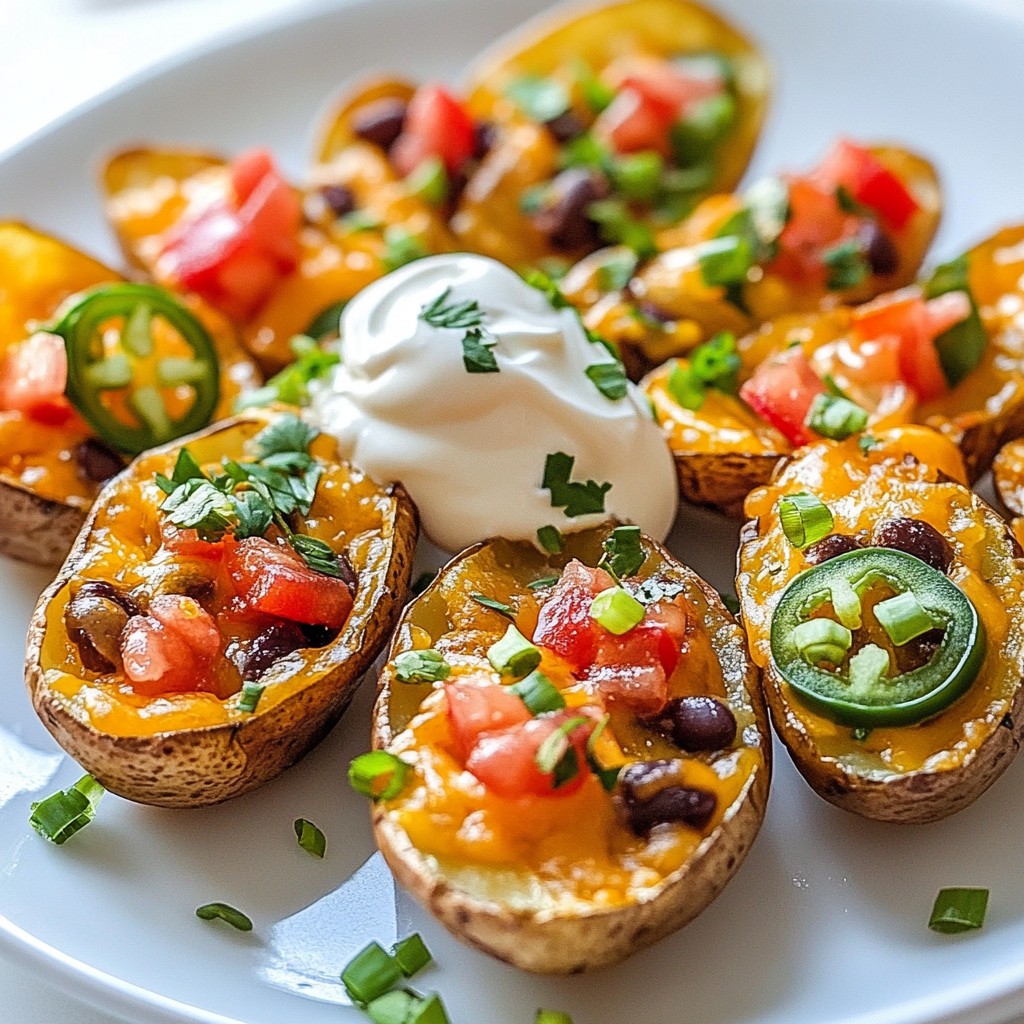
Get ready to elevate your snack game with Loaded Nacho Potato Skins! This cheesy, flavorful dish combines crispy potato skins with all your favorite nacho toppings. Whether you're hosting a game day party or just craving something tasty, these potato skins are sure to impress. In this guide, I'll share easy-to-follow steps and tips for the perfect dish. Let’s dive into the ingredients and bring your nacho dreams to life!
Why I Love This Recipe
- Deliciously Loaded: These potato skins are filled with a mouthwatering combination of cheese, beans, and fresh toppings, making each bite a flavor explosion.
- Perfect for Sharing: Loaded nacho potato skins are great for gatherings, allowing everyone to enjoy their own half while you share the fun.
- Customizable Delight: You can easily adapt the toppings to suit your taste, adding ingredients like avocado, corn, or even different cheeses.
- Quick and Easy: This recipe is straightforward to follow, making it a hassle-free option for weeknight dinners or game day snacks.
Ingredients
Complete List of Ingredients
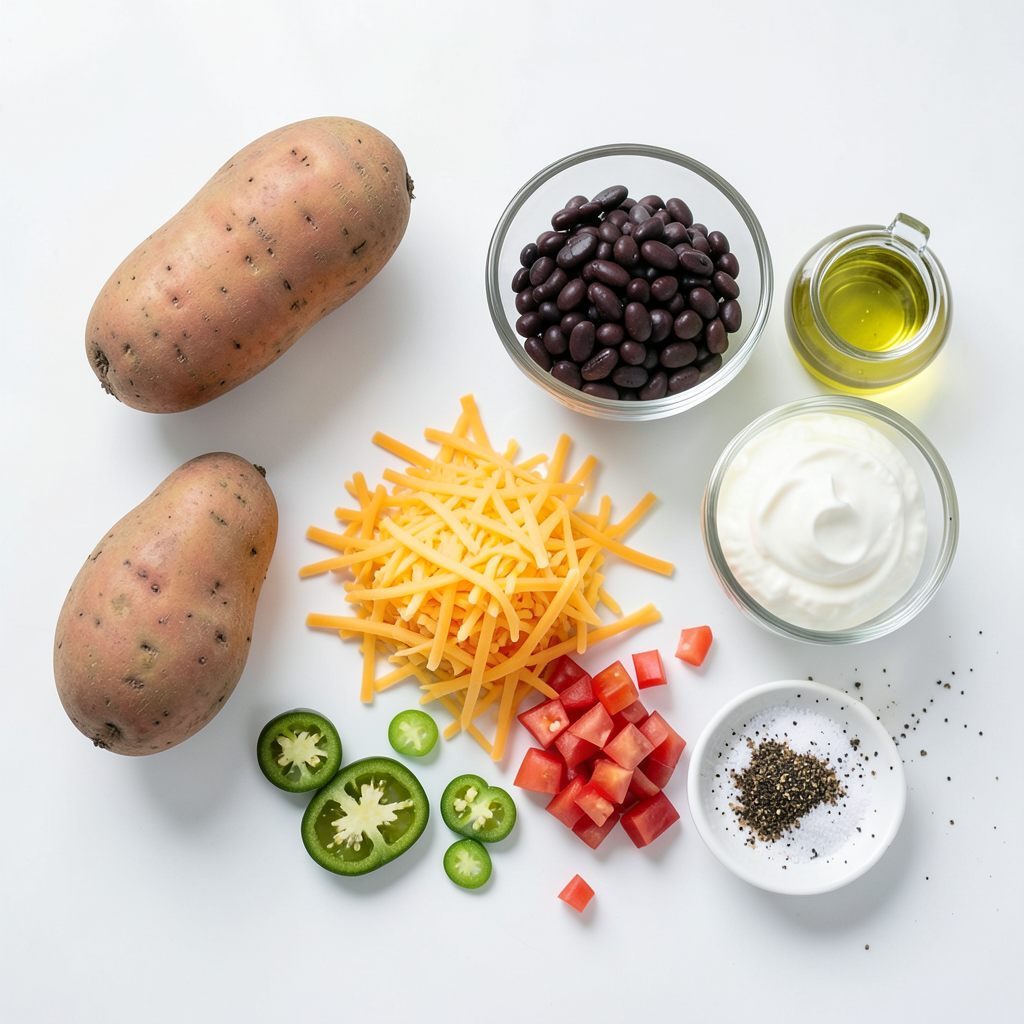
To make loaded nacho potato skins, you will need:
- 4 large russet potatoes
- 1 cup shredded cheddar cheese
- 1 cup black beans, rinsed and drained
- 1/2 cup diced tomatoes
- 1/4 cup sliced jalapeños (pickled or fresh)
- 1/2 cup sour cream
- 1/4 cup chopped green onions
- 2 tablespoons olive oil
- Salt and pepper to taste
- Salsa for serving (optional)
When choosing russet potatoes, look for ones that are firm and smooth. Avoid potatoes with green spots or soft areas. The best russets are larger and have a thick skin. These will give you sturdy skins for loading up with toppings.
Optional Toppings
You can make your loaded nacho potato skins even better with some extra toppings. Here are a few ideas:
- Guacamole adds creaminess and flavor.
- Chopped cilantro gives a fresh taste.
- Diced red onions add crunch and zest.
To make these skins vegetarian or vegan-friendly, skip the sour cream. Instead, use a dairy-free yogurt or avocado cream. You can also replace cheddar cheese with a vegan cheese option. These swaps keep the dish tasty and friendly for everyone.
Step-by-Step Instructions
Preparation Steps
Start by washing the russet potatoes well. Remove any dirt you see. Next, use a fork to prick each potato several times. This helps steam escape while baking. Now, rub the potatoes with olive oil. Make sure to coat them evenly. Season them with salt and pepper to taste.
Baking Process
Preheat your oven to 400°F (200°C). Place the potatoes directly on the oven rack. Bake for 45 to 60 minutes. The potatoes should feel soft when you poke them with a fork. This step creates a fluffy texture inside.
Assembling the Nacho Loaded Skins
Let the baked potatoes cool for a bit. Cut each potato in half lengthwise. Carefully scoop out some of the flesh, but leave a bit of potato inside to hold the skin. Brush the insides with olive oil for extra flavor.
Now, fill each potato skin with shredded cheddar cheese, black beans, diced tomatoes, and sliced jalapeños. Make sure to spread the toppings evenly. This ensures each bite is delicious. Return the loaded skins to the oven. Bake them for another 10 to 15 minutes. You want the cheese to be melted and bubbly. Enjoy the wonderful aroma as they bake!
Tips & Tricks
Perfecting Your Loaded Nacho Potato Skins
To make your potato skins crispy, start by choosing the right potatoes. I prefer large russet potatoes for their thick skin and fluffy inside. Pricking them with a fork helps steam escape. After washing, rub them well with olive oil and season with salt. This gives them flavor and helps create a crisp texture.
For the best cheese melt, use freshly shredded cheddar cheese. Pre-shredded cheese often has additives that prevent it from melting well. Spread the cheese evenly over the skins for even melting. Bake them until the cheese bubbles and turns golden.
Common Mistakes to Avoid
A common mistake is overcooking the potatoes. This can lead to soggy skins. Check your potatoes after 45 minutes. They should be tender but not falling apart. Another mistake is not scooping out enough potato flesh. Leave enough of a border so the skins hold their shape.
For storing leftovers, let the skins cool completely before placing them in an airtight container. They stay fresh for up to three days in the fridge. When reheating, use the oven or air fryer. This keeps the skins crispy. Avoid using the microwave, as it can make them soggy.
Pro Tips
- Choose the Right Potatoes: For the best texture and flavor, stick with russet potatoes. Their starchy nature results in a fluffy interior once baked.
- Don’t Skip the Prickling: Prick the potatoes with a fork before baking. This allows steam to escape, preventing them from bursting in the oven.
- Customize Your Toppings: Feel free to mix and match toppings to suit your taste—try adding cooked ground beef, corn, or avocado for extra flavor!
- Keep It Warm: If you’re serving a crowd, keep the loaded potato skins warm in a low oven (around 200°F or 93°C) until you’re ready to serve.
Variations
Flavor Profile Adjustments
You can spice things up in many ways. Try using different peppers or spices for a kick. If you want heat, add more jalapeños or use a spicy pepper like serrano. For milder flavors, choose sweet bell peppers. You can also try chili powder or cumin to give your skins a unique taste.
When it comes to cheese, there are many options too. Cheddar is classic, but you can switch it up! Use pepper jack for a spicy twist or Monterey Jack for a creamy feel. For a richer flavor, try using Gruyère or Gouda. Mixing cheeses can also create a fun flavor combo.
Dietary Adaptations
If you need gluten-free options, this recipe is easy to modify. The main ingredients are already gluten-free. Just make sure to check any added toppings or sauces. Use gluten-free salsa or sour cream if needed.
For a low-calorie version, you can make a few swaps. Use less cheese or opt for a lower-fat cheese. You can also skip the sour cream or use Greek yogurt instead. This keeps the dish light yet tasty, so you can enjoy it without worry!
Storage Info
Storing Leftovers
To store your loaded nacho potato skins, first let them cool. Then, place them in an airtight container. It’s best to layer them with parchment paper between skins to keep them from sticking. In the fridge, they stay fresh for about three days. If you want to keep them longer, freeze them. Wrap each skin in foil, then put them in a freezer bag. They can last up to three months in the freezer.
Reheating Instructions
When it's time to enjoy your leftovers, reheating properly is key. You can use an oven or air fryer for the best results. For the oven, preheat it to 350°F (175°C). Place the skins on a baking sheet and cover them with foil. Heat for about 10-15 minutes until warmed through. If using an air fryer, set it to 350°F (175°C) and cook for about 5-7 minutes. This way, your skins stay crispy and delicious!
FAQs
Common Questions about Loaded Nacho Potato Skins
What are some good dipping sauces for nacho potato skins? Some great dipping sauces include salsa, guacamole, and ranch dressing. Each adds a new flavor. You can even try hot sauce if you like heat!
Can I make loaded nacho potato skins ahead of time? Yes, you can prepare the potato skins ahead. Bake the potatoes, scoop them, and add toppings. Cover them and store in the fridge. Just bake them again before serving.
General Cooking Questions
How do I know when my potatoes are fully baked? You will know the potatoes are done when a fork easily pierces the skin. They should feel soft inside. About 45-60 minutes at 400°F (200°C) usually works well.
Can I use other types of potatoes for this recipe? Yes, you can use other potatoes like Yukon Gold or sweet potatoes. Each type gives a different taste and texture. Just adjust baking time if needed.
You now have all the details for making loaded nacho potato skins. We covered essential ingredients, optional toppings, and steps for perfect preparation. You learned tips for crispy skins and common mistakes to avoid. Variations let you customize the flavor and meet dietary needs. Plus, storing and reheating advice keeps your leftovers fresh and tasty. Enjoy experimenting and sharing these delicious snacks with friends and family. Getting them just right will impress everyone at your next gathering!