No Bake Biscoff Pumpkin Truffles Simple Fall Treat

WANT TO SAVE THIS RECIPE?

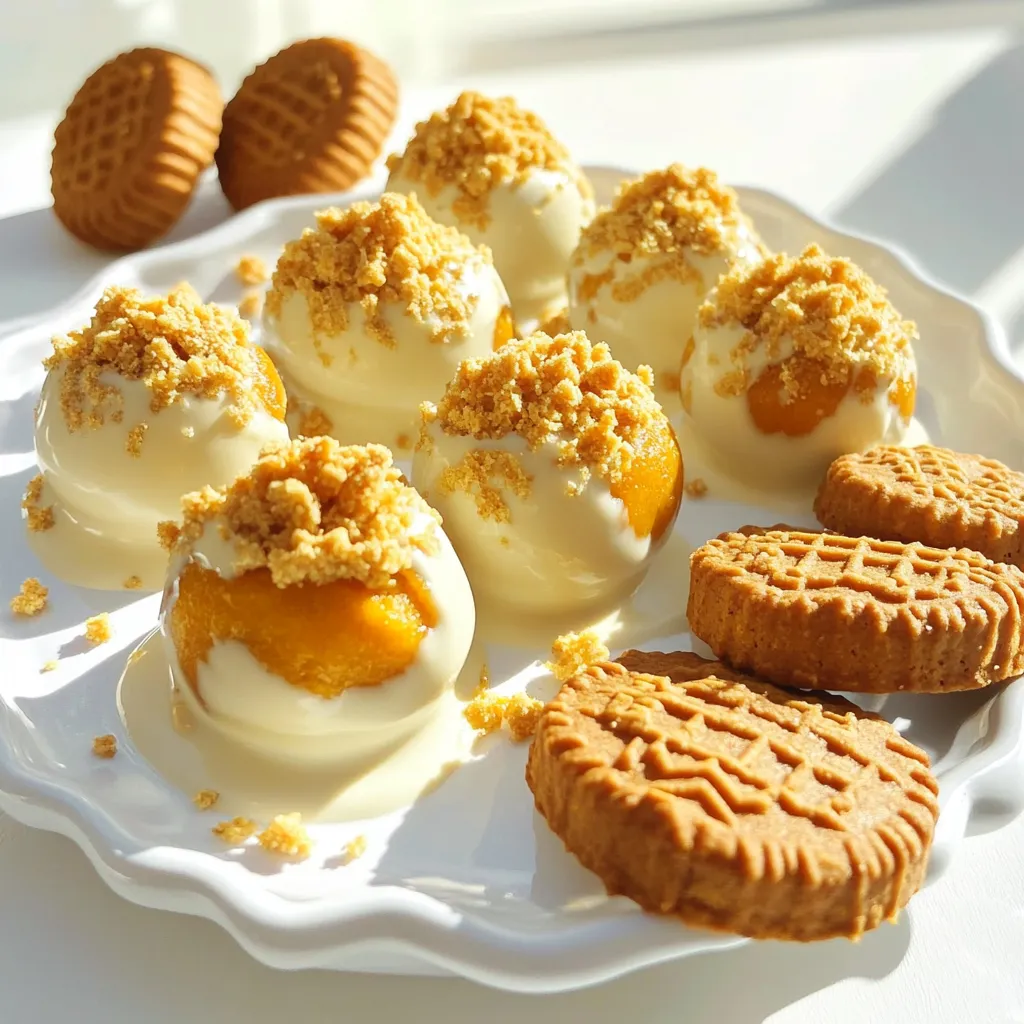
Fall is here, and I have a treat you’ll love—No Bake Biscoff Pumpkin Truffles! These simple bites blend warm pumpkin spice with the cozy flavor of Biscoff cookies. No oven needed, making them perfect for busy days. With easy steps and yummy variations, you’ll impress everyone. Let’s dive into this sweet idea that captures autumn’s essence! Get ready to create your new favorite fall snack!

Ingredients

List of Required Ingredients

To make No Bake Biscoff Pumpkin Truffles, you will need these key items:

– 1 cup pumpkin puree

– 1 cup Biscoff cookie crumbs

– 1/2 cup cream cheese, softened

– 1/4 cup powdered sugar

– 1 teaspoon pumpkin spice

– 1/4 teaspoon vanilla extract

– 1/3 cup white or dark chocolate chips (for coating)

– Extra Biscoff cookie crumbs for garnish

These ingredients work together to create a rich, creamy truffle with a warm pumpkin flavor.

Optional Ingredients for Customization

You can add your own touch with these optional ingredients:

– Chopped nuts, like pecans or walnuts, for crunch

– A pinch of sea salt to enhance flavor

– A splash of maple syrup for sweetness

Feel free to mix and match to suit your taste!

Substitutions and Alternatives

If you need alternatives, try these options:

– Use Greek yogurt instead of cream cheese for a tangy twist.

– Swap pumpkin puree with sweet potato puree for a different flavor.

– Use almond or coconut flour instead of Biscoff crumbs for gluten-free truffles.

These substitutions can help you adapt the recipe to your needs while keeping the deliciousness intact.

Step-by-Step Instructions

Detailed Mixing Process

First, grab a medium mixing bowl. Add 1 cup of pumpkin puree, 1/2 cup of softened cream cheese, and 1/4 cup of powdered sugar. Sprinkle in 1 teaspoon of pumpkin spice and 1/4 teaspoon of vanilla extract. Use a hand mixer to beat this mixture until it is smooth. This will take about one minute.

Next, slowly add 1 cup of Biscoff cookie crumbs. Stir the crumbs into the mixture until a thick dough forms. If the dough feels sticky, use your hands to knead it lightly. This helps combine everything well.

After that, cover the bowl and place it in the refrigerator. Let it chill for about 30 minutes. This step makes the dough easier to shape later.

Shaping the Truffles

Once the dough is firm, take it out of the fridge. Scoop about 1 tablespoon of the mixture. Roll it into a ball using your hands. It should feel smooth and round. Place each truffle on a parchment-lined baking sheet. Repeat this step with the rest of the dough. You should end up with 12 to 15 truffles.

Melting and Coating with Chocolate

Now, it’s time to melt the chocolate! In a microwave-safe bowl, add 1/3 cup of white or dark chocolate chips. Heat in the microwave in 15-second intervals. Stir in between until the chocolate is fully melted and smooth.

Take each truffle and dip it into the melted chocolate. Let any excess chocolate drip off before placing it back on the baking sheet. While the chocolate is still wet, sprinkle extra Biscoff cookie crumbs on top to garnish.

Finally, return the truffles to the fridge for about 30 minutes. This allows the chocolate to harden, making your truffles ready to enjoy!

Tips & Tricks

How to Achieve the Perfect Texture

To get the best texture, use softened cream cheese. It blends well with the pumpkin puree. Make sure to beat the mixture until it is smooth. Gradually add Biscoff cookie crumbs. This helps create a thick dough. If it’s too sticky, chill it for a while. A firm mixture makes rolling easier.

Common Mistakes to Avoid

One common mistake is not chilling the dough. If you skip this step, the truffles can fall apart. Another mistake is over-melting the chocolate. Heat it slowly in short bursts. Stir in between to keep it smooth. Lastly, don’t skip the extra cookie crumbs on top. They add flavor and make your truffles look great.

Serving Suggestions and Presentation Ideas

When serving, arrange truffles on a nice plate. You can drizzle melted chocolate over them for flair. Add whole Biscoff cookies on the side for fun. For a seasonal touch, use fall-themed decorations. These small details make your treat extra special. Enjoy showing off your delicious No Bake Biscoff Pumpkin Truffles!

Variations

Flavor Variations Using Different Spices

You can change the spice mix to fit your taste. Instead of pumpkin spice, try cinnamon or nutmeg. You can also add a hint of ginger for a warm kick. Each spice brings its own charm. Adjust the amounts based on what you like. For example, use one teaspoon of cinnamon if you want a strong flavor. This simple swap can make your truffles unique!

Coating Options Beyond Chocolate

While chocolate is a classic choice, consider other coatings. You can use white chocolate or dark chocolate. If you want something different, try crushed nuts or coconut. A light dusting of cocoa powder adds a nice touch. You can also coat them in more Biscoff crumbs for extra flavor. Each coating option adds a new layer of taste and texture.

Incorporating Other Ingredients

Feel free to add more ingredients for extra fun! Chopped nuts like pecans or walnuts add crunch. You can mix in mini chocolate chips for sweetness. For a creamier texture, add a little more cream cheese. Want a touch of salt? A pinch of sea salt can balance the sweet flavors. Get creative and make these truffles your own!

Storage Info

Best Practices for Refrigeration

To keep your No Bake Biscoff Pumpkin Truffles fresh, store them in an airtight container. Place parchment paper between layers to avoid sticking. The truffles taste best when chilled. They stay fresh for about a week in the fridge.

How to Store for Longer Freshness

If you want to keep them longer, consider using a freezer. Wrap each truffle in plastic wrap. Then, place them in a freezer-safe bag. This method can keep them fresh for up to three months. Remember to label the bag with the date.

Freezing Instructions

To freeze, make sure the truffles are fully set. Once they are, follow the wrapping steps mentioned above. When you’re ready to enjoy, take them out and let them thaw in the fridge. This way, they come back to their creamy texture.

FAQs

Can I use a different type of cookie for the truffles?

Yes, you can use other cookies. Try ginger snaps or Oreos for a twist. Both add unique flavors. Just crush them well to get the right texture. Each cookie will change the taste a bit. Experiment to find your favorite!

How long do these truffles last?

These truffles stay fresh for about one week. Store them in the fridge to keep them firm. If you want them to last longer, they can be frozen. Just place them in an airtight container. They will still taste great after freezing.

Is it possible to make these truffles vegan?

Yes, you can make vegan truffles! Use vegan cream cheese instead of regular. Swap the chocolate chips for dairy-free ones too. The Biscoff cookies are often vegan, but check the label to be sure. This way, everyone can enjoy these tasty treats!

In this post, we covered how to make truffles, starting with the ingredients needed. I detailed the mixing, shaping, and coating steps for perfect results. You learned tips to avoid common mistakes and how to serve your treats. We discussed fun variations and storage methods to keep them fresh.

Making truffles is fun and easy. With practice, you’ll create tasty and unique treats. Enjoy experimenting and sharing these delights with friends and family!

To make No Bake Biscoff Pumpkin Truffles, you will need these key items: - 1 cup pumpkin puree - 1 cup Biscoff cookie crumbs - 1/2 cup cream cheese, softened - 1/4 cup powdered sugar - 1 teaspoon pumpkin spice - 1/4 teaspoon vanilla extract - 1/3 cup white or dark chocolate chips (for coating) - Extra Biscoff cookie crumbs for garnish These ingredients work together to create a rich, creamy truffle with a warm pumpkin flavor. You can add your own touch with these optional ingredients: - Chopped nuts, like pecans or walnuts, for crunch - A pinch of sea salt to enhance flavor - A splash of maple syrup for sweetness Feel free to mix and match to suit your taste! If you need alternatives, try these options: - Use Greek yogurt instead of cream cheese for a tangy twist. - Swap pumpkin puree with sweet potato puree for a different flavor. - Use almond or coconut flour instead of Biscoff crumbs for gluten-free truffles. These substitutions can help you adapt the recipe to your needs while keeping the deliciousness intact. First, grab a medium mixing bowl. Add 1 cup of pumpkin puree, 1/2 cup of softened cream cheese, and 1/4 cup of powdered sugar. Sprinkle in 1 teaspoon of pumpkin spice and 1/4 teaspoon of vanilla extract. Use a hand mixer to beat this mixture until it is smooth. This will take about one minute. Next, slowly add 1 cup of Biscoff cookie crumbs. Stir the crumbs into the mixture until a thick dough forms. If the dough feels sticky, use your hands to knead it lightly. This helps combine everything well. After that, cover the bowl and place it in the refrigerator. Let it chill for about 30 minutes. This step makes the dough easier to shape later. Once the dough is firm, take it out of the fridge. Scoop about 1 tablespoon of the mixture. Roll it into a ball using your hands. It should feel smooth and round. Place each truffle on a parchment-lined baking sheet. Repeat this step with the rest of the dough. You should end up with 12 to 15 truffles. Now, it’s time to melt the chocolate! In a microwave-safe bowl, add 1/3 cup of white or dark chocolate chips. Heat in the microwave in 15-second intervals. Stir in between until the chocolate is fully melted and smooth. Take each truffle and dip it into the melted chocolate. Let any excess chocolate drip off before placing it back on the baking sheet. While the chocolate is still wet, sprinkle extra Biscoff cookie crumbs on top to garnish. Finally, return the truffles to the fridge for about 30 minutes. This allows the chocolate to harden, making your truffles ready to enjoy! To get the best texture, use softened cream cheese. It blends well with the pumpkin puree. Make sure to beat the mixture until it is smooth. Gradually add Biscoff cookie crumbs. This helps create a thick dough. If it's too sticky, chill it for a while. A firm mixture makes rolling easier. One common mistake is not chilling the dough. If you skip this step, the truffles can fall apart. Another mistake is over-melting the chocolate. Heat it slowly in short bursts. Stir in between to keep it smooth. Lastly, don’t skip the extra cookie crumbs on top. They add flavor and make your truffles look great. When serving, arrange truffles on a nice plate. You can drizzle melted chocolate over them for flair. Add whole Biscoff cookies on the side for fun. For a seasonal touch, use fall-themed decorations. These small details make your treat extra special. Enjoy showing off your delicious No Bake Biscoff Pumpkin Truffles! {{image_2}} You can change the spice mix to fit your taste. Instead of pumpkin spice, try cinnamon or nutmeg. You can also add a hint of ginger for a warm kick. Each spice brings its own charm. Adjust the amounts based on what you like. For example, use one teaspoon of cinnamon if you want a strong flavor. This simple swap can make your truffles unique! While chocolate is a classic choice, consider other coatings. You can use white chocolate or dark chocolate. If you want something different, try crushed nuts or coconut. A light dusting of cocoa powder adds a nice touch. You can also coat them in more Biscoff crumbs for extra flavor. Each coating option adds a new layer of taste and texture. Feel free to add more ingredients for extra fun! Chopped nuts like pecans or walnuts add crunch. You can mix in mini chocolate chips for sweetness. For a creamier texture, add a little more cream cheese. Want a touch of salt? A pinch of sea salt can balance the sweet flavors. Get creative and make these truffles your own! To keep your No Bake Biscoff Pumpkin Truffles fresh, store them in an airtight container. Place parchment paper between layers to avoid sticking. The truffles taste best when chilled. They stay fresh for about a week in the fridge. If you want to keep them longer, consider using a freezer. Wrap each truffle in plastic wrap. Then, place them in a freezer-safe bag. This method can keep them fresh for up to three months. Remember to label the bag with the date. To freeze, make sure the truffles are fully set. Once they are, follow the wrapping steps mentioned above. When you're ready to enjoy, take them out and let them thaw in the fridge. This way, they come back to their creamy texture. Yes, you can use other cookies. Try ginger snaps or Oreos for a twist. Both add unique flavors. Just crush them well to get the right texture. Each cookie will change the taste a bit. Experiment to find your favorite! These truffles stay fresh for about one week. Store them in the fridge to keep them firm. If you want them to last longer, they can be frozen. Just place them in an airtight container. They will still taste great after freezing. Yes, you can make vegan truffles! Use vegan cream cheese instead of regular. Swap the chocolate chips for dairy-free ones too. The Biscoff cookies are often vegan, but check the label to be sure. This way, everyone can enjoy these tasty treats! In this post, we covered how to make truffles, starting with the ingredients needed. I detailed the mixing, shaping, and coating steps for perfect results. You learned tips to avoid common mistakes and how to serve your treats. We discussed fun variations and storage methods to keep them fresh. Making truffles is fun and easy. With practice, you’ll create tasty and unique treats. Enjoy experimenting and sharing these delights with friends and family!

No Bake Biscoff Pumpkin Truffles

Indulge in the rich flavors of fall with these No Bake Biscoff Pumpkin Truffles! Easy to make and perfect for a sweet treat, you'll love the creamy pumpkin-chocolate goodness. With just a few simple ingredients like pumpkin puree and Biscoff cookie crumbs, these truffles come together quickly. Click through for the full recipe and impress your friends at your next gathering! #PumpkinRecipes #BiscoffTruffles #NoBakeDesserts #FallTreats

Ingredients
  

1 cup pumpkin puree

1 cup Biscoff cookie crumbs

1/2 cup cream cheese, softened

1/4 cup powdered sugar

1 teaspoon pumpkin spice

1/4 teaspoon vanilla extract

1/3 cup white chocolate chips or dark chocolate chips (for coating)

Extra Biscoff cookie crumbs for garnish

Instructions
 

In a medium mixing bowl, combine the pumpkin puree, softened cream cheese, powdered sugar, pumpkin spice, and vanilla extract. Beat with a hand mixer until the mixture is smooth and well combined.

    Gradually add the Biscoff cookie crumbs to the mixture, stirring until a thick dough forms. Use your hands to knead the mixture lightly if necessary.

      Refrigerate the dough for about 30 minutes to firm it up, making it easier to shape into truffles.

        Once chilled, scoop out a tablespoon of the mixture and roll it into a ball using your hands. Repeat with the rest of the mixture, placing the formed truffles on a parchment-lined baking sheet.

          In a microwave-safe bowl, melt the chocolate chips in 15-second intervals, stirring in between until fully melted and smooth.

            Dip each truffle into the melted chocolate, allowing any excess to drip off before placing it back onto the baking sheet.

              While the chocolate is still wet, sprinkle each truffle with extra Biscoff cookie crumbs to garnish.

                Place the truffles back in the refrigerator for about 30 minutes or until the chocolate has hardened.

                  Prep Time: 15 minutes | Total Time: 1 hour 15 minutes | Servings: 12-15 truffles

                    - Presentation Tips: Arrange the truffles on a decorative plate and drizzle with additional melted chocolate for an elegant touch. Add a few whole Biscoff cookies on the side for a charming display.

                      WANT TO SAVE THIS RECIPE?

                      Leave a Comment

                      Recipe Rating