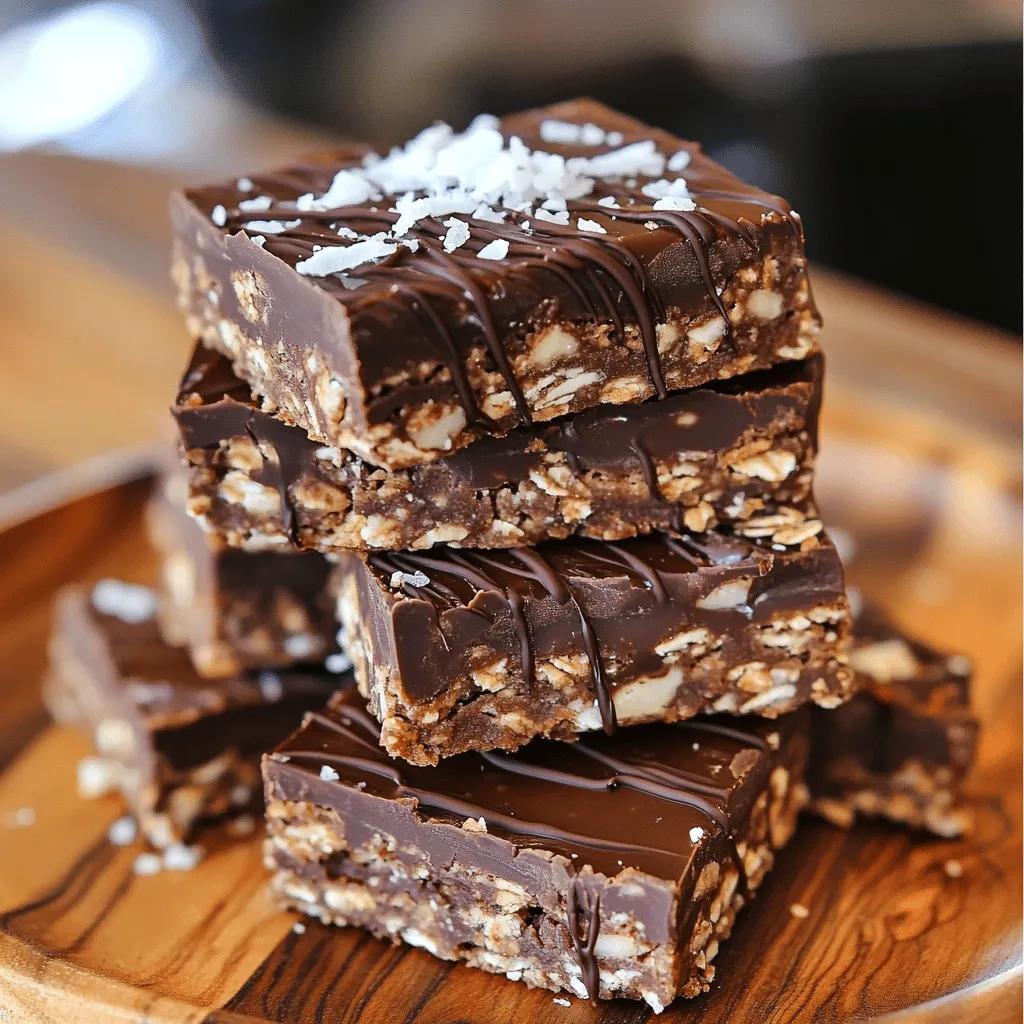
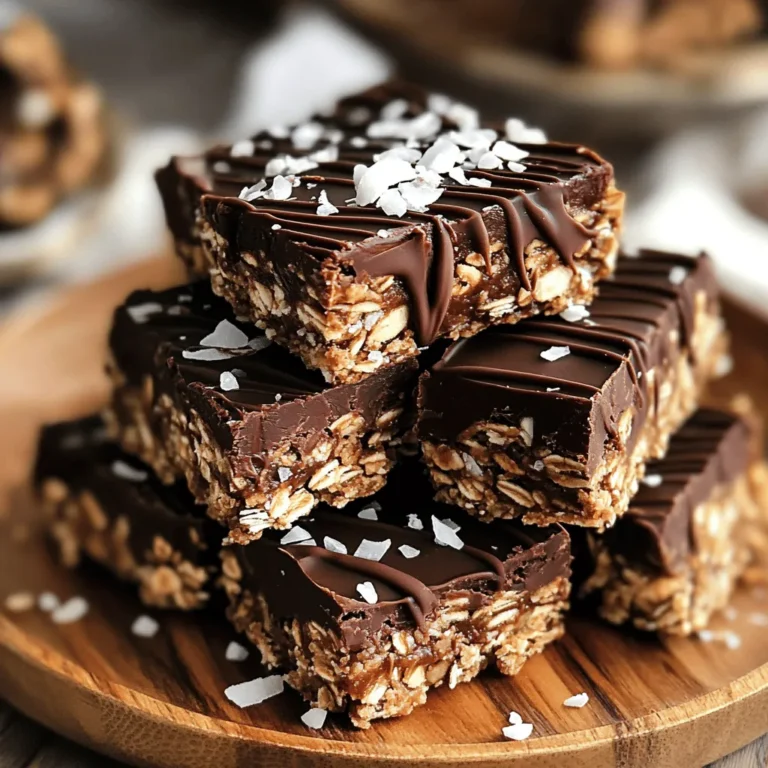
Looking for a quick, tasty treat you can whip up in minutes? These No Bake Chocolate Oat Bars are the answer! Packed with wholesome oats and rich chocolate, they’re perfect for snacks or dessert. Best of all, there’s no need to turn on the oven. Join me as I share this simple recipe that is not only delicious but also customizable to suit your taste. Let’s get started on these yummy bars!
Ingredients
To make the best No Bake Chocolate Oat Bars, you need a few simple ingredients. Here’s the list:
– 2 cups rolled oats
– 1 cup almond butter (or any nut butter of choice)
– 1/2 cup honey or agave syrup
– 1/2 cup cocoa powder
– 1/4 cup dark chocolate chips (dairy-free if desired)
– 1/4 cup chopped nuts (walnuts, almonds, or pecans)
– 1/2 teaspoon vanilla extract
– A pinch of salt
Each ingredient plays a key role. The rolled oats give the bars their chewy texture. Almond butter adds creaminess and protein. Honey or agave syrup sweetens the bars while helping them stick together. Cocoa powder brings rich chocolate flavor. Dark chocolate chips add a melty surprise, while nuts give a nice crunch. Vanilla enhances all the flavors, and salt balances the sweetness.
Using good-quality ingredients makes a big difference. I love using organic oats and natural nut butter. For those with nut allergies, sunflower seed butter works great too!
Step-by-Step Instructions
Preparation Overview
Start by mixing your dry ingredients. In a large bowl, combine rolled oats, cocoa powder, and a pinch of salt. Mix them well; this helps all the flavors blend. Next, melt the almond butter and honey together in a saucepan over low heat. Stir until smooth. Melting them together is key. It creates a creamy base that binds everything.
Combining Ingredients
Once melted, take the pan off the heat. Add vanilla extract and dark chocolate chips, stirring to melt the chips slightly. This makes a rich, chocolatey mixture. Pour this over your dry ingredients. Use a spatula or a spoon to mix it all together. Make sure the oats get coated well. If you want some crunch, add chopped nuts at this stage.
Setting the Bars
Now, it’s time to form the bars. Line an 8×8 inch baking dish with parchment paper. Pour the mixture into the dish, spreading it evenly. Press it down firmly. You can use your hands or a spatula. The more compact it is, the better it will hold together. After pressing, refrigerate the bars for at least 1-2 hours. This helps them set. Once firm, lift the parchment paper to remove the bars and cut them into squares. Enjoy your no bake chocolate oat bars!
Tips & Tricks
Best Practices for Texture
To get the right chewiness in your no-bake chocolate oat bars, use rolled oats. They help the bars hold together while giving a nice bite. If you want a crunchier texture, add chopped nuts. Press the mixture firmly into the pan. This step helps the bars stay together when you cut them.
Customization Options
You can change these bars up to fit your taste. Try adding dried fruits like raisins, cranberries, or apricots. They add a sweet and chewy element. You can also mix in seeds like chia or flax for extra nutrition. Feel free to swap the nut butter too. Sunflower seed butter works well for a nut-free option.
Presentation Tips
Serving these bars can be fun and creative. Stack a few bars on a pretty plate and drizzle with melted chocolate. You can also sprinkle some sea salt on top for a salty touch. If you want a tropical vibe, add shredded coconut. These small touches make your bars look inviting and tasty.

Variations
Nut-Free Version
If you want a nut-free version, you can use sunflower seed butter instead of nut butter. This swap keeps the bars creamy and tasty. You can also try soy nut butter or pumpkin seed butter. Both work well and add their own unique flavor. Always check for allergies when serving to others.
Vegan Adaptations
To make these bars vegan, skip the honey. Use agave syrup or maple syrup instead. These sweeteners keep the bars just as sweet. Make sure your chocolate chips are dairy-free. You can find many brands that offer vegan options. These small changes keep the treat plant-based.
Flavor Variations
Want to mix it up? Add spices for a new twist. A sprinkle of cinnamon can give warmth to the bars. If you like a bit of zest, try cardamom. You can also toss in some dried fruit like cranberries or raisins. These extras add fun flavors and textures to each bite.
Storage Info
Proper Storage Techniques
To keep your no bake chocolate oat bars fresh, store them in an airtight container. You can place parchment paper between the bars to prevent sticking. This helps keep the texture nice and chewy. Store them in the fridge for the best results. They stay fresh for up to one week in the fridge.
Freezing Instructions
If you want to enjoy the bars later, freezing works well. Wrap each bar tightly in plastic wrap. Then, place them in a freezer-safe bag or container. This helps prevent freezer burn. To thaw, simply take them out and let them sit at room temperature for about 30 minutes. You can also pop them in the fridge overnight.
Shelf Life
When stored correctly, these bars last about one week in the fridge. In the freezer, they can last up to three months. This makes them a great make-ahead snack. Enjoy the taste and texture any time you want with these storage tips.
FAQs
Can I use different types of oats?
Yes, you can. Rolled oats work best in this recipe. They add chewiness and texture. Quick oats can also be used, but they absorb moisture faster. This may change the texture slightly, making the bars softer. If you choose quick oats, reduce the liquid slightly. Both types are nutritious and tasty.
How do I make the bars gluten-free?
To make these bars gluten-free, choose certified gluten-free oats. Regular oats may have cross-contamination with gluten. Check labels on all ingredients, like nut butter and chocolate chips. Many brands offer gluten-free options. These simple swaps ensure everyone can enjoy these delicious treats.
What if the mixture is too dry?
If the mixture seems too dry, don’t worry! You can add a little more almond butter or honey. Start with one tablespoon at a time. Mix well after each addition. You want the mixture to hold together but not be sticky. Adjust until you reach the right consistency.
You now have a clear guide to making no-bake chocolate oat bars. I shared the ingredients, step-by-step instructions, tips for texture, and possible variations. Storage tips ensure your bars stay fresh for later. These treats are simple and tasty, plus you can easily customize them. Explore your favorite flavors and enjoy experimenting. Making these bars can be fun and rewarding. I encourage you to try this recipe and share your results!


