No-Bake Chocolate Pumpkin Oat Balls Healthy Treat

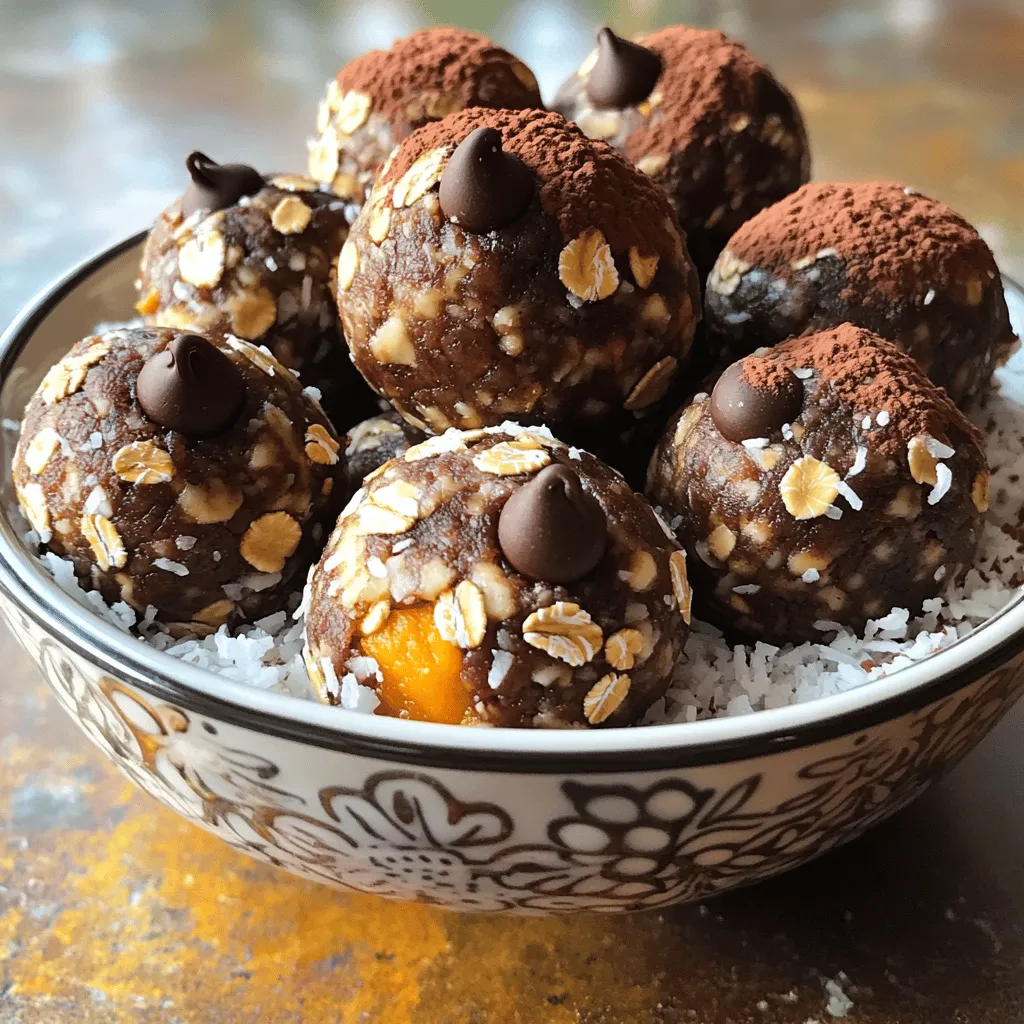
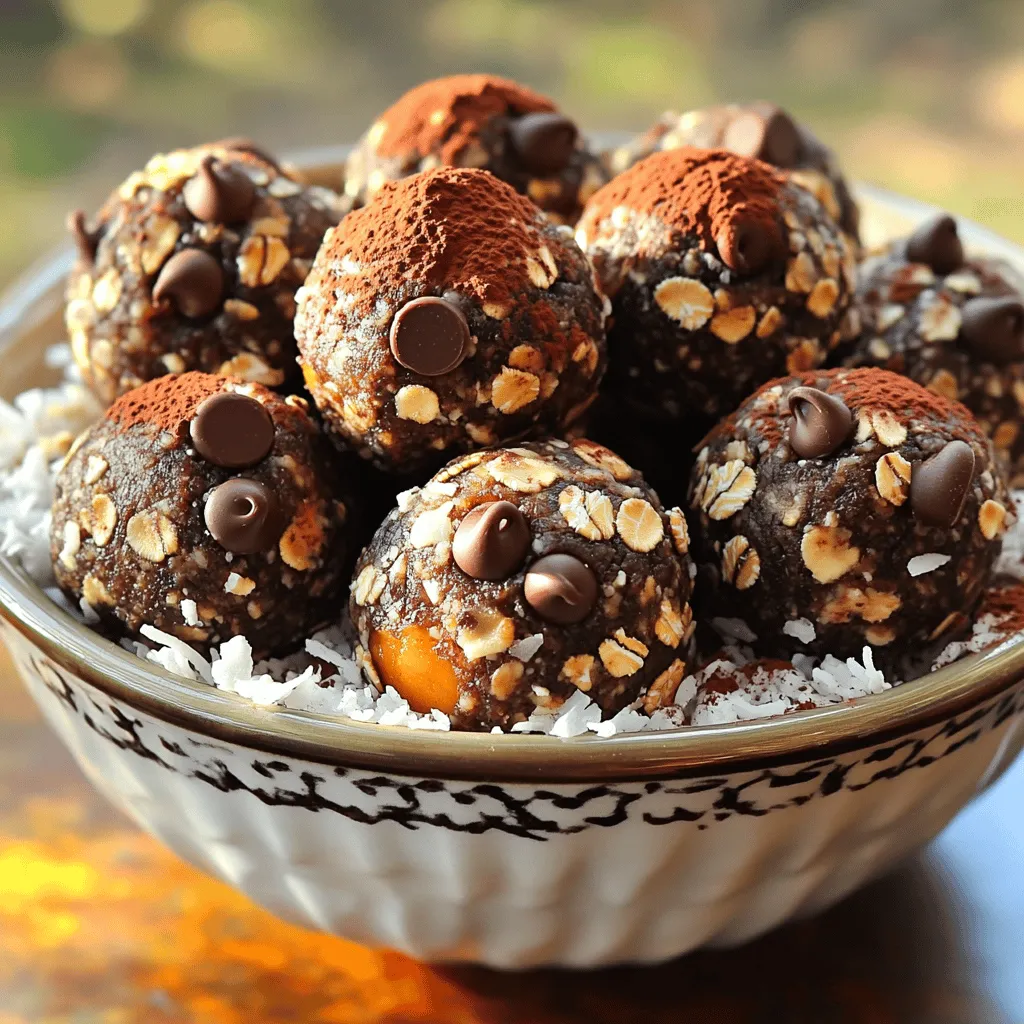
Looking for a quick and healthy snack? You’ll love my No-Bake Chocolate Pumpkin Oat Balls! These delicious bites are packed with nutrition and flavor from simple ingredients like oats, pumpkin, and almond butter. In just a few easy steps, you can whip up this tasty treat. Perfect for busy days or a sweet night treat, these oat balls are ready to satisfy your cravings without any baking. Let’s dive in!

Ingredients

Main Ingredients Required

– 1 cup rolled oats

– 1/2 cup canned pumpkin puree

– 1/3 cup natural almond butter

– 1/3 cup honey or maple syrup

– 1/4 cup unsweetened cocoa powder

The main base of our treat starts with rolled oats. They give a nice chewy texture. Canned pumpkin puree adds moisture and flavor. Almond butter provides healthy fats and a creamy touch. You can use honey or maple syrup for sweetness. Cocoa powder gives that rich chocolate taste.

Flavor Enhancers

– 1/2 teaspoon vanilla extract

– 1/4 teaspoon ground cinnamon

– 1/4 teaspoon ground nutmeg

– A pinch of salt

To boost flavor, we add vanilla extract. It brings warmth to the mix. Ground cinnamon adds a hint of spice. Nutmeg offers a cozy taste, perfect for fall. A pinch of salt balances the sweetness and enhances all flavors.

Optional Add-Ins

– 1/4 cup chocolate chips

– Shredded coconut or crushed nuts for rolling

For a chocolate kick, fold in some chocolate chips. They melt slightly and add sweetness. If you want extra texture, roll the balls in shredded coconut or crushed nuts. This step makes them even tastier and fun to eat.

Step-by-Step Instructions

Preparation Process

Mixing the Base Ingredients

Start by taking a large mixing bowl. Add 1 cup of rolled oats. Then, pour in 1/2 cup of canned pumpkin puree. Next, add 1/3 cup of almond butter and 1/3 cup of honey or maple syrup. Mix these ingredients well. You want a thick and sticky base. Make sure everything blends nicely.

Adding Cocoa and Spices

Now, sprinkle in 1/4 cup of unsweetened cocoa powder. This adds rich chocolate flavor. Next, add 1/2 teaspoon of vanilla extract, 1/4 teaspoon of ground cinnamon, and 1/4 teaspoon of ground nutmeg. Don’t forget a pinch of salt! Stir everything together until the mixture is smooth and even.

Incorporating Chocolate Chips

After mixing the cocoa and spices, fold in 1/4 cup of chocolate chips. This step adds little bursts of sweetness. Be gentle while folding to keep the chips intact. You want them spread throughout the mixture without breaking.

Forming the Oat Balls

Refrigeration to Firm Up

Once the mixture is ready, cover the bowl with plastic wrap. Place it in the refrigerator for about 15-20 minutes. Chilling helps the mixture firm up, making it easier to shape.

Rolling the Mixture into Balls

After chilling, take the bowl out. Use your hands to grab about a tablespoon of the mixture. Roll it into a ball about the size of a golf ball. Repeat this until you shape all the mixture into balls.

Optional: Rolling in Coconut or Nuts

If you like, you can add extra texture. Roll each ball in shredded coconut or crushed nuts. This step is optional but adds a nice touch.

Final Cooling

Placing on Baking Sheet

Once shaped, line a baking sheet with parchment paper. Place the oat balls on the sheet. Make sure to leave space between each ball.

Additional Refrigeration Time

Now, return the baking sheet to the fridge. Let the oat balls chill for another 30 minutes. This final cooling will help them set firmly. Enjoy your tasty and healthy snack!

Tips & Tricks

Perfecting the Texture

To get the right texture, adjust the sweetness. If you want a sweeter treat, use more honey or maple syrup. Start with the amount in the recipe and add more if needed. This helps balance the flavors.

Choosing the right nut butter matters too. I love almond butter for its smoothness. You can use peanut butter for a stronger taste. Just pick what you enjoy most!

Presentation Ideas

For serving, use a fun bowl or platter. Arrange the oat balls in a circle or stack them high. This makes your treat look fancy. A sprinkle of cocoa or cinnamon on top adds a nice touch.

If you host a party, these oat balls are a hit! Place them next to fresh fruit for a colorful display. Guests will love the look and the taste.

Common Mistakes to Avoid

One mistake is overmixing the ingredients. Mix just until combined. This keeps the oat balls from being too dense.

Another mistake is skipping the chilling steps. Chilling helps the mixture firm up. If you don’t chill, the balls may fall apart. Be sure to follow the steps for the best results!

Variations

Flavor Variants

You can change the taste of your oat balls easily. Adding peanut butter gives a rich, nutty flavor. Sunflower seed butter is a great choice too. It keeps the snack nut-free. You can also spice things up! Try adding more cinnamon or even ginger for a warm taste. Mixing in a bit of cocoa nibs adds a fun crunch.

Nutritional Substitutions

Want to lower the sugar? Use less honey or maple syrup. You can also swap in mashed bananas for sweetness. If you need gluten-free options, use certified gluten-free oats. This way, everyone can enjoy these treats without worries.

Additional Mix-Ins

Mix-ins can make these oat balls even better. Dried fruits like raisins or cranberries add a sweet bite. You can also toss in seeds like chia or flax for extra nutrition. Different nuts like walnuts or pecans add a nice crunch too. Explore your favorites and find the perfect mix!

Storage Info

Best Storage Practices

Refrigeration Tips for Freshness: Store these oat balls in an airtight container. Keep them in the fridge for best freshness. This will maintain their texture and flavor.

Freezing for Long-Term Storage: If you want to save some for later, freeze them. Place them in a freezer-safe bag. Make sure to remove as much air as possible before sealing.

Shelf Life

Duration in the Refrigerator: These oat balls stay good in the fridge for about one week. If they last that long, they are a hit!

Duration in the Freezer: In the freezer, they can last for about three months. Just remember to label the bag with the date you made them.

Reheating Instructions

Best Practices to Restore Freshness: You don’t need to reheat these treats. Enjoy them cold or let them sit at room temperature for a few minutes. This will help them soften and bring back the fresh taste.

FAQs

Can I use quick oats instead of rolled oats?

Yes, you can use quick oats. They will create a softer texture. However, rolled oats provide a nice chew. If you prefer a heartier bite, stick to rolled oats.

How long do the oat balls last in the refrigerator?

These oat balls last about one week in the fridge. Keep them in an airtight container. This keeps them fresh and tasty for your snacking needs.

Can I make these without honey or maple syrup?

Yes, you can make these without honey or maple syrup. Try using agave nectar or date syrup instead. For a sugar-free option, use mashed bananas or unsweetened applesauce.

Are these no-bake chocolate pumpkin oat balls vegan-friendly?

Yes, they are vegan-friendly if you use maple syrup. Make sure to choose a plant-based nut butter. This way, you can enjoy them without any animal products.

Can I replace pumpkin puree with another ingredient?

Yes, you can replace pumpkin puree. Use applesauce or mashed sweet potato for a different flavor. Both options will keep the mixture moist and tasty.

These no-bake chocolate pumpkin oat balls are simple to make. You only need a few main ingredients, like oats and pumpkin puree. Mix them with cocoa and spices for flavor. Remember to chill the mixture before rolling it into balls. You can add fun extras like chocolate chips or nuts, too.

Overall, these treats are tasty and healthy. They save well in the fridge and freezer, so you can enjoy them later. Feel free to change flavors and make them your own. Enjoy these easy snacks anytime you want!

- 1 cup rolled oats - 1/2 cup canned pumpkin puree - 1/3 cup natural almond butter - 1/3 cup honey or maple syrup - 1/4 cup unsweetened cocoa powder The main base of our treat starts with rolled oats. They give a nice chewy texture. Canned pumpkin puree adds moisture and flavor. Almond butter provides healthy fats and a creamy touch. You can use honey or maple syrup for sweetness. Cocoa powder gives that rich chocolate taste. - 1/2 teaspoon vanilla extract - 1/4 teaspoon ground cinnamon - 1/4 teaspoon ground nutmeg - A pinch of salt To boost flavor, we add vanilla extract. It brings warmth to the mix. Ground cinnamon adds a hint of spice. Nutmeg offers a cozy taste, perfect for fall. A pinch of salt balances the sweetness and enhances all flavors. - 1/4 cup chocolate chips - Shredded coconut or crushed nuts for rolling For a chocolate kick, fold in some chocolate chips. They melt slightly and add sweetness. If you want extra texture, roll the balls in shredded coconut or crushed nuts. This step makes them even tastier and fun to eat. Mixing the Base Ingredients Start by taking a large mixing bowl. Add 1 cup of rolled oats. Then, pour in 1/2 cup of canned pumpkin puree. Next, add 1/3 cup of almond butter and 1/3 cup of honey or maple syrup. Mix these ingredients well. You want a thick and sticky base. Make sure everything blends nicely. Adding Cocoa and Spices Now, sprinkle in 1/4 cup of unsweetened cocoa powder. This adds rich chocolate flavor. Next, add 1/2 teaspoon of vanilla extract, 1/4 teaspoon of ground cinnamon, and 1/4 teaspoon of ground nutmeg. Don't forget a pinch of salt! Stir everything together until the mixture is smooth and even. Incorporating Chocolate Chips After mixing the cocoa and spices, fold in 1/4 cup of chocolate chips. This step adds little bursts of sweetness. Be gentle while folding to keep the chips intact. You want them spread throughout the mixture without breaking. Refrigeration to Firm Up Once the mixture is ready, cover the bowl with plastic wrap. Place it in the refrigerator for about 15-20 minutes. Chilling helps the mixture firm up, making it easier to shape. Rolling the Mixture into Balls After chilling, take the bowl out. Use your hands to grab about a tablespoon of the mixture. Roll it into a ball about the size of a golf ball. Repeat this until you shape all the mixture into balls. Optional: Rolling in Coconut or Nuts If you like, you can add extra texture. Roll each ball in shredded coconut or crushed nuts. This step is optional but adds a nice touch. Placing on Baking Sheet Once shaped, line a baking sheet with parchment paper. Place the oat balls on the sheet. Make sure to leave space between each ball. Additional Refrigeration Time Now, return the baking sheet to the fridge. Let the oat balls chill for another 30 minutes. This final cooling will help them set firmly. Enjoy your tasty and healthy snack! To get the right texture, adjust the sweetness. If you want a sweeter treat, use more honey or maple syrup. Start with the amount in the recipe and add more if needed. This helps balance the flavors. Choosing the right nut butter matters too. I love almond butter for its smoothness. You can use peanut butter for a stronger taste. Just pick what you enjoy most! For serving, use a fun bowl or platter. Arrange the oat balls in a circle or stack them high. This makes your treat look fancy. A sprinkle of cocoa or cinnamon on top adds a nice touch. If you host a party, these oat balls are a hit! Place them next to fresh fruit for a colorful display. Guests will love the look and the taste. One mistake is overmixing the ingredients. Mix just until combined. This keeps the oat balls from being too dense. Another mistake is skipping the chilling steps. Chilling helps the mixture firm up. If you don’t chill, the balls may fall apart. Be sure to follow the steps for the best results! {{image_2}} You can change the taste of your oat balls easily. Adding peanut butter gives a rich, nutty flavor. Sunflower seed butter is a great choice too. It keeps the snack nut-free. You can also spice things up! Try adding more cinnamon or even ginger for a warm taste. Mixing in a bit of cocoa nibs adds a fun crunch. Want to lower the sugar? Use less honey or maple syrup. You can also swap in mashed bananas for sweetness. If you need gluten-free options, use certified gluten-free oats. This way, everyone can enjoy these treats without worries. Mix-ins can make these oat balls even better. Dried fruits like raisins or cranberries add a sweet bite. You can also toss in seeds like chia or flax for extra nutrition. Different nuts like walnuts or pecans add a nice crunch too. Explore your favorites and find the perfect mix! - Refrigeration Tips for Freshness: Store these oat balls in an airtight container. Keep them in the fridge for best freshness. This will maintain their texture and flavor. - Freezing for Long-Term Storage: If you want to save some for later, freeze them. Place them in a freezer-safe bag. Make sure to remove as much air as possible before sealing. - Duration in the Refrigerator: These oat balls stay good in the fridge for about one week. If they last that long, they are a hit! - Duration in the Freezer: In the freezer, they can last for about three months. Just remember to label the bag with the date you made them. - Best Practices to Restore Freshness: You don’t need to reheat these treats. Enjoy them cold or let them sit at room temperature for a few minutes. This will help them soften and bring back the fresh taste. Yes, you can use quick oats. They will create a softer texture. However, rolled oats provide a nice chew. If you prefer a heartier bite, stick to rolled oats. These oat balls last about one week in the fridge. Keep them in an airtight container. This keeps them fresh and tasty for your snacking needs. Yes, you can make these without honey or maple syrup. Try using agave nectar or date syrup instead. For a sugar-free option, use mashed bananas or unsweetened applesauce. Yes, they are vegan-friendly if you use maple syrup. Make sure to choose a plant-based nut butter. This way, you can enjoy them without any animal products. Yes, you can replace pumpkin puree. Use applesauce or mashed sweet potato for a different flavor. Both options will keep the mixture moist and tasty. These no-bake chocolate pumpkin oat balls are simple to make. You only need a few main ingredients, like oats and pumpkin puree. Mix them with cocoa and spices for flavor. Remember to chill the mixture before rolling it into balls. You can add fun extras like chocolate chips or nuts, too. Overall, these treats are tasty and healthy. They save well in the fridge and freezer, so you can enjoy them later. Feel free to change flavors and make them your own. Enjoy these easy snacks anytime you want!

No-Bake Chocolate Pumpkin Oat Balls

Indulge in the delightful flavors of No-Bake Chocolate Pumpkin Oat Balls! These easy and healthy snacks combine rolled oats, pumpkin puree, and rich chocolate for the perfect guilt-free treat. Packed with nutrients and ready in just one hour, they're ideal for a quick energy boost or party snack. Explore this simple recipe and discover how to make these scrumptious bites today! Click through for the full recipe and enjoy a taste of autumn.

Ingredients
  

1 cup rolled oats

1/2 cup canned pumpkin puree

1/3 cup natural almond butter (or any nut butter)

1/3 cup honey or maple syrup

1/4 cup unsweetened cocoa powder

1/2 teaspoon vanilla extract

1/4 teaspoon ground cinnamon

1/4 teaspoon ground nutmeg

A pinch of salt

1/4 cup chocolate chips

Optional: shredded coconut or crushed nuts for rolling

Instructions
 

In a large mixing bowl, combine the rolled oats, pumpkin puree, almond butter, and honey (or maple syrup). Stir well until all the ingredients are thoroughly mixed.

    Add the cocoa powder, vanilla extract, ground cinnamon, ground nutmeg, and a pinch of salt to the mixture. Mix again until everything is well combined.

      Fold in the chocolate chips gently to ensure they are evenly distributed throughout the mixture.

        Refrigerate the mixture for about 15-20 minutes to make it easier to form the balls.

          Once chilled, remove the mixture from the refrigerator. Using your hands, take about a tablespoon of the mixture and roll it into a ball. Repeat until all the mixture is used up.

            If desired, roll the balls in shredded coconut or crushed nuts for added texture and flavor.

              Place the finished oat balls on a parchment-lined baking sheet and refrigerate for an additional 30 minutes to firm up.

                Prep Time: 20 minutes | Total Time: 1 hour | Servings: 12-15 balls

                  - Presentation Tips: Serve the oat balls in a decorative bowl or on a platter. You can arrange them with a sprinkle of cocoa powder or a dash of cinnamon on top for a finishing touch. These make great snacks for parties or a healthy treat to share!

                    Leave a Comment

                    Recipe Rating