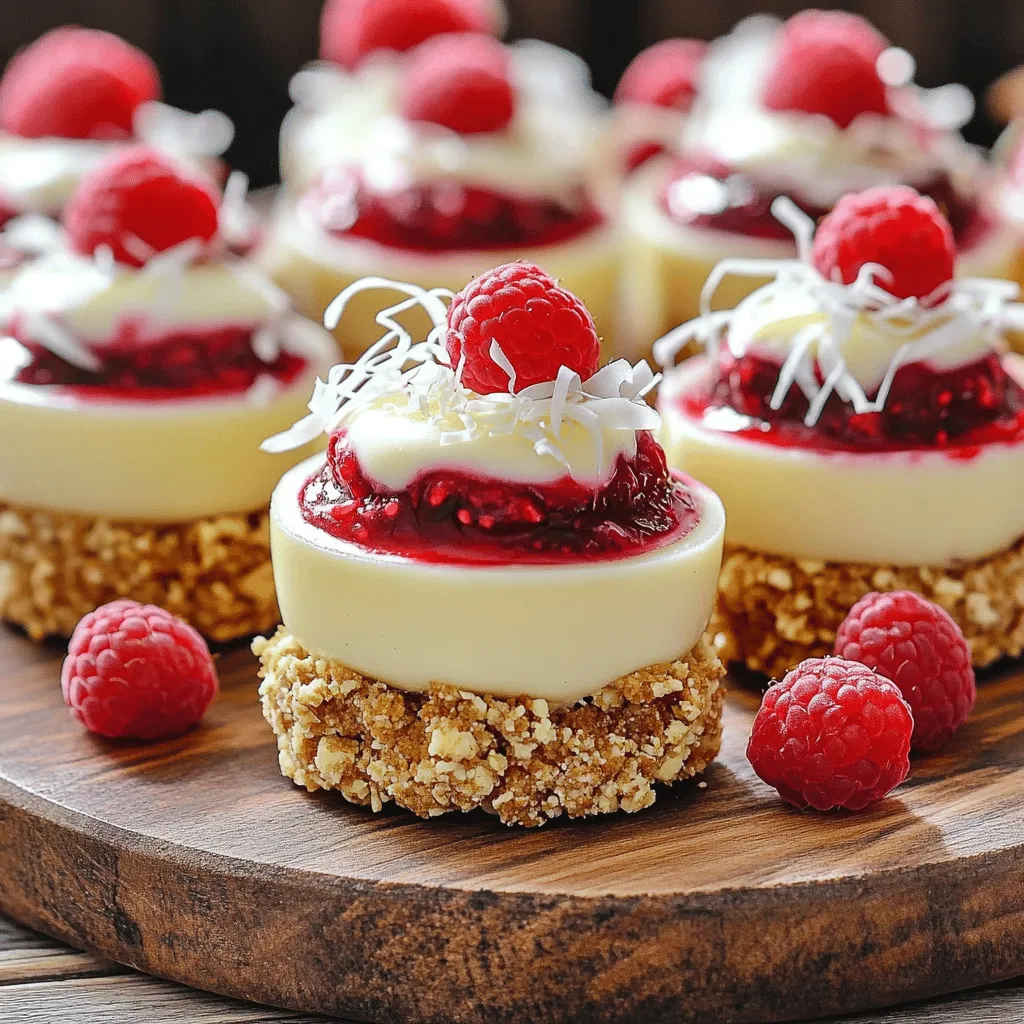
If you’re craving a sweet treat without the fuss of baking, you’re in the right place! These No-Bake White Chocolate Raspberry Cups are the perfect blend of creamy white chocolate and tart raspberries. You can whip them up in no time, and they require just a few simple steps. Join me as I guide you through this delicious dessert that will impress everyone. Let’s get started and create something delightful!
Ingredients
List of Ingredients
To make these tasty cups, gather these ingredients:
– 1 cup white chocolate chips
– 1/4 cup coconut oil
– 1/2 cup fresh raspberries
– 1/2 cup crushed digestive biscuits or graham crackers
– 1 tablespoon powdered sugar
– 1 teaspoon vanilla extract
– Pinch of salt
– Extra raspberries and white chocolate shavings for garnish
Tools Needed
You will need a few simple tools for this recipe:
– Muffin tin
– Cupcake liners or silicone molds
– Microwave-safe bowl
– Mixing spoon
– Measuring cups and spoons
– Refrigerator
Tips for Choosing Quality Ingredients
For great flavor, pick fresh and high-quality ingredients. Here are my top tips:
– White Chocolate: Look for chips with real cocoa butter. Avoid cheap brands with fillers.
– Raspberries: Choose firm, bright red berries. They should smell sweet. Check for any mold.
– Coconut Oil: Use refined coconut oil for a neutral taste. Unrefined adds a coconut flavor.
– Biscuit Base: Digestive biscuits give a great texture. If you prefer, graham crackers work well too.
– Vanilla Extract: Pure vanilla gives the best flavor. Avoid imitation vanilla if possible.
Using quality ingredients makes a big difference in taste!
Step-by-Step Instructions
Preparing the Molds
Start by lining a muffin tin with cupcake liners or silicone molds. This makes it easy to remove the cups later. Choose colorful liners for a fun touch. Make sure they fit snugly in the tin. This helps keep the shape while you fill them.
Melting the Chocolate
In a microwave-safe bowl, mix white chocolate chips and coconut oil together. Heat it in the microwave. Do this in 30-second bursts. Stir after each interval until it is smooth. Watch closely to avoid burning the chocolate. The mixture should be glossy and creamy when done.
Assembling the Cups
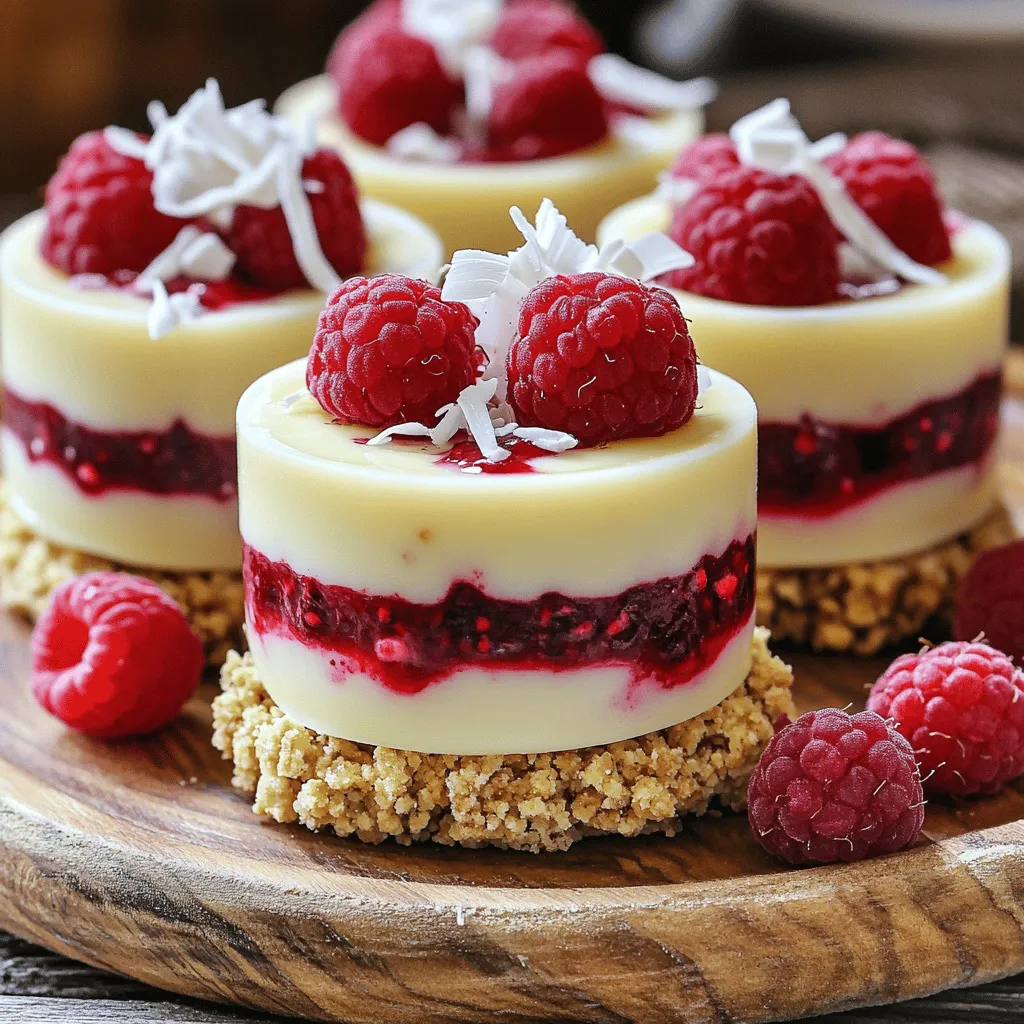
First, pour about 1 tablespoon of the melted chocolate into each cup. This forms a base layer. Next, add a few fresh raspberries right on top. Then, take the crushed biscuits and mix them with 2 tablespoons of the melted chocolate. Spoon this mixture over the raspberries, pressing down gently.
Now, pour another layer of melted chocolate over the biscuit mix. Ensure you cover the raspberries well. Repeat the layers until you fill each cup to the top. When all cups are full, place the muffin tin in the fridge. Chill them for at least 2 hours. This lets the chocolate set properly.
Once they are firm, carefully take the cups out of the molds. You can garnish with extra raspberries and white chocolate shavings if you like. Enjoy your tasty treats!
Tips & Tricks
How to Perfectly Melt White Chocolate
To melt white chocolate, use a microwave-safe bowl. Combine the white chocolate chips with coconut oil. Heat in short bursts of 30 seconds. Stir after each burst. This keeps the chocolate smooth. Avoid overheating, as it can seize up. If it looks grainy, add a bit more coconut oil. Keep stirring until it’s silky and warm.
Variations for Flavor Enhancements
You can change the flavors easily. Try adding orange zest for a citrus twist. You can mix in a bit of almond extract for a nutty taste. For a berry blend, use mixed berries instead of just raspberries. You can also fold in mini marshmallows for extra texture. Get creative and see what you like!
Serving Suggestions
Serve these cups chilled for the best taste. Place them on a nice platter to impress. Add fresh mint leaves around the cups for a pop of color. You can drizzle some extra melted chocolate on top for flair. These cups are perfect for parties or simple treats. Enjoy them with friends and family!
Variations
Alternative Fruit Options
You can switch raspberries for other fruits. Try strawberries, blueberries, or blackberries. Each fruit adds its own flavor. Use fresh or frozen fruit. If you use frozen fruit, let it thaw first. You can even mix different fruits for fun blends.
Different Types of Chocolate
While white chocolate shines here, you can use milk or dark chocolate. Each type will change the taste. Milk chocolate gives a creamier flavor, while dark chocolate adds richness. Just melt it the same way as the white chocolate. Adjust the sugar if needed to balance the taste.
Gluten-Free Modifications
To make these cups gluten-free, choose gluten-free biscuits. Many brands offer great options. You can use gluten-free graham crackers or even ground nuts. This way, everyone can enjoy these treats without worry. Always double-check labels when buying ingredients.
Storage Info
Best Practices for Storing Cups
To keep your No-Bake White Chocolate Raspberry Cups fresh, store them in an airtight container. This helps keep moisture out and prevents them from absorbing other odors. If you use cupcake liners, leave them in the liners for easier serving. Place a piece of parchment paper between layers if stacking.
How Long They Last in the Refrigerator
These delicious cups last up to five days in the fridge. After that, the chocolate may lose its creamy texture. To maintain the best flavor and texture, enjoy them within this time frame. Always check for any signs of spoilage before eating.
Recommended Freezing Methods
If you want to save some cups for later, freezing is a great option. Wrap each cup tightly in plastic wrap. Then, place them in a freezer-safe bag or container. They can last up to three months in the freezer. When ready to eat, thaw them in the fridge overnight before serving. This method keeps them tasting fresh and delightful!
FAQs
Can I use dark chocolate instead?
Yes, you can use dark chocolate. It will change the taste and color. Dark chocolate has a richer flavor. This will balance the tartness of the raspberries. If you love dark chocolate, give it a try!
What can I substitute for coconut oil?
If you do not have coconut oil, you can use butter or vegetable oil. Both options will work well. Butter will add a creamy taste. Vegetable oil is neutral and won’t change the flavor. Choose what you have on hand.
How do I make these cups vegan-friendly?
To make these cups vegan, switch to dairy-free chocolate. Look for brands that are plant-based. You can also use coconut oil instead of butter. Make sure the biscuits are vegan too. This way, everyone can enjoy these treats!
In this post, we covered how to make delicious chocolate cups. We discussed key ingredients and tools needed for success. I shared tips for choosing quality items and outlined a simple step-by-step process. You learned about melting chocolate, assembling the cups, and enhancing flavor. We also explored different variations and storage methods to keep your treats fresh.
Remember, using good ingredients makes a big difference! Enjoy your sweet creations and have fun experimenting!