


Latest & Greatest

Soft and Chewy Snickerdoodle Cookies Easy Recipe
Looking for the ultimate soft and chewy snickerdoodle cookie recipe? You’re in the right place! In this post, I’ll guide
Read more…
Street Corn Chicken Rice Bowl Delightful and Fresh Meal
Looking for a fresh and tasty meal that’s easy to make? The Street Corn Chicken Rice Bowl is your answer!
Read more…
Egg Roll Soup Flavorful and Simple Comfort Dish
Craving a warm, hearty dish that’s packed with flavor? Let me introduce you to Egg Roll Soup—a comforting bowl of
Read more…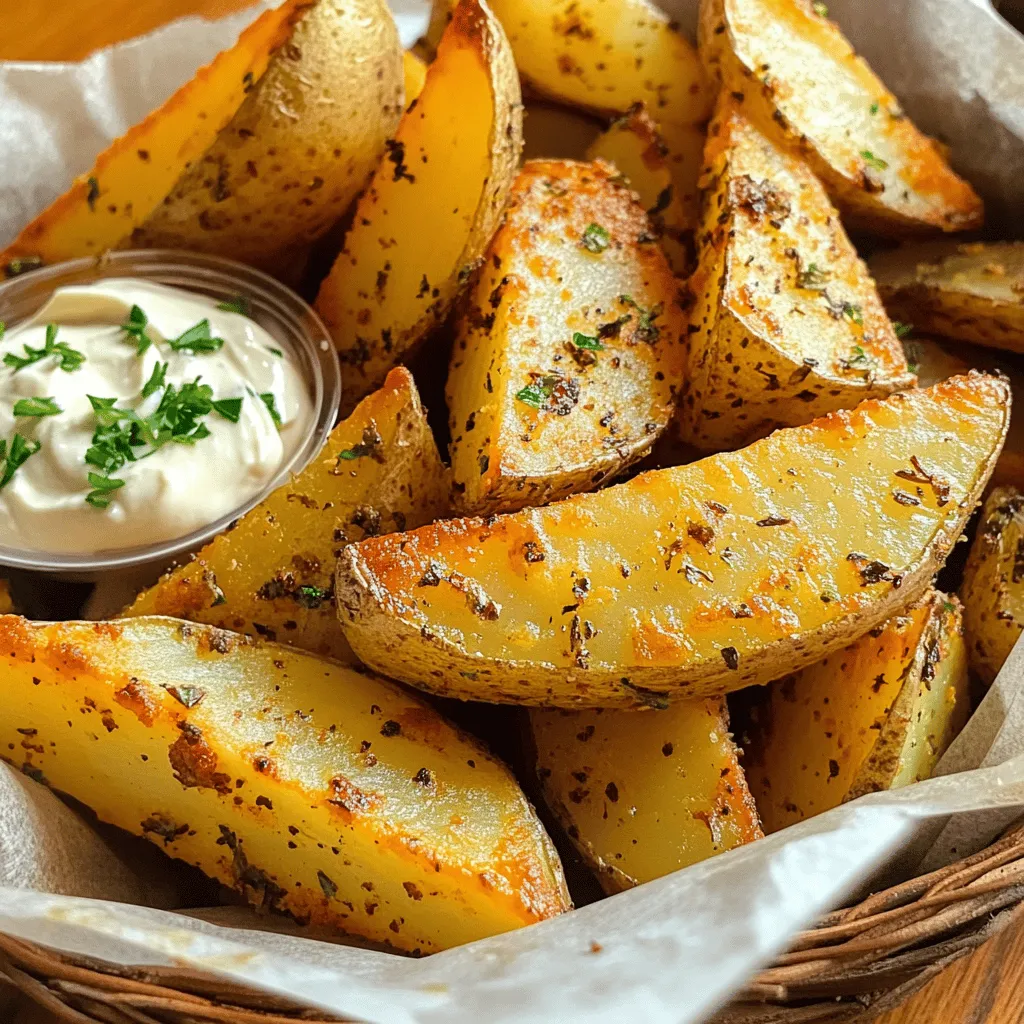
Crispy Potato Wedges Tasty and Simple Side Dish
Crispy potato wedges are the perfect side dish for any meal. They are easy to make and packed with flavor.
Read more…
Olive Cheese Bread Appetizer Savory and Tasty Treat
Looking for a savory snack that impresses? My Olive Cheese Bread Appetizer combines crusty bread with rich, flavorful cheeses and
Read more…
No-Bake Cheesecake Bites Easy and Delicious Treat
Craving a sweet treat but short on time? No-bake cheesecake bites are your answer! These mini desserts combine rich, creamy
Read more…
Chili Pineapple Grilled Chicken Flavorful Dinner Recipe
Are you ready for a dinner that bursts with flavor? My Chili Pineapple Grilled Chicken combines sweet pineapple and spicy
Read more…
Red Velvet Cake Irresistible Dessert Recipe Guide
If you crave a dessert that stands out, look no further than red velvet cake. This guide will walk you
Read more…browse recipes


Loaded Baked Potato Gnocchi Flavorful Comfort Dish
Looking for a cozy dish to warm your soul? Dive into my Loaded Baked Potato Gnocchi, a delightful twist on a classic comfort food.…
My Latest Desserts
My Latest Recipes

hey,
i’m !
I’m so happy you’re here!
I’m not just sharing recipes I’m sharing a piece of my heart. I hope these dishes bring you comfort, joy, and maybe even a new favorite.
. Enjoy crafting your own delicious avocado toast! To start, you need to toast the bread. You can use a toaster or a skillet. I like to use a skillet for an extra crispy edge. Aim for a nice golden brown color. This gives the toast a warm base for the toppings. Next, grab your ripe avocados. Cut them in half and remove the pit. Use a spoon to scoop out the green flesh into a bowl. Mash the avocado with a fork until you get the texture you like. I prefer a mix of smooth and chunky for more flavor. Now, let’s add some flavor to the mashed avocado. Stir in one clove of minced garlic. Add one tablespoon of olive oil and one tablespoon of balsamic vinegar. Don’t forget to sprinkle in some salt and black pepper. Mix everything well so the flavors blend nicely. For the tomatoes, take your halved cherry tomatoes and place them in a bowl. Season them with a pinch of salt and pepper, plus a drizzle of olive oil. Toss them gently to coat without squishing them. This keeps them fresh and vibrant. Once your bread is toasted, it’s time to assemble. Spread the avocado mixture generously on each slice. Then, layer the seasoned tomatoes on top. Finish off by sprinkling crumbled feta cheese over everything. This makes it look beautiful and tasty. You can check the [Full Recipe] for more details. Pair this savory avocado toast with a fresh juice or herbal tea. It also goes well with a light salad on the side. I love serving it for brunch or a quick lunch. You can even enjoy it as a snack any time of the day. To store leftover avocado spread, place it in a bowl. Cover it tightly with plastic wrap, pressing the wrap onto the surface to limit air. This helps keep it fresh. If you have leftover bread, store it in a paper bag. This keeps the bread from getting soggy but still fresh. To add more flavor, try adding a poached egg on top. You can also sprinkle some chopped nuts for crunch. Fresh herbs like cilantro or dill can brighten the taste. Adjust the salt and pepper to your liking for the best flavor. Use the Full Recipe for all the details on making your toast perfect! {{image_2}} You can use many types of bread for avocado toast. Whole grain bread adds a nutty taste. It also gives you more fiber. Sourdough is another great choice. It has a tangy flavor and chewy texture. If you need gluten-free bread, look for options made from rice or almond flour. These can still give you a satisfying crunch without the gluten. If you want to switch cheeses, try goat cheese or ricotta. Both can add a creamy texture. For vegetables, consider thinly sliced radishes or cucumbers. These choices will add fresh crunch and flavor. You can also mix in some arugula or spinach for extra greens. Feel free to get creative with toppings! Adding spices can elevate your avocado toast. Try a pinch of cumin or smoked paprika for warmth. Fresh herbs like dill or cilantro can brighten the dish. You can also use different oils to change the taste. Instead of olive oil, try avocado oil or chili-infused oil for a kick. These small changes can make a big difference in flavor. For the full recipe, check the full recipe section. - 10 minutes prep time - 20 minutes total time - Serves 2-4 individuals This savory avocado toast with feta and tomatoes is quick and easy to make. You start by toasting the bread until it is golden brown. The creamy avocado is mashed and mixed with garlic, olive oil, and balsamic vinegar for a rich flavor. The fresh cherry tomatoes add a juicy burst, while the crumbled feta brings a salty kick. Each bite is a mix of creamy, crunchy, and tangy. You can find the complete steps in the Full Recipe. Presentation is key. Serve this dish on a wooden board or a stylish plate. A drizzle of olive oil or balsamic reduction gives it a nice shine. Add fresh basil leaves for a pop of color. Enjoy this delightful dish at breakfast, lunch, or as a snack! Yes, you can use frozen avocados. They work well if you thaw them first. To thaw, move them to the fridge overnight. If you need them faster, place them in warm water for about 10-15 minutes. Frozen avocados may be softer than fresh, but they still taste great. You can mash them just like fresh ones. To keep your avocado fresh, use lemon or lime juice. The citric acid slows browning. You can also cover it tightly with plastic wrap. Make sure no air gets in. Storing it in an airtight container helps, too. If you leave the pit in the mashed avocado, it can help reduce browning, but it won’t stop it completely. If you don’t have balsamic vinegar, try apple cider vinegar or red wine vinegar. Both add a tangy flavor. You can also use lemon juice for a fresh twist. Each will change the taste slightly, so adjust your salt and pepper to balance the flavor. Yes, you can prep some parts ahead. Toast the bread right before serving to keep it crispy. You can mash the avocado and store it in the fridge for up to a day. Just remember to add lemon juice to keep it fresh. The tomatoes can be prepped an hour ahead. Keep them in the fridge until you are ready to assemble your toast. This blog post covered a simple and tasty recipe for avocado toast. We discussed the key ingredients and provided step-by-step instructions to make it perfect. Along with tips for serving, storing, and variations, you can create your own unique dish. Remember, avocados are versatile. With easy substitutions and additional flavors, this dish is sure to impress. Enjoy your toast as a snack or meal, and don't be afraid to get creative with toppings!](https://emmasdish.com/wp-content/uploads/2025/05/9c4c369e-c34c-4f49-a2cd-53b09274d5b0-300x300.webp)

![- 8 cups apple juice (or apple cider) - 1 orange, sliced - 1 tablespoon whole cloves - 1 tablespoon cinnamon sticks (about 2-3 sticks) - 1 tablespoon allspice berries - 1 tablespoon ginger, grated or 1-inch piece of fresh ginger - 1/4 cup brown sugar (adjust to taste) - Optional: a pinch of nutmeg The ingredients for spiced apple cider are simple yet full of flavor. For the best taste, use fresh apple juice or cider. The orange adds a bright touch, while the spices bring warmth. Whole cloves, cinnamon sticks, and allspice berries work together to create a cozy aroma. Grated ginger adds a little zing that balances the sweetness of brown sugar. If you want a little more spice, feel free to add nutmeg. For tools, you will need an Instant Pot, measuring cups, and a fine mesh strainer. A large pot or pitcher is great for serving. This combination of ingredients and tools makes the cooking process easy and fun. You can find the full recipe at the end to guide you through each step. - Gather and slice up the orange. - Measure out the spices and brown sugar. Start by gathering all your ingredients. You need 8 cups of apple juice or cider. Slice the orange into round pieces. Next, measure out 1 tablespoon each of whole cloves, cinnamon sticks, and allspice berries. Don’t forget the grated ginger! You can use 1 tablespoon or a 1-inch piece. Finally, get 1/4 cup of brown sugar. This will add sweetness. If you want a little extra spice, add a pinch of nutmeg. - Pour apple juice or cider into the pot. - Add all spices and orange slices. Now it's time to combine everything in the Instant Pot. Pour the apple juice or cider right into the pot. Then, add all the spices you prepared, along with the orange slices. Mix them well. This step is key to infusing those rich flavors into your cider. - Seal the Instant Pot and set the timer for 15 minutes. - Allow proper pressure release and safety measures. After combining, close the lid of the Instant Pot. Make sure the valve is set to sealing. Select the 'Pressure Cook' or 'Manual' setting. Set the timer for 15 minutes. When the timer goes off, let the pressure release naturally for 10 minutes. After that, switch the valve to venting to release any remaining steam. Always be careful when doing this! By following these steps, you create a warm, spiced apple cider that fills your home with cozy aromas. For the complete recipe, check out the [Full Recipe]. To tweak the sweetness, add more brown sugar. Start with a tablespoon, then taste. You can always add more, but it's hard to take it out! For a bolder spice flavor, consider adding a pinch of nutmeg. This small adjustment can make a big difference in taste. If you want even more spice, add an extra cinnamon stick or some more ginger. Adjust it until it feels just right for you. Enjoy your spiced apple cider warm, straight from the pot. It makes a great drink for gatherings or cozy nights. You can serve it in mugs that show off the steam. Garnish with cinnamon sticks or fresh orange slices for a nice touch. If you want to impress your guests, try some whipped cream on top. It adds a fun twist! You can prepare this cider in advance for a big event. Just make it and let it cool. Store it in the fridge until you're ready to serve. When it's time to enjoy, reheat it gently on the stove. Stir well to mix any settled spices. This method keeps the flavor strong and delicious. Enjoy the warmth of your homemade drink when you need it! {{image_2}} You can spice up your drink by adding some rum or brandy. This gives a warm kick to the cider. Simply pour in a cup of your chosen spirit after cooking. Stir it well. This adult twist makes it perfect for cozy gatherings. You can also try spiced rum for extra flavor. Herbs and spices can elevate your cider. Consider adding star anise or cardamom for depth. You can also experiment with citrus peels or a splash of vanilla extract. If you want a different taste, try substituting apple juice with pear juice or cranberry juice. Each juice brings a unique flair to your cider. Want to enjoy cider on a hot day? Make iced spiced apple cider! After cooling, pour it over ice. Garnish with cinnamon sticks and orange slices for a fun look. You can also create cider cocktails by mixing it with soda or sparkling water. This adds fizz and a refreshing twist to your drink. For all the details, check out the Full Recipe. To store leftover cider, let it cool first. Pour the cider into an airtight container. You can keep it in the fridge for up to one week. For best taste, try to drink it within three days. Freezing spiced apple cider is easy. First, cool the cider completely. Then, pour it into freezer-safe bags or containers. Leave some space at the top for expansion. Seal tightly, and label with the date. For thawing, place the cider in the fridge overnight. Reheat on the stove over low heat or in the microwave. The cider lasts about one week in the fridge. If you freeze it, it can last for up to six months. Always check for taste and smell before using after storage. Enjoy your delicious spiced apple cider any time! Yes, you can use fresh apples to make spiced apple cider. Simply core and chop the apples. Then, add them to the Instant Pot with some water. Cook them down to release their juices, then strain the mixture to get a delicious cider. This method gives a fresh and fruity taste. It typically takes about 15-20 minutes to warm your spiced apple cider in the Instant Pot after refrigeration. Use the 'Saute' function to heat it quickly. Stir occasionally to ensure even warming. I recommend using 100% pure apple juice or apple cider. Look for options without added sugars or preservatives. Different apple varieties provide unique flavors, so try a blend for a richer taste. Yes, you can make spiced apple cider on the stovetop. Just combine the ingredients in a large pot. Bring it to a boil, then reduce heat and let it simmer for 30 minutes. This method also enhances the flavors. Absolutely! This spiced apple cider is vegan-friendly. It uses plant-based ingredients like apple juice and spices. Feel free to adjust the sweetness to your liking using brown sugar or maple syrup. Enjoy it guilt-free! For the complete method and additional tips, check the Full Recipe. This blog post covered how to make delicious spiced apple cider in an Instant Pot. You learned about the key ingredients, tools, and step-by-step instructions. We also shared tips for enhancing flavor and storage methods. Spiced apple cider is easy to customize and perfect for any season. You can enjoy it warm or cold, with or without alcohol. Now you have the knowledge to create a delightful drink for yourself and others. Happy brewing!](https://emmasdish.com/wp-content/uploads/2025/05/ea5b1a01-c8aa-46b6-9c7a-b3ff2b363864-300x300.webp)
![- 6 large eggs - 1/2 cup milk - 1 cup spinach, chopped - 1/2 cup cherry tomatoes, halved - 1/2 cup bell pepper, diced - 1/4 cup red onion, finely chopped - 1/2 cup feta cheese, crumbled - 1 teaspoon garlic powder - 1 teaspoon dried oregano - Salt and pepper to taste - 2 tablespoons olive oil When I make a vegetable frittata, I focus on fresh ingredients. Fresh veggies bring out great flavors. I love using a mix of bell peppers for color and taste. Cherry tomatoes add a nice sweetness. Spinach gives it a bright green look and packs in nutrients. For the eggs, I choose large ones. They hold up well in the frittata. The milk adds creaminess but is not too heavy. Feta cheese crumbles add a salty kick. - Choose Seasonal Vegetables: This gives your frittata the best flavor. Look for local produce at farmers' markets. - Inspect for Freshness: Check for firm, bright vegetables. Avoid any that feel soft or look dull. - Store Properly: Keep eggs and veggies in the fridge. This keeps them fresh longer. - Prep Ahead: Wash and chop your veggies before cooking. This saves time and makes cooking easier. Using fresh, high-quality ingredients sets the stage for a delicious vegetable frittata. If you want to try this recipe, check out the Full Recipe for more details! Start by preheating your oven to 375°F (190°C). This step ensures the frittata cooks evenly. In a large bowl, mix together six large eggs, 1/2 cup of milk, garlic powder, oregano, and salt and pepper. Whisk these ingredients well until they blend smoothly. Next, heat two tablespoons of olive oil in an oven-safe skillet over medium heat. I prefer using a cast iron skillet for better heat retention. Add 1/4 cup of finely chopped red onion and 1/2 cup of diced bell pepper. Sauté them for about 3-4 minutes until the onions are soft. Then, toss in 1 cup of chopped spinach and 1/2 cup of halved cherry tomatoes. Cook for another 2 minutes, stirring often, until the spinach wilts. Pour the egg mixture over the sautéed vegetables. Stir gently to mix everything well. Sprinkle 1/2 cup of crumbled feta cheese on top. Cook on the stove for 2 minutes to set the edges. Then, transfer the skillet to the oven. Bake for 15-20 minutes until the frittata is puffed and the center is set. Once done, remove it from the oven and let it cool for a few minutes before slicing. For more details, refer to the Full Recipe. To make a great vegetable frittata, you need to focus on texture. A frittata should be soft but firm. Start by cooking the vegetables just enough. This way, they stay tender and keep their flavor. Sauté them on medium heat for about 5-6 minutes. This helps to release their juices without making them mushy. Using an oven-safe skillet is key. A cast iron skillet works best. It heats evenly and keeps the frittata warm. Plus, it can go straight from the stove to the oven. This makes cooking easier and helps the frittata rise nicely. Feel free to switch up the veggies. You can use zucchini, mushrooms, or even broccoli. Just remember to chop them small for even cooking. If you have leftover veggies, throw them in too! This makes the dish fun and unique each time. Cheese can change the whole taste. Feta is a great choice, but try cheddar or goat cheese for something different. You can also add spices. A pinch of paprika or red pepper flakes can give a nice kick. Herbs like basil or thyme can add freshness. Use what you love! For more ideas, check out the Full Recipe for inspiration. {{image_2}} You can easily make this vegetable frittata fit many diets. For a vegetarian version, just leave out any meat. The recipe is already vegetarian-friendly because it uses eggs and fresh veggies. If you want to make it vegan, replace the eggs with a mixture of chickpea flour and water. This mix gives a nice texture and taste. Also, skip the cheese or use a vegan cheese alternative. For gluten-free options, you don’t need to worry at all! The frittata is naturally gluten-free since it uses no flour. Just make sure all your ingredients, like cheese or any added spices, are gluten-free. This way, everyone can enjoy a hearty and healthy breakfast. To make your frittata even more special, try adding different herbs. For a fresh twist, mix in basil, thyme, or rosemary. These herbs add a burst of flavor that brightens the dish. You can also try a blend of herbs for a unique taste. If you want to include meats, think about adding cooked bacon, ham, or sausage. These meats add a savory note that pairs well with the eggs. You can also add cooked chicken for a protein boost. Just remember to cook the meat before adding it to the frittata mix. This helps ensure everything cooks evenly. For the complete recipe, check out the [Full Recipe]. To keep your vegetable frittata fresh, store it in the fridge. Place it in an airtight container. This helps prevent it from drying out. You can keep it for up to three days. If you want to save it longer, consider freezing it. For freezing, let the frittata cool completely. Then, wrap it tightly in plastic wrap and place it in a freezer-safe bag. This way, it can stay fresh for up to two months. When you're ready to eat, just thaw it in the fridge overnight. Reheating frittata requires care to maintain its texture and flavor. The best method is using the oven. Preheat your oven to 350°F (175°C). Place the frittata on a baking sheet. Heat it for about 10-15 minutes. This warms it evenly without making it rubbery. You can also use a microwave if you’re in a hurry. Cut a slice and place it on a microwave-safe plate. Heat it for 30 seconds to 1 minute. Check it often to avoid overheating. Enjoy your frittata warm and tasty, just like when you first made it! Can you make frittata ahead of time? Yes, you can make a frittata ahead of time. It keeps well in the fridge. After baking, let it cool. Store it in an airtight container. It will stay fresh for up to three days. To serve, simply reheat it in the oven or microwave. This makes it a great choice for busy mornings. What vegetables work best in a frittata? Many vegetables work well in a frittata. Spinach and bell peppers add great flavor. Tomatoes bring juiciness, while onions add depth. You can also use zucchini, mushrooms, or broccoli. The key is to sauté them first. This enhances their taste and texture. Nutritional Information Overview A vegetable frittata is a healthy meal option. It is packed with protein from eggs. Each serving offers vitamins from fresh vegetables. It is also a good source of healthy fats, especially from feta and olive oil. This dish can be low in carbs, making it suitable for various diets. Benefits of Eating Vegetables in Breakfast Dishes Eating vegetables at breakfast offers many benefits. It helps you start the day with energy. Veggies provide fiber, which aids digestion. Having them in the morning can also support weight management. Plus, they boost your immune system with essential nutrients. Enjoying a vegetable frittata gives your body a healthy kick. For a tasty frittata, check out the Full Recipe. In this article, we explored the key ingredients and steps for a delicious vegetable frittata. We covered techniques to ensure the right texture and shared customization options for various diets. You learned how to store leftovers for freshness and reheating tips. A vegetable frittata is not just tasty; it’s also packed with nutrients. Enjoy making this dish and feel great about the healthy choices you’re making. Keep experimenting with flavors and vegetables!](https://emmasdish.com/wp-content/uploads/2025/06/d0c92555-845c-40a8-b349-d0793884ec67-300x300.webp)
Honey Garlic Glazed Salmon Scrumptious and Simple Dish
Looking for a quick and tasty meal? Honey Garlic Glazed Salmon is perfect! This dish combines sweet honey with savory garlic for a simple…