


Latest & Greatest
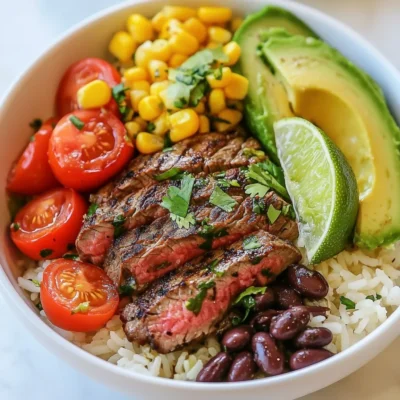
Cilantro Lime Steak Bowls Tasty and Simple Recipe
Ready to wow your taste buds? My Cilantro Lime Steak Bowls recipe is not only simple but bursting with flavor.
Read more…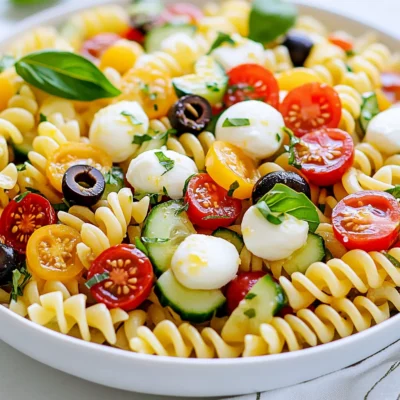
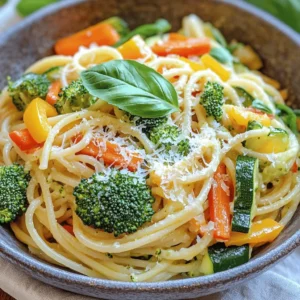
Cold Pasta Salad Flavorful and Easy Recipe
Are you ready to make a cold pasta salad that wows? This flavorful and easy recipe combines fresh ingredients and
Read more…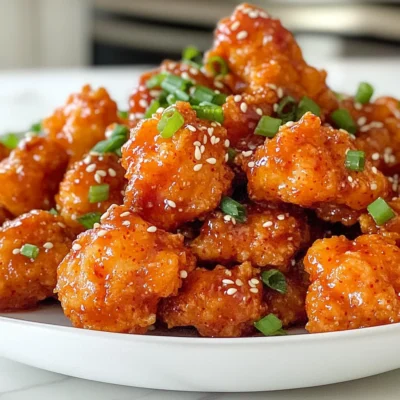
Crispy Korean Popcorn Chicken Irresistible Flavor Boost
Are you ready to elevate your snack game? Crispy Korean popcorn chicken packs a flavor punch that’s hard to resist.
Read more…
Kielbasa Potato Soup Hearty and Comforting Delight
Warm up your dinner table with my Kielbasa Potato Soup! This dish is hearty, comforting, and packed with flavor. I’ll
Read more…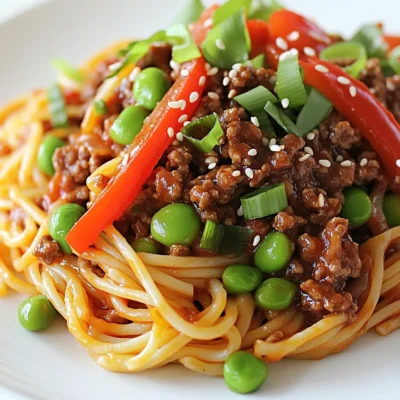
Asian Ground Beef Spaghetti Flavorful and Simple Dish
Looking for a quick and tasty dinner idea? This Asian Ground Beef Spaghetti is your answer! It’s easy to make
Read more…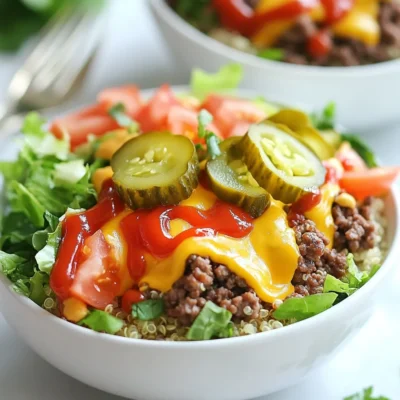
High Protein Cheeseburger Bowls Easy and Delicious Meal
Are you ready to enjoy a meal that’s both tasty and packed with protein? My High Protein Cheeseburger Bowls are
Read more…
Cheesy Beef Burritos with Fries Flavorful Fiesta Dish
Are you ready to spice up your dinner routine? These Cheesy Beef Burritos with Fries are a fiesta on your
Read more…browse recipes


Air Fryer Sweet Potato Fries Crispy and Delicious Treat
Craving a tasty snack that’s easy to make? Look no further than Air Fryer Sweet Potato Fries! These crispy treats are not just delicious…
My Latest Desserts
My Latest Recipes

hey,
i’m !
I’m so happy you’re here!
I’m not just sharing recipes I’m sharing a piece of my heart. I hope these dishes bring you comfort, joy, and maybe even a new favorite.

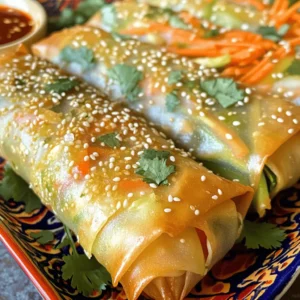

Rainbow Veggie Sushi Rolls Fresh and Colorful Delight
If you crave something fresh and colorful, let’s make Rainbow Veggie Sushi Rolls! These vibrant treats are packed with flavor and good-for-you ingredients. You’ll…
![- 2 cups sushi rice - 2 1/2 cups water - 3 tablespoons rice vinegar - 1 tablespoon sugar - 1 teaspoon salt - 4 sheets of nori (seaweed) - 1 small cucumber, julienned - 1 red bell pepper, thinly sliced - 1 yellow bell pepper, thinly sliced - 1 small carrot, julienned - 1 avocado, sliced - 1 cup purple cabbage, finely shredded - Soy sauce, for dipping - Pickled ginger, for serving (optional) - Sesame seeds, for garnish (optional) To make rainbow veggie sushi rolls, gather these fresh ingredients. The sushi rice is the base. Rinse it well to remove excess starch. This will help the rice become sticky. You need to season the rice with vinegar, sugar, and salt. This adds flavor and balances the dish. Next, pick colorful vegetables. The cucumber adds crunch. Red and yellow bell peppers give sweetness and color. The carrot brings a nice snap, while avocado adds creaminess. Finally, the purple cabbage provides a lovely contrast. Don't forget the nori! This seaweed holds everything together. You can serve the rolls with soy sauce and pickled ginger for extra taste. If you like, sprinkle sesame seeds on top for a nice touch. For the full recipe, refer to the section at the end. Enjoy making these tasty and vibrant rolls! 1. Rinsing the rice: First, rinse the sushi rice in cold water. Do this until the water runs clear. This step removes the extra starch. It helps the rice cook better and keeps it from getting too sticky. 2. Cooking the rice and seasoning it: In a medium pot, add your rinsed rice and 2 1/2 cups of water. Bring it to a boil. Once it boils, reduce the heat to low. Cover the pot and let it simmer for about 20 minutes. After that, turn off the heat and let it steam for another 10 minutes. For seasoning, mix 3 tablespoons of rice vinegar, 1 tablespoon of sugar, and 1 teaspoon of salt in a small bowl. Stir until dissolved. Gently fold this mix into the cooked rice. Be careful not to mash the grains. Let the rice cool to room temperature. 1. Preparing the sushi mat: Place a bamboo sushi mat on a clean surface. This mat will help you roll the sushi easily. 2. Spreading the rice: Lay a sheet of nori on the mat, shiny side down. Wet your hands with water to stop the rice from sticking. Take about 1/2 cup of sushi rice and spread it over the nori. Leave about 1 inch at the top edge. 3. Layering the vegetables: Now it’s time for the fun part! Arrange a line of colorful veggies on the rice. Use your cucumber, red bell pepper, yellow bell pepper, carrot, avocado, and purple cabbage. Spread them out nicely across the middle of the rice. 1. Rolling technique: Carefully lift the mat and start rolling the sushi away from you. Tuck the filling in tightly as you go. Keep rolling until you reach the edge of the nori. Wet the top edge with a little water to seal the roll. 2. Slicing the rolls: Take a sharp knife and slice the roll into bite-sized pieces. Make sure to clean the knife with a damp cloth after each cut. This keeps the rolls neat and helps prevent sticking. 3. Cleaning the knife: It’s important to clean your knife often. This way, your sushi rolls look great and stay intact. Now you have a colorful plate of rainbow veggie sushi! For the full recipe, check out the [Full Recipe]. To make your sushi rolls look great, use a colorful plate. A white plate lets the colors pop. Arrange the rolls neatly, and place a small dish of soy sauce for dipping. Add some pickled ginger on the side. For a final touch, sprinkle sesame seeds on top of the rolls. It adds a nice crunch and looks nice too. A good sushi mat makes rolling easier. I recommend a bamboo rolling mat. It helps you shape the rolls tightly. A sharp knife is key for clean cuts. Use a chef’s knife or a sushi knife. Clean the knife with a damp cloth between cuts. This keeps the rolls from sticking. Pair your sushi with refreshing drinks. Green tea or sparkling water works well. They cleanse your palate. For toppings, use pickled ginger. It adds a zesty flavor. You can also serve soy sauce on the side for dipping. If you want to impress, try making a dipping sauce with soy sauce and a dash of sesame oil. These tips ensure your Rainbow Veggie Sushi Rolls are not just tasty but also beautiful! For the full recipe, check out the recipe section above. {{image_2}} You can easily make these sushi rolls vegan. Just skip any fish or meat. Use more veggies like carrots and avocados. For gluten-free sushi, swap the soy sauce with tamari. This keeps the flavor without gluten. If you don't have some veggies, use what you have. Try zucchini, radishes, or even spinach. For rice vinegar, you can use apple cider vinegar or lemon juice. These options still add a nice tang. If you can't find nori, use lettuce leaves for wrapping. This gives a fresh crunch. To make your sushi rice special, try adding flavor. Use a little garlic powder or sesame oil in the rice. You can also add herbs like cilantro for a fresh taste. Spices like chili powder can give it a kick. Every twist makes your sushi rolls unique. For the [Full Recipe], follow the steps to create vibrant, tasty rolls! To keep your rainbow veggie sushi rolls fresh, store them in an airtight container. This helps prevent the nori from getting soggy. If you have leftovers, wrap each roll in plastic wrap. This keeps moisture out and keeps the rolls nice. You can also use a bamboo mat to keep them tight. You might wonder, can you reheat sushi? The answer is no for traditional sushi. It tastes best fresh. However, if you need to refresh your sushi rolls, you can let them sit at room temperature for a few minutes. This can help them regain some of their original flavor and texture. How long can sushi be stored? Rainbow veggie sushi rolls can last in the fridge for about 24 hours. After that, they may lose their taste and texture. Watch for signs of spoilage. If the nori becomes too soft or the vegetables look wilted, it's time to toss it. Always trust your senses when it comes to food safety. To make rainbow sushi rolls, you need a few steps. First, cook sushi rice and let it cool. Then, lay a sheet of nori on a mat. Spread rice on the nori, leaving some space at the top. Add a mix of colorful veggies, like cucumber, bell peppers, and avocado. Roll it up tightly and seal the edge with water. Finally, slice the roll into pieces. You can find the full recipe above. Yes, you can use brown rice for sushi. Brown rice has more fiber and nutrients than white rice. However, it takes longer to cook and is chewier. White rice is stickier, which helps keep the rolls together. If you prefer brown rice, rinse it well and adjust your cooking time. Yes, nori sheets are quite healthy. They are low in calories and high in vitamins. Nori is rich in iodine, which helps your thyroid. It also has antioxidants that can boost your immune system. Plus, nori provides some protein and fiber, making it a great addition to your diet. If you don’t have a sushi mat, you can use a clean kitchen towel. Lay the nori on the towel and spread the rice as usual. You can also roll the sushi with your hands, but it may be trickier. Another option is to use a cutting board or a flat plate to help you shape your rolls. Yes, you can prepare sushi rolls in advance. However, they taste best fresh. If you make them ahead, store them in an airtight container in the fridge. To keep them from drying out, wrap each roll in plastic wrap. You can also prepare the ingredients and assemble them later. Just keep everything cool until you're ready to roll. Making sushi is fun and tasty! You learned about key ingredients like sushi rice and fresh veggies. I shared easy steps for preparing and rolling your sushi. You now know tips for how to present and store it well. With variations and storage info, you can enjoy sushi your way. Have fun exploring new flavors and impressing friends with your skills!](https://emmasdish.com/wp-content/uploads/2025/05/588d0668-3fa7-4b8c-bbf9-14edba240981.webp)
