Latest & Greatest

Salted Caramel Mocha Frappuccino Copycat Recipe
Do you crave the sweet and salty delight of a Salted Caramel Mocha Frappuccino? You’re in the right place! This
Read more…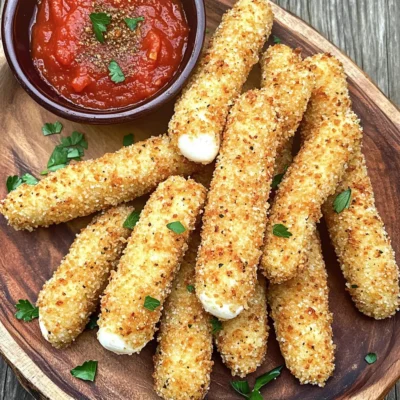
Air Fryer Mozzarella Sticks Crispy and Delicious Snack
Are you craving a crunchy, cheesy snack? Good news! Making air fryer mozzarella sticks at home is simple and fun.
Read more…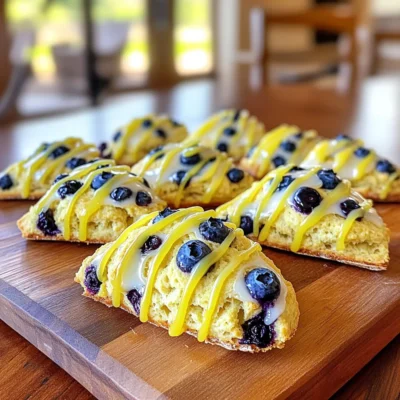
Zesty Lemon Blueberry Scones Flavorful and Fresh Treat
If you’re craving a fresh, zesty treat, you’ve come to the right place! Zesty Lemon Blueberry Scones combine bright citrus
Read more…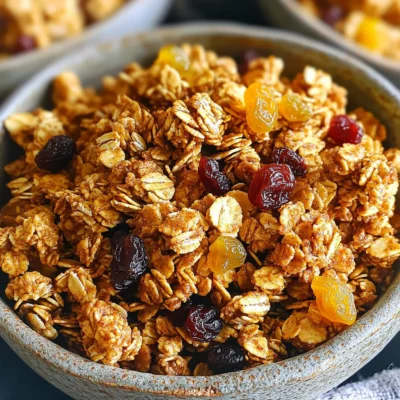
Maple Cinnamon Granola Clusters Fresh and Crunchy Treat
Are you ready to elevate your snack game? Maple Cinnamon Granola Clusters are fresh, crunchy, and oh-so-delicious! In this article,
Read more…
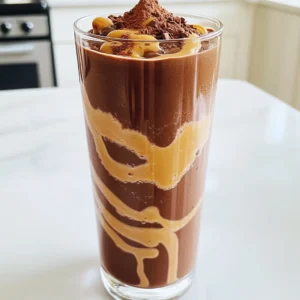
High-Protein Mocha Espresso Smoothie Delight
Craving a delicious way to boost your energy? Try my High-Protein Mocha Espresso Smoothie Delight! This tasty blend packs a
Read more…
No-Bake S’mores Cheesecake Jars Decadent Dessert Treat
You crave a dessert that’s simple yet indulgent, right? Look no further than these No-Bake S’mores Cheesecake Jars. Imagine creamy
Read more…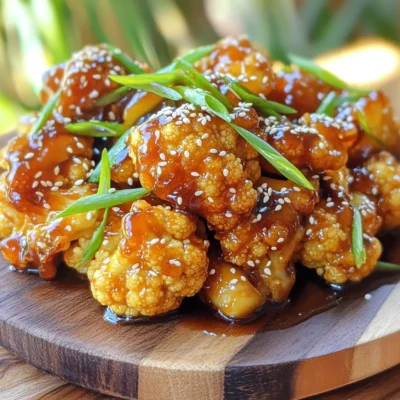
Sticky Sesame Cauliflower Crispy and Flavorful Dish
Are you ready to try a dish that bursts with flavor and crunch? My Sticky Sesame Cauliflower is your new
Read more…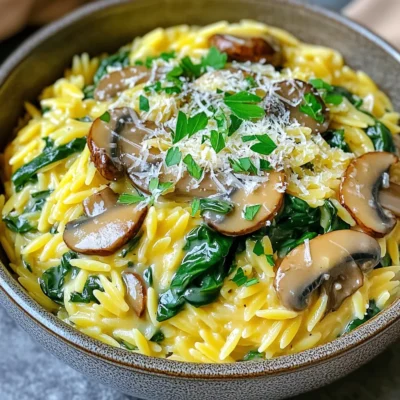
Creamy Mushroom Spinach Orzo Flavorful Comfort Meal
Craving a dish that warms your heart and fills your belly? Look no further than Creamy Mushroom Spinach Orzo! This
Read more…browse recipes


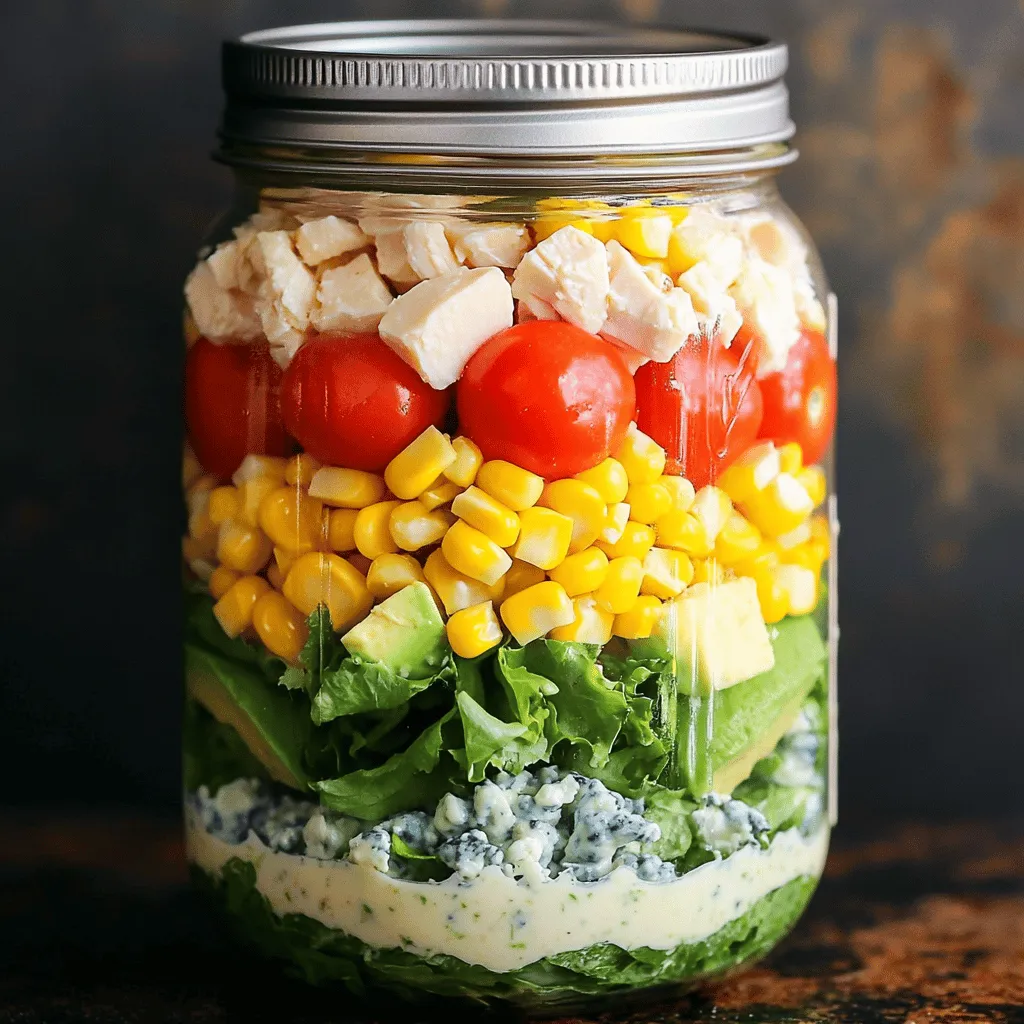
Mason Jar Cobb Salad Fresh and Flavorful Meal Prep
Looking for a fresh meal that’s easy to prep? This Mason Jar Cobb Salad is your answer! Packed with vibrant colors and bold flavors,…
My Latest Desserts
My Latest Recipes

hey,
i’m !
I’m so happy you’re here!
I’m not just sharing recipes I’m sharing a piece of my heart. I hope these dishes bring you comfort, joy, and maybe even a new favorite.
![- 2 cups pecan halves - 1/2 cup granulated sugar - 1 tablespoon ground cinnamon - 1/4 teaspoon salt - 1/4 cup unsalted butter, melted - 1 teaspoon vanilla extract - 1/4 teaspoon nutmeg (optional for extra warmth) - Baking sheet - Parchment paper - Mixing bowls - Measuring cups and spoons Pecans are packed with healthy fats. They can help lower bad cholesterol. They also have fiber, which aids digestion. One ounce of pecans has about 200 calories. Cinnamon offers many health perks, too. It can help reduce inflammation and lower blood sugar. Plus, it adds a warm flavor. When you make cinnamon sugar pecans, you enjoy a tasty treat. Each serving is about 200 calories, plus all the benefits from pecans and cinnamon. For the complete recipe, check out the Full Recipe link. - Preheat your oven to 350°F (175°C). - Line a baking sheet with parchment paper. This keeps the pecans from sticking. - In a medium bowl, mix together: - 1/2 cup granulated sugar - 1 tablespoon ground cinnamon - 1/4 teaspoon salt - 1/4 teaspoon nutmeg (optional) - In a large bowl, stir together: - 1/4 cup unsalted butter, melted - 1 teaspoon vanilla extract - Add 2 cups of pecan halves to the butter mixture. Stir well to coat. - Gradually sprinkle the cinnamon sugar mixture over the pecans. Toss to cover evenly. - Spread the coated pecans in a single layer on the baking sheet. - Bake for 12-15 minutes. Stir halfway to ensure they roast evenly. - Keep an eye on them. They should turn golden brown and smell great. - Once done, let the pecans cool on the baking sheet. They will get crisp as they cool. - Break apart any clumps before serving. For the full recipe, refer to the earlier section. To prevent burning, watch your pecans closely. Set a timer for every five minutes. This way, you can check them and stir as needed. Stirring halfway through baking helps them roast evenly. This ensures all sides get that tasty crunch. Serve your cinnamon sugar pecans in a bright bowl or a glass jar. This makes them look extra inviting. You can also gift them in small bags with ribbons. This adds a personal touch and shows you care. Be careful not to overmix the ingredients. This can lead to clumping and uneven coating. Also, let your pecans cool fully after baking. They will become crisp as they cool down. If you skip this step, they may stay soft and chewy. {{image_2}} You can switch up the flavors of your cinnamon sugar pecans. Try adding cayenne for heat or ginger for warmth. Both spices will give your snack a unique twist. If you want a different sweet taste, use honey or maple syrup instead of granulated sugar. They will add a nice flavor depth. You can cook these pecans in different ways. The stovetop caramelization method is quick. Just melt the butter and sugar in a pan, then add the pecans. Stir until they are coated and golden brown. If you prefer, you can use a slow cooker. This method takes longer but makes the pecans very tender and flavorful. If you follow a vegan diet, use coconut oil instead of butter. This will keep the recipe plant-based. For those watching sugar intake, you can try sugar substitutes like stevia or erythritol. These options help reduce calories while keeping the sweet flavor alive. For the full recipe, be sure to check the complete instructions above. To keep your cinnamon sugar pecans fresh, use an airtight container. A glass jar or a plastic container works well. Make sure the container seals tightly. Store the pecans in a cool, dark place, like a pantry. Avoid direct sunlight or heat, as this can make them go stale quickly. Cinnamon sugar pecans stay fresh for about two weeks when stored properly. Over time, they may lose their crunch and flavor. Signs that they have gone bad include a soft texture, off smell, or any signs of mold. If you notice these signs, it's best to throw them away. Freezing pecans is a great way to keep them fresh longer. Here’s how to do it: 1. Let the pecans cool completely after baking. 2. Place them in a freezer-safe bag or container. 3. Remove as much air as possible to prevent freezer burn. 4. Label the bag with the date for easy reference. To thaw, simply remove them from the freezer. Let them sit at room temperature for about 30 minutes before enjoying. For best results, avoid microwaving them, as this can affect their texture. For the full recipe and to make this delicious snack, click on [Full Recipe]. To make cinnamon sugar pecans, follow these simple steps: 1. Preheat your oven to 350°F (175°C) and line a baking sheet with parchment paper. 2. Mix sugar, cinnamon, salt, and optional nutmeg in a bowl. 3. In a separate bowl, combine melted butter and vanilla extract. 4. Toss in the pecans and coat them well. 5. Gradually add the cinnamon sugar mixture, stirring to coat evenly. 6. Spread pecans in a single layer on the baking sheet. 7. Bake for 12 to 15 minutes, stirring halfway. 8. Once golden brown, cool them completely on the baking sheet. For a detailed guide, check out the Full Recipe. Yes, you can buy cinnamon sugar pecans at various stores. Look for them in: - Grocery stores - Specialty nut shops - Online retailers These options make it easy to enjoy this tasty treat without the hassle of making them yourself. Pecans are not just delicious; they also offer health benefits: - They are high in healthy fats, which support heart health. - They provide fiber, aiding digestion. - Pecans contain vitamins and minerals, like vitamin E and magnesium. - They are rich in antioxidants, which help fight free radicals. This makes pecans a great choice for a healthy snack. Yes, cinnamon sugar pecans are gluten-free. Pecans do not contain gluten, making them a safe snack for those with gluten sensitivities. For gluten-free alternatives, consider: - Using gluten-free granulated sugar. - Checking labels on any pre-made mixes. This way, you can enjoy your snack worry-free! Cinnamon sugar pecans blend taste and health in a simple recipe. We covered ingredients, tools, and nutritional benefits, making this recipe easy to follow. Remember to adjust flavors and storage methods for the best results. Whether you're serving guests or gifting them, these nuts are a hit. Enjoy experimenting with variations to find your favorite mix. Healthy snacking never tasted so good!](https://emmasdish.com/wp-content/uploads/2025/04/af4d0beb-955c-4e50-b81f-80c03cf5187a-300x300.webp)

. Enjoy cooking this simple yet elegant dish! Pat the scallops dry with paper towels. This step is key for a nice sear. If the scallops are wet, they will steam instead of brown. Next, season both sides with salt and black pepper. This simple step adds great flavor. Heat a large skillet over medium-high heat. Add 2 tablespoons of olive oil. When the oil starts to shimmer, place the scallops in the pan. Make sure to leave space between each scallop. This helps them cook evenly. Sear the scallops for 2-3 minutes without moving them. Look for a nice golden crust. Then, flip the scallops and cook for another 2-3 minutes. When both sides are golden and fully cooked, remove them from the pan. Set them aside on a warm plate. In the same pan, reduce the heat to medium. Add 2 tablespoons of unsalted butter and let it melt. Once it's melted, add 2 cloves of minced garlic. Sauté the garlic for about 30 seconds until it becomes fragrant. This adds a rich aroma to the sauce. Next, stir in 1 tablespoon of capers, the zest of 1 lemon, and 2 tablespoons of fresh lemon juice. Scrape any browned bits from the pan. These bits add extra flavor. Let the sauce simmer for 1-2 minutes. This helps the flavors blend well. Return the scallops to the pan. Gently toss them in the lemon caper sauce for about a minute. This lets the scallops soak up the delicious sauce. To serve, place the scallops on a plate. Drizzle the lemon caper sauce over them. For a nice touch, sprinkle with 1 tablespoon of chopped fresh parsley. You can add lemon wedges on the side for extra zest. For the full recipe, check out the complete guide. To get a great sear on your scallops, start by drying them well. Moisture will prevent a golden crust. Use paper towels to pat each scallop dry. This simple step makes a big difference. Next, heat your skillet. Use medium-high heat and add olive oil. Wait until the oil shimmers before adding the scallops. This means it is hot enough. If the oil is too cool, the scallops will not sear properly. You can switch up flavors in your sauce. Try adding a splash of white wine for depth. You can also use Dijon mustard for a tangy touch. For a bit of heat, add red pepper flakes. Herbs can elevate the sauce. Fresh dill or basil can bring new life to your dish. Mix and match herbs to find your favorite flavor profile. Pair your scallops with light side dishes. A crisp salad or sautéed asparagus works well. These sides keep the meal fresh and bright. For wine, choose a dry white. A Sauvignon Blanc or a Pinot Grigio complements the lemon caper sauce. The right wine enhances the meal and adds to the experience. For the full recipe of Pan Seared Scallops with Lemon Caper Sauce, check the earlier sections. {{image_2}} You can switch scallops for shrimp or fish. Shrimp cooks faster, so reduce the time. For fish, adjust the cook time based on thickness. A thick piece may need an extra minute. Thin fish fillets cook quickly and may need less time. This way, you can enjoy a new taste while keeping the same lemon caper sauce. Feel free to play with citrus flavors. Try lime or orange juice for a twist. You can also mix in spices like paprika or cumin for warmth. These small changes can make a big flavor impact. Experiment with different herbs, too! Fresh dill or basil can brighten the dish. To make this dish gluten-free, ensure all ingredients are safe. Most items here are naturally gluten-free. For a vegan version, swap scallops for mushrooms or tofu. Use olive oil instead of butter. Adjust cooking times based on what you choose. The sauce can stay the same, keeping that zesty flavor. To store cooked scallops, let them cool first. Place the scallops in an airtight container. Use parchment paper between layers to avoid sticking. You can keep them in the fridge for up to two days. After that, the texture may start to change. For freezing scallops, do this before cooking. Rinse and pat them dry. Place them in a single layer on a baking sheet and freeze. Once frozen, transfer them to a freezer bag, removing as much air as possible. They can stay frozen for up to three months. For cooked scallops, let them cool and follow the same steps. When you are ready to use them, thaw in the fridge overnight. This keeps them juicy and tender. To reheat scallops, avoid using the microwave. Instead, place them in a skillet over low heat. Add a splash of water or broth to keep them moist. Cover the pan to help retain heat. Cook until warmed through, about five minutes. Common mistakes include cooking them too long or at high heat. This can make them rubbery. Always check for warmth instead of time. With these tips, you can enjoy your scallops again without losing flavor. For this recipe, I recommend using sea scallops. They are larger and meatier than bay scallops. Sea scallops have a sweet taste and a firm texture. Bay scallops are smaller and cook faster, but they can be less meaty. If you want a great sear and a nice bite, sea scallops are the way to go. You can tell scallops are done when they are opaque and firm to the touch. They should have a nice golden crust on the outside. If you poke them with a fork, they should spring back. Overcooked scallops can become rubbery, so keep a close eye on them while cooking. Yes, you can make the lemon caper sauce ahead of time. Just store it in an airtight container in the fridge. When you are ready to serve, gently reheat the sauce in a pan. Stir in a bit of fresh lemon juice to brighten the flavors. This keeps the sauce fresh and ready to go when you cook the scallops. For the full recipe, check out the detailed steps provided earlier. In this blog post, we explored how to prepare delicious sea scallops with a lemon caper sauce. You learned the key ingredients, step-by-step instructions, and tips for perfecting your dish. Remember, patted-dry scallops lead to the best sear. Don’t hesitate to experiment with other proteins or sauces to fit your taste. Lastly, proper storage and reheating methods ensure you enjoy leftovers without losing flavor. Enjoy your cooking journey!](https://emmasdish.com/wp-content/uploads/2025/04/f5316e19-2e1c-421a-9deb-cda128bd7a83-300x300.webp)
Asian Mushroom Ramen Noodles Flavorful and Easy Recipe
Are you craving a warm, hearty bowl of ramen? You’re in for a treat! This Asian Mushroom Ramen Noodles recipe combines tasty mushrooms, fresh…
![Here are the ingredients you need for this tasty Asian mushroom ramen noodles recipe: - 200g ramen noodles - 300g mixed mushrooms (shiitake, oyster, button), sliced - 4 cups vegetable broth - 1 tablespoon sesame oil - 2 cloves garlic, minced - 1 inch ginger, minced - 2 tablespoons soy sauce - 1 tablespoon miso paste (white or yellow) - 1 tablespoon rice vinegar - 1 teaspoon chili paste (adjust to taste) - 1 cup baby spinach - 2 green onions, sliced - Sesame seeds for garnish - Fresh cilantro leaves for garnish These ingredients come together to create a flavorful and easy dish that warms the soul. The mix of mushrooms adds a deep umami flavor, while the broth ties everything together. You can easily find these items at your local grocery store or farmer's market. For the complete recipe details, check out the Full Recipe link. To cook the ramen noodles, boil water in a pot. Add the ramen noodles and cook them for 3-4 minutes. Check the package for exact times. Once they are tender, drain them and set aside. Timing is key here; undercooking helps keep noodles firm. In a large pot, heat 1 tablespoon of sesame oil over medium heat. Once hot, add 2 cloves of minced garlic and 1 inch of minced ginger. Sauté these for 1-2 minutes until they smell great. This step builds a strong flavor base for your ramen. Next, add 300g of sliced mixed mushrooms to the pot. Stir-fry them for about 5-7 minutes. You want them to be tender and slightly browned. Stir-frying at medium heat helps intensify their flavor. Now, pour in 4 cups of vegetable broth. Add 2 tablespoons of soy sauce, 1 tablespoon of miso paste, 1 tablespoon of rice vinegar, and 1 teaspoon of chili paste. Stir well to mix everything. Let the broth simmer for a few minutes. This mix creates a rich and savory taste. Once your broth is simmering, add 1 cup of baby spinach. Cook it for 2-3 minutes until it wilts. Then, gently add the cooked ramen noodles to the pot. Stir everything to coat the noodles in the broth. Heat for another 2-3 minutes. Ladle the ramen into bowls. Make sure each bowl gets plenty of mushrooms and spinach. For the final touch, garnish with sliced green onions, sesame seeds, and fresh cilantro leaves. This adds color and flavor. For the full recipe, check the details above. To enhance the depth of your broth, use fresh ingredients. Fresh garlic and ginger will add zest. Miso paste gives a rich umami flavor. You can adjust the soy sauce for a saltier kick. Add a splash of rice vinegar to balance the savory notes. This layer of flavors makes every sip tasty. To avoid mushy noodles, cook them just until tender. Follow the package instructions closely. Drain them promptly, and rinse with cold water. This halts the cooking process. Timing is key; add the noodles to the broth right before serving. This keeps them firm and perfect. If you can’t find certain mushrooms, try using portobello or enoki. Both add unique flavors. For added nutrition, toss in veggies like bok choy or carrots. You can also add proteins like tofu or chicken for a heartier meal. Customize your ramen to suit your taste. {{image_2}} To make your ramen spicy, add chili oil. Just a small drizzle can bring heat. You can also mix in red pepper flakes or Sriracha. Adjust the spice to your taste. Some like it hot, while others prefer mild flavors. Adding heat can make the dish more exciting. If you want a punch, use more chili paste. The heat level can change with each bite! If you want a vegan version, choose a plant-based broth. Look for options without animal products. You can even make your own broth with veggies and herbs. For protein, swap in tofu or tempeh. Both options soak up flavor well. You could also add chickpeas for a nice texture. These changes make the dish filling and satisfying. You can enjoy this ramen cold, too! Just cool the noodles after cooking. Mix them with fresh veggies like cucumber and bell peppers. For toppings, add sliced radishes and sesame seeds. A drizzle of soy sauce or sesame dressing adds flavor. This cold version is perfect for warm days or picnics! Looking for the full recipe? Check out the [Full Recipe]. To keep your Asian mushroom ramen fresh, store leftovers in an airtight container. Glass or plastic containers work well. Make sure to cool the ramen to room temperature before sealing. This helps avoid condensation, which can make the noodles soggy. Store your ramen in the fridge for up to three days. When you’re ready to enjoy your leftover ramen, reheating is key. I recommend using the stovetop. Just add a little broth or water to a pot and heat gently. Stir often to keep the noodles from sticking. This method helps preserve the texture and flavor of your ramen. You can also use a microwave if you're short on time. Just cover the bowl and heat in short bursts, stirring in between. If you want to save your ramen for later, you can freeze it. First, cool the ramen completely. Then, separate the noodles from the broth. Place each in a freezer-safe bag or container. This way, the noodles won’t get mushy when thawed. To thaw, simply place in the fridge overnight. For a quick option, you can microwave it, but be gentle to keep the noodles intact. Yes, you can use many types of noodles. If you want gluten-free options, try rice noodles or buckwheat noodles. These choices cook quickly and offer a nice texture. For a healthier option, whole grain noodles work well too. Just remember to check the cooking times for your noodles, as they may differ from regular ramen. To add more heat, use chili paste or chili oil. You can mix it into the broth while cooking. Another option is to sprinkle red pepper flakes on top before serving. If you want a kick, try adding sliced jalapeños or fresh chili peppers. Adjust the spice level to suit your taste! To make your ramen more filling, consider adding protein. Tofu is a great choice for a vegetarian option. You can cube and sauté it until golden before adding it to the broth. If you prefer meat, grilled chicken or beef slices work nicely too. Eggs are another great addition; simply soft-boil them and place on top of your noodles. You can store cooked ramen in the fridge for up to three days. Place it in an airtight container to keep it fresh. When reheating, add a splash of broth or water to keep the noodles from drying out. For longer storage, you can freeze the broth and noodles separately. This way, you can enjoy your ramen later, just like the first time! You've learned how to make delicious ramen from scratch. We covered ingredients, cooking methods, and tips for the best flavor. I shared ideas for variations and how to store leftovers. Ramen is simple yet fun to customize. Whether you enjoy it spicy or as a cold salad, the options are endless. Remember, great ramen starts with good ingredients and careful cooking. Dive in, experiment, and make this dish your own!](https://emmasdish.com/wp-content/uploads/2025/05/ccff1442-7f7e-4302-a921-eb22a6107e7c.webp)
