Latest & Greatest
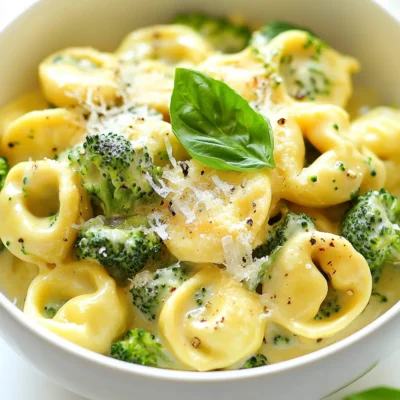
Creamy Chicken Tortellini with Broccoli Delight
Welcome to Creamy Chicken Tortellini with Broccoli Delight! If you’re craving a comforting meal that balances creamy goodness with healthy
Read more…
Easy Chicken Korma Flavorful and Quick Dinner Guide
Craving a tasty meal that’s ready in no time? You’re in the right place! My Easy Chicken Korma recipe offers
Read more…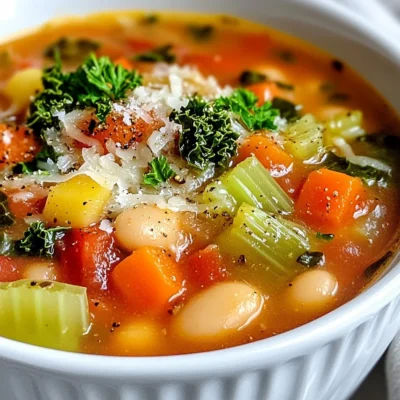
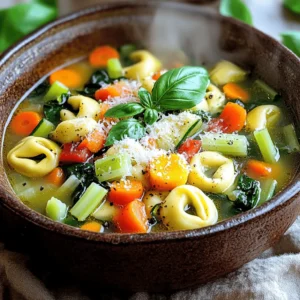
Tuscan White Bean Soup Flavorful and Nourishing Meal
If you’re looking for a meal that’s both flavorful and nourishing, Tuscan White Bean Soup is a must-try. This hearty
Read more…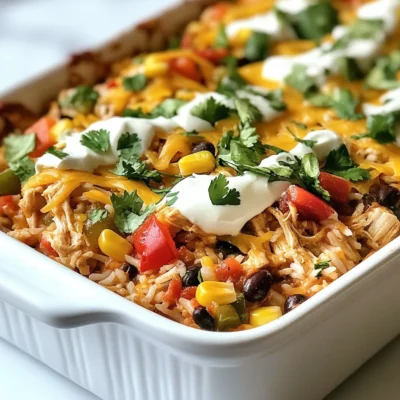
Fajita Chicken Casserole Flavorful and Easy Dinner
Are you looking for an easy and tasty dinner option? This Fajita Chicken Casserole is just the dish for you!
Read more…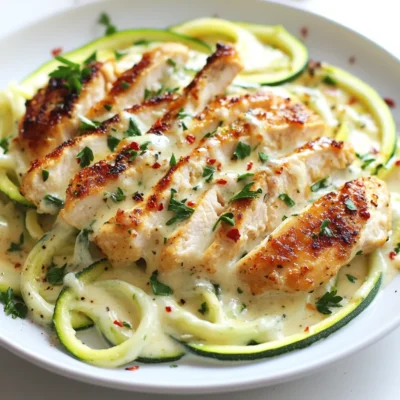
Zucchini Noodle Chicken Alfredo Flavorful Dinner Dish
Ready to whip up a delicious, healthy dinner? Zucchini Noodle Chicken Alfredo is your answer! This dish combines tender chicken
Read more…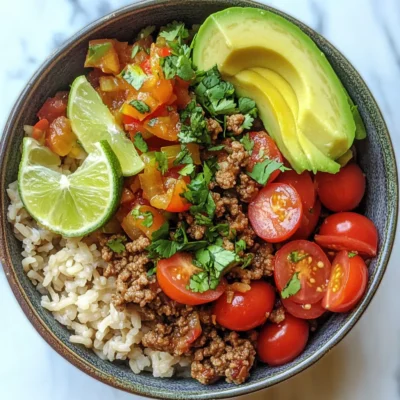
Turkey Taco Bowl Flavorful and Easy Dinner Recipe
Looking for a quick and tasty dinner? This Turkey Taco Bowl is your answer! Packed with lean ground turkey, colorful
Read more…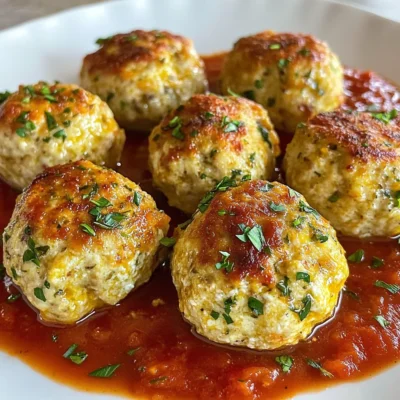
Ricotta Chicken Meatballs Flavorful and Easy Recipe
If you’re looking for a tasty and easy dinner, try my Ricotta Chicken Meatballs. These meatballs are juicy and full
Read more…
Skeleton Halloween Cupcakes Fun and Spooky Treats
Get ready to bake spooky fun with Skeleton Halloween Cupcakes! These delightful treats are perfect for Halloween parties, school events,
Read more…browse recipes


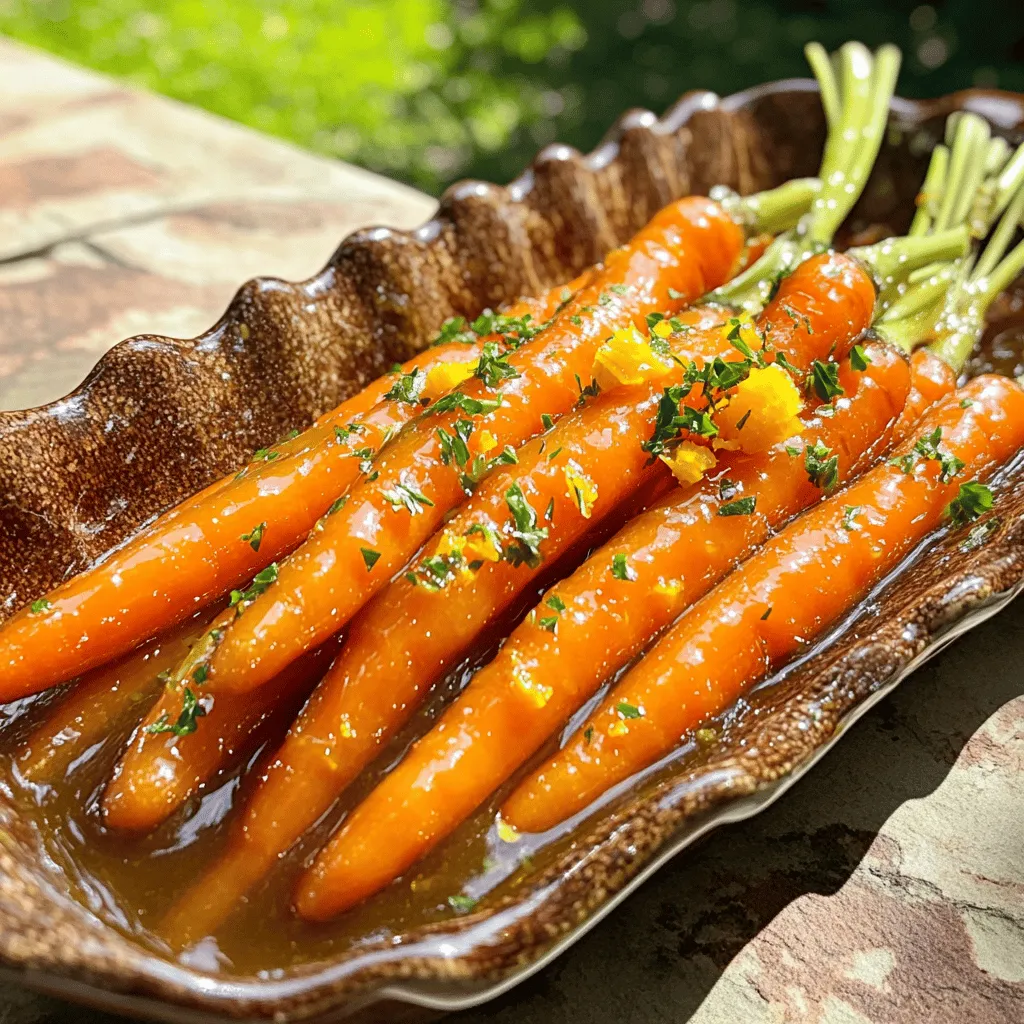
Honey Citrus Glazed Carrots Flavorful and Easy Recipe
Looking for a simple and delicious side dish? My Honey Citrus Glazed Carrots are perfect for any meal. This recipe blends sweet honey and…
My Latest Desserts
My Latest Recipes

hey,
i’m !
I’m so happy you’re here!
I’m not just sharing recipes I’m sharing a piece of my heart. I hope these dishes bring you comfort, joy, and maybe even a new favorite.

![- 1 pound large shrimp, peeled and deveined - 2 tablespoons olive oil - 2 teaspoons chili powder - 1 teaspoon cumin - 1 teaspoon garlic powder - 1 teaspoon paprika - ½ teaspoon cayenne pepper (adjust to taste) - Salt and pepper to taste To make these shrimp tasty, start with fresh shrimp. The olive oil blends well with spices. Chili powder adds a warm kick, while cumin gives depth. Garlic powder and paprika give it a rich flavor. Cayenne pepper adds heat. Adjust it to your liking! - 8 small corn tortillas - 1 cup green cabbage, shredded - 1 cup red cabbage, shredded - ½ cup carrots, grated - ½ cup cilantro, chopped - 2 tablespoons lime juice The slaw adds crunch and freshness. The green and red cabbage bring color. Carrots add sweetness, while cilantro gives a burst of flavor. Lime juice ties it all together with brightness. - ¼ cup sour cream or Greek yogurt (for sauce) - Extra lime wedges for serving Sour cream or Greek yogurt makes a creamy sauce. Lime wedges add a zesty touch when serving. You can also try avocado slices or sliced radishes for extra flavor and fun! For the full recipe, check out the details to create these delicious spicy shrimp tacos. To start, grab a bowl. In it, mix these ingredients: - 2 tablespoons olive oil - 2 teaspoons chili powder - 1 teaspoon cumin - 1 teaspoon garlic powder - 1 teaspoon paprika - ½ teaspoon cayenne pepper (adjust to taste) - Salt and pepper to taste Stir them together. This mix creates a zesty marinade that gives the shrimp great flavor. Now, add 1 pound of shrimp to the bowl. Toss the shrimp in the marinade, ensuring each piece is coated. Let it sit for about 15 minutes. This allows the shrimp to soak up the spices. Next, heat a skillet over medium-high heat. Once hot, add the marinated shrimp. Cook for about 2-3 minutes on each side. The shrimp will turn pink and opaque when done. Remove them from the heat. While the shrimp cooks, prepare the slaw. In a large bowl, mix these: - 1 cup green cabbage, shredded - 1 cup red cabbage, shredded - ½ cup carrots, grated - ½ cup cilantro, chopped Toss everything together until well mixed. Next, squeeze in 2 tablespoons of lime juice. This adds a fresh, tangy taste. Toss again to combine all the flavors. To warm the tortillas, use another skillet. Heat 8 small corn tortillas for about 30 seconds on each side. They should become soft and easy to fold. Now, it’s time to build your tacos. Place a few shrimp on each tortilla. Add a generous scoop of slaw on top. For a final touch, drizzle a simple lime-infused sauce made from sour cream or Greek yogurt. Serve with extra lime wedges on the side. For the full recipe, check out the detailed steps provided. Cooking Time and Temperature Recommendations Cook shrimp quickly. Heat your skillet to medium-high. Cook the shrimp for 2-3 minutes on each side. Look for shrimp to turn pink and opaque. This shows they are done. Avoiding Overcooking Be careful not to overcook the shrimp. Overcooked shrimp can become tough. Keep a close eye on them while cooking. Remove them from heat as soon as they finish cooking. Adjusting Spice Levels You can change the spice level. If you like it hotter, add more cayenne pepper. For less heat, cut back on the cayenne. Taste the marinade before adding the shrimp to adjust as needed. Ingredient Substitutions Feel free to swap ingredients. If you don’t have chili powder, use taco seasoning. Instead of cabbage, try shredded lettuce or kale. Get creative with what you have at home. Pairing with Sides Serve your tacos with sides. Cilantro rice or black beans work great. You can also add a fresh corn salad for extra crunch. These sides will complement the tacos well. Creative Serving Ideas Think outside the box when serving. Try using lettuce wraps instead of tortillas. This makes it a fun low-carb option. You can also serve the shrimp on a platter and let guests build their own tacos. For the complete recipe, check the [Full Recipe] section! {{image_2}} You can easily make these tacos gluten-free. Use corn tortillas as your base. They are naturally gluten-free. Check the label to ensure they are certified gluten-free. This way, you can enjoy the tacos without worry. For a dairy-free version, swap out the sour cream. Use dairy-free yogurt or avocado instead. Both options add creaminess without dairy. You can also squeeze extra lime for a zesty kick. You can change the marinade for more flavor. Try adding lime zest or fresh herbs like cilantro. For a sweeter taste, mix in some honey or agave. You can also switch chili powder with a smoky chipotle spice. The slaw can be fun to play with! You can use different veggies like radishes or bell peppers. Try adding mango for a sweet touch. This gives a fresh twist to your tacos. Don't hesitate to experiment! Toppings can make your tacos unique. Add diced avocado for creaminess or pickled onions for tang. Fresh jalapeños can increase the heat. You can also sprinkle some queso fresco for extra flavor. For garnishes, fresh cilantro adds a pop of color. Lime wedges are perfect for squeezing over. You can even use a drizzle of hot sauce for more spice. These little touches can enhance your taco experience! For the full recipe, check out the [Full Recipe]. - Best Practices for Refrigeration Keep any leftover tacos in an airtight container. Store the shrimp and slaw separately. This helps prevent sogginess. The tacos can stay fresh for up to three days. - Reheating Tips To reheat the shrimp, use a skillet over medium heat. Cook for about two minutes until warm. For the slaw, eat it cold for the best crunch. If you prefer it warm, lightly heat it in the skillet but avoid overcooking. - How to Freeze Shrimp and Slaw To freeze the shrimp, place it in a zip-top bag. Remove as much air as possible before sealing. For the slaw, store it in a separate airtight container. Shrimp can last up to three months, while slaw is best used within one month. - Best Use of Freezing Leftovers Use frozen shrimp in soups, stir-fries, or tacos later. The slaw can be added as a fresh topping for other dishes. Remember, thaw shrimp in the fridge overnight before cooking. This helps maintain the texture and flavor. For the full recipe of Spicy Shrimp Tacos, check out the detailed instructions! What type of shrimp is best for tacos? I recommend using large shrimp for tacos. They hold their shape and flavor well. Fresh or frozen shrimp works great. Just make sure they are peeled and deveined. This saves you prep time. Can I prepare the slaw in advance? Yes, you can make the slaw ahead of time. Just mix the cabbage, carrots, and cilantro. Add lime juice just before serving. This keeps the slaw fresh and crunchy. How do I grill the shrimp instead of pan-frying? To grill shrimp, preheat your grill to medium-high. Skewer the shrimp to prevent them from falling through. Brush them with olive oil and season with spices. Grill each side for 2-3 minutes until they turn pink. What can I substitute for corn tortillas? If you need a substitute, try flour tortillas or lettuce wraps. Flour tortillas are softer and easier to fold. Lettuce wraps make it a low-carb option. Either works well with the shrimp and slaw. Are these tacos healthy? Yes, these tacos can be healthy. Shrimp is low in calories and high in protein. The slaw adds fiber and vitamins. Just watch the sauce and tortillas for extra calories. What are the calorie counts for Spicy Shrimp Tacos with Slaw? Each taco has about 200-250 calories, depending on the toppings. The full recipe makes four servings. You can check the Full Recipe for detailed nutrition facts. In this blog post, we covered spicy shrimp tacos from start to finish. We explored the essential ingredients, like shrimp, slaw, and toppings. You learned step-by-step instructions for preparing shrimp and making slaw. I shared tips for perfecting your shrimp and offered tasty variations. To wrap up, these tacos allow for creativity and personal flair. You can adjust flavors and toppings to suit any taste. Enjoy making these delicious tacos for your next meal. They bring joy to the table and delight every palate.](https://emmasdish.com/wp-content/uploads/2025/06/27d20a44-b4df-42f5-9b15-66b8cc294368-300x300.webp)


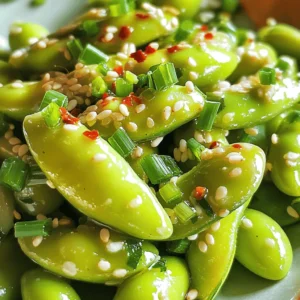
No Bake Zucchini Energy Bites Simple and Nutritious
Looking for a quick boost of energy without turning on the oven? These No Bake Zucchini Energy Bites are simple and nutritious! Packed with…

