

Latest & Greatest

Air Fryer Apple Hand Pies Simple and Tasty Recipe
If you love sweet treats but want to keep it simple, Air Fryer Apple Hand Pies are for you! You
Read more…
Creamy Pepperoncini Chicken Skillet Easy Weeknight Meal
Looking for an easy weeknight meal? Let me introduce you to my Creamy Pepperoncini Chicken Skillet. This dish packs a
Read more…
Vegan Creamy Tomato Basil Soup Comforting and Easy Recipe
Are you craving a warm, soothing bowl of soup that’s both vegan and creamy? Look no further! My Vegan Creamy
Read more…
Creamy Veggie Soup One-Pot Delightful Recipe
Looking for a warm, hearty meal that’s easy to make? This Creamy Veggie Soup is your perfect one-pot solution! Packed
Read more…
Maple Pecan Sticky Buns Irresistible and Soft Treat
If you crave a sweet treat that melts in your mouth, these Maple Pecan Sticky Buns are for you! With
Read more…
One Pot Sausage and Rice Easy Flavorful Meal
Looking for an easy and delicious meal? One Pot Sausage and Rice is the answer! This dish packs a punch
Read more…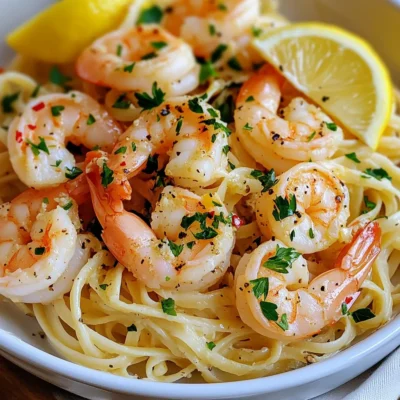
Garlic Butter Shrimp Scampi Flavorful Dinner Delight
Do you want a dinner that’s both quick and packed with flavor? Garlic Butter Shrimp Scampi is your answer! With
Read more…
Spinach Stuffed Chicken Breast Flavorful and Easy Dish
Looking for a simple yet tasty meal? Spinach Stuffed Chicken Breast is packed with flavor and nutrients. This dish is
Read more…browse recipes


Spooky Halloween Snack Mix Fun and Festive Treat
Get ready for a frightfully fun treat! This Spooky Halloween Snack Mix is perfect for Halloween parties, family gatherings, or cozy nights in. With…
My Latest Desserts
My Latest Recipes

hey,
i’m !
I’m so happy you’re here!
I’m not just sharing recipes I’m sharing a piece of my heart. I hope these dishes bring you comfort, joy, and maybe even a new favorite.


Crispy Air Fryer Chicken Wings Tasty and Easy Recipe
Are you ready to enjoy the best chicken wings ever? My Crispy Air Fryer Chicken Wings are an easy way to bring your favorite…

