
Latest & Greatest

Pumpkin Cream Cheese Truffles Creamy Delight Recipe
Love fall flavors? You’ll adore these Pumpkin Cream Cheese Truffles! This creamy delight blends the rich taste of pumpkin with
Read more…
Pumpkin Cheesecake Swirl Brownies Delightful Treat
Get ready to enjoy the best fall treat! These Pumpkin Cheesecake Swirl Brownies mix rich chocolate with a creamy pumpkin
Read more…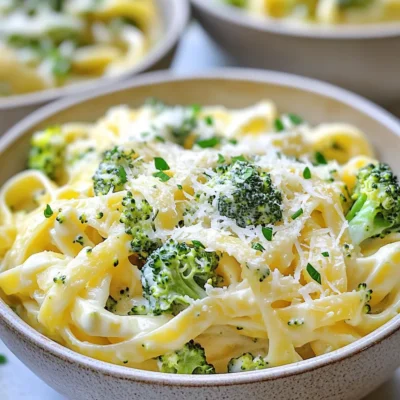
One Pot Broccoli Alfredo Pasta Simple and Tasty Meal
If you’re looking for a quick and easy dinner, you’ll love this One Pot Broccoli Alfredo Pasta. This simple dish
Read more…
Chocolate Peanut Butter Mug Cake Quick and Easy Delight
Craving a quick treat? This Chocolate Peanut Butter Mug Cake is your answer! In just a few minutes, you can
Read more…
Slow Cooker Ham and Potato Soup Flavorful Comfort Meal
Looking for a warm and hearty meal? My Slow Cooker Ham and Potato Soup is perfect for you! This easy
Read more…
Sheet Pan Honey Garlic Chicken Fajitas Delight
Are you ready for a dinner that’s as simple as it is delicious? Let me introduce you to my Sheet
Read more…
Air Fryer Garlic Butter Cod Bites Flaky and Flavorful
Craving a quick seafood dish that’s both flaky and flavorful? Air fryer garlic butter cod bites are your answer! In
Read more…
No Bake S’mores Cheesecake Cups Quick and Easy Recipe
Are you ready to whip up a sweet treat that requires zero baking? Our No Bake S’mores Cheesecake Cups are
Read more…browse recipes


Garlic Herb Butter Salmon Quick and Flavorful Recipe
Are you ready to delight your taste buds with a dish that’s quick, easy, and bursting with flavor? Today, I’m sharing my favorite recipe…
My Latest Desserts
My Latest Recipes

hey,
i’m !
I’m so happy you’re here!
I’m not just sharing recipes I’m sharing a piece of my heart. I hope these dishes bring you comfort, joy, and maybe even a new favorite.
![- 1 block (200g) of feta cheese - 300g pasta (penne or fusilli) - 2 cups cherry tomatoes, halved - 4 cloves garlic, minced - 1 teaspoon dried oregano - 1 teaspoon red pepper flakes - ½ cup olive oil - Salt and pepper to taste - Fresh basil leaves - Zest of 1 lemon To create this dish, start with fresh, high-quality ingredients. The feta cheese is key. It melts beautifully and adds a creamy texture. I love using ripe cherry tomatoes. They burst with flavor as they cook. The seasonings enhance the dish's taste. Garlic brings a strong aroma, while oregano adds earthiness. The red pepper flakes give a kick that you can adjust based on your spice level. Olive oil is essential for richness. Don’t forget the garnishes! Fresh basil brightens the dish with its herbal note. The lemon zest adds a zesty punch. Combining all these ingredients creates a vibrant and tasty meal. This recipe is simple yet impressive. You can easily find all these ingredients at your local market. For the full recipe, check out the details above. Enjoy your cooking! - Preheat the oven to 400°F (200°C). - In a large baking dish, combine: - 2 cups cherry tomatoes, halved - 4 cloves garlic, minced - 1 teaspoon dried oregano - 1 teaspoon red pepper flakes - ½ cup olive oil - Season with salt and pepper. Toss to coat all the ingredients. - Place 1 block (200g) of feta cheese in the center of the dish. - Bake for 30 minutes until tomatoes burst and feta turns golden. - Cook 300g pasta according to package instructions until al dente. - Drain and set aside until ready to mix. - Once baked, mash the feta and tomatoes with a fork until creamy. - Toss in the cooked pasta and the zest of 1 lemon. Mix well to combine. For the complete instructions and detailed steps, check the Full Recipe. To make your baked feta pasta shine, use ripe cherry tomatoes. They add a nice sweetness to the dish. You can also adjust the red pepper flakes to control the heat. If you want more spice, add a bit more, but start slow. Don't be afraid to try different cheeses. Goat cheese can bring a tangy twist to your dish. You can also use flavored feta for added taste. Herbs or spices in the cheese can enhance the overall flavor. Pair your baked feta pasta with crusty bread or a light salad for balance. This adds texture and freshness. For a vibrant finish, garnish with extra basil and lemon zest. This simple touch enhances both flavor and presentation. For the full recipe, check out the [Full Recipe]. {{image_2}} You can easily mix things up with fresh greens. I love adding spinach or arugula. They add color and nutrients. You can also use other seasonal veggies like zucchini. Just chop them up and toss them in before baking. This keeps the dish fresh and exciting. Feel free to switch up the pasta shape. Spaghetti or rigatoni work great too. If you need a gluten-free option, choose gluten-free pasta. It tastes just as good and works well with the feta sauce. Want to add some protein? Grilled chicken or shrimp are perfect choices. They bring a nice flavor and texture. For a vegetarian option, try adding chickpeas. They boost your meal with healthy protein and add a nice bite. For the full recipe, check out the Baked Feta Pasta Fiesta section above. - Store your baked feta pasta in an airtight container. - It stays fresh for up to 3 days in the fridge. - Make sure to let it cool completely before storing. - You can reheat the pasta in a microwave. - Alternatively, use an oven for even heating. - Add a splash of olive oil to keep it moist. - You can freeze the pasta for up to 2 months. - To enjoy later, thaw it in the fridge overnight. - Reheat it fully before serving for the best taste. This quick and flavorful dish is perfect for busy nights! For the full recipe, check out the details above. To make Baked Feta Pasta vegan, swap the feta cheese with tofu or a vegan cheese alternative. Tofu works well because it absorbs flavors and gives a creamy texture. You can marinate the tofu in olive oil and herbs for extra taste before baking. Yes, you can use goat cheese or mozzarella as great substitutes. Goat cheese adds a tangy flavor that pairs well with the tomatoes. Mozzarella gives a creamy, stretchy texture that is delightful in this dish. Baked Feta Pasta pairs well with a simple salad or crusty bread. A green salad with fresh veggies complements the pasta’s rich flavor. Crusty bread is perfect for soaking up the creamy sauce. To adjust the spice level, modify the amount of red pepper flakes to suit your taste. Add less for a milder dish or more for a spicy kick. You can also use fresh chili peppers for a different heat profile. For the full recipe, check out the [Full Recipe]. You can make a delicious baked feta pasta with just a few simple steps. Start with quality ingredients, bake the feta and tomatoes, then mix it with pasta. This dish is easy to adapt with different vegetables and cheeses. Remember to store leftovers properly and feel free to experiment with flavors. Enjoy this warm and creamy meal anytime. It’s a crowd-pleaser that you can share with family and friends. Happy cooking!](https://emmasdish.com/wp-content/uploads/2025/07/5b57608a-14be-4aed-bd2a-b719a965912e-300x300.webp)


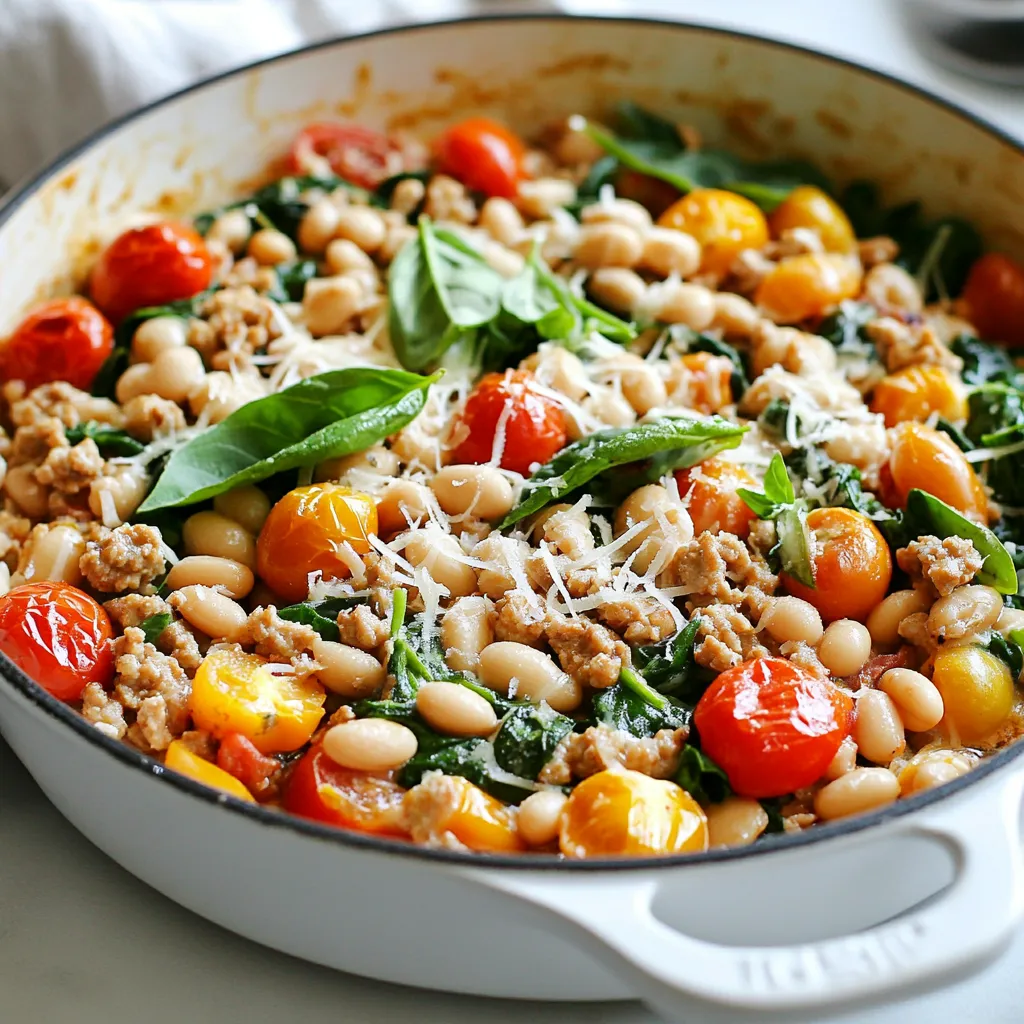
Tuscan White Bean Turkey Skillet Flavorful Dinner Delight
Are you ready to make dinner exciting? The Tuscan White Bean Turkey Skillet is packed with flavor and nutrition. This one-pan meal combines ground…