
Latest & Greatest

Cheesy Ranch Potato Sausage Skillet Delightful Dish
If you’re looking for a quick, tasty dinner, you’ve found it! My Cheesy Ranch Potato Sausage Skillet is a winning
Read more…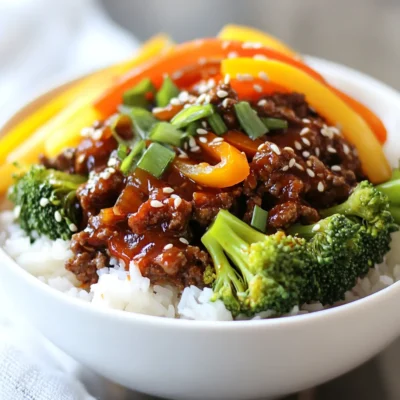
Spicy Korean Beef Bowls Simple and Tasty Recipe
Are you craving a dish that packs a punch? Spicy Korean Beef Bowls are the answer! This quick and easy
Read more…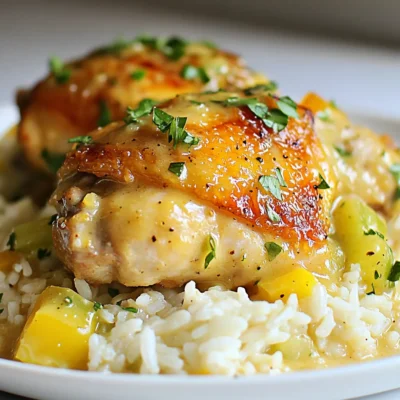
Smothered Chicken and Rice Flavorful Comfort Dish
Looking for a warm and filling meal that hits the spot every time? Smothered Chicken and Rice is the perfect
Read more…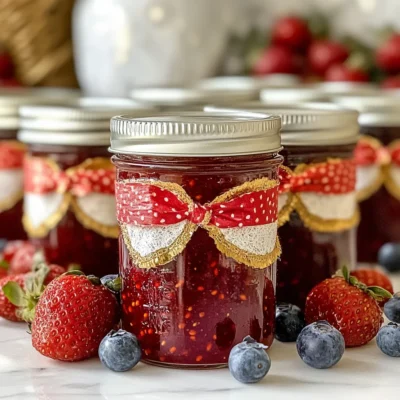
Amish Christmas Jam Festive and Flavorful Delight
Are you ready to spread some joy this holiday season? Amish Christmas Jam brings festive flavors to your table, perfect
Read more…
Chicken Tortellini Broccoli Delightful Creamy Dish
Are you ready to whip up a tasty meal? My Chicken Tortellini Broccoli dish is creamy, rich, and packed with
Read more…
Teriyaki Ground Beef Stir-Fry Quick and Flavorful Meal
Looking for a quick and tasty meal? You’ve landed in the right place! This Teriyaki Ground Beef Stir-Fry is easy
Read more…
Grilled Cheese Burrito Copycat Easy and Tasty Recipe
Craving something cheesy and satisfying? Look no further! This Grilled Cheese Burrito Copycat recipe gives you the best of both
Read more…
Chicken Enchiladas with White Sauce Simple Recipe
Are you ready to spice up your dinner routine? In this simple recipe for Chicken Enchiladas with White Sauce, I’ll
Read more…browse recipes

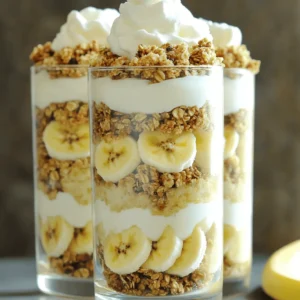


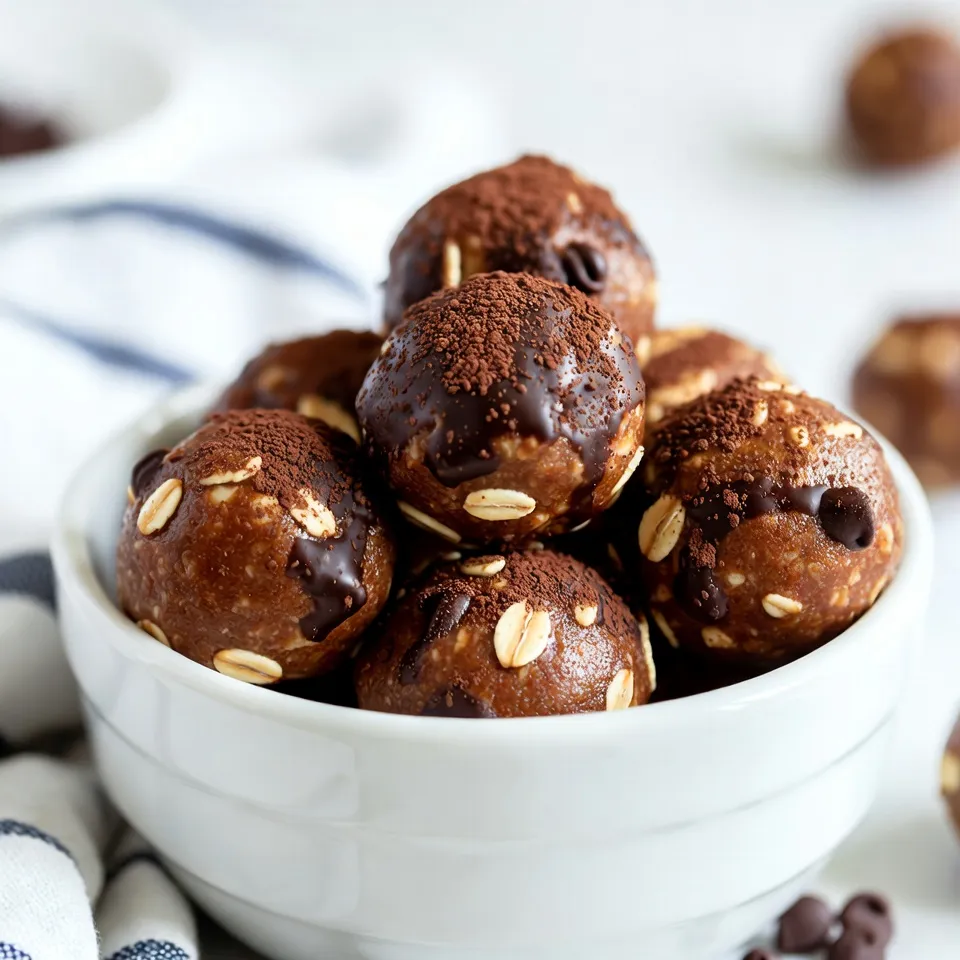
Chocolate Peanut Butter Energy Bites Tasty and Nutritious
If you’re craving a quick snack that’s both delicious and good for you, look no further! Chocolate Peanut Butter Energy Bites are the perfect…
My Latest Desserts
My Latest Recipes

hey,
i’m !
I’m so happy you’re here!
I’m not just sharing recipes I’m sharing a piece of my heart. I hope these dishes bring you comfort, joy, and maybe even a new favorite.

![To make spinach stuffed chicken breasts, gather these key items: - 4 boneless, skinless chicken breasts - 2 cups fresh spinach, chopped - 1 cup ricotta cheese - 1/2 cup grated Parmesan cheese - 1/2 cup cream cheese, softened - 2 cloves garlic, minced - 1 teaspoon Italian seasoning - 1/2 teaspoon salt - 1/4 teaspoon black pepper - 1/4 cup sun-dried tomatoes, chopped (optional) - 1 tablespoon olive oil - 1 cup marinara sauce (for serving) - Fresh basil leaves (for garnish) You can change up the flavor with these options: - Feta cheese instead of ricotta - Chopped artichokes for a unique twist - Fresh herbs like parsley or dill - Spicy red pepper flakes for heat Each serving of spinach stuffed chicken breasts offers: - Calories: 350 - Protein: 42g - Carbohydrates: 8g - Fat: 16g - Fiber: 1g - Sodium: 600mg This dish is tasty and healthy. It combines lean protein with fresh spinach and cheese. Enjoy it as a filling meal that fuels your day! For the full recipe, check out the cooking section. First, preheat your oven to 375°F (190°C). This step sets the stage for cooking. A hot oven helps the chicken cook evenly and keeps it juicy. In a medium skillet, add one tablespoon of olive oil. Heat the oil over medium heat. Once hot, add two minced garlic cloves. Sauté them for about one minute until fragrant. Next, add two cups of chopped fresh spinach. Stir and cook until the spinach wilts. Remove the skillet from heat and let it cool slightly. In a large mixing bowl, combine the cooked spinach and garlic with one cup of ricotta cheese, half a cup of cream cheese, and half a cup of grated Parmesan cheese. Add one teaspoon of Italian seasoning, half a teaspoon of salt, and a quarter teaspoon of black pepper. If you like, stir in a quarter cup of chopped sun-dried tomatoes. Mix everything well until it is creamy and smooth. Grab four boneless, skinless chicken breasts. Place each one between two pieces of plastic wrap. Use a meat mallet or rolling pin to gently pound them to about half an inch thick. This helps the chicken cook evenly and makes it easier to stuff. Take a generous spoonful of the spinach filling. Spread it on one side of each chicken breast. Fold the other side over to cover the filling. If you want, use toothpicks or kitchen twine to hold the chicken closed. Arrange the stuffed chicken breasts in a baking dish. Pour one cup of marinara sauce over the top. Cover the dish with aluminum foil. Bake it in the preheated oven for 30 minutes. After that, remove the foil and bake for another 10-15 minutes. The chicken should reach an internal temperature of 165°F (75°C). After baking, take the chicken out of the oven. Let it rest for five minutes before serving. This helps the juices stay inside the chicken. Slice each chicken breast in half to show off the beautiful filling. Serve with extra marinara sauce and sprinkle fresh basil leaves on top. Enjoy this tasty dish! For the full recipe, check the previous section. To make the best spinach stuffed chicken, start with fresh ingredients. Use fresh spinach, not frozen. When you mix the filling, ensure it is creamy and well combined. This helps the flavors blend well. Also, don’t skip the step of pounding the chicken. It helps the chicken cook evenly and makes it easier to stuff. For juicy chicken, avoid overcooking. Use a meat thermometer to check the temperature. The chicken should reach 165°F (75°C) when done. Covering the dish with foil during baking keeps the chicken moist. After cooking, let it rest for a few minutes. This step allows the juices to redistribute throughout the meat. Serve the stuffed chicken with marinara sauce for added flavor. A bed of arugula or roasted vegetables makes a great side. You can also sprinkle fresh basil on top for color and taste. For a fun twist, add a side of garlic bread or a light salad. Check out the Full Recipe for more serving ideas. {{image_2}} You can play with different cheeses in this dish. Try using feta, goat cheese, or mozzarella. Feta adds a tangy kick, while goat cheese brings creaminess. Mozzarella melts beautifully and makes the dish gooey. Mix and match these cheeses for your perfect flavor. Adding extra ingredients can elevate your stuffed chicken. Consider sun-dried tomatoes, which give a burst of flavor. You can also include chopped artichokes or roasted red peppers. For a spicy twist, add some crushed red pepper flakes. Each option offers a new taste experience. You can grill or fry the stuffed chicken for a different texture. Grilling gives a smoky flavor and nice char. Cook it on medium heat for about 6-7 minutes per side. Frying can create a crispy crust. Use a skillet with a bit of oil over medium-high heat. Cook for about 5-6 minutes per side. Each method brings out unique flavors and textures. Check the [Full Recipe] for more details. After you enjoy your spinach stuffed chicken breasts, store leftovers in the fridge. Place them in an airtight container. This keeps the chicken moist and fresh. You can store them for up to three days. Make sure they cool down before sealing the container. This helps prevent excess moisture. To reheat, use a microwave or oven. If using a microwave, place the chicken on a microwave-safe plate. Cover it with a damp paper towel. Heat for 1-2 minutes until warm. If you prefer the oven, set it to 350°F (175°C). Place the chicken in a baking dish and cover it with foil. Heat for about 15 minutes. This keeps the chicken from drying out. You can freeze spinach stuffed chicken for later. Wrap each stuffed chicken breast tightly in plastic wrap. Then, place them in a freezer bag or container. Label with the date. They can last up to three months. To thaw, move the chicken to the fridge overnight. This ensures even cooking when you reheat it. If you want to enjoy a homemade meal later, this is a great option! For the full recipe, check out Spinach Stuffed Chicken Breasts. Bake the spinach stuffed chicken breasts for about 30 minutes covered, then 10-15 minutes uncovered. This helps the chicken cook through while keeping it moist. You should check for an internal temperature of 165°F (75°C) to make sure it's safe to eat. Yes, you can use frozen spinach in this recipe. Just make sure to thaw and drain it well. Frozen spinach has more water than fresh spinach, so you want to remove excess moisture. This keeps the filling from becoming too soggy. There are many great sides to serve with spinach stuffed chicken breasts. Here are a few ideas: - Roasted vegetables - Garlic mashed potatoes - Quinoa salad - Steamed broccoli - A light garden salad These sides complement the flavors of the chicken and add color to your plate. To know if your stuffed chicken is fully cooked, use a meat thermometer. Insert it into the thickest part of the chicken. It should read at least 165°F (75°C). If you don’t have a thermometer, cut into the chicken. The juices should run clear, not pink. Yes, you can make the filling ahead of time. Just mix it up and refrigerate it. This can save you time when you’re ready to cook. Just remember to let it come to room temperature before stuffing the chicken. This helps the chicken cook evenly. For the full recipe, check the section above. This blog post covered the essential steps to make delicious spinach stuffed chicken. We explored ingredients, preparations, and creative variations. I shared tips for juicy chicken and great serving ideas. Remember, cooking is fun and you can make this dish your own. Try different fillings and cooking methods. Enjoy your meal, trust your taste, and savor each bite!](https://emmasdish.com/wp-content/uploads/2025/04/59097e38-f156-42e4-9730-d54aab190257-300x300.webp)
. Enjoy making these delightful bites! - First, preheat your oven to 375°F (190°C) and grease your mini muffin tin with cooking spray or butter. This step ensures the bites do not stick. - In a mixing bowl, whisk together the dry ingredients: 1 cup of flour, 2 tablespoons of granulated sugar, 1 tablespoon of baking powder, and 1/2 teaspoon of salt. Once mixed, pour in 1/2 cup of whole milk and 2 tablespoons of melted butter. Stir gently until just combined. Be careful not to overmix; that can make the dough tough. - In a separate bowl, mix together 1/4 cup of packed brown sugar and 1 tablespoon of ground cinnamon. The smell will make you excited! - On a lightly floured surface, roll out your dough into a rectangle that is about 1/4 inch thick. Spread the cinnamon-sugar mixture evenly over the surface of the dough. This is the magic that makes these bites sweet and tasty. - Starting from one end, carefully roll the dough into a tight log. Once rolled, slice the log into 1-inch pieces. Each piece is a future mini cinnamon roll bite! - Place each slice in the greased mini muffin tin, cut side up. Bake in the preheated oven for 12-15 minutes or until they are golden brown. - While the bites bake, prepare the icing by mixing 1/2 cup of powdered sugar with 1-2 tablespoons of milk in a small bowl. Stir until smooth and drizzly. Once baked, allow the bites to cool for a few minutes, then drizzle with the icing. Serve warm and enjoy! Check out the Full Recipe for more details. To get the best mini cinnamon roll bites, avoid overmixing the dough. When you mix too much, the bites can turn tough. Stir just until the ingredients come together. Use room temperature ingredients for better mixing. This helps each part blend well and creates a softer texture. The icing should be smooth and easy to drizzle. If it is too thick, add a little milk to thin it down. Start with one tablespoon, then add more if needed. For even icing on each bite, use a small spoon or a squeeze bottle. This will help you control the amount of icing on each roll. Serve your mini bites on a bright platter. Adding fresh fruit like berries or slices of orange can make it look inviting. For a fancy touch, sprinkle some extra cinnamon sugar around the bites. This adds color and makes your plate stand out. {{image_2}} You can easily switch up the flavors in mini cinnamon roll bites. Adding chocolate chips gives a sweet twist. You can also mix in chopped nuts for crunch. Try walnuts or pecans for a tasty touch. If you're feeling bold, add spices like nutmeg or cardamom. These spices add warmth and depth. Just a pinch can change the whole taste. You can experiment until you find your favorite blend. Want to try something new? Make a savory version of these bites. Use herbs like rosemary or thyme. Mix in cheese like cheddar or feta. This change will surprise your taste buds. You can also explore alternative fillings. Try sun-dried tomatoes or spinach. These flavors add a fun twist to the classic recipe. Each bite can be a new adventure. If you're short on time, look for pre-made mini cinnamon roll bites. Many stores carry them in the freezer section. They can save you time and effort. When comparing homemade vs. store-bought, consider taste and freshness. Homemade bites, made from the full recipe, often taste better. You can also customize them to your liking. Store-bought options may be convenient, but they can lack the same flavor. To keep your mini cinnamon roll bites fresh, store them at room temperature. Use an airtight container to seal in moisture. This will help the bites stay soft and tasty. Make sure to place a paper towel inside the container. This absorbs extra moisture and keeps the bites from getting soggy. If you want to save some bites for later, freezing is a great option. Wait until they cool completely, then place them in a freezer-safe bag. Remove as much air as possible before sealing. To reheat, take out the desired amount and let them thaw. You can warm them in the microwave for about 15 seconds. This keeps them soft and fluffy. Mini cinnamon roll bites last about 3 days at room temperature. If frozen, they can last up to 2 months. Check for signs of spoilage before eating. If they smell off or show mold, it's best to toss them. Enjoy your bites while they're fresh for the best taste! Yes, you can prepare these bites in advance. Make the dough and filling first. Then, roll and slice them. Place the slices in the muffin tin and cover it with plastic wrap. You can refrigerate them for up to 24 hours. When you are ready to bake, just pop them in the oven. You may need to add a few minutes to the baking time if they are cold. This method helps you save time for special occasions or busy mornings. To reduce the sweetness of the icing, use less powdered sugar. Start with a half cup and add more as needed. You can also add a little extra milk to thin it out. This way, the icing becomes less sweet and still enjoyable. Another option is to use cream cheese in place of some powdered sugar. This gives a tangy flavor and balances the sweetness. You can get creative with toppings for your mini bites. Here are some tasty ideas: - Chopped nuts like walnuts or pecans for crunch - Drizzles of caramel or chocolate sauce for extra flavor - Sprinkles to add color and fun - Fresh fruit like berries to brighten the dish These options can enhance your mini bites experience and make them even more delightful. In this post, we explored how to make delicious mini cinnamon roll bites. We covered ingredients like flour, milk, and sugars. I shared step-by-step instructions to create the dough and filling. Plus, I included tips for perfect texture and icing. You can also try fun flavor variations or store them properly. These bites are great for sharing or enjoying alone. Experiment with these ideas, and you'll surely impress everyone with your baking skills! Happy baking!](https://emmasdish.com/wp-content/uploads/2025/06/9e8c8df4-6ff0-41d6-9c1f-84df389225cd-300x300.webp)
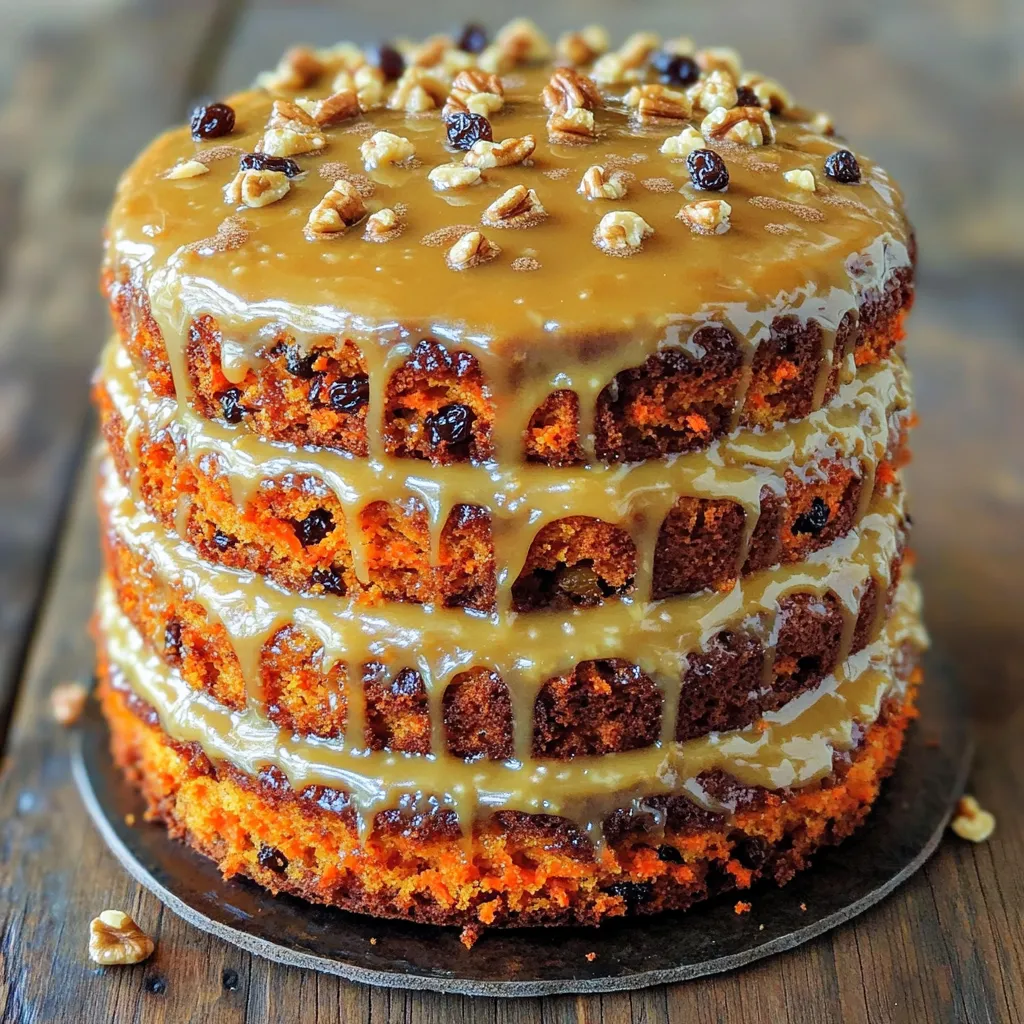
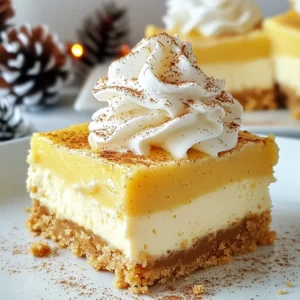
Maple Glazed Carrot Cake Delightful and Moist Treat
Indulging in a slice of Maple Glazed Carrot Cake is a treat like no other. Its rich flavors and delightful moisture create the perfect…