
Latest & Greatest
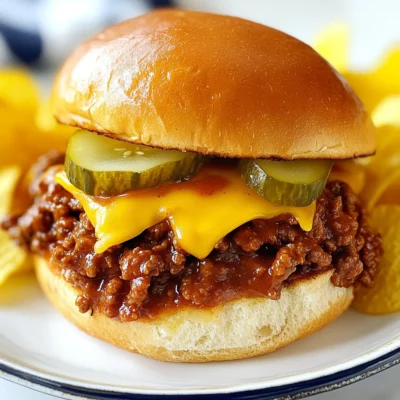
Homemade Sloppy Joes Simple and Flavorful Recipe
Are you ready to spice up your weeknight dinners? Homemade Sloppy Joes offer a tasty twist on a classic meal.
Read more…
Chicken Pot Pie Pasta Comforting and Creamy Dish
Are you ready to enjoy a warm, creamy dish that brings comfort to your dinner table? Chicken Pot Pie Pasta
Read more…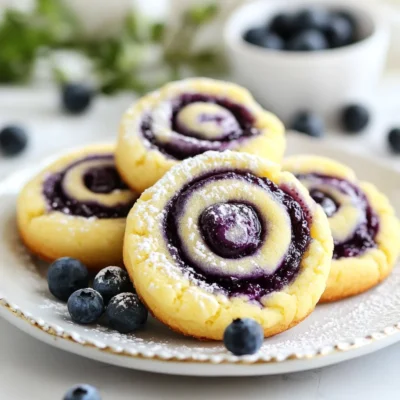
Blueberry Cheesecake Swirl Cookies Delightful Treat
Are you ready to try a cookie that’s a true game changer? Blueberry Cheesecake Swirl Cookies blend creamy cheesecake and
Read more…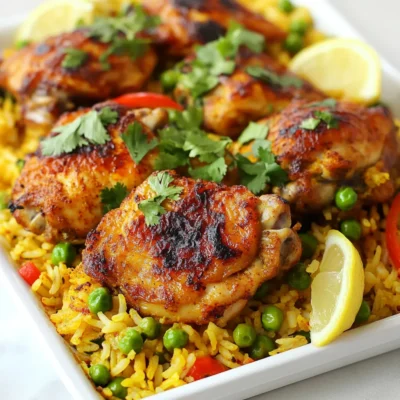
Peruvian Chicken and Rice Flavorful Comfort Meal
Are you ready to dive into a comforting dish that warms the heart and delights the senses? Peruvian Chicken and
Read more…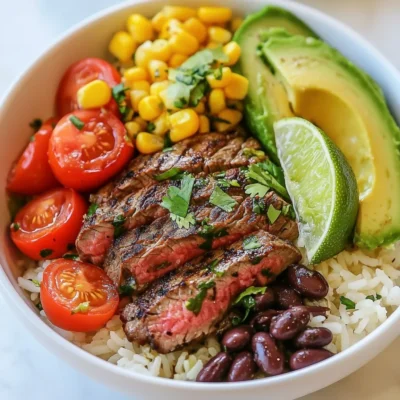
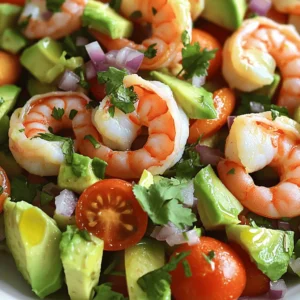
Cilantro Lime Steak Bowls Tasty and Simple Recipe
Ready to wow your taste buds? My Cilantro Lime Steak Bowls recipe is not only simple but bursting with flavor.
Read more…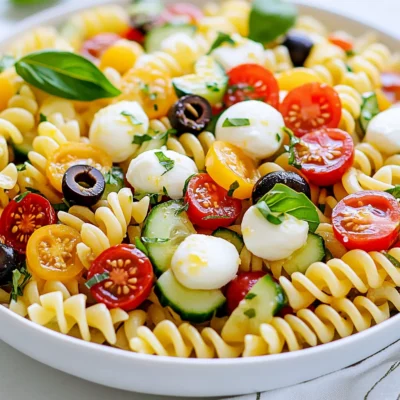
Cold Pasta Salad Flavorful and Easy Recipe
Are you ready to make a cold pasta salad that wows? This flavorful and easy recipe combines fresh ingredients and
Read more…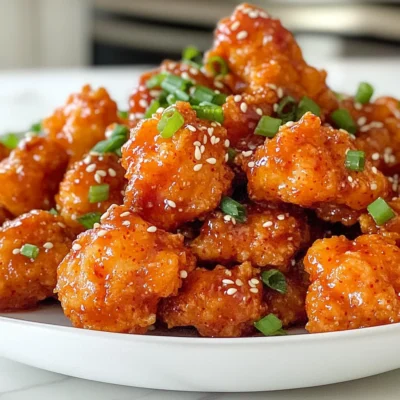
Crispy Korean Popcorn Chicken Irresistible Flavor Boost
Are you ready to elevate your snack game? Crispy Korean popcorn chicken packs a flavor punch that’s hard to resist.
Read more…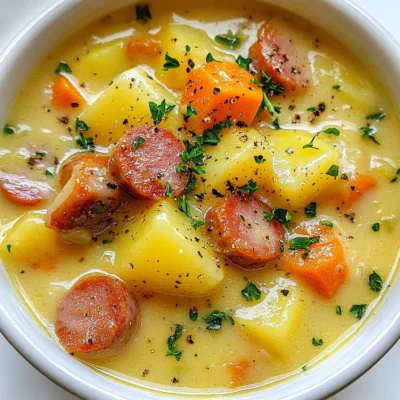
Kielbasa Potato Soup Hearty and Comforting Delight
Warm up your dinner table with my Kielbasa Potato Soup! This dish is hearty, comforting, and packed with flavor. I’ll
Read more…browse recipes
![To create your Coconut Pineapple Matcha Freeze, gather the following fresh ingredients: - 1 cup coconut milk (full-fat recommended) - 1 cup fresh pineapple chunks (or canned) - 2 teaspoons matcha powder - 2 tablespoons honey or agave syrup - 1/2 cup crushed ice - A pinch of sea salt - Fresh pineapple slices and shredded coconut for garnish These ingredients work together to create a smooth, tropical delight. The coconut milk gives it a rich creaminess. The pineapple adds a bright sweetness that pairs perfectly with matcha. Matcha powder provides a unique flavor and a boost of antioxidants. Honey or agave syrup sweetens the mix, while crushed ice gives it a refreshing chill. A pinch of sea salt enhances all the flavors. Don’t forget to garnish! Fresh pineapple slices and shredded coconut make it look as good as it tastes. This is a simple yet fun recipe that anyone can enjoy. For the full recipe, check out the detailed instructions and tips. - Combine all ingredients in a blender. - Blend until smooth and creamy. - Adjust sweetness as necessary. To start, add 1 cup of coconut milk, 1 cup of fresh pineapple chunks, 2 teaspoons of matcha powder, 2 tablespoons of honey or agave syrup, and 1/2 cup of crushed ice into your blender. I prefer using full-fat coconut milk for that creamy texture. Blend on high until everything mixes well and becomes smooth. If you find the matcha lumps, scrape down the sides and blend again. After blending, taste your mix. If you want it sweeter, add more honey or agave syrup and blend once more. - Pour into serving glasses and freeze for 30 minutes. - Stir gently to maintain creamy texture. Next, pour the mixture into your serving glasses. Fill them about three-quarters full. Place these in the freezer for about 30 minutes. You want them slightly firm but not frozen solid. After 30 minutes, take them out and stir gently. This helps keep that dreamy, creamy texture you want. - Garnish with pineapple slices and shredded coconut. - Serve chilled with a straw or spoon. Now comes the fun part! Garnish your Coconut Pineapple Matcha Freeze with fresh pineapple slices and a sprinkle of shredded coconut. This adds a lovely tropical touch. Serve it chilled, either with a straw or a spoon, and enjoy your refreshing treat! If you need the full recipe, check back for a complete guide. To make your Coconut Pineapple Matcha Freeze taste amazing, start with ripe pineapple. Ripe fruit gives a sweet, fresh taste. You can also play with sweeteners. Try honey for a rich flavor or agave for a lighter touch. Each option brings out different notes in your freeze. Getting the right texture is key. Blend your mixture thoroughly to avoid any matcha lumps. This makes your freeze smooth and creamy. Pay attention to the freezing time. If you freeze it too long, it can become hard. Aim for a soft, creamy texture that you can scoop easily. Make your treat look as good as it tastes. Use clear glasses to show off those vibrant colors. For a fun touch, add mint leaves on top. This not only looks nice but adds a fresh scent too. Enjoy the beauty of your Coconut Pineapple Matcha Freeze while you eat! For the complete recipe, check the [Full Recipe]. {{image_2}} You can make this recipe fit your diet. For a vegan option, simply swap honey for agave syrup. This keeps the sweet taste without using any animal products. If you need a gluten-free version, check that all ingredients are certified gluten-free. That way, you can enjoy this treat without worry. Want to change up the flavor? Try adding a hint of mint. It adds a nice freshness that can brighten up the drink. You can also experiment with other fruits like mango or banana. These fruits can bring a new twist and keep things exciting. There are fun ways to serve this treat too! You can create matcha pineapple popsicles. Just pour the mixture into popsicle molds and freeze until solid. Another option is to serve it as a smoothie bowl. Top it with your favorite fruits or nuts for added crunch and flavor. For the full recipe, check out the list of ingredients and instructions in the earlier section. You can refrigerate leftovers for up to 2 days. Store them in an airtight container. This helps keep the flavor fresh. If you notice any changes in taste or smell, it’s best to toss it. To freeze portions for later, pour the freeze into ice cube trays or small containers. This makes it easy to grab a small amount whenever you want. To thaw, move the frozen cubes to the fridge for about 6 hours or leave them at room temperature for 30 minutes. This helps them soften without losing texture. You can repurpose leftover freeze in many ways. Blend it into smoothies for a tropical twist. You can also layer it in parfaits with yogurt and granola. This adds flavor and makes a fun dessert or snack. Enjoy experimenting with these ideas! Matcha is full of antioxidants. These help protect your body from harm. They fight free radicals that cause aging. Matcha can also boost your metabolism. This means it helps you burn calories faster. A faster metabolism can lead to weight loss. Plus, matcha gives you energy without the crash. It does this by calming your mind and body. Yes, you can mix the ingredients without a blender. Use a whisk or a fork instead. Start by blending the matcha powder with a bit of coconut milk. This helps avoid lumps. Then, slowly add the rest of the coconut milk and mix well. You can also use a jar with a tight lid. Add all the ingredients, seal it, and shake hard until mixed. To make this drink even more refreshing, use chilled ingredients. Cold coconut milk and fresh pineapple will help. You can also add more crushed ice. This gives a slushy texture. For an extra twist, try using frozen pineapple. It will make your Coconut Pineapple Matcha Freeze even colder. Enjoy it on a warm day for a tasty treat! This blog post covered how to make a delicious matcha pineapple drink. We shared simple steps for preparation, freezing, and serving. You learned tips for flavor and texture, along with great variations to try. In the end, this drink is fresh and easy to make. Enjoy it as a tasty way to refresh yourself or impress friends. Get creative with your ingredients, and most importantly, have fun!](https://emmasdish.com/wp-content/uploads/2025/06/95f0bd42-8f40-4f80-b2de-1daa2e62c0ea.webp)
Coconut Pineapple Matcha Freeze Tasty Refreshing Treat
Looking for a cool, tasty treat? Try my Coconut Pineapple Matcha Freeze! This drink is not only refreshing but also packed with flavor and…
My Latest Desserts
My Latest Recipes

hey,
i’m !
I’m so happy you’re here!
I’m not just sharing recipes I’m sharing a piece of my heart. I hope these dishes bring you comfort, joy, and maybe even a new favorite.
![- 1 lb large shrimp, peeled and deveined - 4 tablespoons unsalted butter - 4 cloves garlic, minced - 1 teaspoon red pepper flakes (adjust to taste) - 1 cup heavy cream - 1 cup shredded mozzarella cheese - 1/2 cup grated Parmesan cheese - Salt and black pepper to taste - 2 tablespoons fresh parsley, chopped - Lemon wedges (for serving) To make Cheesy Garlic Butter Shrimp, you need some key ingredients. The shrimp is the star. I love using large shrimp because they cook quickly and taste great. You want to peel and devein them before cooking. Next, you’ll need unsalted butter. This adds richness and flavor to the dish. Garlic is essential too. Fresh minced garlic gives a strong taste that pairs well with shrimp. For an extra kick, consider adding red pepper flakes. You can adjust the amount based on your spice preference. Heavy cream makes the sauce creamy and smooth. Mozzarella cheese is what makes it cheesy and delicious. Don’t forget Parmesan cheese for that salty finish. You can season with salt and black pepper to taste. Fresh parsley adds color and a fresh taste. Finally, lemon wedges are perfect for squeezing on top before eating. For the full recipe, check the full recipe section. Start by melting the butter in a large skillet over medium heat. Once it melts, add the minced garlic. Sauté the garlic for about one minute. You want it fragrant but not burnt. Next, sprinkle in the red pepper flakes. This adds a nice kick to the dish. You can adjust the amount based on your taste. Now, increase the heat to medium-high. Add the peeled and deveined shrimp to the pan. Season them with salt and black pepper. Cook the shrimp for about 2 to 3 minutes. They should turn pink and opaque when done. This means they are perfectly cooked. Once the shrimp are ready, turn the heat back to medium. Pour in the heavy cream and stir gently. This will form the base of your sauce. Gradually add the mozzarella and Parmesan cheese. Keep stirring until the cheeses melt. You want a creamy and smooth sauce that clings to the shrimp. Allow the sauce to simmer for 2 to 3 minutes. This will help it thicken slightly. Taste and adjust the seasoning with more salt and pepper if needed. Finally, remove the skillet from heat. Garnish with fresh chopped parsley. Serve hot with lemon wedges on the side. Drizzle some extra sauce over the shrimp for an appealing look. This recipe is a fun way to enjoy a savory dish at home. For the full recipe, check the earlier sections. To prevent shrimp from overcooking, watch the color closely. When shrimp turn pink and opaque, they are done. Remove them from heat right away. This keeps them tender and juicy. For sautéing garlic, use medium heat. Too high can burn the garlic, making it bitter. Cook it for just one minute until it smells great. This will give your dish a lovely flavor. To adjust the spice level, add more or less red pepper flakes. Start with a small amount. You can always add more later. This lets you control the heat to match your taste. For cheese, mozzarella and Parmesan work well together. You can also try cheddar or Gouda for a twist. Each cheese adds a different flavor and texture. Serve Cheesy Garlic Butter Shrimp with crusty bread. It’s perfect for soaking up the sauce. You can also serve it over pasta for a filling meal. For presentation, use shallow bowls or plates. Drizzle extra sauce on top and sprinkle more parsley for color. This makes your dish look as good as it tastes. Explore the [Full Recipe] for more tips on serving! {{image_2}} You can switch up the protein in this dish. Scallops cook quickly, just like shrimp. They add a sweet taste. Chicken is another option. Use boneless, skinless chicken breasts for a tender bite. Cut them into small pieces. Cook them until they are golden brown. For vegetarian adaptations, try using mushrooms or tofu. Both soak up flavors well. If you use mushrooms, choose large ones for a hearty bite. Tofu can be marinated for extra flavor. Cook it until crispy for great texture. Want to add more flavor? Toss in some veggies like spinach or sun-dried tomatoes. Spinach wilts nicely in the sauce. Sun-dried tomatoes bring a tangy kick. You can also play with herbs. Try basil or thyme for a fresh twist. These herbs add depth and aroma. Do not be afraid to experiment! Each change can create a new dish. You can choose between creamy or non-creamy sauces. A creamy sauce is rich and comforting. If you prefer a lighter dish, use broth instead of cream. This will still taste great. For vegan options, swap out dairy. Use coconut milk or almond milk for creaminess. Nutritional yeast can replace cheesy flavors. This gives you a savory kick without dairy. These variations let you make the dish your own. Check out the Full Recipe for more ideas! To store leftovers, place them in an airtight container. This keeps the shrimp fresh and safe. Label the container with the date you made the dish. This way, you know when to use it. The shelf life in the fridge is about 2 to 3 days. After that, the shrimp may lose quality. For freezing, use freezer-safe containers or heavy-duty bags. Make sure to remove as much air as possible. This helps prevent freezer burn. Shrimp can last in the freezer for up to 3 months. To thaw, move the container to the fridge for about 8 hours or overnight. For quick thawing, you can run cold water over the bag. The best method for reheating is on the stove. Use low heat to warm the shrimp gently. This keeps them tender and moist. Stir occasionally to heat evenly. You can also reheat in the microwave. Use a microwave-safe dish and cover it with a lid. Heat for 1 to 2 minutes, stirring halfway through. Aim for a temperature of 165°F for safe eating. Enjoy your Cheesy Garlic Butter Shrimp with the rich flavors intact! What wine pairs well with Cheesy Garlic Butter Shrimp? A crisp white wine works best. I recommend a Sauvignon Blanc or Pinot Grigio. They balance the rich sauce and fresh shrimp flavors. A chilled glass enhances your meal. Can I make this dish ahead of time? Yes, you can prepare the shrimp and sauce ahead. Cook the shrimp until just pink. Cool it quickly, then store it in the fridge. When ready to serve, reheat gently on low heat. How many calories are in Cheesy Garlic Butter Shrimp? Each serving has about 400 calories. This may vary based on the amount of butter and cheese you use. It’s a rich dish, so enjoy in moderation. Is this recipe suitable for gluten-free diets? Yes, this dish is gluten-free. Just ensure all your ingredients are gluten-free. The heavy cream and cheeses do not contain gluten. Where did Cheesy Garlic Butter Shrimp originate? Cheesy Garlic Butter Shrimp has roots in Mediterranean cuisine. It combines classic flavors from Italian and Spanish dishes. Shrimp is popular in many coastal regions worldwide. How can I customize the recipe to my taste? You can add vegetables like spinach or bell peppers. For some heat, use more red pepper flakes. Try different cheeses like cheddar or gouda for unique flavors. You’ve now learned how to make Cheesy Garlic Butter Shrimp. We explored key ingredients and step-by-step cooking instructions. I shared tips on enhancing flavors and offered variations to keep things exciting. Don’t forget about storage tips to keep your leftovers fresh. Remember, this recipe is flexible. You can swap proteins or adjust the spice level based on your taste. Enjoy your cooking adventure and impress your friends with this delicious dish!](https://emmasdish.com/wp-content/uploads/2025/06/69fa4acd-26ff-4cad-83d7-673042a39f6e-300x300.webp)
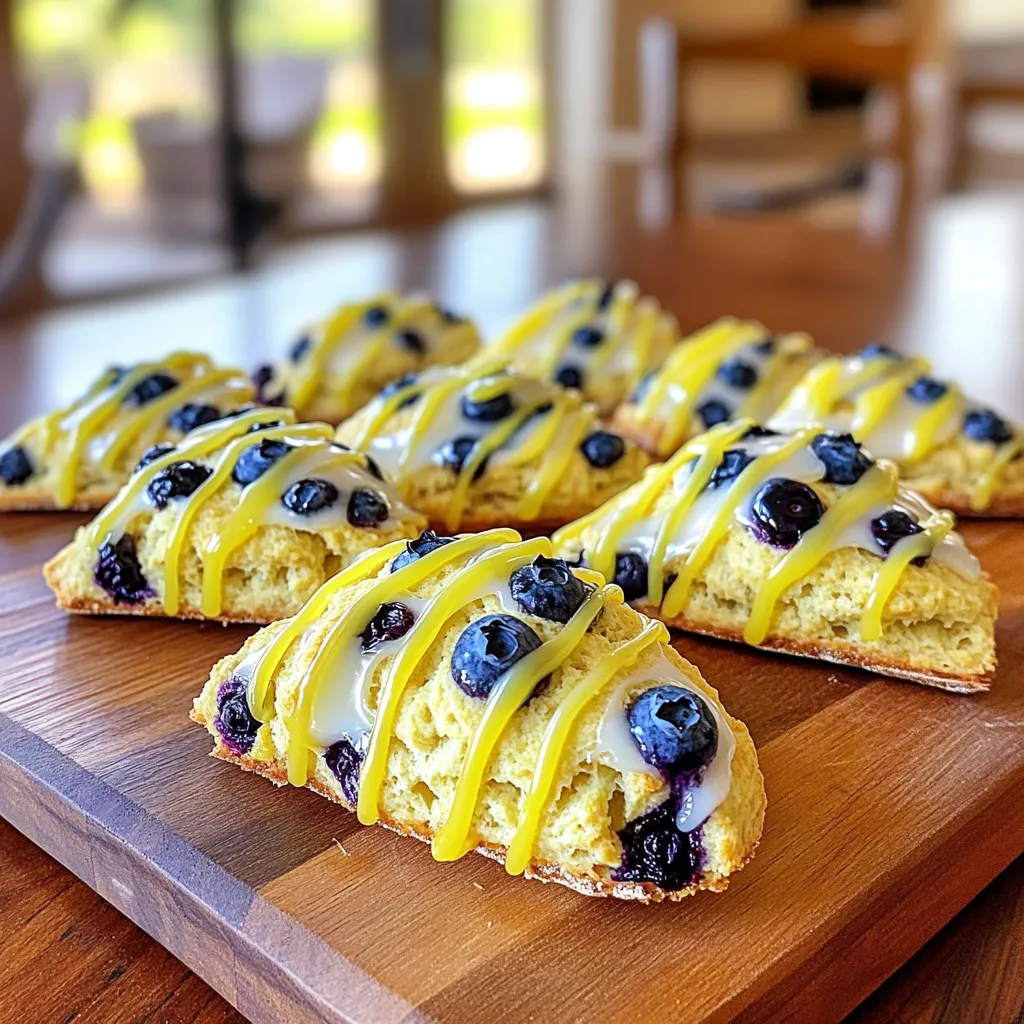
Zesty Lemon Blueberry Scones Flavorful and Fresh Treat
If you’re craving a fresh, zesty treat, you’ve come to the right place! Zesty Lemon Blueberry Scones combine bright citrus with sweet blueberries in…