

Latest & Greatest

Pumpkin Cheesecake Swirl Brownies Delightful Treat
Looking for a sweet fall treat that blends two classic desserts? Try my Pumpkin Cheesecake Swirl Brownies! These rich, fudge
Read more…
Herb Roasted Chicken & Potato Sheet Pan Delightful Meal
If you’re looking for a simple yet delicious meal, you’re in the right place! My Herb Roasted Chicken & Potato
Read more…
Chocolate Peanut Butter Oat Cups No-Bake Delight
Indulging in a sweet treat can be simple and guilt-free! Join me as I whip up delicious Chocolate Peanut Butter
Read more…
Caramel Apple Cinnamon Roll Cake Simple Delight Recipe
Get ready to satisfy your sweet tooth with my Caramel Apple Cinnamon Roll Cake! This easy recipe combines soft, fluffy
Read more…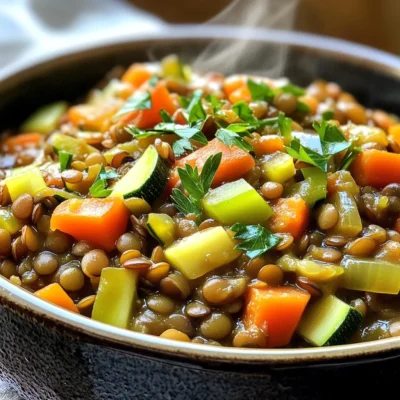
Rustic Lentil Vegetable Stew Slow Cooker Delight
Welcome to your new favorite slow cooker recipe! My Rustic Lentil Vegetable Stew is hearty, healthy, and full of flavor.
Read more…
Air Fryer Cinnamon Roll Bites Tasty and Simple Treat
Get ready to impress your taste buds with Air Fryer Cinnamon Roll Bites! These delicious treats are quick and easy
Read more…
Minute Buffalo Chicken Wraps Quick and Easy Recipe
Are you craving a quick meal that’s full of flavor? Look no further! My Minute Buffalo Chicken Wraps are here
Read more…
Garlic Herb Roasted Sweet Potatoes Flavorful Side Dish
Looking for a tasty and easy side dish? Garlic Herb Roasted Sweet Potatoes are the answer. With simple ingredients and
Read more…browse recipes


S’mores Cookie Bars Irresistible Dessert Recipe
Get ready to satisfy your sweet tooth with my S’mores Cookie Bars! This easy dessert combines soft cookie goodness with rich chocolate, gooey marshmallows,…
My Latest Desserts
My Latest Recipes

hey,
i’m !
I’m so happy you’re here!
I’m not just sharing recipes I’m sharing a piece of my heart. I hope these dishes bring you comfort, joy, and maybe even a new favorite.
![To create these tasty bites, gather these key ingredients: - 1 can (12 oz) refrigerated cinnamon roll dough - 3 large eggs - 1/2 cup milk - 1 tsp vanilla extract - 1/2 tsp ground cinnamon - 2 tablespoons butter - 1/4 cup maple syrup (for serving) - Powdered sugar (for dusting, optional) These ingredients make the bites sweet and fluffy. The cinnamon roll dough gives that classic flavor. Eggs and milk create a nice soak, making each piece delicious. The vanilla adds a lovely aroma. Ground cinnamon enhances this treat's warmth. Butter helps with browning and adds richness. You can personalize these bites with a few extra ingredients: - Fresh fruit (like berries or bananas) - Nuts (such as pecans or walnuts) - Chocolate chips for sweetness - Cream cheese frosting for dipping Adding fruits or nuts can boost the flavor and add texture. Chocolate chips make them extra special. Cream cheese frosting can turn them into a rich dessert. To make Cinnamon Roll French Toast Bites, you’ll need: - A baking tray - Parchment paper - Mixing bowls - Whisk - Large skillet - Tongs or a spatula Using the right tools makes cooking easier. The parchment paper helps with cleanup, while the skillet ensures even cooking. A whisk is perfect for mixing the egg mixture well. Tongs or a spatula let you flip the bites safely. For the complete recipe, check out the [Full Recipe]. Start by preheating your oven to 375°F (190°C). Line a baking tray with parchment paper. Open the can of refrigerated cinnamon rolls. Carefully pull apart each roll and cut them into four small pieces. This makes them easy to dip and cook. Keep them close as you will use them soon. In a mixing bowl, gather your eggs, milk, vanilla extract, and ground cinnamon. Whisk these together until they blend well. This egg mixture gives the bites a nice flavor and helps them cook evenly. Make sure there are no lumps. Take each piece of cinnamon roll dough and dip it into the egg mixture. Let it soak for a few seconds but do not let it get too soggy. In a large skillet, melt 2 tablespoons of butter over medium heat. Add the soaked pieces carefully, making sure they do not overlap. Cook for about 2-3 minutes until golden brown. Flip them and cook for another 2-3 minutes. Once browned, move the bites to your prepared baking tray. Bake in the oven for 10 minutes to set. After baking, let them cool for a few minutes. Drizzle with maple syrup and dust with powdered sugar, if you like. Enjoy your sweet treat! For the complete process, check out the Full Recipe. To get fluffy bites, use fresh cinnamon roll dough. The dough should be soft and pillowy. Cut each roll into equal pieces for even cooking. Soak them in the egg mix just long enough. A few seconds is perfect! This way, they absorb enough flavor without falling apart. When cooking, space the pieces out in the pan. This helps them brown nicely and stay fluffy. If you have leftovers, store them in an airtight container. Let the bites cool completely before sealing. This keeps them from getting soggy. You can keep them in the fridge for up to three days. For longer storage, freeze them in a single layer. After freezing, move them to a freezer bag. They will last for about a month. One common mistake is overcrowding the skillet. If the bites touch, they won’t cook evenly. Always make sure there is space between each piece. Another mistake is not soaking the dough enough. If you don’t soak them long enough, they will be dry. Lastly, check your oven temperature. An oven that is too hot can burn the outside while leaving the inside doughy. Follow these tips for perfect bites every time! {{image_2}} You can easily mix flavors with your Cinnamon Roll French Toast Bites. Here are some ideas: - Nutty Delight: Add chopped walnuts or pecans to the egg mix. - Chocolate Swirl: Include mini chocolate chips in the dough. - Fruit Burst: Toss in fresh berries or sliced bananas before cooking. - Maple Pecan: Drizzle with a maple pecan sauce instead of syrup. Each of these options adds a new twist. Experiment and find what you love most. If you need a different approach, I have you covered. Here are some alternatives: - Gluten-Free: Use gluten-free cinnamon roll dough. - Dairy-Free: Swap milk for almond or oat milk. - Vegan: Replace eggs with a flaxseed mixture or a commercial egg replacer. - Sugar-Free: Use sugar-free syrup or a natural sweetener. These swaps let everyone enjoy the treat. Serving your bites can be fun and creative. Try these ideas: - Skewers: Place bites on skewers for a fun presentation. - Dipping Sauces: Offer different sauces like chocolate, caramel, or yogurt. - Fruit Garnish: Add fresh fruit on the side for color and taste. - Breakfast Platter: Serve with bacon or sausage for a full meal. These ideas can make your brunch special. For the full recipe, check the details above. After enjoying your Cinnamon Roll French Toast Bites, store any leftovers in the fridge. Place them in an airtight container. This keeps them fresh for up to three days. Make sure to let them cool completely before sealing. This helps avoid moisture buildup inside the container. To enjoy your bites again, reheat them in the oven. Preheat the oven to 350°F (175°C). Place the bites on a baking sheet for about 5-7 minutes. This method keeps them crispy and warm. You can also use a microwave. Simply heat them for about 30 seconds. However, the oven gives a better texture. If you want to save some bites for later, freezing is a great option. Let them cool completely, then place them in a freezer-safe bag. Squeeze out as much air as possible before sealing. They can last up to three months in the freezer. When you’re ready to eat, thaw them in the fridge overnight. Reheat as mentioned above for the best taste. The prep time for Cinnamon Roll French Toast Bites is just 15 minutes. You can whip these up quickly. The total time from start to finish is around 30 minutes. That includes cooking and baking. This makes it a great choice for a fast breakfast or brunch. Yes, you can make these bites ahead of time. Prepare them fully and let them cool. Store them in an airtight container in the fridge. They will last for about three days. When you are ready to eat, you can reheat them in the oven or microwave. They taste best warm and fresh. To make Cinnamon Roll French Toast Bites without eggs, use a simple substitute. You can mix 1 tablespoon of ground flaxseed with 2.5 tablespoons of water. Let it sit for a few minutes until it thickens. This mix will act as an egg replacement in your recipe. You can also use mashed banana or unsweetened applesauce for a different twist. Just keep the same amount as you would for eggs. This way, you still get tasty bites! You learned how to make tasty Cinnamon Roll French Toast Bites. We covered key ingredients and tools you need. I shared step-by-step instructions for perfect bites every time. You also got tips on storing leftovers and avoiding common mistakes. Variations and dietary options can help make this dish your own. Enjoy making this fun and sweet treat! It’s easy to share and always a hit. Try it out, and you’ll see how simple it is to impress your friends and family.](https://emmasdish.com/wp-content/uploads/2025/05/3ec461bd-9462-46f6-9e04-130163b32764-300x300.webp)

![To make a delightful roasted beet and goat cheese salad, you need fresh ingredients that shine. Here’s what you’ll need: - Beets: 3 medium beets, scrubbed clean. Roast them to bring out their sweet flavor. - Mixed greens: 4 cups of mixed greens, like arugula, spinach, and radicchio. They add a crunchy texture. - Goat cheese: 1/2 cup of crumbled goat cheese. It gives a creamy, tangy taste. - Additional toppings: - 1/4 cup of walnuts, toasted and chopped for crunch. - 1/2 red onion, thinly sliced to add some bite. - Fresh herbs like parsley or dill for garnish. These ingredients come together for a salad that is both colorful and tasty. You can find the full recipe [Full Recipe]. Preheating the oven: Temperature and tips Start by preheating your oven to 400°F (200°C). This is the perfect temperature for roasting beets. A hot oven makes the beets tender and flavorful. Wrapping and roasting: Duration and method Wrap each beet in aluminum foil. Place them on a baking sheet. Roast for 45-60 minutes. Check if they are done by piercing them with a fork. They should feel soft. Cooling and peeling beets: Best practices Once the beets are done, take them out and let them cool. This makes them easier to handle. Use your hands or a paper towel to peel off the skin. It should come off easily. Cut the beets into small cubes. Combining ingredients: Assembly tips In a large bowl, add your mixed greens. Next, toss in the roasted beets and sliced red onion. Make sure to mix them gently. You want the greens to stay crisp. Mixing the dressing: Proportions and techniques In a small bowl, mix 2 tablespoons of balsamic vinegar and 2 tablespoons of olive oil. This dressing will add a nice tangy flavor. You may add salt and pepper to taste. Tossing ingredients: Tips for even coating Drizzle the dressing over the salad. Toss everything together gently. Make sure all the ingredients are well coated with the dressing. This step helps the flavors blend nicely. For the full recipe, check out the [Full Recipe]. Enjoy your delicious roasted beet and goat cheese salad! Cooking time adjustments: Check the beets after 45 minutes. You want them tender. Insert a fork to test doneness. If the fork slides in easily, they are ready. If not, roast for another 10 to 15 minutes. All ovens differ, so keep an eye on them. Foil wrapping techniques: Wrapping beets in foil helps them steam. This keeps them moist and flavorful. Make sure the foil is tightly sealed around each beet. This way, they will roast evenly. The steam will also make peeling easier after roasting. Ideal pairings: Roasted beet and goat cheese salad shines with nuts and fruits. Try adding sliced apples or pears. They add sweetness and crunch. Also, consider serving it with grilled chicken or fish for a full meal. Presentation tips: Make your salad pop with color. Use a large bowl to show off the mixed greens. Arrange the beets and goat cheese on top. Sprinkle the walnuts and red onion for a beautiful finish. A drizzle of balsamic vinegar adds a nice touch. Fresh herbs like parsley or dill make the dish look fresh and inviting. For the complete recipe, refer to the Full Recipe. {{image_2}} You can make your roasted beet and goat cheese salad even better by adding proteins. Grilled chicken is a great choice. It adds a nice flavor and makes the salad filling. You can also use chickpeas if you want a plant-based option. Chickpeas are rich in fiber and protein, making your salad more nutritious. Adding protein changes the taste of your salad. Chicken gives a smoky, savory flavor. Chickpeas add a mild, nutty taste. Both options help balance the sweetness of the beets and the tanginess of the goat cheese. If you want to change the nuts, try using pecans or almonds instead of walnuts. Pecans have a sweeter, buttery flavor. Almonds bring a crunchy texture and mild taste. Both options will complement your salad perfectly. Toasting the nuts enhances their flavor. Just place them in a dry skillet over medium heat. Stir them frequently for about five minutes until they are golden brown. This simple step makes a big difference in taste and texture. To keep your Roasted Beet and Goat Cheese Salad fresh, store it in the fridge. Use an airtight container. This keeps the salad crisp for up to three days. If you have extra dressing, keep it separate. This will prevent the greens from wilting too fast. If you notice your greens look a bit sad, don’t worry! You can revive them. Just place them in a bowl of cold water for about 10-15 minutes. This helps them regain some crunch. Afterward, dry them gently with a towel. Want to save some roasted beets for later? You can freeze them! First, let the beets cool completely. Then, cut them into cubes. Place the cubes in a freezer bag, removing as much air as possible. Seal the bag tightly. Your beets can last up to six months in the freezer. When you’re ready to use frozen beets, simply thaw them in the fridge overnight. You can add them to salads or warm them up for a tasty side dish. Using frozen beets is a great way to enjoy their flavor while saving time in the kitchen. Yes, you can use canned beets. They save time and effort. However, the taste and texture differ from fresh roasted beets. Canned beets are softer and may lack the rich, earthy flavor of roasted ones. Fresh beets bring a sweet and smoky taste that enhances this salad. If you choose canned beets, rinse them well to remove excess salt. The best goat cheese for this salad is creamy and tangy. Soft goat cheese, often called chevre, adds a smooth texture. You can also use aged goat cheese for a sharper flavor. Each option brings a unique taste to the dish. Try different types to see what you like best. A herbed goat cheese can add extra flavor and freshness, too. This salad serves four people. It’s perfect for a light lunch or as a side dish at dinner. If you need more servings, just double the ingredients. You can also make smaller portions by halving the recipe. This flexibility makes it a great choice for any gathering. In this blog post, we covered how to create a delicious beet salad. We listed the key ingredients, including beets, mixed greens, and goat cheese. You learned step-by-step instructions for roasting beets, preparing the salad, and making the dressing. We shared tips for cooking and serving, along with variations to try. Remember, this salad is flexible; you can add proteins or switch up the nuts. I hope you create this tasty dish and enjoy every bite. Happy cooking!](https://emmasdish.com/wp-content/uploads/2025/05/1cac6a3c-3cbd-4bc6-96ff-a26a53a2173b-300x300.webp)
Tropical Smoothie Bowl Fresh and Flavorful Recipe
Looking to whip up a tropical escape right in your kitchen? My Tropical Smoothie Bowl recipe is fresh, colorful, and bursting with flavor! With…
![- 1 ripe banana - 1 cup frozen mango chunks - 1/2 cup frozen pineapple chunks - 1/2 cup coconut milk or your preferred plant-based milk The main ingredients create a rich and creamy base. The ripe banana adds natural sweetness. Frozen mango and pineapple chunks bring a tropical twist. Coconut milk gives it a smooth texture. - 1 tablespoon honey or agave syrup - 1/2 teaspoon vanilla extract - 1 tablespoon chia seeds You can add honey or agave syrup for extra sweetness. Vanilla extract enhances the flavor. Chia seeds add nutrition and a nice texture. - Fresh fruit: sliced kiwi, strawberries, and banana - 2 tablespoons granola - 1 tablespoon shredded coconut - Mint leaves for garnish Toppings make your smoothie bowl fun and colorful. Fresh fruit adds visual appeal and freshness. Granola gives a nice crunch. Shredded coconut adds flavor and texture. Mint leaves offer a pop of color. You can find the Full Recipe for a detailed guide on how to create this delicious dish. To make the smoothie base, start by getting your blender ready. Place it on a clean, flat surface. Next, add the ripe banana, frozen mango chunks, and frozen pineapple chunks into the blender. Pour in the coconut milk, and add the chia seeds. If you want it sweeter, include honey or agave syrup. Finish with a splash of vanilla extract. Blend everything on high speed until it becomes smooth and creamy. If it’s too thick, just add more coconut milk for the right consistency. Once your smoothie base is ready, pour it into a bowl. Now comes the fun part—decorating! Arrange the fresh fruit slices on top in a colorful pattern. Use sliced kiwi, strawberries, and banana for a vibrant look. Next, sprinkle granola and shredded coconut over the top. This adds a nice crunch. To make it pop, garnish with mint leaves. It not only looks great but also adds a fresh aroma. Serve it right away with a spoon and enjoy this tropical delight! You can easily adjust the thickness and creaminess of your smoothie bowl. If you prefer it thicker, use less coconut milk. For a creamier texture, blend in more coconut milk. You can also add sweeteners to enhance the taste. Honey and agave syrup are great options. If you want to explore new flavors, consider adding a dash of cinnamon or nutmeg. The possibilities are endless, so make it your own! Check out the Full Recipe for more ideas. To make a great Tropical Smoothie Bowl, choose ripe bananas. Look for bananas that are yellow with a few brown spots. This means they are sweet and soft. For mangoes, pick ones that feel slightly soft when gently pressed. They should have a sweet smell at the stem. Using frozen fruits is key. They help keep your smoothie cold and thick. I always use frozen mango and pineapple chunks. They blend well and add a nice texture. Plus, frozen fruits last longer and save you time. To get a smooth blend, start on low speed. Gradually increase to high speed. This method helps mix everything evenly. If your smoothie is too thick, add more liquid. Coconut milk works well for this recipe. You want a creamy texture, not runny. If it seems too thin, add more frozen fruit. This way, you’ll get that perfect bowl. You can boost your smoothie with protein. Add a scoop of protein powder or a spoon of nut butter. It gives a nice flavor and helps keep you full. Chia seeds are a great addition, too. They are small but mighty. They add fiber and omega-3s. Plus, they help thicken your smoothie. Just one tablespoon is enough for added nutrition without changing the taste. For the full recipe, check out the Tropical Paradise Smoothie Bowl. It's a delicious way to start your day! {{image_2}} You can switch up the flavors in your tropical smoothie bowl. Try using papaya or passion fruit for a more exotic taste. These fruits add a punch of flavor and bring the tropics to your bowl. Another fun option is a berry-infused smoothie bowl. Mix in frozen berries like strawberries or blueberries. They make the bowl colorful and add a tart twist. For a vegan smoothie bowl, use plant-based milks like almond or oat milk. You can replace honey with agave syrup for sweetness. Check your granola to make sure it is gluten-free. Many brands offer tasty, gluten-free granola options. Toppings can make your smoothie bowl exciting. Drizzle some nut butter on top for rich flavor. Almond or peanut butter work great. You can also add seeds like hemp or pumpkin. These seeds not only add crunch but also boost nutrition. Get creative with your toppings to make each bowl unique. For the full recipe, check out the Tropical Paradise Smoothie Bowl. To store leftover smoothie mix, pour it into an airtight container. Make sure to seal it tightly. Keep the mix in the fridge. It stays fresh for about one day. If you have topped smoothie bowls, store them in the fridge, too. Cover the bowl with plastic wrap. Avoid storing them for more than a few hours. Prepping fruits ahead of time is easy. Slice your bananas, mangoes, and pineapples. Place them in a freezer bag. Squeeze out the air and seal the bag. Use these frozen fruits in your next smoothie bowl. You can also make smoothie packs. Combine your fruits and chia seeds in bags. When ready, just add coconut milk and blend! To refresh a stored smoothie bowl, add a splash of coconut milk. Stir it well to mix everything. This helps bring back the creamy texture. If you stored the smoothie mix, drink it within 24 hours. Topped bowls should be eaten within a few hours for best taste. Follow the [Full Recipe] for great results! To make a Tropical Smoothie Bowl vegan, swap out some ingredients. Use plant-based milk like almond or oat milk in place of coconut milk. You can also replace honey with agave syrup or maple syrup. This keeps the bowl sweet without using animal products. For extra protein, consider adding a scoop of protein powder. You can choose whey or plant-based options, like pea or rice protein. Nut butters, like almond or peanut butter, also work well. They add flavor and a creamy texture. Yes, you can prep Tropical Smoothie Bowls ahead of time. Store the smoothie base in an airtight container in the fridge for up to 24 hours. Keep toppings separate to maintain freshness. Just add them before serving for a perfect bowl every time. Creating a Tropical Smoothie Bowl is easy and fun. You blend ripe fruits with coconut milk. Then, add your favorite toppings for a delicious finish. Remember, you can customize the recipe to fit your taste. Try different fruits and toppings for variety. Store any leftovers properly for later use. Enjoying a healthy smoothie bowl can boost your day. It’s a simple treat that is good for you. Dive into this tasty adventure!](https://emmasdish.com/wp-content/uploads/2025/07/eff28613-94f7-41dc-8bee-cc8fca0735f3.webp)
