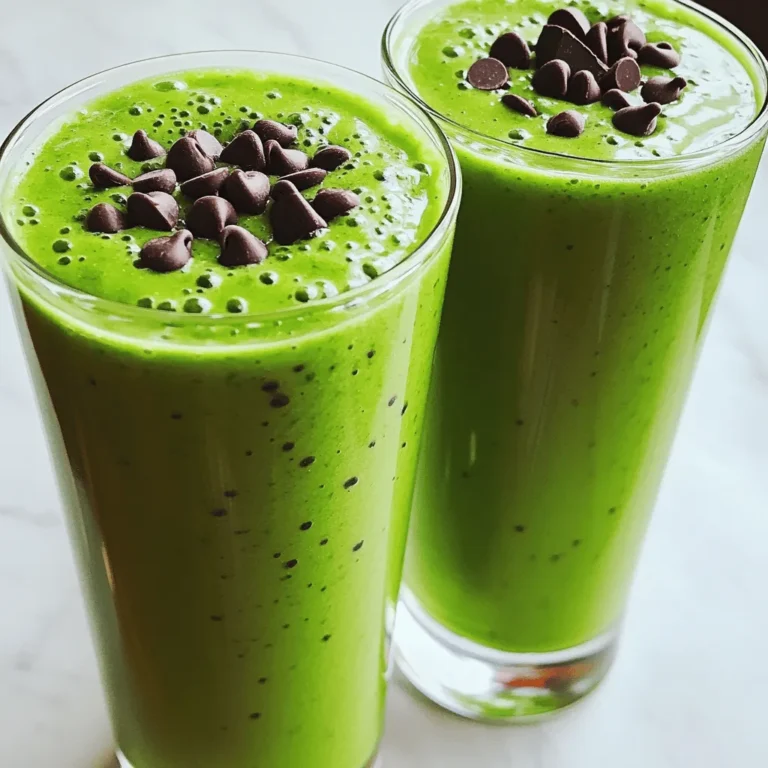
Latest & Greatest

Cilantro Lime Chicken Tacos Fresh and Flavorful Treat
Craving a fresh and flavorful meal? Let me introduce you to cilantro lime chicken tacos! These delicious tacos are packed
Read more…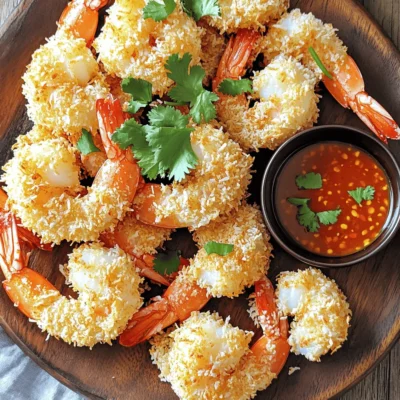
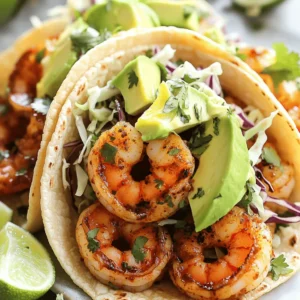
Air Fryer Coconut Shrimp With Dip Simple Recipe
Looking to impress at your next gathering? My Air Fryer Coconut Shrimp With Dip is a game-changer! This simple recipe
Read more…
Greek Lemon Chicken Soup Avgolemono Nourishing Dish
Looking for a warm, comforting dish that’s packed with flavor? Greek Lemon Chicken Soup, or Avgolemono, is a go-to option.
Read more…
Pumpkin Spice Cream Cheese Cinnamon Rolls Delightful Treat
Are you ready for a fall treat that’ll spark joy? Pumpkin Spice Cream Cheese Cinnamon Rolls are the perfect way
Read more…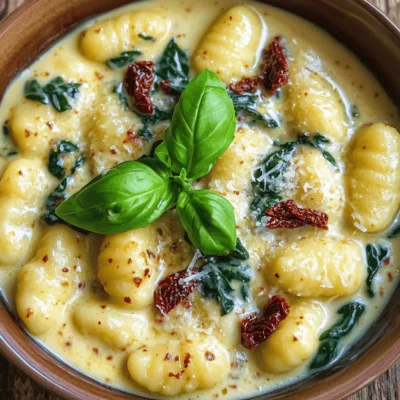
Min Creamy Sun Dried Tomato Gnocchi Delightful Dish
Creamy Sun Dried Tomato Gnocchi captures so much flavor in one dish! I’ll show you how to whip up this
Read more…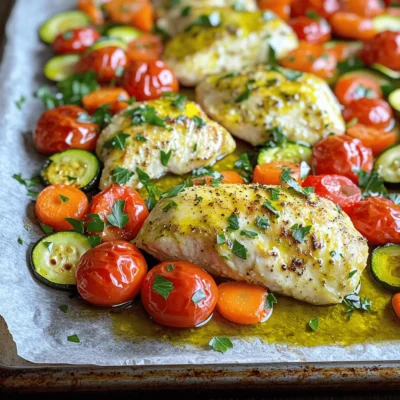
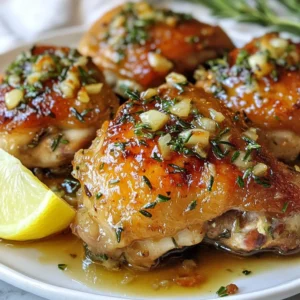
Sheet Pan Ranch Chicken And Veggies Delightful Meal
If you’re seeking a simple yet delicious dinner idea, look no further than Sheet Pan Ranch Chicken and Veggies. This
Read more…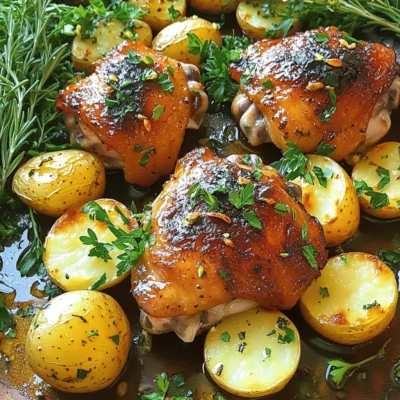
Garlic Butter Chicken and Potatoes Sheet Pan Delight
Looking for a simple, tasty dinner idea? Garlic Butter Chicken and Potatoes Sheet Pan Delight checks all the boxes! This
Read more…
Pumpkin Coffee Cake with Crumble Perfectly Moist Recipe
If you love fall flavors, you’ll adore this Pumpkin Coffee Cake with Crumble. This recipe gives you a moist, spiced
Read more…browse recipes


![- 1 block (14 oz) firm tofu, pressed and drained - 1/2 cup cornstarch - 3 tablespoons vegetable oil - 1/4 cup honey - 2 tablespoons soy sauce - 4 cloves garlic, minced - 1 teaspoon fresh ginger, grated - 1 tablespoon sesame seeds - 2 green onions, sliced - Salt and pepper to taste - Skillet or frying pan - Shallow dish - Tongs or spatula - Paper towels When making crispy honey garlic tofu, I always focus on the ingredients first. Firm tofu works best here. Press it to remove extra water. This helps the tofu crisp up nicely. Cornstarch is key. It gives the tofu a crunchy coat. You'll need vegetable oil for frying. This helps achieve that golden-brown color. Honey adds sweetness. It balances the salty soy sauce. Garlic and ginger bring great flavor. Fresh herbs like green onions add a pop of color. For cooking, a skillet or frying pan is your best friend. A shallow dish helps when coating the tofu. Tongs or a spatula make flipping easy. Keep paper towels on hand to drain excess oil. This simple list makes cooking easy. Check the [Full Recipe] for all details and steps. First, cut your pressed tofu into bite-sized cubes. Aim for about 1-inch pieces. This size helps the tofu cook evenly and get crispy. Next, take a shallow dish and spread the cornstarch in it. Sprinkle a pinch of salt and pepper into the cornstarch to add flavor. Toss your tofu cubes in the cornstarch. Make sure each piece is well-coated. Shake off any excess cornstarch. This step is key for that perfect crunch. Now, grab a large skillet and heat the vegetable oil over medium-high heat. Once the oil is hot, add the tofu cubes in a single layer. Sauté the tofu for about 5 to 7 minutes. Turn the cubes occasionally to get all sides golden and crispy. When done, remove the tofu from the skillet and place it on a plate lined with paper towels. This helps absorb any extra oil. In the same skillet, lower the heat to medium. Add the minced garlic and grated ginger, sautéing them for about 1 minute. Their aroma will fill your kitchen! Pour in the honey and soy sauce, stirring well. Cook this mixture for 2 to 3 minutes until it thickens slightly. Now, return the crispy tofu to the skillet. Toss it gently in the honey garlic sauce until well-coated. This step ensures every piece is packed with flavor. Remove from heat and sprinkle sesame seeds and sliced green onions on top. This adds a lovely crunch and freshness. You can serve this crispy honey garlic tofu over a bed of steamed jasmine rice or quinoa. For an extra touch, add more green onions and sesame seeds. Enjoy your meal! You can find the Full Recipe for more details. To get crispy tofu, start by pressing it. Pressing removes extra water. This helps the tofu soak up flavors and crisp up nicely. Use a tofu press or wrap the block in a clean towel. Place a heavy object on top for about 15 minutes. Next, coat the tofu with cornstarch. This is key for crispiness. Use a shallow dish to spread the cornstarch evenly. Toss the tofu in the cornstarch until each piece is coated. Shake off any extra cornstarch before cooking. You can boost the flavor of the dish easily. Try adding spices like chili powder or smoked paprika. This gives your tofu a nice kick. You can also change the sauce by adding a splash of lime juice or sesame oil. Fresh herbs can take your dish to the next level. Chopped cilantro or basil adds brightness. Sprinkle these on right before serving for the best taste. Presentation matters! Serve your crispy honey garlic tofu over rice or quinoa. This adds a nice base and makes the dish look appealing. For garnishing, sprinkle more green onions and sesame seeds on top. You can even add some sliced cucumbers or radishes on the side for color. These small touches make your meal special and inviting. For the complete recipe, check out the Full Recipe section. {{image_2}} If you're looking to make this dish gluten-free, swap soy sauce for tamari. Tamari has a similar taste without gluten. For a vegan option, you can replace honey with maple syrup or agave nectar. Both will add a nice sweetness without any animal products. You can use different types of tofu based on your taste. Silken tofu gives a softer texture, while extra-firm tofu will be crunchier. If you want to change up the sauce, try hoisin or teriyaki sauce instead of honey and soy sauce. This will give your tofu a unique flavor twist. You can bake the tofu for a healthier option. Just coat the tofu in oil and cornstarch, then bake at 400°F for 25 minutes, flipping halfway. Air frying is another great choice. It cooks the tofu quickly and keeps it crispy without much oil. Just set your air fryer to 375°F for about 15 minutes. Feel free to explore these variations to find your perfect crispy honey garlic tofu recipe! For the full recipe, check out the section above. To store your crispy honey garlic tofu, let it cool first. Place leftovers in an airtight container. This keeps the tofu fresh and prevents it from drying out. Use a glass or plastic container with a lid for best results. To reheat tofu, use a skillet or oven. Heat a little oil in a skillet and add the tofu. Cook it over medium heat until it’s warm and crispy. If you use the oven, preheat to 350°F and bake for about 10-15 minutes. This keeps the crispy texture intact. You can store crispy honey garlic tofu in the fridge for up to 3 days. Check for spoilage by looking for any off smells or changes in texture. If it feels slimy or has an unusual odor, it’s best to throw it away. Enjoy your crispy honey garlic tofu while it’s fresh for the best taste. It takes about 15 minutes to prep and 15 minutes to cook. The total time is 30 minutes. This is quick, making it great for busy nights. Yes, you can freeze crispy honey garlic tofu. To freeze, let it cool completely. Place it in an airtight container. It will last up to 3 months. When ready to eat, thaw it in the fridge overnight. Reheat in the oven to keep it crispy. You can serve crispy honey garlic tofu with: - Steamed jasmine rice - Quinoa - Stir-fried vegetables - A simple green salad These sides balance the flavors and make a full meal. To make the honey garlic sauce vegetarian, use maple syrup as a substitute for honey. You can also try agave nectar or brown rice syrup. These options keep the sauce sweet and tasty. In this post, we explored how to make crispy honey garlic tofu. You learned about essential ingredients, equipment needed, and step-by-step instructions to achieve perfect results. We also provided tips for flavor and presentation, along with variations to suit different diets. Remember, pressing tofu and using cornstarch are key for crispiness. With the right techniques, you can create a delicious dish that pleases everyone at your table. Enjoy your cooking journey and make this meal a standout dish!](https://emmasdish.com/wp-content/uploads/2025/07/a62a8118-0118-41a9-8dcd-10793e5e2e73.webp)
Crispy Honey Garlic Tofu Simple and Quick Recipe
Craving a quick and tasty dinner? You’ll love this Crispy Honey Garlic Tofu recipe! It’s easy to make and packed with flavor. I’ll show…
My Latest Desserts
My Latest Recipes

hey,
i’m !
I’m so happy you’re here!
I’m not just sharing recipes I’m sharing a piece of my heart. I hope these dishes bring you comfort, joy, and maybe even a new favorite.
![To make these yummy granola bars, you need some great ingredients. Here’s a list: - 2 cups rolled oats - 1 cup mixed nuts (almonds, walnuts, and pecans), roughly chopped - 1/2 cup honey or maple syrup - 1/2 cup creamy peanut butter or almond butter - 1/2 cup dried fruit (cranberries, raisins, or apricots) - 1/4 cup sunflower seeds - 1 teaspoon vanilla extract - 1/2 teaspoon cinnamon - A pinch of salt These ingredients work well together. The oats give fiber, while nuts add crunch. Honey or maple syrup provides sweetness, and nut butter helps bind it all. You can change up your granola bars with some fun add-ins! Here are some ideas: - Chocolate chips or chunks - Coconut flakes - Chia seeds or flaxseeds - Pumpkin seeds - Spices like nutmeg or ginger Adding these can change the flavor and texture. Experiment with what you like. You might find a new favorite mix! These granola bars are not only tasty but healthy too. Here’s a quick look at what’s in a single bar (based on 12 bars): - Calories: About 200 - Protein: 5 grams - Carbohydrates: 25 grams - Fiber: 3 grams - Sugar: 8 grams They offer energy for your day. Perfect for breakfast or a snack! For a full recipe, check out the [Full Recipe]. Start by preheating your oven to 350°F (175°C). Grab an 8x8 inch baking dish. Line it with parchment paper. Leave some paper hanging over the edges for easy removal later. In a large bowl, add 2 cups of rolled oats. Next, add 1 cup of mixed nuts. I like using almonds, walnuts, and pecans. Chop them up a bit. Then, toss in 1/2 cup of dried fruit. You can use cranberries, raisins, or apricots. Add 1/4 cup of sunflower seeds, 1/2 teaspoon of cinnamon, and a pinch of salt. Stir everything together well. In a small saucepan, combine 1/2 cup of honey or maple syrup with 1/2 cup of creamy peanut butter. Heat it on low until it's melted and smooth. Take it off the heat and stir in 1 teaspoon of vanilla extract. This will give your bars a nice flavor. Pour the warm mixture over the dry ingredients. Mix everything until the oats and nuts are well coated. Now, transfer the mixture into your prepared baking dish. Press it down firmly and evenly. You can use a spatula or your hands. If your hands stick, wet them a little. Bake in the oven for 20-25 minutes. Look for golden brown edges. Keep an eye on them to prevent burning. Once baked, take the dish out of the oven. Let it cool for about 10 minutes. Use the parchment paper to lift the bars out of the dish. Let them cool completely on a wire rack. When cooled, cut into bars or squares. Store your granola bars in an airtight container at room temperature for up to a week. You can also refrigerate them for longer freshness. Check out the Full Recipe for more details! To get the best texture, use rolled oats. They hold together well and give a nice chew. When mixing the wet ingredients, make sure the honey or maple syrup is warm. This helps it blend smoothly with the nut butter. You can also add a bit of cinnamon for warmth. One common mistake is not pressing the mixture firmly into the pan. Pressing helps the bars hold together. Also, watch the baking time closely. If left too long, they can burn. If they feel too soft after baking, let them cool completely. They will firm up as they cool. For a great look, cut the bars neatly into squares or rectangles. You can place them on a colorful platter. To make it special, sprinkle some chopped nuts or dried fruit on top. If you want to gift them, wrap each bar in parchment paper. Tie with a string for a charming touch. For the full recipe, check out the complete guide! {{image_2}} You can easily change the nuts in the recipe. Each nut brings its own taste. For a nutty twist, try cashews or hazelnuts. You can also mix in seeds like pumpkin or chia. This adds a nice crunch and more nutrients. Just make sure to keep the total nut weight the same. This keeps the texture right and ensures your bars hold together. Chocolate can make your granola bars even better. You can add dark chocolate chips or chunks. They melt slightly and give a sweet touch. If you want spice, try adding some cocoa powder or cinnamon. This gives your bars warmth and depth. Just a little can go a long way. You can also use nutmeg or ginger for a different flavor kick. Swapping out dried fruit can change the whole flavor. Instead of cranberries, try dried cherries or blueberries. You can also use chopped dates or figs for extra sweetness. Fresh fruit can work too, but be careful with moisture. It can make your bars soggy. If you want a fresh taste, add a little zest from an orange or lemon. This gives a bright, fresh flavor that makes your bars pop. Remember, these variations make your granola bars unique. Feel free to experiment and find your favorite mix. For the complete recipe, check the Full Recipe. To keep your granola bars fresh, store them in an airtight container. You can place a piece of parchment paper between layers to avoid sticking. If you prefer, wrap each bar in plastic wrap for easy grab-and-go snacks. Always keep them in a cool, dry place to prevent them from getting too soft. When stored properly, granola bars last about a week at room temperature. If you choose to refrigerate them, they can stay fresh for up to two weeks. The cold can help maintain their texture and flavor. Just remember to let them sit at room temperature for a bit before eating, so they soften slightly. Freezing granola bars is a great option for long-term storage. Wrap each bar tightly in plastic wrap, then place them in a freezer bag. They can last for up to three months in the freezer. When you’re ready to eat, simply pull out a bar and let it thaw at room temperature. They taste just as good as fresh! To make gluten-free granola bars, choose certified gluten-free oats. Many brands offer oats that are safe for people with gluten allergies. Always check labels to ensure no cross-contamination occurs during processing. You can also use gluten-free flours in place of regular flour if you add any. Yes, you can use different sweeteners. Maple syrup, agave nectar, or brown rice syrup work well. Each sweetener gives a unique flavor. Just remember to adjust the amount based on sweetness levels. If your bars crumble, increase the binding agent. You can add more honey or nut butter. Press the mixture more firmly into the baking dish to help it stick together. Baking them slightly longer may also help. You can change flavors by adding spices or extracts. Try cinnamon, nutmeg, or even cocoa powder for a chocolate twist. You can also mix in different dried fruits or nuts to create your perfect blend. Yes, you can use quick oats. They may change the texture a bit, making the bars softer. If you prefer a chewier bar, stick with rolled oats. Both options are tasty, so it’s up to your preference. To cut the bars easily, let them cool completely. Use a sharp knife for clean cuts. If the bars are still warm, they may fall apart. A gentle sawing motion helps keep them intact. Granola bars are fun to make at home. You learned about key ingredients, step-by-step instructions, and helpful tips. Explore variations to make your bars unique, and store them well for freshness. Remember, you can swap ingredients to suit your taste and needs. With practice, you'll avoid common mistakes and create tasty bars every time. Enjoy customizing flavors and sharing your delicious snacks!](https://emmasdish.com/wp-content/uploads/2025/07/a02fe091-a79a-44d9-aed4-4483d79151d0-300x300.webp)
![To make a tasty Chicken Tikka Masala, you need a mix of simple ingredients. Here’s what you need: - Chicken and marinade components - 500g chicken breast, cut into bite-sized pieces - 1 cup plain yogurt - 4 cloves garlic, minced - 1 inch ginger, grated - Spices and seasonings - 2 tablespoons garam masala - 1 tablespoon ground cumin - 1 tablespoon ground coriander - 1 teaspoon turmeric - 1 teaspoon chili powder (adjust for spice preference) - Salt to taste - Cooking essentials and garnishing - 2 tablespoons olive oil - 1 onion, finely chopped - 1 can (400g) diced tomatoes - 1 cup coconut milk - Fresh cilantro (coriander) for garnishing These ingredients work together to create the rich and creamy flavor of Chicken Tikka Masala. Using fresh herbs and quality spices makes a big difference. I suggest you use a good yogurt for the marinade. The marinating process is key to tender chicken. For the best results, let the chicken sit in the marinade for a few hours or overnight. This way, it absorbs all the bold flavors. Enjoy the process of gathering these ingredients; they set the stage for a wonderful meal. For the full recipe, check out the instructions in this article. To start, you’ll need a mixing bowl. Combine 1 cup of plain yogurt with the spices. Use 2 tablespoons of garam masala, 1 tablespoon of ground cumin, 1 tablespoon of ground coriander, 1 teaspoon of turmeric, and 1 teaspoon of chili powder. Add half of the minced garlic and the grated ginger. Mix everything well. This forms a creamy, flavorful marinade. Next, add 500g of chicken breast, cut into bite-sized pieces. Make sure each piece is coated with the marinade. Cover the bowl and refrigerate it for at least 1 hour. If you have time, marinate overnight for the best flavor. Now, heat 2 tablespoons of olive oil in a large skillet over medium heat. Once the oil is hot, add 1 finely chopped onion. Sauté it for about 5 minutes until it turns translucent. Then, stir in the remaining minced garlic and ginger. Cook for another 1 to 2 minutes. The kitchen will smell amazing! Now it’s time for the chicken. Add the marinated chicken pieces to the pan, reserving any extra marinade. Cook the chicken until it browns, which should take around 7 to 10 minutes. After the chicken is browned, pour in 1 can of diced tomatoes, including the juice, and the reserved marinade. Stir everything together, and let it simmer for about 10 minutes. Next, lower the heat and add 1 cup of coconut milk. Mix it well and allow it to simmer for another 10 minutes. If the sauce looks too thick, adjust the consistency with a little water. Taste and add salt as needed. Once cooked, remove the pan from heat and let it sit for a few minutes. This helps the flavors blend. When ready to serve, present the Chicken Tikka Masala in a bowl. Garnish with fresh cilantro for a pop of color. Pair your dish with fluffy basmati rice or warm naan bread. For an extra zing, add a squeeze of fresh lime. Enjoy your delicious, easy Chicken Tikka Masala! For the complete recipe, check the [Full Recipe]. Choosing the right chicken I recommend using chicken breast for this dish. It cooks quickly and stays moist. You can also use thighs for extra flavor. Marination times for enhanced flavor Marinate the chicken for at least one hour. If you have time, let it sit overnight. This helps the spices soak in for better taste. Balancing spice and creaminess Adjust the chili powder based on your spice level. For a creamy taste, ensure you add enough coconut milk. This balance makes each bite enjoyable. Overcooking chicken Be careful not to overcook the chicken. It should be tender, not dry. Keep an eye on it while cooking. Skipping the marinade Never skip the marinade. It adds depth to the dish. Marinating makes your chicken flavorful and juicy. {{image_2}} You can easily adjust the recipe for different diets. If you want to make it gluten-free, use gluten-free yogurt. For a dairy-free version, swap yogurt for coconut yogurt. You can also use boneless chicken thighs instead of breasts for a richer flavor. If you prefer vegetarian options, try using paneer or chickpeas. Both options work well with the same marinade. Just cook them until heated through instead of browning. Chicken Tikka Masala pairs well with several dishes. Fluffy basmati rice is a classic choice. It soaks up the sauce nicely. Naan bread is also great for dipping. You can serve it with a side of cucumber raita. This cool, creamy dip balances the spices. For a full meal, add a simple salad. A fresh green salad with lemon dressing works best. You can also offer roasted vegetables for color and flavor. For the full recipe, check out the Easy Chicken Tikka Masala section above! To keep your Chicken Tikka Masala fresh, store it in an airtight container. Place it in the fridge if you plan to eat it within three days. When you refrigerate, allow it to cool first. This helps keep it safe and tasty. For longer storage, use your freezer. Freeze the dish in a container or a freezer bag. Make sure to remove as much air as possible to prevent freezer burn. You can freeze it for up to three months. When reheating, I recommend using a stovetop. This method helps maintain the dish's flavor. Place your Chicken Tikka Masala in a pan over low heat. Stir it often to heat evenly. If it looks dry, add a splash of water or coconut milk. You can also use a microwave. Place it in a microwave-safe dish, cover, and heat in short intervals, stirring in between. This keeps it from drying out. Enjoy your meal warm and delicious! To make this dish spicier, you can adjust the chili powder. Start with one teaspoon. If you like more heat, add more chili powder. You can also add fresh green chilies. Finely chop them and stir into the dish. Another option is adding cayenne pepper for a kick. Always taste as you go. This way, you control the heat level. Yes, you can use other meats. Chicken thighs work well, as they stay juicy. You can also try lamb or shrimp. If you want a vegetarian option, use firm tofu or paneer. Just adjust the cooking time for different meats. Ensure they are cooked through for safety. Chicken Tikka Masala has roots in Indian cuisine. It is a popular dish in the UK. The exact origin is debated, but many say it was created by South Asian chefs. It blends Indian spices with British taste. This dish shows how cultures can mix in food. Chicken Tikka Masala is now enjoyed worldwide. It reflects the joy of sharing flavors. In this blog post, I covered how to make Easy Chicken Tikka Masala. We discussed essential ingredients like chicken, spices, and cooking tips. Each step, from marinating to serving, helps you create a tasty dish. I shared tips to avoid common mistakes and offered variations for dietary needs. In closing, making Chicken Tikka Masala is fun and rewarding. With practice, you'll impress your family and friends. Enjoy cooking and exploring this delicious dish!](https://emmasdish.com/wp-content/uploads/2025/07/7203decf-58c7-4016-ac99-38120703d330-300x300.webp)
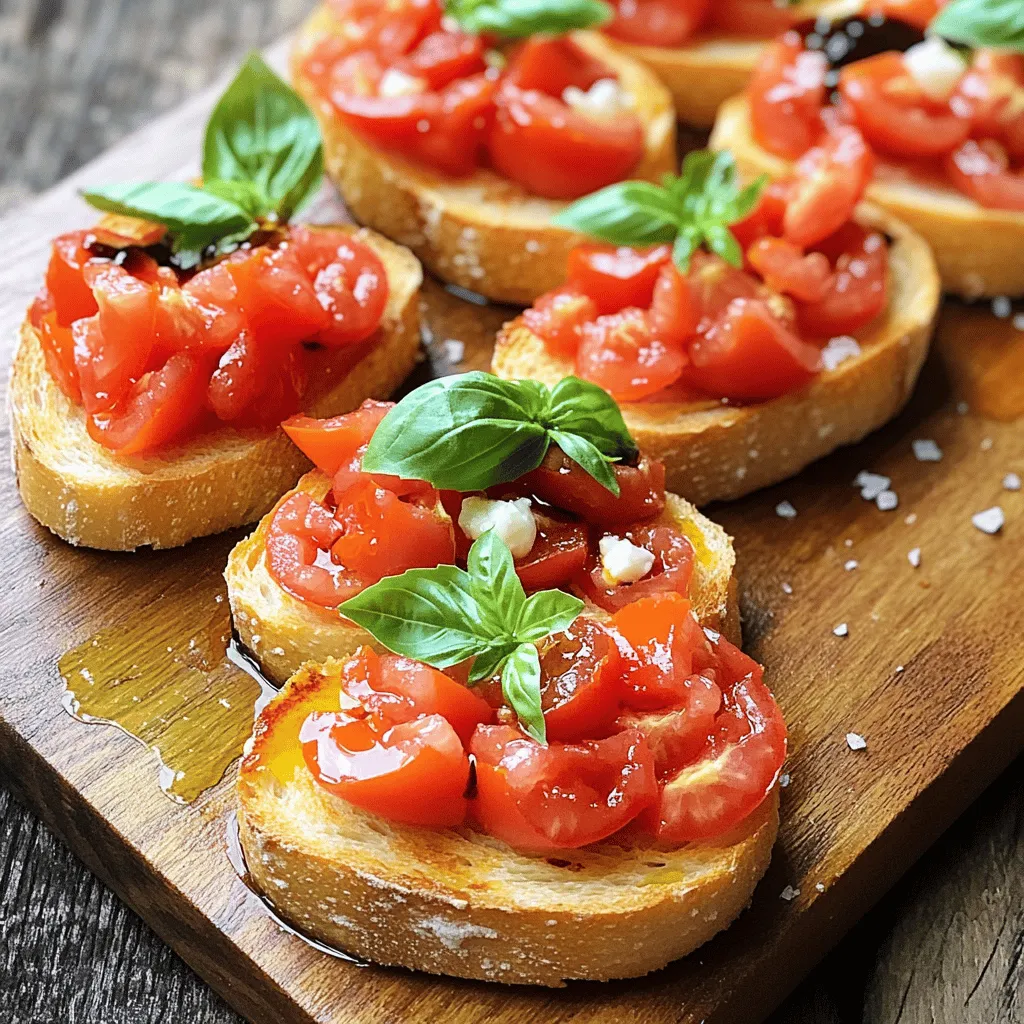
Fresh Tomato Basil Bruschetta Flavorful Easy Recipe
Are you ready to elevate your appetizer game? Fresh Tomato Basil Bruschetta is a bright, tasty treat that’s easy to make and perfect for…