
Latest & Greatest

Cinnamon Apple Baked Oatmeal Cups Flavorful Breakfast
Start your day right with these delicious Cinnamon Apple Baked Oatmeal Cups! Packed with flavor, they’re easy to make and
Read more…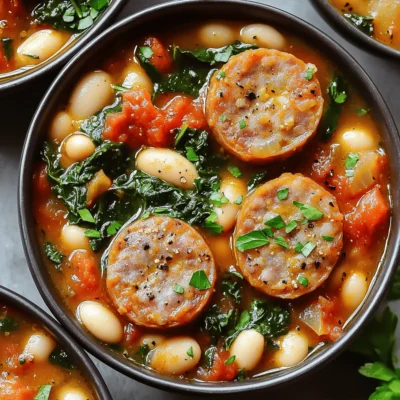
Slow Cooker Sausage White Bean Stew Rich and Hearty Meal
Are you ready to create a rich and hearty meal that’s easy to make? Slow Cooker Sausage White Bean Stew
Read more…
Pumpkin Pecan Coffee Cake Simple and Delicious Treat
Looking for a cozy treat that warms your heart? This Pumpkin Pecan Coffee Cake is simple and so delicious! With
Read more…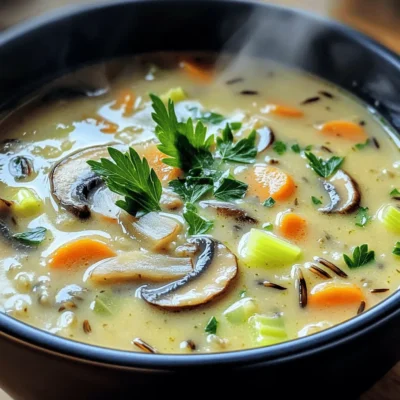
Creamy Mushroom Wild Rice Soup Cozy Comfort Dish
Are you ready to warm up with a bowl of delicious Creamy Mushroom Wild Rice Soup? This cozy comfort dish
Read more…
Air Fryer Ranch Chicken Nuggets Crispy and Tasty Treat
Craving a crispy and tasty snack? Look no further than Air Fryer Ranch Chicken Nuggets! I’ll show you how to
Read more…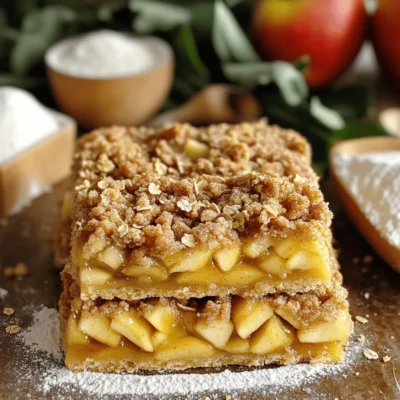
Cinnamon Streusel Apple Pie Bars Simple and Delicious
Craving a sweet treat that’s easy to make and bursts with flavor? Look no further than these Cinnamon Streusel Apple
Read more…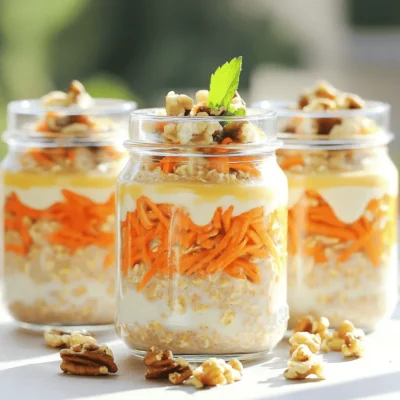
Carrot Cake Overnight Oats Easy and Delicious Recipe
Want a quick and tasty breakfast that feels like dessert? Carrot Cake Overnight Oats are easy to make and packed
Read more…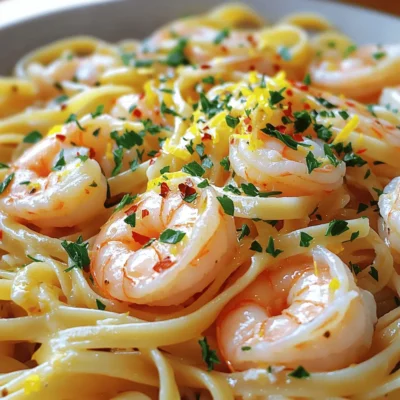
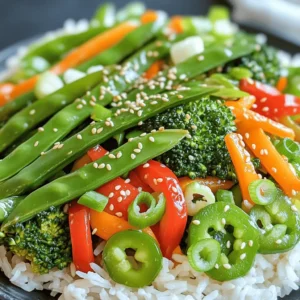
Garlic Butter Scampi Linguine Rich and Flavorful Dish
Are you ready to dive into a plate of Garlic Butter Scampi Linguine? This rich and flavorful dish brings the
Read more…browse recipes


Sunrise Breakfast Burritos Tasty and Easy Recipe
Wake up to a tasty start with my Sunrise Breakfast Burritos recipe! These easy-to-make burritos combine vibrant flavors, crisp veggies, and soft eggs, ensuring…
My Latest Desserts
My Latest Recipes

hey,
i’m !
I’m so happy you’re here!
I’m not just sharing recipes I’m sharing a piece of my heart. I hope these dishes bring you comfort, joy, and maybe even a new favorite.


One-Pot Lemon Garlic Pasta Flavorful and Easy Meal
Get ready for a meal that bursts with flavor and is super easy to make! This One-Pot Lemon Garlic Pasta is your new go-to…
![To make One-Pot Lemon Garlic Pasta, gather these ingredients: - 12 oz spaghetti - 4 cups vegetable broth - 4 cloves garlic, minced - 1 medium onion, finely chopped - 1 lemon (zest and juice) - 1 cup cherry tomatoes, halved - 1/2 cup fresh parsley, chopped - 1/2 teaspoon red pepper flakes (optional) - Salt and pepper to taste - 2 tablespoons olive oil - Grated Parmesan cheese for serving (optional) You can swap ingredients if needed. Here are some ideas: - Use penne or fettuccine instead of spaghetti. - Swap vegetable broth for chicken broth for a richer taste. - If you don't have fresh parsley, use basil or spinach. - For a creamier dish, add a splash of cream or cashew milk. - If you want a kick, use crushed red pepper or fresh chili instead of red pepper flakes. Choose your ingredients wisely for the best flavor. Here are some tips: - Look for firm, bright cherry tomatoes without blemishes. - Pick lemons that feel heavy for their size; they’re juicier. - Choose garlic that is firm and has no green shoots; it’s fresher. - When buying parsley, look for vibrant green leaves with no wilting. - For onions, select those that are firm and dry without soft spots. These simple steps help you create a delicious meal with fresh flavors! For the full recipe, check out the [Full Recipe]. To start, gather all your ingredients. This makes cooking easier. You will need spaghetti, vegetable broth, garlic, onion, lemon, cherry tomatoes, parsley, and olive oil. Get your salt, pepper, and red pepper flakes ready too. 1. Heat the olive oil in a large pot over medium heat. 2. Add the chopped onion and cook for 3-4 minutes. The onion should turn soft and clear. 3. Next, add the minced garlic. Stir it for about 1-2 minutes. Be careful not to let it burn. 4. Now, add the spaghetti, vegetable broth, red pepper flakes, lemon zest, salt, and pepper. Bring everything to a boil. 5. Once it boils, lower the heat. Cover the pot and let it simmer for 10-12 minutes. Stir occasionally. The spaghetti should be al dente. 6. Add the halved cherry tomatoes and lemon juice. Cover the pot and let it sit for 2-3 minutes. The tomatoes will soften up. 7. Finally, take it off the heat and mix in the chopped parsley. Taste and adjust the salt and pepper if needed. 8. Serve hot and sprinkle grated Parmesan cheese on top if you like. You will know the pasta is done when it feels firm but tender. The liquid should mostly be absorbed, leaving a nice sauce. The tomatoes will be soft, and the dish should smell great. Enjoy your meal! For the full recipe, check the earlier section. To boost the taste of your One-Pot Lemon Garlic Pasta, use fresh herbs. Fresh parsley adds a bright note. You can also add basil or thyme for more depth. Don’t skip the lemon zest! It gives a punch of flavor. If you like heat, add more red pepper flakes. For a richer taste, use vegetable broth instead of water. A splash of white wine can also elevate the dish. Finally, finish with a drizzle of high-quality olive oil. One common mistake is overcooking the pasta. Always check it a minute before the time is up. Remember, it will continue to cook off the heat. Another mistake is not seasoning enough. Taste and adjust the salt and pepper. Skipping the lemon juice will dull the flavor. Lastly, don’t forget to stir. Stirring helps the pasta cook evenly and prevents sticking. You need a large skillet or pot to make this dish. A wooden spoon helps mix the ingredients well. Use a microplane or zester for the lemon zest. A good knife is key for chopping garlic and onion. For serving, have shallow bowls ready. They show off the pasta nicely. If you want, use a cheese grater for the Parmesan cheese. These tools will make cooking easier and more fun. For the full recipe, check out the One-Pot Lemon Garlic Pasta. {{image_2}} You can easily add protein to your One-Pot Lemon Garlic Pasta. Chicken is a great choice. Simply cut it into small pieces and cook it with the onions. Shrimp works well too. Toss in some shrimp during the last few minutes of cooking. For a hearty dish, add cooked sausage or even chickpeas for a plant-based option. Each adds flavor and makes the meal more filling. If you want a vegetarian version, skip the meat and focus on veggies. You can add spinach, zucchini, or bell peppers. These veggies blend well with the lemon and garlic. You can also use mushrooms for a rich taste. Just sauté them with the onions. They will soak up all the lovely flavors. To boost the flavor, think about adding spices. Fresh herbs like basil or thyme can brighten the dish. A dash of cayenne pepper adds heat without overpowering. For a fun twist, try a splash of soy sauce or balsamic vinegar. These give a unique depth to the pasta. Always taste and adjust to your liking. You want each bite to burst with flavor! For the complete process, don’t forget to check the Full Recipe! Store your leftover One-Pot Lemon Garlic Pasta in an airtight container. Let it cool first. Once cooled, seal the container and place it in the fridge. This pasta dish can stay fresh for up to three days. When you're ready to enjoy your leftovers, use a pot or microwave. If using a pot, add a splash of vegetable broth or water. Heat it on low, stirring often. If using a microwave, heat in short bursts. Stir it every 30 seconds until hot. To freeze One-Pot Lemon Garlic Pasta, let it cool completely first. Then, pack it tightly in freezer-safe bags or containers. Remove any air before sealing. This dish can freeze well for about two months. When ready to eat, thaw it in the fridge overnight before reheating. For best flavor, consume it sooner rather than later. Yes, you can use other pasta types. Penne, fusilli, or fettuccine work well. Just keep an eye on the cooking time. Each pasta varies slightly, so check package instructions. You want it al dente, which means firm but not hard. This ensures every bite stays tasty. To change the spice level, add more or less red pepper flakes. For mild pasta, skip the flakes. If you love heat, double the amount! You can also add black pepper for a different spice. Taste as you cook. This way, you find the perfect balance for your meal. Many side dishes pair well with this pasta. A simple green salad brings freshness. Garlic bread adds a nice crunch and flavor. Roasted vegetables like zucchini or bell peppers complement the dish well. You can even serve a light soup as a starter. The options are endless! Check out the Full Recipe for more ideas. In this blog post, we explored important ingredients and their substitutions. I shared tips for selecting fresh items and provided clear steps for cooking. You learned how to enhance flavors and avoid common mistakes. Variations included protein options and vegetarian alternatives, plus storage strategies for leftovers. Always remember, cooking should be fun and creative. Use these tips to make your dishes shine and enjoy every bite!](https://emmasdish.com/wp-content/uploads/2025/06/5b16e991-6f12-4d99-807f-d952f0038b53.webp)
