

Latest & Greatest
Salted Caramel Greek Yogurt Cups Delightful Treats
Are you ready to indulge in a sweet, creamy treat? These Salted Caramel Greek Yogurt Cups are the perfect blend
Read more…
Crispy Lemon Herb Potatoes Perfect for Any Meal
Are you ready to elevate your meals? Crispy Lemon Herb Potatoes are the ultimate side dish. With a zesty flavor
Read more…
Pumpkin Chocolate Chip Muffins Soft and Flavorful Treat
Are you ready to bake a delicious treat that blends sweet chocolate and cozy pumpkin flavors? In this guide, I’ll
Read more…
Honey Garlic Chicken Stir Fry Flavorful and Easy Meal
Get ready to spice up your dinner routine with my easy Honey Garlic Chicken Stir Fry! This dish is packed
Read more…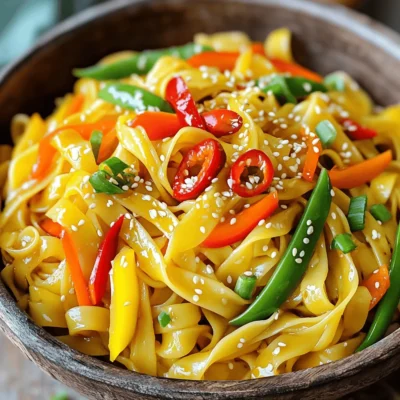
Garlic Chili Noodles Stir Fry Flavorful and Quick Meal
Looking for a meal that’s quick, flavorful, and will satisfy your cravings? Garlic Chili Noodles Stir Fry is the perfect
Read more…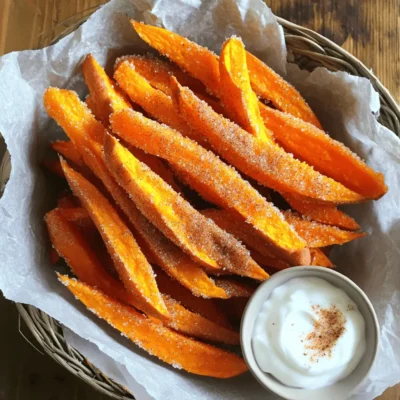
Cinnamon Sugar Sweet Potato Fries Quick and Tasty Snack
Are you ready to elevate your snacking game with a sweet twist? In this post, I’ll show you how to
Read more…
Creamy Cajun Shrimp Pasta One Pot Delicious Dinner
Are you ready for a tasty meal that takes just one pot? This Creamy Cajun Shrimp Pasta is not only
Read more…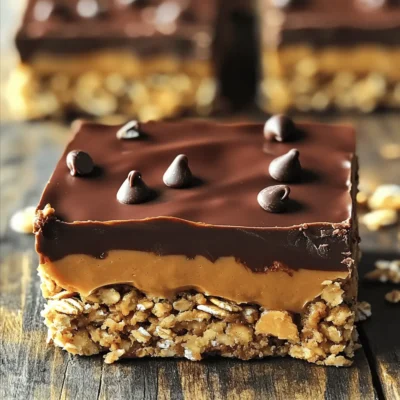
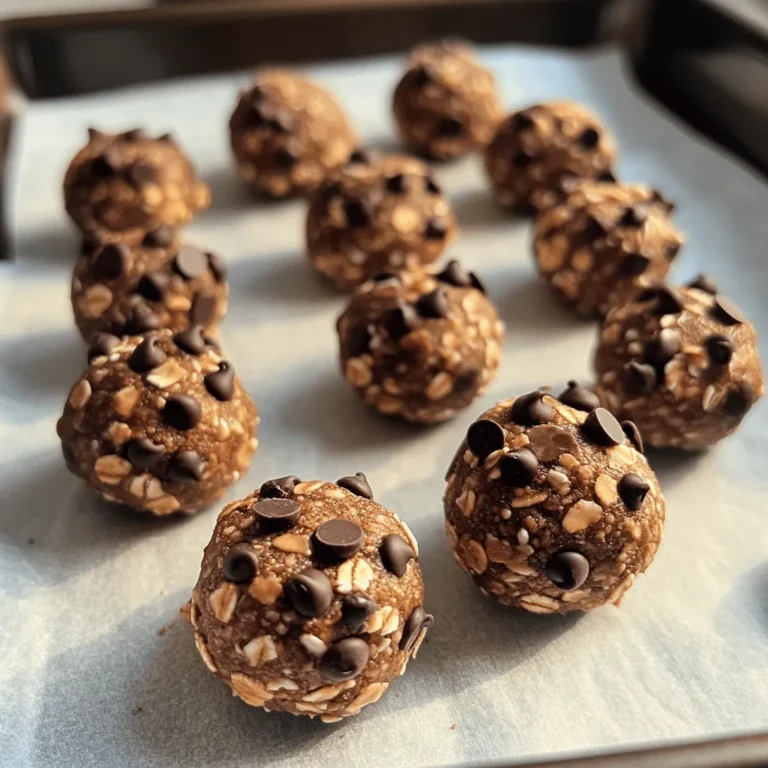
No-Bake Chocolate Peanut Butter Oat Bars Recipe
Are you ready to whip up a sweet, no-bake treat? This No-Bake Chocolate Peanut Butter Oat Bars Recipe brings together
Read more…browse recipes


Rainbow Veggie Pinwheels Colorful and Crunchy Snack
Looking for a fun and healthy snack? Rainbow Veggie Pinwheels are your answer! In this article, I’ll show you how to make these colorful…
My Latest Desserts
My Latest Recipes

hey,
i’m !
I’m so happy you’re here!
I’m not just sharing recipes I’m sharing a piece of my heart. I hope these dishes bring you comfort, joy, and maybe even a new favorite.

![To make delightful peanut butter toast, you need these simple and tasty ingredients: - Whole Grain Bread - Peanut Butter (Crunchy or Creamy) - Banana - Honey or Maple Syrup - Chia Seeds - Cinnamon - Sea Salt - Fresh Berries for Garnish These ingredients come together to create a great snack or meal. Whole grain bread gives you fiber. Peanut butter adds protein and healthy fats. Bananas bring sweetness and potassium. Honey or maple syrup gives extra sweetness. Chia seeds add crunch and omega-3s. Cinnamon provides warmth and flavor. A pinch of sea salt balances everything. Finally, fresh berries make it colorful and fun! When you mix these ingredients, you create a treat that is both yummy and good for you. This recipe is not just a snack; it's a tasty way to fuel your day. If you want to try this amazing dish, check out the Full Recipe. Making peanut butter toast is easy and fun. You only need a few minutes and simple steps. Gather your ingredients first. This helps you stay organized and quick. - Toaster settings for optimal bread crispiness: Set your toaster to a medium-high setting. This gives you a nice, golden brown color. Keep an eye on it to avoid burnt toast. You want a crispy outside but soft inside. - Even spreading techniques for peanut butter: Use a butter knife for spreading. Take 2 tablespoons of peanut butter for each slice. Start from the center and push outwards. Make sure to cover the whole slice. Go all the way to the edges to get that rich flavor in every bite. After spreading, layer banana slices on top. Drizzle honey or maple syrup for sweetness. Then, sprinkle chia seeds and cinnamon for health and flavor. Lastly, add a pinch of sea salt to balance the taste. Top with fresh berries for color and fun. You can add these touches to your [Full Recipe] for a delightful treat! When it comes to bread, I recommend whole grain. It adds fiber and flavor. You can also try sourdough or rye for a twist. These breads hold up well with peanut butter. Toasting them enhances the taste and crunch too. To get the best out of your peanut butter toast, toast your bread just right. Aim for a light golden color. This gives a crisp bite without being too hard. Spread the peanut butter evenly, reaching the edges. This way, every bite has flavor. Layer your banana slices close together. This makes each bite sweet and smooth. A drizzle of honey or maple syrup adds a touch of sweetness. Don’t forget a pinch of sea salt; it really boosts the flavor. One common mistake is using stale bread. Always use fresh bread for the best taste. Another mistake is not toasting enough. A lightly toasted slice brings out the best in peanut butter. Avoid overloading your toast with toppings. Too much can make it soggy and hard to eat. Lastly, don’t skip the salt! It balances the sweetness and brings everything together. For more ideas, check the Full Recipe. {{image_2}} Peanut butter toast is a great base for many toppings. You can swap peanut butter for other nut butters. Almond butter, cashew butter, or sunflower seed butter all taste amazing. Each nut butter gives a unique flavor and texture. Fruits add freshness and color. While bananas are a popular choice, you can try other fruits too. Sliced strawberries, apples, or pears work well. You can even mash up some raspberries or blackberries. These fruits add natural sweetness and a fun twist. For those who follow a vegan diet, you can easily adjust this recipe. Use maple syrup instead of honey for sweetness. Most nut butters are already vegan, so you’re all set there! If you need gluten-free options, choose gluten-free bread. Many brands offer tasty gluten-free choices. Just make sure to check the label. This way, everyone can enjoy peanut butter toast, no matter their diet! To make your peanut butter toast last, store your leftover ingredients properly. Keep the peanut butter in a cool, dry place. It should be fine for months if sealed well. If you have leftover banana slices, place them in a bowl and cover them tightly. This keeps them fresh for a day. Chia seeds and cinnamon can go in an airtight container in your pantry. They will stay fresh for a long time. Yes, you can prepare peanut butter toast in advance. However, keep in mind that the bread may get soggy. To avoid this, follow these tips: - Toast the Bread: Toast your bread right before serving. - Slice Bananas: Cut up your bananas and store them in a container with a bit of lemon juice. This helps them stay fresh and bright. - Pack Ingredients Separately: Store peanut butter, honey, and toppings in separate containers. This way, you can enjoy a quick, healthy meal without losing flavor. If you want to save your peanut butter toast, store it carefully. Wrap the toast in foil or parchment paper. You can keep it in the fridge for up to a day. But, for best results, it’s best to eat it fresh. Reheat it in a toaster or a toaster oven. This way, it stays crispy. If you've made the full recipe, enjoy it fresh for the best taste! Peanut butter toast has about 300 to 400 calories per serving. This count includes bread, peanut butter, and toppings. The exact number varies based on ingredients. For example, using whole grain bread is a smart choice that adds fiber. You can make peanut butter toast healthier in many ways. Use whole grain bread for more fiber. Choose natural peanut butter with no added sugar or oil. You can add fruits like berries or apples for vitamins. Instead of honey, try mashed banana for natural sweetness. Yes, you can freeze peanut butter toast. Make sure to wrap it well in plastic. This keeps it fresh and prevents freezer burn. When ready to eat, just toast it again. It will taste great even after freezing. For the full recipe, check out Peanut Butter Paradise Toast. In this blog, we explored how to make delicious peanut butter toast. We covered ingredients, from whole grain bread to fresh berries. Next, I shared step-by-step instructions for preparing your toast perfectly. I also offered tips on the best bread choices and creative topping ideas. Don’t forget to check storage tips to keep things fresh. Peanut butter toast is simple, tasty, and can fit any diet. Enjoy experimenting with flavors and toppings!](https://emmasdish.com/wp-content/uploads/2025/04/2dbd974b-c2d2-4bcf-87da-b20f1a626c95-300x300.webp)

Garlic Butter Steak Bites Flavorful and Easy Recipe
Are you ready to elevate your dinner game? Garlic Butter Steak Bites are an easy way to impress family and friends. With just a…
![- 1 lb sirloin steak, cut into 1-inch cubes - 4 tablespoons unsalted butter - 4 cloves garlic, minced For the best flavor, I always choose sirloin steak. It’s tender and easy to work with. Unsalted butter adds richness, while fresh garlic gives a strong, aromatic kick. - 1 teaspoon fresh rosemary, chopped - 1 teaspoon fresh thyme, chopped - Salt and pepper to taste - 2 tablespoons olive oil Fresh herbs like rosemary and thyme brighten the dish. Salt and pepper bring out the steak’s natural taste. Olive oil helps cook the meat evenly and adds a light flavor. - Fresh parsley - Serving suggestions (e.g., with sides) I like to add fresh parsley for color and freshness. These steak bites pair well with sides like mashed potatoes or a crisp salad. For the full recipe, check [Full Recipe]. Start by seasoning the steak cubes with salt and pepper. Use enough to coat each piece well. This step adds flavor right from the start. Let the seasoned steak rest for about 15 minutes. This allows the meat to come to room temperature. Room temperature steak cooks more evenly. It also helps achieve a nice crust when searing. Heat a large skillet over medium-high heat. Add olive oil once the skillet is hot. Place the steak cubes in a single layer. Avoid crowding the pan to ensure even cooking. Sear each side for 2-3 minutes. This timing gives a nice browning. For medium-rare, aim for an internal temperature of 130°F (54°C). Once done, remove the steak from the skillet and set it aside. In the same skillet, lower the heat to medium. Add the unsalted butter and minced garlic. Be careful with the heat; burnt garlic tastes bitter. Stir the mixture for 1-2 minutes. You want the garlic fragrant but not brown. Next, add chopped rosemary and thyme. These herbs bring out a rich flavor. Combine everything well, then return the steak bites to the skillet. Toss them in the garlic butter until well coated. Cook for another minute to warm the steak through. For the full recipe, check out the detailed instructions above. - Choosing the right cut of meat: Sirloin works great for steak bites. It is tender and has good flavor. You can also try ribeye or filet mignon for a richer taste. Always pick fresh meat for the best outcome. - Importance of an accurate thermometer: Use a meat thermometer to check doneness. For medium-rare, aim for 130°F (54°C). This helps you avoid overcooking the meat, keeping it juicy and tender. - Experimenting with spices and herbs: Don’t be afraid to play with flavors. Add chili flakes for heat or smoked paprika for depth. Fresh herbs like parsley or basil can also brighten the dish. - Using additional sauces for flavor depth: A drizzle of balsamic glaze or a spoonful of Dijon mustard can add a nice kick. You can mix these sauces into the garlic butter for a unique twist. - Plating suggestions for aesthetics: Use a clean white plate to showcase the steak bites. Arrange them in a circle or stack them for height. Drizzle some garlic butter around the edges for a visual pop. - Pairing with complementary side dishes: Serve with roasted veggies or a fresh salad. These sides balance the richness of the steak and add color to your plate. For a fun twist, try serving with garlic bread for extra flavor! For the full recipe, check out the Garlic Butter Steak Bites. {{image_2}} You can enjoy garlic butter steak bites with many steak cuts. Ribeye is a great choice. It has a good amount of fat. This makes it tender and juicy. Filet mignon is another option. It is very tender and mild in flavor. Flank steak works well too. It has a strong beef taste and is great for marinating. You can use any of these cuts to make your dish unique and tasty. Want to spice things up? Try adding chili flakes for some heat. This will give your steak bites a nice kick. You can also mix in different herbs. Basil, oregano, or parsley can change the taste. Fresh herbs add brightness and flavor. Feel free to get creative and find your favorite mix! You can cook garlic butter steak bites in different ways. Grilling gives a great smoky flavor. Just make sure to keep the heat high. If you prefer, you can also use a skillet. It gives a nice sear and is easy to control. Baking in the oven is another method. Preheat your oven to 400°F (204°C). Place the seasoned steak bites on a baking sheet. Bake for about 10-12 minutes, or until they are cooked to your liking. This method is simple and requires less attention. Each method gives a different texture and flavor. Choose what works best for you! For the full recipe, check out the [Full Recipe]. To keep your garlic butter steak bites fresh, follow these tips: - Allow the steak bites to cool completely before storing. - Place them in an airtight container to prevent moisture loss. - Store in the fridge for up to 3 days. For longer storage, you can freeze the leftovers: - Wrap the steak bites tightly in plastic wrap. - Place them in a freezer-safe bag or container. - They can last up to 3 months in the freezer. When reheating your steak bites, you have two main options: stovetop or microwave. Stovetop: - Heat a skillet over medium-low heat. - Add a little olive oil or butter. - Place the steak bites in the skillet, turning them often. - This method keeps the steak tender and flavorful. Microwave: - Place steak bites in a microwave-safe dish. - Cover with a damp paper towel to retain moisture. - Heat in short bursts, stirring in between. - Be careful not to overcook them, or they may get tough. Your steak bites can last in the fridge for about 3 days. After that, they may spoil. Signs of spoilage include: - A sour smell or off odor. - Changes in color or texture. - Slimy or sticky surface. If you notice any of these signs, it's best to throw them away. Enjoy your garlic butter steak bites while they are fresh! For the full recipe, check the earlier section. For Garlic Butter Steak Bites, I recommend using sirloin steak. Sirloin is tender, flavorful, and affordable. It cooks quickly, making it perfect for this dish. You can also try ribeye or filet mignon for a richer taste. Ribeye has more marbling, which adds great flavor. Filet mignon is super tender and melts in your mouth. Each cut has its own charm, but sirloin is my go-to for easy cooking. Yes, you can prepare this recipe ahead of time. Cook the steak bites and store them in an airtight container. Keep them in the fridge for up to three days. When you're ready to eat, just reheat them in a skillet. Add a bit of butter and garlic to keep the flavors fresh. You can also cook the garlic butter sauce ahead. Just combine it with the steak bites right before serving for a warm, tasty dish. To check if your steak is perfectly cooked, use a meat thermometer. For medium-rare, look for an internal temperature of 130°F (54°C). If you don’t have a thermometer, look for the following signs: - The steak should feel firm but slightly springy. - The juices should run clear, not pink. - If you cut into it, the inside should be a warm red-pink. These tips will help you nail the perfect steak every time. For more details, check the Full Recipe. Garlic Butter Steak Bites are simple and tasty. We covered key ingredients like sirloin, garlic, and butter. The step-by-step guide helps with cooking perfectly tender steak. Tips on enhancing flavor and presentation can elevate your dish. Don’t forget about variations and storage options for leftovers. With these ideas, you can impress anyone at the table. Enjoy cooking and sharing this delicious meal with friends and family!](https://emmasdish.com/wp-content/uploads/2025/06/ccb2e3ea-6933-4bba-b827-7566143a7229.webp)
