
Latest & Greatest
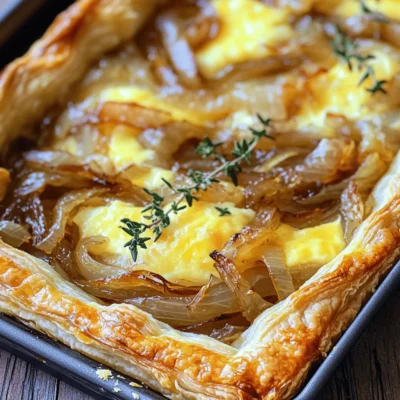
Savory Caramelized Onion Gruyere Tart Recipe Guide
Looking to impress at your next gathering? This Savory Caramelized Onion Gruyere Tart will do just that! With sweet, rich
Read more…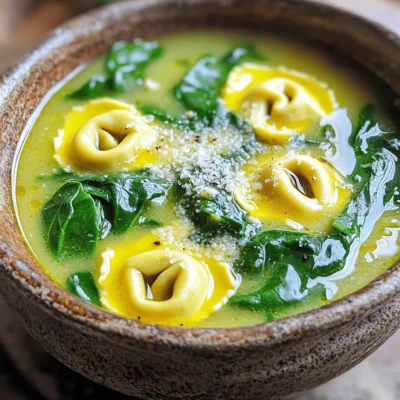
One-Pot Spinach Tortellini Soup Hearty and Simple Dish
Looking for a quick, warm meal that fills you up? Try my One-Pot Spinach Tortellini Soup! This hearty dish blends
Read more…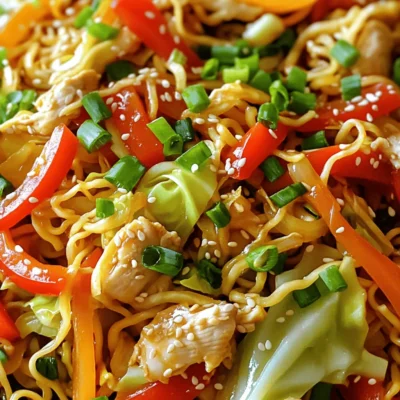
Chicken Chow Mein Takeout Fakeout Flavorful Delight
Craving a hearty Chicken Chow Mein but don’t want to order takeout? You’ve come to the right place! In this
Read more…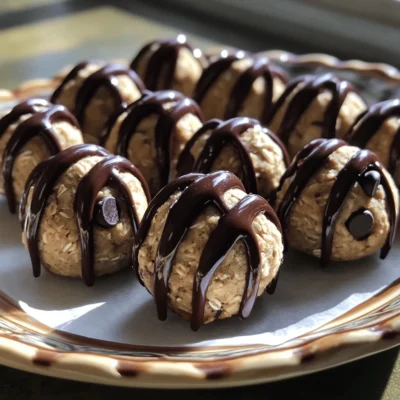
Protein Chocolate Chip Cookie Dough Bites Delight
Looking for a tasty, healthy snack? These Protein Chocolate Chip Cookie Dough Bites are the answer! Packed with nutrients and
Read more…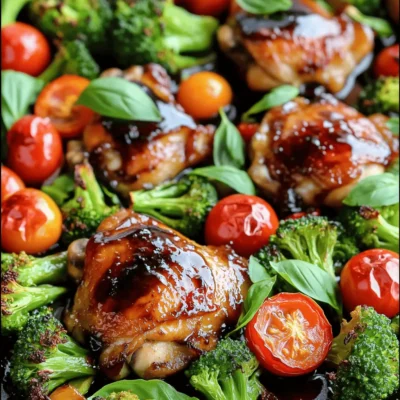
Sheet Pan Balsamic Chicken & Veggies Easy Dinner Delight
Looking for an easy dinner that packs flavor? My Sheet Pan Balsamic Chicken & Veggies offers just that! With tender
Read more…
Air Fryer Cajun Salmon Bites Tasty and Quick Snack
Looking for a quick and tasty snack? Air Fryer Cajun Salmon Bites are the perfect solution! With fresh salmon coated
Read more…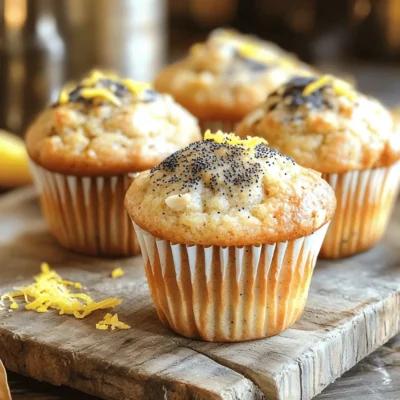
Almond Poppy Seed Muffins Bakery Delightful Recipe
Welcome to the delightful world of Almond Poppy Seed Muffins! If you crave a tasty treat that’s easy to make,
Read more…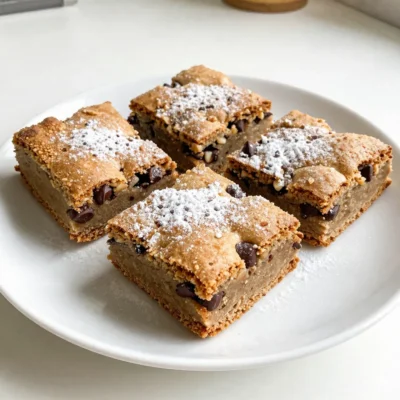
Brown Butter Blondies Simple and Sweet Delight
Are you ready to sweeten your day with a treat that’s simple and rich? Brown butter blondies bring a delightful
Read more…browse recipes


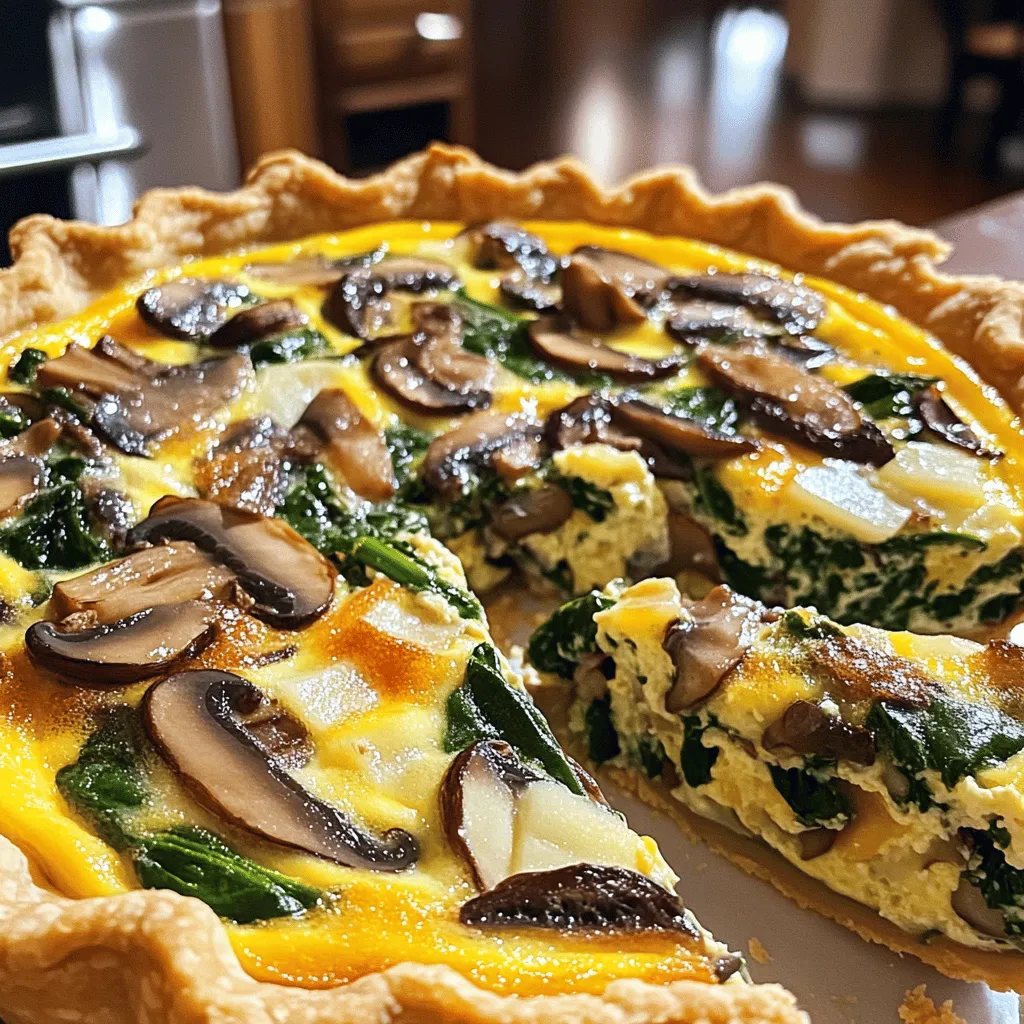
Savory Mushroom and Spinach Quiche Delight Recipe
Are you craving a comforting and delicious dish? Look no further! In this Savory Mushroom and Spinach Quiche Delight Recipe, I’ll guide you through…
My Latest Desserts
My Latest Recipes

hey,
i’m !
I’m so happy you’re here!
I’m not just sharing recipes I’m sharing a piece of my heart. I hope these dishes bring you comfort, joy, and maybe even a new favorite.

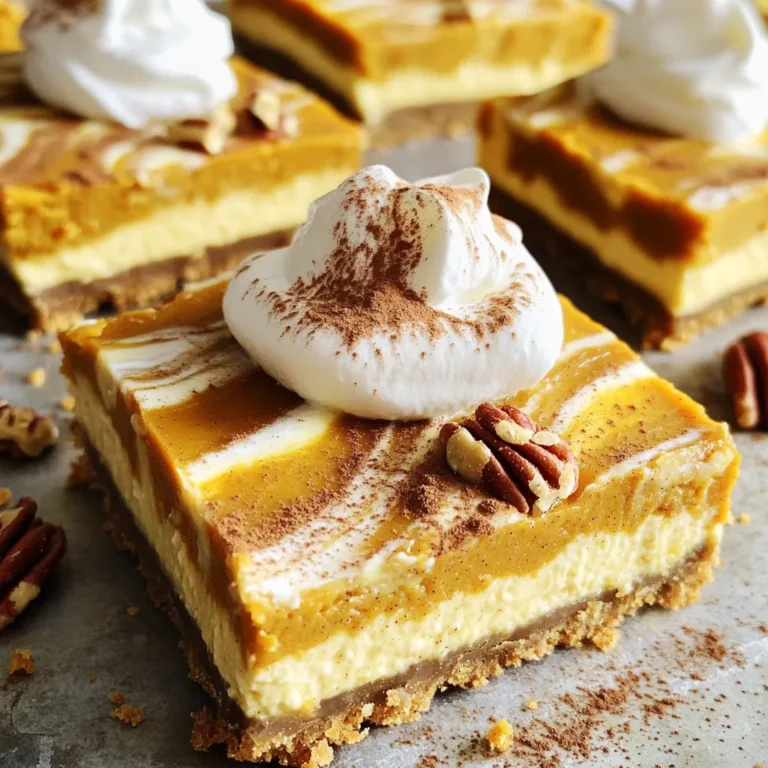
![When making Pumpkin Cream Cheese Swirl Muffins, you need to gather your ingredients. Here’s a detailed list: - 1 cup all-purpose flour - 1 cup whole wheat flour - 1 tablespoon baking powder - 1 teaspoon baking soda - 1 teaspoon ground cinnamon - 1/2 teaspoon ground nutmeg - 1/2 teaspoon salt For the dry ingredients, use both all-purpose and whole wheat flour. This combo gives great texture. Baking powder and baking soda help the muffins rise, while spices like cinnamon and nutmeg add warmth and flavor. Don't forget the salt, which balances the sweetness. - 1 cup pumpkin puree (canned or homemade) - 1/2 cup granulated sugar - 1/2 cup brown sugar, packed - 1/2 cup vegetable oil - 3 large eggs - 1 teaspoon vanilla extract Pumpkin puree is the star of this recipe. It gives moisture and flavor. The sugars sweeten the muffins. Vegetable oil keeps them tender. Use large eggs for the best rise. A touch of vanilla enhances the taste. - 4 ounces cream cheese, softened - 1/4 cup powdered sugar - 1/2 teaspoon vanilla extract (for cream cheese mixture) The cream cheese mixture brings a rich swirl to the muffins. Soften the cream cheese for easy mixing. The powdered sugar adds sweetness, and a bit of vanilla ensures every bite is tasty. For the complete recipe, refer to the Full Recipe section. It will guide you step by step to create these delightful muffins. Enjoy your baking! - Preheat your oven to 350°F (175°C). - Line a muffin tin with paper liners or lightly grease it. - In a medium bowl, whisk together the dry ingredients. - In a large bowl, mix the wet ingredients until creamy. - Gradually add the dry ingredients to the wet mixture. - In a small bowl, prepare the cream cheese mixture and add it to the muffin batter. - Fill each muffin cup about halfway with the pumpkin batter. - Add a spoonful of the cream cheese mixture on top and swirl it gently. - Bake for 18-22 minutes until a toothpick comes out clean. This recipe is a joy to follow. You can find the full recipe above. - Don’t overmix batter for light muffins. Overmixing makes them dense. Mix just until combined. - Ensure all ingredients are at room temperature. Cold ingredients can lead to uneven baking. - Use a toothpick or skewer for gentle swirling. This keeps the cream cheese blend nice and pretty. - Adjust swirl amount for desired cream cheese flavor. More cream cheese gives a richer taste. - Dust with powdered sugar before serving. It adds a sweet touch and looks great. - Serve warm with seasonal decorations. A small pumpkin or cinnamon stick makes it festive. To make the most of your baking, follow these tips. They will help you create the perfect Pumpkin Cream Cheese Swirl Muffins. For the complete recipe, check the Full Recipe section. {{image_2}} You can make these muffins fit your needs! For a gluten-free option, replace all-purpose flour with almond flour. This choice gives the muffins a nutty flavor and a soft texture. You can also use sugar alternatives to make healthier muffins. Try honey, maple syrup, or coconut sugar instead of regular sugar. These swaps can keep the taste great while lowering sugar content. Want to mix it up? Consider adding chocolate chips or nuts to your batter. Chocolate chips add sweetness, while nuts give a nice crunch. You can also incorporate dried fruits like cranberries or raisins. These fruits not only add flavor but also bring extra texture to each bite. They make the muffins even more fun to eat! You can create a festive twist by adding cranberries to the batter. They pair perfectly with pumpkin and bring a tart taste. Another option is to use sweet potato puree instead of pumpkin. Sweet potatoes add a creamy texture and a slightly different flavor. This change can make your muffins unique and exciting for any season. For the complete recipe, check out the [Full Recipe]. To keep your Pumpkin Cream Cheese Swirl Muffins fresh, store them in an airtight container at room temperature. This method helps keep them moist. If you want them to last longer, refrigerate the muffins. The cool air will slow down spoilage. To properly freeze your muffins, let them cool completely. Then, wrap each muffin tightly in plastic wrap. Place the wrapped muffins in a freezer bag or an airtight container. For optimal taste, thaw muffins overnight in the fridge or at room temperature for a few hours before enjoying. At room temperature, these muffins last about 2-3 days. If refrigerated, they can stay fresh for up to a week. Watch for signs of spoilage, like a dry texture or off smell. If they feel hard or crumbly, it’s time to toss them. For the full recipe, check out the details above. To make these muffins more moist, you can add a few simple ingredients. Try using: - 1/4 cup of applesauce - 1/4 cup of yogurt - 1/4 cup of sour cream These ingredients will help keep the muffins soft and tender. You can also reduce the baking time slightly. This keeps them from drying out. Yes, you can use homemade pumpkin puree. The main difference is texture. Canned pumpkin is smooth and thick, while homemade may be chunkier. To make your homemade puree smoother, blend it well before adding it to the muffin mix. Both options work great in this recipe. If you want to make vegan muffins, several egg substitutes work well. Here are some great options: - 1/4 cup of unsweetened applesauce - 1/4 cup of mashed banana - 1 tablespoon of ground flaxseed mixed with 3 tablespoons of water These substitutes help bind the ingredients together, just like eggs do. Each option adds its own flavor, so choose one that fits your taste! These Pumpkin Cream Cheese Swirl Muffins are both fun and easy to make. We covered the key ingredients and step-by-step instructions. I shared tips to avoid common mistakes, variations for dietary needs, and storage info to keep them fresh. In conclusion, these muffins are tasty and versatile. You can enjoy them any time of year. Don’t hesitate to get creative with flavors or mix-ins. Baking these muffins can bring joy and warmth to your kitchen. Happy baking!](https://emmasdish.com/wp-content/uploads/2025/06/19beff08-eb1f-44d3-9dc9-dbced9bcb3a8-300x300.webp)

![- 2 cups cooked chicken, shredded - 1 cup carrots, diced - 1 cup peas - 1 cup potatoes, diced - 1/2 cup celery, diced - 1/2 cup onion, chopped I love using cooked chicken for this recipe. It adds great flavor and saves time. You can use leftover chicken or rotisserie chicken. Fresh veggies give the pot pie a nice crunch. Carrots, peas, and potatoes are my go-to choices. They cook well and taste amazing together. - 3 tablespoons butter - 3 tablespoons all-purpose flour - 1 3/4 cups chicken broth - 1/2 cup milk - 1 teaspoon dried thyme - Salt and pepper to taste - 1 pre-made pie crust (or make your own) - 1 egg (for egg wash) Butter and flour make a great base for the filling. They help thicken the broth. Chicken broth adds depth to the flavor. I prefer using low-sodium broth for better control over seasoning. Milk gives the filling a creamy texture. Don’t forget thyme; it makes a big difference! For the crust, you can buy one or make it from scratch. - Large cooking pot - Pie dish - Rolling pin - Mixing spoon You will need a large pot for cooking. A pie dish is a must for baking. A rolling pin helps to shape the crust. And a mixing spoon is handy for stirring everything together. Having the right tools makes cooking easier and more fun! For the full recipe, check out the [Full Recipe]. - Preheat the oven to 425°F (220°C). - In a large pot, melt 3 tablespoons of butter over medium heat. - Add 1/2 cup of chopped onion, 1/2 cup of diced celery, 1 cup of diced carrots, and 1 cup of diced potatoes. - Sauté the vegetables for about 5-7 minutes, until they start to soften. - Stir in 3 tablespoons of all-purpose flour and cook for 1 minute. - Gradually add 1 3/4 cups of chicken broth while stirring. This prevents lumps. - Pour in 1/2 cup of milk and bring the mixture to a simmer. - Add 2 cups of shredded cooked chicken, 1 cup of peas, 1 teaspoon of dried thyme, and salt and pepper to taste. - Cook for another 5-10 minutes until the mixture thickens. Remove from heat and let cool slightly. - Roll out a pre-made pie crust on a clean surface. - Place the crust in a pie dish. - Fill it with the chicken mixture. - Cover with another layer of pie crust. Seal the edges well. - Cut several slits in the top crust to allow steam to escape. - Beat 1 egg and brush it over the crust for a nice golden finish. - Bake in the preheated oven for 30-35 minutes until golden brown. - Let the pot pie cool for about 10 minutes before serving. For the full recipe, check the detailed ingredients and steps. Enjoy your homemade classic chicken pot pie! To make a flaky crust, focus on your flour choice. Use all-purpose flour for the best results. It has the right protein level for good structure. Next, keep your ingredients cold. Chill your butter and water before mixing. Cold fat creates steam, which helps the crust puff up while baking. Enhancing flavor is key to a great pot pie. I always use homemade chicken broth. It adds richness and depth to your filling. You can also add herbs or spices. Fresh thyme works well, but feel free to experiment. A pinch of garlic powder or a dash of paprika can make a big difference. If your crust turns out soggy, it may not have cooked enough. Ensure you bake it until golden brown. To fix uneven cooking, rotate the pie halfway through baking. This helps it cook evenly. If you notice that the filling is too runny, add a bit more flour to thicken the sauce in your next batch. Following these tips will help you perfect your chicken pot pie every time. For the full recipe, check out the Comforting Chicken Pot Pie section. {{image_2}} You can change the filling in many ways. Swap chicken for turkey or even beef. This gives a new taste to the pot pie. You can also use seasonal vegetables for freshness. Try adding zucchini, green beans, or even corn. These choices keep the pie vibrant and tasty. Don't feel stuck with one type of crust. You can find gluten-free crust alternatives at most stores. They taste great and fit many diets. If you want a twist, consider a biscuit topping. A fluffy biscuit can make the dish even more special. Think about what to serve with your pot pie. Pair it with a fresh side salad or warm bread. This adds balance to your meal. If you have leftovers, get creative! You can make pot pie sliders or use it in a new soup. There are many fun ways to enjoy the dish again. To store leftovers, let the chicken pot pie cool down first. Then, cover it tightly with plastic wrap or place it in an airtight container. This helps keep it fresh. You can store it in the fridge for up to three days. After that, it may lose its flavor and texture. If you want to keep your chicken pot pie longer, freezing is a great option. First, let it cool completely. Then, wrap it well in plastic wrap and then in aluminum foil. This double layer prevents freezer burn. You can freeze it for up to three months. When you’re ready to eat, take it out and reheat directly from frozen. Just add about 15-20 extra minutes to the baking time. To reheat, place the pot pie in a preheated oven at 350°F (175°C). Bake until the filling is hot and the crust is crispy, usually about 20 minutes. Check the pie for any signs of spoilage. If there’s an off smell or mold, it’s best to throw it away. Enjoy your comforting chicken pot pie! You can find the full recipe above if you need a refresher. Making a classic chicken pot pie takes about 50 minutes. You will spend 15 minutes preparing the ingredients. The cooking time is around 35 minutes. This includes baking the pie until golden brown. Yes, you can make chicken pot pie ahead of time. Prepare the filling and let it cool. Then, place it in the fridge. You can assemble the pie later, right before baking. This way, you save time on busy days. If you want alternatives to chicken, try these options: - Shredded turkey - Cooked beef - Tofu for a vegetarian option - Chickpeas for a plant-based protein These substitutes work well and keep the dish tasty. To make the filling thicker, use these tips: - Add more flour when cooking the filling. - Use cornstarch mixed with water for a quick thickener. - Let the filling simmer longer to reduce moisture. These methods help create a perfect, creamy filling. To reheat chicken pot pie, follow these steps: - Preheat your oven to 350°F (175°C). - Place the pie on a baking sheet. - Heat for about 20-25 minutes or until warm. This method keeps the crust crispy and the filling flavorful. In this article, we explored how to make a classic chicken pot pie. We discussed the main ingredients, essential cooking tools, and step-by-step instructions. I shared tips for a flaky crust and ways to enhance flavor. You learned about variations, storage tips, and FAQs to help you succeed. Making chicken pot pie is not just easy; it’s fun! Enjoy creating this warm meal, filled with love and flavor.](https://emmasdish.com/wp-content/uploads/2025/06/4ae6b0a5-7bf5-4c83-8f74-995a65110410-300x300.webp)
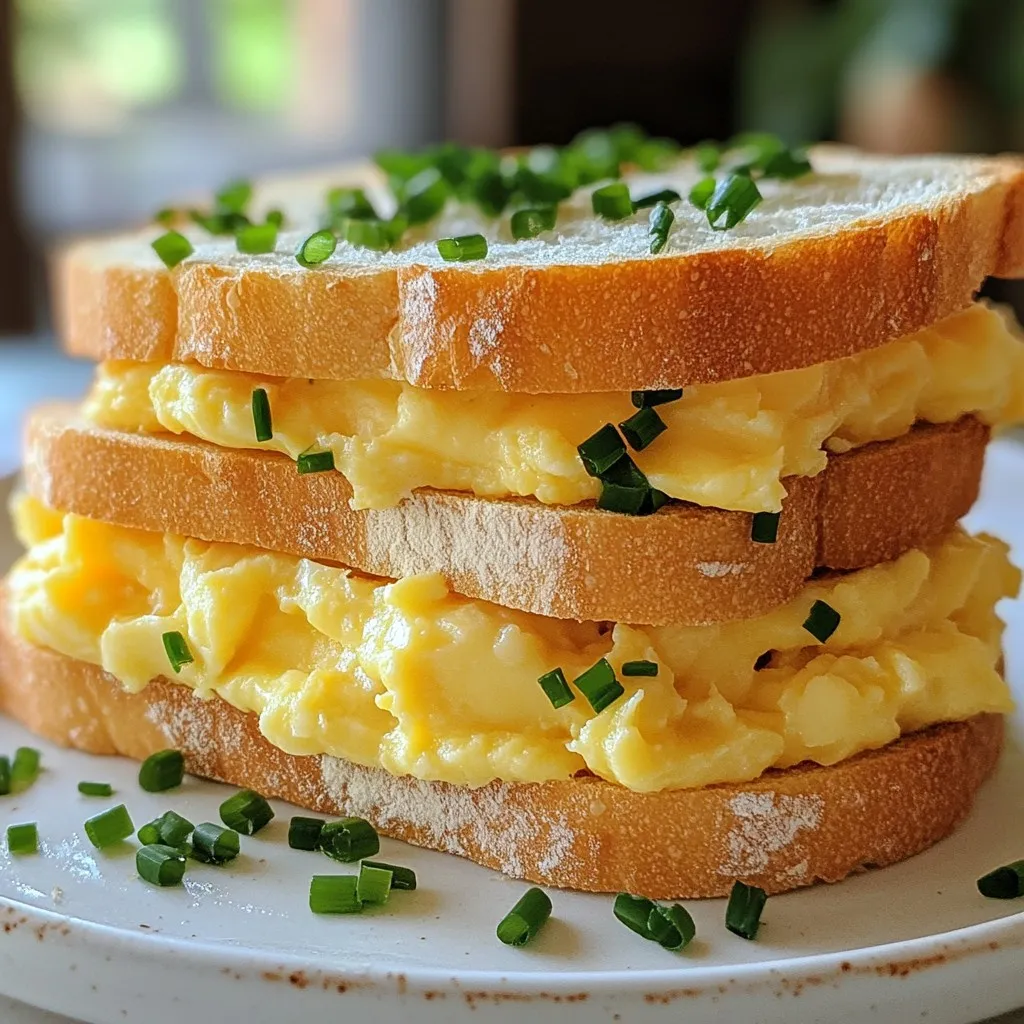
Japanese Egg Sandwich Tamago Sando Delight Recipe
Are you ready to try a delicious Japanese treat? The Tamago Sando, or egg sandwich, is creamy, flavorful, and easy to make. This delightful…