

Latest & Greatest

Crispy Garlic Parmesan Cauliflower Bites Delight
Are you ready to savor a crunchy, cheesy delight? These Crispy Garlic Parmesan Cauliflower Bites are perfect for a snack
Read more…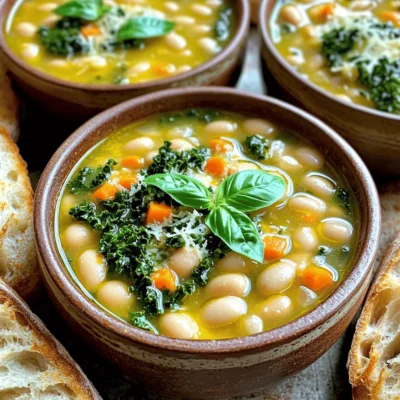
Cozy Tuscan White Bean Soup Simple and Nourishing Recipe
Warm up your kitchen with my Cozy Tuscan White Bean Soup. This simple and nourishing recipe is perfect for chilly
Read more…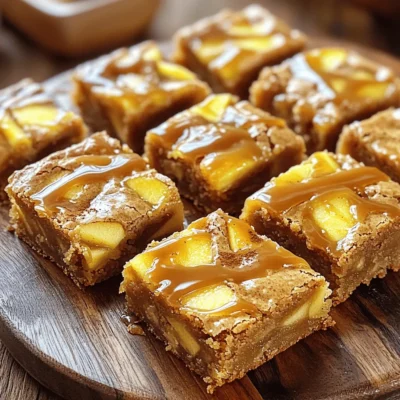
Apple Cider Caramel Blondies With Rich Flavor Burst
Ready to indulge in a sweet autumn treat? Apple Cider Caramel Blondies are here to delight your taste buds! With
Read more…
No-Bake Chocolate Coconut Pumpkin Truffles Delight
Are you ready to enjoy a tasty treat without turning on the oven? In this post, I’ll guide you through
Read more…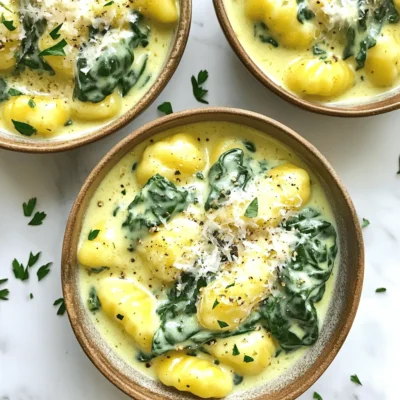
Creamy Garlic Parmesan Spinach Gnocchi Delight
If you’re craving a dish that’s both simple and delicious, you’ve found it! My Creamy Garlic Parmesan Spinach Gnocchi Delight
Read more…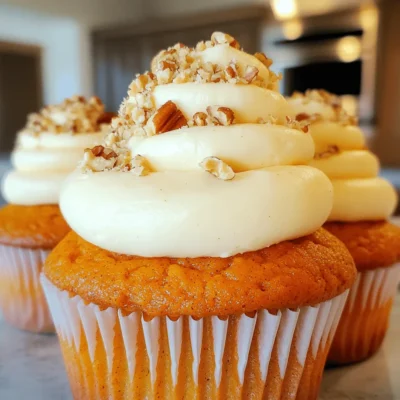
Pumpkin Cream Cheese Frosted Cupcakes Delightful Treat
If you’re craving a cozy treat that screams fall, you’ve found it! Pumpkin Cream Cheese Frosted Cupcakes blend warm pumpkin
Read more…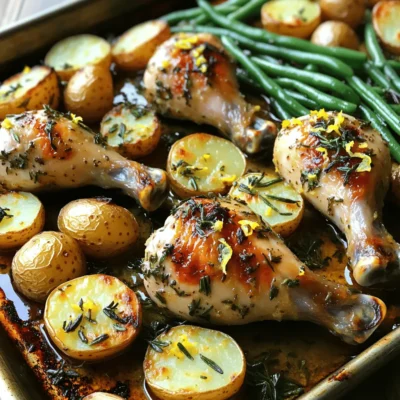
Garlic Herb Chicken Drumsticks Sheet Pan Delight
When you’re craving a simple yet delicious meal, Garlic Herb Chicken Drumsticks Sheet Pan Delight is the answer. This recipe
Read more…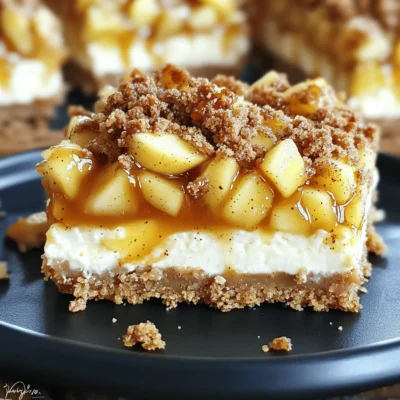
Caramel Apple Streusel Cheesecake Bars Delightful Treat
If you’re dreaming of a sweet treat that combines the warmth of autumn with creamy bliss, you’re in the right
Read more…browse recipes

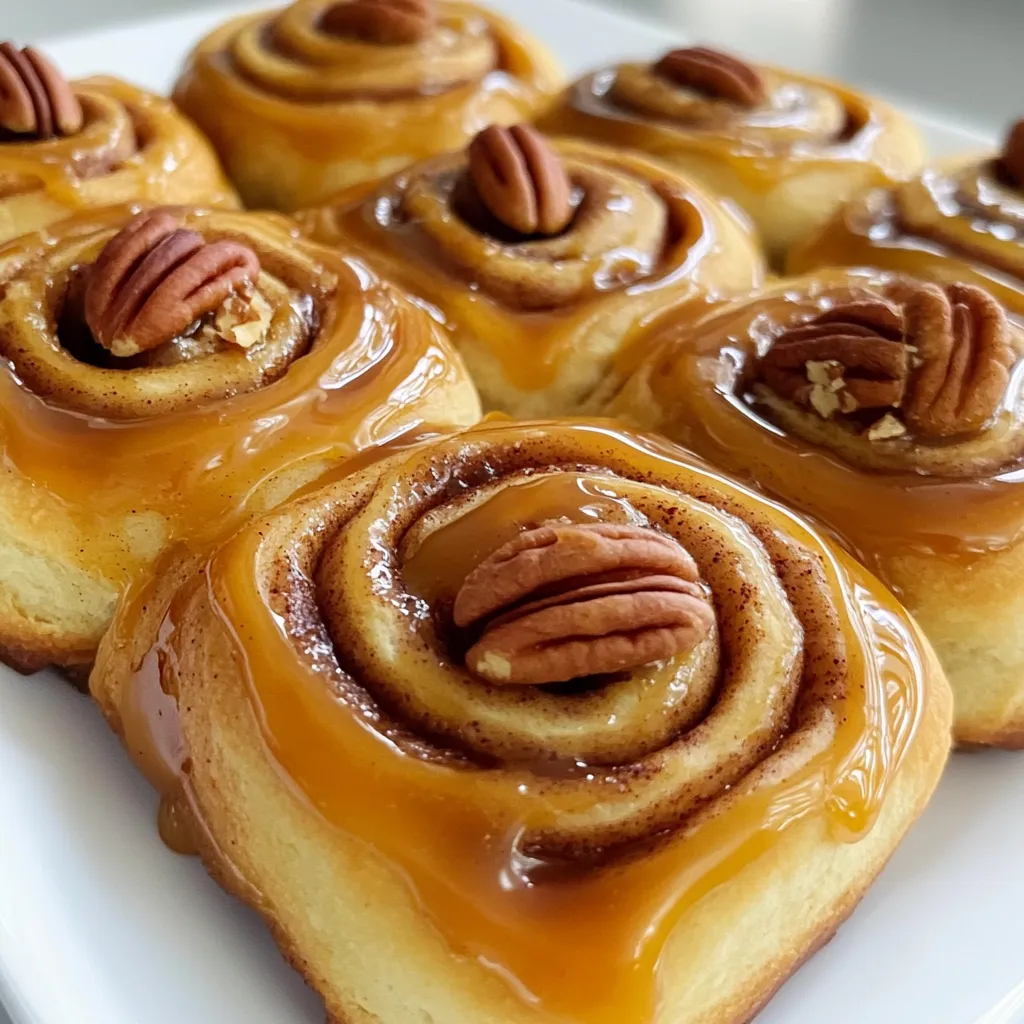
Bakery-Style Caramel Pecan Cinnamon Rolls Delight
Get ready to bake the ultimate treat: Bakery-Style Caramel Pecan Cinnamon Rolls! These rolls are soft, sweet, and packed with the rich flavors of…
My Latest Desserts
My Latest Recipes

hey,
i’m !
I’m so happy you’re here!
I’m not just sharing recipes I’m sharing a piece of my heart. I hope these dishes bring you comfort, joy, and maybe even a new favorite.


Classic Banana Pudding Delightful and Creamy Recipe
Are you ready to indulge in a classic treat that takes you straight back to childhood? This Classic Banana Pudding recipe is both delightful…
![- 4 ripe bananas, sliced - 1 cup heavy cream - 1 cup milk - 1/2 cup granulated sugar - 1/4 cup cornstarch - 1/4 teaspoon salt - 1 teaspoon vanilla extract - 2 large egg yolks - 1 package (about 200g) vanilla wafers - Whipped cream for topping (optional) - Additional banana slices for garnish When I make classic banana pudding, I always start with fresh, ripe bananas. The riper they are, the sweeter they taste. Choosing the best ingredients is key to making this dish shine. The heavy cream and milk create a rich and creamy base. I prefer using granulated sugar, but feel free to swap it with something else if you want. - You can use half-and-half instead of heavy cream for a lighter option. - For a non-dairy choice, try coconut cream or almond milk. - If you want to cut sugar, use honey or maple syrup instead. These substitutions let you adjust the recipe to fit your needs. Each option brings its own special flavor to the pudding. - Look for bananas with a few brown spots. They are sweet and ripe. - Choose medium-sized bananas, as they slice better and fit nicely in layers. Picking the right bananas is important. The right ripeness adds flavor and texture to your pudding. Always smell them too; a sweet scent means they are ready to use! First, let’s get our dry ingredients ready. In a medium saucepan, combine the following: - 1/2 cup granulated sugar - 1/4 cup cornstarch - 1/4 teaspoon salt Whisk these together until well mixed. This helps avoid lumps in our pudding. Next, heat the cream mixture. Pour in: - 1 cup heavy cream - 1 cup milk Stir these ingredients over medium heat. Keep stirring until the mixture starts to bubble and thicken. This should take about 5 to 7 minutes. Now, we need to temper the egg yolks. In a separate bowl, whisk: - 2 large egg yolks Once smooth, slowly pour in a bit of the hot milk mixture while whisking. This step is key to avoid scrambling the eggs. After tempering, add the egg mixture back into the saucepan. Continue to cook it over medium heat for another 2 to 3 minutes. Stir constantly until the pudding becomes thick and creamy. Let’s start layering our dessert. In a large serving dish or individual cups, begin with: - A layer of vanilla wafers - A layer of sliced bananas - A layer of the pudding Repeat these layers until you use all your ingredients. Finish with a layer of pudding on top. Be careful with common mistakes. Don’t add bananas too early; they may brown. Also, ensure your pudding is thick enough before layering. This will keep everything from getting runny. Now you're ready to chill! Cover the dish and refrigerate for at least 4 hours. Enjoy the delightful blend of flavors in this classic banana pudding. For the full recipe, refer to the earlier section. To achieve that creamy texture, you must blend the milk and cream well. Start with a smooth mixture, whisking to avoid lumps. As you heat it, stir constantly. This helps it thicken without burning. Once it bubbles, you know it’s ready for the egg yolks. Chilling time is vital. After you layer the pudding, let it cool in the fridge. At least four hours works best. This time helps all flavors meld together. It also allows the pudding to set properly. For garnishing, think simple yet elegant. A dollop of whipped cream adds a nice touch. You can also place banana slices on top for extra flair. If you want to impress guests, serve in clear cups. This showcases the beautiful layers. Pair your banana pudding with coffee or sweet tea. The flavors complement each other well. This makes for a delightful dessert experience. To store leftovers, cover them tightly with plastic wrap. This keeps the pudding fresh. You should eat it within three days for the best taste. After that, the bananas may brown and lose their texture. Always check for freshness before serving. If it smells off or looks different, it’s best to toss it. {{image_2}} You can easily change up classic banana pudding by adding some fun flavors. Here are two tasty ideas: - Chocolate Banana Pudding: Mix in cocoa powder or melted chocolate with the pudding. This adds a rich, deep taste. You can also layer chocolate wafers or cookies instead of vanilla for a unique twist. - Nut-based Variations: If you love nuts, try adding crushed almonds or pecans. Sprinkle them between layers for crunch. You can also use nut butter in the pudding for added flavor. Making banana pudding healthier is simple. Here are two great swaps: - Using Greek Yogurt: Replace some of the heavy cream with Greek yogurt. This adds protein and creaminess without all the fat. Choose plain yogurt to keep the flavor balanced. - Reducing Sugar: Cut back on granulated sugar. You can use ripe bananas for natural sweetness. You might not need as much sugar when the bananas are extra sweet. You can make banana pudding special for different seasons. Here are some ideas: - Fruits to Include: Add berries like strawberries or blueberries in the summer. They add color and fresh taste. In the fall, sliced apples or pears work great too. - Holiday-themed Variations: For Thanksgiving, you can incorporate pumpkin spice into the pudding. During Christmas, try adding peppermint extract for a festive flavor. To make the perfect banana pudding, check out the Full Recipe above. Banana pudding started in the Southern United States. It became a favorite treat in homes and diners. This dish celebrates comfort and family gatherings. Many people enjoy it during holidays and special events. The layers of bananas and creamy pudding bring joy to all ages. Over time, banana pudding has changed. Early recipes used simple ingredients like milk, sugar, and bananas. Today, cooks add twists like different flavors and textures. Some use whipped cream or chocolate for a fun touch. The core elements, though, stay the same. Banana pudding is popular across the U.S. You can find it in many regional variations. Some chefs create their unique spins, adding caramel or nuts. This dish has even appeared in cooking competitions! It remains a beloved dessert for everyone. For a classic experience, try the Full Recipe. Homemade banana pudding lasts about 3 to 4 days in the fridge. To keep it fresh, cover it tightly with plastic wrap. This helps prevent the pudding from absorbing other smells in your fridge. Also, try to keep it in an airtight container. This way, it stays creamy and delicious. Yes, you can use instant pudding mix. It saves time and is easy to use. Just mix it with milk according to the package instructions. However, homemade pudding has a richer taste and creamier texture. Instant pudding can be less flavorful and may not set as well as homemade. Some common issues include separation and browning of bananas. To avoid separation, make sure you mix the pudding well and chill it properly. For browning bananas, slice them just before serving. You can also dip them in lemon juice to slow down the browning. This keeps your dessert looking fresh and tasty. Yes, you can freeze banana pudding, but it may change texture. The creaminess may turn grainy once thawed. If you do freeze it, use a freezer-safe container. Thaw it in the fridge for a few hours before serving. It’s best to add fresh banana slices and whipped cream after thawing. Enjoy the full flavor of the pudding by using the [Full Recipe] for best results. Banana pudding is a delightful treat, made with simple ingredients like ripe bananas and cream. You can easily adjust recipes with substitutions, ensuring everyone can enjoy it. Following the steps carefully helps achieve that perfect texture and flavor. With tips for serving and storage, your dessert will impress guests. Remember, banana pudding has a rich history rooted in Southern cuisine. Try the variations for a fun twist. Embrace the joy of making this classic dessert yourself!](https://emmasdish.com/wp-content/uploads/2025/06/2270da16-0b21-4017-a800-73ddf1839134.webp)
