
Latest & Greatest
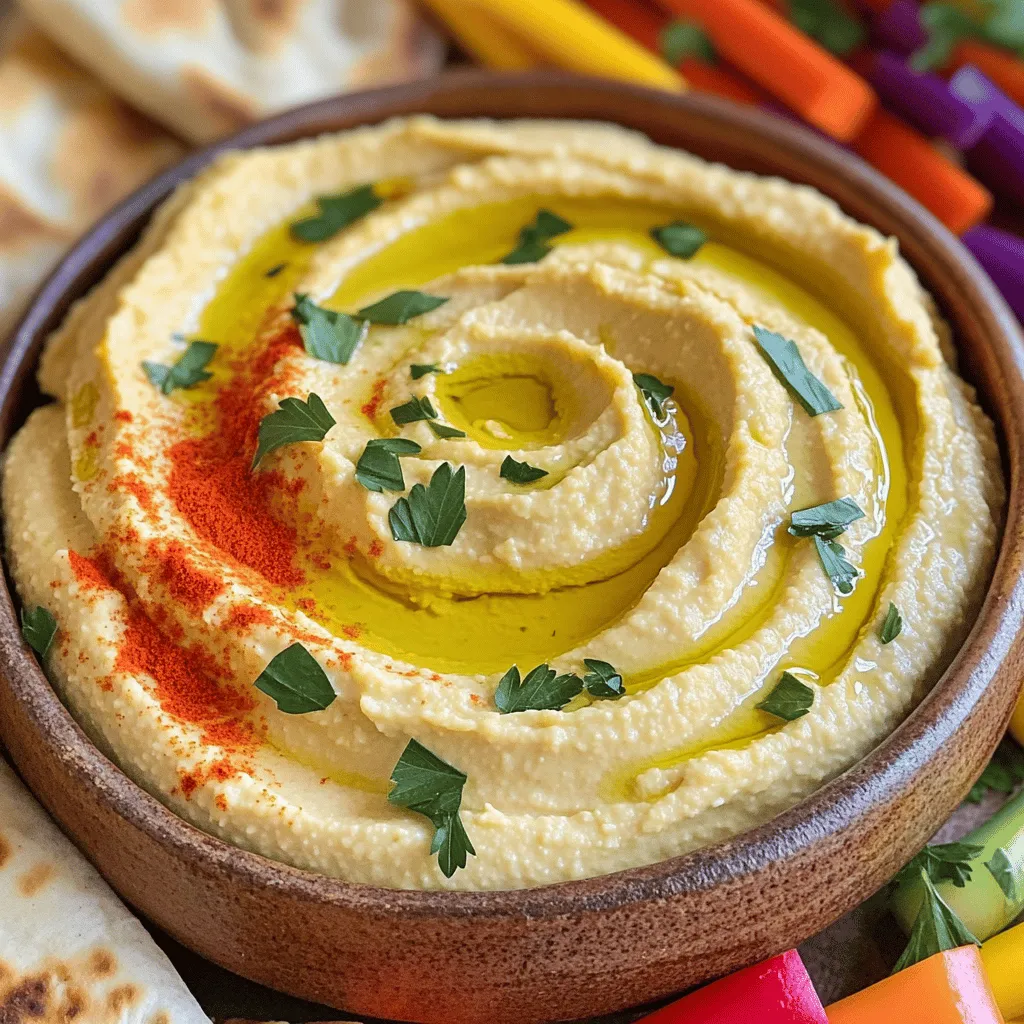
Roasted Garlic Hummus Flavorful and Easy Recipe
Are you ready to turn simple ingredients into a tasty treat? This Roasted Garlic Hummus recipe is not only easy
Read more…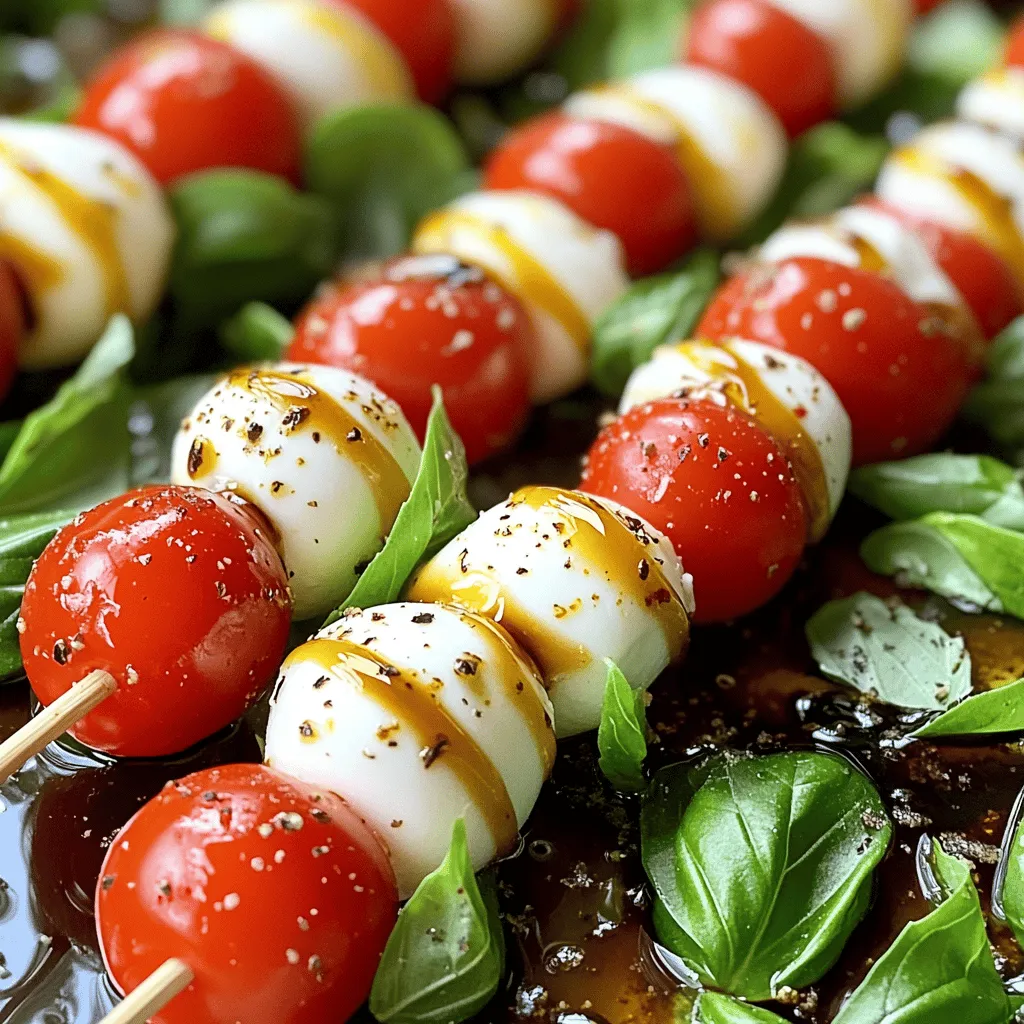
Caprese Salad Skewers Fresh and Flavorful Delight
Are you ready to elevate your snack game? Caprese Salad Skewers are a fresh and flavorful delight that everyone will
Read more…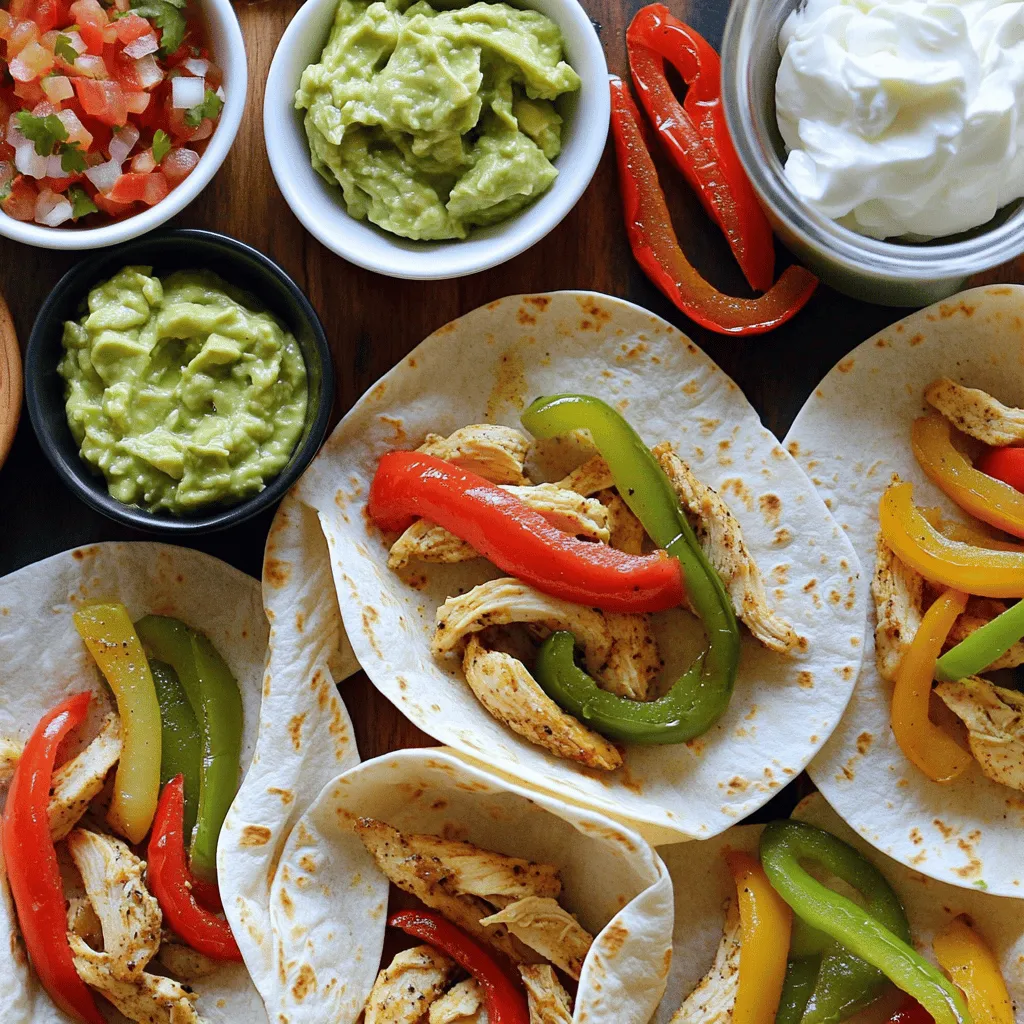
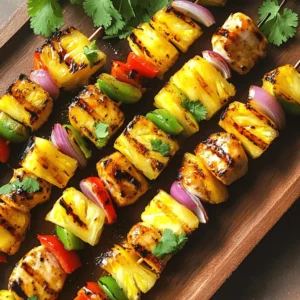
Easy Chicken Fajitas Flavorful and Quick Meal Guide
If you’re craving a quick, tasty meal, you’ve come to the right place! Easy chicken fajitas are not only delicious
Read more…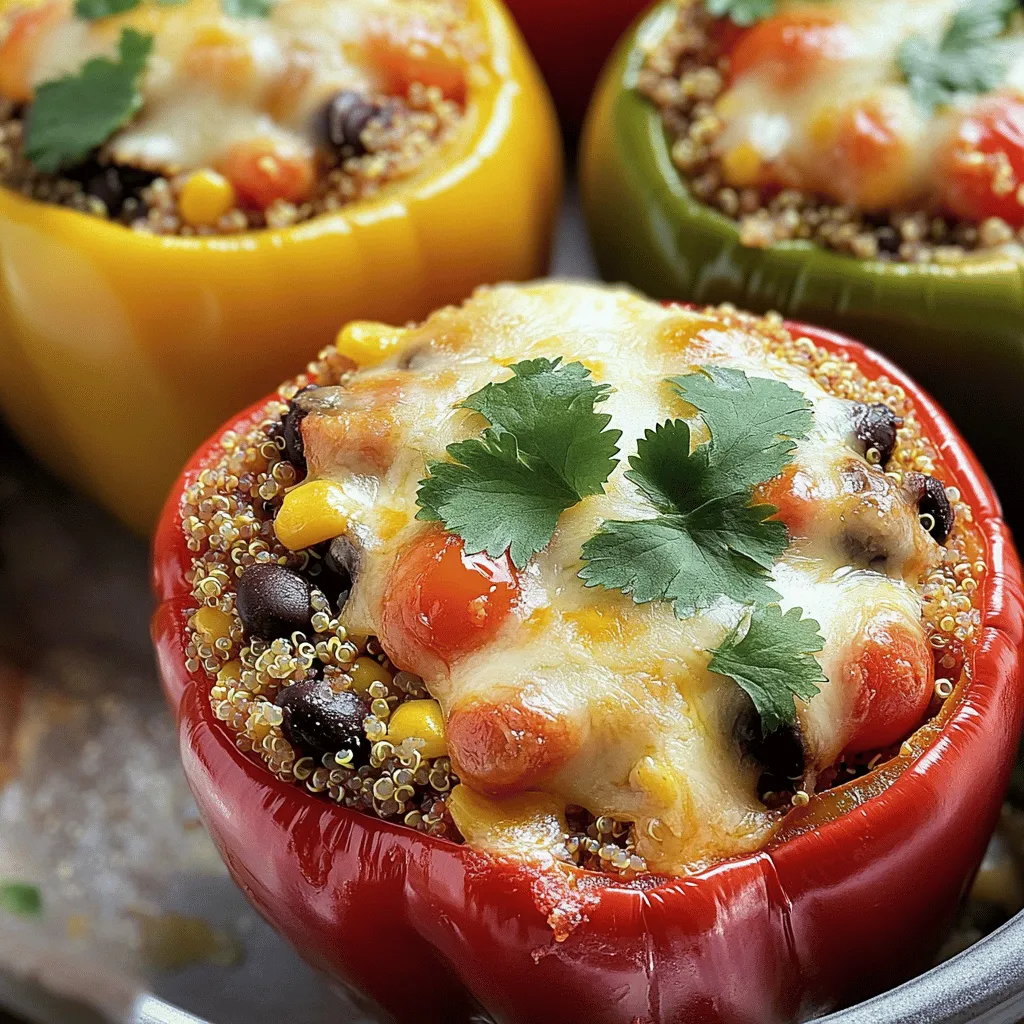
Veggie Stuffed Peppers Tasty and Nutritious Delight
Are you looking for a healthy, tasty meal that’s easy to make? Veggie stuffed peppers are a perfect choice! They’re
Read more…
Berry Coconut Popsicles Refreshing Summer Treat
Looking for a cool, fruity treat this summer? These Berry Coconut Popsicles are your perfect solution! Packed with mixed berries
Read more…
Blueberry Chia Seed Jam Simple Healthy Spread
Looking for a healthy, homemade spread? This Blueberry Chia Seed Jam is simple to make and packed with flavor. With
Read more…
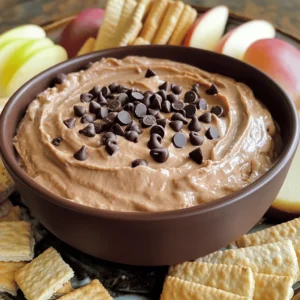
Chocolate Chip Cookie Dough Dip Quick and Simple Recipe
If you love the taste of cookie dough but want a safe, creamy treat, I’ve got a simple recipe for
Read more…
Homemade Veggie Burger Simple and Flavorful Recipe
Are you ready to elevate your meal game with a delicious homemade veggie burger? In this simple and flavorful recipe,
Read more…browse recipes


. You can create delicious breakfast burritos with simple ingredients and steps. Start with eggs, veggies, and cheese. Cook them gently for the best flavor, and warm your tortillas before filling. Experiment with add-ins for variety. Store extras wisely to enjoy later. Whether you're prepping for a busy day or a special brunch, breakfast burritos offer endless options. Enjoy making tasty meals that satisfy your whole family!](https://emmasdish.com/wp-content/uploads/2025/05/bbc86894-47d5-454f-816c-9602cf0d9147.webp)
Savory Breakfast Burritos Easy and Flavorful Meal
Start your day with a burst of flavor! Savory breakfast burritos are quick and easy to whip up, packed with wholesome ingredients. With just…
My Latest Desserts
-

Lemon Blueberry Pound Cake Delightful and Easy Recipe
Looking for a sweet treat that’s simple to make? This Lemon Blueberry Pound Cake combines bright citrus flavors and juicy Read Full Recipe -

Easy Cinnamon Roll Bites Simple and Quick Treat
Craving a sweet, warm treat that takes mere minutes to make? You’re in the right place! In this article, I Read Full Recipe -
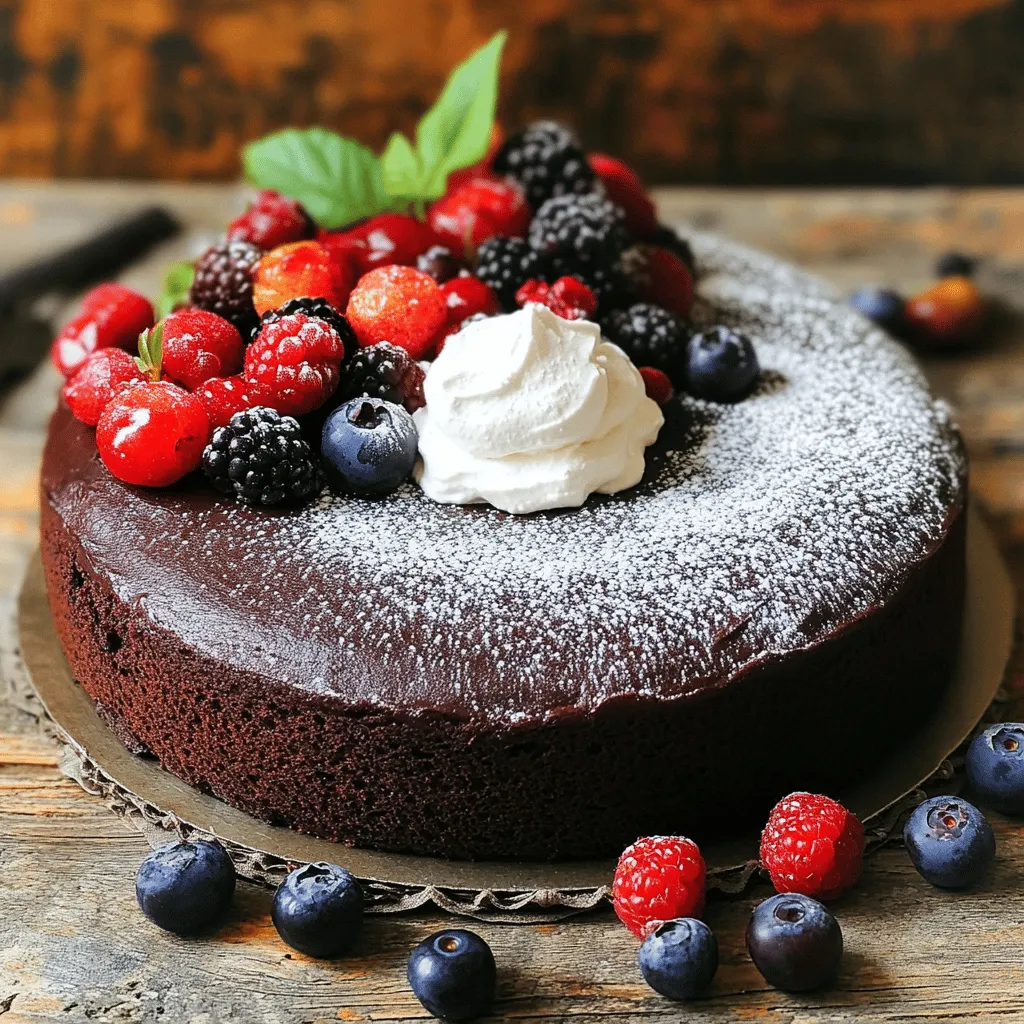
Vegan Chocolate Cake Easy and Delicious Recipe
Are you ready to indulge in a tasty Vegan Chocolate Cake? This easy recipe gives you rich flavor without dairy Read Full Recipe -
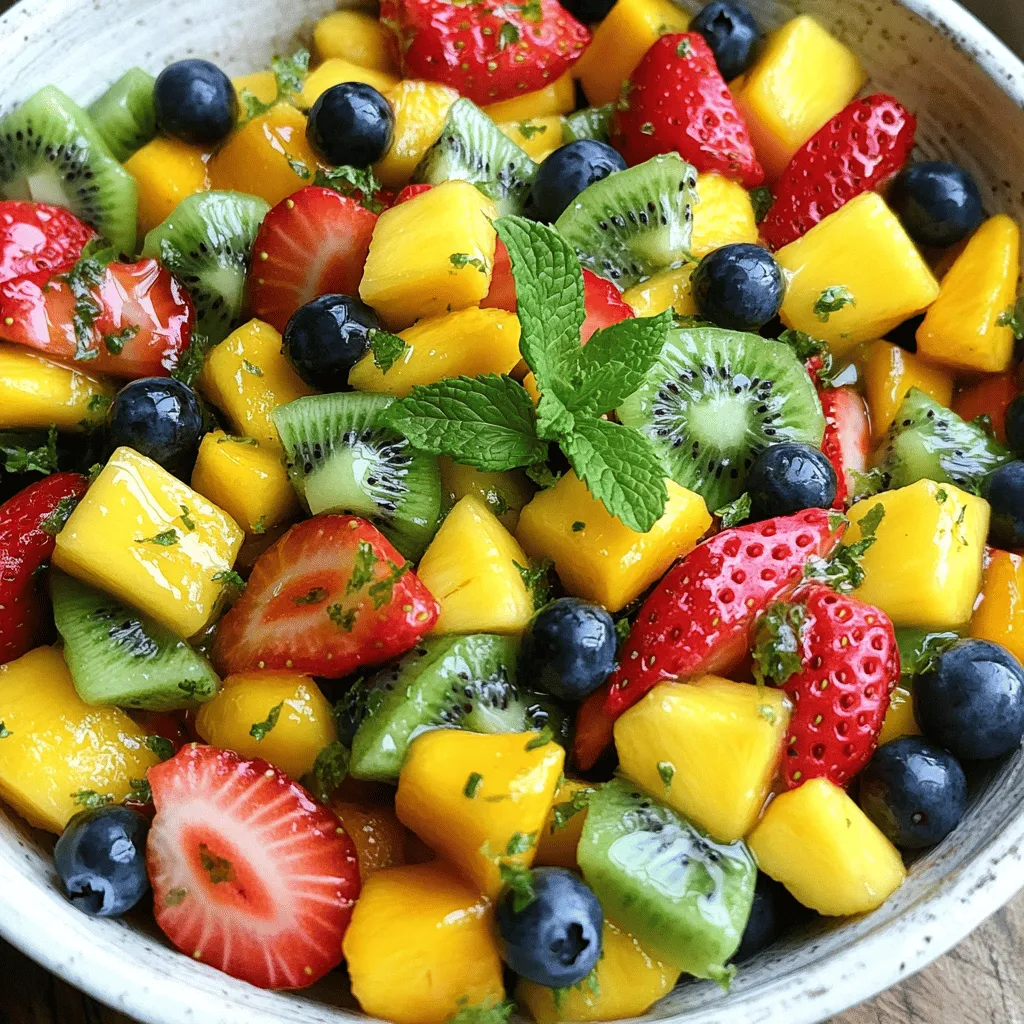
Honey Lime Fruit Salad Refreshing and Simple Recipe
Looking for a cool and tasty dish to brighten your day? This Honey Lime Fruit Salad is simple and refreshing! Read Full Recipe -

Chocolate Avocado Mousse Rich and Creamy Delight
Are you ready to dive into a world of rich and creamy delight? This Chocolate Avocado Mousse recipe combines ripe Read Full Recipe -
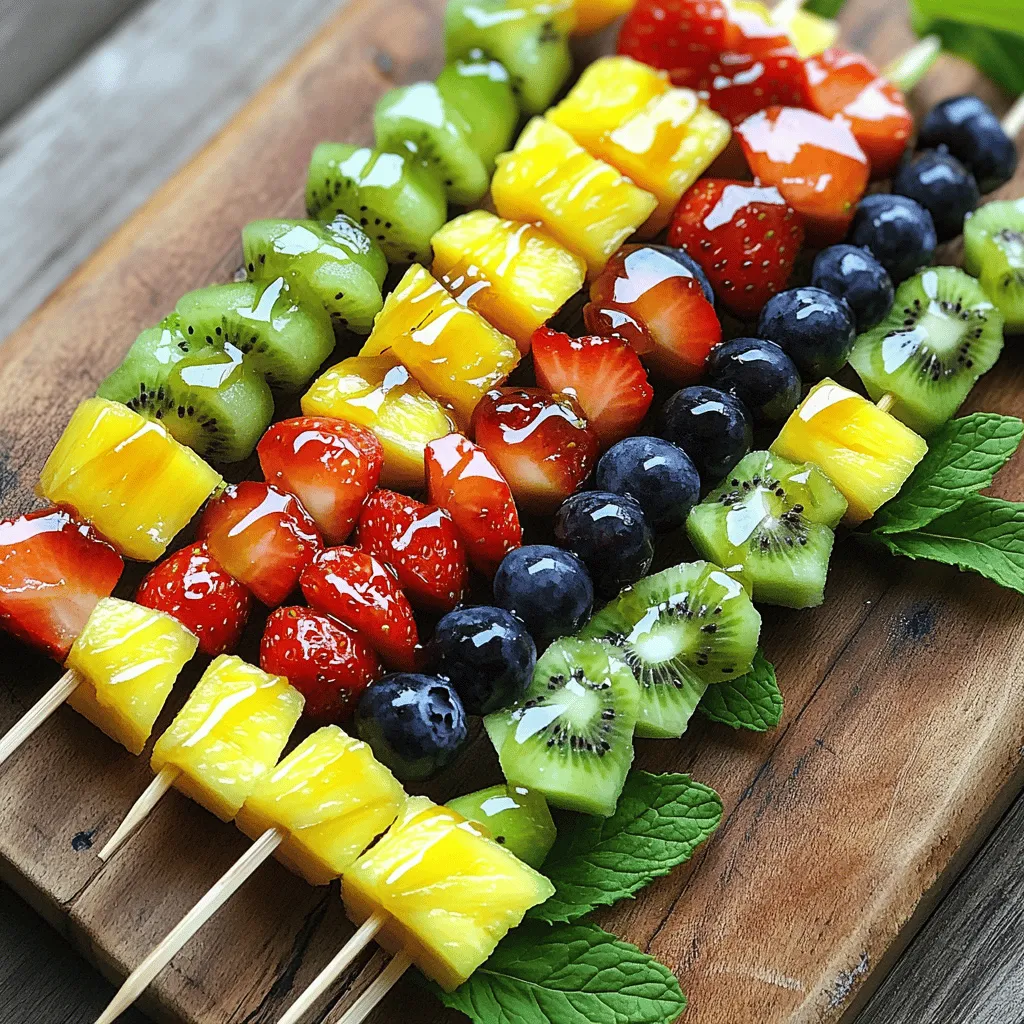
Rainbow Fruit Skewers Colorful and Healthy Delight
Looking for a fun and easy way to enjoy fruits? Rainbow fruit skewers are your answer! Bursting with color and Read Full Recipe -

Lemon Blueberry Yogurt Muffins Simple and Tasty Treat
If you love delicious snacks that are easy to make, then you’re in for a treat! My Lemon Blueberry Yogurt Read Full Recipe -

No-Bake Lemon Icebox Pie Refreshing Dessert Recipe
Looking for a cool and easy dessert? You’ll love this No-Bake Lemon Icebox Pie! With just a few simple ingredients, Read Full Recipe -

Vegan Chocolate Mousse Simple and Delectable Treat
Indulging in a rich, creamy dessert doesn’t mean you have to forgo your plant-based lifestyle. In this guide to making Read Full Recipe -
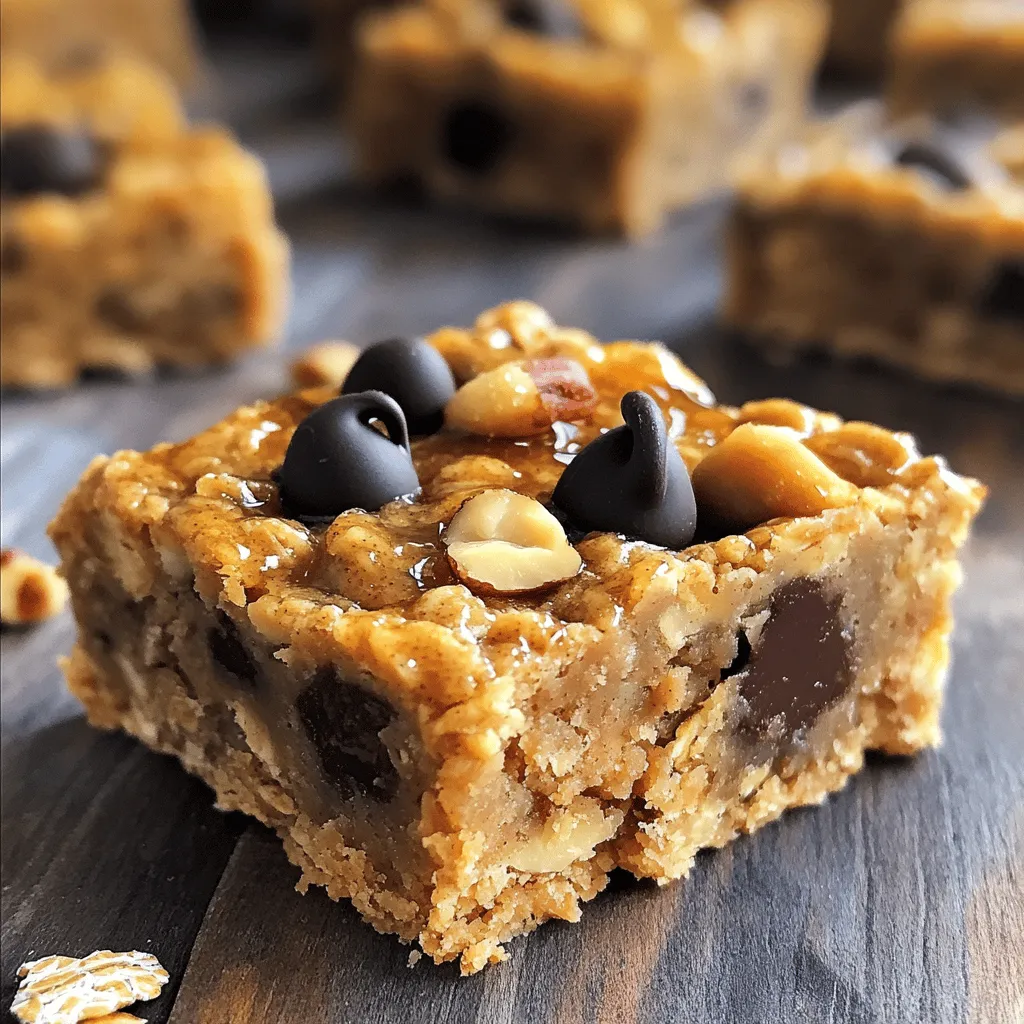
Peanut Butter Banana Oat Bars Energizing Snack Choice
Looking for a quick and tasty snack? Peanut Butter Banana Oat Bars are your answer! These bars are packed with Read Full Recipe
My Latest Recipes

hey,
i’m !
I’m so happy you’re here!
I’m not just sharing recipes I’m sharing a piece of my heart. I hope these dishes bring you comfort, joy, and maybe even a new favorite.
![- 1 lb (450g) chicken breast, thinly sliced - 1 red bell pepper, sliced - 1 green bell pepper, sliced - 1 medium onion, sliced - 2 tablespoons olive oil The main ingredients in this recipe are simple. You need fresh chicken breast, bell peppers, and onion. These create a colorful and tasty mix. Olive oil adds flavor and helps cook the chicken. - 2 teaspoons chili powder - 1 teaspoon cumin - 1 teaspoon paprika - 1/2 teaspoon garlic powder - 1/4 teaspoon salt - 1/4 teaspoon black pepper The spices bring the fajitas to life. Chili powder gives heat. Cumin adds warmth. Paprika adds depth. Garlic powder gives a nice touch. Salt and black pepper make all the flavors pop. - Flour tortillas - Optional toppings: salsa, guacamole, sour cream, shredded cheese Flour tortillas wrap around the filling. They are soft and warm. For toppings, you can choose salsa for zest, guacamole for creaminess, sour cream for coolness, or cheese for a touch of richness. You can mix and match to make it your own. Using these ingredients, you can make delicious chicken fajitas from the [Full Recipe]. 1. Marinate chicken with spices Start by slicing 1 pound of chicken breast into thin strips. In a large bowl, mix the chicken with chili powder, cumin, paprika, garlic powder, salt, and black pepper. I like to use my hands to ensure the chicken is coated well. Drizzle 1 tablespoon of olive oil over the chicken and mix again. Let it marinate for at least 15 minutes to allow the flavors to blend. 2. Prepare vegetables While the chicken marinates, slice 1 red bell pepper, 1 green bell pepper, and 1 medium onion. Keep the slices similar in size for even cooking. This step makes the cooking process easier and adds color to your fajitas. 1. Cooking marinated chicken Heat a large skillet over medium-high heat. Pour in the remaining tablespoon of olive oil and let it heat up. Once hot, add the marinated chicken. Cook for about 5-7 minutes, stirring often, until the chicken is no longer pink and has a slight char. This step brings out the great flavors in the chicken. 2. Adding vegetables to skillet Next, toss in the sliced bell peppers and onions. Stir everything together and cook for another 5 minutes. You want the vegetables to be tender but still crisp. This adds a nice texture and fresh flavor to your fajitas. 1. Squeeze lime juice Once the chicken and veggies are cooked, squeeze the juice of 1 lime over the mixture. Stir to combine, and let the lime juice brighten up the dish. The acidity enhances all the flavors and adds a zesty kick. 2. Serve in tortillas To serve, warm your flour tortillas in a pan or microwave. Then, fill each tortilla with the sizzling chicken and veggie mix. Add your favorite toppings like salsa, guacamole, sour cream, or shredded cheese. Enjoy your easy chicken fajitas! For the full recipe, check out the detailed steps provided. - Marination time: Marinate the chicken for at least 15 minutes. This helps the spices soak in well. If you have more time, marinate for up to two hours. This will boost the flavor even more. - Cooking temperature: Use medium-high heat to cook the chicken. This gives a nice sear on the meat. A hot skillet helps lock in the juices. - Spice adjustments: Feel free to tweak the spices based on your taste. If you like it hotter, add more chili powder. For a milder kick, reduce the cumin. - Fresh ingredients: Always use fresh veggies. Fresh bell peppers and onions offer better taste and crunch. Squeeze fresh lime juice just before serving. It adds a zesty finish to the dish. - Plating ideas: Serve the fajitas on a large platter. Place the chicken in the center, with veggies around it. This creates a colorful display that is eye-catching. - Garnishing tips: Add a sprinkle of chopped cilantro on top for color. You can also place lime wedges on the side. This makes it easy for guests to add more juice. Consider serving with bowls of salsa and guacamole for a fun touch. For the full recipe, check out the [Full Recipe]. {{image_2}} You can switch up the protein in your fajitas. Beef fajitas are a great choice. Use thinly sliced flank steak or skirt steak. Cook them the same way as chicken, and you'll get a rich flavor. If you want a meat-free option, try vegetarian fajitas using mushrooms. Portobello or button mushrooms work well. Slice them and sauté with the same spices. They absorb flavors nicely and add a great texture. Adding different spices can change your fajitas. Besides chili powder, try using smoked paprika for a deeper flavor. Or add cayenne pepper for some heat. Using citrus marinades can also boost taste. A mix of lime and orange juice will soften the meat and add zest. Marinate your chicken or beef for at least 30 minutes for the best results. Serving styles can vary, too. Burrito-style fajitas are a fun twist. Just wrap your fillings in a large tortilla with rice and beans. Fajita bowls are another great option. Layer cooked chicken, veggies, and toppings in a bowl over rice. This style is perfect for a quick lunch or dinner. For the full recipe, check out the details above and enjoy your meal! To keep your chicken fajitas fresh, use airtight containers. Glass or plastic containers both work well. Store your leftovers in the fridge. They will last for up to three days. After that, the taste may fade. When it’s time to eat again, use the stove or microwave to reheat. For the stove, add a splash of water or oil to prevent sticking. Heat over medium until warm. For the microwave, cover the dish with a damp paper towel. This helps keep the fajitas moist and tasty. Avoid reheating too long, as it may lead to dryness. To freeze chicken fajitas, let them cool completely. Place them in freezer-safe bags or containers. Remove as much air as possible. They can stay in the freezer for up to three months. When you’re ready to eat, thaw them overnight in the fridge. You can also use the microwave for quick thawing. Just be sure to cook them fully after thawing. For the full recipe, check out the [Full Recipe]. You can bake or grill chicken fajitas if you lack a skillet. For baking, preheat your oven to 400°F (200°C). Spread the marinated chicken and veggies on a baking sheet. Bake for about 20-25 minutes until the chicken is cooked. Stir halfway for even cooking. Grilling is also a great option. Heat your grill to medium-high. Place the marinated chicken and veggies in a grill basket or on skewers. Grill for about 10-15 minutes, turning occasionally, until fully cooked. Both methods yield tasty fajitas! If you want a low-carb option, consider using lettuce wraps. Large leaves of romaine or butter lettuce work well. They add crunch and freshness. You can also use cabbage leaves for a similar effect. Another alternative is to use cauliflower tortillas. They are gluten-free and low in carbs. Store-bought wraps made from almond or coconut flour are also great options. These alternatives keep your meal light and fun! Yes, you can use frozen chicken! Just remember to thaw it first. You can thaw it safely in the fridge overnight. If you're short on time, place the sealed chicken in cold water for about an hour. Once thawed, slice it and marinate as usual. If you cook chicken straight from frozen, it may take longer to cook. Always check that it's fully cooked before serving. This way, you still enjoy great chicken fajitas! For the full recipe, check out the Sizzling Chicken Fajitas. In this article, we covered how to make delicious chicken fajitas. We discussed ingredients, from the main ones like chicken and bell peppers to spices that add flavor. I detailed a step-by-step cooking process and shared tips for perfecting your dish. Don’t forget, you can mix it up with different proteins and unique flavors. Explore storage options to keep your leftovers fresh. Enjoy making fajitas your way, and let your creativity shine in every bite!](https://emmasdish.com/wp-content/uploads/2025/05/bd698464-eb3b-4e8b-82da-063956c143ee-300x300.webp)


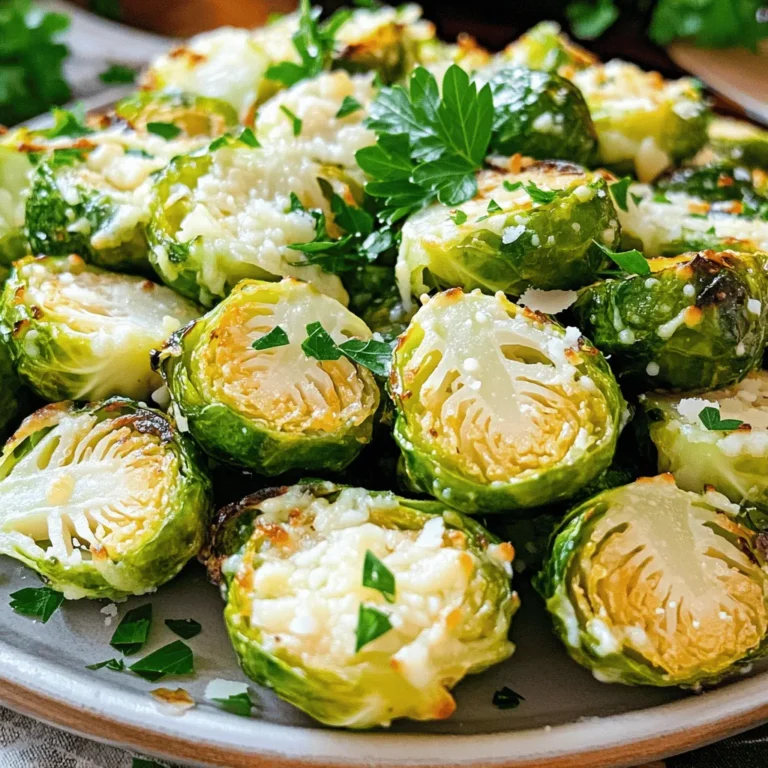
Garlic Parmesan Roasted Asparagus Savory Side Dish
If you’re looking to elevate your dinner game, Garlic Parmesan Roasted Asparagus is the answer. This savory side dish combines crisp asparagus with rich…
![- 1 bunch of fresh asparagus, trimmed - 3 tablespoons olive oil - 4 cloves garlic, minced - 1/2 cup grated Parmesan cheese - 1 teaspoon lemon zest - 1/2 teaspoon red pepper flakes (optional) - Salt and pepper to taste - Fresh parsley, chopped (for garnish) Selecting fresh asparagus Choose asparagus that is bright green and firm. The tips should be tightly closed. Avoid any stalks that are wilting or have brown spots. Choosing the right olive oil Use a high-quality extra virgin olive oil. It adds a rich flavor and helps the asparagus roast nicely. Look for oils labeled as cold-pressed for the best taste. The importance of freshly grated Parmesan Freshly grated Parmesan cheese melts better and has a more robust flavor than pre-grated cheese. Grate your cheese just before using it for the best results. For the complete recipe, check out the [Full Recipe]. Enjoy making this delicious side dish! 1. Preheat the oven and prepare the baking sheet First, set your oven to 425°F (220°C). This hot oven helps the asparagus roast nicely. Line a baking sheet with parchment paper. This makes cleanup easy. 2. Toss asparagus with olive oil Take your fresh asparagus and trim the tough ends. Place them in a large bowl. Drizzle three tablespoons of olive oil over the asparagus. Toss them well, so they are coated evenly. 1. Add seasonings, and spreading asparagus on the sheet Next, add four minced garlic cloves, half a cup of grated Parmesan cheese, and one teaspoon of lemon zest to the bowl. If you like a kick, sprinkle in half a teaspoon of red pepper flakes. Season with salt and pepper. Toss everything again until the asparagus is well coated. Then, spread the asparagus in a single layer on your prepared baking sheet. 2. Roasting time and checking for doneness Place the baking sheet in the preheated oven. Roast the asparagus for 15 to 20 minutes. Check them for tenderness. They should be soft yet still have a slight crunch. The edges will become slightly crispy. 1. How to garnish and serve the dish Once the asparagus is done, take it out of the oven. Let it cool for a few minutes. Garnish with freshly chopped parsley for a pop of color. This adds a nice touch and fresh flavor. 2. Pairing options for Garlic Parmesan Roasted Asparagus Garlic Parmesan Roasted Asparagus pairs well with many dishes. Serve it alongside grilled chicken or fish for a complete meal. You can also enjoy it with pasta or on a bed of rice. This dish adds great flavor and nutrition to any plate. For the full recipe, check out the details above. - Ideal oven temperature: Set your oven to 425°F (220°C). This high heat helps the asparagus roast perfectly. You will get a nice crisp outside while keeping the inside tender. - How to avoid overcooking asparagus: Check your asparagus after 15 minutes. If you see brown edges, it's done. Asparagus cooks quickly, so stay close during the last few minutes. - Creative serving suggestions: Serve Garlic Parmesan Roasted Asparagus on a bed of fluffy rice or alongside grilled chicken. This adds color and flavor to your plate. You can even toss it in a fresh salad for extra crunch. - Best time to serve for freshness: Serve this dish right after cooking. The flavors are bright, and the texture is crisp. If you need to hold it, cover it with foil to keep it warm. - Best baking sheets or cookware to use: Use a rimmed baking sheet lined with parchment paper. This makes cleanup easy and helps the asparagus roast evenly. - Tools for preparing asparagus: A sharp knife works best for trimming. A large mixing bowl is great for tossing the asparagus with the olive oil and seasonings. A pair of tongs is helpful for flipping the asparagus when needed. For the full recipe, check out the detailed steps above. {{image_2}} You can change the flavors in Garlic Parmesan Roasted Asparagus easily. Try adding fresh herbs like thyme or rosemary for a fragrant twist. If you prefer a bit of heat, use crushed red pepper instead of flakes. You can also swap out the Parmesan cheese. Nutritional yeast gives a cheesy flavor without dairy. Or use pecorino Romano for a sharper taste. Making this dish gluten-free is simple. All the ingredients are naturally gluten-free. Just be sure to check labels on any packaged items. For a vegan version, omit the Parmesan and use a plant-based cheese. You can also blend cashews with nutritional yeast for a creamy, cheesy sauce. You can adapt this recipe for seasonal vegetables. In spring, use asparagus, but in summer, try zucchini or green beans. In fall, roasted Brussels sprouts work well. This dish shines during holiday meals too. Serve it alongside turkey or ham for a festive touch. It adds color and flavor to any table. To keep your Garlic Parmesan Roasted Asparagus fresh, store it correctly. First, let the asparagus cool down completely. Then, place it in an airtight container. This will help keep the moisture in and prevent it from getting soggy. You can store it in the fridge for up to 3 days. If you want to keep it longer, consider freezing it. Just make sure to use freezer-safe bags or containers. Frozen asparagus can last up to 2 months. For reheating, the best method is the oven. Preheat your oven to 350°F (175°C). Place the asparagus on a baking sheet and heat for about 10 minutes. This keeps it crispy. If you want to use a microwave, use a low power setting. Heat it in short bursts, checking often. This will help avoid sogginess. To achieve the same great texture, add a splash of olive oil before reheating. Enjoy your leftovers just like the first time! For the full recipe, check out the section above. Can I use frozen asparagus for this recipe? Yes, you can use frozen asparagus. However, fresh asparagus will give you the best taste and texture. If you use frozen, thaw it first. Pat it dry before cooking. This helps avoid sogginess. What is the best way to trim asparagus? To trim asparagus, hold the stalk in your hands. Bend it gently until it snaps. This breaks off the tough end. You can also cut about an inch from the bottom with a knife. How can I make this recipe ahead of time? You can prep the asparagus a few hours in advance. Toss it with oil, garlic, and seasonings. Store it in the fridge until you are ready to roast. This makes it easy to cook when needed. What are other dishes that pair well with Garlic Parmesan Roasted Asparagus? Garlic Parmesan Roasted Asparagus goes well with grilled chicken or fish. It also pairs nicely with pasta dishes. You can serve it alongside a fresh salad for a light meal. How many calories are in Garlic Parmesan Roasted Asparagus? One serving has about 150 calories. This may vary based on the amount of olive oil used. It’s still a healthy side dish that fits well into many diets. What are the health benefits of asparagus? Asparagus is low in calories and high in nutrients. It contains vitamins A, C, E, and K. It also has fiber, which aids digestion. Plus, it has antioxidants that help keep you healthy. This blog post shared easy steps for a tasty Garlic Parmesan Roasted Asparagus dish. We covered ingredients, cooking techniques, and expert tips for the best results. You learned how to select fresh asparagus, use the right oils, and the benefit of fresh cheese. Remember, cooking should be fun and flexible. Feel free to experiment with flavors or pairings. Enjoy making and sharing this tasty side dish! It’s sure to impress at any meal.](https://emmasdish.com/wp-content/uploads/2025/06/31f02132-0972-47ce-ba26-05432beb78d0.webp)
