Latest & Greatest

BBQ Chicken Flatbread Flavorful and Easy Delight
Looking for a quick and tasty meal? My BBQ Chicken Flatbread is just what you need! It combines juicy chicken,
Read more…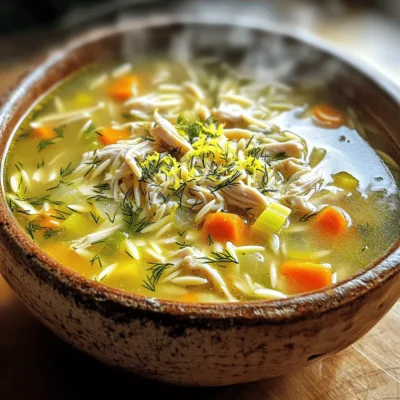
Greek Lemon Chicken Soup Flavorful and Comforting Bowl
If you’re looking for a warm, satisfying dish that bursts with flavor, then Greek Lemon Chicken Soup is your answer.
Read more…
Chocolate Peanut Butter Mug Cake Quick Dessert Idea
Craving something sweet but short on time? This Chocolate Peanut Butter Mug Cake is your solution! In just a few
Read more…
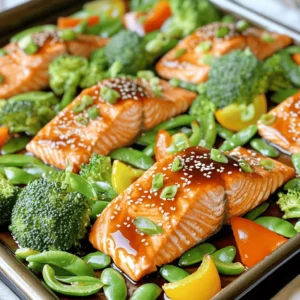
One-Pan Garlic Butter Salmon Quick and Simple Recipe
Are you craving a simple yet tasty meal? This One-Pan Garlic Butter Salmon recipe is your answer! With fresh ingredients
Read more…
Sesame Ginger Soba Noodle Salad Fresh and Crunchy Bowl
Ready for a fresh and crunchy delight? This Sesame Ginger Soba Noodle Salad is packed with flavor and easy to
Read more…
Coffee Crumble Ice Cream Pie Dessert Delight
Get ready to indulge in a treat that’s as rich as it is simple: Coffee Crumble Ice Cream Pie! This
Read more…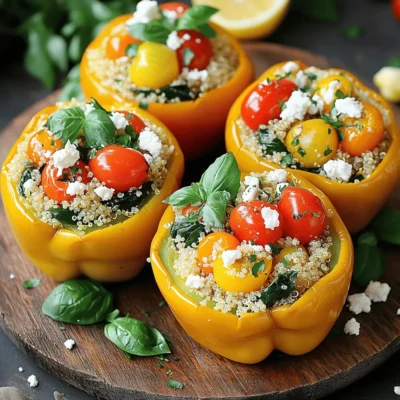
Lemon Herb Quinoa Stuffed Peppers Flavorful Delight
Looking for a fresh and tasty meal? My Lemon Herb Quinoa Stuffed Peppers are just what you need! This dish
Read more…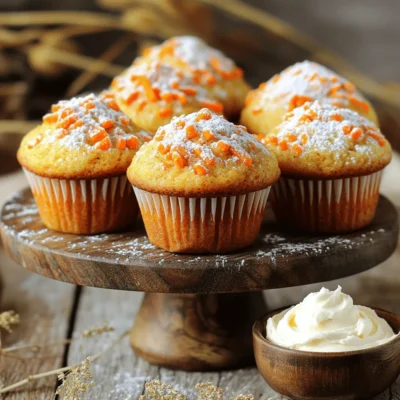
Spiced Carrot Cake Muffins Flavorful and Easy Recipe
Looking for a tasty treat that’s both easy to bake and full of flavor? Try these spiced carrot cake muffins!
Read more…browse recipes


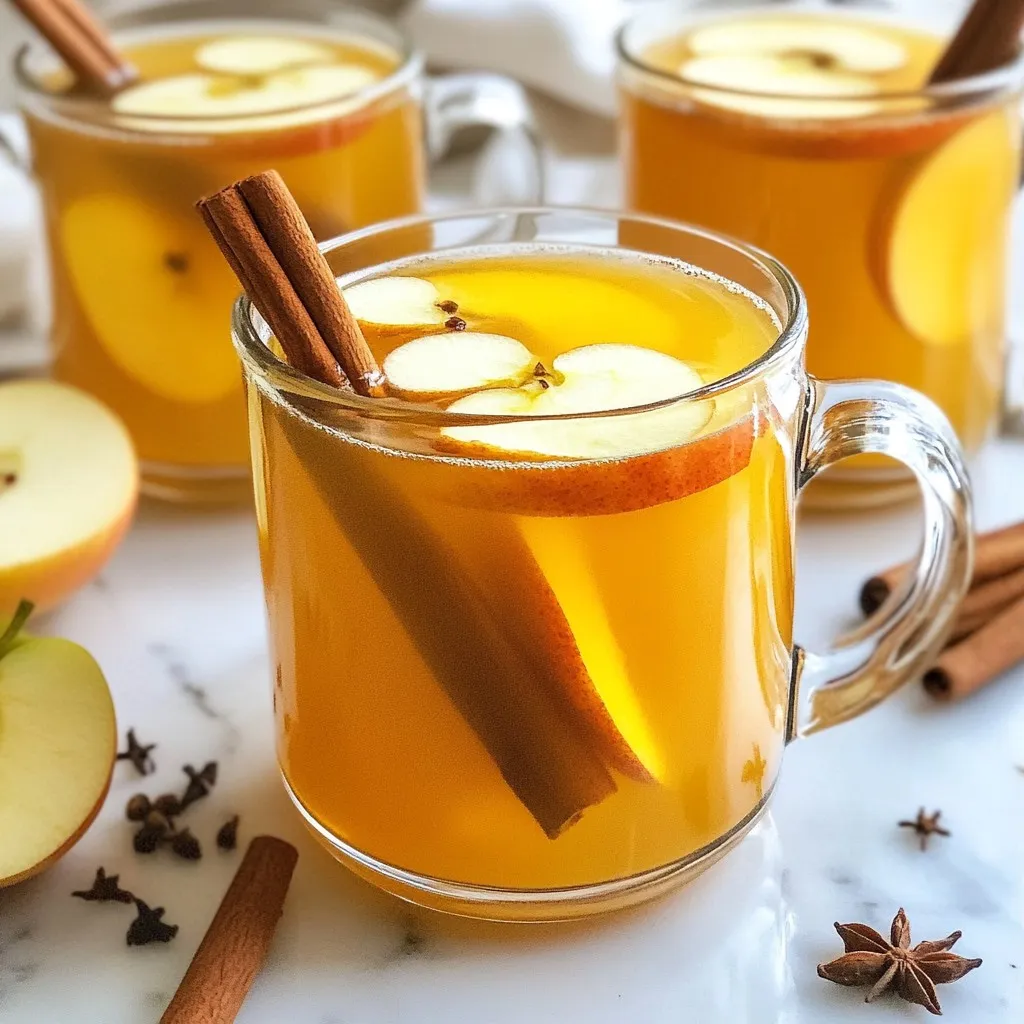
Instant Pot Apple Cider Simple and Tasty Recipe
Want to make warm, delicious apple cider in no time? You’ve come to the right place! In this post, I’ll show you how to…
My Latest Desserts
My Latest Recipes

hey,
i’m !
I’m so happy you’re here!
I’m not just sharing recipes I’m sharing a piece of my heart. I hope these dishes bring you comfort, joy, and maybe even a new favorite.


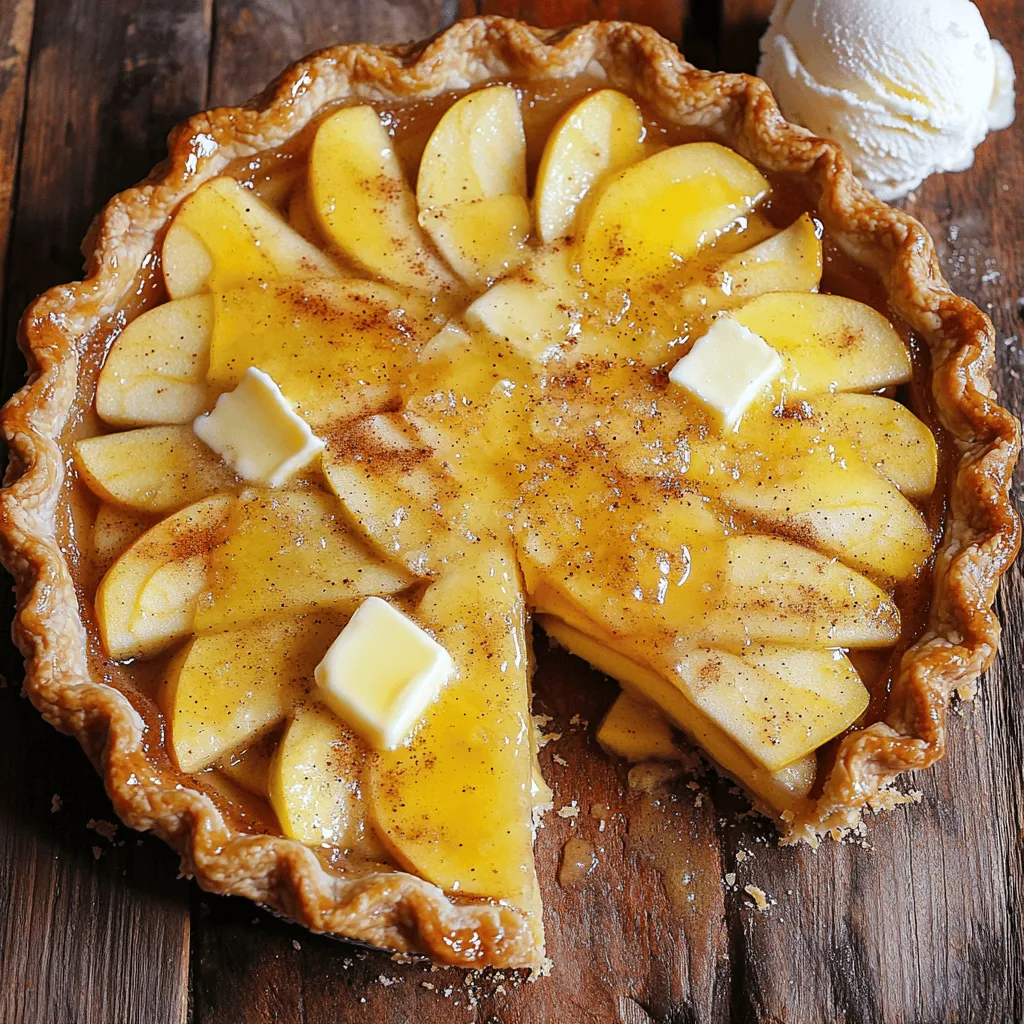
Classic Apple Pie Delightful and Easy Recipe Guide
Are you ready to bake the perfect apple pie? I’ll guide you through each step, ensuring your creation is both delightful and easy. From…