


Latest & Greatest
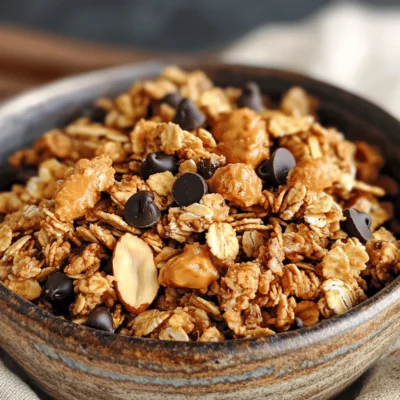
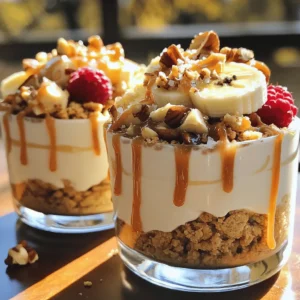
Peanut Butter Chocolate Granola Easy and Tasty Snack
Looking for a quick and tasty snack? This Peanut Butter Chocolate Granola is a game changer! With simple ingredients like
Read more…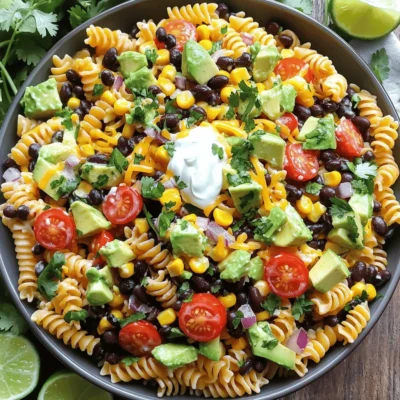
Fiesta Taco Pasta Salad Flavorful Party Delight
Get ready to impress your guests with a dish that brings the fiesta right to your table! Fiesta Taco Pasta
Read more…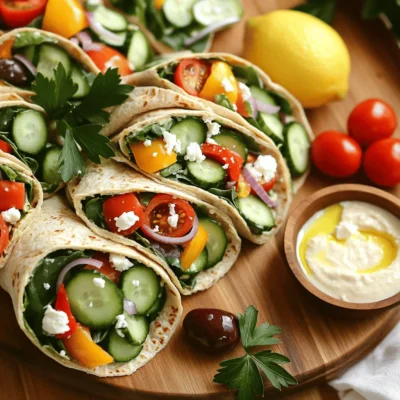
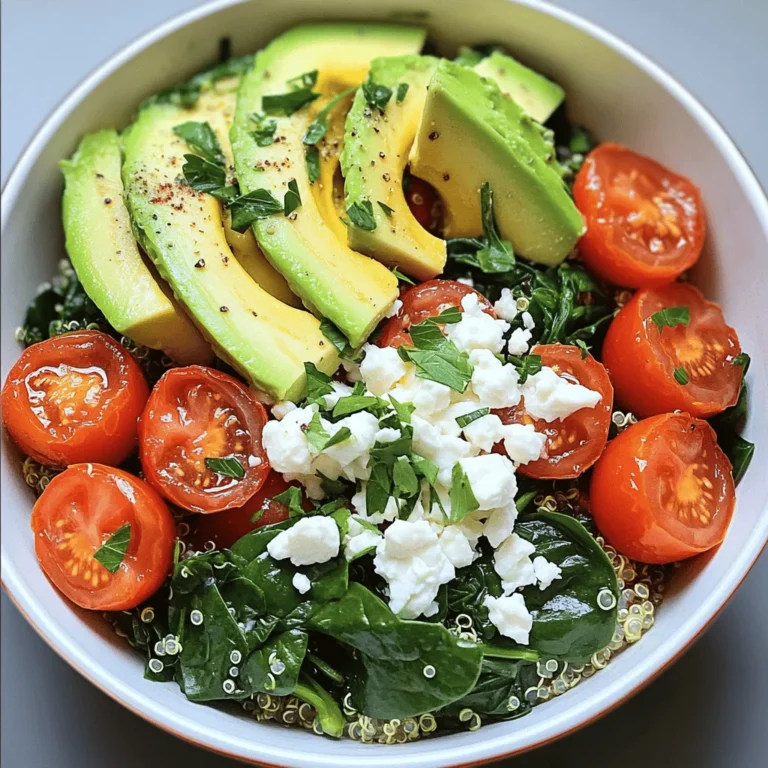
Greek Veggie Hummus Wrap Fresh and Flavorful Delight
Are you ready for a fresh and tasty treat? My Greek Veggie Hummus Wrap is perfect for lunch or a
Read more…
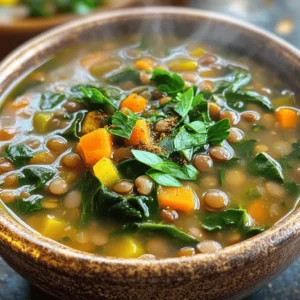
Vegan Carrot Potato Soup Healthy and Flavorful Recipe
When you’re craving a soup that warms your body and soul, Vegan Carrot Potato Soup is the answer. This easy
Read more…
Spicy Garlic Ramen Noodles Bold and Flavorful Dish
Looking to spice up your dinner routine? My Spicy Garlic Ramen Noodles are just the ticket! This bold and flavorful
Read more…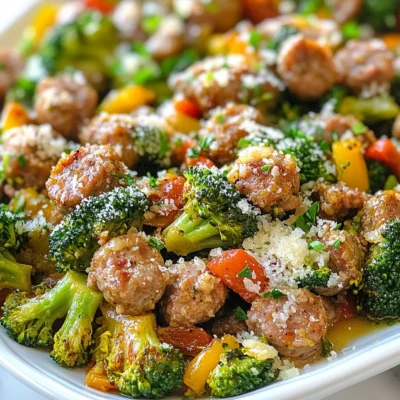
Sausage and Broccoli Skillet Quick and Easy Meal
Looking for a quick and easy meal that’s packed with flavor? This Sausage and Broccoli Skillet hits the spot! With
Read more…
Buffalo Ranch Chicken Dip Simple and Flavorful Snack
Looking for a snack that packs a punch? Buffalo Ranch Chicken Dip is your go-to! With just a few simple
Read more…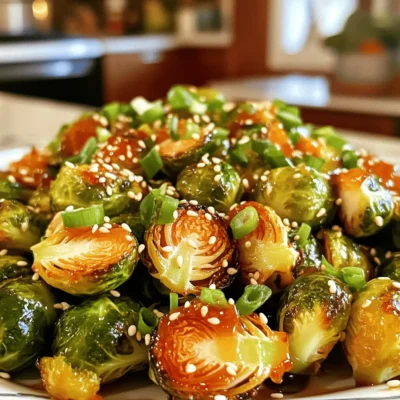
Honey Sriracha Brussels Sprouts Tasty Roasted Delight
Are you ready to spice up your dinner table? My Honey Sriracha Brussels Sprouts are a tasty roasted delight that
Read more…browse recipes


. Set your oven to 425°F (220°C). This high heat helps the Brussels sprouts become crispy and golden. Preheating is key for even cooking. Take 1 pound of Brussels sprouts and cut them in half. Place them in a large bowl. Add 3 tablespoons of olive oil. Toss them well, so every piece gets coated. This oil helps with cooking and adds flavor. Now, add 4 minced cloves of garlic, ½ teaspoon salt, and ¼ teaspoon black pepper to the bowl. Mix everything together. Then, spread the Brussels sprouts on a baking sheet. Make sure they are not crowded. This space helps them roast well. Roast them in the hot oven for 20-25 minutes. Halfway through, shake the pan a bit. This helps them cook evenly. They should be golden brown and crispy when done. For an extra touch, sprinkle ¼ cup of grated Parmesan cheese on top right after you take them out. If you like, drizzle some balsamic vinegar for added flavor. Garnish with chopped parsley before serving for a fresh look. Enjoy your Easy Roasted Brussels Sprouts! For the complete recipe, check out the [Full Recipe]. To make your Brussels sprouts crispy, avoid overcrowding on the baking sheet. If they are too close, they will steam instead of roast. Give each sprout space to breathe. Shake the pan halfway through cooking. This helps them brown evenly and get that nice crunch. You can experiment with spices and herbs to boost flavor. Try adding paprika, chili flakes, or even Italian herbs. These can add depth and warmth to your dish. Consider adding lemon juice or zest for a fresh twist. The acidity brightens the dish and balances the richness of the cheese. Serving is key to enjoying your meal. Place the Brussels sprouts on a large platter. Garnish with fresh parsley for color and flavor. Add extra grated Parmesan on top for a cheesy finish. You can drizzle a bit of balsamic vinegar for a glossy look and added taste. For the full recipe, check out the Crispy Garlic Parmesan Roasted Brussels Sprouts. {{image_2}} You can easily switch up the flavor of your roasted Brussels sprouts. Add paprika or chili flakes for a nice kick. If you love cheese, try different options like feta or goat cheese. These changes can make the dish more exciting and unique. You can even mix different cheeses for a rich flavor. Roasted Brussels sprouts pair well with many main dishes. Serve them with proteins like chicken or fish for a balanced meal. They also make a great side for holiday meals. Imagine how lovely they look on your table! You can even serve them with a drizzle of balsamic vinegar for a touch of sweetness. For full details, check out the Full Recipe. After enjoying your Easy Roasted Brussels Sprouts, store any leftovers right. Place them in an airtight container. This keeps them fresh and tasty. You can store them in the fridge for up to three days. When it's time to enjoy your leftovers, the oven is your best friend. Preheat the oven to 350°F (175°C). Spread the Brussels sprouts on a baking sheet. Heat for about 10-15 minutes. This way, they stay crispy and delicious. Avoid the microwave, as it makes them soggy. Can Brussels sprouts be frozen after cooking? Yes, you can freeze them. However, they taste best fresh. If you want to freeze, let them cool first. Place them in a freezer-safe bag or container. They can last for up to three months in the freezer. When ready to eat, thaw in the fridge overnight and reheat in the oven. For the full recipe, check out Crispy Garlic Parmesan Roasted Brussels Sprouts. To make Brussels sprouts less bitter, trim the ends and remove the outer leaves. This helps reduce some of their strong taste. Soaking them in cold water for 10-15 minutes can also help. After soaking, dry them well before cooking. Roasting with garlic and olive oil adds flavor and can mask bitterness. You can serve roasted Brussels sprouts with many dishes. They pair well with proteins like chicken, fish, or pork. Try them beside a hearty steak or as part of a vegetarian meal. You can also serve them with grains, like quinoa or rice. For a complete meal, add a simple salad or some crusty bread. Yes, you can use frozen Brussels sprouts. However, fresh ones taste better. Frozen sprouts may not get as crispy. If you use frozen, thaw and drain them first. Then, dry them well before roasting. This improves texture and flavor. Brussels sprouts are best in fall and winter. They are in season from September to March. Eating them in season means they taste better and are more fresh. They are rich in vitamins and nutrients, making them a healthy choice year-round. Roasting Brussels sprouts is simple with just a few key ingredients. We covered how to preheat the oven, prepare the sprouts, and roast them to crispy perfection. Remember, adjusting seasonings and using fresh herbs can enhance flavor. Serve them with proteins or during holidays for a delightful side dish. Store any leftovers properly and enjoy them later. With these tips, you'll enjoy Brussels sprouts like never before. Trust me, you can make this dish a hit at any meal!](https://emmasdish.com/wp-content/uploads/2025/06/28c224e5-da10-48a0-90d9-a13d2016e7c4.webp)
Easy Roasted Brussels Sprouts Simple and Delicious Dish
Get ready to fall in love with Brussels sprouts! In this blog post, I’ll show you how to make easy roasted Brussels sprouts that…
My Latest Desserts
My Latest Recipes

hey,
i’m !
I’m so happy you’re here!
I’m not just sharing recipes I’m sharing a piece of my heart. I hope these dishes bring you comfort, joy, and maybe even a new favorite.

![To make a great shrimp fried rice, you'll need some key ingredients. Here’s what you should gather: - 2 cups cooked jasmine rice (preferably day-old) - 1 cup shrimp, peeled and deveined - 2 tablespoons vegetable oil - 2 eggs, lightly beaten - 1 cup mixed vegetables (carrots, peas, corn) - 2 green onions, chopped - 3 tablespoons soy sauce - 1 teaspoon sesame oil - 1 teaspoon garlic, minced - 1 teaspoon ginger, minced - Salt and pepper to taste These ingredients come together to create a dish full of flavor and texture. I always recommend jasmine rice for this dish. It has a lovely aroma and a fluffy texture. You want to use day-old rice. Fresh rice can be too sticky. If you cook rice the same day, spread it on a pan to cool. This helps it dry out a bit. The rice will fry better this way. Fresh ingredients make a big difference. Use bright, colorful veggies. Carrots, peas, and corn add sweetness and crunch. For the best taste, chop your green onions right before cooking. Fresh garlic and ginger add a punch of flavor. They make the dish smell amazing. Don’t skip these, as they really enhance the taste. For the full recipe, check out the details provided above! First, heat your large pan or wok over medium-high heat. Add 1 tablespoon of vegetable oil. When the oil is hot, toss in the shrimp. Cook them for 2-3 minutes. You want them to turn pink and opaque. Once cooked, remove the shrimp and set them aside. This step gives the shrimp a nice flavor. In the same pan, add another tablespoon of oil. Next, add the minced garlic and ginger. Sauté these for about 30 seconds. This helps release their wonderful aroma. Once fragrant, push them to one side of the pan. This way, you have space for the eggs. Pour the beaten eggs into the pan next. Scramble them gently until just cooked. Mix the eggs with the garlic and ginger. This will let the flavors blend nicely. After that, you can add your mixed vegetables. Stir-fry everything together for another 2 minutes until heated through. This will make your dish colorful and tasty. Now you are ready for the next steps! Check the [Full Recipe] for more details. To get that true taste of Chinese fried rice, start with day-old rice. Fresh rice is too sticky. Day-old rice is dry, making it easier to fry. Use soy sauce for umami. Sesame oil adds a rich, nutty flavor. Don't skip garlic and ginger; they give the dish depth. You can also use oyster sauce for extra flavor. Use a hot wok or pan. High heat helps fry the rice quickly. First, cook the shrimp until pink, then set aside. Sauté garlic and ginger until fragrant. Scramble eggs separately to keep them fluffy. Finally, add the rice and toss everything well. Stir-frying in batches can help. This keeps each grain separate and tasty. One big mistake is using fresh rice. It clumps and won’t fry well. Don't overcrowd the pan. This lowers the heat and causes steaming. Avoid overcooking the shrimp; they should be just pink. Also, be careful with soy sauce. Too much can make the dish too salty. Follow the Full Recipe for best results. {{image_2}} You can switch up the shrimp with other proteins. Chicken, beef, or tofu work great. Just cut them into small pieces. Cook them the same way you do the shrimp. For a veggie option, try using edamame or chickpeas. Each choice adds a unique taste to your dish. Feel free to mix in different vegetables. Broccoli, bell peppers, or snap peas all add flavor and crunch. You can even use leftover veggies from your fridge. Just remember to chop them small for even cooking. This makes your fried rice colorful and fun. If you like heat, add some spice! You can mix in chili paste or hot sauce. Sriracha is a tasty option for those who enjoy a kick. You can also sprinkle red pepper flakes while cooking. Adjust the spice to your taste, and enjoy a fiery twist on the classic dish. For more details, check out the Full Recipe for Chinese Style Shrimp Fried Rice. After you finish your meal, let the shrimp fried rice cool down. Once cool, transfer it to an airtight container. Make sure to seal it tight. This will help keep the flavors fresh. Store it in the fridge for up to three days. If you want to keep it longer, you can freeze it. When you're ready to eat your leftovers, you have a few options. You can use a microwave, a pan, or a wok. For the microwave, place your rice in a bowl. Add a splash of water to keep it moist. Heat it for 1-2 minutes, stirring halfway through. If you prefer a pan, heat some oil over medium heat. Add the rice and stir until hot. This method keeps the rice from getting soggy. If you want to freeze your shrimp fried rice, first cool it completely. Then, scoop it into freezer-safe bags. Press out any air before sealing. Label the bags with the date. You can freeze it for up to three months. When you want to eat it, thaw it overnight in the fridge. Then, reheat it using one of the methods above. Enjoy your shrimp fried rice again with that fresh taste! Yes, you can use frozen shrimp. Just thaw them first. Place the shrimp in cold water for about 15 minutes. This quick method saves time and keeps the shrimp tasty. After thawing, peel and devein them if needed. The shrimp will cook well in the dish. To make shrimp fried rice without eggs, simply skip the eggs. Add more mixed veggies instead. You can also use tofu for extra protein. It gives a nice texture. Just stir-fry the tofu until golden before adding rice. The flavor will still be great! To avoid mushy rice, use day-old jasmine rice. This rice is drier and firmer. If you don't have day-old rice, spread fresh rice on a tray to cool. Let it sit for 30 minutes. This helps keep each grain separate. Also, don't overcook the rice in the pan. Stir gently to keep it fluffy. For more details, check the Full Recipe. In this post, we explored shrimp fried rice, from ingredients to cooking tips. We covered the main ingredients and how to prepare the rice perfectly. We shared step-by-step cooking instructions and discussed common mistakes. You learned about tasty variations and how to store leftovers effectively. With this knowledge, you can make a delicious shrimp fried rice at home. Enjoy experimenting and creating your own favorite version!](https://emmasdish.com/wp-content/uploads/2025/05/5cfdd21c-82e6-43b4-b4f9-63ee290d3215-300x300.webp)
![To make Healthy Peanut Butter Energy Bites, you need simple ingredients that pack a punch. Here’s a list of what you’ll need: - 1 cup natural peanut butter (creamy or crunchy) - 1 cup rolled oats - 1/2 cup honey or maple syrup - 1/4 cup chia seeds - 1/4 cup mini chocolate chips (dark or milk chocolate) - 1/4 cup flaxseeds - 1 teaspoon vanilla extract - A pinch of sea salt These ingredients blend well together to create a tasty and nutritious snack. Each ingredient in these bites serves a purpose. Here's how they help your body: - Natural peanut butter provides protein and healthy fats. It keeps you full longer. - Rolled oats are rich in fiber. They help with digestion and energy. - Honey or maple syrup adds natural sweetness and quick energy. - Chia seeds are full of omega-3s and antioxidants. They support heart health. - Mini chocolate chips add flavor and joy while giving a small energy boost. - Flaxseeds are great for fiber and healthy fats. They can improve heart health. - Vanilla extract gives a lovely aroma and flavor. - Sea salt enhances the taste and balances sweetness. Together, these ingredients create a balanced snack that fuels your day. Feel free to mix things up! You can swap some ingredients based on your taste or needs: - Use almond butter or sunflower seed butter if you're nut-free. - Swap honey for agave syrup for a vegan option. - Add dried fruits like cranberries or raisins for sweetness and texture. - Try protein powder for an extra boost. Customizing these energy bites makes them even more enjoyable. You can make a new flavor each time! If you want the complete details, check out the Full Recipe. First, gather all your ingredients. You need peanut butter, oats, honey, chia seeds, chocolate chips, flaxseeds, vanilla, and salt. This recipe is easy and quick. You will spend about 15 minutes preparing these bites. In a large bowl, mix the peanut butter and honey until smooth. This step is key for a great texture. Next, add vanilla and a pinch of salt. Stir well to combine. After that, add oats, chia seeds, flaxseeds, and chocolate chips. Mix everything until you have a thick dough. Use a spatula or your hands to ensure all ingredients blend well. Once your mixture is ready, cover the bowl with plastic wrap. Chill it in the fridge for about 30 minutes. This helps the mixture firm up. After chilling, scoop out small portions and roll them into balls. Aim for about one inch in diameter. Place these bites on a baking sheet lined with parchment paper. Chill again for another 30 minutes. This helps them set properly. Finally, store them in an airtight container in the fridge. Enjoy your Healthy Peanut Butter Energy Bites throughout the week! For the full recipe, check the details above. To make your energy bites even tastier, try adding spices. Cinnamon adds warmth, while nutmeg brings a hint of sweetness. You can also add dried fruits like raisins or cranberries for a chewy texture. If you like crunch, toss in some chopped nuts or seeds. These small tweaks can take your bites to the next level, making them a joy to eat. One mistake is not measuring ingredients properly. Too much peanut butter can make the bites too sticky. Not enough oats can make them crumbly. Make sure to use a measuring cup for each ingredient. Another mistake is skipping the chilling step. Chilling helps the mixture firm up, making it easier to roll into balls. Don’t rush this step! To roll perfect bites, keep your hands slightly damp. This helps prevent the mixture from sticking to your hands. Aim for about one inch in diameter for each ball. You can also use a cookie scoop for even portions. If you want a fun look, roll the bites in shredded coconut or cocoa powder. This adds flair and extra flavor to each bite. {{image_2}} If you want to make nut-free energy bites, use sun butter. Sun butter comes from sunflower seeds. It has a nice taste and will keep the bites creamy. You can also try soy nut butter as another option. Both add great flavor and keep your snacks safe for kids with nut allergies. You can change up the flavor of your energy bites easily. Try adding cinnamon for a warm touch. It gives a sweet, cozy taste that pairs well with peanut butter. You can also mix in dried fruit like raisins or cranberries. This adds both sweetness and chewiness, making each bite even more fun. If you like coconut, shredded coconut works great, too. Just sprinkle some in for a tropical twist. If you need more protein, add protein powder. A scoop of your favorite protein powder mixes well with the other ingredients. This makes your bites a great post-workout snack. You can also use hemp seeds for extra protein and healthy fats. They have a mild flavor and blend in nicely. For a savory kick, consider adding some ground flaxseed. It boosts fiber too! For the complete recipe, check out the [Full Recipe]. To keep your energy bites fresh, use an airtight container. Line the container with parchment paper. This helps prevent sticking. Place the bites in a single layer. If you have many, add layers of parchment between them. Store them in the fridge to maintain their texture and taste. These energy bites last about a week in the fridge. For longer storage, you can freeze them. Freeze the bites on a baking sheet for a few hours. Once frozen, transfer them to an airtight container or freezer bag. They can stay in the freezer for up to three months. When you want a snack, just take a few out to thaw. These bites make a great snack anytime. Pack them in your lunch or keep them in your bag. You can serve them with fruit, yogurt, or a glass of milk. They are great for kids and adults alike. For a fun twist, drizzle some melted chocolate over the bites before serving. Try the Full Recipe for more ideas! To make healthy peanut butter energy bites gluten-free, you need to choose oats that are labeled gluten-free. Regular oats can be cross-contaminated with gluten. Always check the package to ensure they meet gluten-free standards. This small change keeps the bites safe for those with gluten sensitivities. Yes, you can use almond butter in place of peanut butter. Almond butter gives a different flavor, but it works well. The texture may change slightly, but the bites will still be tasty and healthy. Make sure to pick a natural almond butter with no added sugars or oils for the best results. If you want to replace honey or maple syrup, you can use agave nectar or brown rice syrup. Both options add sweetness without changing the flavor too much. For a sugar-free alternative, try using mashed bananas or applesauce. Just remember, these substitutes may change the texture a bit. Healthy peanut butter energy bites are easy to make and enjoy. We covered key ingredients, their benefits, and fun ways to customize them. Preparation steps let you mix and shape your bites just right. I shared tips to enhance flavor and avoid mistakes, plus lots of variations for everyone. Remember to store your bites well for the best taste and texture. These snacks offer great nutrition and energy for busy days. Try different ingredients to find your favorite blend. Enjoy making your treats and feel good about what you eat!](https://emmasdish.com/wp-content/uploads/2025/07/6567b5f5-792d-4cd5-ae3c-89c54ed54ee5-300x300.webp)
Strawberry Cheesecake Eggrolls Tasty and Easy Recipe
Get ready to make a quick and easy treat that will wow your friends! Strawberry Cheesecake Eggrolls are a fun twist on a classic…

