

Latest & Greatest
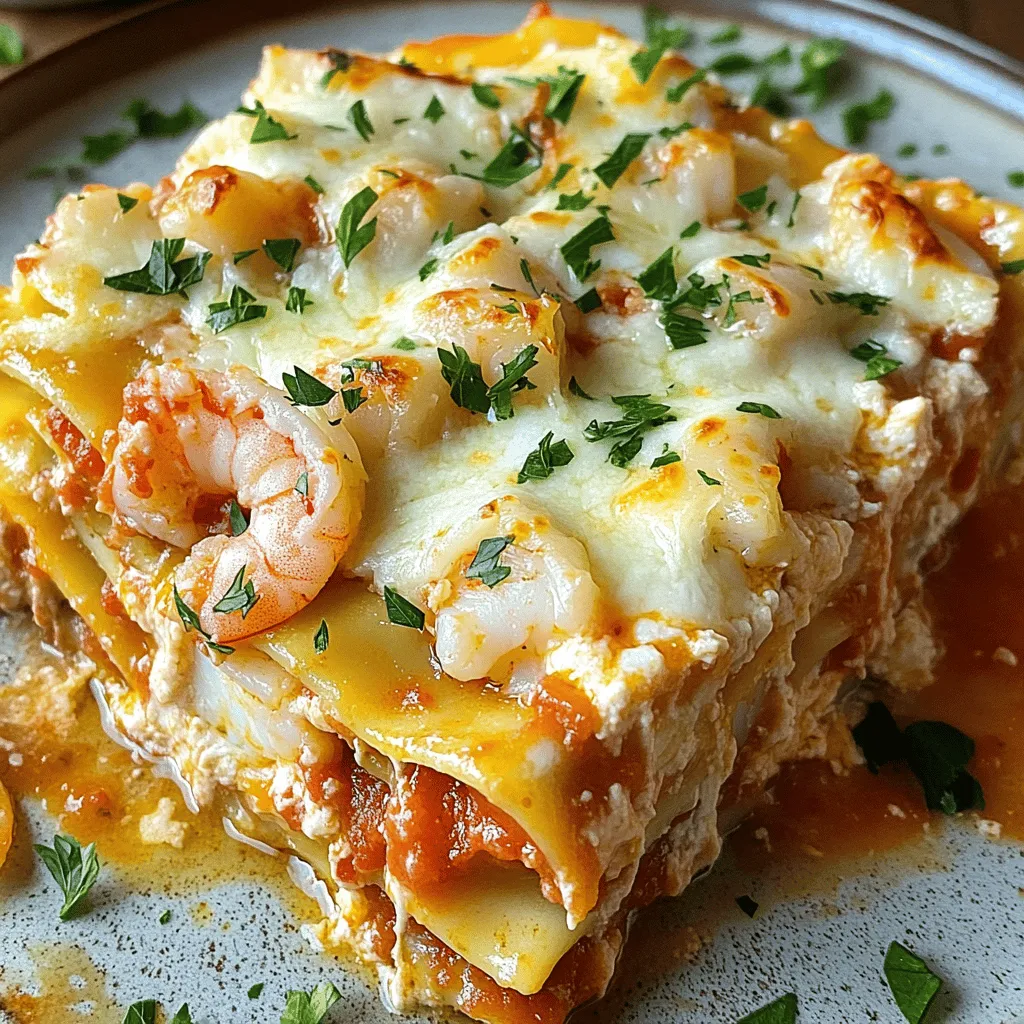
Savory Seafood Lasagna Flavorful and Delightful Dish
Craving a dish that combines rich flavors with a touch of elegance? Dive into this Savory Seafood Lasagna, where layers
Read more…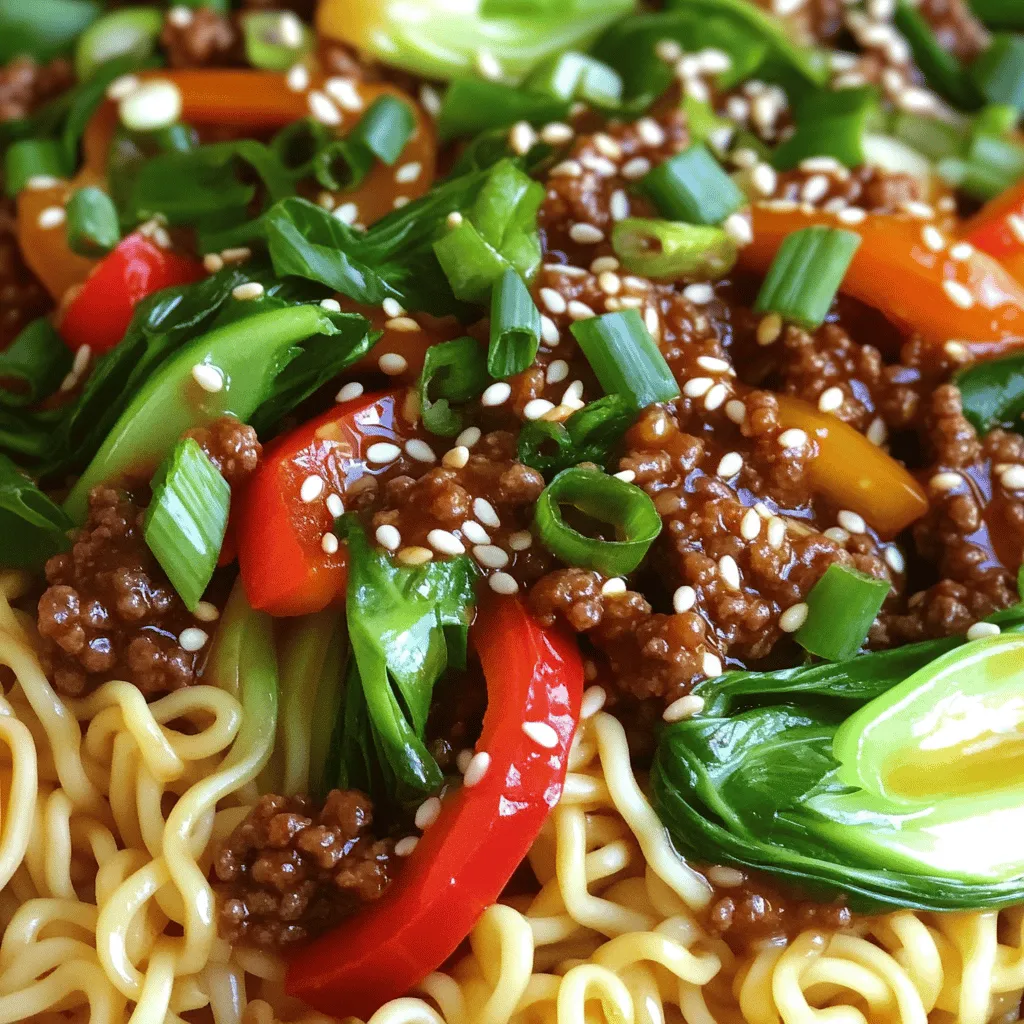
Mongolian Ground Beef Noodles Quick and Flavorful Dish
Are you ready to enjoy a quick, flavorful meal? Mongolian Ground Beef Noodles are your answer! This dish combines tender
Read more…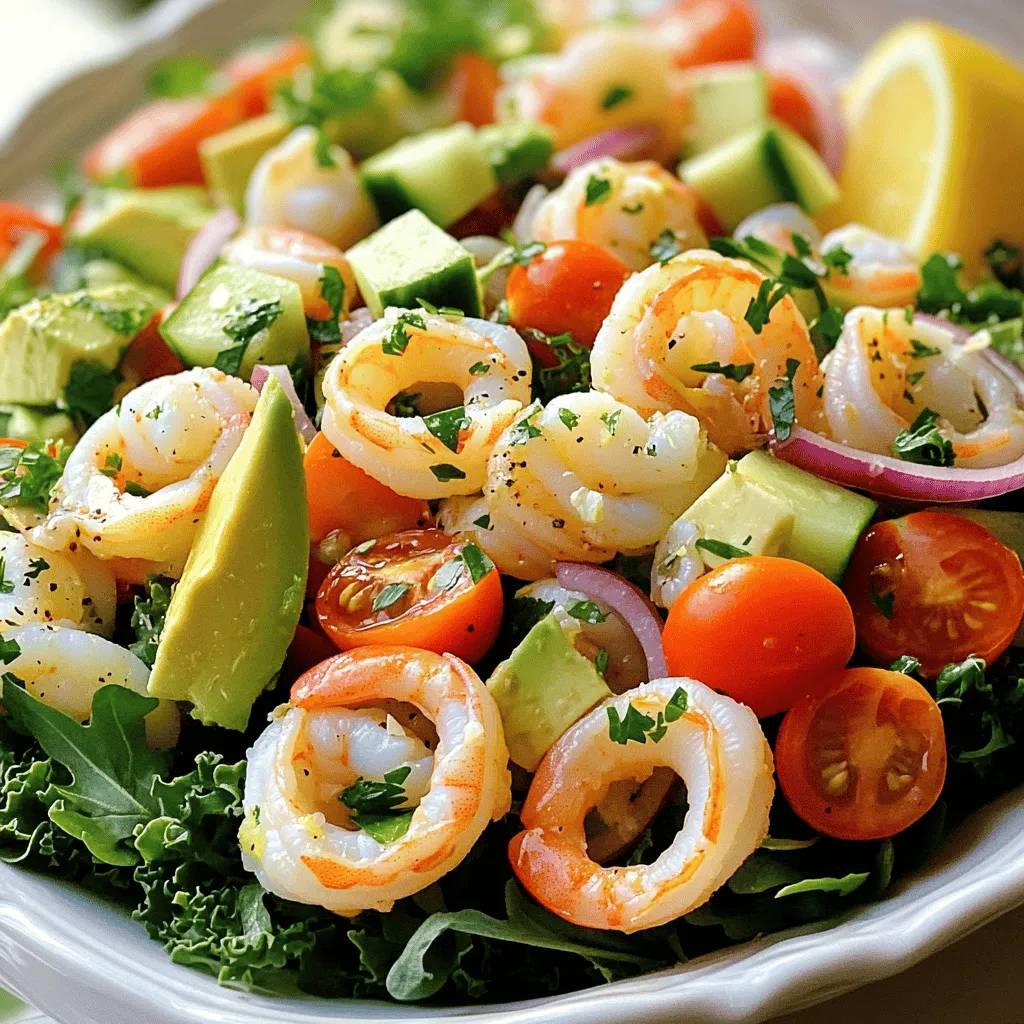
Savory Seafood Salad Fresh and Flavorful Delight
If you crave a fresh and tasty dish, seafood salad is the perfect choice. This savory mix of shrimp, scallops,
Read more…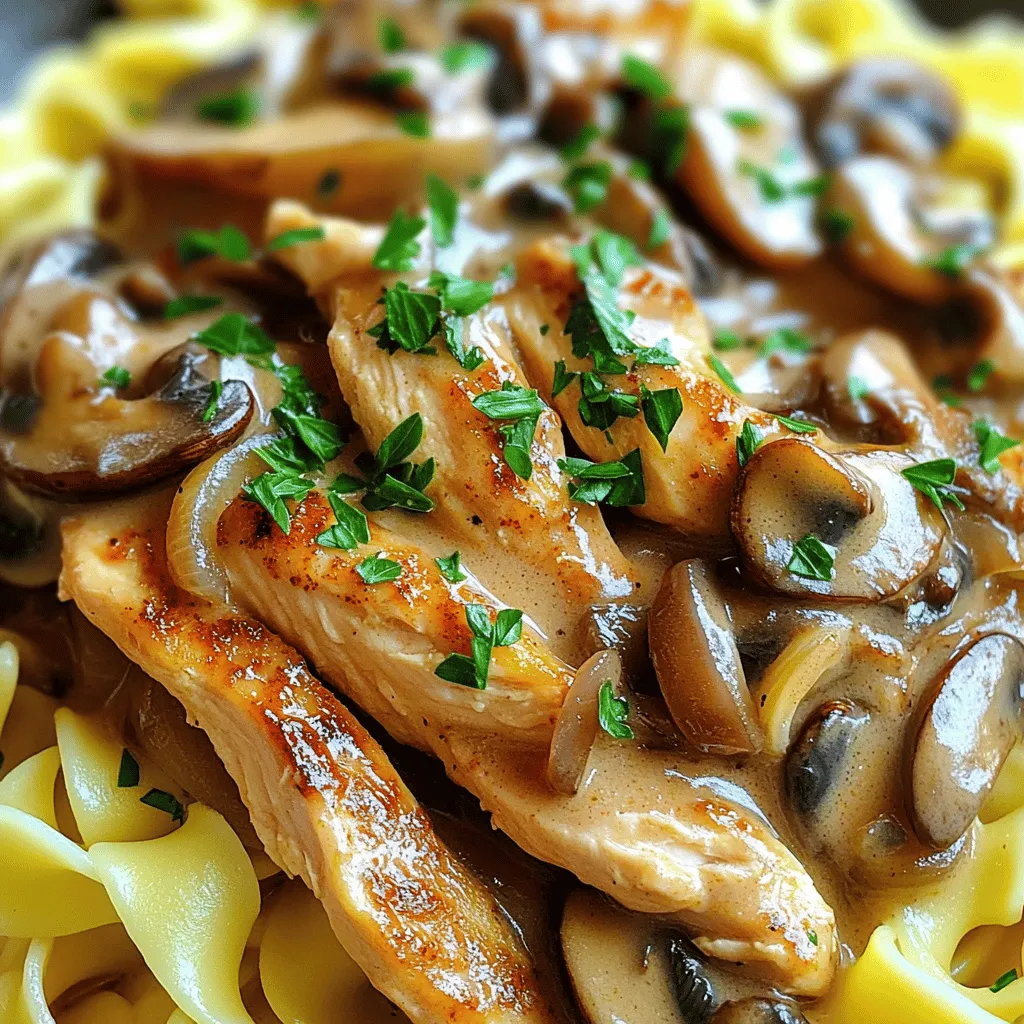
Homemade Chicken Stroganoff Flavorful Comfort Meal
If you’re craving a warm, hearty meal that’s easy to make, Homemade Chicken Stroganoff is your answer. Packed with tender
Read more…
Loaded Baked Potato Gnocchi Flavorful Comfort Dish
Looking for a cozy dish to warm your soul? Dive into my Loaded Baked Potato Gnocchi, a delightful twist on
Read more…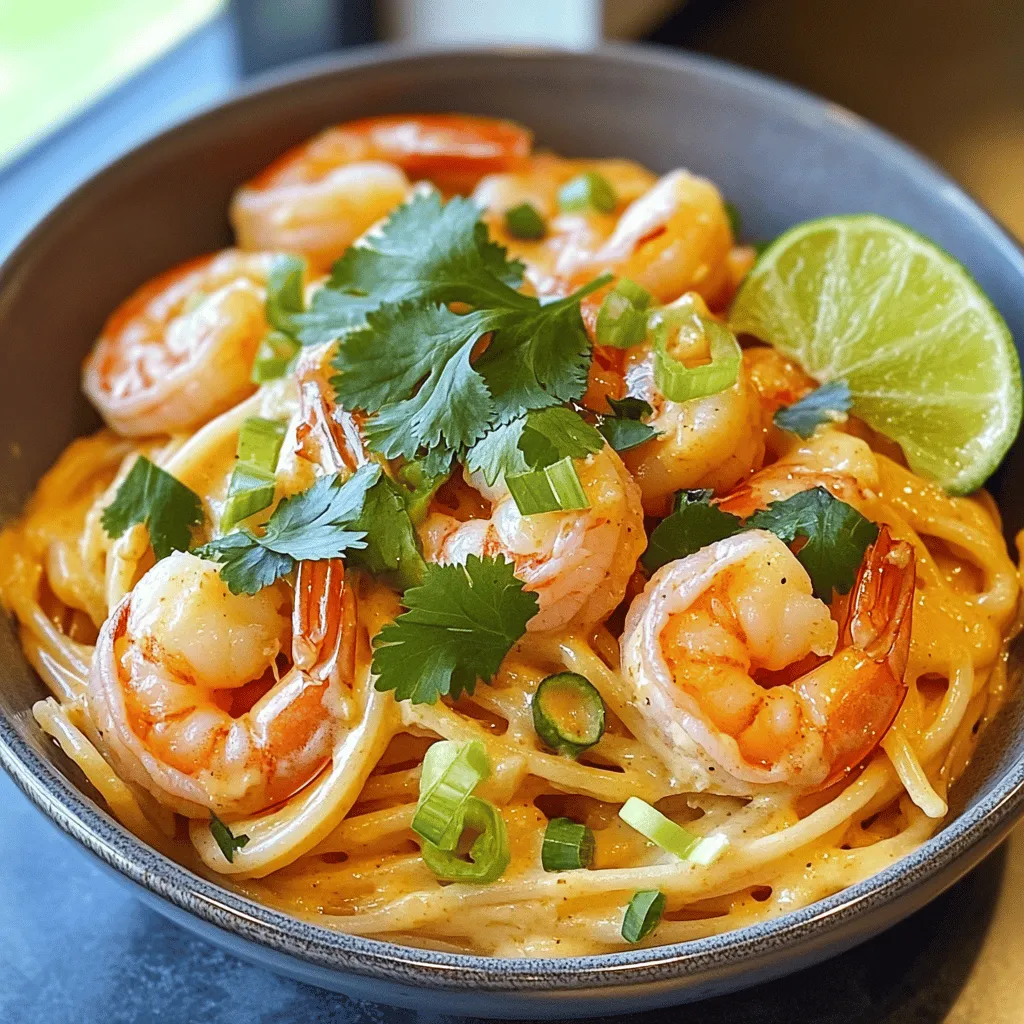
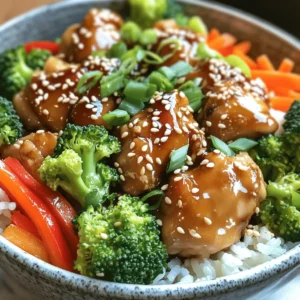
Bang Bang Shrimp Pasta Easy and Quick Dinner Option
Looking for a quick and tasty dinner? Bang Bang Shrimp Pasta checks all the boxes! I’ll guide you through this
Read more…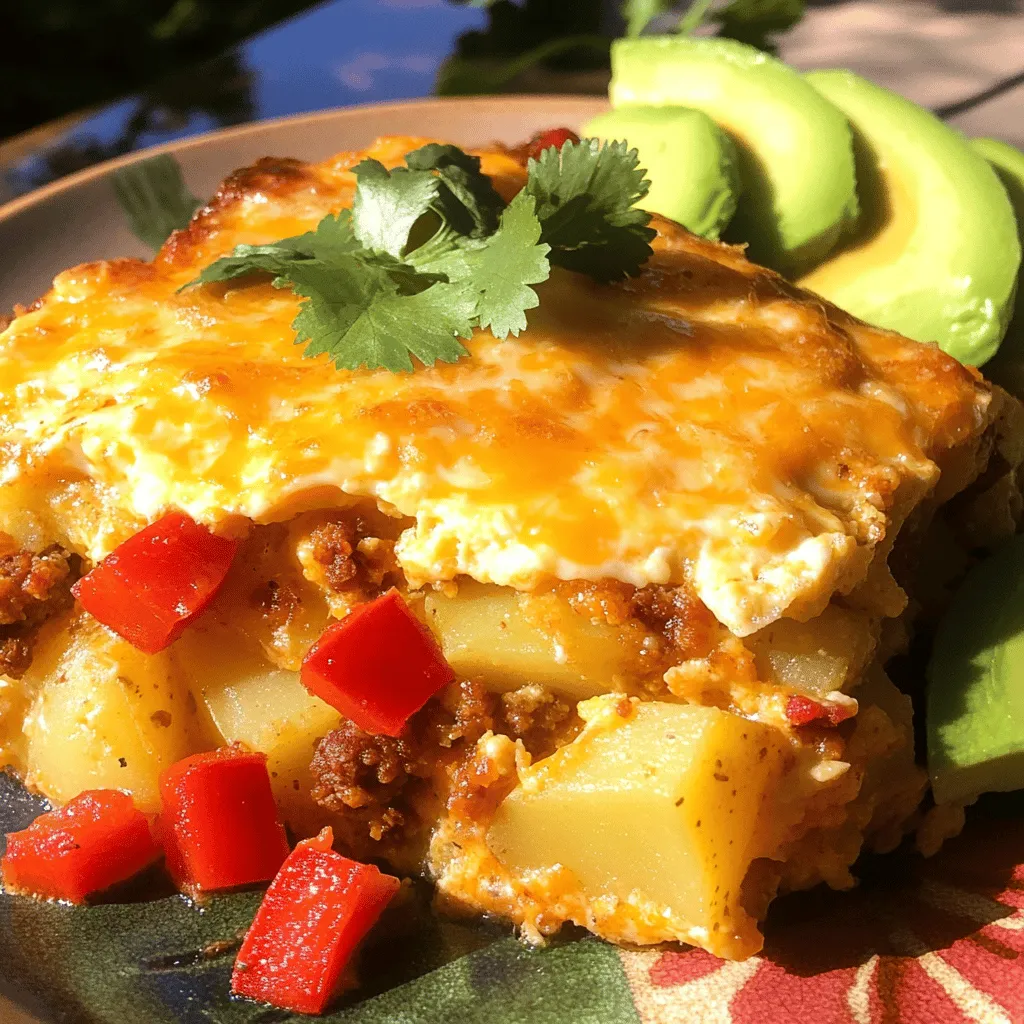
Chorizo & Potato Egg Casserole Tasty Weekend Dish
Looking for a tasty weekend dish that packs a punch? This Chorizo & Potato Egg Casserole is your answer! It’s
Read more…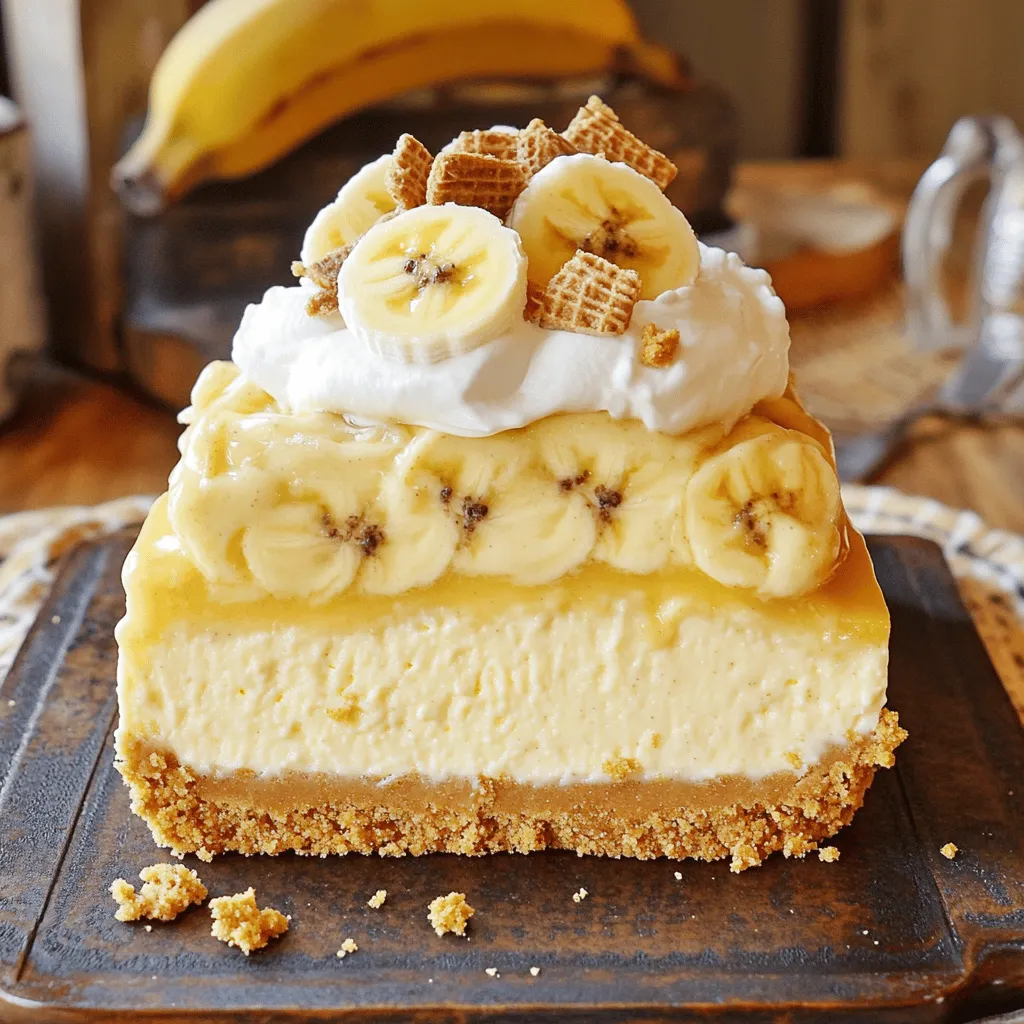
Banana Pudding Cheesecake Irresistible Creamy Delight
Looking for a dessert that combines creamy cheesecake with the classic taste of banana pudding? You’ve landed in the right
Read more…browse recipes

Buffalo Chicken Dip Irresistible and Easy Recipe
Are you ready to make a dish that everyone loves? Buffalo chicken dip is the perfect snack for parties or game nights. This recipe…
My Latest Desserts
-
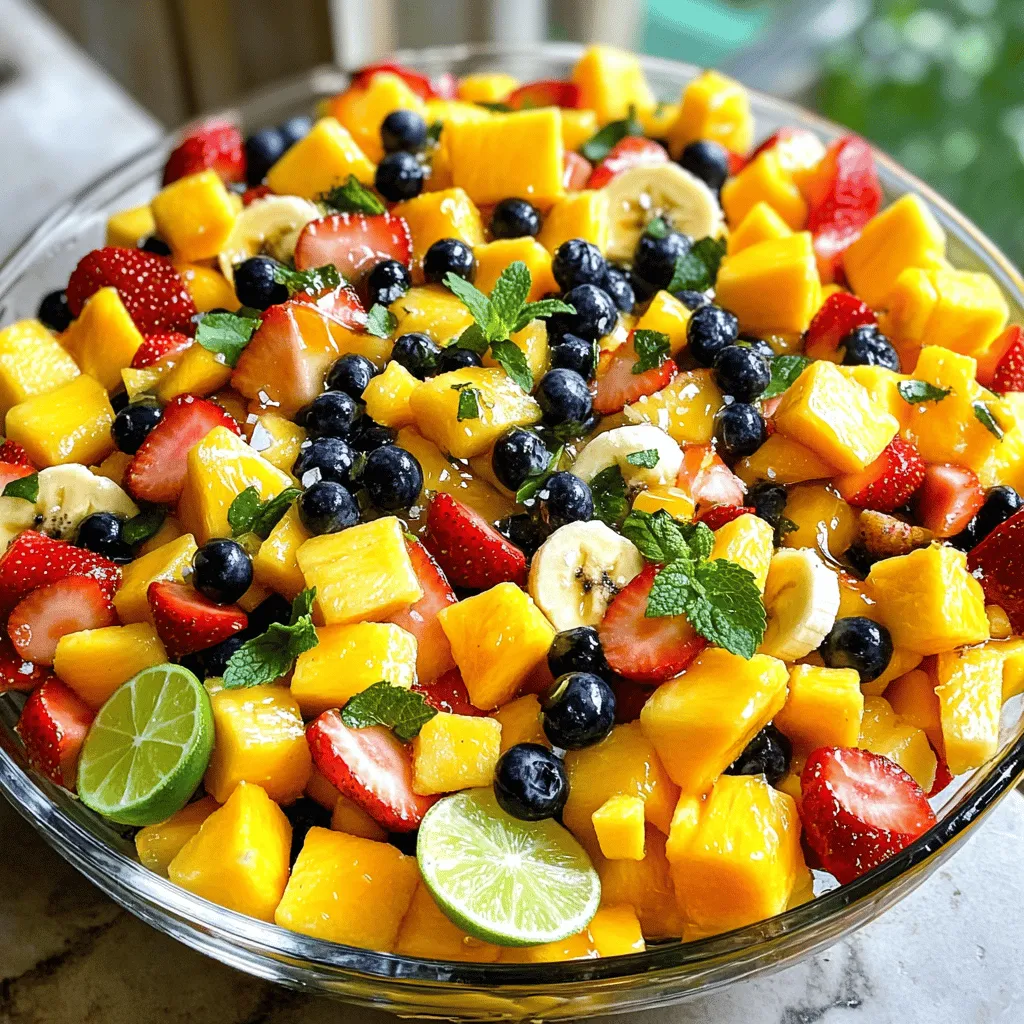
Tropical Fruit Salad Refreshing and Healthy Mix
Dive into a colorful world of flavors with my Tropical Fruit Salad! This healthy mix is bursting with fresh, tropical Read Full Recipe -
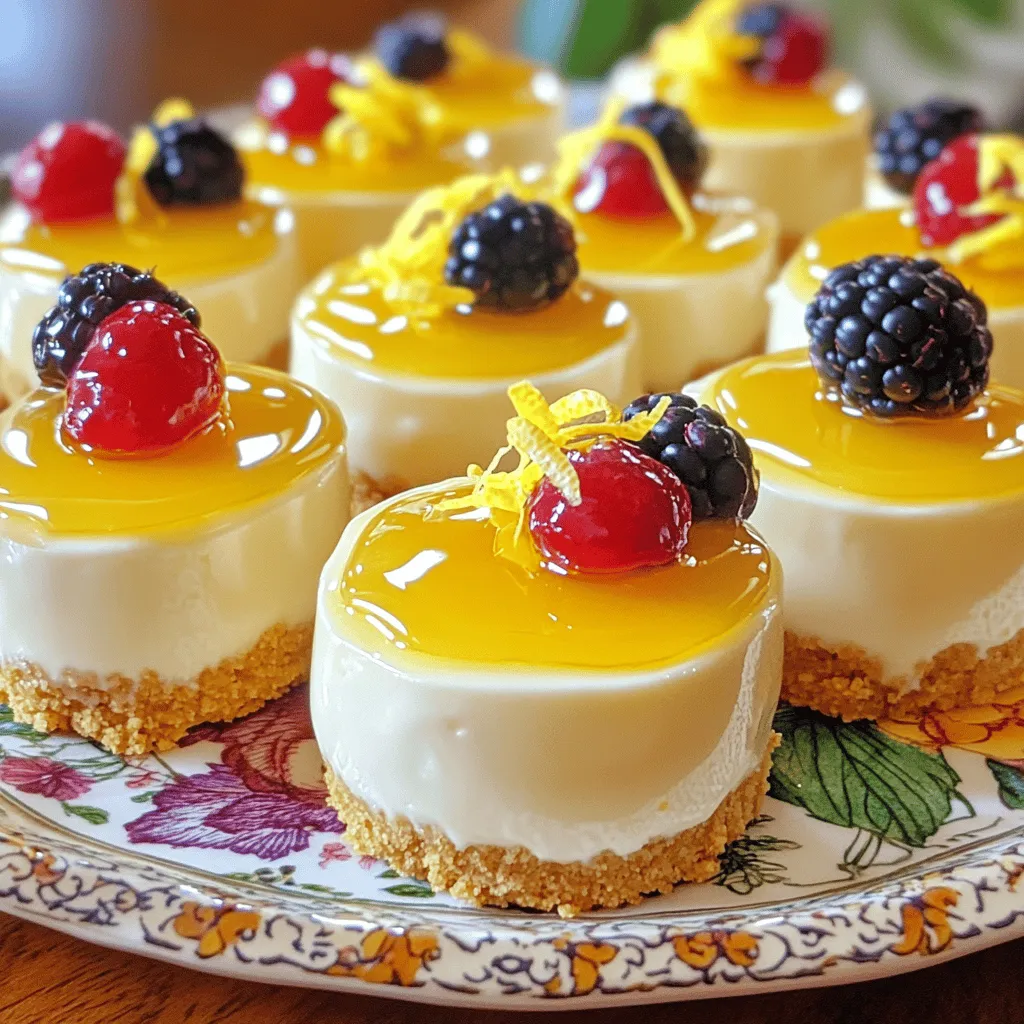
No-Bake Lemon Cheesecake Bites Tasty and Simple Dessert
Are you ready to indulge in a creamy treat without turning on the oven? No-Bake Lemon Cheesecake Bites are your Read Full Recipe -
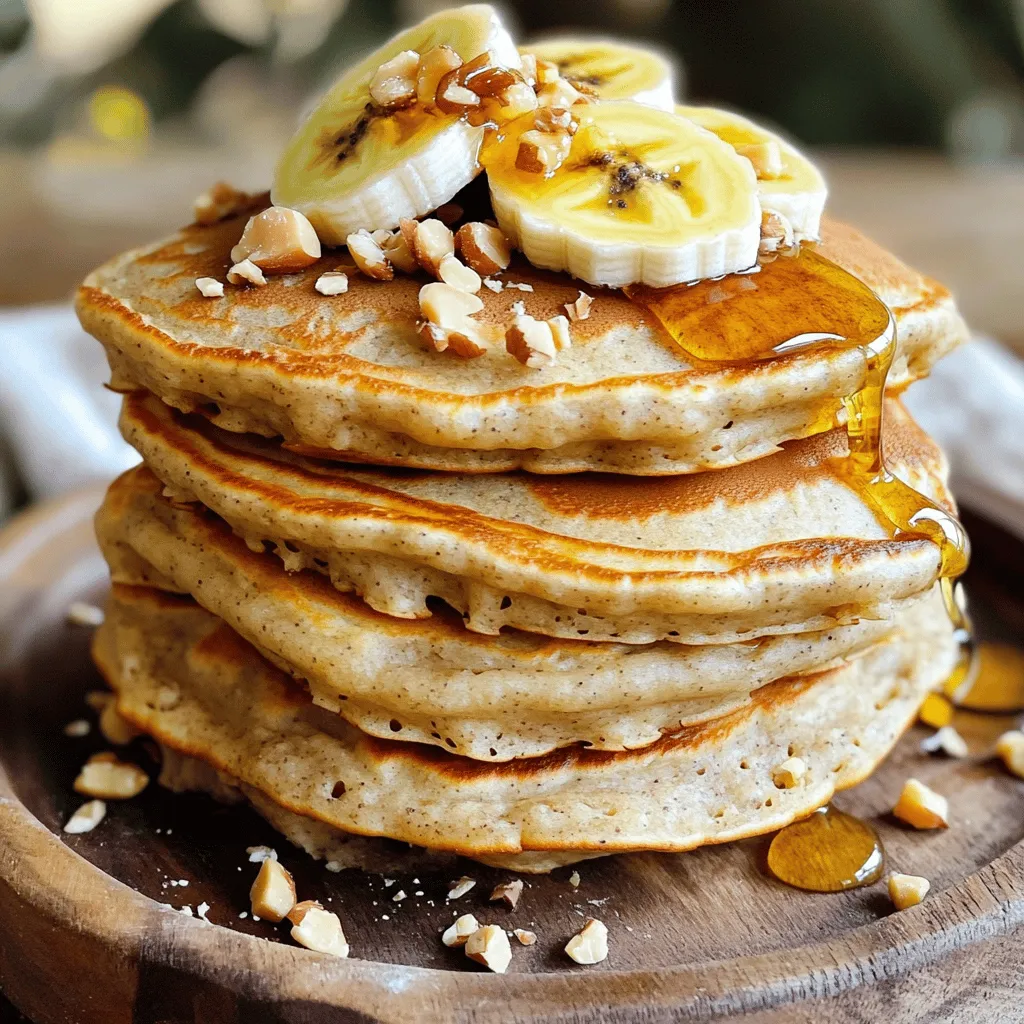
Healthy Banana Oat Pancakes Simple and Quick Recipe
Are you ready to flip the perfect pancake? In just minutes, you can whip up healthy banana oat pancakes that Read Full Recipe -

No-Bake Oreo Cheesecake Delightful and Easy Recipe
Are you craving a dessert that’s both easy and delicious? Look no further than this No-Bake Oreo Cheesecake! With just Read Full Recipe -
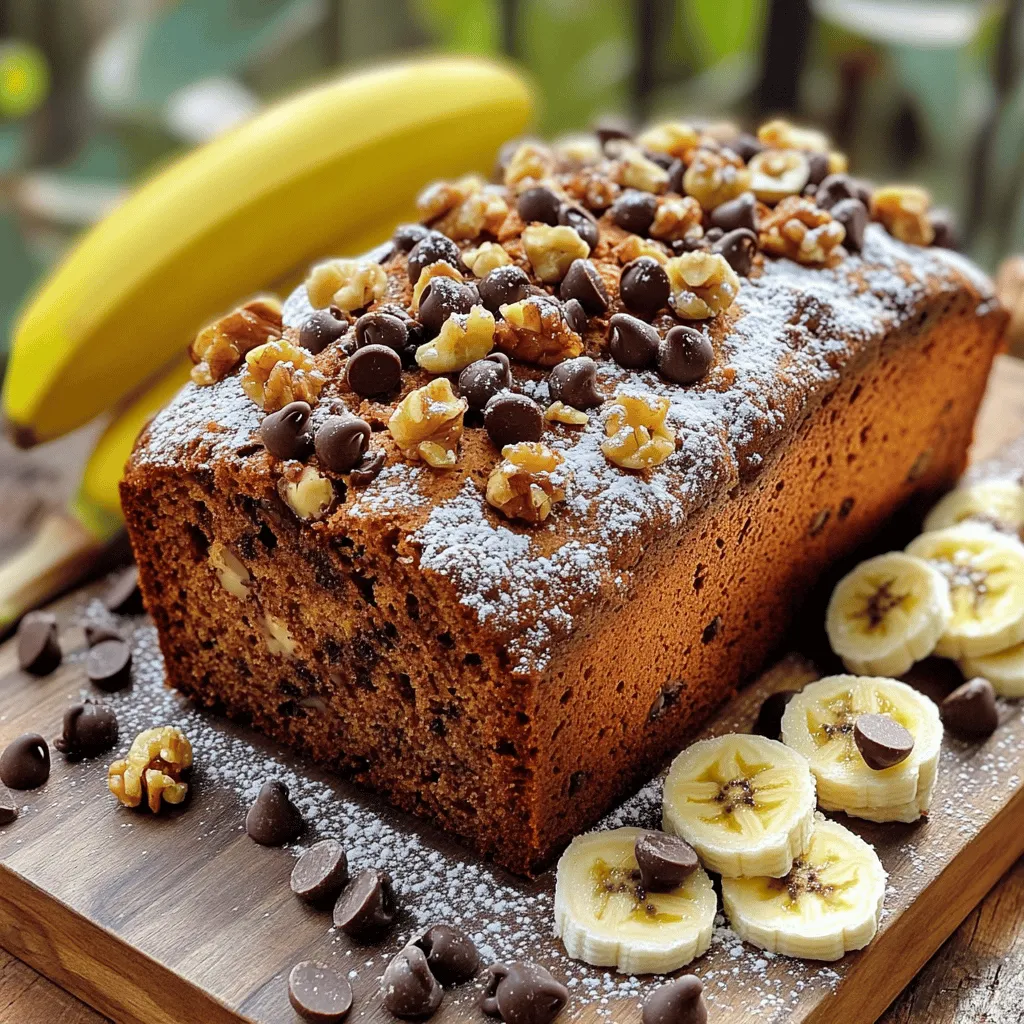
Chocolate Chip Banana Bread Irresistible Flavor Treat
If you love the sweet, comforting taste of banana bread, you’re in for a treat! This Chocolate Chip Banana Bread Read Full Recipe -
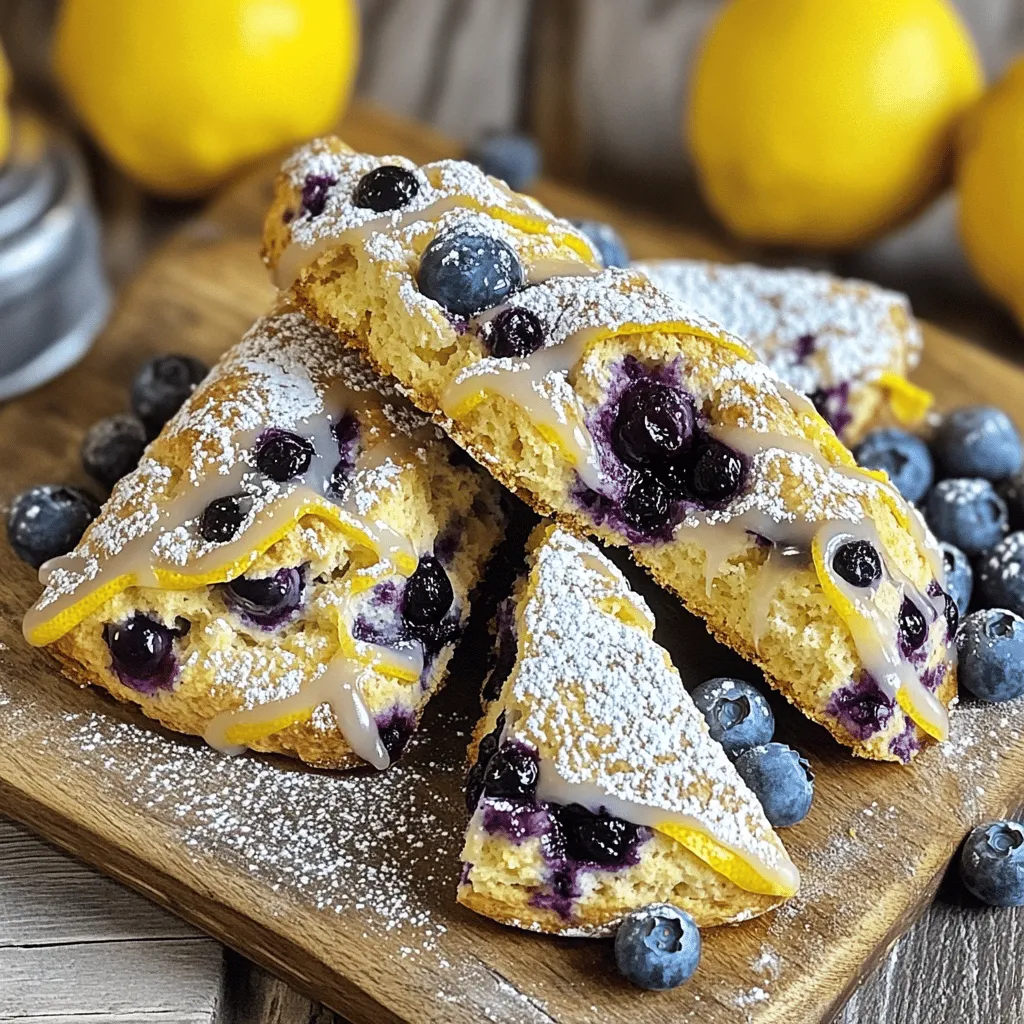
Lemon Blueberry Scones Flavorful and Easy Recipe
If you’re craving a delightful treat that’s both zesty and sweet, you’re in the right place. Lemon Blueberry Scones are Read Full Recipe -
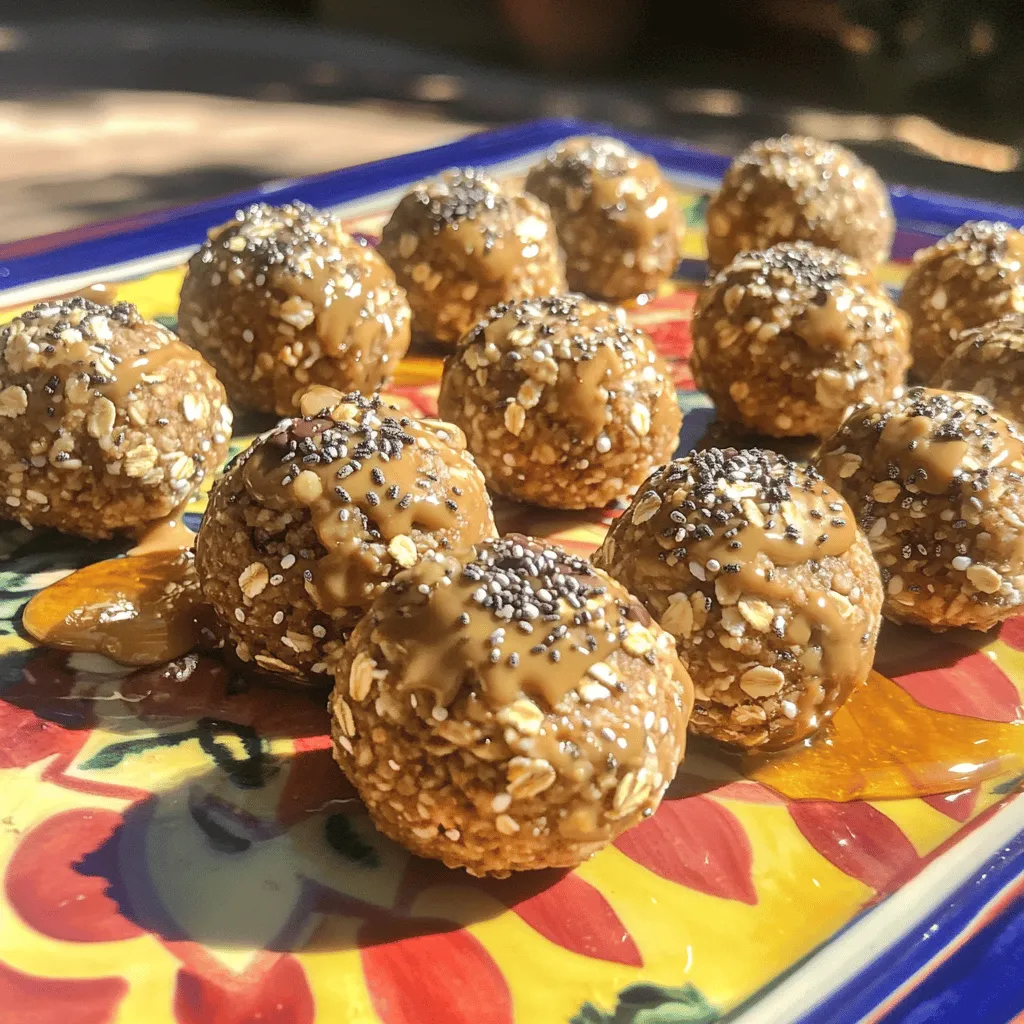
Healthy Peanut Butter Energy Bites Simple Snack Delight
Are you looking for a quick, tasty snack that packs a nutritious punch? Healthy Peanut Butter Energy Bites are the Read Full Recipe -
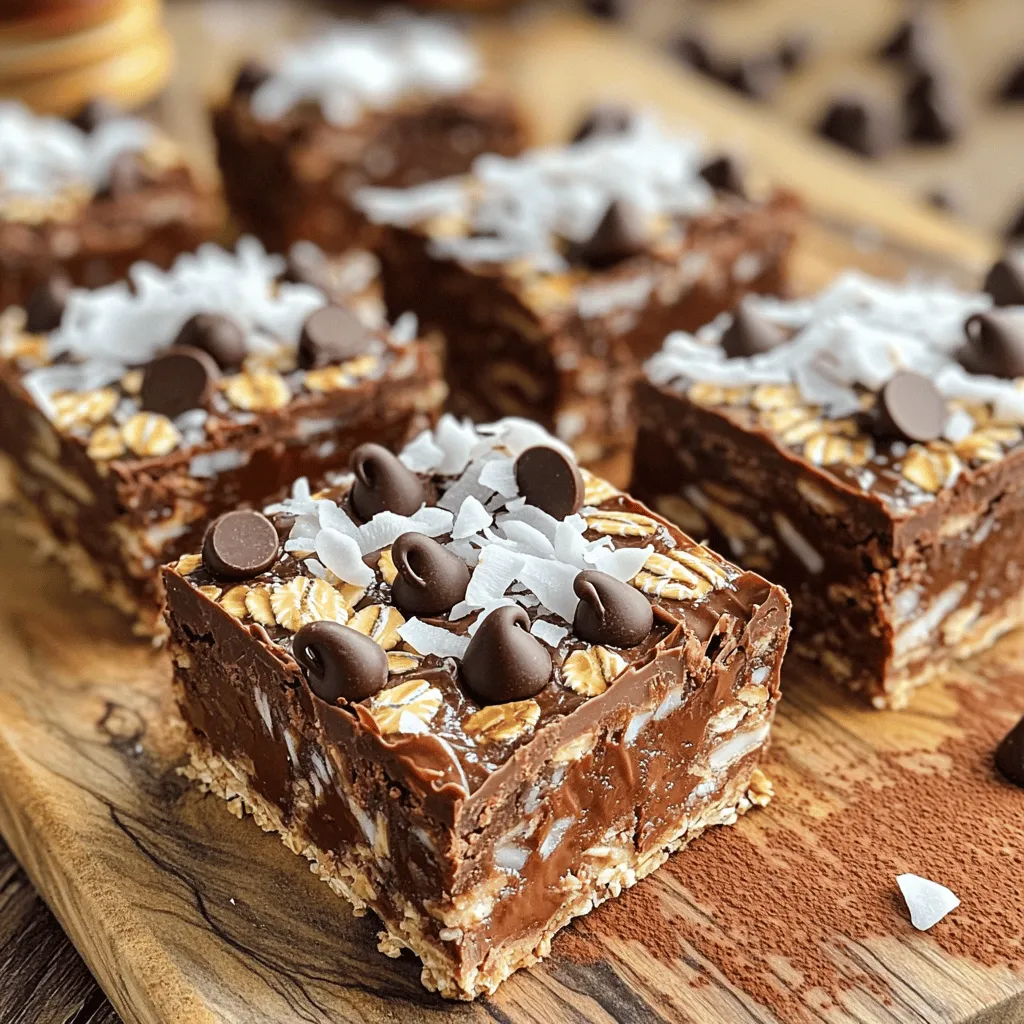
No-Bake Chocolate Oat Bars Simple and Tasty Snack
Looking for a quick and tasty snack? Try my No-Bake Chocolate Oat Bars! With simple ingredients like oats, nut butter, Read Full Recipe -
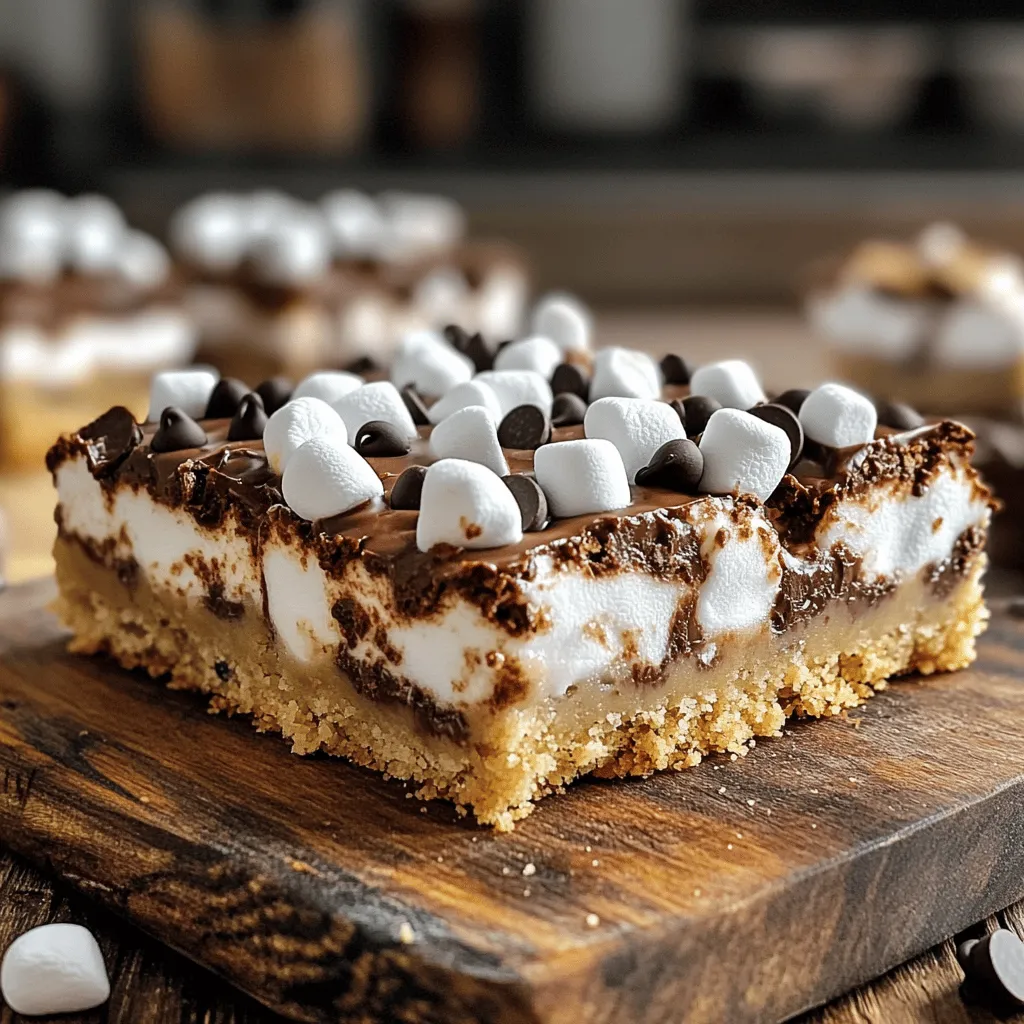
S’mores Cookie Bars Irresistible Dessert Recipe
Get ready to satisfy your sweet tooth with my S’mores Cookie Bars! This easy dessert combines soft cookie goodness with Read Full Recipe -
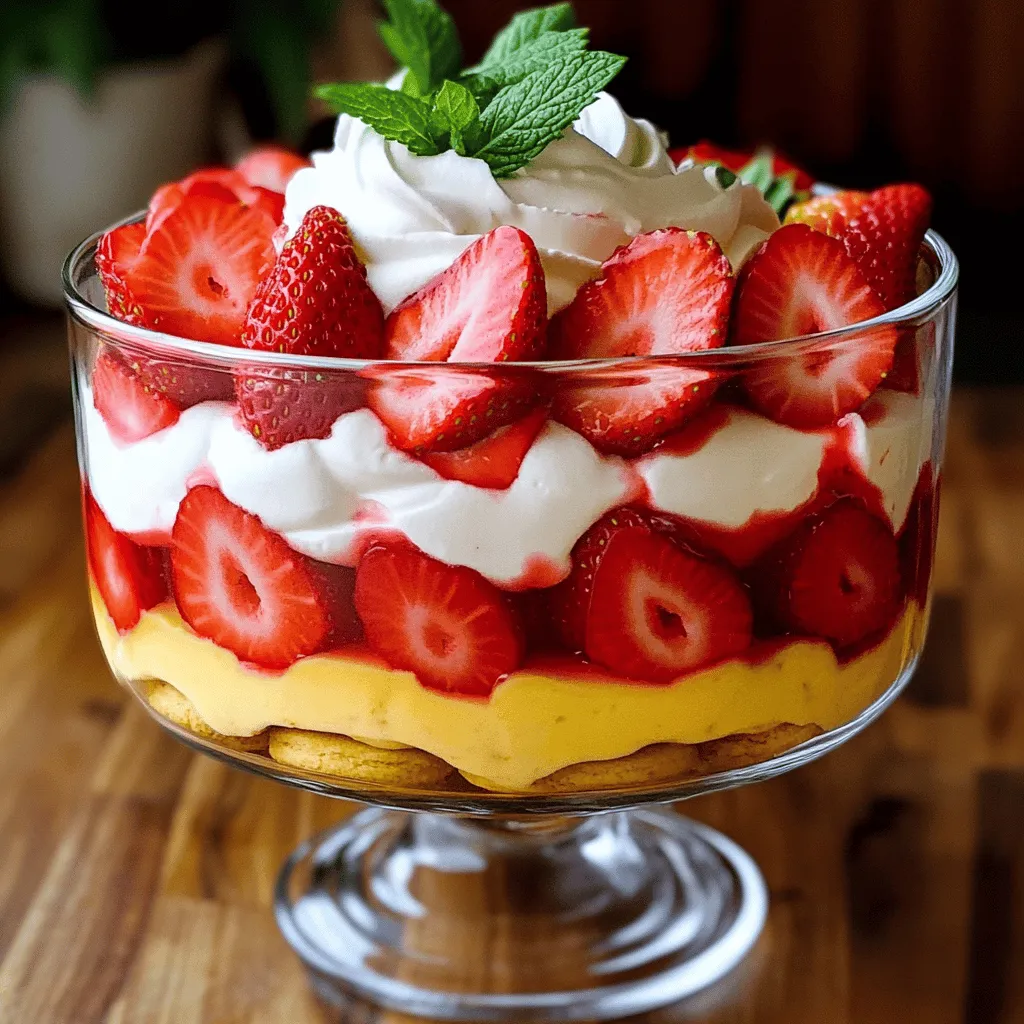
Strawberry Shortcake Trifle Delicious Dessert Delight
Ready for a dessert that wows your guests? Strawberry Shortcake Trifle combines fresh strawberries, whipped cream, and ladyfingers into a Read Full Recipe
My Latest Recipes

hey,
i’m !
I’m so happy you’re here!
I’m not just sharing recipes I’m sharing a piece of my heart. I hope these dishes bring you comfort, joy, and maybe even a new favorite.

![- 2 cups cooked jasmine rice - 1 lb chicken breast, diced - 1 cup corn kernels (fresh or frozen) - 1 red bell pepper, diced - 1 avocado, diced - 1/4 cup red onion, finely chopped - 1/2 cup cotija cheese, crumbled - 1 tbsp olive oil - 2 tbsp mayonnaise - 1 tbsp lime juice - 1 tsp chili powder - 1/2 tsp paprika - Salt and black pepper to taste - Fresh cilantro, chopped (for garnish) - Lime wedges (for serving) - Lime zest - Extra spices (cumin, garlic powder) Gather these simple and fresh ingredients. You will create a bright and tasty meal. The jasmine rice serves as a great base. The chicken adds protein and flavor. Corn gives sweetness and crunch. The bell pepper brings color and a bit of spice. Avocado adds creaminess, while red onion gives a nice bite. Cotija cheese offers a salty kick. Olive oil brings richness, and mayonnaise mixed with lime juice adds a creamy tang. Chili powder and paprika heat up the dish just right. Salt and black pepper enhance all these flavors. Fresh cilantro and lime wedges finish it off, adding a burst of freshness. This recipe is easy to adapt. You can try lime zest or extra spices to change the flavor. If you like it spicy, add more chili powder. If you prefer a milder meal, skip the spices. Enjoy the process of making this dish your own! Check the [Full Recipe] for complete details. - Heat 1 tablespoon of olive oil in a skillet over medium heat. - Season 1 pound of diced chicken breast with 1 teaspoon of chili powder, 1/2 teaspoon of paprika, salt, and black pepper. - Sauté the chicken for 7 to 10 minutes until it is fully cooked and golden brown. Remove from heat and set aside. - In the same skillet, add 1 cup of corn kernels and 1 diced red bell pepper. - Cook for 3 to 5 minutes until the corn is charred and tender. Remove from heat. - In a small bowl, mix 2 tablespoons of mayonnaise with 1 tablespoon of lime juice. - Taste the dressing and adjust seasoning if necessary. - In serving bowls, layer 2 cups of cooked jasmine rice as the base. - Top with the sautéed chicken and charred corn mixture. - Add fresh toppings like 1 diced avocado, 1/4 cup of finely chopped red onion, and 1/2 cup of crumbled cotija cheese. - Drizzle the creamy dressing over the prepared bowls. - Garnish with chopped cilantro and serve with lime wedges. For the full recipe, check out the details above. Enjoy your delightful street corn chicken rice bowl! - Use a meat thermometer to ensure doneness. Aim for 165°F for chicken. - Let the chicken rest for optimal juiciness. Resting for five minutes keeps it moist. - For perfect char on corn, use high heat. A grill pan works great for this! - If you can’t find fresh corn, frozen corn works well too. Thaw it before cooking. - Try using Greek yogurt instead of mayonnaise for a tangy twist. - To make it dairy-free, replace cotija cheese with avocado or a nut-based cheese. {{image_2}} You can switch the chicken for shrimp or tofu. Shrimp cooks fast and brings a lovely taste. Tofu is a great choice for a vegetarian meal. It absorbs flavors well and adds protein. Add leafy greens like spinach for more vitamins. Spinach is mild in flavor and cooks down easily. You can also toss in beans for extra fiber. Beans make the dish filling and keep you satisfied. Change the spices for a new flavor. Try cumin for a warm taste or garlic powder for depth. You can also add tropical fruits like mango. Mango adds sweetness and a fresh twist to the bowl. Feel free to explore these options to create your ideal street corn chicken rice bowl. For a complete recipe, check the Full Recipe section above. To keep your Street Corn Chicken Rice Bowl fresh, start by storing leftovers in the fridge. Place them in an airtight container to keep flavors intact. This method helps prevent drying out. Use glass or BPA-free plastic containers for longer-lasting quality. Avoid metal containers, as they can react with certain foods. When you reheat, use the microwave or stovetop for best results. For the microwave, place your bowl on a plate and cover it with a damp paper towel. This keeps moisture in and helps prevent drying out. If you use the stovetop, add a splash of water to the pan and cover it. This method keeps your rice fluffy and warm. To avoid sogginess, do not reheat rice too long. Heat just until warm to keep its texture. If you want to freeze components, start with the chicken and corn mixture. Cool them first, then place them in freezer-safe bags. Flatten the bags to save space. For rice, use separate bags to keep it fresh. When you’re ready to eat, thaw in the fridge overnight. For reheating, use the microwave or stovetop as mentioned above. This keeps all components tasty and fresh, just like when you first made it. Yes, you can prepare parts of this dish ahead of time. Cook the chicken and corn mixture the day before. Store them in airtight containers in the fridge. This way, you save time on busy days. Just reheat everything when you’re ready to eat. If you cannot find cotija cheese, try feta or queso fresco. For a vegan option, use nutritional yeast or vegan cheese. These alternatives will still give you a tasty finish to your rice bowl. This recipe is great for meal prep! Cook a big batch and portion it into containers. It keeps well in the fridge for about four days. You can enjoy it throughout the week without losing flavor. To make it milder, use less chili powder. You can also skip it altogether if you prefer no heat. For a spicier kick, add more chili powder or some hot sauce. Adjusting spices can help you find your perfect flavor. Yes, you can skip the mayonnaise. Use Greek yogurt instead for a creamy texture. Another option is to mix olive oil with lime juice and herbs. This gives a lighter dressing that still tastes great. Serve your rice bowl with a fresh salad or grilled veggies. Corn on the cob or tortilla chips work well too. You can also add a fruit salsa for a sweet touch. These sides enhance the meal and add variety. For the full recipe, check the earlier section. Enjoy your cooking! This blog post shared a tasty rice bowl recipe packed with chicken, corn, and toppings. You learned how to cook the chicken and prepare a creamy dressing to elevate the flavors. We covered ways to customize with different proteins and flavors, along with tips on storage and reheating. Remember, cooking should be fun and easy! Enjoy experimenting with variations and make this dish your own. Happy cooking!](https://emmasdish.com/wp-content/uploads/2025/04/2d2563cd-021b-46bc-b20e-5e415e06c873-300x300.webp)
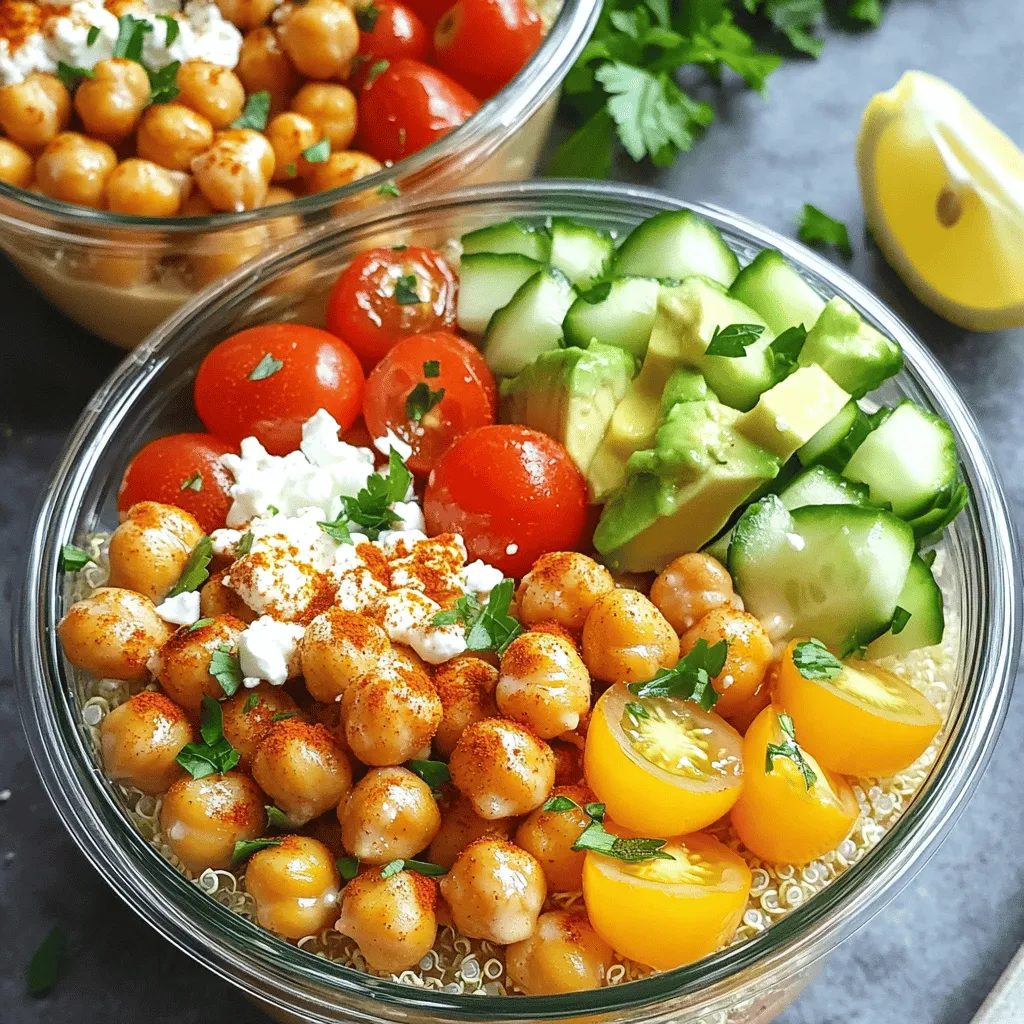
Crispy Chickpea Power Bowls Flavorful and Nourishing Dish
Looking for a tasty, healthy meal? Crispy Chickpea Power Bowls are packed with flavor and nourishment! You’ll love how easy they are to make,…