

Latest & Greatest

Strawberry Cheesecake Eggrolls Tasty and Easy Recipe
Get ready to make a quick and easy treat that will wow your friends! Strawberry Cheesecake Eggrolls are a fun
Read more…
Turkey Veggie Skillet Flavorful Healthy Dinner Option
Looking for a quick, tasty, and healthy dinner? The Turkey Veggie Skillet is your answer. This one-pan meal combines ground
Read more…
Ricotta Meatballs Flavorsome and Easy Family Meal
Looking for an easy, tasty family meal? Try my ricotta meatballs! Packed with ground beef, creamy ricotta, and fresh herbs,
Read more…
Easy Wonton Soup Simple and Flavorful Comfort Food
Looking for a cozy dish that packs a punch of flavor? Easy wonton soup fits the bill! With tender wontons,
Read more…
Peanut Butter Banana Overnight Oats Simple Recipe
Are you ready to start your day with a tasty, healthy breakfast? My Peanut Butter Banana Overnight Oats recipe is
Read more…
Sheet Pan Buffalo Chicken Wraps Flavorful and Easy Meal
Craving a quick and tasty dinner? Try my Sheet Pan Buffalo Chicken Wraps! They’re packed with bold flavors, easy to
Read more…
Air Fryer Parmesan Crusted Tilapia Crispy Delight
Looking for a simple yet delicious meal? My Air Fryer Parmesan Crusted Tilapia is your answer! With just a few
Read more…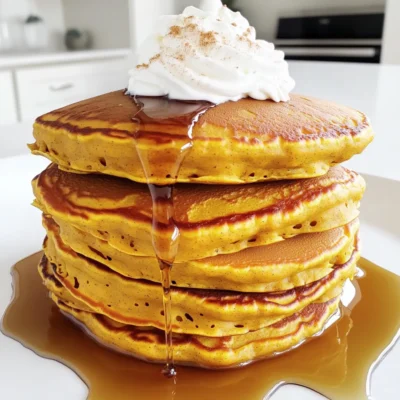
Pumpkin Pancakes with Maple Syrup Delightful Recipe
Craving a warm, cozy breakfast? Let’s whip up some delightful pumpkin pancakes drizzled with maple syrup! This easy recipe transforms
Read more…browse recipes


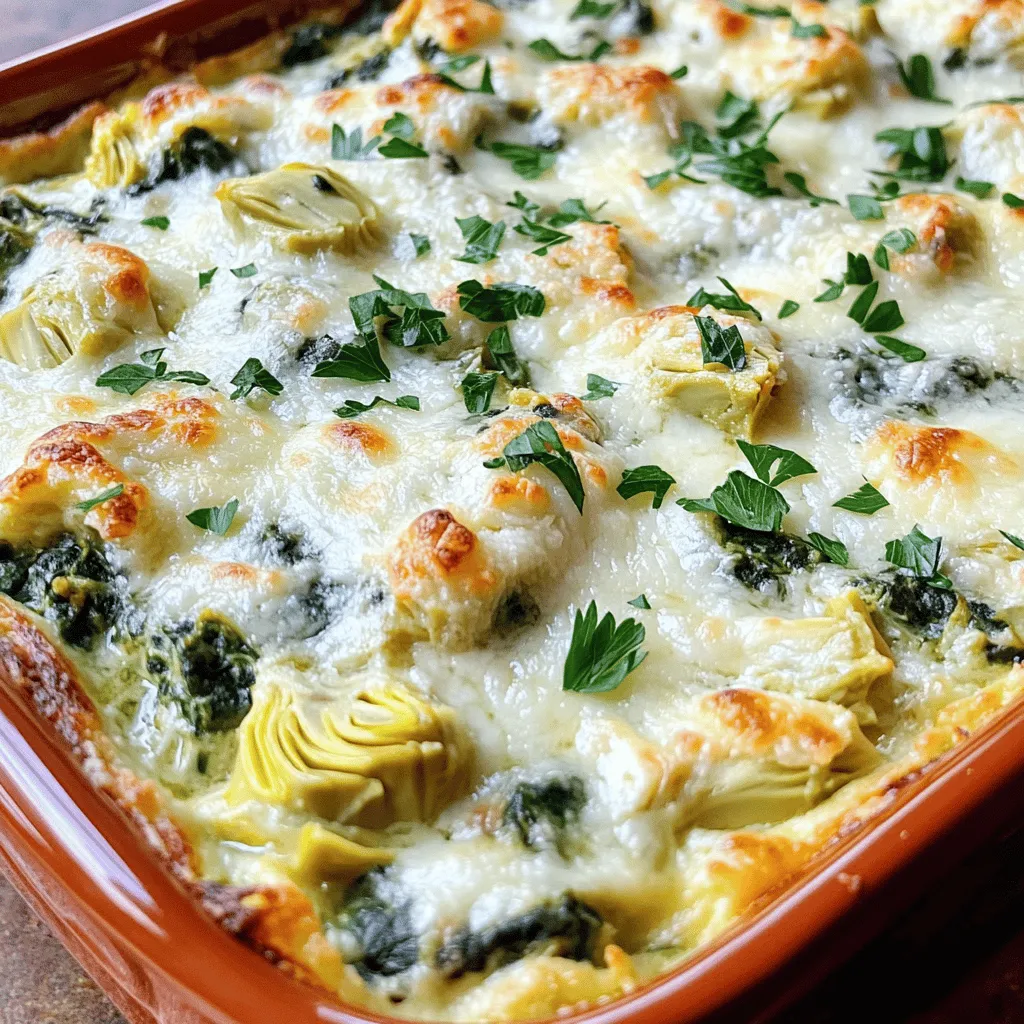
Spinach Artichoke Dip Flavorful and Creamy Delight
Are you ready to impress your friends with a dish that’s both simple and delicious? Spinach Artichoke Dip is the perfect blend of creamy…
My Latest Desserts
My Latest Recipes

hey,
i’m !
I’m so happy you’re here!
I’m not just sharing recipes I’m sharing a piece of my heart. I hope these dishes bring you comfort, joy, and maybe even a new favorite.

![Cheesy Broccoli Rice Casserole is a warm, creamy dish. It blends rice, cheese, and broccoli into a tasty meal. You can serve it as a side or a main dish. The [Full Recipe] gives you all the details you need to create this comfort food classic. You will need the following key ingredients: - 2 cups cooked jasmine rice - 3 cups fresh broccoli florets - 1 ½ cups shredded sharp cheddar cheese - ½ cup cream cheese, softened - 1 cup sour cream - 1 cup vegetable broth - 1 cup shredded mozzarella cheese - 1 teaspoon garlic powder - 1 teaspoon onion powder - ½ teaspoon black pepper - ½ teaspoon salt These ingredients create a rich and cheesy flavor. The jasmine rice gives a lovely texture. Fresh broccoli adds a nice crunch and nutrition. The cream and cheese make it creamy and delicious. You can add these optional ingredients to make the dish your own: - ½ cup bread crumbs (for a crunchy topping) - 2 tablespoons olive oil (if using bread crumbs) The bread crumbs will add a crunchy layer on top. Olive oil helps them brown nicely. Feel free to explore and add your favorite herbs or spices as well! First, gather all your ingredients. You will need cooked jasmine rice, fresh broccoli, and cheeses. Here’s what to do: - Blanch 3 cups of broccoli florets in boiling water for 2-3 minutes. - Drain the broccoli and set it aside. - In a large bowl, mix 2 cups of cooked jasmine rice, ½ cup of softened cream cheese, and 1 cup of sour cream. - Add 1 teaspoon of garlic powder, 1 teaspoon of onion powder, ½ teaspoon of black pepper, and ½ teaspoon of salt. - Stir until the mixture is creamy and smooth. Next, fold in the blanched broccoli and half of the 1 ½ cups of sharp cheddar cheese. - Pour in 1 cup of vegetable broth slowly while stirring. - This keeps the mix moist but not soupy. - Transfer the mixture to a greased baking dish, spreading it evenly. Now it's time to bake! Here’s how: - Sprinkle the remaining sharp cheddar cheese and 1 cup of mozzarella cheese on top. - If you want a crunchy topping, mix ½ cup of bread crumbs with 2 tablespoons of olive oil. - Sprinkle this mix over the cheese layer. - Bake in your preheated oven at 350°F for 25-30 minutes. - Look for bubbly and golden cheese. - Once done, remove the dish and let it cool for a few minutes before serving. For the full experience, you can check the Full Recipe. Enjoy your delicious Cheesy Broccoli Rice Casserole! To make the best Cheesy Broccoli Rice Casserole, start with well-cooked rice. I recommend using jasmine rice for its aroma and texture. Rinse the rice first to remove excess starch. Use a 1:1.5 rice-to-water ratio. Bring the water to a boil, then add the rice. Cover and simmer on low heat for about 15 minutes. Let the rice rest after cooking. This step keeps it fluffy. Blanching broccoli keeps it bright and tender. First, bring water to a boil in a large pot. Add salt to enhance flavor and color. Once boiling, add the broccoli florets. Cook them for 2 to 3 minutes. You want them just tender but still crisp. After cooking, quickly transfer the florets to ice water. This stops the cooking process and locks in the vibrant green color. Choosing the right cheese makes a big difference. I use sharp cheddar for its bold taste. It melts beautifully and adds depth to the dish. Mixing in mozzarella gives a nice stretchy texture. For a twist, try adding a bit of pepper jack or gouda. The key is to use high-quality cheese. This will elevate your casserole and make it extra delicious. Don’t forget to check the Full Recipe for exact amounts! {{image_2}} You can easily change this dish to fit your needs. If you are vegan, swap out the cream cheese and sour cream for plant-based versions. Instead of cheese, use a vegan cheese that melts well. For a gluten-free option, choose gluten-free bread crumbs or skip them altogether. You can also use brown rice instead of jasmine rice for more fiber and nutrients. Want to boost the protein in your casserole? Consider adding cooked chicken, turkey, or even tofu. Shredded rotisserie chicken works great. You could also try canned chickpeas for a vegetarian twist. Mix in about one cup of your chosen protein into the rice and broccoli mixture for a heartier dish. To elevate the taste, try adding spices and herbs. A pinch of cayenne pepper gives it a kick. You could also add fresh herbs like thyme or parsley for a fresh flavor. For a smoky taste, mix in some smoked paprika. Experiment with flavors to find your favorite twist on this classic dish. For the full recipe, check the details above. After you enjoy your cheesy broccoli rice casserole, let it cool. Place leftovers in an airtight container. Store them in the fridge for up to three days. Make sure the lid is tight to keep the flavors fresh. If you have extra toppings, store them separately. To reheat, you have a few options. The best way is to use the oven. Preheat it to 350°F (175°C). Place the casserole in a baking dish and cover it with foil. Heat for about 15-20 minutes. You can also use the microwave. Just place a portion in a microwave-safe dish. Heat it for 1-2 minutes, stirring halfway through. Make sure it’s hot all the way through. If you want to save some for later, freezing works great. First, let the casserole cool completely. Then, cut it into portions. Wrap each piece tightly in plastic wrap. Place the wrapped portions in a freezer bag. Remove as much air as possible before sealing. You can freeze it for up to two months. When ready to eat, thaw it in the fridge overnight before reheating. This keeps the flavors intact and tasty. For the full recipe, check the earlier section. Yes, you can make Cheesy Broccoli Rice Casserole ahead of time. Prepare the dish, but do not bake it. Cover it well and store it in the fridge for up to 24 hours. When you are ready, just pop it into the oven. Baking time may need a few extra minutes since it is cold. You can use any rice you like! Long-grain white rice works well. Brown rice is a healthy option too. Quinoa can also be a fun choice for a twist. Just remember to cook it before adding to the mix. Yes, you can make Cheesy Broccoli Rice Casserole gluten-free. Use gluten-free breadcrumbs if you want a crunchy topping. Check the labels on the cream cheese and sour cream to ensure they contain no gluten. This way, everyone can enjoy the dish! This blog post explored how to make a Cheesy Broccoli Rice Casserole. We covered essential and optional ingredients for great flavor. The step-by-step instructions made it easy to prepare, cook, and bake. I shared tips for perfect rice, blanching broccoli, and cheese selection. You can also try variations for different diets or add protein for a boost. In conclusion, this dish is simple to make and fun to customize. Enjoy your cheesy creation!](https://emmasdish.com/wp-content/uploads/2025/06/4dcfb9e7-e836-48a4-ab7e-cb9e48083887-300x300.webp)


No Bake Cookie Dough Protein Bites for Energy Boost
Looking for a quick energy boost? Try my No Bake Cookie Dough Protein Bites! These tasty treats are simple to make and packed with…