
Latest & Greatest

Ambrosia Salad Delightful Fruit and Creamy Treat
Are you ready to dive into a bowl of fruity bliss? Ambrosia Salad is the perfect blend of creamy goodness
Read more…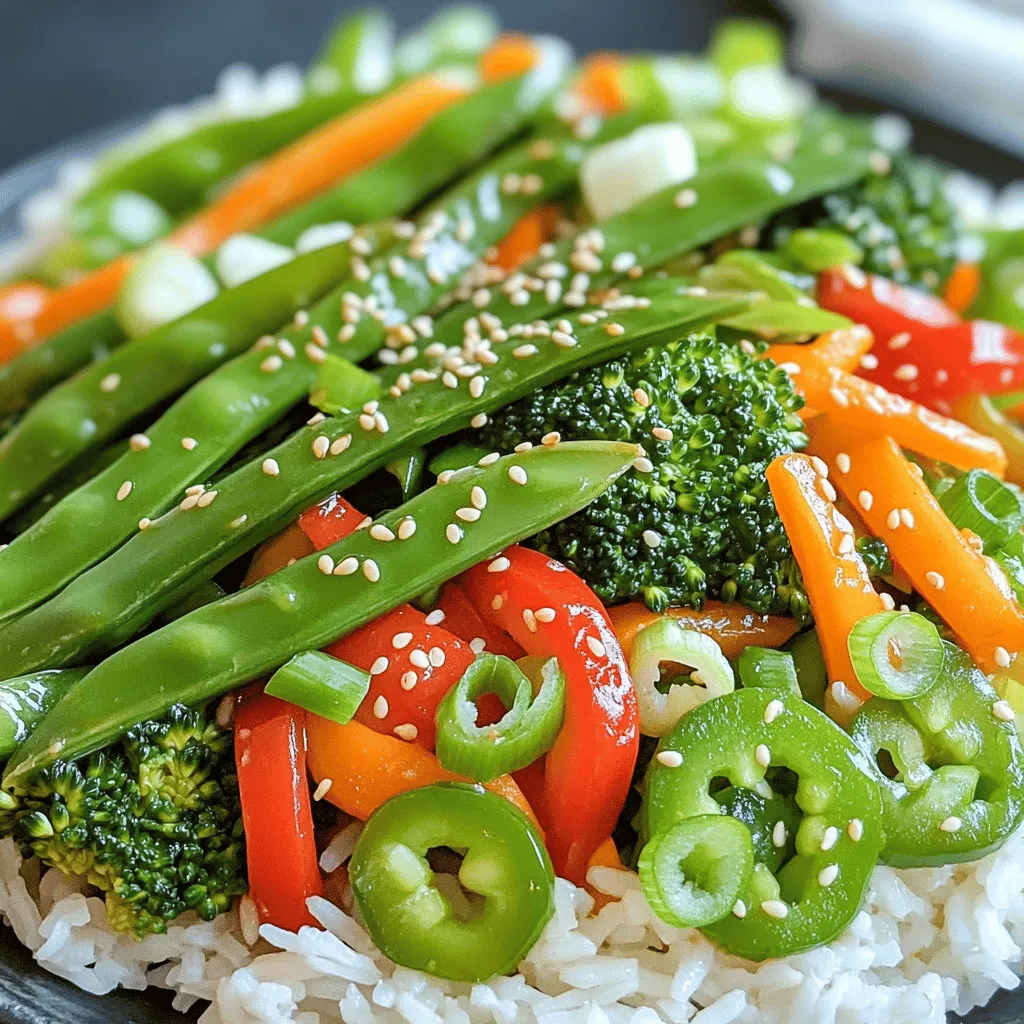
Spring Vegetable Stir-Fry Quick and Flavorful Meal
Spring brings fresh veggies bursting with flavor, and a stir-fry is the perfect way to showcase them. In this post,
Read more…
Easy Italian Baked Chicken Flavorful and Simple Meal
If you’re looking for a meal that’s both simple and packed with flavor, you’re in the right place! My Easy
Read more…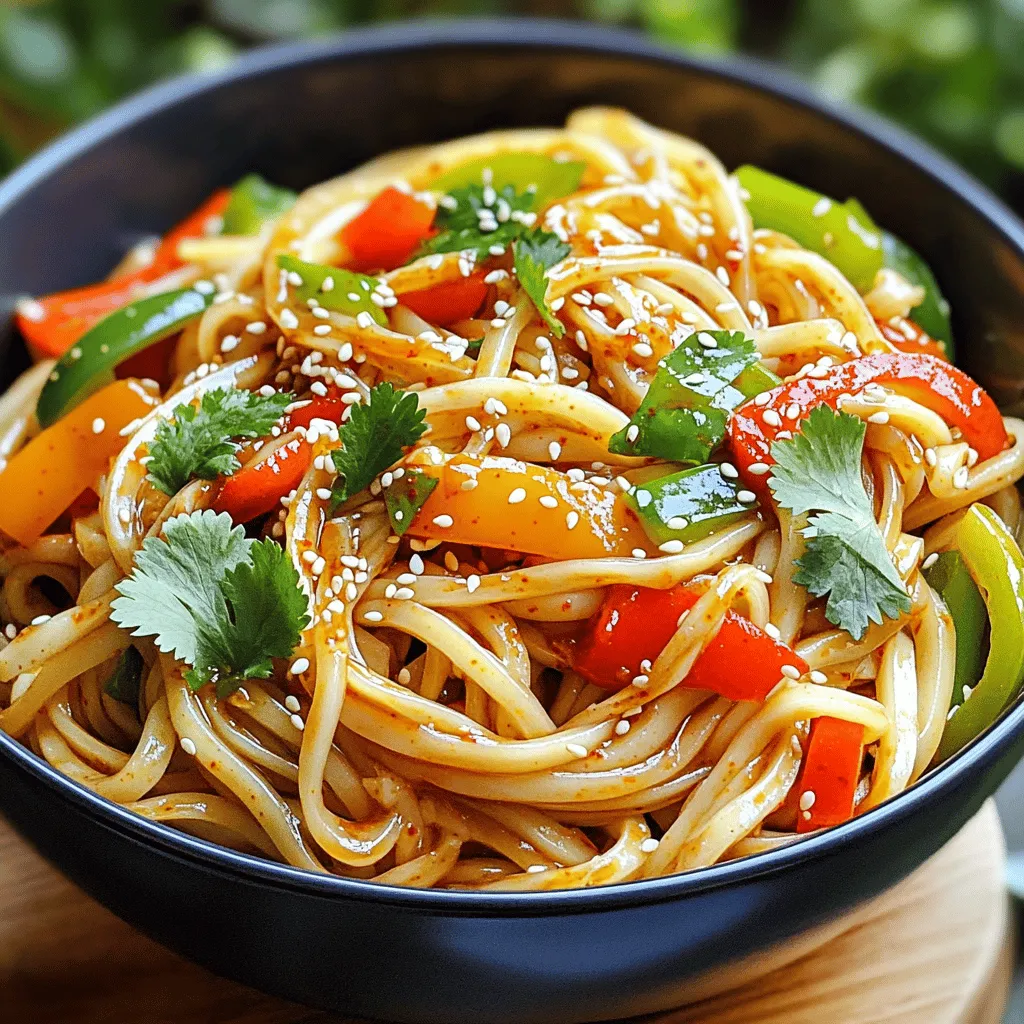
Chili Oil Udon Noodles Quick and Flavorful Meal
Are you craving a quick and tasty meal? Chili Oil Udon Noodles are the answer! This dish blends chewy udon
Read more…
Coconut Cream Pie Delightful and Easy Recipe Guide
Welcome to your ultimate guide for Coconut Cream Pie! If you crave a creamy, dream-like dessert that’s easy to make,
Read more…
Crispy Fried Chicken Irresistible Flavor At Home
Are you ready to master the art of crispy fried chicken at home? This recipe packs irresistible flavors and gives
Read more…
Tangy Lemon Garlic Roasted Carrots Flavorful Side Dish
Looking for a vibrant side dish that adds zest to your meals? Try my Tangy Lemon Garlic Roasted Carrots! With
Read more…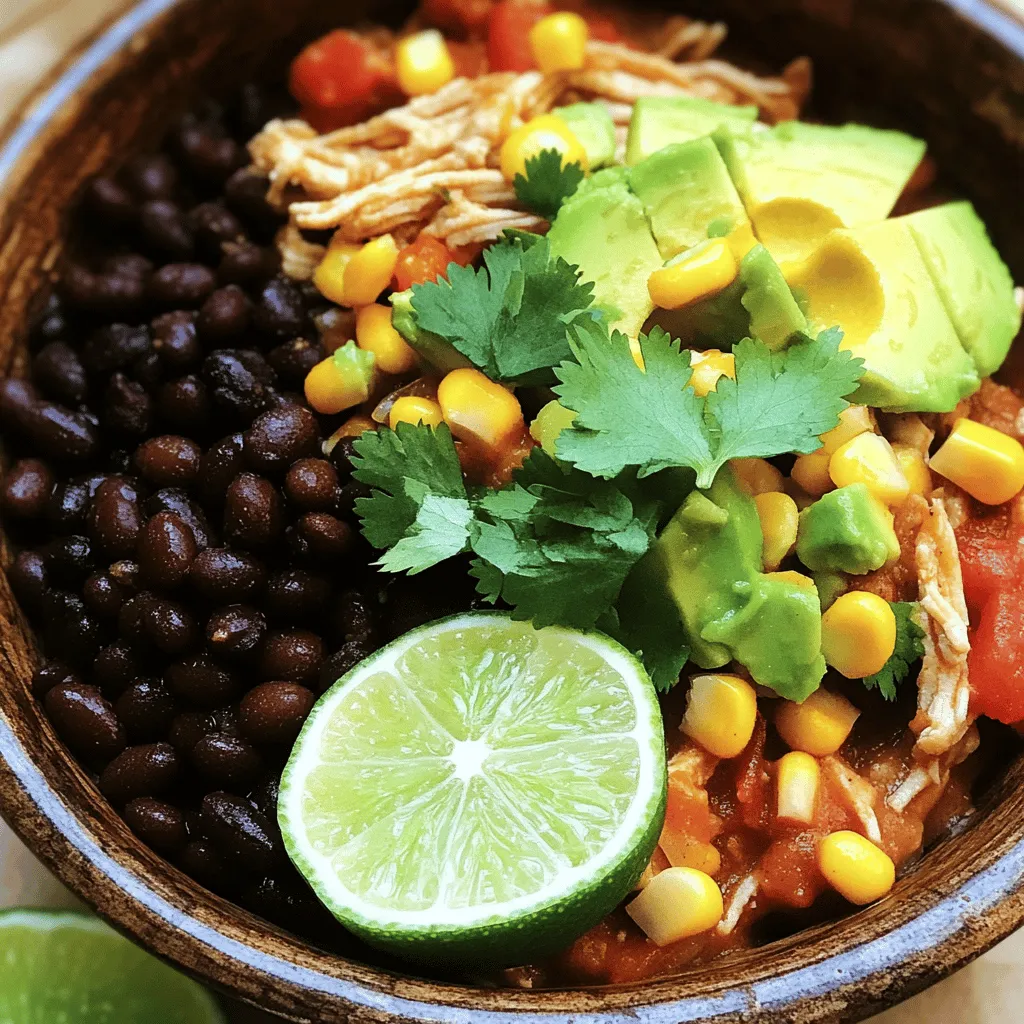
Crockpot Mexican Chicken Flavorful and Easy Meal
Are you in search of a simple yet delicious dinner idea? Look no further than my Crockpot Mexican Chicken! With
Read more…browse recipes


Savory Breakfast Muffins Tasty and Easy Recipe
Are you tired of the same old breakfast routine? Try my savory breakfast muffins! They are easy to make and pack a big flavor…
My Latest Desserts
-

Healthy Greek Yogurt Parfaits Easy and Delicious Recipe
Are you ready to transform breakfast with a Healthy Greek Yogurt Parfait? This easy and delicious recipe combines creamy Greek Read Full Recipe -
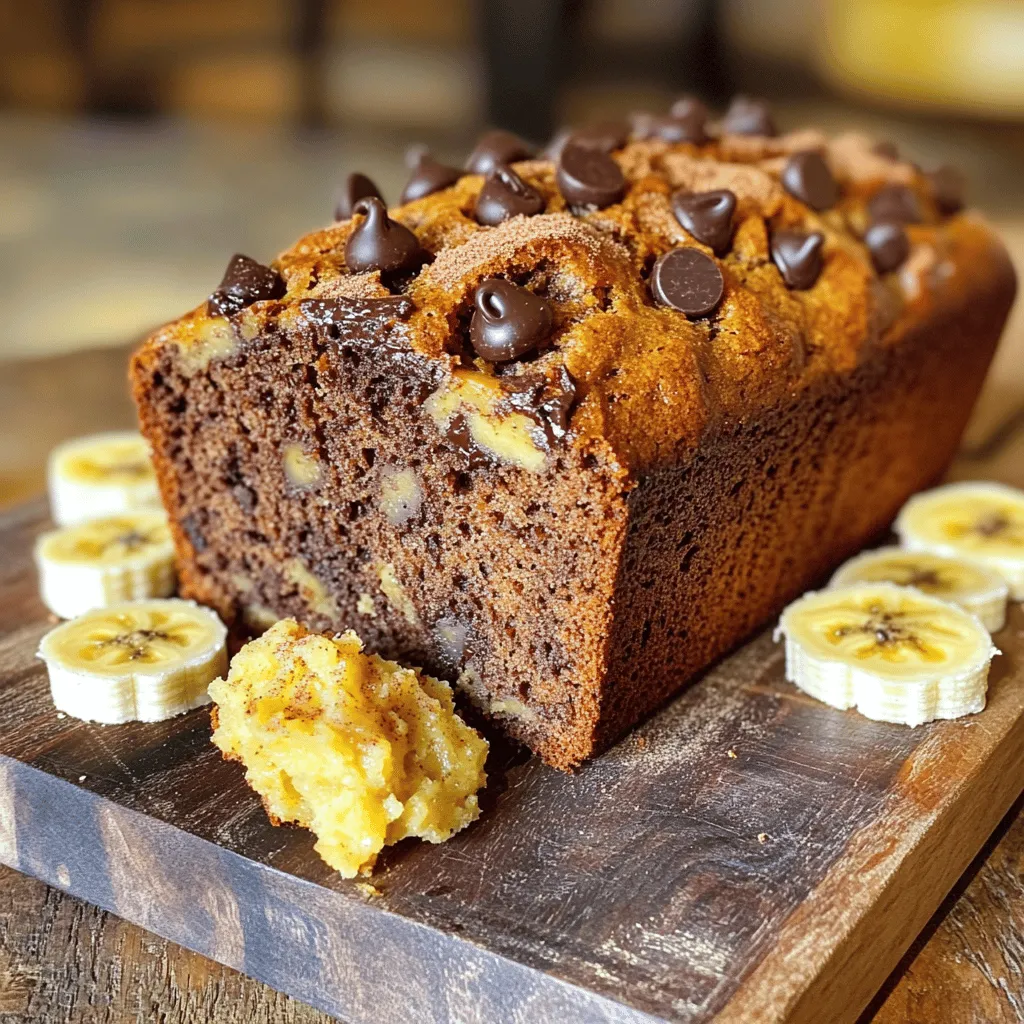
Chocolate Chip Banana Bread Irresistible Comfort Food
If you love comfort food, then Chocolate Chip Banana Bread is for you! It combines soft, ripe bananas with sweet Read Full Recipe -

Lemon Blueberry Scones Irresistible Morning Treat
Start your day with a burst of flavor! These Lemon Blueberry Scones are a delightful morning treat. With tender crumb Read Full Recipe -

Lemon Blueberry Scones Delightfully Fluffy Recipe
Get ready to bake the flakiest, most flavorful Lemon Blueberry Scones you’ll ever taste! This easy recipe combines the bright Read Full Recipe -

Easy Homemade Granola Bars Healthy and Simple Recipe
Are you ready to whip up some easy homemade granola bars? I’ll show you a simple recipe that’s healthy and Read Full Recipe -
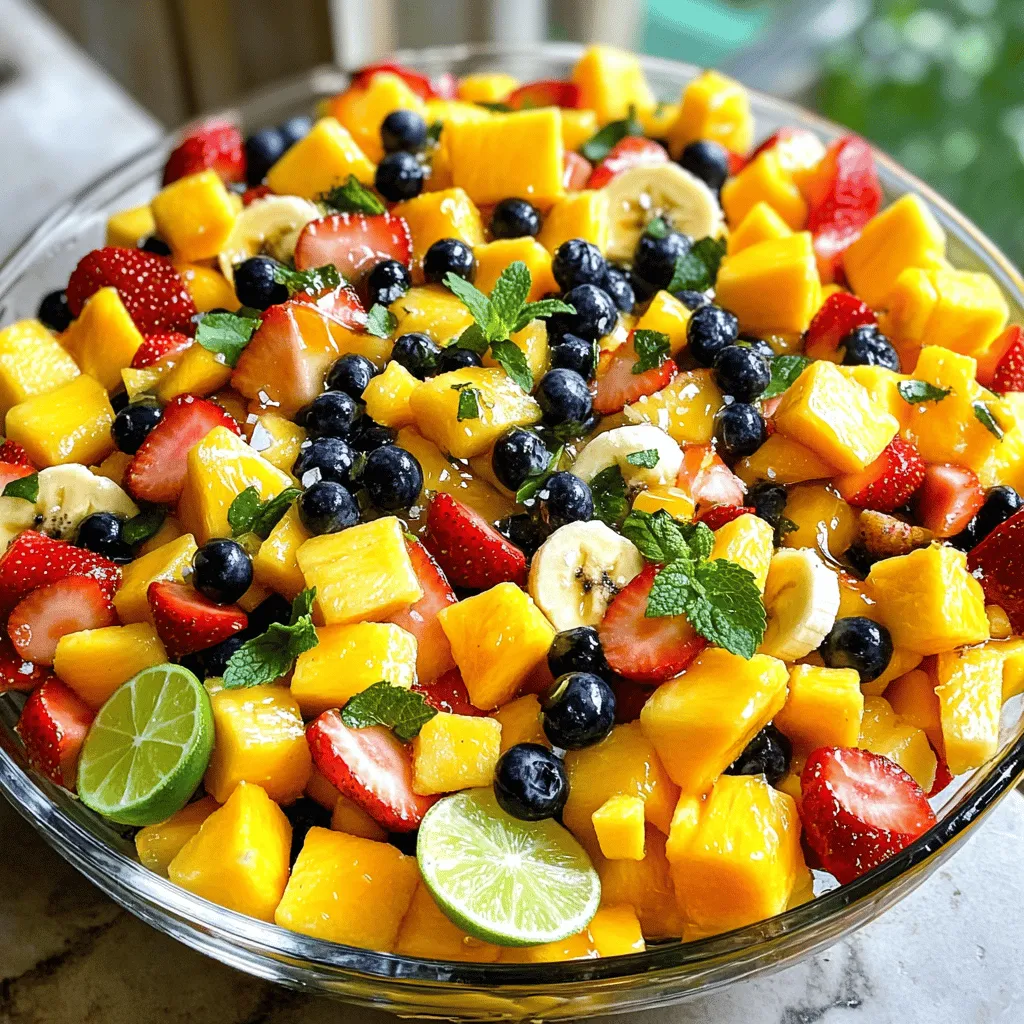
Tropical Fruit Salad Refreshing and Healthy Mix
Dive into a colorful world of flavors with my Tropical Fruit Salad! This healthy mix is bursting with fresh, tropical Read Full Recipe -

No-Bake Lemon Cheesecake Bites Tasty and Simple Dessert
Are you ready to indulge in a creamy treat without turning on the oven? No-Bake Lemon Cheesecake Bites are your Read Full Recipe -

Healthy Banana Oat Pancakes Simple and Quick Recipe
Are you ready to flip the perfect pancake? In just minutes, you can whip up healthy banana oat pancakes that Read Full Recipe -

No-Bake Oreo Cheesecake Delightful and Easy Recipe
Are you craving a dessert that’s both easy and delicious? Look no further than this No-Bake Oreo Cheesecake! With just Read Full Recipe -
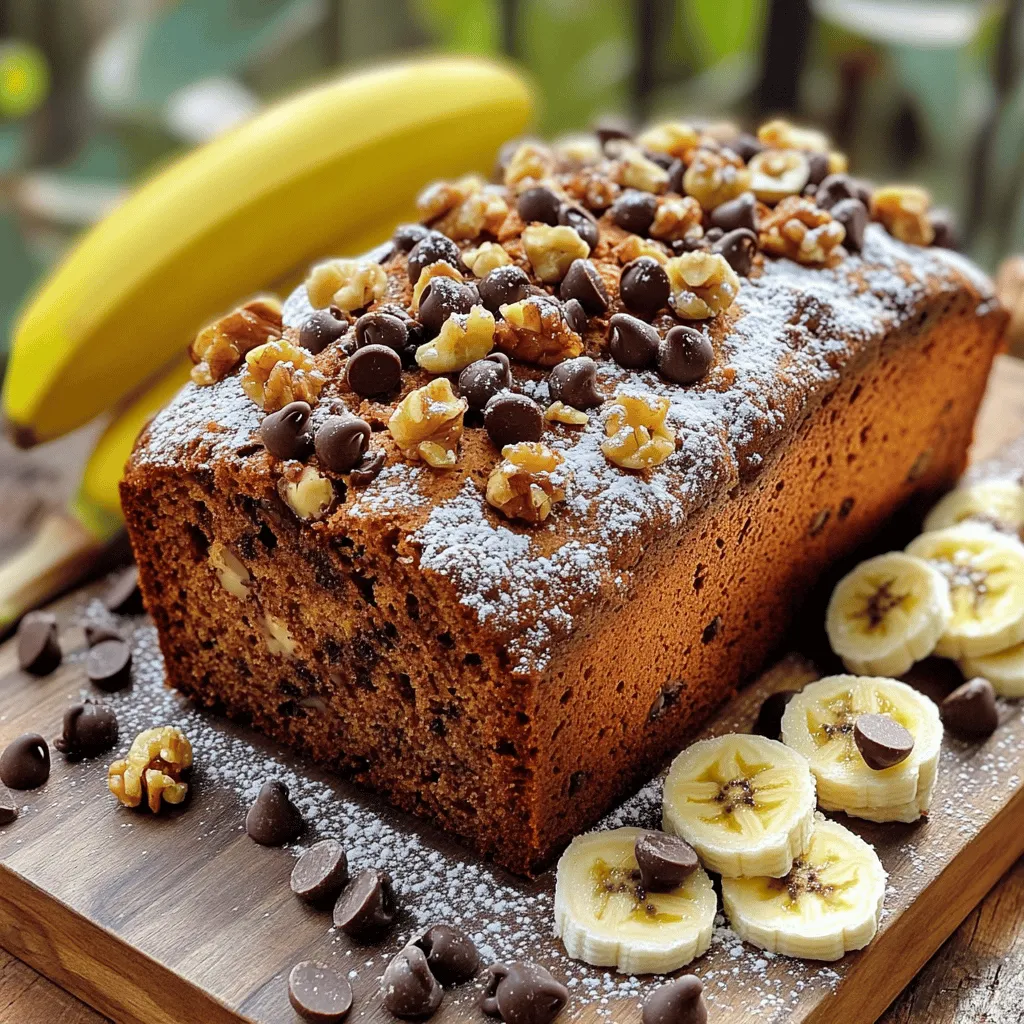
Chocolate Chip Banana Bread Irresistible Flavor Treat
If you love the sweet, comforting taste of banana bread, you’re in for a treat! This Chocolate Chip Banana Bread Read Full Recipe
My Latest Recipes

hey,
i’m !
I’m so happy you’re here!
I’m not just sharing recipes I’m sharing a piece of my heart. I hope these dishes bring you comfort, joy, and maybe even a new favorite.

![To make the best classic chicken noodle soup, you need a few key items. These ingredients create a rich and tasty soup. Here’s what you need: - 2 tablespoons olive oil - 1 medium onion, diced - 2 carrots, sliced - 2 celery stalks, chopped - 3 cloves garlic, minced - 8 cups chicken broth - 1 pound boneless, skinless chicken breasts - 1 teaspoon dried thyme - 1 teaspoon dried oregano - Salt and pepper to taste - 2 cups egg noodles These ingredients give the soup its heart and flavor. The chicken broth forms a warm base. The veggies add crunch and sweetness. Chicken breasts provide protein. Seasonings and herbs bring out the best flavors in your soup. I suggest using: - 1 teaspoon dried thyme - 1 teaspoon dried oregano - Salt and pepper to taste Thyme adds a lovely earthiness. Oregano brings a hint of warmth. Adjust salt and pepper to match your taste. These simple seasonings elevate the dish and make it memorable. Want to add a twist? Consider these optional add-ins: - 1 cup fresh spinach - Fresh parsley, chopped (for garnish) Fresh spinach adds color and nutrients. It wilts nicely in the hot soup. Chopped parsley gives a fresh touch as a garnish. These add-ins enhance flavor and nutrition without extra fuss. For the full recipe, check out the Cozy Classic Chicken Noodle Soup 🥣 section. Cooking this soup is simple and rewarding. Enjoy every comforting bite! To make your classic chicken noodle soup, start with the easy prep steps. First, gather your ingredients. You'll need olive oil, onion, carrots, celery, garlic, chicken broth, chicken breasts, and seasonings. 1. Heat the olive oil in a large pot over medium heat. 2. Add the diced onion, sliced carrots, and chopped celery. Sauté these for about 5-7 minutes. You want them to soften but not brown. 3. Next, stir in the minced garlic. Cook for one more minute until it smells great. 4. Pour in the chicken broth and bring the mix to a gentle boil. 5. Now, add the chicken breasts, dried thyme, dried oregano, salt, and pepper. 6. Lower the heat and let the soup simmer for about 20 minutes. The chicken should be cooked through. 7. Take the chicken out of the pot and shred it using two forks. This makes it easy to eat. 8. Return the shredded chicken to the pot. 9. Add the egg noodles and cook them according to the package's time. This usually takes about 6-8 minutes. 10. If you'd like, stir in fresh spinach during the last minute of cooking until it wilts. 11. Lastly, taste the soup and adjust the seasoning if needed. Serve it hot, and garnish with chopped parsley. Shredding chicken can be simple and fun. After cooking, let the chicken cool for a few minutes. Use two forks to pull apart the meat. Hold one fork in each hand. This will help you shred the chicken into small pieces. If you want to save time, you can also use a stand mixer with the paddle attachment on low speed. This method quickly shreds the chicken. Just be careful not to overdo it! Cooking egg noodles is easy. To get them just right, follow these steps. First, bring a pot of salted water to a boil. This adds flavor to the noodles. Once boiling, add the egg noodles. Stir them gently to keep them from sticking. Check the package for cooking time. Most egg noodles take around 6-8 minutes. Taste one to see if it’s done. They should be tender but still firm. When cooked, drain the noodles and add them to your soup right away. This keeps them from getting mushy. For the full recipe, refer back to the ingredients and instructions provided above. Enjoy your cooking! To make a tasty broth, start with good chicken broth. Use low-sodium broth for control over salt. Add fresh herbs like thyme and parsley. These herbs bring out the best flavors. Always taste as you go. Adjust salt and pepper to your liking. The broth should be clear and flavorful. Simmer gently to let the flavors blend. If it’s too thick, add more broth or water. If it's too thin, simmer longer to reduce it. Don't rush this step; patience gives you the best results. Sauté your veggies first. This adds depth and sweetness to the soup. Shred the chicken after cooking for a tender texture. Stir in the noodles at the end. This keeps them firm and prevents overcooking. For a boost, add fresh spinach just before serving. For the complete method, check the Full Recipe. {{image_2}} You can easily make your chicken noodle soup healthier. For a low-sodium option, use low-sodium chicken broth. This helps cut down on salt without losing flavor. You can also swap out regular egg noodles for gluten-free ones. Look for rice noodles or gluten-free pasta. These changes keep the soup tasty while making it lighter. Have leftover chicken or turkey? Use it in your soup! Shred the meat and add it to the broth. This saves time and reduces waste. It also adds a new flavor. Remember, you can adjust the cooking time since the meat is already cooked. Just heat it through before serving. Don’t be shy with veggies! You can add more to your soup for extra nutrition. Try adding green beans, peas, or corn. These veggies mix well with the other flavors. You can also use kale or zucchini for a twist. Just chop them into small pieces before adding them to the pot. This way, they cook evenly and blend perfectly with the chicken and noodles. For the complete recipe, check out the Full Recipe. After making your chicken noodle soup, let it cool down to room temperature. This step helps keep your soup fresh. Pour it into an airtight container. Make sure to leave some space at the top. Soups can expand when frozen. Label the container with the date. This way, you know when you made it. To freeze chicken noodle soup, use freezer-safe bags or containers. Divide the soup into single servings if you want easier meals. Squeeze out excess air from bags before sealing. This helps prevent freezer burn. Chicken noodle soup can last in the freezer for up to three months. When you're ready to eat, just thaw it in the fridge overnight. For reheating, pour the soup into a pot. Heat it on medium until steaming hot. Stir occasionally to make sure it heats evenly. If it's too thick, add a bit of broth or water. You can also reheat it in the microwave. Use a microwave-safe bowl and cover it loosely. Heat for a few minutes, stirring halfway through. Enjoy your warm, comforting soup! Check the [Full Recipe] for more tips. The best way starts with fresh ingredients. Use a large pot. Heat olive oil and add diced onions, sliced carrots, and chopped celery. Sauté for about five to seven minutes. Then, add minced garlic and cook for one more minute. Pour in chicken broth and bring to a gentle boil. Add boneless chicken breasts and seasonings. Simmer until the chicken cooks through. Shred the chicken, return it to the pot, and cook the egg noodles. This method brings out rich flavors. Yes, you can use rotisserie chicken! It saves time and adds great flavor. Simply shred the chicken and add it to the soup after the broth boils. This speeds up your cooking process and still delivers a comforting dish. Homemade chicken noodle soup lasts about three to four days in the fridge. Make sure to store it in an airtight container. Keep it cool to maintain freshness. If you notice any off smells, it's best to discard it. If you need a substitute for egg noodles, try using rice, quinoa, or even zucchini noodles. These options add different textures and flavors. Rice and quinoa make it hearty, while zucchini noodles keep it light. Yes, there is a vegetarian version! Replace chicken with hearty vegetables like mushrooms or chickpeas. Use vegetable broth instead of chicken broth. You can still enjoy a comforting and nourishing soup. This version is just as tasty and satisfying. Making classic chicken noodle soup is simple and rewarding. We covered essential ingredients, seasonings, and optional add-ins to boost flavor. The step-by-step guide helps you cook the perfect broth and noodles. Remember the tips for storage and possible variations to suit your taste. Chicken noodle soup can warm your heart and nourish your body. Keep experimenting with different ingredients and methods. Enjoy your cooking journey!](https://emmasdish.com/wp-content/uploads/2025/06/2027c732-1d16-4b61-aa4d-ce999cd315c9-300x300.webp)

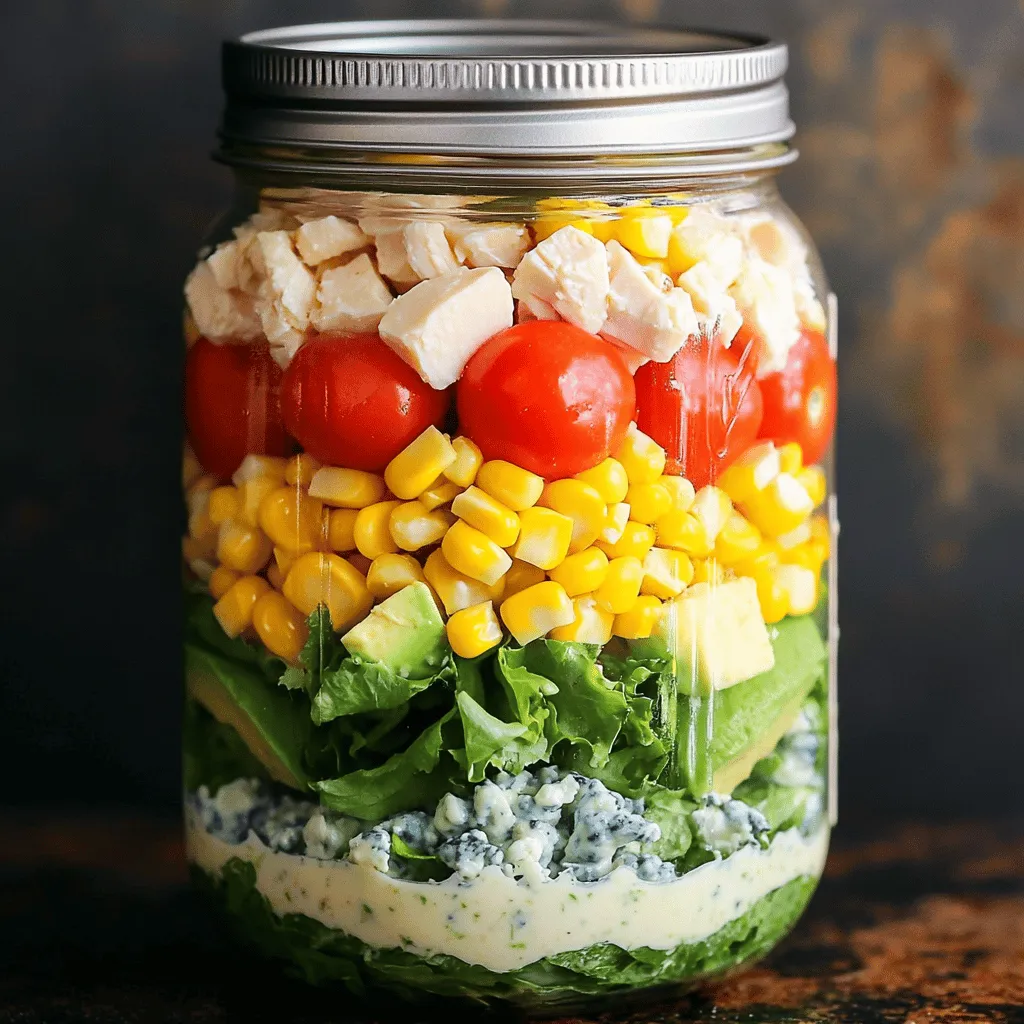
Mason Jar Cobb Salad Fresh and Flavorful Meal Prep
Looking for a fresh meal that’s easy to prep? This Mason Jar Cobb Salad is your answer! Packed with vibrant colors and bold flavors,…