
Latest & Greatest
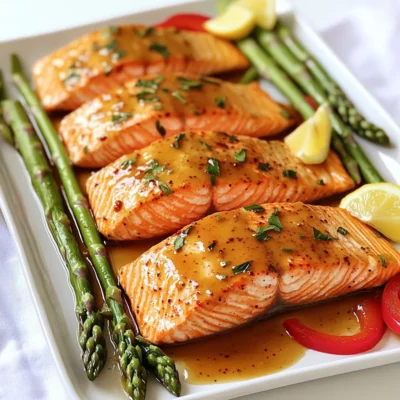
Sheet Pan Maple Dijon Salmon Savory and Simple Dish
If you’re craving a dish that’s both savory and simple, look no further! My Sheet Pan Maple Dijon Salmon is
Read more…
Persian Dopiazeh Aloo Flavorful and Hearty Meal
If you crave a warm, hearty meal that’s packed with flavor, then Persian Dopiazeh Aloo is for you. This comforting
Read more…
Turmeric Chicken Soup Nutritious Comfort in a Bowl
Are you craving a warm bowl of comfort? Look no further! My Turmeric Chicken Soup offers a cozy blend of
Read more…
Air Fryer Orange Chicken Easy and Flavorful Delight
Do you crave a quick, tasty meal? Air Fryer Orange Chicken is your answer. This dish is packed with flavor
Read more…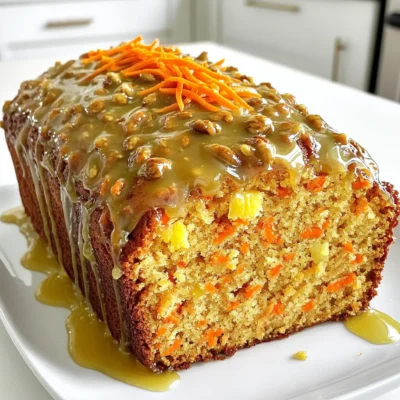
Maple Glazed Carrot Cake Loaf Delightful and Easy Recipe
Are you ready to indulge in a sweet treat that’s easy to make? This Maple Glazed Carrot Cake Loaf combines
Read more…
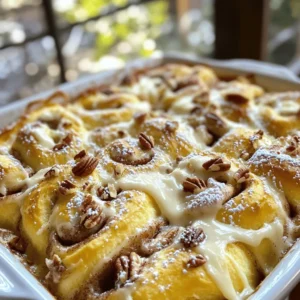
Savory Slow Cooker French Dip Sandwiches Recipe
Looking for a meal that’s warm, hearty, and easy to make? Savory Slow Cooker French Dip Sandwiches are your answer!
Read more…
Churro Donut Holes Tasty and Easy Treat Recipe
If you love sweet treats, you’ll adore these Churro Donut Holes! They combine the soft, fluffy joy of donuts with
Read more…
One Pot Cheesy Taco Pasta Quick and Tasty Meal
Are you ready to whip up a quick and tasty meal that’ll please everyone? One Pot Cheesy Taco Pasta combines
Read more…browse recipes


![- Cherry tomatoes - Fresh mozzarella balls - Fresh basil leaves These three ingredients form the heart of your Caprese salad skewers. Cherry tomatoes bring sweetness. Fresh mozzarella balls add a creamy texture. Fresh basil leaves give a burst of herbal flavor. Each bite should taste fresh and vibrant. - Balsamic glaze - Olive oil - Salt and pepper These extra ingredients elevate your skewers. Balsamic glaze adds a sweet and tangy touch. Olive oil enhances the flavors and adds richness. A sprinkle of salt and pepper balances everything out. Together, they create a perfect dressing for your skewers. - Skewers - Mixing bowl You need skewers to hold everything together. I like to use 8-inch ones for appetizers. A mixing bowl is key for whisking your dressing. Simple tools make this dish easy and fun to prepare. For the full recipe, check out the Caprese Salad Skewers section above. Start by rinsing and drying the cherry tomatoes. Use cool water and a clean towel to dry them well. Next, do the same with the fresh basil leaves. Drying is key to keeping the flavors bright. When you gather your skewers, choose the right size. I prefer 8-inch skewers for easy handling. Lay them out on a clean surface. This will help you assemble the skewers quickly. Now, let’s get to the fun part! Take a skewer and thread on one cherry tomato first. Then, add a fresh basil leaf. After that, slide on a mozzarella ball. Repeat this pattern. Aim for about three to four sets of tomato, basil, and mozzarella on each skewer. Leave some space at the ends. This makes it easier to grab and eat. To make the olive oil dressing, grab a small bowl. Whisk together two tablespoons of olive oil, a pinch of salt, and some cracked black pepper. Mix it well until it looks nice and smooth. Once your skewers are ready, drizzle the olive oil mixture over them. Make sure each skewer gets a good coat. This adds flavor and richness. Finish by drizzling balsamic glaze over the skewers. The sweet and tangy flavor of the glaze pairs perfectly. Serve the skewers chilled or at room temperature. They make a great appetizer or side dish. For the full recipe, check out the details above. Enjoy! To make your Caprese salad skewers shine, focus on great flavors. Start by using fresh and ripe cherry tomatoes. They should be sweet and juicy. Pair them with high-quality mozzarella balls. Look for fresh mozzarella, like bocconcini. It has a creamy texture that makes a big difference. Next, season with salt and freshly cracked black pepper. These simple seasonings enhance all the flavors. A drizzle of olive oil adds richness. I often mix it with a touch of balsamic glaze for a sweet tang. This combination makes each bite delightful. When it comes to serving, presentation matters. You can use colorful platters or bamboo boards. Arrange the skewers in a fan shape for a fun look. Layering is key! Start with a tomato, follow with basil, and then mozzarella. Repeat this pattern until the skewer is full. You can also use decorative toothpicks for smaller portions. This makes them perfect for parties or picnics. Add a sprinkle of chopped basil on top for extra color. Caprese salad skewers are great for many occasions. They work well as a light appetizer at dinner parties. Pair them with a chilled white wine or sparkling water. The light flavors of the skewers complement these drinks perfectly. You can also serve them alongside grilled meats or pasta dishes. They add a fresh touch to any meal. For a gathering, place them on a buffet table. Guests will love grabbing these tasty bites. For the full recipe, check out the details above and get started on your Caprese salad skewers! {{image_2}} You can switch mozzarella with other cheeses. Try feta or goat cheese for a different taste. If you prefer, look for vegan cheese options. These choices can keep the dish fresh and exciting. For herbs, basil is classic, but you can use mint or oregano instead. Each herb brings its unique flavor. Experiment with what you have on hand or what you love. Adding fruit can make your skewers shine. Slice avocado or add melon balls for a sweet twist. These fruits pair well with the cheese and tomatoes. Grilled vegetables also work great. Try zucchini, bell peppers, or mushrooms. Grilling brings out their natural sweetness and adds depth to your skewers. Make Mediterranean skewers by adding olives or artichokes. These ingredients bring a briny taste that complements the fresh flavors. For seasonal variations, use ingredients that reflect the time of year. In summer, fresh peaches or strawberries can add a lovely sweetness. In fall, consider roasted butternut squash for warmth and comfort. For the full recipe, check [Full Recipe]. To keep your Caprese salad skewers fresh, store them in the fridge. Place them in an airtight container. This will help maintain their taste and texture. They stay good for about 2-3 days. Make sure not to crowd the skewers, as this can cause them to bruise. If you have extra skewers, you can freeze them. First, take off the basil leaves and drizzle. Lay the skewers flat in a single layer on a baking sheet. Once they are frozen, you can stack them in a freezer bag. They will keep for about 2-3 months. To reheat, thaw them in the fridge overnight. After thawing, drizzle the dressing and balsamic glaze before serving. To keep your skewers fresh before serving, cover them with plastic wrap. This prevents them from drying out. If you want to prepare them ahead of time, you can assemble them a few hours before your event. Just wait to drizzle the dressing and balsamic glaze until you are ready to serve. This way, they stay vibrant and tasty. For Caprese Salad Skewers, bocconcini mozzarella is the best choice. Bocconcini are small, round balls of fresh mozzarella. They are creamy and soft, making them perfect for skewers. You can also use larger mozzarella balls, but they require more cutting. Fresh mozzarella offers the best flavor, but you can use packaged mozzarella if fresh is not available. Packaged mozzarella often lacks the same taste and texture, so opt for fresh when you can. Yes, you can make Caprese Salad Skewers ahead of time. I recommend prepping them no more than four hours before serving. This keeps the ingredients fresh and tasty. Store pre-assembled skewers in the fridge. Use an airtight container to maintain their quality. Just remember to drizzle the balsamic glaze right before serving for the best flavor. To enhance flavor, consider adding a sprinkle of Italian seasoning or fresh cracked pepper. A pinch of sea salt also brings out the taste of the tomatoes and mozzarella. You can balance flavors by drizzling a bit of olive oil before serving. A splash of lemon juice gives a bright touch too. Experiment with flavors to find your perfect mix! Caprese salad skewers are easy and fun to make. We covered key ingredients like cherry tomatoes, fresh mozzarella, and basil. I shared tips for assembling and dressing, which elevate the flavors. Don’t forget the best practices for storing and serving. Experiment with variations to keep it fresh and tasty. Remember, use high-quality ingredients for the best results. Enjoy these skewers at your next gathering or snack on them anytime!](https://emmasdish.com/wp-content/uploads/2025/05/91af7a7d-d74d-4439-836a-a229fe8d635d.webp)
Caprese Salad Skewers Fresh and Flavorful Delight
Are you ready to elevate your snack game? Caprese Salad Skewers are a fresh and flavorful delight that everyone will love! With juicy cherry…
My Latest Desserts
My Latest Recipes

hey,
i’m !
I’m so happy you’re here!
I’m not just sharing recipes I’m sharing a piece of my heart. I hope these dishes bring you comfort, joy, and maybe even a new favorite.

 to guide you through each step! To cook linguine perfectly, bring a large pot of water to a boil. Add salt to the water. Use about 1-2 tablespoons of salt. This will help flavor the pasta. Cook the linguine according to the package instructions until it's al dente. That means it should be firm but not hard. Reserve about 1 cup of pasta water before draining. This water will help later. Using medium heat is key for sautéing garlic. This helps release its aroma without burning it. Add minced garlic to the skillet with butter. Stir it for about 1-2 minutes. You want it fragrant, not brown. Burnt garlic tastes bitter, and we want sweet and rich flavor. When choosing shrimp, look for large, fresh shrimp. Their shells should be shiny and firm. If you use frozen shrimp, thaw them first. Cook the shrimp for about 2-3 minutes on each side. They should turn pink and opaque when done. Overcooked shrimp can become rubbery, so watch them closely. To make a tasty sauce, pour chicken broth into the skillet. Use medium heat to keep it from boiling too fast. Scrape any brown bits from the skillet as it simmers. This adds great flavor to your dish. After 2-3 minutes, add lemon juice to brighten the sauce. Now, add the cooked linguine to the skillet. Toss it gently to coat it in the sauce. Add the shrimp back in along with lemon zest and parsley. If the pasta looks dry, add some of the reserved pasta water. This helps reach your desired consistency. For a beautiful presentation, garnish with fresh parsley and lemon wedges. It adds color and flavor. Pair the dish with a simple salad or garlic bread. This meal is quick and sure to impress! Be sure to check out the Full Recipe for more details. - Using high-quality butter: I always choose the best butter I can find. It makes a huge difference. The rich, creamy taste adds depth to the dish. Look for unsalted butter for better control over seasoning. - Enhancing the dish with fresh herbs: Fresh herbs brighten up your meal. I love using parsley for a fresh touch. Just chop it finely and sprinkle it on top before serving. You can also try basil or cilantro for a twist. - Avoiding overcooking shrimp: Shrimp cooks fast! I cook them for just 2-3 minutes on each side. Overcooked shrimp gets tough and rubbery. Watch them closely. - How to tell when shrimp are done: When shrimp turn pink and opaque, they’re ready. This change shows they cooked through. If you see a little curl, they’re perfect! - Recommended utensils for easy cooking: A good skillet is key. I recommend a large, non-stick skillet for easy cooking. It helps prevent sticking and makes cleanup easier. - The benefits of using a non-stick skillet: Non-stick pans let you cook with less fat. They also make it easy to stir and toss the shrimp. Plus, they help keep your shrimp juicy. {{image_2}} You can use different types of pasta for your Garlic Butter Shrimp Scampi. If you want to swap out linguine, try spaghetti, fettuccine, or even penne. Each noodle brings its own charm. For those who need gluten-free options, consider using rice noodles or gluten-free pasta. They work well and still taste great. Just follow the cooking times on the package to get the best results. Adding vegetables can boost flavor and nutrition. Consider including spinach, cherry tomatoes, or bell peppers. They add color and taste to the dish. When cooking vegetables with shrimp, add them to the pan before the shrimp. Start with the harder veggies first, like bell peppers. Then, add softer ones, like spinach, later. This keeps everything tender and fresh. To make your dish stand out, try adding herbs like basil or thyme. These herbs add lovely notes to your dish. You can also try a pinch of oregano for a different twist. If you want a creamier sauce, stir in some heavy cream. Just a little will add richness. It pairs well with the garlic and shrimp, making the dish even more delightful. For the full recipe, check out the section above. To keep your Garlic Butter Shrimp Scampi fresh, let it cool first. Place leftovers in an airtight container. Store in the fridge for up to three days. If you want to store it longer, freeze it for up to two months. Just remember to label your container with the date. The best way to reheat Garlic Butter Shrimp Scampi is on the stove. Use low heat and add a splash of broth or water. This keeps the shrimp moist. Avoid the microwave, as it can make shrimp rubbery. Stir gently to heat evenly, and enjoy your tasty meal again! Yes, you can use frozen shrimp. Start by thawing them. Place shrimp in a bowl of cold water for about 15-20 minutes. This helps them defrost evenly. Pat them dry before cooking. This prevents extra water in the dish. Cook the shrimp until they turn pink and opaque. This usually takes about 2-3 minutes per side. If you want a vegetarian version, use vegetable broth. You can also use water with a bit of lemon juice for flavor. This keeps the dish light and fresh. Another option is to use white wine. It adds a nice depth to the sauce. To spice up your Garlic Butter Shrimp Scampi, add more red pepper flakes. Start with half a teaspoon more. Taste the dish as you go. This helps you find the right heat level. You can also add fresh chopped chili peppers for a kick. Just remember, a little goes a long way! Yes, you can prepare components ahead of time. Cook the pasta and shrimp separately, then store them. Keep them in airtight containers in the fridge. Reheat them when you are ready to serve. For best flavor, combine them right before you eat. This keeps everything fresh and tasty. For the full recipe, check the instructions above! This blog post covered how to make delicious Garlic Butter Shrimp Scampi. You learned about the key ingredients, step-by-step cooking methods, tips for great flavor, and storage info. Making this dish can impress anyone at your table. Don't forget to try the different variations for your own twist. Cooking is fun, so enjoy every step. With practice, you'll master this dish and make it your own. Happy cooking!](https://emmasdish.com/wp-content/uploads/2025/06/0bab4196-5d05-4d38-864f-25c352aafc90-300x300.webp)


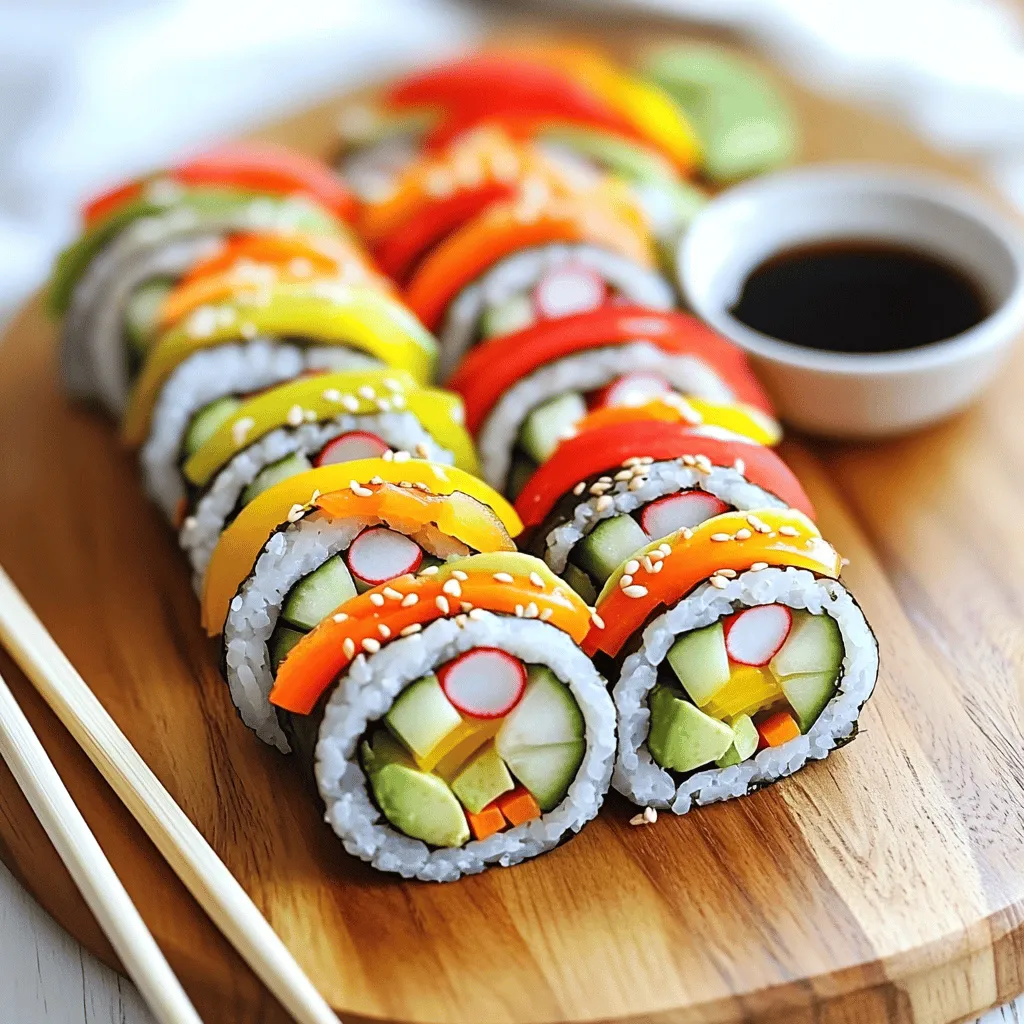
Rainbow Veggie Sushi Rolls Fresh and Simple Delight
Looking for a fresh and colorful dish that impresses? Try Rainbow Veggie Sushi Rolls! They’re easy to make, packed with veggies, and bursting with…